Squiggles Quilt Along Week 4 – Batting and Backing

If you are just now joining the quilt along – click here for links to all of the previous posts.

Squiggles Quilt Top

I remade Squiggles from precut squares of Modern Marks, plus contrasting background.

Now that the Squiggles quilt top is finished, it’s time to prepare it for basting, which will be next week’s post. I decided to throw in an extra tutorial on backing since it’s the part that’s not talked about very much. This will also allow those of you just joining to catch up with your piecing. But remember – you can go at your own pace and quilt along at any time!

Calculating and Sewing the Backing

You want to ensure your backing is at least 4″ larger around the quilt on all for sides. For example, my version of Squiggles finishes at about 50″ x 63″. So my pieced backing should measure a minimum of 58″ x 71″.

Backing of Squiggles, Made from Modern Marks

When measuring backing, I put it up on m y design wall and make sure it’s wider than the quilt.

I always work with 40-42″ wide fabric so If I piece two lengths of fabric parallel to the selvage edges that will give me roughly 80″ of length. So that takes care of the 71″ measurement. More backing is fine because it can just get trimmed away later. For the other direction, 58/36 inches = 1.611 or approximately 1 3/8 yards of fabric. Since you need two of those, that’s a total of 3 1/4 yards of backing fabric, cut into two pieces.

Pieced Backing for Squiggles

It takes 2 lengths of fabric to completely cover the finished quilt top.

I chose to use the quirky triangles print in Navy for my backing. My recommendation is to use a busy backing with a colorful quilt so that whatever thread color you choose for quilting will blend in on the back of the quilt. Busy backs also help hide quilting imperfections, too!

Finished backing

Always double check that the pieced backing is bigger than the top on all four sides.

Tear or cut of the selvages and join the two pieces together with 1/2″ seam. Then press the seam open. It’s okay if the two pieces aren’t perfectly even because the excess will get trimmed away later.

A note about batting

I prefer to use natural fiber battings, like Hobbs cotton, wool or an 80/20 blend. Natural fiber batting will cling to the quilt better and reduce the chances that you’ll get tucks or puckers while you quit.

Hobbs 80/20 batting black

Bonus tip: take a picture of the batting with your quilt so you remember what’s in it!

I used black 80/20 batting for my quilt, because the colors were so bright and saturated, and the background is so dark. However, it slightly shadowed through the lighter fabrics. It’s not noticeable unless you get up really close. But each quilt I make is always an experiment!

Be sure to trim the batting down before you baste the quilt, but make sure it’s still an inch or two larger than the top on all sides. I use the floor for this and pair of specialty batting scissors. They cut through the batting like butter!

Squiggles - Trim the Batting

I’ll also take an extra step to iron m y batting so it’s nice and flat for basting. For natural fiber batting, I’ll spritz it with water and press with a hot, dry iron. For a more delicate batting, I recommend covering it with fabric while you press. As always, be sure and test a small piece first to see how it performs.

Share Your Progress

Click here to join my facebook group and share pics of your progress!
You can also share on instagram by tagging @christaquilts and #squigglesqal.

Click here for all of the Squiggles Quilt Along tutorials.
Click here to pick up a signed copy of my book to get the Squiggles quilt pattern.

Christa’s Soap Box – Life After Social Media

A couple of months ago, I decided to decrease the amount of time I spent on social media. You can read that post here. This ties into my words for the year which are “simply and focus.”

I’m back with a quick update to let you know how it’s going. Now, just to reiterate, I’m not giving it all up, obviously since I’m still writing on my blog. But I did give up a lot. I paired my social media presence down to 3 places: the blog, instagram, and my facebook group. That’s still a lot for some, but it’s less than half the social media venues I used to keep up with.

In a word – it’s fabulous!

Boundless Bundle

Here are pretty pictures of fabric I’m currently working with so it’s not all just words!

At first I was having withdrawals, which quickly subsided after I finally allowed myself more time to contemplate and think. I was in several business Facebook groups that I had joined for networking purposes. It was a little hard to give them up in the beginning because I missed the daily interactions.

However, by getting in to the habit of checking them every day, multiple times a day, it pulled me into a constant timesuck because I didn’t have the fortitude to get in and get out. Now that I only have one place to go on Facebook, it’s a quick check in the morning, a couple pop-ins throughout the day to reply to comments, and I can focus on GETTING THINGS DONE!

Fat Quarters in Blues and Greens

I love organizing these fat quarters from light to dark  to see how they sparkle.

I also have so much less FOMO (Fear of Missing Out)!! When I don’t know what I don’t know, it’s so liberating to not constantly be comparing myself to what others are doing. I was worried that I’d miss out on opportunities to do great things, by not being “out there” as much, but let me tell you – the work has NOT slowed down. I’m currently working on my 4th book proposal, my 3rd Craftsy class and my 2nd fabric line, not to mention preparing for a slew of in-person workshops.

Now it’s kinda nice when I get an email from someone wanting to collaborate on something. Yes, email is still a great way to communicate! For me, it’s so much more effective than trying to keep up with direct messages on Instagram or Facebook that I sometimes don’t even know are there!  I’m also not on a strict time schedule on my blog. Sometimes I’ll blog three times a week, sometimes just once and it feels great to have that flexibility.

Cut and labeled fabric pieces

Here’s a tip – label the pieces of fabric you are working with to stay organized. I use a “big board” to iron my fabrics and stay organized when piecing. It gives me a huge surface on top of my ironing board. Now I need to work on getting prettier furniture that matches in my sewing room…

By not being constantly sucked into social media, I have a more realistic time frame for how long it takes me to actually make a quilt. I think the constant barrage of New!New!New! on social media can give us unrealistic expectations of how much we need to accomplish or how fast we need to get it done. I prefer a slow and steady pace so that I can enjoy each step of the process, and by stepping back I’ve been able to enjoy more making without feeling like I have to crank out  a new project or tutorial each week. I’m definitely a person who prefers quality over quantity.

And now, so as not to spend all day writing this post, I’ll sign off with huge hugs to you, my readers who make this all possible. By continuing to support me,  you allow me to pursue my passion full time and I can’t thank you enough!! Now I’m off to continue working on the project I shared a few sneak peeks of above. More about that in a couple of months….

Squiggles Quilt Along Week 3 – Assembling the quilt top

How are you doing on the Squiggles Quilt Along? Some of you may have just started while others of you have already finished the quilt top, and that’s totally fine. With all of my quilt alongs I encourage you to work at your own pace and share progress. Share on instagram with the hashtag #squigglesqal and see the other amazing versions everyone is creating. Or join my Christa Quilts facebook group to post pics and get additional support!

This week it’s time to assemble the quilt top!

See the diagram and instructions. page 18 of Piece and Quilt with Precuts for the quilt top assembly. Here’s a tip from one of the members of my facebook group who recently completed her top:

“Try sewing the rows together vertically instead of horizontally – it’s easier to line things up that way.”

And a bonus tip from me: notice that when you sew the rows together it looks like the background triangles don’t match up and that’s correct. This gives the design a slightly more interesting look and makes it faster and easier to go together. I also recommend pinning generously for best results.

Squiggles Blocks

The centers of the Squiggles blocks don’t intersect. That’s correct.

Once the quilt top is complete, take a “victory lap!” Sew approximately 1/8″ in from the edge of the quilt to keep the seams from splitting open as you handle the quilt. I usually do this with a longer stitch length so it goes faster.

My Work in Progress

My mom helped me put together the quilt top earlier this summer so that I could display it along with the fabric at a company trade show. I only had a few days to complete the top, so my in-progress pics aren’t great. But here are the rows going up on my design wall. The rows were sewn together randomly and then I spent time arranging them until I was happy with the overall composition

Squiggles work in Progress

I called in the reinforcements to help me put together 5 quilt tops in 4 days! You can see one of my quilting buddies pressing Squiggles amidst all of the sewing chaos!

Sewing Party at Christa's

(Notice the other quilt going up on the design wall? You can get that free pattern here.)

Bonus Inspiration

Here are a few quilt tops in progress shared by some members of my facebook group. I’m just blown away by the creativity!!

Yellow and Gray Squiggles

Karen T. is working on this lovely yellow and gray combo. She’s currently deciding on her final layout, so you can pop over to the Facebook group and lend your suggestions!

Squiggles Gradation

I love this fabulous color gradated design that Maritza F is working on. It’s so clever and a great way to use up some of her older charm pack stash!

Modern Marks Squiggles

Marcia D recently finished her quilt top from one of the Squiggles Modern Marks kits. Because of the color placement, even kitted versions of Squiggles will each be unique!

Kits and books still available

Pick up a signed copy of Piece and Quilt with Precuts from me book here.
Click here to grab a Squiggles quilt kit or Modern Marks Fat Quarter bundle.

(As of this writing I have 7 fat quarter bundles and 3 kits left – two with a white background/red binding, and one with a black background/blue binding. But of course you can use any fabric you like!)

Squiggles from Piece and Quilt with Precuts

Click here for the complete Quilt Along Schedule with links to all of the previous posts.

Squiggles Quilt Along Week 2 – Making the Blocks

I sure have enjoyed seeing pictures of the fabrics everyone is using so far to make their Squiggles quilts. (Check out my facebook group and #squigglesqal on Instragram.) One of my favorite parts of any Quilt Along is seeing how different fabric choices affect the look of a quilt made from the same pattern. Even those who purchased Squiggles quilt kits will end up looking different because of the fabric placement.

Squiggles from Piece and Quilt with Precuts

I’m remaking Squiggles from my book using my Modern Marks Fabric.
Click here to purchase a kit with black or white background.

Making the Quilt Blocks

This week it’s time to make the Squiggles blocks! Turn to page 16-17 of Piece and Quilt with Precuts for instructions on making the individual units and sewing them into quilt blocks.

Squiggles Unit – See the book for how many to make and what size squares to  use.

Once the units are complete, randomly sew them together to make pairs of “C” blocks:

Squiggles Block from Piece and Quilt with Precuts

C is for Christa, right?? Just kidding!!

Bonus Piecing Tips

In order to get my quilt top really flat for easier domestic machine quilting, I prefer to press all of my seams open while sewing the blocks. Contrary to popular myth this will not weaken the seams.

Because I’m using bold prints with a black background, I pieced them together using a darker thread – Aurifl 50 weight cotton #4241 Very Dark Gray. This makes it less likely that thread will show through the seams when they are pressed open.


I’m using very dark gray from my Aurifil Piece and Quilt Collection – Neutrals

I also used a shorter stitch length to help secure the seams. For example, the default stitch length on my BERNINA is set to 2.5. I turn it all the way down to 2.0 while piecing so that the seams ends don’t come apart. Smaller stitches also helps ensure that you don’t see the thread peaking through the seams. If you don’t want to use a shorter stitch length, you can instead back stitch each set of units at the start and end of each unit while chain piecing.

Sharing is Caring

Next week it will be time to sew the blocks into the quilt top! In the meantime be sure and post pictures of your progress in my facebook group, and share them on instagram using the hashtag #squigglesqal. (You can also tag me on instagram @christaquilts). I love it when we all cheer each other on!

In fact, check out this fun mini quilt that Leslie Frost made from the corners that are leftover when you make the blocks. Isn’t it cute??

Squiggles Leftovers

Use up the leftover corners in a mini quilt or throw them in your scrap pile.

For a limited time I have Modern Marks Squiggles Kits available with a black or white background. But once they’re gone – they’re gone!!

Suiggles with Modern Marks

If you are just joining the quilt along, click here for the complete schedule.


Squiggles Quilt Along Week 1 – Fabrics and Cutting

Are you excited to make Squiggles? It’s a super easy precut quilt made from your favorite 5″ charm packs. As mentioned previously, I’m making my version using my Modern Marks fabric line with Benartex, but it will look great with any fabrics you choose, as long as you have a very strong contrast for the background. I’m using black, but it would also look fabulous with white or gray!

Squiggles recolored in Modern Marks

As of this writing I have 3 Squiggles Kits left for sale. Click here to purchase.

If you are just hearing about the Quilt Along, not to worry. Just grab the fabrics you need as listed below and join in anytime! This Quilt Along is totally free to follow (you just need a copy of my latest book), and you can post your progress on social media with the hashtag #squigglesquilt. You can also join my Facebook Group: Christa Quilts to share as many photos as you like and get additional help!

Supply List

Piece and Quilt with Precuts

  • Copy of my book, Piece and Quilt with Precuts for the piecing instructions
  • Two – 5″ charm packs of background solid or tonal fabric (or a total of 77 squares)
  • Four – 5″ charm packs of print fabric (or a total of 154 squares)
    • (Note – you can also substitute one 10″ square pack if needed, and cut to size)
  • 1/2 yard of fabric for binding
  • 3 1/4 yards of fabric for backing
  • 56″ x 70″ piece of batting (I recommend Hobbs batting)
  • Approx. 1200 yards (or one large spool) of fabric for quilting (I recommend Aurifil)
  • Sewing Machine with new needle and basic sewing supplies
  • Rotary cutting equipment (6″ acrylic ruler, mat, standard cutter with new blade)

Cutting the Fabric

Modern Marks Charm Pack

Click here to purchase Modern Marks Charm packs and precuts.

The super easy thing about making this quilt from precuts is that most of the cutting has already been done for you! If you are using 10″ squares, cut them into 5″ squares. If you are using 5″ squares, you’ve already saved yourself a huge step!

Benartex Basics precuts
Click here to purchase Benartex Basics in black or white.

Then follow the cutting instructions in the book on page 15 to cut out the background squares and you’re ready to start piecing the blocks next week!

Click here for links to all of the Quilt Along blog posts and schedule.

Click here to share pictures of your fabrics + progress in my Facebook group.

Save

Save

Save

Save

Save

Save

Save

Save

Save

Save

Bonus Quilt Along – Make My Charming Chevrons Pattern with Alyssa from Penguin and Fish

I know that many of you are eagerly awaiting the start of my Squiggles QAL which officially launches next Monday. But in the meantime, you can quilt along either virtually or in real time with my friend Alyssa Thomas of Penguin and Fish. All you need is a copy of my Charming Chevrons pattern and your favorite charm packs (5″ squares).

Each weekday night from now until she finishes, Alyssa is posting a live “relax and craft” video stream on Facebook. Then she’s uploading the recordings to YouTube so anyone can view them later. So you can make the quilt along with her, or just hang out and watch her sew! If you do choose to sew along, you can share your progress in my facebook group or hers. (Scroll to the end for all the pertinent links you’ll need.)

Click the image above to watch the very first video with Alyssa.
She’ll be broadcasting her progress each weeknight until she’s finished the quilt!

I love Charming Chevrons so much that I’ve already made it three times, and I recolored it a 4th time using my Modern Marks fabric. Check these out for inspiration, and notice how all 4 versions feature the same block, but rotated in a slightly different position. All 4 layouts are included in the pattern.

Charming Chevrons at QuiltCon 2013

The original Charming Chevrons, shown above, made its debut at QuiltCon in 2013. It was my first time ever entering a national show. It went on to win viewer’s choice in the Blogger’s Quilt Festival in 2013 so it was a banner year!!

Colorful chevrons

A larger remake, Colorful Chevrons with a navy blue background, was my first magazine submission and it graced the cover of Quilty in 2013. It went on to win 3rd place in the first ever modern category at AQS Quilt Week in Paducah, a ribbon at my local guild’s show, and founder’s choice at MQX.

Feathered Chevrons with Kona Solids

Photography credit: Kitty Wilkin

When Robert Kaufman invited me to curate a bundle of solid fabrics for them, I decided to make a third version using my Kona Designer palette in bright citrus hues with a dark gray background. I call this version Feathered Chevrons and it was included as part of the Quilter’s Planner pattern bundle for 2017. The layout above is included in the Charming Chevrons pattern.

Charming Chevrons with Modern Marks

Finally, after making 3 solid versions, I wanted to see what it would look recolored in EQ8 using my Modern Marks collection from Benartex/Contempo. I colored it using the “Double Chevrons” layout that’s also included in the pattern.

Charming Chevrons includes 4 sizes and these are the fabric requirements & # of charm packs needed to make each size:

Links to all the Fun:

Purchase the Print version of Charming Chevrons here.
Purchase the PDF version of Charming Chevrons here.
Click here for the first YouTube video from Alyssa.
Click here to like and follow her page where she’ll post live videos.
Click here to share your progress in my Facebook Group: Christa Quilts.
Click here to share in Alyssa’s group: Penguin & Fish Crafters.
Get the Modern Marks Charm packs here.

Happy New Year 2018 – Word of the Year – Squiggles Quilt Along

Happy Quilty New Year 2018! My words for this year are “simplify and focus.” I got caught up in the social media rat race last year, and near the end of the year I decided to scale down my social media presence so I could simplify my life and focus on what’s important. You can read my about my decision on a previous blog post here.

My Pride and Joy – Watson Family, November 2017

My oldest heads off to college this week (at BYU Idaho), and I’ve got a full year of teaching and creating lined up. I’m also excited to be blogging on a regular basis again where I can share indepth tutorials and lots of inspiring quilt images.

After a couple year break, I’m super excited to be hosting my next quilt along, featuring Squiggles from my book, Piece and Quilt with Precuts.

Squiggles recolored in Modern Marks

I’m remaking Squiggles using my Modern Marks fabric line from Benartex.
Click here to get Modern Marks charm packs to make a similar version!

The Squiggles quilt along will run each Monday for 6 weeks, starting January 15.

Click here for the Squiggles Quilt Along Supply List and Schedule

I hope you’ll share pictures of your quilt along progress, so I can cheer you on! Use the hashtag #squigglesquilt on Instagram, and post pictures of your progress directly to my Christa Quilts Facebook Group. I’m excited to start the fun in 2 weeks!!

My Quilts from Modern Quilts: Designs of a New Century – Modern X and HST

Today I’m pleased to be a part of the blog tour for the brand new book published by The Modern Quilt Guild and C&T Publishing, Modern Quilts: Designs of the New Century. 

It’s a beautiful coffee table book presented in hard cover with images of over 200 modern quilts.

Modern Quilts Book

Click here to pick up your copy of Modern Quilts: Designs of the New Century.

I always like to give a little behind the scenes backstory about how I end up being featured in collaborations such as this one. Sometimes it’s luck, other times it’s tenacity, and most of the time, it’s a bit of both!

When I attended the first QuiltCon in 2013, I knew right away that the time had finally come to start getting published and raise my professional quilting profile. One of the lectures I attended was on publishing a book, given by the editor of C&T, with panelists such as Angela Walters, among others. I came home from the show on fire and ready to get to work! Although I ultimately went with a different publisher for my own books, I’ve always been impressed with the quality of books published by C&T (and will be a small part of another book of theirs coming up in 2018 – so stay tuned).

An early “profile” image of me with Modern X back in 2014.

As soon as I could, I starting participating in Modern Quilt Guild events, submitting quilts to their shows each year, teaching at QuiltCon, giving webinars, and being one of their designers of the month (back in 2014-the first year they launched that program.) In other words, I got involved!!

When the MQG had a call for entries for this book, I eagerly applied. They looked through images of all the quilts that were submitted along with entries into all previous QuiltCons and I was pleased to end up with two quilts in the book!
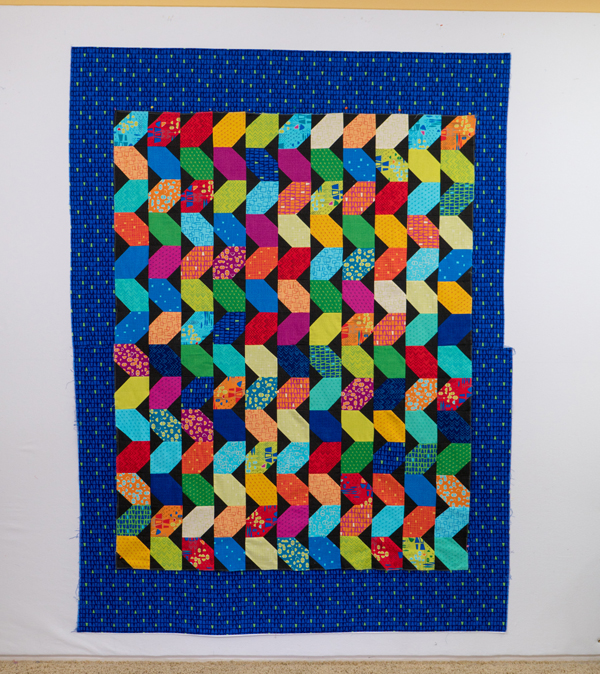
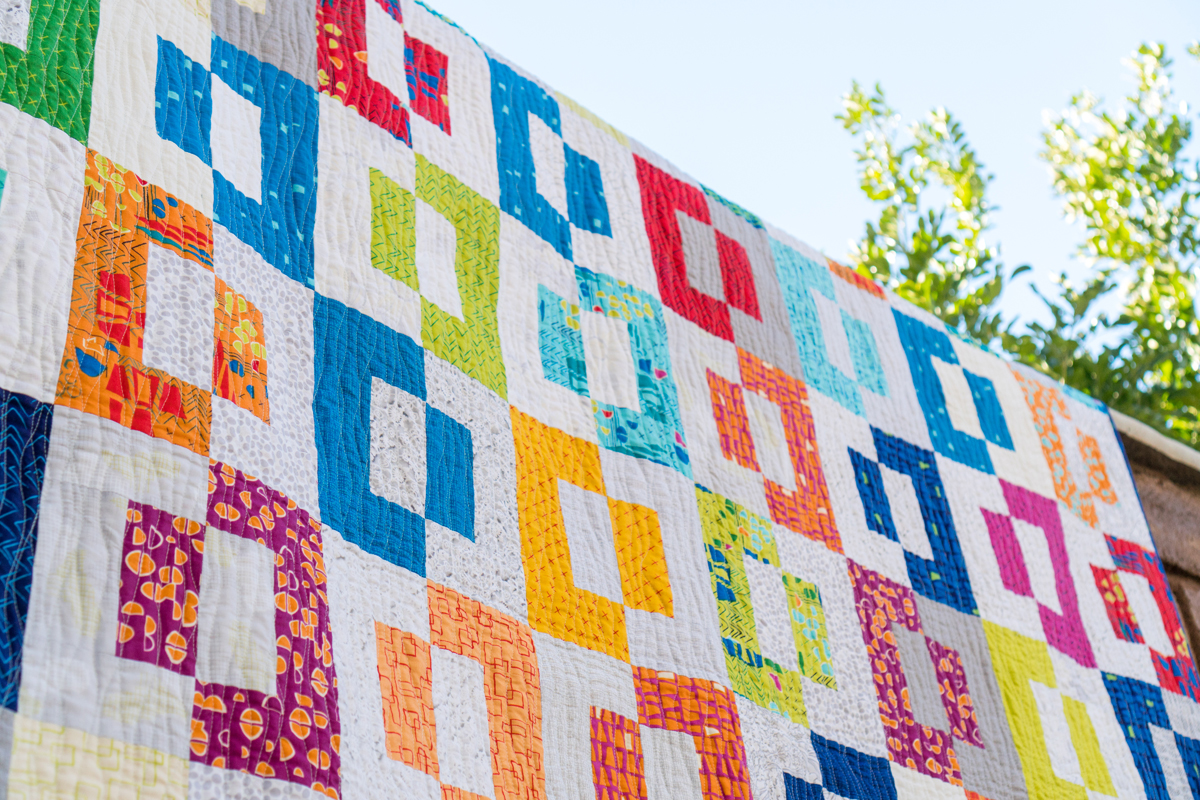
Modern X

Modern X Quitling Detail

Check out #modernxquilt on instagram to see many amazing versions of this quilt!

Click here to get the PDF version of Modern X quilt pattern.
Click here to get the print version of Modern X quilt pattern.

Modern X was featured as one of the quilt patterns of the month created by and for MQG members. Here’s a fun fact: It was my suggestion that the MQG feature the quilts of the month as a special exhibit at QuiltCon which they’ve done every year since 2015!

Modern X at QuiltCon with Bill Volckening

Modern X on display during the “special exhibits tour” given by Bill Volckening at QuiltCon 2015

This quilt has gone on to win an award at a local quilt show and has been in a couple of traveling exhibitions of modern quilts. This is also the quilt I talk about when I share the importance of batting and basting in my lectures. (Originally I used a polyester batting for Modern X which created all kinds of puckers because it’s so slippery. I un-quilted, re-basted, and re-quilted this quilt using a cotton blend batting and was much happier with the results!)

HST (The Original)

HST Quilt

The original HST quilt. My photography isn’t great since this was taken before we got good equipment. However the photos in the book are top notch!

HST (Half -Square Triangle) was originally patterned way back in issue 5 of Make Modern Magazine. When I originally made the quilt in 2015 I knew I had created a special design and wanted to enter it into QuiltCon for 2016. However, when I went to wash the quilt, I used a “gentle” wash powder that ended up bleaching parts of the quilt!

bleach stain on HST quilt

The quilt now has random bleach stains throughout. 😦

Needless to say I was devastated. Since I’m always one to try and turn lemons into lemonade, I was pleased when this quilt was still able to be selected for the book. With some clever photoshop editing, you can’t see the bleach stains in the book photography and I’m glad it was able to be included.

Machine Quilting HST

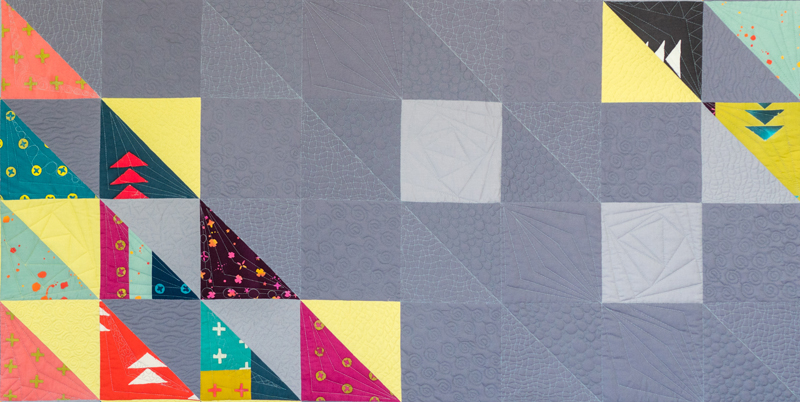
Quilting Detail on HST

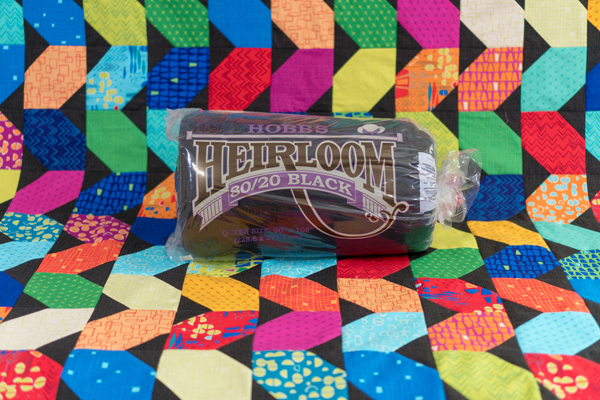
Since I love making functional quilts, I still use the quilt every day and it’s nice and warm because I used super thick cotton batting. I quilted HST with a lot of straight line quilting, and I created a woven texture in the background by alternating the direction of the lines. I threw in a few random spirals in the lighter gray blocks.

HST pieced backing

HST Backing – I love making pieced backs from leftovers!

The only thing I wasn’t happy about HST (besides the bleach stains) is that doesn’t hang well because I used a woven textured background fabric. Because of the looser weave, the background ended up stretching too much as I quilted it.

So even thought it was painful to accidentally “ruin” a quilt, I decided that if I remade the quilt, I’d be able to create an even better version and try out some different quilting ideas.

HST Remix

HST Remix by Christa Watson

I was pleased to sneak in a little of my Modern Marks fabric for the binding!

And now there’s another happy ending to this story. Because I loved this design so much, I knew I had to remake it and submit it for QuiltCon 2018. I almost cried when I received my acceptance that it made it into the show!

The background of the HST remix is all pieced from regular cotton solids so they were nice and stable and didn’t stretch. In both versions, the negative space is made from individually pieced background squares to add a bit more dimension rather than using large chunks of fabric.
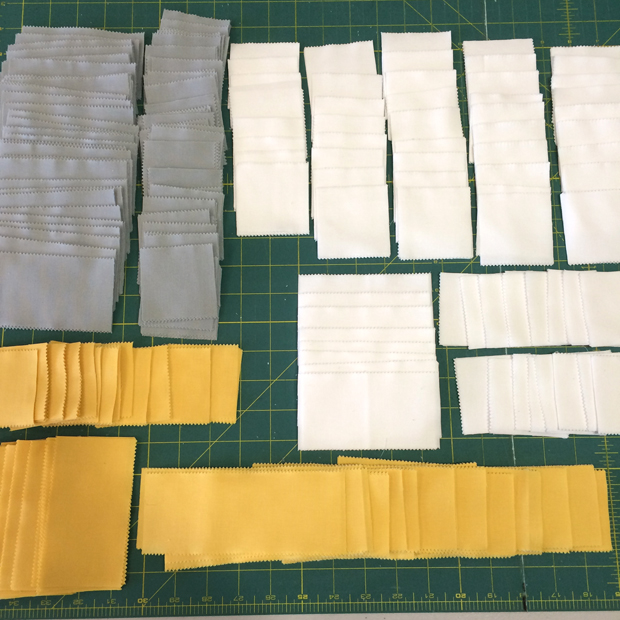
HST's in progress

Improv-pieced HST’s

There are some slight differences from the first version. Because I ran out of fabric, I had to do some improv piecing to get enough triangles. I also decided to make them slightly bigger so that it would fit my bed. I also kept the idea of random pops of yellow and lighter gray but tried not to duplicate the layout exactly.

Quilting Plan

Quilting plan for HST

A draft “quilting plan” for HST remix. I obviously went in a different direction, but kept some of the elements in my final version. It often takes me many tries until I get a design I like.

The hardest part was deciding how to quilt it! I went through dozens of iterations of quilting plans until I could find something I liked. To make a quilting plan, I’ll print a copy of the design from EQ8 and will try sketching out different ideas until I’m pleased with how it looks. (You can do something similar by printing a photo of the quilt top.)

Although this takes time, it saves me hours of time ripping out a quilted design that looks great in my head, but doesn’t actually work on the quilt!

quilting plan for hst remix

Another quilting plan in progress – it’s getting closer to what I actually did!

Machine Quilting on HST RemixClick the image above to see closeup details.

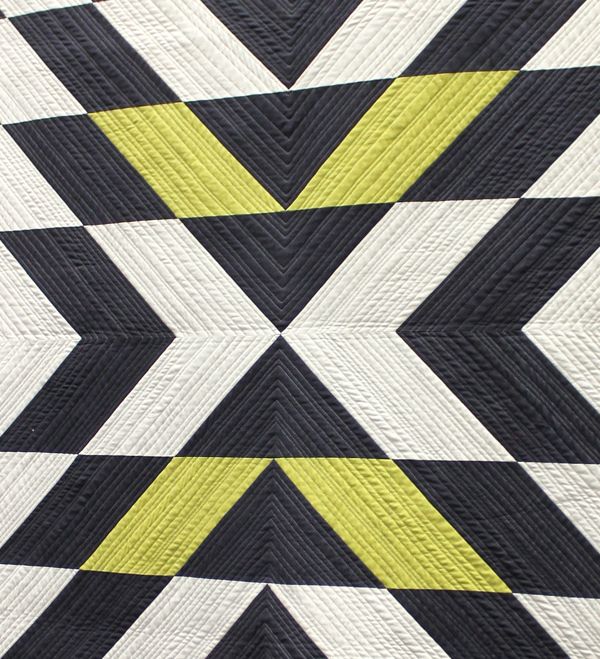
I think my favorite part of the quilting was quilting some irregular chevron designs in each of the HST blocks and adding a bit of  “embellishment” by randomly quilting a different free-motion design in a few of the blocks.

HST remix quilting detail

I gave a nod to the original HST with a touch of straight line quilting and modern spirals.

Overall, I’m happy with how it turned out and I’m pleased that the original HST is preserved in the book, and folks will get to see HST remix “in the cloth” at QuiltCon next year!

More detail of HST remix

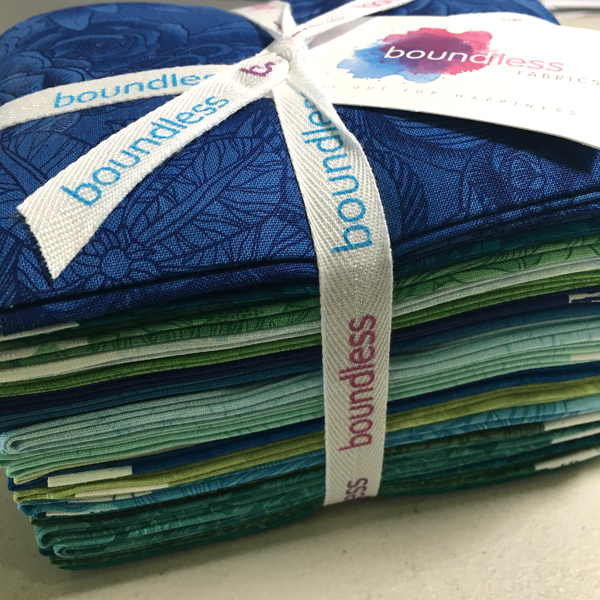
I loved using Alison Glass handcrafted batiks for this quilt!

Click here for a list of all the stops on the Modern Quilts blog hop, and to see more of the beautiful quilts in the book! There are no patterns in the book, just hundreds of pages of beautiful modern quilts for you to explore. I highly recommend this volume for anyone interested in modern quilts!

Finished Quilt: Color Weave, QuiltCon Entry + Quilting Tips

Today I have another quilt finish to share! Now that I’m not inundated with too many projects and too little time (yay for balance!), I can actually blog more about quilts I’ve recently finished, and I love sharing my virtual show and tell with you!

Color Weave by Christa Watson

Color Weave was published in issue 21 of Modern Quilts Unlimited. Photo Credit MQU.

Modern Quilts Unlimited is one of my all-time favorite magazines and it’s such a thrill when my work appears in their pages. Fun fact: the editor, Laurie Baker and I met backin 2014 when she helped edit my first book, Machine Quilting with Style, and we’ve been friends ever since!

Color Weave Backstory

I originally made Color Weave to be included in my most recent book, Piece and Quilt with Precuts, since it’s completely sewn from 2 1/2″ strips. While the book was in the layout and editing stage, the editors realized it was going to be too long (what? Me wordy???) and we had to make the agonizing decision to cut this project.

Quilting Detail on Color Weave

I love quilts with simple color schemes. Pick any 3 colors to make this quilt!

This happens with craft books more often than you realize, because book publishers would rather have too much content to choose from than not enough. For budgeting purposes, they have to stick to a strict page limit that’s agreed ahead of time in the book contract, and there’s only so many ways you can lay things out with a limited number of pages.

Precut Pieces for Color Weave

I love it when all of the pieces of a quilt are cut and ready to sew!

So after I held my 5 minute pity party, I contacted MQU and asked if they’d be interested in publishing this pattern in their magazine and they said yes! FYI – if you are interested in getting into magazines, editors are always on the lookout for great content and the fact that my quilt was ready to go meant they could schedule it for any issue where they needed to fill pages.

Machine Quilting Details

Needless to say I was thrilled that Modern Quilts Unlimited was excited to publish the pattern for Color Weave, and I was even more pleased that they included the instructions on how to quilt it as a free “web extra” on their blog. (See below image for link.)

Color Weave Web ExtraPhoto Credit – Modern Quilts Unlimited Magazine

Click here to get my machine quilting instructions for Color Weave, courtesy of MQU magazine.

Random crosshatch is actually one of my favorite ways to quilt a quilt with your walking foot (or dual feed) and it is so easy to do! Rather than painstakingly trying to mark and create a perfectly symmetrical grid, I use the piecing seams as a guideline for my lines.

Machine Quilting Random Crosshatch

I started off by quilting in the ditch between all the seams to stabilize and anchor the quilt. Then I filled in between the grid with straight lines at random intervals. I used the edge of my walking foot as a guideline for spacing, moving the needle position to create narrower or wider lines.

QuiltCon Acceptance

I knew right away when I received this quilt back from the magazine that I wanted to enter it into QuiltCon for their 2018 show. I haven’t really seen a design like this before, so I thought it had a good shot of getting into the innovative “Piecing” category.  I’m pleased that others will be able to see it at next years’ show because one of the reasons I enter shows is to share my work with a wider audience who might not have discovered me yet.

Quilting Detail on Color Weave

Quilting detail from Color Weave. Just remember: the best way to hide an imperfectly straight line is to surround it with more imperfectly straight lines!!

It took me awhile to figure out how to create the woven effect in the piecing. It’s like an optical illusion, and I’m sure the quilt would look totally different using scrappy prints, but I was pleased with how it turned out.

When trying to quilt parallel lines, just remember that “straight-ish” lines are perfectly ok! When you are two inches away from the quilt, you’ll notice all the imperfections. But once you back away from the quilt, all of a sudden your eye sees the overall texture rather than the individual stitches.

Random Crosshatch Grid by Christa Watson

Quilting Tip:  If you want your quilting to show, use a solid back. If you want to hide your quilting, using a busy back. I always use the same color thread in top and bobbin because I’d rather see the quilting show up on the back, than little dots of bobbin color on the top!

color Weave Stats:

Color Weave by Christa Watson

Photo Credit: Jason Watson

Modern quilts are my favorite. Now I just need to make more of them!!

Finished Quilt: Modern Puzzle + Quilting Tips

Meet Modern Puzzle – one of the quilts I made for quilt market this past fall. The quilt pattern is a free PDF download and it’s made from one Pinwheel (aka Jellyroll) of Modern Marks + one pinwheel of white/gray neutrals from Benartex.

Modern Puzzle Free Qult patter by Christa Watson

Click here to download my Modern Puzzle quilt pattern for free.
Click here to get the precuts to make this quilt.

I recently wrote up a spray basting tutorial using my design wall using Modern Puzzle as my example. Now I’m ready to share more about the quilting process. Because I was in a hurry to get this quilt done, AND I really wanted to show off the fabrics rather than the quilting, I used a simple wavy line design that I teach in my book Piece and Quilt with Precuts.

Click the image below to enlarge it so you can see the quilting detail:

Machine Quilting detail - wavy lines

Making a Quilting Plan

Whenever I’m quilting an allover design using my walking foot (or dual feed system), I use a method I call “divide and conquer.” The basic idea is that I make one pass across the quilt, stitching near the ditch rather than IN the ditch.

This allows me to use my seam lines as a guideline for spacing so that I don’t have to mark anything. Once the quilt is stabilized, or “anchored,” then I’ll add additional wavy lines, one pass across the quilt at a time.

Quilting Plan for Modern Puzzle

Quilting plan for Modern Puzzle – I’ll fill in more lines on the quilt until it feels finished.

I introduced my audience to the concept of making a “quilting plan” in my first book, Machine Quilting with Style, and my first Craftsy class, The Quilter’s Path.  Now I love to seeing that so many have embraced this concept with their own quilts!

Quilting Modern Puzzle

Each time I quilt a set of wavy lines across the quilt, the space to fill gets smaller and smaller.

Whenever I quilt any quilt, I “scrunch and smoosh” it under the machine however I can. Having a wide area between the needle and the side of the machine is really nice, but not absolutely necessary. As long as you shove the quilt out of the way and only focus on one area at a time, it’s easy  to do!

Overlapping wavy lines

Once the lines got close enough, I overlapped a few of them for extra texture.

My philosophy when it comes to machine quilting is, “more is more.” For example, one individual line of stitching will stand out like a sore thumb. However, when you surround that line with additional quilting lines on both sides, all of a sudden, you notice the overall texture before you see the individual stitches.

Modern Puzzle Quilt by Christa Watson

When it comes to choosing thread color for a highly contrasting quilt such as this one, it’s best to use a lighter color thread rather than a darker one. A lighter thread will blend in more on darker fabrics, rather than the reverse.

Aurifil Cotton Thread

For Modern Puzzle, I chose a light gray/blue from my Piece and Quilt Collection – Neutrals from Aurifil. Even with dense quilting, one large spool was plenty of thread, and I like to use the same color in top and bobbin to help hide any tension issues.

Quilting Detail on Modern Puzzle

Dense quilting is my favorite way to hide quilting imperfections!

Behind the Scenes

Fun fact: when I got my fabric samples for Modern Marks back in July, I had about 4 days to whip up 5 quilt tops to display at a special event for BERNINA dealers taking place here in my hometown of Las Vegas. Because BERNINA owns Benartex, the dealers got to see sneak peeks of the fabric before it was debuted at quilt market in October.

Quilts in Progress

Honest sewing room and quilt top making frenzy: notice the fabric samples in the left corner rolled on a tube – this is how fabric comes from the factory before it’s folded onto bolts!!

This was my chance to introduce myself to shop owners who hadn’t heard of me yet, so it was a huge opportunity if I could finish the samples in time. So I called in the reinforcements – my mom and a few friends – and we sewed non-stop to get them done! It was a fun impromptu retreat and I’m thankful to say, the fabric was well received. Thank goodness I only needed to finish the tops and was able to quilt them over the next 3 months at a more leisurely pace!

Modern Puzzle Quilt by Christa Watson

I love how the bright pops of color in in Modern Marks contrast against my desert surroundings. This is one of my favorite quilts, and the dense quilting makes it so snuggly!!

Remember, if you make Modern Puzzle, (or anything else from my books, patterns, or fabric) I’d love to see your progress! Please share in my ChristaQuilts Facebook community. I’d love to cheer you on!!

Modern Puzzle Stats:

Modern Puzzle by Christa Watson

All outdoor photogrophy taken by my husband, Jason Watson. (C) 2017