Featured Designer and Positive Direction Pattern in Modern Quilts Unlimited

The Summer 2016 issue of Modern Quilts Unlimited goes on sale today and I’m pleased as punch to have two features in it.

Modern-Quilts-16-08-Summer-Cover

First of all, I’m the profiled designer. If you are like me, you may enjoy quilting magazines for the articles as much as you like the unique patterns. Well, imagine my surprise when they asked to interview me for this issue. I was so impressed with Linda Griepentrog who wrote the article. After a nice phone chat, she was able to take my often long answers and rambling thoughts about quilting, and distill them into a concise well-written article. (I always joke around with my workshop students that they get to see me live and unedited when they learn from me in person, LOL!)

Spotlight_Article

When Modern Quilts Unlimited asked to include me in the issue, they also invited me to submit a pattern to go along with it. (In case you were wondering, I got paid for the pattern, and the freelance writer gets paid for her feature article). This was just perfect because I had playing around with a patriotic plus design for awhile, and creating it for the issue was the perfect excuse to make the quilt, which I named Positive Direction.

Postiive Direction Magzine Image

Positive Direction in the Summer 2016 issue of Modern Quilts Unlimited

I’ve always wanted to make a modern patriotic quilt since I’m not as much of a fan as traditional Americana decor. I think adding the aqua and grey punched it up a bit and of course I had to quilt it to death like I usually do. I used Wool batting to give it some loft which really allows the machine quilting to pop!

I designed the quilt in EQ7, like I do all of my quilts and I just love being able to see what the quilt is going to look like before I make it!

positive_direction

My Positive Direction EQ7 sketch – I get all the thinking done before I start sewing!

Update: The PDF pattern is available for purchase in my Craftsy Shop!

Save

Save

Save

The Skull Quilt Mini and a Fun Quilt Swap

My local modern quilt guild, Las Vegas MQG recently teamed up with the Orlando MQG to do a modern member mini quilt swap. It was So. Much. Fun! Each team leader from both guilds assigned us someone to make a quilt for and we were given an interest sheet about what our partner liked and didn’t. We made a mini quilt for one person, but then received a mini from a different partner (scroll to the end to see the awesome quilt I received from Rene’!)

skullduggery_finished

Skullduggery by Christa Watson, 15″ x 17″

So here’s the quilt I made for Frank Palmer of Full Frontal Quilt and Dyeworks, who thinks “Black is fabooshalicious and red is a neutral.” He also loves “odd and unusual things and skulls and tattoos.” (As a side note, Frank was a guest on the Crafty Planner Podcast earlier this year so I knew I needed to make him something that would fit his fun personality!)

sitd

I stitched in the ditch using the BERNINA dual feed, which acts much like a walking foot.

I pieced the quilt from solid black and red squares, so that it would retain the pixelated look. Then I stitched in the ditch around the major skull sections to outline the design and anchor the quilt for additional free-motion quilting.

wavy_flames

Free-motion quilting wtih the BSR, using matching Aurifil thread – #2250 Red.

Next, I free-motion quilted a wavy flame design in all of the red areas. I thought the look of the flames matched the feel of the design quite nicely! I used a matching Aurifil 50 cotton weight thread in red. I quilted it using the BERNINA stitch regulator which helps my stitches stay nice and even. Though truth be told, I can quilt just as easily with or without the regulator. I love using the open toe so I can see my quilting stitches easier.

pebble_quilting

Finally, I quilted the background with a dense pebble texture, using one of my favorite neutrals – Aurifil #4241 Very Dark Gray. It’s not quite black so it actually shows up on black fabrics better than straight black does.

Skullduggery EQ7

Like all of my quilts, I created this design using EQ7 software so that I knew exactly how to put it together before starting. As an added bonus for my fellow EQ7 users, I’ve made the file available for you if you want to make your own version (just be sure to credit me as the designer if you do).

Click here to get the Skullduggery EQ7 file download.
Note, this link will only work if you have EQ7 installed on your computer.

If you make a version of this quilt or any of my other patterns, please be sure and share it in my Facebook Group: Quilt with Christa. 🙂

orlando_swap

This is the quilt I received in the swap. I love solids and black and white so this suits me to a T!

Feathered Chevrons Finish

I’m so happy to have finished another version of my Charming Chevrons pattern! This layout is called Feathered Chevrons, and I made it using my Kona Designer series charm packs, plus Kona Coal.

Feathered Chevrons is an alternate of my Charming Chevrons quilt pattern.

Feathered Chevrons by Christa Watson, 64″ x 80″

This is the third version of Charming Chevrons I have made, and all three layouts are available in the original pattern, along with 4 different sizes.

Click here to purchase a PDF pattern of Charming Chevrons.
Click here to purchase a print pattern of Charming Chevrons.

feathered-chevrons-backing

I love it when the quilting shows up well on the back.

I used some leftover chunks of Kona solids to make a pieced backing. I love how the quilting really shows up on the back. I stuck a label on the lower back corner before I put the binding on so I would only have to hand-sew it along two of the sides.

quilting_practice

On the test sample, I quilted the swirls flowing in opposite directions. On the quilt, I quilted them all flowing in one direction. Other than that, I stuck to the original plan.

Like I do for most of my quilts, I made up a test block so that I could see how the quilting design and thread color looked before diving in. Even though it’s a little more effort to do this, it saves me a lot of aggravation in the long run. If I like how this piece looks, then there won’t be any surprises when I’m quilting the quilt, and I can just relax and enjoy the process.

quilting_switchbacks

I filled in all of the gray background areas with switchbacks, one of the motifs I teach in my book Machine Quilting with Style. Notice how I stitched an area of relief inside the block, by quilting straight lines about 1/4″ away from the seams. This allows the different sections to pop, and also shrinks up the amount of area I need to quilt.

swirls_pebbles

Next, I filled in the chevrons with a motif I call “swirl-feathers.” It’s a new design for me, made up of swirls that branch off of each other rather than filling in the whole space. Then I filled in the spaces in between the swirls with pebbles.

I quilted it entirely on my BERNINA 770 QE. I anchored the quilt by quilting straight lines with my integrated dual feed (which works like a walking foot) and then the free-motion sections with my BSR (BERNINA stitch regulator.)

Aurifil-Thread

You’ll be hearing more about some of my favorite Aurifil thread colors in the coming months.

I love to use Aurifil 50 weight cotton for piecing and quilting all of my quilts. It’s lightweight yet strong and I never have any issue with thread breaks. I used  Aurifil 2920 Light Brass for the swirls and 2605 Grey for the background.

feathered_chevrons_quilting_detail

If you make your own version of Charming Chevrons, please share it in my Facebook group: Quilt with Christa. I’d love to see you progress! I’m also happy to chat about machine quilting over there and answer your questions in the group for all to see.

Save

Save

The Ultimate Guide to Machine Quilting: U-Turns

Thanks for joining Angela Walters and I on our journey as we’ve shared our quilts from The Ultimate Guide to Machine Quilting. Today we’ll show the last quilt, U-Turns, made in different fabrics with drastically different quilting, done either on a sit-down domestic (me) or a stand up long-arm (Angela).

U-Turns_Christa

In this quilt, I pay homage to Angela, by choosing one of her first fabric designs as the print in my version of U-Turns. I quilt all of my quilts exclusively on a BERNINA 770 Quilter’s Edition, which gives me lots of room to scrunch and smoosh my quilts under the machine.

U-Turns_Christa_detail

In my version, I’ve combined several of my favorite designs which are super easy to do on thin sashing and borders: wavy lines, double loops, and switchbacks.

U-Turns_Angela

Angela also shows how to do some super fun and easy designs and she includes several ideas for quilting around the corners on her long arm. It’s much easier than you think!

I had such a fabulous time writing this second book with Angela. She was a fantastic co-author, and this book gave me a chance to expand on some of the ideas I presented in my first book, Machine Quilting with Style.

Christa Watson Books

Where to Buy

Sharing is Caring

Be sure to share your progress on your projects from either book in my Facebook group: Quilt with Christa. You can also share your machine quilting progress, ask questions and get advice about future projects!

The Ultimate Guide to Machine Quilting – Quatrefoil Applique

Quatrefoil Applique from The Ultimate Guide to Machine Quilting was by far the most fun quilt to quilt (even though I’m sure I say that about every quilt)! For my version, I really wanted it to be a showcase of tons of different quilting designs – sort of like a free-motion sampler.

Quatrefoil-Applique_Christa

I used a cheery fat quarter bundle of Kona Solids in pinks and oranges (called Blushing Bouquet) and quilted a dozen different motifs with lots of variations.

Quatrefoil-Applique_Christa_detail

Christa’s version – it’s a machine quilting sampler!

I quilted a different design in each petal and echo quilted around the edges, filling the background with dense pebbles, allowing the motifs to really pop!

Ultimate Guide to Machine Quilting

All photography by Martingale/That Patchwork Place and Brent Kane

Angela and I really wanted to pack the book full of as many ideas as we could, so there are over 50 different quilting designs for you to try (along with 10 complete quilt patterns).

Quatrefoil-Applique_Angela

Angela’s version – very dramatic!

I think Angela’s version is just as beautiful! I love the pop of metallic she added to one petal of each block. Her plumb background is vary dramatic and allows lots of space to explore alternate background quilting.

Click here to see the rest of the quilts from the book.

Where to Buy

The Ultimate Guide to Machine Quilting – Fractured Squares

The next quilt I get to share from The Ultimate Guide to Machine Quilting is called Fractured Squares. This one was designed by Angela Walters and we each had so much fun choosing fabric colors and quilting designs!

Fractured_Squares_Christa

Christa’s version – quilted with straight lines and decorative stitches.

This quilt is another example of what I call “Structued Improv” – starting out with a general plan of how the quilt will look, but not knowing exactly how you are going to get there. This simple to piece quilt consists of a center square surrounded by slightly improv pieced borders.

Fractured_Squares_Christa_detail

I quilted my version completely with my BERNINA integrated dual feed, which basically acts as a built in walking foot. I combined straight lines with decorative stitches to create some interesting textures. Then I used a ruler in the center (yes with the walking foot/IDF) to get those nice, straight lines. If you don’t have a ruler, you can totally mark them with a pen, or painter’s tape.

Fractured_Squares_Angela

Angelas version – so rich and striking!

I love how Angela combined bright pastels with a deep brown for her version. She used a mix of blending and contrasting threads that allowed her beautiful machine quilting to really pop!

Whether you enjoy quilting using a sit-down domestic machine, or a stand-up longarm, (or even if you prefer to “quilt by check”) we are so excited to share our passion of machine quilting with you in The Ultimate Guide to Machine Quilting. With over 50 different quilting motifs to choose from, I’m sure you’ll find the perfect design for your next quilt!

Ultimate Guide to Machine Quilting

Click here to purchase an autographed copy, signed by us both!

Click here to see all of the quilts from the book.
All photography courtesy of Brent Kane and Martingale.

Work in Progress – Feathered Chevrons Quilt Top

It’s been awhile since I’ve been able to share a work in progress quilt. I’ve been mostly working on behind the scenes projects for upcoming magazine and book projects. However, I’m excited to let you know that I’ve been working on a new quilt called Feathered Chevrons.

feathered chevrons

Feathered Chevrons Quilt top – 64″ x 80″ shown on my design wall

This is an updated version of my Charming Chevrons quilt which was my first modern quilt and published pattern. I’ve included the layout (shown as an EQ7 illustration) for Feathered Chevrons in the Charming Chevrons Pattern because I knew I would eventually get around to making it!

feathered_chevrons_precuts

I used 4 charm packs of my Christa Watson Palette of Kona Solids for Robert Kaufman, along with 4 charm packs of Kona Coal for this version. You could easily make it from a layer cake (ten square) pack of each fabric as well.

hsts

To make the triangle trimming process go more quickly, I used the quilt in a day triangle square up ruler. It allows you to trim up the triangles while they are still folded, and then press.

sewing_blocks

I enjoyed mindless chain piecing while sewing the blocks together, listening to audio books and quilting podcasts as I sewed. I try to assembly line the process as much as possible when working on my quilts: I trim all the blocks, do all the pressing and then all the sewing again. The hardest part is not getting distracted by other projects!!

batting

I used my design wall to help measure out the amount of batting I would need. I’m actually going to quilt this with a double layer of batting: 100% Cotton on the bottom layer to provide stability and drape, then Wool for the top layer (shown above) to add loft and really allow the machine quilting to pop.

In the next post, I’ll share my machine quilting process. I’m going to apply the principles of domestic machine quilting that I teach in both of my books. I use the same processes no matter how big the quilt is, or what the final design will be. 🙂

CharmingChevronsCover

Click her to purchase a print pattern of Charming Chevrons.
Click here to purchase a PDF pattern of Charming Chevrons pattern.

Scrap Quilt Designer Showcase with Persimon Dreams

Today, I’m pleased to be a part of Kim Lapacek’s Scrap Quilt Challenge over on her blog at Persimon Dreams. On the 15th of each month through October, Kim will be featuring a different designer talking about how they approach quilting with scraps. The funny thing is that I never considered myself a “scrap quilter” until I started realizing that I do love scraps, if they can be organized in a controlled way (yep, that’s a little bit of my type A control freak personality showing!!)

header

Controlling the Chaos

This actually goes well with my approach to improv as well. It’s hard for me to go completely willy-nilly as I still like to have some structure in my quilts. Today I’ll share are a few examples of quilts and blocks where I’ve mashed up “controlled scrappy” together with “structured improv” to create some really dynamic quilts!

my_stash

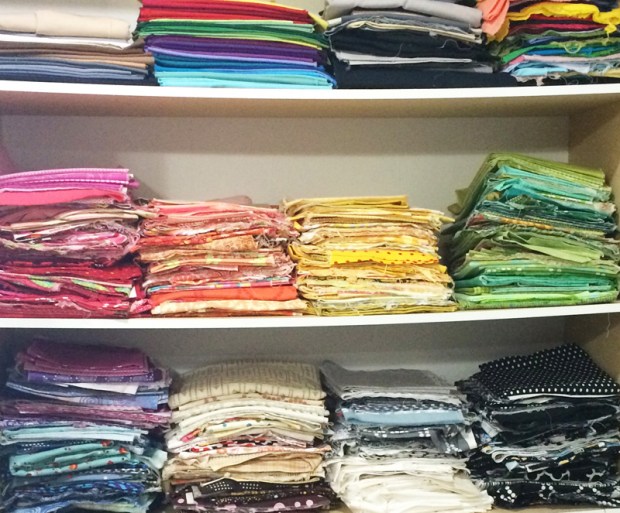
I don’t keep a separate scrap bin – I just sort my fabric chunks by color and then try to use as many different prints as possibly in my “controlled scrappy” quilts. I don’t let my stash get too big so it’s easier to work with. If I don’t love something on the front, I’ll throw it on the back.

The following three examples are all from my first book, Machine Quilting with Style. I didn’t even realize what I had done with the controlled scrappy/structured improv thing until the quilts were finished. No wonder they are 3 of my favorites from the book!!

Lightning

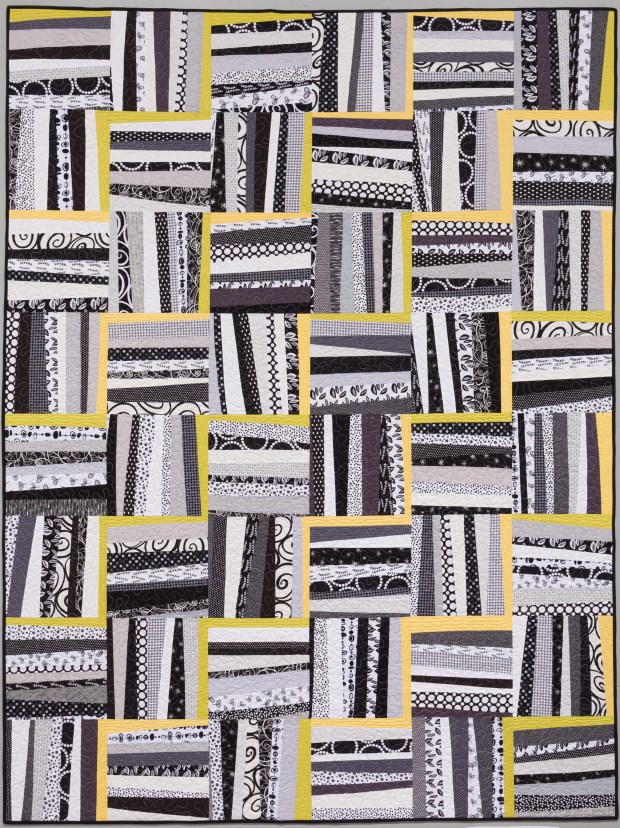
This is “Lightning”. I pulled out all of the black, white and gray fabrics from my stash to put this one together, creating improv rail fence blocks. To add a pop of color, I added some solid yellow/green. I didn’t have enough of either color – so I just used both!!

My approach to fabric selection is why choose 1 or 2 fabrics when 20 will do?

Ripples

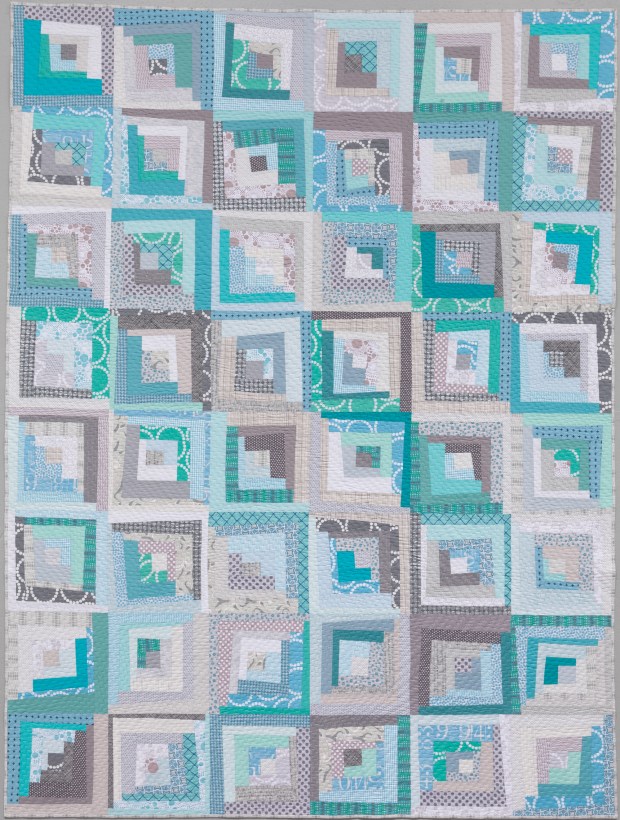
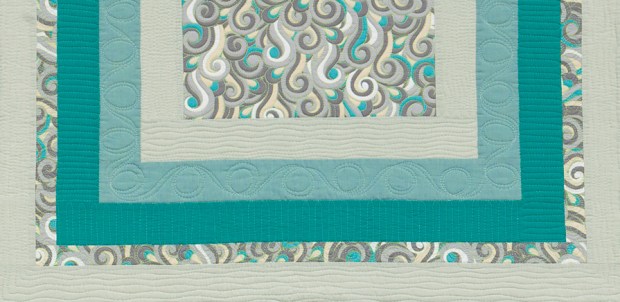
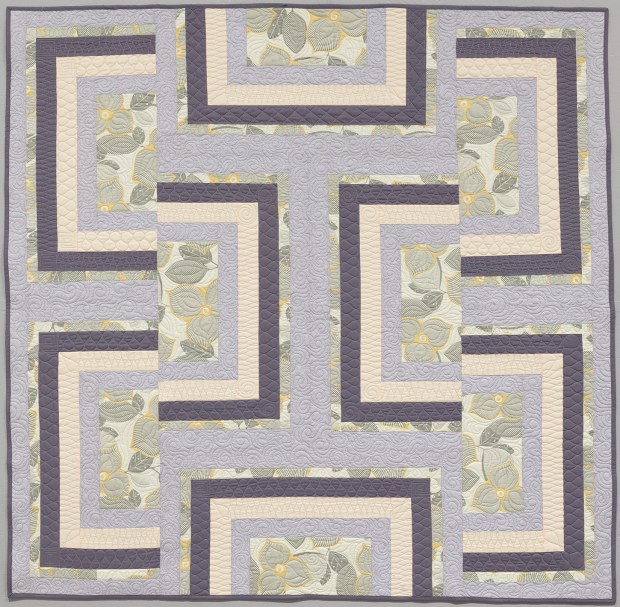
I used a similar approach when combing through my stash, pulling fabrics for “Ripples” above. Again, I started with a controlled palette of aqua and gray, pulling every fabric I had in those two colors ranging from light to dark. I love the movement that is created when many different fabrics are used.

I think more is more when it comes to fabric selection, don’t you?

Facets

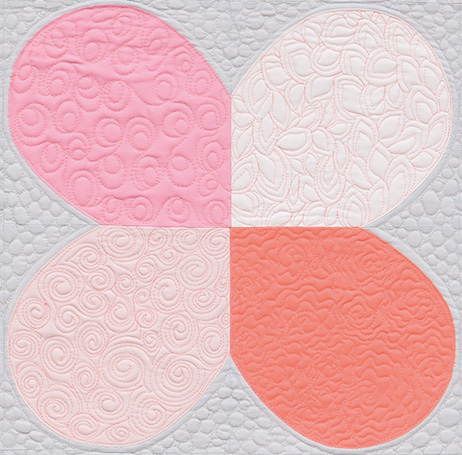
“Facets” above is my absolute favorite quilt I’ve made to date. Although I “cheated” a little and started with a 28 piece fat quarter bundle for this quilt, (using my Kona Designer palette), I really wanted to show that you can still get a scrappy look and feel using only solids. The solid white background sets it off and provides contrast, but I’m really tempted to remake this using scrappy backgrounds, too!

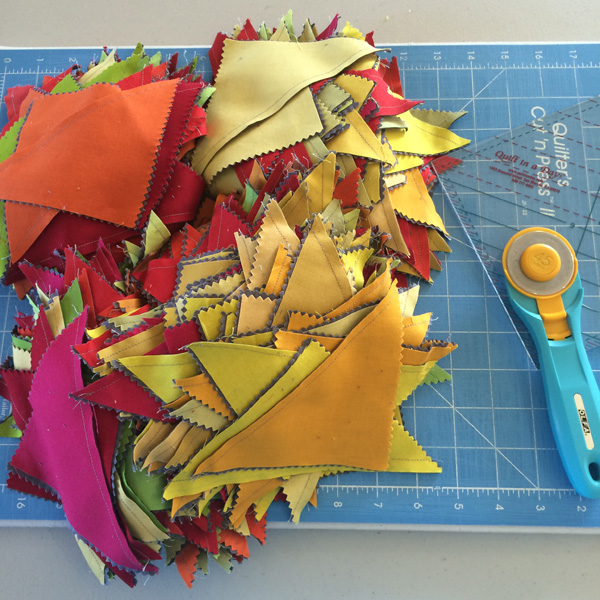
By combining scraps with improv – you can use even the tiniest leftover bits to make your own fabric, then cut it up into recognizeable shapes!

Scrap Happy Blocks

I used the same approach to combining scraps with improv when making these two blocks that are part of a larger designer block program.

scrappy_heart_finished

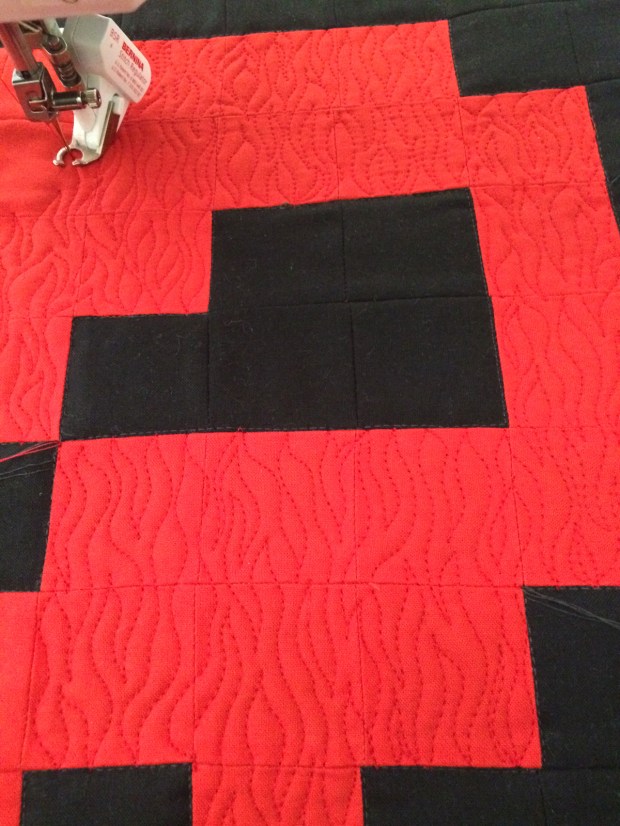
My Scrappy Happy Heart is part of The Splendid Sampler block series. It’s a paper pieced block that uses up to 16 different fabrics. Can we say scrappiness galore?? Wouldn’t a whole quilt of them be just fabulous??

Click here for the free block pattern to make Scrappy Happy Heart.

1b_improv_star_flat

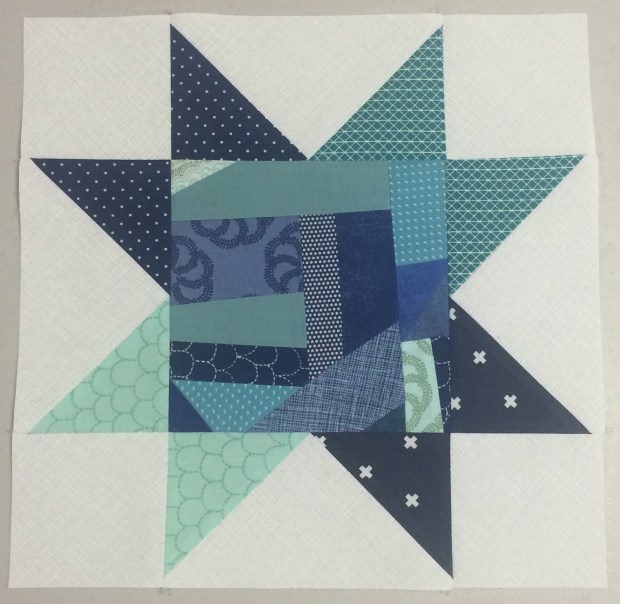
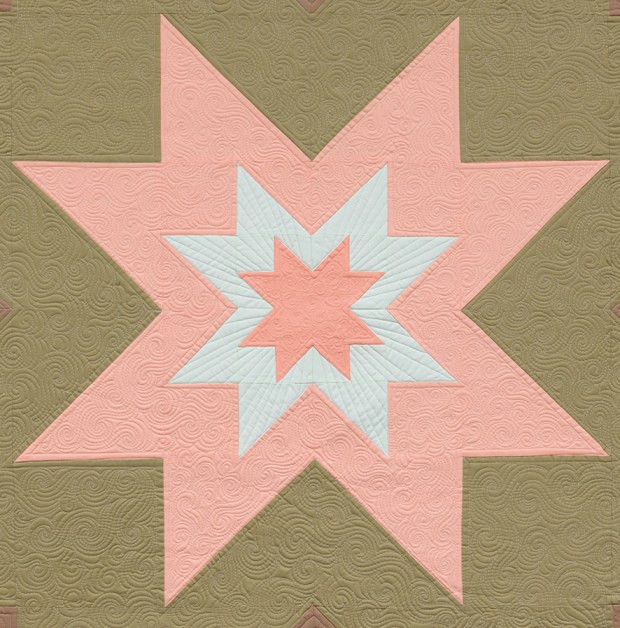
Improv Star was made for the Aurifil Designer of the Month Series. I had just made a quilt using the colors above and had enough leftovers to create this fun block from the scraps! I’m starting to explore the idea of taking traditional blocks and making the individual block units from scrappy improv. I think it makes for a much more interesting block, don’t you?

Click here for the free block pattern for Improv Star.

Join the Challenge!

If you are inspired to start using up your scraps, be sure to join in on the Scrap Quilt Challenge and link up your project. Complete rules are listed on Kim’s blog and you have until Nov. 3rd to link up! When you do, be sure to also share your scrappy quilt over in my Facebook Group so we can all ooh and ahh over it!!

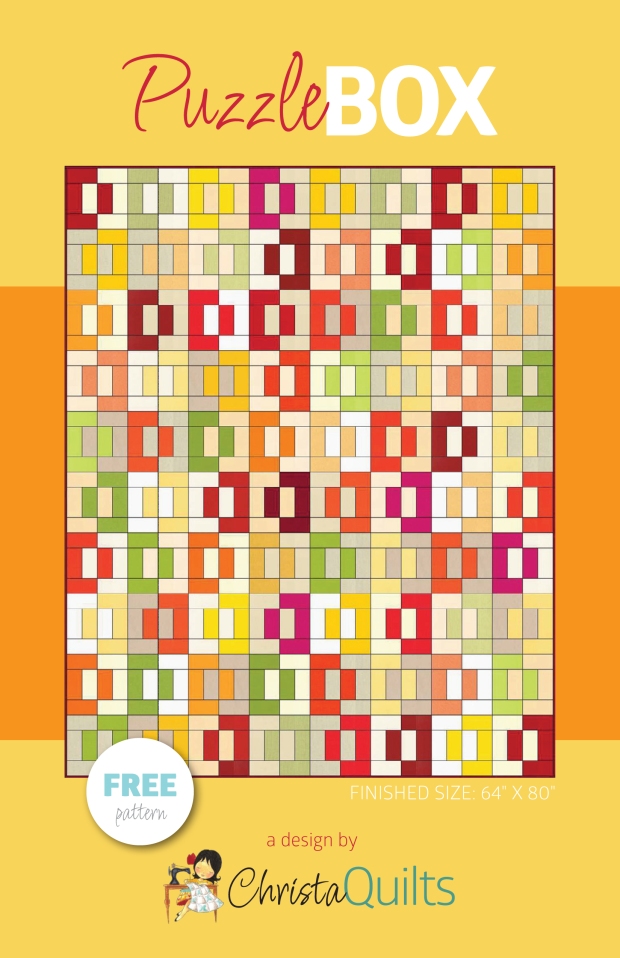
And finally, as my welcome gift to those of you who are new to my blog, be sure to click here to to get my free Puzzle Box PDF pattern. It’s perfect for using up leftover scrappy strips!!

Puzzle Box Pattern


Machine Quilting Tips and Tricks – Guest Posting at Diary of a Quilter

Hi Friends! Today I am guest posting over at my friend Amy Smart’s blog – Diary of a Quilter.I’m sharing some encouragement to help get you started on the path towards quilting your own quilts. If you are popping over here from there, welcome!!

2015quiltstack

I love a nice stack of colorful quilts – don’t you?

Here’s a roundup of additional blog posts I’ve written over the last couple of years that will help you feel confident in diving into domestic machine quilting. Happy reading… and quilting!!

Amy’s Craftsy Class is on Sale!

When writing this post, I got a message from my friends at Craftsy letting me know that Amy’s new class Pre-Cut Shortcuts is on sale, along with ALL craftsy classes at 50% off through 6/13.

You can read my review of Amy’s class here.
Click here to save 50% on ALL Craftsy classes!

The Ultimate Guide to Machine Quilting – Exploding Star

Exploding Star was my favorite one to quilt in The Ultimate Guide to Machine Quilting. Angela Walters and I each quilted our versions completely differently, showcasing what is possible when quilting either on a domestic machine, or a long-arm.

I used a large continuous spiral, which is only possible to do on a sit-down machine, while Angela showed how quilting the same motif in different scales really draws your eye towards the center of the quilt.

Exploding Star by Christa Watson

My version of Exploding Star, using Angela’s fabric (of course!!)

Machine Quilting Detail

Detail of large spiral quilting. I introduced this concept in my first book, then expanded on it to create overlapping spirals in the second book.

Exploding Star by Angela Walters

Angela’s version of Exploding Star – isn’t it fun to see the same quilt 2 different ways?

Exploding_Star_Angelaa-detail

Closeup of Angela’s Stunning Swirls

Click here to see all of the quilts from the book, as they are added each week!
All photography courtesy of Brent Kane and Martingale.

Ultimate Guide to Machine Quilting

Click here to purchase an autographed copy, signed by us both!