Favorite Tools – Lint Roller

I have found a lint roller comes in very handy when trying to get my quilts ready for presentation. Whether it’s to display locally, or to ship to an out of state show or publisher, I want my quilts to look good! (The picture below shows my String of Pearls quilt.)

Lint Roller

Favorite Tools – Jumbo Lint Roller

I found this awesome jumbo lint roller at my local discount store and it works wonders for covering a lot of area. It’s basically large sheets of masking tape perforated together and rolled around a tube. Such a clever idea!

First, I lint roll about half of the quilt top. I can catch enough lint and stray threads that I only get halfway through before I have to rip off a piece of tape. Then I can do the other half.

Lint Roll

Clean Threads with a Lint Roller

Same thing for the back – I roll it half at a time. Voila! A pretty quilt that is (mostly) free of thread and lint. 🙂

If you like these types of blog posts, you can read about all of my favorite tools here.

Favorite Tools – Aurifil Thread

In my quest to find the perfect threads for piecing and quilting, I’ve been trying to make as many quilts as I can, trying out different quilting designs and brands of thread. I can now say I’ve enthusiastically jumped on the Aurifil bandwagon. (That is, once I learned how to spell it!)

Aurifil ThreadsI’ve been hearing rave reviews about how wonderful Aurifil 100% cotton thread is for piecing, so that was a no brainer. But after finishing my latest quilt, I can now recommend it for machine quilting, too. Here’s a closeup of one of my String of Pearls blocks, quilted with matching Aurifil 50wt cotton.

Aurifil Thread

Aurifil Thread in Purple and Black

I like the 50 weight because it works well for both piecing and quilting. I prefer to buy the larger 1300 meter spools because that’s usually enough thread for an average sized quilt. Since it can be kind of spendy to stock up on large spools of all the colors I need, being able to use the same thread for sewing and quilting makes it more economical to keep a wide variety of colors on hand. I love all the neutral basics, too!

Aurifil Basics

Aurifil Basics

Thanks to Nancy at Owen’s Olivia for her indepth thread review, I was able to see exactly why Aurifil is such a good quality thread. Her husband took these pictures under a microscope showing what thread looks like when magnified close up. I’m re-posting them here with her permission.

Aurifil ThreadSuperior Thread

Coats Thread

Aurifil is very smooth and closely twisted, leaving less lint and making for a nice tight stitch. No wonder the cheaper cotton threads are so linty – just look at all of those thread slubs sticking out everywhere on the last picture!

My top two machine quilting tips are to use a thread that blends with your fabric, and use the same thread in the top and bobbin. Both of these suggestions will help hide your mistakes (not that anyone makes those, right?).

In all fairness, I do like other brands, too (Superior So Fine 50 wt Polyester, Glide and Isacord Polyester, and Superior Silk.) But Aurifil will be my new “baseline” or go-to thread for both piecing and quilting from now on.

My Other Machine is a Singer Featherweight

Over 10 years ago, this Singer Featherweight was the first thing I bought from ebay. Ever. I knew I wanted one, so I signed up for an account and had to create a user ID. For lack of anything better, I chose ChristaQuilts as my user name. It has stuck with me ever since. And so has this beauty.

Sewing in the Mountains, 2013

Sewing in the Mountains, 2013

Singer Featherweights were quite popular in my traditional guild about 10-15 years ago and since then, their popularity has ebbed and flowed. Sometimes at a retreat or class I will see more than half the class using them. I recently got mine tuned up and I’m excited to sew with it again. So imagine my delight when I’m starting to see Featherweights popping up on modern quilting blogs.

Sewing at the Beach, 2012

Sewing at the Beach, 2012

I took mine with me to the beach last year and to the mountains this year. It’s such a fun little machine to use and I can set it up anywhere I can find a table and a plug.

After lugging my Klingon Battle Cruiser of a machine to my owner’s class last week (my new Bernina as my mom calls it), the Featherweight makes a nice travel machine. 🙂

Sewing Machines

It’s so tiny!

Favorite Tools – Painters Tape

I have found one of my favorite nifty notions to use is a roll of blue painters’ tape! It’s low tack, so it will temporarily stick where I need it, but doesn’t leave any permanent residue.

It’s perfect to help tape down the edges of a quilt back when basting…

Tape Basting

Use painters tape for basting.

And it recently came in handy when I was wanting to quilt rows of straight lines without marking. I cut a bunch of pieces off, laid them on the quilt and quilted right along the edge. Then, I was able to use the width of my quilting foot to quilt the remaining lines.

Painters Tape Quilting

Tape for Quilting Straight Lines

I love it when I can use up cheap supplies that are just lying around the house!

Favorite Tools – Happy Bernina Birthday To Me!

You don’t just turn 40 and let it idly pass you by! Although my birthday is not until later this summer, I got an early present last weekend. 🙂

Christa's BerninaI love my new Bernina! It’s the model 710 and it has a whopping 10 inches of space to the right of the needle (compared to my old machine which is less than 7 inches). Look at the size difference of the two. It’s like mama sewing machine and baby sewing machine. 🙂

Bernina Sizes

Big Mama vs. Baby Bernina

I’m just glad it still fits in my sewing table. All I need is a new insert and I’m good to go.

Bernina BobbinsThe funny thing is that the manual kept referring to it as a “sewing computer” rather than a “machine”. It’s a whopper! And check out the bobbin. It’s nearly twice as big – size really does matter. 🙂

When the new bigger Berninas (8 series) first came out a few years ago, they were being offered for nearly the same price as a long-arm machine. So although my machine quilting was starting to take off, I knew I would need to stick with my trusty model 1630 (16 years old and counting) for a few more years.

But last week I just happened to be at the dealer getting a tune-up and they just happened to be having a great financing deal going on. Knowing I wouldn’t be able to afford any of the 8 series, I crossed off all the extras I could live without. No, I don’t need the BSR (Bernina Stitch Regulator). No I don’t need a machine that’s too big for my table. No, I don’t need the embroidery capability.

Test Drive

My “Test Drive” Sample

I just wanted a good working machine with a bigger arm – and a larger bobbin would be nice, too.  Plus all the standard features of my old machine: snap on feet, needle up/down, knee lift, etc. Oh and the new automatic duel feed is nice too – no more clunky walking foot! The brand new 7 series, introduced just this year has all this at about half the cost of the original 8 series.

Bernina Boxes

Andrea Rolls Out My New Dream Machine

I’d been telling my hubby for awhile that I was ready for a new machine, but after taking an absence from quilting for awhile he said it needed to earn its keep. He suggested once I started entering quilt shows and earning awards again, we could justify the expense.

Wouldn’t you know – I just happened to win a viewer’s choice award in the Blogger’s Quilt Festival last month? It was a sewing miracle! So I earned my Bernina. 🙂

Andrea, a fellow Vegas Modern Quilter works for Quiltique, my favorite local shop which also happens to be a Bernina dealer. (Andrea taught at the Riley Blake Fabric Fest so that’s pretty cool, too!) I laughed when she brought it out to me. It came in 2 boxes!

So you may ask, why Bernina? Simply put, because when I was first learning to quilt, most  of the award winning quilts I fell in love with were sewn and quilted on Berninas.

When I tried one for the first time nearly 20 years ago it was love at first stitch. Over the years I’ve tried different machines. I really even tried like long arm quilting too, but every time I tried one I just knew it wasn’t for me.

So I’ve been in heaven all week long as I’ve been quilting my project that will be featured in Quilty later this year. (Be sure to sign up for a Quilty Magazine Subscription here so you don’t miss it!) This is the back side so far. I can’t wait to show you the front!

Quilty Quilt

Favorite Tools – Cut ‘n Press II Iron Mat and Cutting Surface

It’s been a few months since I’ve reviewed any of my favorite tools, so this week I wanted to share with you a fabulous tool that I’ve been using a lot lately. It’s the Quilters’ Cut ‘n Press II which has a pad for ironing on one side and a cutting surface on the other.

Cut 'n PressThese are too big and bulky for me to stock and ship from my store. However, you can find them for sale (usually with free shipping) on Amazon.

When I have a ton of small pieces to press, it’s much easier to whip this puppy out rather than having to set up my large ironing board. Plus I always take it with me to classes since it has a cutting surface on the other side.

Block PressingI’ve been using it while pressing all of the pieces for my String of Pearls Quilt Along. (Incidentally, my iron of choice is a Rowenta, but I’ll save that for another blog post!)

There is a smaller version available, but I prefer the nice 12″ x 18″ size.

Just like a regular ironing board, it can get dirty over time and eventually wear out. However, in 18 years of quilting, I’ve only had to buy 2, so that’s not too shabby!

Christa’s Quilt Along 5.8 – Hugs ‘n Kisses Stitching in the Ditch

Although machine quilting is my absolute favorite part of making a quilt, stitching in the ditch is my least favorite part of the quilting process. Stitching in the ditch means quilting right in the middle of the seam lines, usually outlining a block or part of the quilt. Think of stitching in the ditch as the anchor that holds the quilt together and provides stability so you can have fun quilting more exciting motifs later (as in next week)!

Step 1 – Gather the Needed Supplies

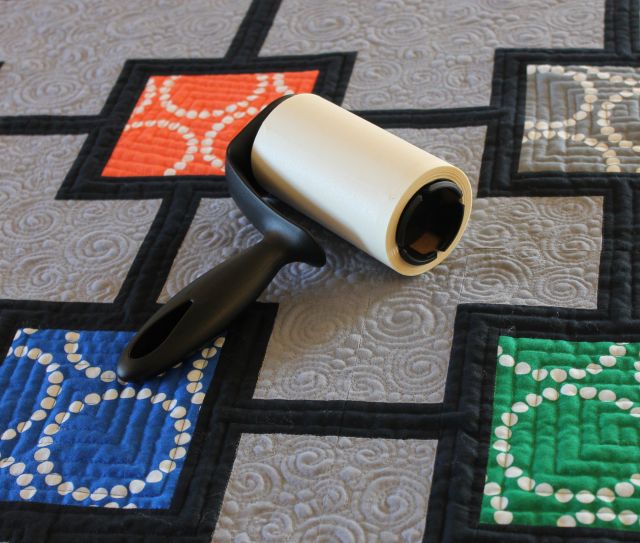
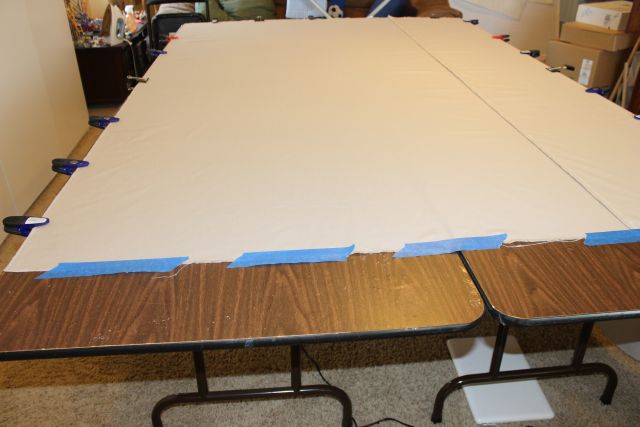
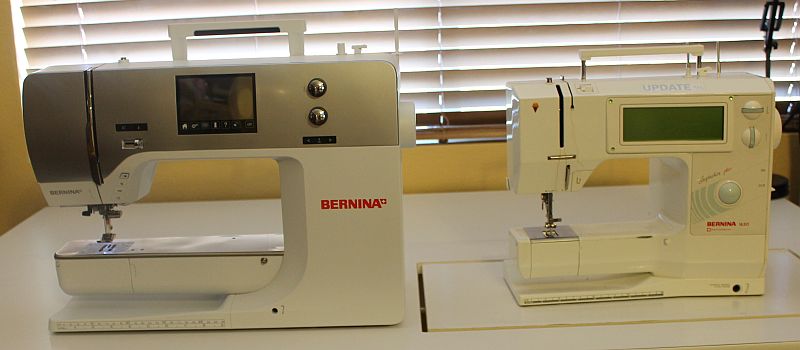
My Hugs ‘n Kisses Quilt is basted and ready to go so now it’s time to give a little thought to quilting supplies and thread selection.  Below are my absolute favorite supplies for machine quilting: a Supreme Slider, quilting gloves, a free-motion foot and a walking foot.

Machine Quilting Supplies

The Supreme Slider enables me to slide the quilt around easily during free-motion quilting.  It sits on the bed of the machine and covers the feed dogs so I don’t even have to drop them if I don’t want to (some machines perform better when the feed dogs are still engaged). However, one word of caution – remember to remove it when doing any walking foot quilting or you’ll stitch right through it!

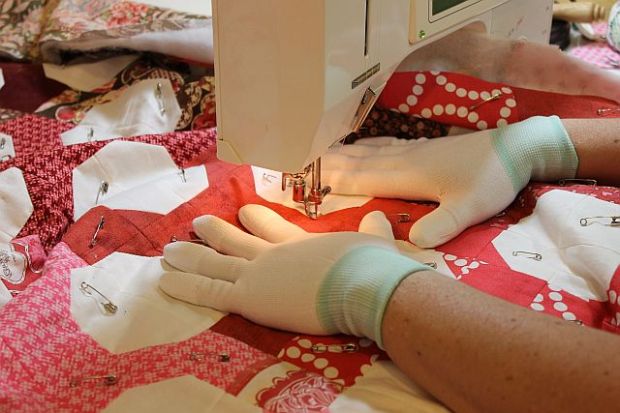
I wear a pair of quilting gloves the entire time while quilting (both with the walking foot and the free motion foot). They allow me to grip the quilt, smoosh it around and push it through with ease. If you can only buy one tool for quilting, this is my number one recommendation. They are machine washable, too.

Thread and Needles

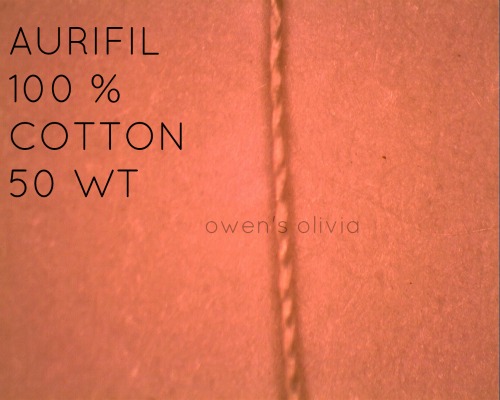
My favorite needles to use are titanium topstitch needles from Superior Threads. They have a longer eye so the thread can easily glide through the hole. I use them for all sewing from piecing to quilting. I use a size 70 or 80 needle for thinner polyester threads (50-60 weight) and a size 90 needle for thicker (30-40 weight) cotton or polyester threads, or specialty threads.

Whenever possible, I like to choose a stitch in the ditch thread that blends with most of the colors of my quilt top. In this case a light pink thread will work well for this quilt. A 50 weight cotton or 50-60 weight polyester are good choices for stitching in the ditch. I use the same color thread in top and bobbin.

Step 2 – Stitch in the Ditch to Anchor the Quilt (4.5 Hours)

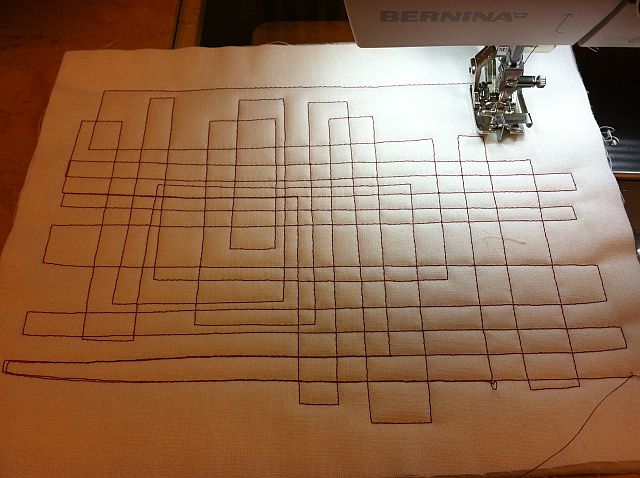
First, decide which “ditches” you want to stitch. If you are quilting the X and O configuration it’s very easy to stitch between each row of blocks. Start in the middle of the quilt and stitch all of the horizontal rows from one end of the row to the other. Move over one row, and quilt all of the rows on that side. Then finish the other side, turn the quilt 90 degrees and stitch through all of the vertical rows. I’ve also included a closeup of my original Hug’s N Kisses where I was able to stitch through all of the ditches in white thread.

Stitch in the Ditch Closeup

Hugs 'N Kisses

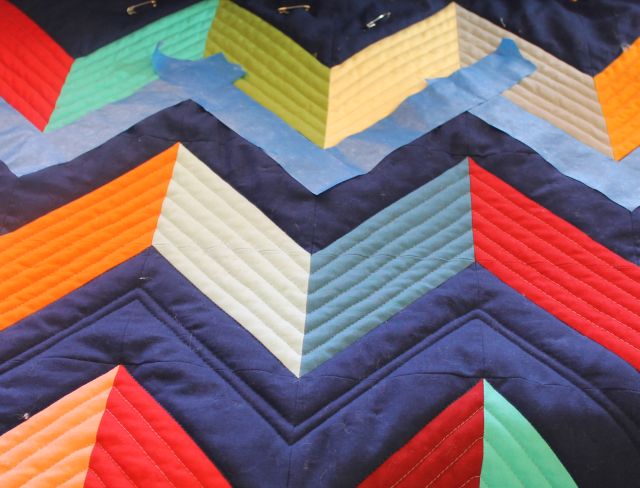
Stitching in between the X and O blocks and should take a lot less time. Because I made my quilt with all X’s, getting in between the ditches took a lot longer.

For the all X configuration, I had to constantly turn and pivot to outline all of the blocks. In some cases, I back-stitched through previous lines of stitching. Here are some in process photos below:

Pulling up the Bobbin ThreadAlways thread your machine with the needle in the “up” position. This ensures proper threading of the top thread in between the tension discs.

When starting a line of stitching, pull your bobbin thread up to the top. Remember this phrase, “needle down, foot down – needle up, foot up” to grab your bobbin thread. You can either tie off your thread ends, or start and stop each  line of stitching with a few tiny stitches to secure your threads.

You can pull your bobbin thread up to the top at the end of a line of stitching by yanking on the top thread until a little loop of bobbin thread comes to the surface. Then pull it through with a needle or small pin.

Stitch in the DitchPivot When Needed


Using an open-toe walking foot really helps so you can see where you are stitching! Try to stay as close to the ditch as possible and slow down if needed so your stitches are straight and consistent. I only removed pins as they got in my way. I left the rest of the pins in for stability as I stitched.

About halfway through quilting, I decided to see if I could stitch in the ditch using my free-motion foot. This is a little more advanced technique which requires a lot of control over the movement of the foot. I found that if I slowed down enough I could stitch in the ditch with my free motion foot. The upside is that I didn’t have to pivot the quilt so much. I could just move the foot where I needed to go to get around all of the ditches.

FMQ Ditching
Whenever I’m quilting, my hands act as a hoop constantly surrounding the needle, giving me more control over the quilting process.

Step 3 – Quilting the Border Outlines (30 Minutes)

Some of the inner border will have already been quilted from outlining the blocks. I quilted the rest of the inner border seams and the outer border seam. This will stabilize the borders for now so I can add more decorative quilting later.

Stitch the BordersYou can see that I’ve left in most of my basting pins. I will remove them as I need to next week when doing the decorative free-motion work.

Stitched in the Ditch

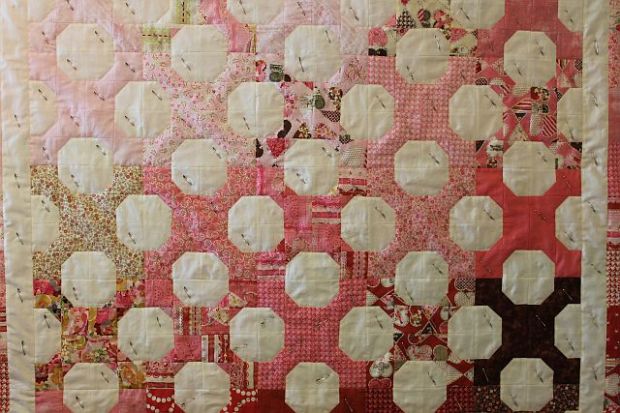
All of my ditches have been stitched! I know it doesn’t look like much but you can sort of see the “poof” left by the quilting. The quilt is nice and flat and stable and I’m ready to move onto the “exciting” quilting next week!


Hugs ‘n Kisses Quilt Kits are available for purchase while supplies last. If you have any questions about this week’s homework, please be sure to join my flickr discussion, leave a comment, or email me directly at christa@christaquilts.com.

Quilt Along Schedule – Links will go to each active post when published.

Hugs 'N Kisses

Hugs ‘N Kisses 48″ x 64″


Grab my Quilt Along button!

<div align="center"><a href="http://christasquiltalong.com" title="Christa's Quilt Along" target="_blank"><img src="https://christaquilts.com/wp-content/uploads/2013/03/christas-quilt-along-175-2.png" alt="Christa's Quilt Along" style="border:none;" /></a></div>

Favorite Tools – Starch and a Big Board

I am finally learning to love starch! It took me awhile to warm up to the idea but I’ve used starch on my last few quilt projects and have been pretty happy with it. Once I learned how to spray starch on the back side of the fabric and let it soak in first before I pressed the fabric, I was much happier with my results.

My good friend Alyssa from Pile O’Fabric put together these two wonderful video tutorials on how to starch your fabrics, including blocks and cut pieces.

My vote for favorite brand? Niagra spray starch. It’s super cheap and I can get it by the bundle at Sam’s Club. I was surprised at how quickly I ran through my first bottle.

Along with starch, my other favorite item to share with you this week is a Big Board. I’m sorry that I don’t have a source for them. I’ve only seen them at quilt shows and through distributors. Unfortunately they are way too big and bulky for me to carry in my store. 😦

Big Board

Big Board

If you see one out and about in your travels, be sure to pick it up. I can iron 1/2 yard length of fabric without having to move it around. Yippee! It sits right on top of my regular ironing board and I love it. When I fold up my iron for storage, the board stands right next to it.

Updated

Hi all – be sure to read all of the comments that go along with this post. Many of my wonderful blog readers have added links showing where to get one or how to make one. Thank you all for sharing your knowledge!!!

Tuesday Tools and Techniques – Fusible Batting Tape

Fusible what you say? Fusible batting tape! It’s my favorite new little find. Since I like to quilt my own quilts, I accumulate lots of large chunks of leftover batting that it’s hard to do anything with. Sure, I use them for table runners, wall-hangings, pillows, and practice samples. But yet, I still end up with LOTS of leftover batting pieces.

Heat Press Batting Together

Heat Press Batting Together

Well, not anymore! By simply joining the straight edges of two lengths of batting with a few pieces of special “tape”, now I can use up chunks that are too large to throw away, but too small for a quilt on their own. I can even add a thin strip of batting if needed when my batting piece is just an inch or so too short!

So far, I’ve only used the tape on Warm-N-Natural cotton batting, but the instructions say it’s suitable for all types of batting. Just reduce the heat of the iron as needed and test on a scrap piece first. I used it when basting my latest Quilt-Along, Sea of Squares:

Fusible Tape

fusible tape


The best part about using this tape is that it’s soft and you can’t feel it at all in your quilt. It just feels like the rest of the batting (There are no sewing lumps made from zig-zag stitching two pieces of batting together like I used to do previously.)

I have to admit, I did not find out about this cool stuff all by myself. I saw it being demoed at a quilt show about a year ago. It just took me this long to finally order some and try it out. If you would like to check it out for yourself, you can order a roll of fusible batting tape here.

Favorite Tools – Flickr!

I finally decided to jump on the Flickr bandwagon and I hope you will, too! I have created a Flickr group especially for my quilt-along tutorials, and the link for you to join is:

http://www.flickr.com/groups/christasquiltalong/

Jolly Jelly RollPink Baby BricksBlue Baby BricksCharming ChevronsSea of Squares


So before I go any further, I want to answer the question, what the heck is flickr all about? I’m answering because I’ve had this thought for several months now since I first heard of it.

Simply put, flickr is an interactive forum where you can post pictures, engage in discussions, and comment on other people’s photos and conversations. There are literally thousands of different groups on flickr, each moderated by the group’s creator.

My quilt-along group is a great supplement to my blog because you can post pictures of the quilts you are working on, ask me questions, and get input from anyone else in the group.

flickr

I have long lamented that I didn’t have a good way for you to share your WIP’s (works-in-progress) but now you can! And the best part is, you don’t even need a blog to participate – just a free flickr account.

My friend Alyssa from Pile O’ Fabric moderates a group on flickr for her Skillbuilder Block of the Month. She has put together 3 fantastic video tutorials showing how to create a flickr account and join some groups. Watch them and then be sure to join my group (and hers!)