Christa’s Quilt Along 3.8 – Quilting Chevrons Part 2

I love quilting pebbles! I have stippled my quilts like crazy for the last 10 years, but just recently got the hang of pebbling. Jut in time,  too, as I was on stipple burnout!!

Pebble Quilting

The time it took to finish the pebbling on my Charming Chevrons quilt was a little ridiculous though – it took 23 hours!! Yes, that’s right. The pebbling took more time to do than every other part of the quilt combined. It gives new meaning to the term Quilt-in-a -Day, LOL!!

Since I don’t really expect everyone to spend that much time quilting this quilt, I will first talk about pebbling in more detail, but then give you an alternative so that you can actually finish this quilt. (But by all means do the pebbling if your heart desires – mine did!)

Step 1 – Doodle on Paper First

Just like you had to learn your alphabet before you could write, so it is with quilting any FMQ (free-motion quilting) design. When I was in kindergarten my penmanship was terrible! (And it hasn’t really improved much since!) You need to practice your quilting “penmanship”, too!

Paper Practice

If you doodle on scraps of paper every day before you begin quilting, it will help you develop muscle memory between what you are drawing with your hands and what you are stitching out on the quilt. This will form a mind body connection so that eventually you will be able quilt without thinking. Think of FMQ as drawing with your sewing needle.

Step 2 – Practice on Scraps Next

I took a few FMQ classes at Road to California 2 years ago. For most of the class, we just made practice samples. If you really want the feeling of completing FMQ on a quilt, practice on charity quilts. You will get great practice and the recipients will love your efforts!

Practice Scraps

When I began free-motion quilting, my first efforts looked pretty bad. It took a while for me to put together different combinations of fabric, thread, batting, needles and tension settings. A few quick things I learned while practicing FMQ on my Bernina:

  • Select a needle with a large hole so that the thread doesn’t shred, like Superior Topstich needles. The size depends on the thickness of your thread (size 90 for the heavier polyster thread). Change every 8-12 hours of quilting. I used 3 of them on this quilt.
  • Loosen the bobbin tension slightly.
  • Use the same thread in top and bobbin for most quilts – it hides mistakes and makes for more even tension. I used Superior Highlights polyester in a rainbow of colors.
  • Break your quilting up into sections and don’t rush the process. Although it took a long time to quilt my pebbles, it really worked out to about 33 minutes per chevron block.  Quilting one block a day is not a bad goal.
  • Use a free motion slider, quilting gloves, and bobbin washers for the best quilting combo.
  • It’s Ok to “travel stitch” over your previous lines to get into all the nooks and crannies.

Step 3 – Apply your practice to your actual quilt

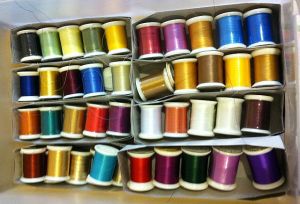
Thread DrawerFor this quilt I changed threads with every fabric color. I never could find a neutral that blended in with everything so I used a total of 18 different colors.

When I didn’t have an exact match, I used something close. It gave the quilt some interest without being overpowering.

I quilted the pebbles in sections first.

I quilted a batch of greens, then oranges, then reds, then blues, etc. This helped me from getting too bored. Usually I like to off each my stitches between thread changes. However, because I stitched over many of my quilting lines to form the pebbles, it hid most of my stops and starts. Therefore, I cheated a little and used really small “anchor” stitches at the beginning and end of each color change to avoid tying off.

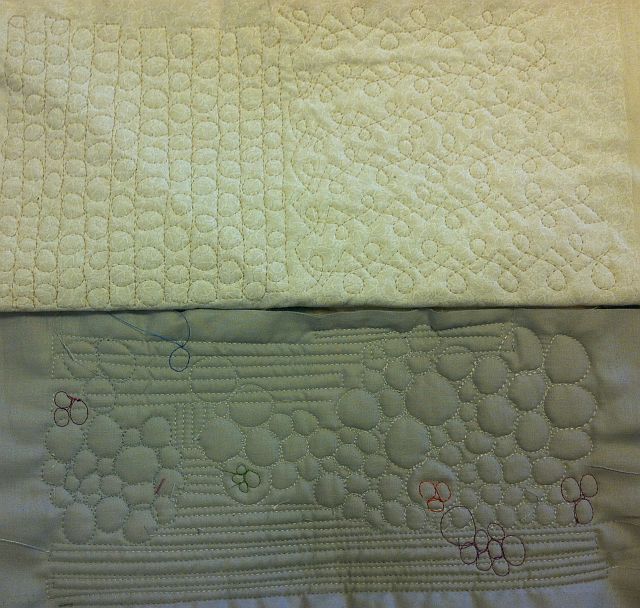
Pebble Quilting

Step 4 – Alternative Quilting Motif – Loops

Loop QuiltingIf  you are not crazy like me and don’t want to spend this much time quilting your chevrons, try a simple meandering loop instead.

This is my other “go-to” design and it covers your area pretty quickly. In fact, this motif would look great quilted all over the surface if you want to skip the straight line background quilting.

Here’s a little background quilting I did using loops on an earlier quilt. Click to enlarge.

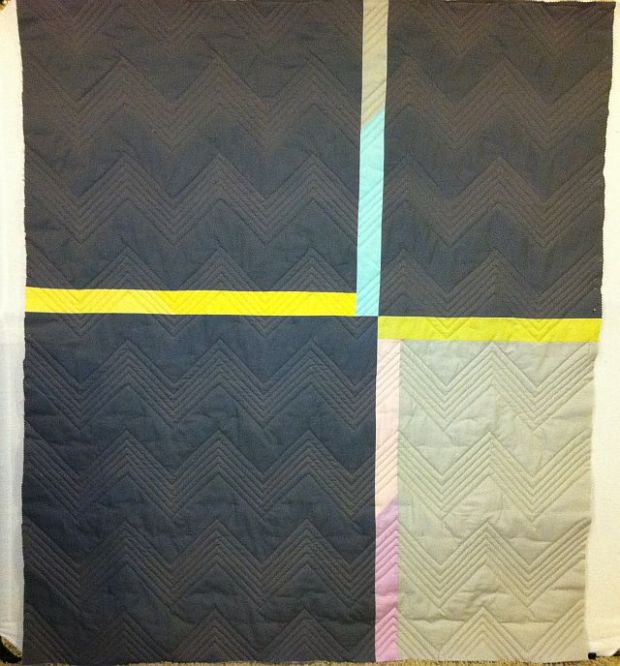
Because I used so many threads, my quilt back turned out just as colorful as the front!

Chevron Quilt Back

Other Resources

Please visit Leah Day at the Free Motion Quilting Project.  Her blog has so many in-depth tutorials on stitching particular FMQ designs. She has a video tutorial showing how to do pebble quilting and loops.

Yes, it was a little crazy to quilt that much, but honestly, I loved every minute of it! Next week it will be time to finish the binding and then I’ll start on another brand new tutorial. Isn’t this fun?? Be sure to check out my other two quilt-alongs here and here.

And, please continue to email me pictures of your Charming Chevrons quilt. I love to see how you are doing, no matter how you quilt it!

Quilt Along Schedule (Links are active once each step has been completed.)

Paper Pieced Wreath Berry Christmas – Part 1 of 2

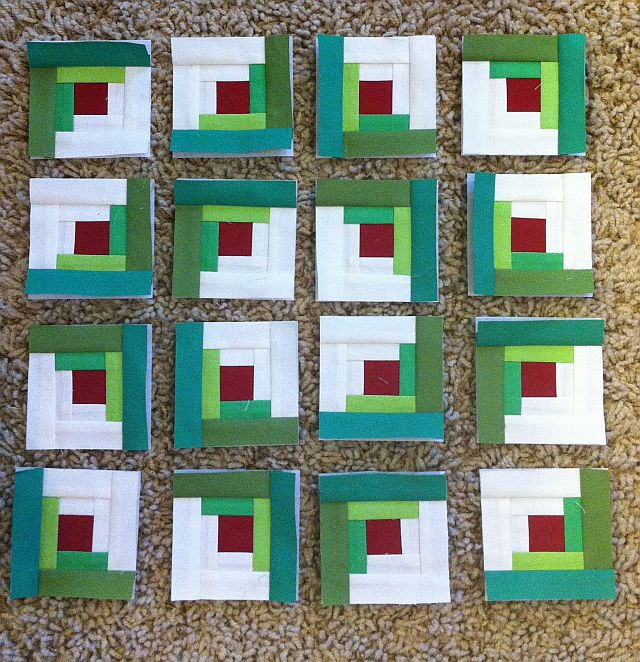
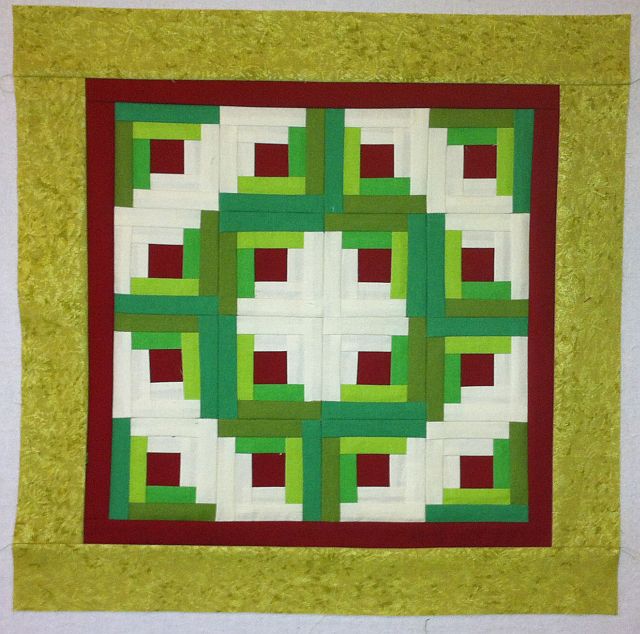
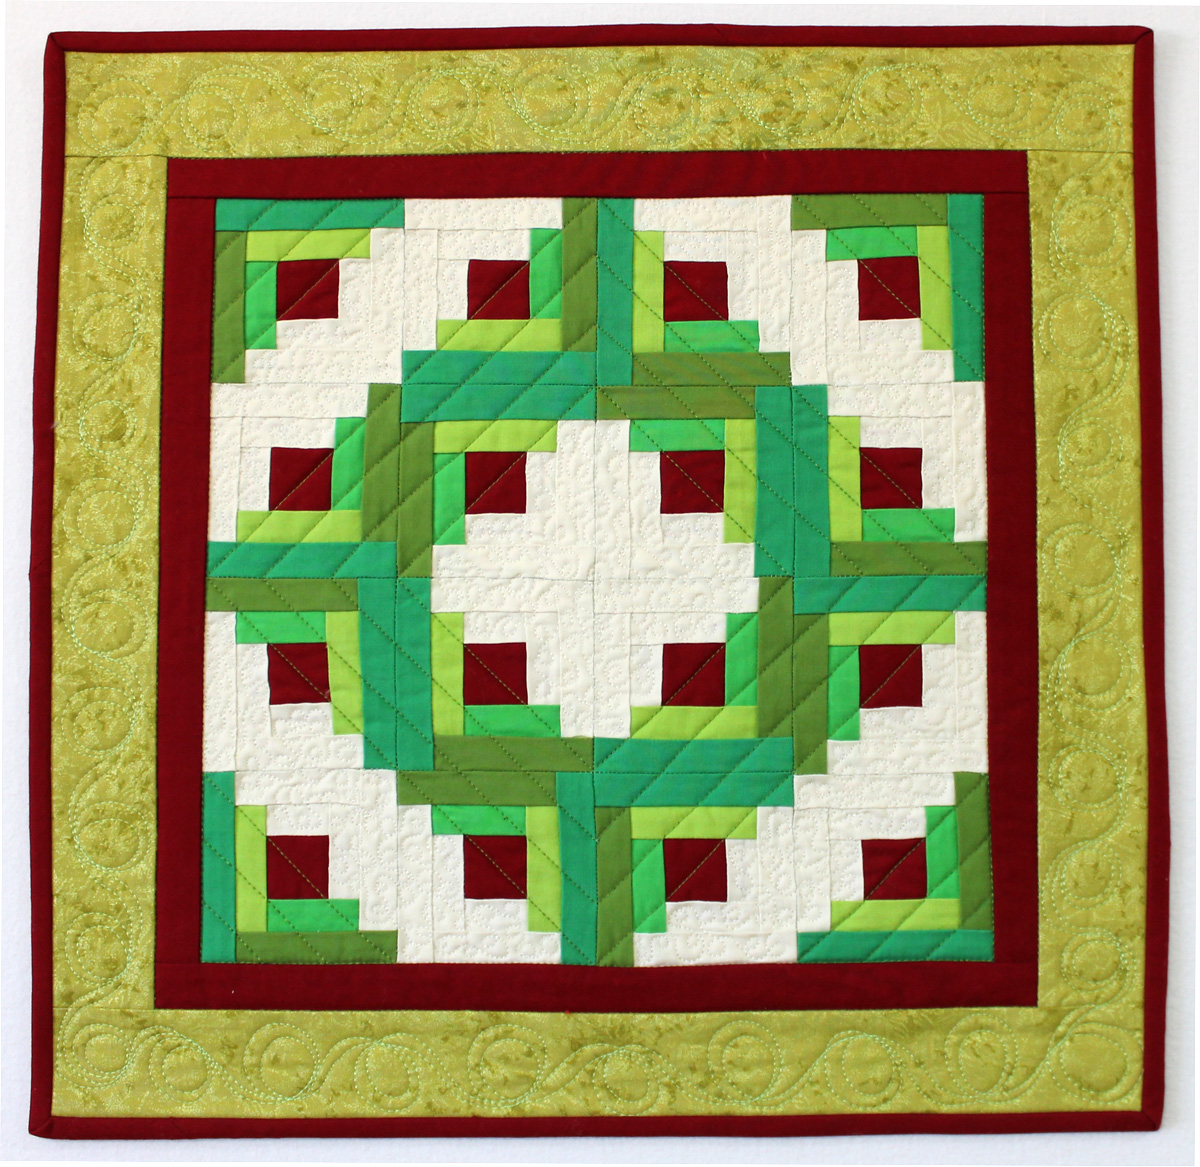
Paper Pieced Log Cabin WreathThis is a Christmas Wreath quilt I designed and made from paper-pieced Log Cabin blocks.

Since I can’t make anything anymore without feeling the need to write a tutorial for it, here you go:

I will demo making the log cabin blocks today. Part 2 covers completing the top and machine quilting.

The finished block size is 3″. The finished mini quilt (or table topper or pillow) is 18″ x 18.”

Step 1 – Gather Your tools and supplies. These are not a necessity, but as with any project, they make the job easier!

  • Rotary Cutter
  • Wooden Seam Roller for pressing
  • Add a Quarter Ruler for neatly trimming while piecing
  • A straight edge surface such as a postcard or piece of template plastic
  • Vellum Tracing Paper to print the foundations on
  • 1/2 yard of red fabric for centers, borders and binding (or scraps to equal that much)
  • 1/4 yard of cream to tan fabric for light half of log cabin blocks (or scraps)
  • 1/2 yard total of assorted green fabric scraps for log wreaths and border
  • FQ of green for outer border
  • Size 90 sewing needles for sewing through paper foundations
  • Small scissor snips for trimming
  • Cotton Thread for piecing
  • Your choice of decorative thread for machine quilting

Step 2 – Cutting all the logs. I prefer to have everything cut out before I begin my sewing. The pieces are cut bigger and will be trimmed later. Although there are 4 sizes of  light logs and 4 sizes of dark logs, I cut only 2 sizes for each. It wastes a tiny bit more fabric, but it’s easier to keep things organized, especially if I change my mind on fabric placement.

A little note on cutting pieces to fit – measure the finished size of your pieces and add 3/4  inch to this measurement (more if working with triangles). The units used for paper piecing have the extra 3/4 inch added in already.

Fabric cuts are based on 20-22″ long strips for working with fat quarters.

From the red fabric cut (if you cut very carefully you can get it all from just one fq):Red Fabric

  • 16 – 1.75″ squares for centers
  • 4 – 1.25 ” x 16″ strips for inner borders (to trim down later)
  • 4 – 2 .25″ strips for binding (2 strips if using 42″ wide fabric)

From assorted white, cream, or tan scraps, cut 10 – 1.25″ wide Cream Fabricstrips. Cross-cut into:

  • 32 – 1.25″ x 2.25″ rectangles
  • 32 – 1.25 x 3.25″ rectangles

From assorted green scraps, cut 12 – 1.25″ wide strips. Cross-cut into: Green Fabric
  • 32 – 1.25″ x 2.75″ rectangles
  • 32 – 1.25″ x 3.75″ rectangles

From green border fabric, cut 4 – 2.25″ x 22″ strips (trim later)


Step 3 – Printing the Paper Foundations

You can download the paper pieced log cabin block pattern by clicking the image below. There are 4 per page, so you would need to print 4 pages for a total of 16 blocks. Be sure to set your printer to print the PDF at actual size, not print to fit.

Paper Pieced Log Cabin Blocks

You can print on copy paper but it is much easier to see what you are doing if you use see-through paper (vellum) instead. Cut apart your paper foundations leaving a seam allowance all around. It is printed in grey-scale so you can tell which side of the block is light and which is dark. The blocks are printed as a mirror image for this technique.

Step 4 – Sewing the Paper Pieced Log Cabins

There are a lot of pictures for this next section so I have shrunk them down in order. Just click on any picture to enlarge so you can see the details.

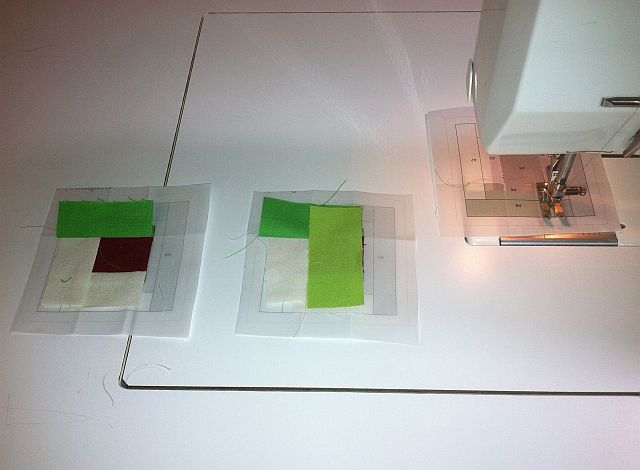
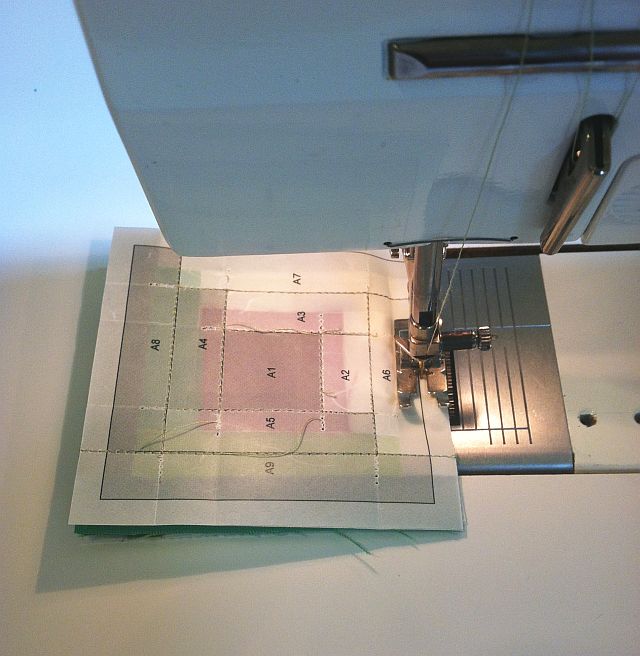
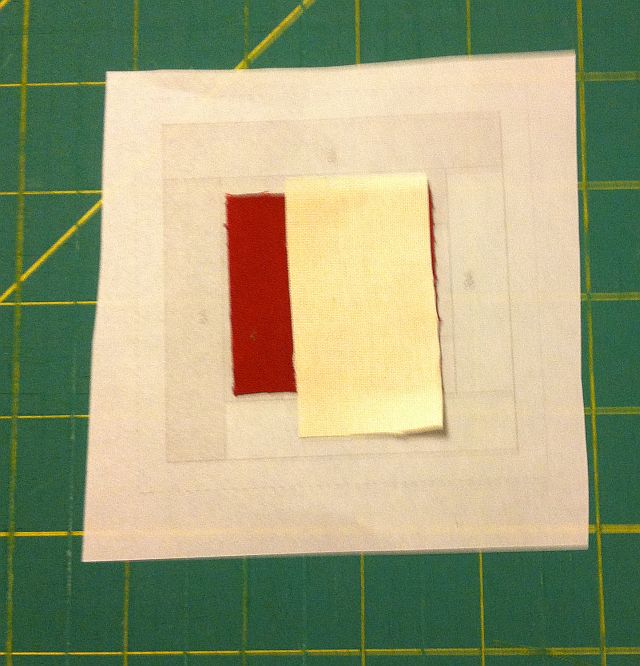
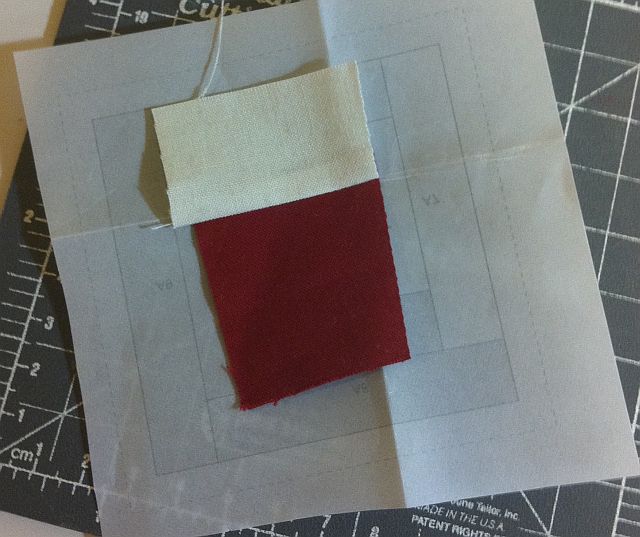
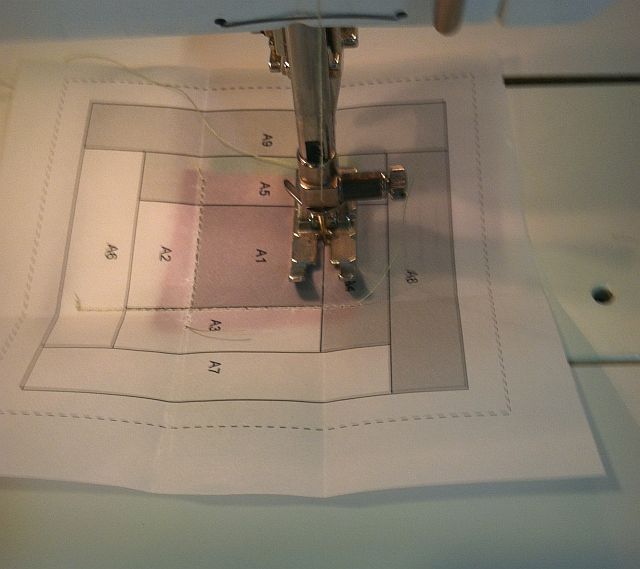
Line up your red square so that the BACK of the fabric touches the BACK of the paper. (Kind of tricky with solids – I know!) With right sides together, line up your first short white log on top of the red square, with about 1/4 inch overlapping your sewing line.

This first two pictures show the back side. You will be sewing from the front.

Log Cabin 1

Log Cabin 2

Log Cabin 3

You can see a shadow where the fabric is sticking out far enough for the seam allowance.

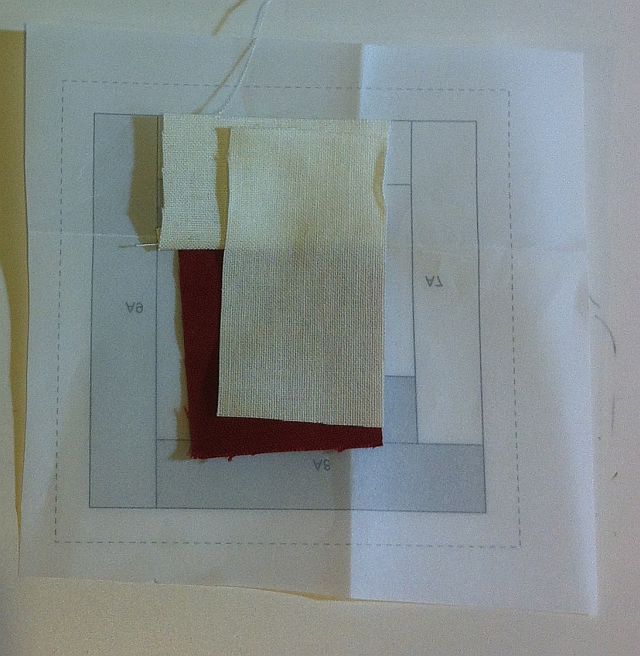
Remember to start and end 1/8 to 1/4 inch before and after the line. Use a smaller stitch length and a larger needle. Sew on the line between A1 and A2.

Log Cabin 4

Log Cabin 5

Log Cabin 6Log Cabin 7

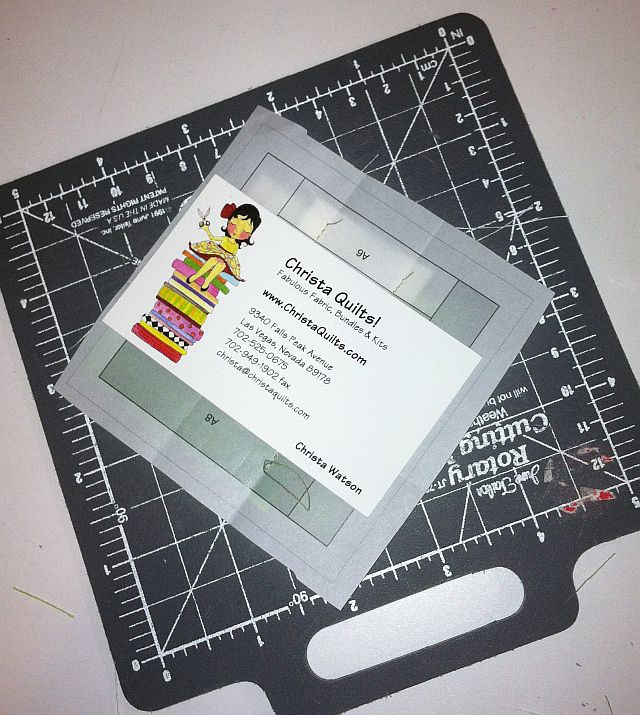
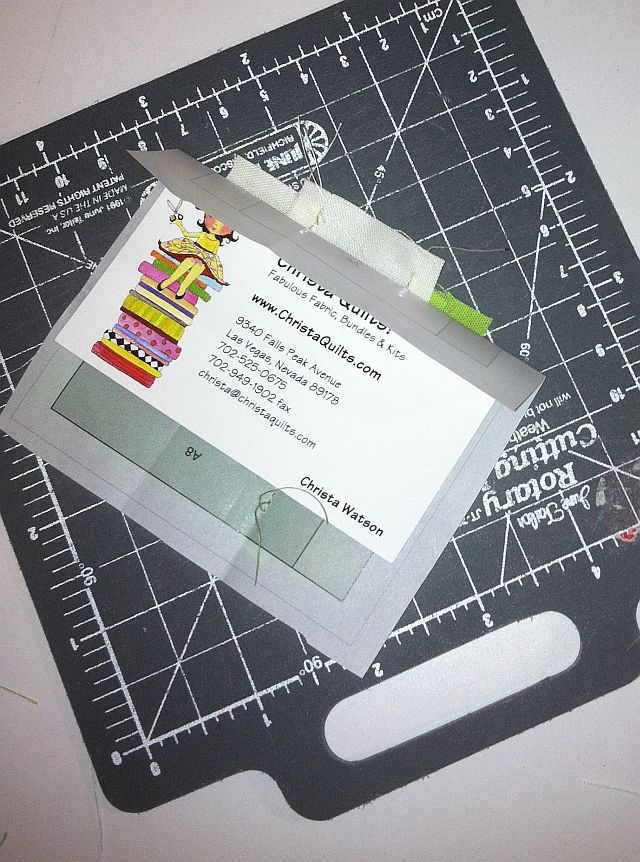
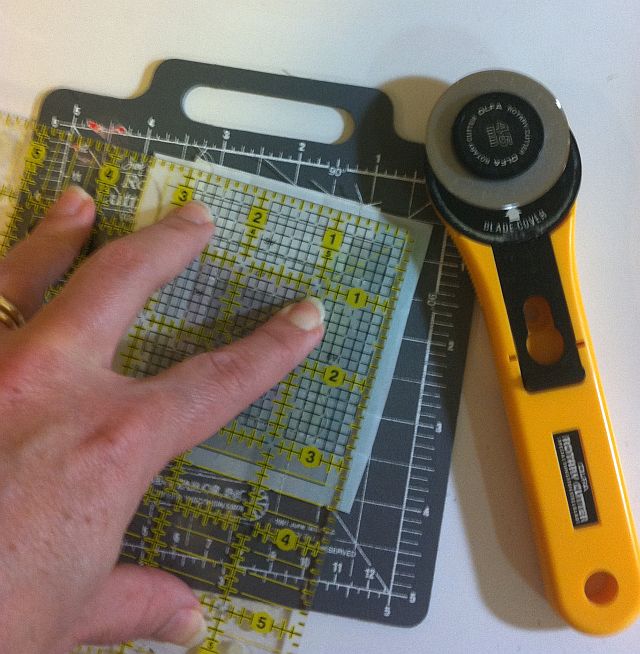
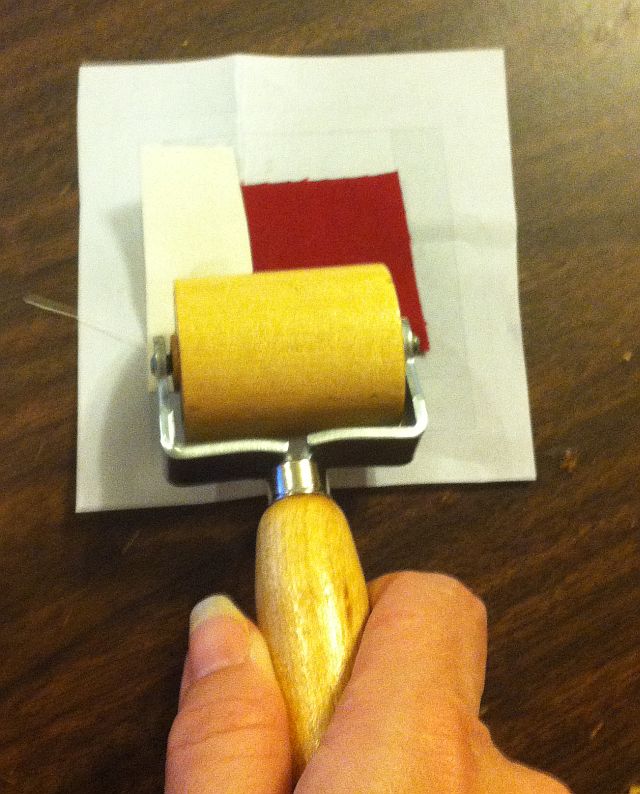
Remove the block from the machine and clip threads. Use a wooden seam roller to press the newly sewn piece to the side. Flip the block back over to the front and using a straight edge (like a business card), fold over the paper on the next sewing line (between A1 & A3).

Log Cabin 8

Log Cabin 9Log Cabin 10Log Cabin 11

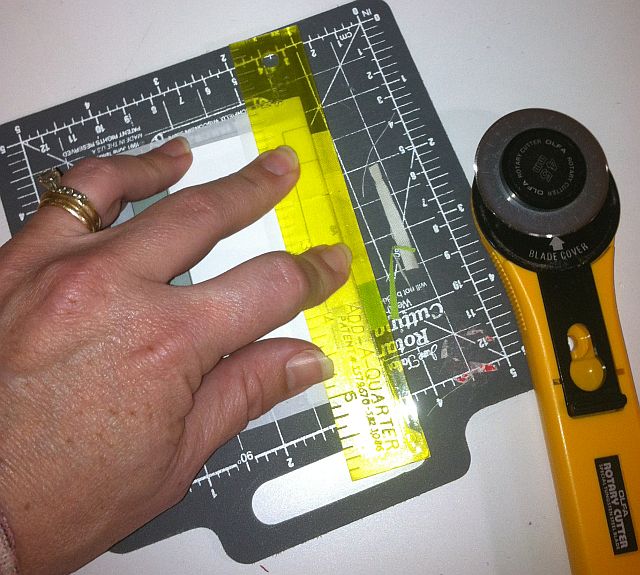
The excess seam will be exposed. (You may need to tug the fabric from the paper a bit to get it to lie flat.) To trim it neatly, use the add-a-quarter ruler to create a ridge on top of your block, paper, and straight edge. Trim off the excess. Flip the block over and add your next light log along the newly trimmed edge. Sewing on the printed side, sew the next seam.

Log Cabin 12

Log Cabin 14Log Cabin 15Continue sewing in this manner until all of your logs have been added. Remember to Sew, then Press, then Trim each seam.

Once the block is complete you can trim off the excess leaving 1/4″ seam allowances.

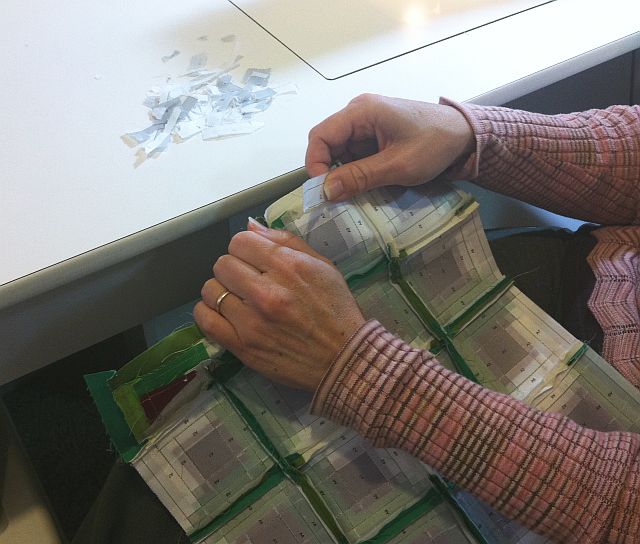
Make your first block completely to test your process. Once you are satisfied with the results,  Repeat to make a total of 16 blocks. You can sew all of the same steps at the same time to speed up the process. When you are done with the blocks, you may remove all the foundations, or keep them on until your complete your top.

Christa’s Quilt Along 3.7 – Quilting Chevrons Part 1

As I quilted my Charming Chevrons quilt this week I realized it would be way too much “homework” to try to get it all into one post. Therefore, I’ve broken down the steps into two parts. I’ll cover the straight line quilting this week, and then the free-motion quilting (FMQ) in next week’s post.

I had so much fun quilting this quilt! Machine quilting is my absolute favorite part of making any project. I often spend much more time on the quilting than I do in piecing the top.

It took me a total of 5 Hours to quilt the straight lines.

Step 1 – Stitch in the Ditch

Probably one of the most important (and often overlooked) parts of quilting any quilt successfully is to first outline all of them major seams by stitching in the ditch. This may be the most boring  step because you can’t really see your stitches. However, it can really make your quilt “pop”, no matter what additional quilting you add to it.

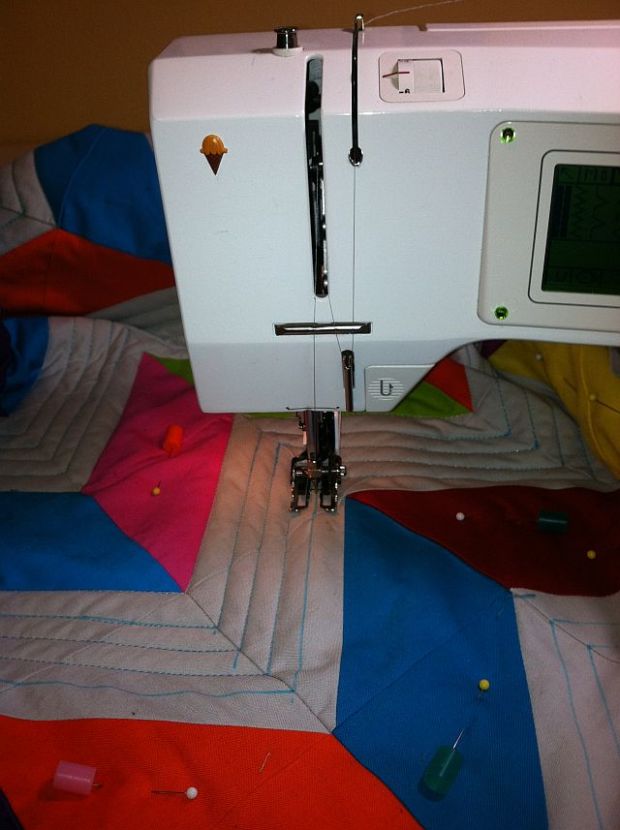
Be sure to start with a brand new needle when quilting. I used a Size 90 Topstitch needle for all of my machine quilting. The longer shaft and larger eye eliminated stress on the thread passing through the needle. My quilting was smooth and trouble free!

Though I list step 1 and 2 separately, you can combine them if you wish, and do all of the quilting at the same time.

Step 2 – Quilt The Chevron Echoes

If you have marked straight lines onto your background, you can stitch them with a walking foot. I like to match my thread as closely as I can do my background so that you notice the quilting first, not the thread. I used Isacord polyester in the Sterling silver color for all of my straight line quilting. It was weighty enough to show the quilting and there were no issues with thread breaks.

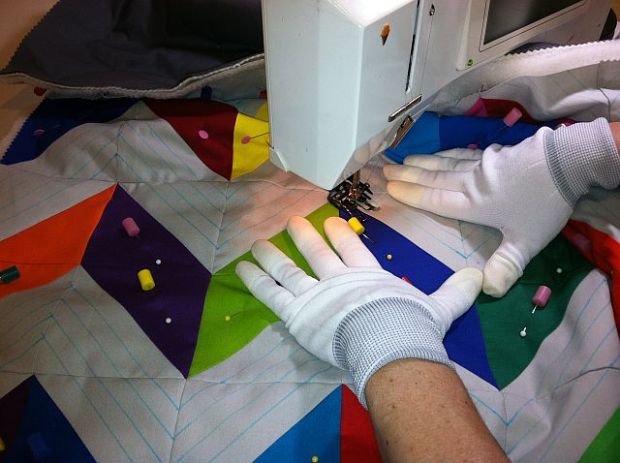
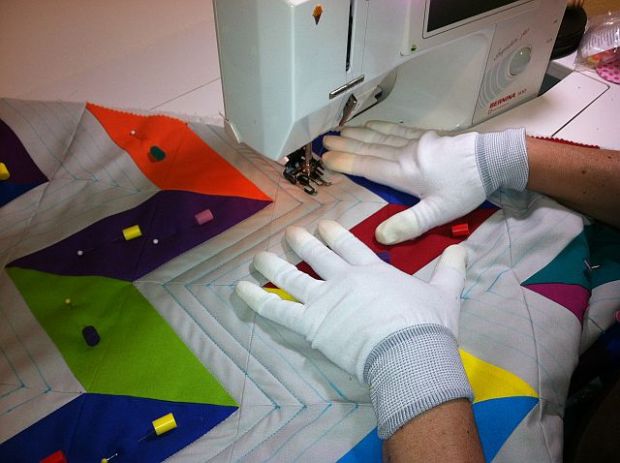
Starting on one edge of the quilt, stitch one straight line at a time all the way over to the other edge of the quilt. This means no tying off or needing to bury threads. I simply started a few stitches off the quilt on either side to anchor my threads.

I started quilting in the center row of my quilt and worked my way across half of the quilt. When I got to the end I rotated the quilt and finished the other side.

I did have to pivot each time the lines zigged and zagged so I got really good at pushing and scrunching the bulk of the quilt out of my way. The Machingers gloves helped me keep a good grip on the quilt. (They also helped keep the quilt clean from any chocolate residue left on my fingers during snack break time!!)

I removed the Pinmoors, one a time as they got in my way while quilting. Once the straight quilting was finished, I removed the rest of the pins.

Step 3 – Removing the Blue Lines

Because I like to see my work as soon as possible, I like to remove the lines immediately once I am done quilting them. One word of caution here, be sure to test your fabrics to make sure they are color fast before you spray water all over your quilt. If there are any worries about color bleeding, you can remove the lines with an aqua eraser pen or a wet toothbrush instead so you can more easily guide where the water goes.

If the blue lines resurface later, I simply wet them again, or soak the whole quilt when finished (if I know I’m not going to have any issues with fabric bleeding).

Doesn’t the back of the quilt look scrumptious, too?

Additional Ideas

If you don’t want to hassle with marking or quilting straight lines, you can quilt a wavy decorative stitch instead. It goes a little faster and you don’t have to be so precise. I used this type of quilting on my first tutorial – The Jolly Jelly Roll Quilt.

I feel very accomplished this week – how about you?

Quilt Along Schedule (Links are active once each step has been completed.)

Christa’s Quilt Along 3.6 – Marking and Basting the Chevrons

Grid MarkingAlthough basting a quilt is my least favorite “chore” of the whole quilting process, it’s a necessary step so I can get to my most favorite part which is the machine quilting. I always have better results if I take the time to properly mark and baste my quilt.

It took me a total of 2.5 hours to mark the top and prepare my quilt for machine quilting.

This doesn’t include the time it took to sew my quilt backing which took an additional 1.5 hours.

I wrote a separate pieced quilt backing tutorial where I could show off my “back art”.

Step 1 – Marking The Quilt Top (1 Hour, 15 Minutes)

If I know the design I’m going to quilt ahead of time, I will mark my lines before I baste, using a water-soluble blue marking pen. (Test ahead of time to be sure your marks will come out and that your fabrics are color-safe.)

June Tailor Grid Marker

For my Charming Chevrons, I chose to mark a set of grid lines following the outline of the chevrons. I used a June Tailor grid marker to speed up the process. I drew my lines so that they were about 1/2″ apart. I marked the top at my dining table while watching a movie with the family!

Step 1 – Preparing to Baste (30 Minutes)

Be sure your backing is at least 3″-4″ larger than your quilt top on all sides. (Professional long-armers need even more space than this but since I know you will all be quilting your own quilts, you can get away with less space if you are careful with your layout!)

Roll of Batting

Roll out your batting if cut from a roll, and cut it a couple of inches bigger than your quilt top. If you are using a packaged batting, be sure to unfold it and air it out a day or two before you begin to remove as many wrinkles as possible.

Be sure you have a nice big area for basting. You can use the floor, your kitchen table, a couple of utility tables, or even some tables thrown together at your local library or quilt shop.

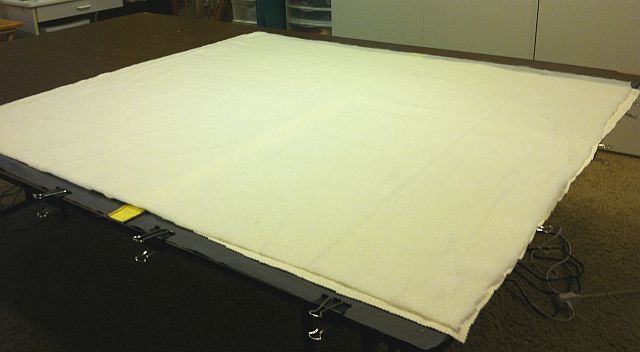
Give your backing a final pressing before laying it out. Remove any excess threads and smooth it out a flat as you can onto your basting surface. Clamp or tape down all sides of your quilt backing. I use binder clips on two sides of the quilt where the backing meets the edge of the table. I tape down the other two sides.

Layer 1 Quilt Backing

Layer 1 – Quilt Backing

Spread out your batting onto your quilt backing. Again, smooth it out so there are no wrinkles and puckers. You don’t need to clamp down the batting. For my quilt I am experimenting with a double batting. I laid down a layer of Warm-N-Natural Cotton, then a layer of Wool on top of that. I’ll let you know how I like it when it comes to quilting!

Layer 2 Quilt Batting

Layer 2 – Quilt Batting

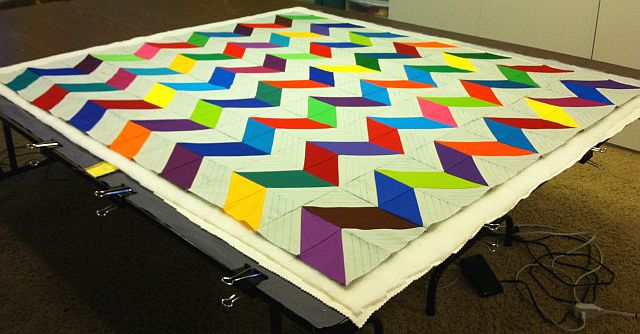
Finally, spread out your quilt top as smoothly as possible. Since I use two tables to baste, I use the center between the tables as my reference point for where the middle is. This helps me keep the quilt top straight.

Layer 3 Quilt Top

Layer 3 – Quilt Top

Step 3 – Pin Basting (45 Minutes)

Pinmoors for Quilt BastingI mention this every time I get to this step of the quilting process, but I really love Pinmoors for basting!

They go into the batting quickly and come out super easy when machine quilting.

You get 50 per pack and it took just over 3 packs (168 to be exact) to baste my Chevrons quilt. I put one pin and Pinmoor anchor in each colored triangle and that was enough for this size quilt.

Because my batting was a little thicker, the longer flower pins worked great for getting through all the layers.

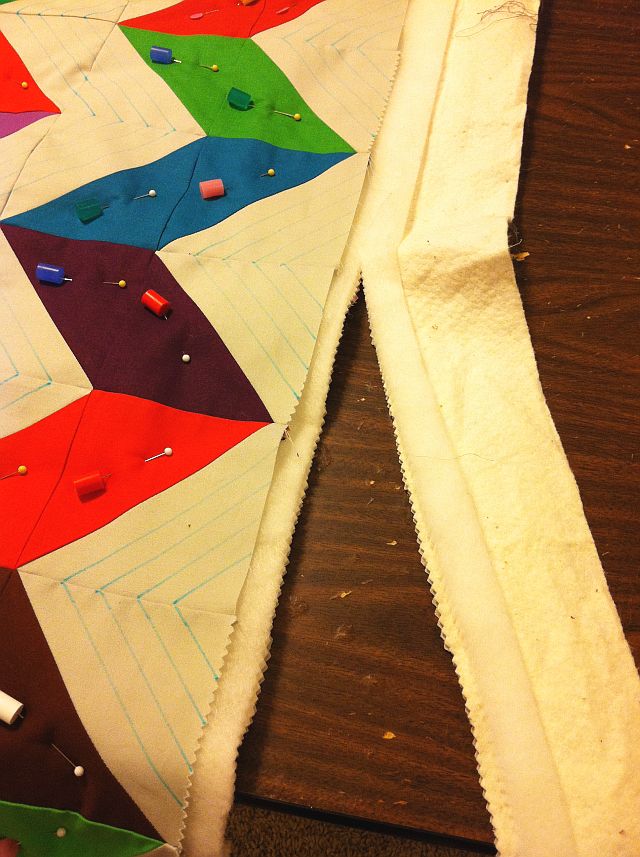
Trim the Excess

The last step before I begin quilting is to trim up the extra couple of inches around the quilt.

I don’t cut off all the excess, but I do trim it up pretty close so I have less bulk going under the arm of the machine.

I am super excited to quilt this puppy!

Be sure to email me pictures of your progress – it’s so fun to see all the variety!


Quilt Along Schedule (Links are active once each step has been completed.)

Christa’s Quilt Along 3.5 – Charming Chevrons Quilt Top

This week I assembled my Charming Chevrons quilt top made from just four charm packs. Be sure to scroll to the end of this post for links to all of the previous weeks’ tutorials. For your convenience, quilt kits are available for a limited time in 3 different colorways.

It took me a total of 3 hours to follow the steps below and finish sewing my quilt top. (I think it took longer than that just to edit the pictures and write this blog post!)

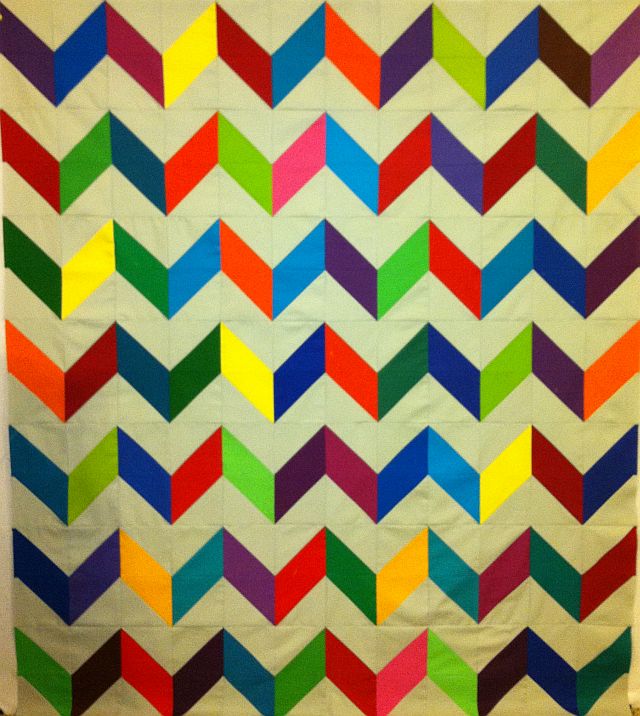
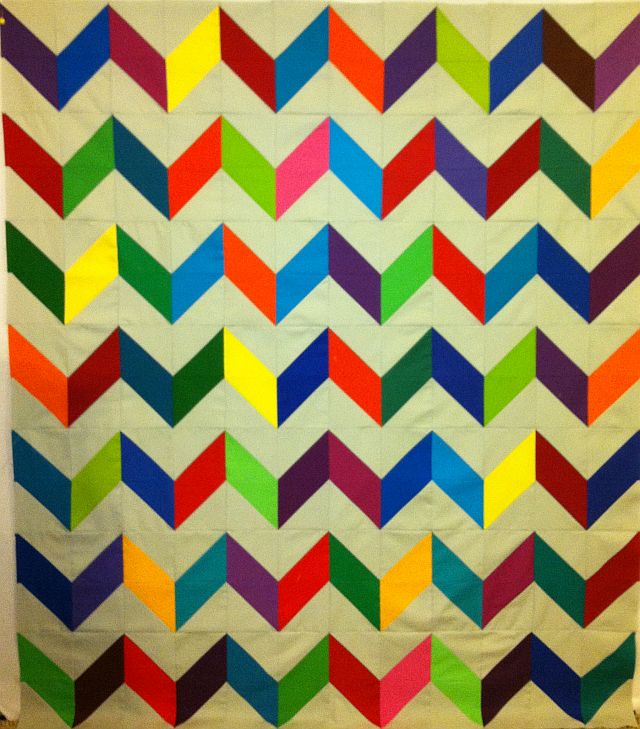
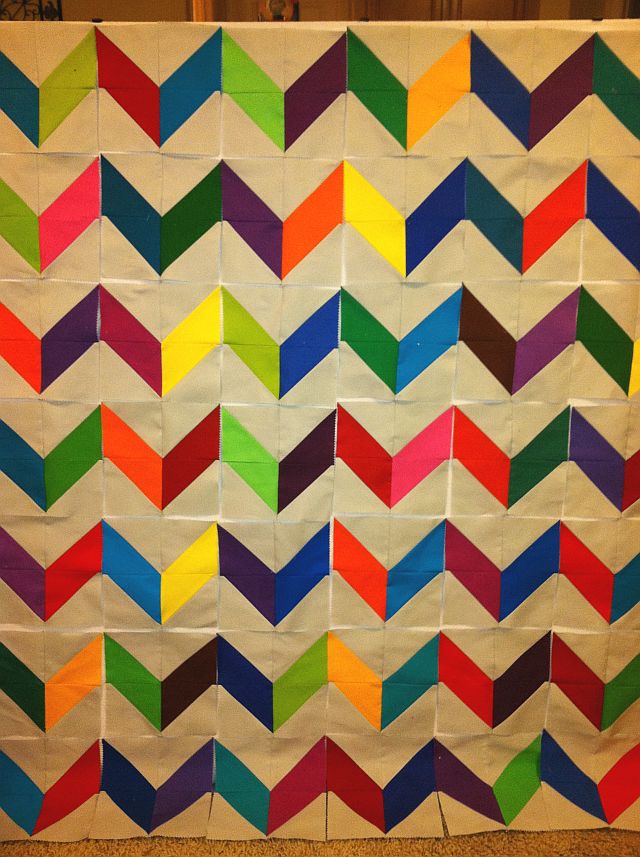
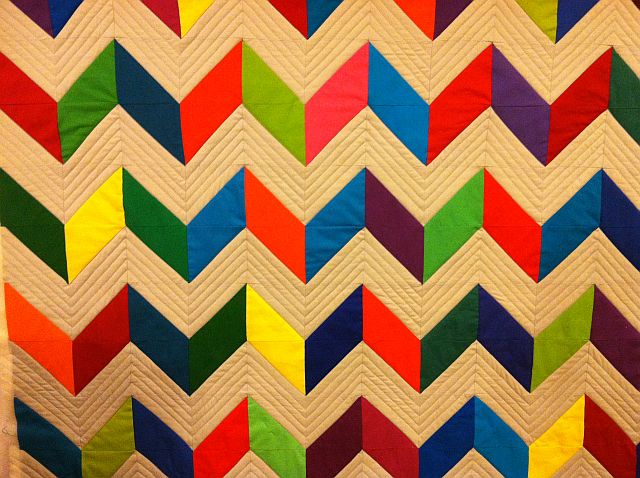
Charming Chevrons Quilt TopAnd yes, this is my actual completed quilt top, not a computer generated picture.

Step 1 – Sewing the Block Pairs (45 Minutes)

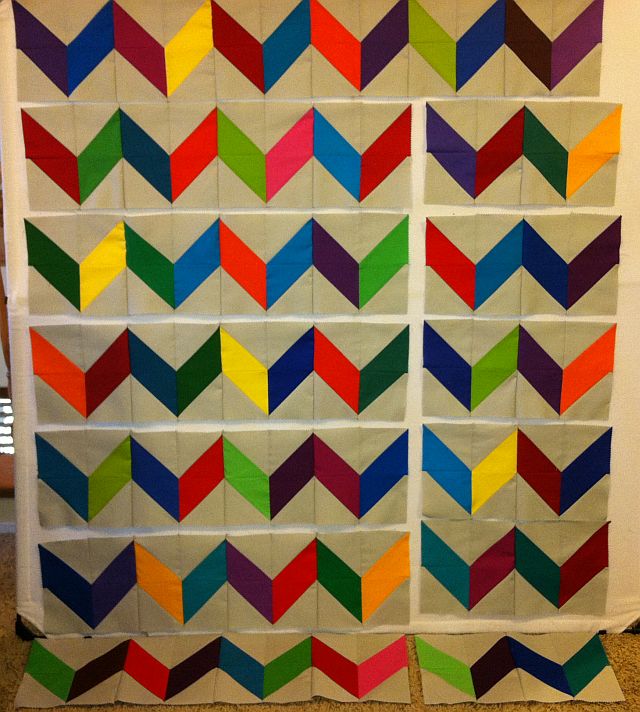
Lay out your chevron blocks in a pleasing arrangement on your design wall or other large flat surface. You will have 7 rows with 6 blocks per row for a total of 42 blocks.

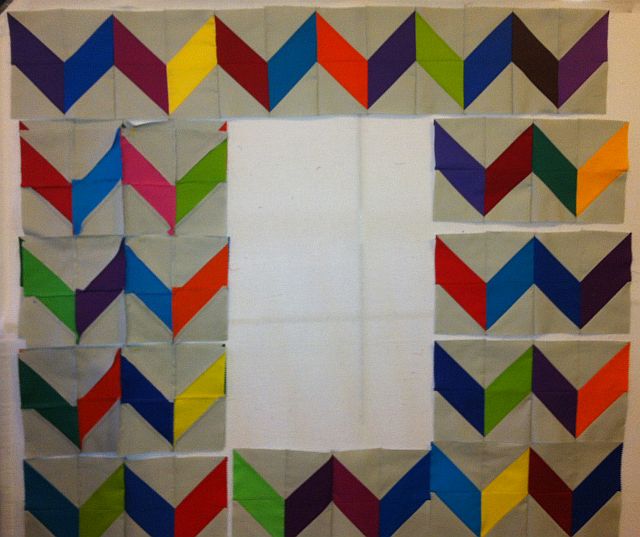
Sew each row into pairs of 2 blocks each. Each row will have 3 pairs of sewn blocks. Now you have 21 w’s instead of  42 v’s! (Yes, I’m missing a row in the picture because it wouldn’t fit on my design wall. You should still have 7 rows.)

Chevron Block Pairs

Step 2 – Sewing the Pairs into Rows (1 Hour)

Now you can sew 2 pairs of chevron blocks together in each row. You can see a “hole” in my quilt where I’ve flipped the second pair onto the first along the right side edges. I left the third pair of each row on the design wall so I can remember where each one goes as I sew.

Sewing the RowsNow that you have 2/3 of each row finished, you can add the last pair to the end of each row. Be sure to pin generously and flip over any seams if needed so that your seams lie flat.

Partial Rows

PPress The Seamsress the seams so that they are all going the same direction in each row.

Be sure that your seams for rows 1, 3, 5 and 7 are all going one way and that rows 2, 4, and 6 are pressed in the opposite direction.

You could also press them open if you prefer. This took me a little while but it was worth it.

Step 3 – Join The Rows to Complete The Quilt Top (1 Hour, 15 Minutes)

Join 2 rows together at a time, pinning at the intersections. You will then have 3 pairs of sewn rows with one row left over. Press each long seam open.

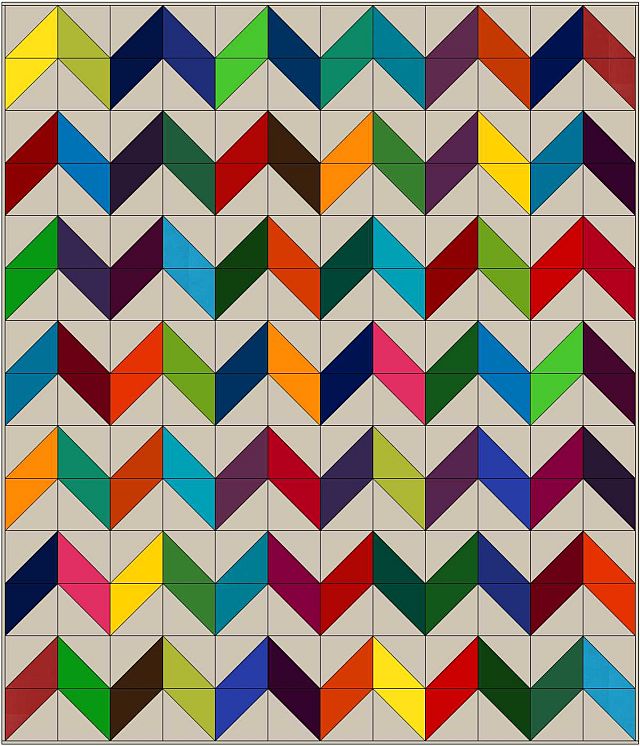
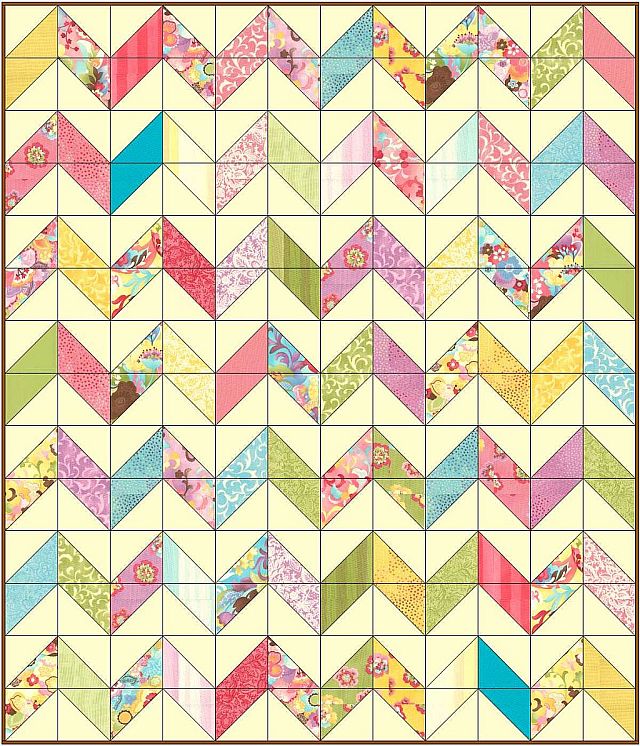
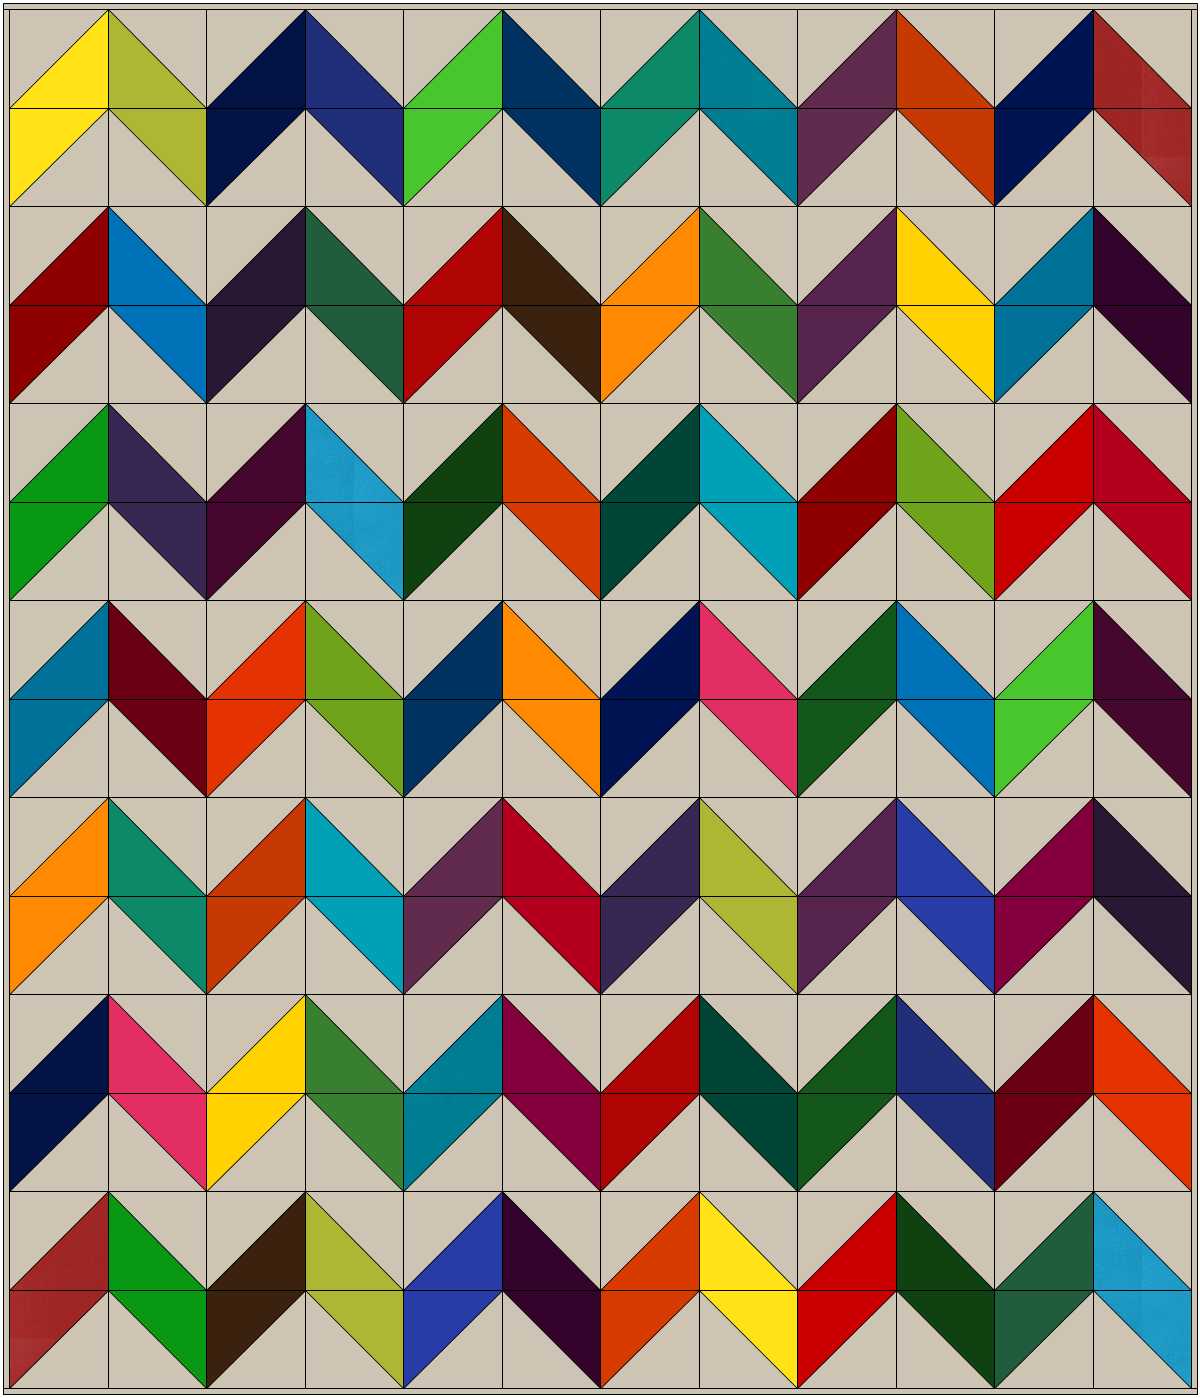
Joining The RowsNow join these last 3 seams to complete the quilt top and give it a final pressing. It’s fun to see how the actual top turned out compared to my original computerized drawing. I like the chevrons with the tips pointing down better. But you can decide either way!

Computer Design

Computer Designed Version

Finished Quilt Top

Actual Quilt Top


I’m very pleased with how my top turned out – now I can’t wait to see yours! Please email me pictures of your work in progress and I’ll be glad to share them here on my blog.

Sewing Schedule (All links will be active once each step has been completed.)

Christa’s Quilt Along 3.4 – Charming Chevrons Block Tutorial

This is the week where our Charming Chevrons quilts really start coming together! We will sew all of the blocks and start laying them out so that the top can get finished by next week. Be sure to scroll to the end of this post for the complete tutorial schedule.

It took me a total of 2 hours, 15 minutes to sew and press all 42 of my Chevron blocks.Chevron Blocks

Step 1 – Sewing the Half-V’s (1 Hour)

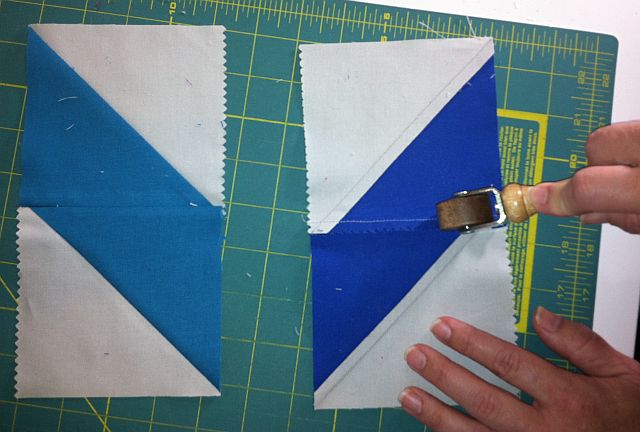
Each chevron looks like a V and each half of the block is a mirror image so keep that in mind while assembling your units.

Block UnitsFirst, separate all of your triangle squares from last week  into 4 equal piles, orienting them to form a V.

Note that each half of the V is made from two triangle squares of the same fabric. You should have a total of 42 sewn triangle squares per pile.

Since each half of the block is a mirror image,  I will be sewing one half at a time.

Starting with the left half of the block – the left V – I laid a stack of units next to my sewing machine. They are oriented in the direction I will sew them. Chain piece all left V units.

Chain Piece the VsStacked Units Chain Piecing means sewing pairs of blocks with no stops.

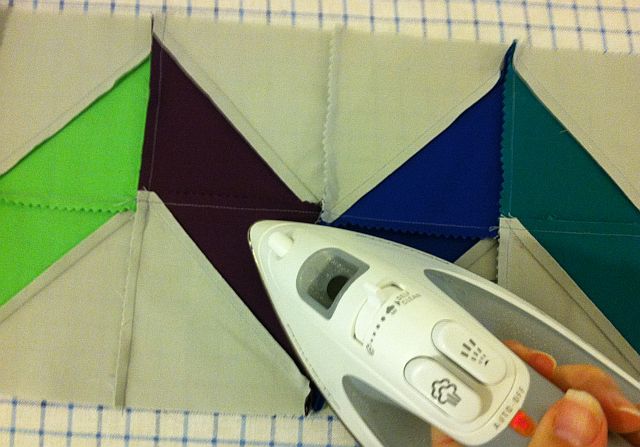
After sewing all of your left V stacks, finger press (or use a wooden seam roller) from the back and then again from the front. Press them all to the same side and repeat for all halves.

Press Front SidePress Back Side

You should have a total of 42 left V units.

Now, repeat the steps above for the other half of the blocks, the right V units. Be sure to press the right halves in the opposite direction so they nestle when sewing the blocks.

Press OppositeRight V Units


Repeat for a total of 42 right V units.

Step 2 – Joining the Halves (1 Hour, 15 Minutes)

Pin the two halves of each block together. If desired, you can flip over any seams so that they will nestle with the other side of the block – look at the pin on the far right below.

Pin the Chevron Halves

The key to sewing crisp points on these blocks  is to hit the “sweet spot” when sewing your seams. Sew from the side where you can see a little “x” made by previous seams. This is right where my pin intersects the block below.

Sew Through the X

When you have sewn all of the blocks together, press or seam-roll them again on both front and back. When finished, you will have a total of 42 blocks.

Finished Chevron BlockPress the Chevrons

Because of the way this quilt is laid out, you will want the major seams in your blocks to alternate. To do this make sure you press 18 blocks in one direction and 24 blocks the opposite direction. You’ll have 3 rows of block seams one way and 4 going the other way.

Seams Pressed Opposite

Once your blocks are complete, you can start laying them out in a pleasing color arrangement on your design wall (watch which way you pressed the seams).

Kona Solids Kit

Kona Solids Kit

You’ll notice that in my original drawings I started with the  Chevrons pointing up first. But now that I’ve laid them out, I think I prefer them as shown in the photo above with the points starting down. It’s your choice! I have kits available for all 3 colorways shown.

American Jane Kit

American Jane Kit

Coquette Kit

Coquette Kit


Sewing Schedule (All links will be active once each step has been completed.)

Christa’s Quilt Along 3.3 – Trimming the Triangle Squares

I am very glad I decided to take some time putting together my Charming Chevrons Do-It-Yourself Quilt Tutorial, and spread it out over several weeks. This week’s step of making the triangle squares is a very simple process; however it was a little time consuming.

It took a total of 3 hours to complete the steps below. That’s not bad considering I’m giving you a whole week to complete it, but I suggest you break it up over a few cutting sessions. It’s too tedious to do all at once! Scroll down to the end for the complete schedule.

Step 1 – Cutting the Squares in Half (20 Minutes)

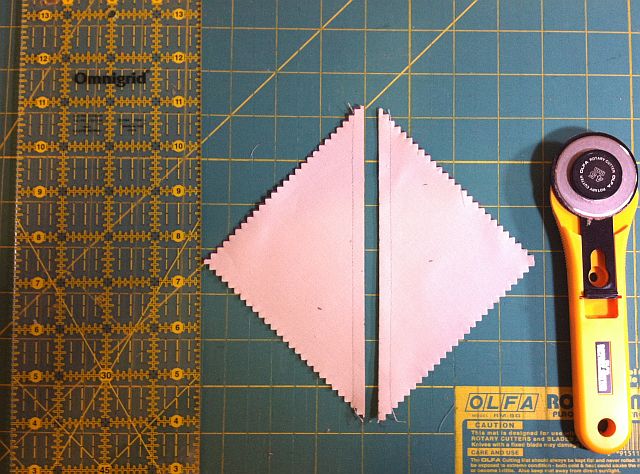
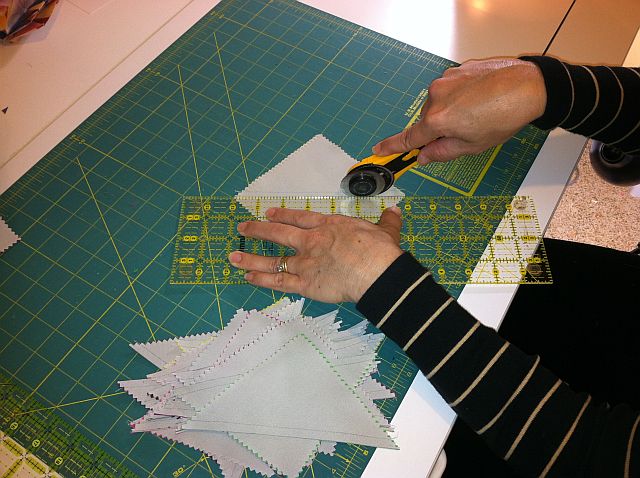
With your ruler, rotary cutter and mat, slice each pair of sewn squares in half on the diagonal, down the middle on your previously drawn line. You may use scissors instead, but rotary cutting them is definitely faster.

Line up Your Ruler

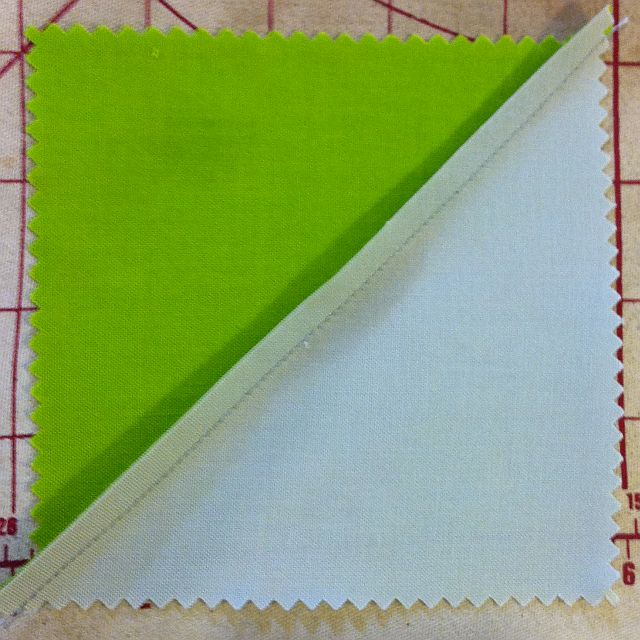
Cut the Squares ApartEach pair of squares has been sewn together 1/4 inch away from the drawn line, yielding 2 half square triangles per each pair of charm squares (following last week’s instructions).

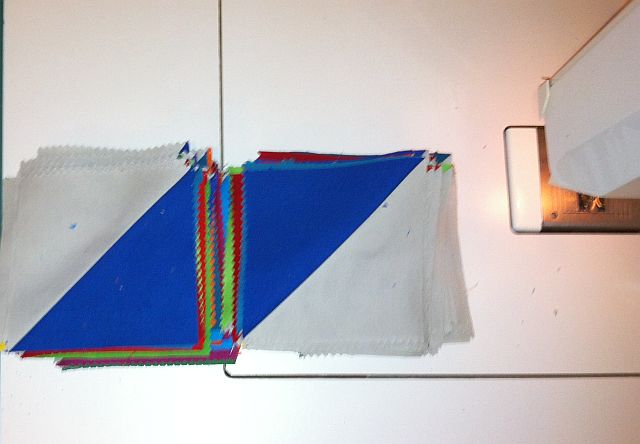
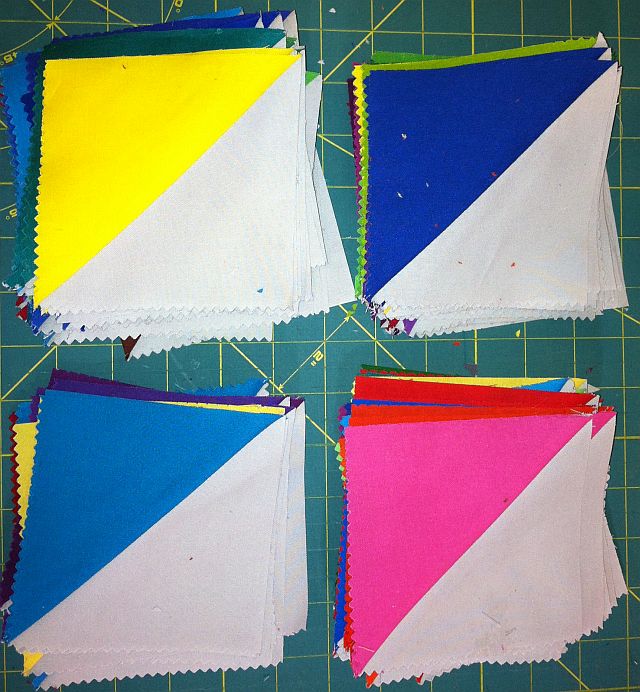
I like to stack them up as I cut, keeping the same pairs of colors together. They look like little fabric sandwiches. Yummy!

Sewn Triangle Stacks

Step 2 – Pressing the Triangle Squares (1 Hour)

It took me longer then normal to press the squares because I starched each block first.

Press the BlocksI am not sure if I’m happy with the results so I mention this with caution – test on the back side or some scrap fabric first or just skip it.

I got starch marks on the front sides of several of the blocks.

I had to soak them in water to get the marks out.

And yes, I used Mary Ellen’s Best Press which was not supposed to leave any residue.

So I’m not sure if I had my iron on too high of a setting, or perhaps it doesn’t work well with solids?

Press Seams to the Darker SideIs anyone else familiar with this? I’m still a starching newbie.

This is why I’m making this quilt in real time – so I can learn these things!

So if you just press your squares without worrying about starch or sizing, it will be quicker!

I pressed all of my seams toward the darker fabric.

Once my stacks were all pressed, it was time to trim them to size!

Step 3 – Trimming the Triangles (1 Hour 40 Minutes)

This was the tedious part because you will be trimming a total of 168 squares 1 at a time! So set aside a few afternoons and enjoy the process!

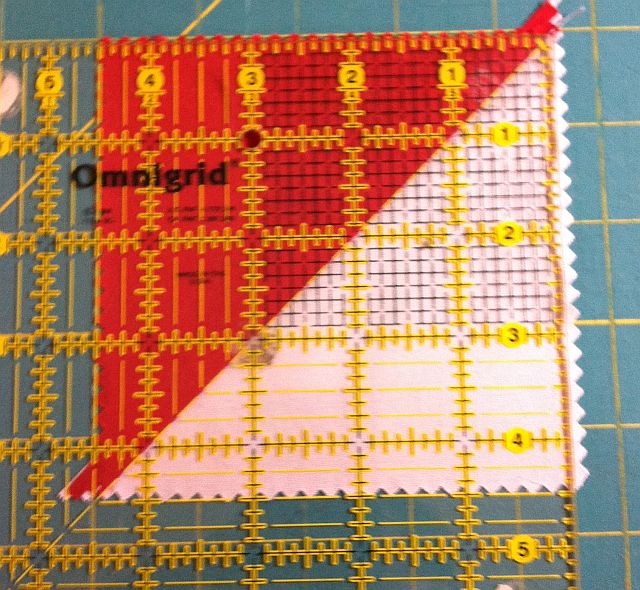
With a square ruler and a sharp cutter, trim the blocks so that they measure 4 1/2 inches. Line up the diagonal line of your ruler on the seam of the blocks.

Trim the Blocks

Then trim the sides. You may be able to trim only on 2 sides, or you may need to trim all four sides depending on where you need to slide your ruler so that the diagonal line stays in the center of the block.

Half Square Triangle Blocks

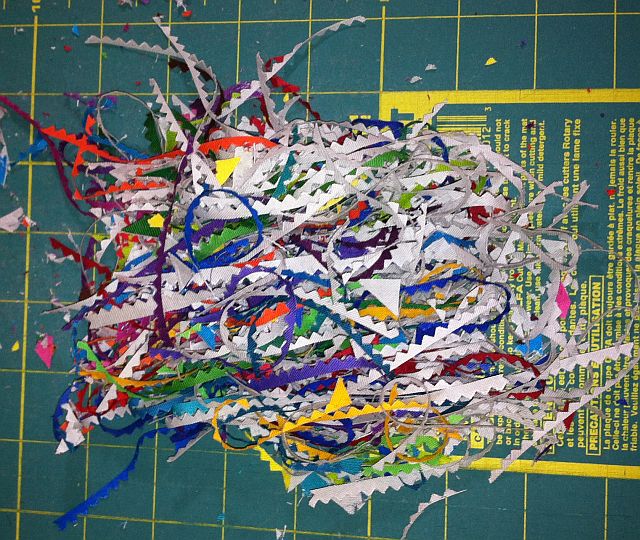
Block TrimmingsWhen you are all finished trimming, you will have a leftover pile of cuttings.

I think it looks rather pretty, don’t you?

You can use it as colorful stuffing or confetti.

Or how about wrapping up used needles or rotary blades with these scraps, put them in a bag, and safely throw away these sharp objects!

Sewing Schedule (All links will be active once each step has been completed.)

Charming Chevrons Follow Up Questions #1

I am starting something new with my Charming Chevrons quilt-along. Each week or so I will post follow-up questions and answers the day after that week’s tutorial is posted. This will be so that I can answer any questions, or follow up on any suggestions while making your quilt.

Charming Chevrons Original Size

Charming Chevrons Original Size 48″ x 56″

You can either ask your questions on any of my blog posts, or email me directly and I’ll answer them here on the blog.

The first question is from JennyWren in Tx. She asked about which day will I be posting the weekly tutorials.

That’s an easy one to answer!

Usually on Wednesdays, depending on when I get that week’s step finished. My goal is to be about a week ahead of you guys but sometimes life gets in the way. If I get really behind, I’ll post no later than Thursday of that week, but I’ll really try to get it up as early on Wednesday morning as I can. How’s that for an answer?

Kathie asked if it was ok to use a Layer Cake to make the quilt larger.

Absolutely! I have two ideas on how to do this:

1. Use one layer cake of print/color fabric and one layer cake of background. Cut each piece into four – 5″ squares, yielding 168 per layer cake. This is twice as many squares as I have listed for my pattern (mine calls for 2 charm packs of print, 2 packs of background or about 1/2 a layer cake’s worth each). This will make a larger quilt measuring 64″ x 80″.

Charming Chevrons More Squares

Charming Chevrons More Squares

2. Still use a total of 2 Layer Cakes, but treat each one as an oversized charm square and follow the same pattern, making adjustments for the size of the blocks. This will still yield a larger quilt but with bigger blocks, rather than more smaller blocks as in answer number 1 above. It would measure about 72″ x 90″ (less waste lost to seams yielding bigger blocks).

Charming Chevrons with Layer Cake Blocks

Charming Chevrons with Layer Cake Blocks

Here’s another way to think of it. If you can find a layer cake with an even amount of light/dark pieces, you can get 2 of the same layer cake. Then separate the lights from the darks and treat them as two separate cakes!

Great questions! Keep ’em comin’!

Christa’s Quilt Along 3.2 – Marking and Sewing the Charm Squares

Welcome to week 2 of my do-it-yourself quilt along, Charming Chevrons. Last week we gathered our supplies. This week we will mark and sew our charm squares. Scroll down to the end of this post for a link to last week’s supply list and a schedule for the entire tutorial. Three versions below are available as quilt kits on my website; you can also make your own.

Solid ChevronsAmerican Jane ChevronsCoquette Chevrons

You can work at your own pace and I will start posting how long it takes me to complete each step. This will give you a general idea of how long my quilts will take to make. Today’s tutorial took me a total of one hour, 15 minutes to mark and sew.

Step 1 – Mark the Background Squares (15 minutes)

I chose 2 charm packs of Kona Ash grey and 2 packs of Kona Classics Solids (new palette). My pattern calls for 84 – 5″ squares of color and 84 – 5″ squares of background. The Kona color solids only came in 41 pieces per pack, so I had to add an extra charm to each set to ensure I had enough. (I made sure to add extra charms to the kits using this fabric, too!)

Straight Edge with Pen for MarkingMark all Backgrounds

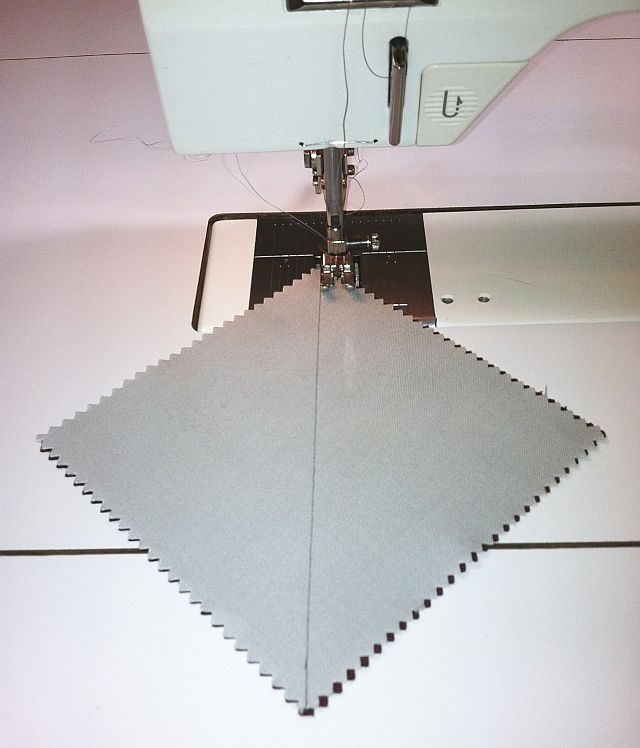
Using a straight edge and marking pen of your choice, draw a diagonal line down the back of each background square. (Kona Solids don’t have a right or wrong side so just pick one. )

After several tries with different marking tools,  I had great success with the Frixion pen because it drew dark smooth lines on the fabric with no snagging or bleeding.

Step 2 – Sew the Seam Lines (1/2 hour each side, 1 hour total)

My favorite method for making half-square triangles is to sew 1/4 inch on either side of your marked lines. This goes really fast and you can sew for a few minutes at a time.

Sew 1/4 inch away from the line.

Grab one background charm and one color charm at random. Flip it over so that the background (grey) square is on top. Starting off of the sewing machine, sew 1/4″ in away from the marked line.

Chain Piece Your Blocks

Do not clip your threads at the end. Rather,  “chain piece” the next pair of charms. Continue sewing together pairs of charms (background/color) until you have sewn a total of 84 pairs, all on one side.

Pile of Colorful Blocks

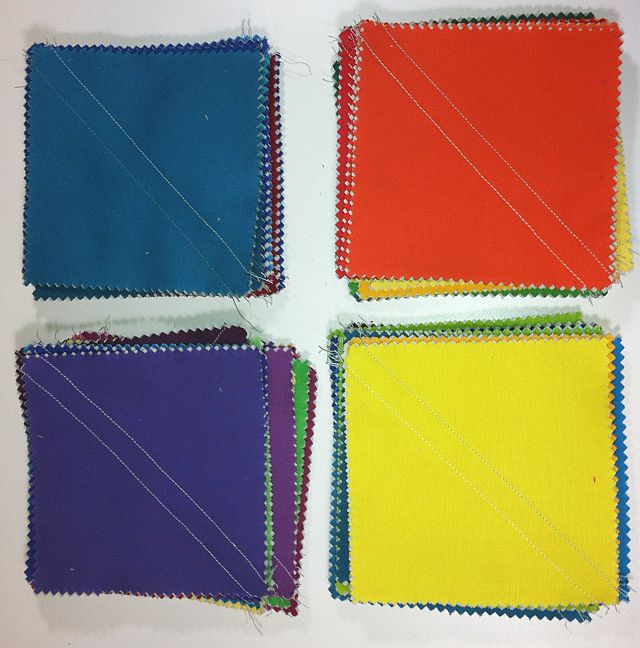
Now, gather your long chain and this time sew on the other side of the line, again using 1/4″ seams. If they get tangled up, it’s ok to cut a few sections apart. If your seams are not exactly perfect, that’s ok, too. We will trim the blocks next week so they are all the same size.

Sew the other side.

Once all of your pairs are sewn, clip the threads between the blocks, stack them into a pile, and set aside for the next step. Now, give yourself a pat on the back! Wasn’t that fun??

Stacks of Colorful Blocks

If you are now just joining us, here is the complete schedule for making this quilt from start to finish, including quilting and binding. You’ll have a finished quilt in just a few weeks!

Sewing Schedule (All links will be active once each step has been completed.)

Christa’s Quilt Along 3.1 – Charming Chevrons Supply List

Free Quilt Pattern

New to my blog? Be sure to sign up for my email newsletter to get a free pattern!

Charming Chevrons

I am so excited to start my next quilt along! I’m having a blast designing new quilt patterns and breaking them down into easy to follow step-by-step tutorials.

To purchase a PDF download of this pattern, click here.

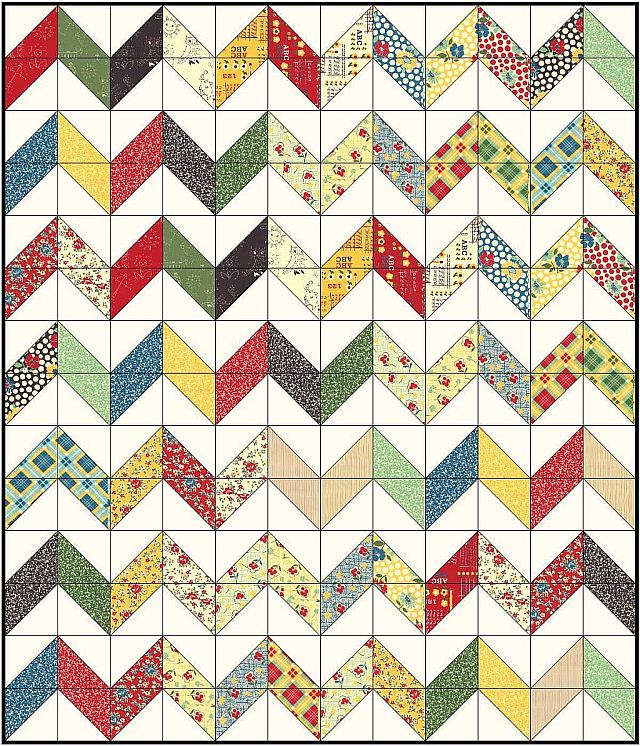
What do you get when you combine a couple of charm packs with a fun geometric design made from triangles? The answer is Charming Chevrons (48″ x 56″), shown below:

Charming Chevrons

I designed my quilt using Kona Cotton charm packs in their new classic palette.

I have put together quilt kits using the exact fabrics shown above, plus a couple of variations using these Moda charm packs shown below.

American Jane School Days

American Jane School Days

Chez Moi Coquette

Chez Moi Coquette

Supply List

Important! If you’d like to pick your own charms, make sure that each pack contains at least 42 – 5 inch squares. Be sure to purchase or cut extra charms if needed.

Fabric

  • 2 of the same charm packs in darks or prints – 84 charms total (Kona colors above)
  • 2 of the same charm packs in lights or neutral solids – 84 charms total (Grey above)
  • 1/2 yard for the binding (can be same as the background or something else)
  • 3 yards for backing split into 2 equal pieces if using all the same fabric. If you prefer a scrappy backing like I do, collect assorted chunks and scraps to total this amount.
  • Batting piece measuring at least 54″ x 62″ – (why not piece together some leftovers?)

Supplies

  • Basic sewing equipment in good working order
  • Rotary cutting mat and equipment
  • Iron and/or pressing tool
  • A variety of acrylic plastic ruler sizes including a 6 inch square up ruler (or larger)
  • Brand new sewing machine needles (I always start with a fresh needle on a new project!)
  • Frixion marking pen for drawing straight piecing lines (or your favorite marking pen)
  • Neutral cotton thread for piecing
  • Decorative thread to match fabrics for quilting
  • Walking foot for straight line quilting
  • Optional – darning foot for free-motion quilting (FMQ)
  • Optional – design wall or large space to lay out your design
  • Optional – blue water soluble marking pen for marking quilting lines
  • Optional – pinmoors and pins for easy basting
  • Optional – supreme slider, machingers gloves, bobbin washers for smooth FMQ

Sewing Schedule (All links will be active once each step has been completed.)

Based on past tutorials, I am allowing plenty of time to sew the quilt together so no one feels rushed. You are always welcome to work ahead or slow it down. That’s the beauty of this quilt along – you can sew and quilt at your own pace!

Sharing is Caring

Please share your work in progress in my facebook group: Quilt With Christa . 🙂