Valentine’s Quilts

Today I wanted to quickly share with you a tutorial that I made a few Valentine’s Days ago. It’s still a fun one to make and it includes a bit of fun machine applique (which I just don’t do enough of these days!)

Love Runner

Click here for my Love Table Runner Tutorial

Don’t think you are just limited to making it the exact same way as me. How about making it into a wall banner, or make a square version into a cute little wallhanging or pillow? Here are couple more inspiration images to get you started.

Love SquaredLove Wall QuiltHappy Valentine’s Day and Happy Sewing!

Check out the Bee Hive – A Fun, Free Year Long Block of the Month

I love it when my quilty, bloggy friends do cool stuff. Have you visited my friend Alyce from Blossom Heart Quilts? Not only is she a recurring writer for Make Modern Magazine and awesome pattern writer, she’s a generous designer as well.

20150110_beehvie

For all of 2015, she’s put together a fun, free BOM (Block of the Month) program that anyone can follow along with. It’s called The Bee Hive and she’s featuring not just one, but two block tutorials each and every month!

20150110_beehive_block_tictactoe

January’s first block of the month features this awesome tic-tac-toe block!

Here’s how it will work:

The first block of the month will feature a unique 12″ finished block design by Alyce, that when laid out side by side forms a secondary design. Then, the second block of each month will be designed by a host of talented guest designers. Alyce’s blog will be the place to go to keep up with all of the tutorials.

20150110_beehive_tictactoeI love the modern, graphic look of these tic-tac-toe blocks set together!

I will be the guest designer for April and I’ve included the complete schedule below. Just think, if you follow along all year, you’ll have 24 finished blocks! As with any quilt along, you are welcome to work at your own pace and join in anytime. 🙂

The Schedule

January 12 – Tic Tac Toe
January 26 – Kristy from Quiet Play

February 9 – Chainlink
February 23 – Janice from Better Off Thread

March 9 – Houndstooth
March 23 – Jane aka Quiltjane

April 6 – Spinwheel
April 20 – Christa from Christa Quilts

May 4 – Busy
May 18 – Angie from Gnome Angel

June 1 – Bunting
June 15 – Anne from Play Crafts

July 13 – Abacus
July 27 – Jess from Elven Garden Quilts

August 10 – Homebase
August 24 – Joshua from Molli Sparkles

September 7 – In The Middle
September 21 – Jennie from Clover and Violet

October 5 – Magic 8 Ball
October 19 – Diane from From Blank Pages

November 2 – Alpine
November 16 – Melissa from Ms Midge

December 14 – Treasure Hunt
December 28 – Finale

When you do join the fun, Alyce has created a hashtag so you can share your blocks on social media: #thebeehivequilts. I can’t wait to see what everyone makes!

Tutorial – How to Make a Hanging Sleeve for Your Quilt

With quilt show season upon us, I thought I would share my favorite method for making a 4″ wide hanging sleeve. This is the quilt show standard, so that a pole can easily slide through the back. I made this sleeve for my Modern Logs quilt which will be hanging in the modern quilt category at Road to California later this month.

Hanging-Sleeve-FinishedMy Modern Logs backing was scrappy, so I made the hanging sleeve to match!

Materials Needed:

  • 8 1/2″ strip of fabric by the width of your quilt
  • Pins for hemming
  • Cotton thread to match your fabric
  • Hand sewing needle
  • Washable fabric glue (optional)

Step 1:

Measure the width of your quilt and cut a strip of fabric 8 1/2″ wide by 1 inch less than the width. Piece together additional strips if needed, for quilts wider than 42″. For example, my quilt measures 48″ wide so I will cut scrappy fabric strips, seam them together, and trim the strip to be 47″ long.

pinned-hemPin the hem in place – use a seam gauge if necessary to keep it even.

Step 2:

Hem both short sides by folding them over 1/4″ twice. You will be folding them over to the back side of the strip. Use a seam gauge if necessary to get consistent width folds. Pin to hold the folds and secure with stitching on both ends.

sewn-hemUse matching cotton thread so your seams will blend.

Step 3:

Fold the strip in half along the long side, wrong sides together. Press the fold on the bottom for a nice sharp crease.

folded-stripThe bottom of this picture is the folded, creased side. The top is the raw edge.

Step 4:

Open up the strip and bring each half of the strip together in the middle at the crease. Press the top and bottom edges to make a crease on both sides. These will be your guidelines for later.

creased-stripThe original crease is in the middle; you are adding 2 more creases.

Step 5:

Open up the strip and align the raw edges wrong sides together. Pin if needed and sew the raw edges along the length with 1/4″ seam. Backstitch at the beginning and end of the strip to secure.

pin-and-sew-the-tubePin and sew the raw edges together with 1/4″ seam allowance.

Step 6:

Wiggle the sleeve so that the seam is now in the middle of the sleeve and press the seam open. You will notice that the sleeve does not lie flat. This is correct – the extra room allows the quilt to hang nicely on the pole. Try to avoid pressing the sleeve flat (but if you do, it’s not the end of the world and it will still work).

sewn-bubbleThe sleeve will not lie flat on both sides – that is correct!

Step 7 (optional):

If desired, gently add glue along the length of the hanging sleeve, on the seam side. Be sure you use a light hand, keeping at least 1/8″ away from the edges so the hand stitching won’t get caught up in the glue. You can skip this part and use pins only, if you prefer.

glue-bastingGlue-basting the sleeve on Abacus. Keep that glue away from the edges!

Step 8:

Lay out your quilt on a flat surface and gently place your hanging sleeve into position, seam side down, right along the edge of the binding. Center the sleeve so that you have about 1/2″ left on either side of the quilt. The sleeve will bubble up a bit along the center, giving you that extra hanging space.

bubble-sleeveThe sleeve should bubble up, giving you extra wiggle room for the hanging pole.

When you are happy with the sleeve position, press with a dry iron to secure the glue. It’s easiest to press on either long edge, one at a time, to avoid pressing out the bubble. Add a couple of pins around the edges for extra security while sewing.

basted-sleeveI like to line my sleeve right up next to the binding.

Step 9:

Using several lengths of cotton thread, hand sew the sleeve into place using a whip stitch or a ladder stitch. Secure all four ends and pop the knot into the batting of the quilt each time you finish up a length of thread.

Variation:

You can avoid sewing the top of the sleeve by hand if you add the sleeve to the quilt after the binding is sewn to the front of the quilt, but before it is flipped over to the back for finishing. In this case, align the top edge of the sleeve with the edge of your quilt. Stitch in place by machine, then finish the bottom and sides of the sleeve by hand. The binding will cover about 1/4″ of the sleeve but that should still be okay.

Machine-Sleeve A quilt sleeve partially sewn by machine, covered by binding on the top edge.


Herringbone Finish and Tips for Better Binding

Today I get to share the big reveal: Herringbone is finished!

herringbone_finishedHerringbone, 63″ x 73″ designed and made by Christa Watson for Camelot Fabrics

You can click the links below to read my WIP process posts as I worked on this quilt:

Herringbone took a total of 25 hours to complete (13 hours to cut, sew and press the top; 12 hours to baste, quilt and bind by hand.)

I wanted to share a few tips for better binding that I practiced while finishing this quilt:

binding_cornerWhen attaching the binding, I marked my stopping point with a water soluble pen so that I know exactly where to stop stitching at the corners. Whenever I “fudge” this part of the process, it always gives me problems.

binding_ironAfter the binding is attached by machine, I will iron it away from the quilt so that it’s easier to pull over to the back for hand sewing. (By the way, this is another reason I prefer to quilt with cotton thread and natural fiber batting, so I don’t have to worry about melting anything with the iron!)

binding_clips1When I get to the corners, I fold them so that they match up evenly and use Clover Wonder Clips to secure the binding in place. I fold over the corners opposite from how they are folded on the front to reduce bulk. I also prefer to add clips so that the clear side of the clip is showing on the back. It seems less bumpy that way.

binding_clips2I use a liberal amount of clips and space them pretty close together. So far, I’ve invested in two 100 clip packs and am ready to order another set. I prefer to clip all the way around the perimeter of my quilt so that I can sew continuously without having to adjust the clips!

For more step by step pictures, click here for my indepth tutorial on binding by hand.

Herringbone is on it’s way to the Camelot Fabrics quilt booth at Spring Market. I won’t be there, so if any of you go – be sure to snap a picture of it for me, will you?


Project Linus Charity Drive and Free Quilt Tutorials

I’d like to help spread the word about the the Project Linus Charity Drive being coordinated by Fave Quilts and Leisure Arts. They are requesting quilts and blankets to be donated to the Chicago, Illinois chapter of Project Linus.

2014 Project Linus Drive

If you are able to send in a quilt or blanket, they are giving away some pretty nice prize packs sponsored by Leisure Arts books. The drive runs through June 23rd, 2014. For complete details and where to send, please click here.

Fave Quilts has been very supportive of my efforts to share my love of quilting with as many people as possible. They routinely feature my free quilt alongs on their website, along with hundreds (possibly thousands) of other free patterns and tutorials. You can check out my profile here and literally spend hours on their site, combing through all the inspiration!

Baby BricksBaby Bricks Quilts by Christa Watson

For the charity drive, I’m sending them the Baby Boy Blue version of my Baby Bricks quilts shown above. I made two versions of Baby Bricks to illustrate how different a pattern can look, depending on the fabrics. I knew I wanted to donate them both, and I was able to give away the pink version to a brand new mom earlier this year. However, I held onto the blue one until just the right opportunity came along. Now I’m glad it’s going to the right place! 🙂

Here’s a full shot of just the blue version:

babybricksblue_finishedAs you can see, I added more straight line quilting to the original quilt. Here’s a closeup so that you can see that straight lines don’t need to be perfectly straight or evenly spaced! The trick is to add enough lines so that your eye takes in the overall effect of the added texture.

straight_line_quilting_detaWhen I quilted this quilt, I marked all of the original straight lines, about 2″ apart. Then I filled in the rows of quilting between the lines using the edge of my foot as a guide. It’s totally not perfect, but I love it and hope it will go to a good home. 🙂

Click here to get the free tutorials for Baby Bricks and whip up your own version for someone you love, or for someone in need!

And remember, pieced quilt backs are a great place to use up all those leftovers, whether they match perfectly or not. 🙂

baby_bricks_backI love the yummy crinkly texture all that straight line quilting provides!

Herringbone WIP – Simple Stipples and FMQ Tips

Today I’ll share with you how I’m quilting my Herringbone quilt. Just call me the stipple queen. 🙂 I did all piecing and quilting on my Bernina 710 without a stitch regulator.

stipplingHerringbone by Christa Watson; free quilt pattern designed for Camelot Fabrics

I spent the first 10 years of my quilting career stippling everything I could get my hands and needle on! Then I took a break due to stipple burnout and starting spending way too much time quilting more labor intensive custom designs on my quilts. However, for Herringbone, I returned to my favorite go-to allover motif: stippling!

Since I wanted the quilting to enhance the graphic nature of the design rather than steal the show, I chose to go with a thin, 50 weight Aurifil thread in both top and bobbin. I tried out several colors to see which would blend in the most with both the yellow and grey fabrics.

aurifil_thread_choicesTip: audition thread colors before you begin quilting. The grey blends best!

I ended up going with Aurifil #2600-Dove which I think is just the perfect shade of light grey! It surprised me how well it seemed to disappear into the yellow fabric – providing scrumptious texture, rather than a heavy, “thready” appearance.

For this quilt, I practiced on a few scraps first (like I always do) and tested my machine’s tension. Here’s a quick tip: if your machine has really nice tension when you are sewing regular seams, it shouldn’t need to be adjusted too much for free-motion quilting.

herrinbone_quilting_glovesI usually quilt with flat hands forming a hoop – gotta love those Machingers!

Don’t be afraid to experiment a little until you get a pretty stitch! For some reason, the day I quilted it, I was able to achieve more consistent stitches with the feed dogs engaged, but covered with a Supreme Slider. I didn’t fret about why, I just went for it. I’m very pleased with the consistency of my stitching on this quilt and I think slowing down just a little helped, too.

I made a label ahead of time and ironed it to the backing fabric with fusible web before I quilted it. Because I am using a thin blending thread, the quilting stitches will hold the label in place nicely without too much distortion of the writing.

herringbone_label

I chose to use a coordinating chevron print from the line for the backing – “sew” fun!

I also tried Soy batting for the first time with this quilt and I really like it. It stuck really well to the quilt while spray basting, and I like the drape and heft of it. I reminds me most of quilting with a nice cotton batting (like Warm ‘N Natural) but with a little more loft to it. Now I need to see how it washes up!

bamboo_battingSoy Blend batting given to me by my friend Cory. It was fun to try!

I timed myself like I usually do, and it took less than 4 hours to completely stipple this baby. After spending over 40 hours intricately quilting my last quilt, that was like a speed record for me! (Hmm – I need to seriously quilt more quick and fun allover motifs for the next few quilts….)

Now I’ll go get the binding put on and share the final reveal next time!

Roundup of Machine Quilting Blog Posts I’ve Written:

I’d like to leave you with links to several blog posts I’ve written about machine quilting, both here on my blog and for Craftsy. Some of my tools and techniques have changed slightly and a few things may be repeated, but I’ve covered a lot of basics:


Herringbone WIP – Tips on Working With Directional Fabric

I finished sewing my Herringbone quilt top this week and I wanted to share with you a few new things that I tried while making it.

herringbone_top_closeupHerringbone quilt top, using the free pattern I designed for Camelot Fabrics.

Herringbone is made from a plethora of HST’s (half-square triangles). Usually, the fabric direction doesn’t matter, but in this case, I wanted to figure out how to line up the directional fabrics I was using so that they all went the same way.

herringbone_cut_fabric_squaresI used Gray Matters More fabrics in yellow and gray – so yummy!

I started out by cutting all of the squares like I normally do. My favorite method of making HST’s is to draw a line down the middle on the wrong side of my background fabric, match it up right sides together with the main print, and sew on either side of the line. Cutting the squares apart on the lines will then yield 2 half-square triangles each.

herringbone_hst_stackDon’t you just love a stack of yummy HST’s? They look like little triangle sandwiches!

For my “experiment,” I flipped the background squares so that half of the lines were left-diagonals, and half were right-diagonals. I then matched up each background square with a print square, keeping the print squares oriented in the same direction.

herringbone_diagonal_lines

After sewing and cutting apart, I ended up with 4 stacks of HST’s with the prints running in 4 different directions, exactly what I wanted for this pattern. Each half of the squares shown above produced two different orientations below.

hst_paisleyI’m very visual, so I had to constantly refer back to my pattern to line up all the pieces in the correct block position. (I’m not sure how the directional shift will look with other HST configurations, but you can test it out and see.)

herringbone_block_diagramThe fabric shown below is one-way directional rather than two, so I just needed to separate them into 2 different directional stacks, rather than 4. Do any of you math geniuses out there remember what type of asymmetry that’s called? I forget!

hst_directional_fabricI still had to mark and sew diagonal lines going left and right for these 2 piles!

Since I decided to get carried away with lining up the prints in my blocks, I decided to match up my border seams as well. To do this, I cut out strips that were the exact same width, following the same design repeat. I then sewed a seam between the motifs, trying to match up the design as best I could. I trimmed the seam allowance down later.

border_match_seamsThe picture below is how it looks on the front. The key is to match the print where it will be less noticeable, like in between rows of design motifs.

border_motifMy final top tip is for joining seams that cross over your triangle points. Sew on the side where you can see the tiny triangle in the seam below. This will help you achieve nice, crisp triangle points. 🙂

seam_intersectionIt feels great to have a finished top – or as some would call it, a “flimsy.” I love how it looks exactly like my original EQ7 design (minus the design wall wrinkles and bad lighting). Next time I will share with you how I quilted it.

herringbone_combinedOn the left is my finished top. On the right is my EQ7 sketch. I love it when they match!


Tutorial – How To Bind a Quilt

I love making every part of a quilt, including the binding, so I thought I’d share with you my favorite method for binding my quilts. It’s called continuous length, double fold, straight of grain binding. That’s a mouthful, but it’s how I do all my quilts.

the quilt Shown is Modern X. Pattern available here.

Ready for picture overload? Here goes:

bind_0

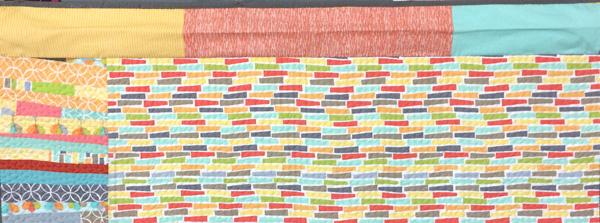
Note: I used Kona Solid Charcoal for my binding strips with Aurifil thread #1246.

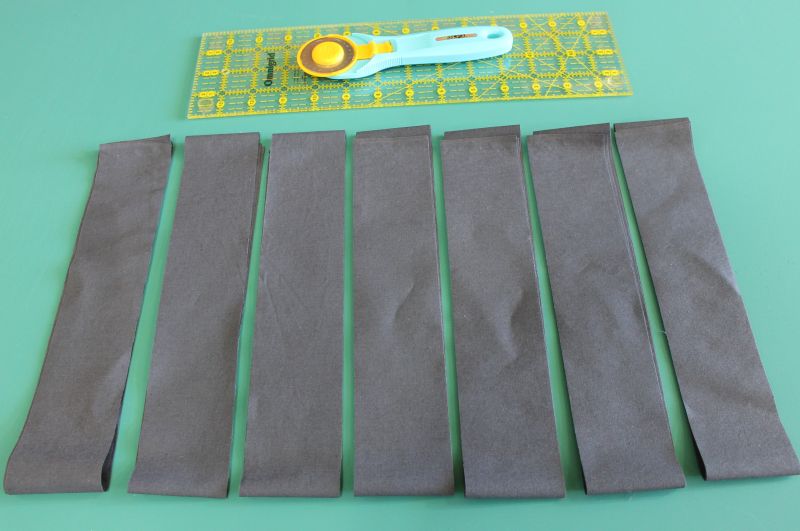
Step 1 – Calculate and cut your binding strips

bind_1Measure the perimeter of your quilt by adding the length and width of your quilt and multiplying that by 2. Then add an extra 10 inches to deal with seams and corners. For example, my quilt measures 56″ x 70″. Here’s how I calculate my binding:

56+56+70+70+10 = 262 inches needed

Next, take this measurement and divide it by 40 inches. This will tell you the number of strips you will need to cut, with 40″ of useable fabric. My number is 6.55 which I will round up to 7 strips of fabric.

bind_2I like my binding to finish approximately 1/4″ on both front and back. Therefore I will cut my strips at 2 1/4″ wide. You can cut them wider if you prefer more of the binding to show.

I need to cut a total of (7) 2 1/4″ wide strips to bind my quilt.

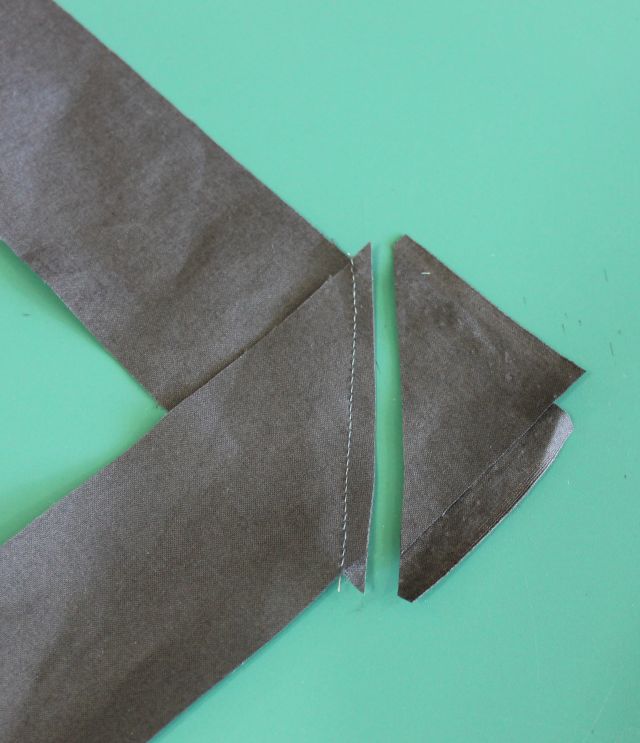
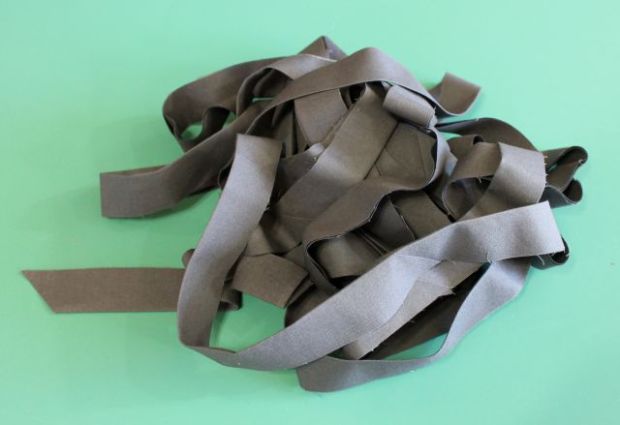
Step 2 – Sew the binding into a continuous length

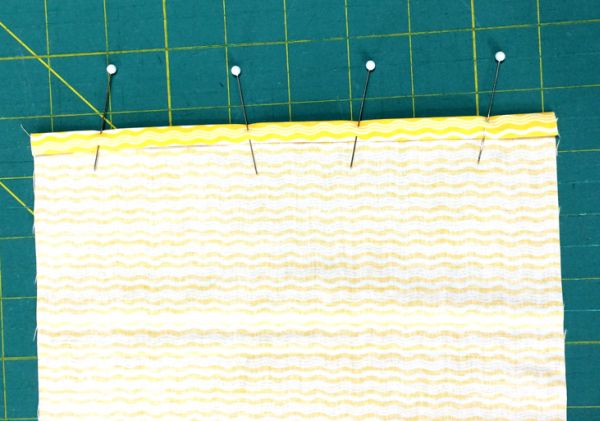
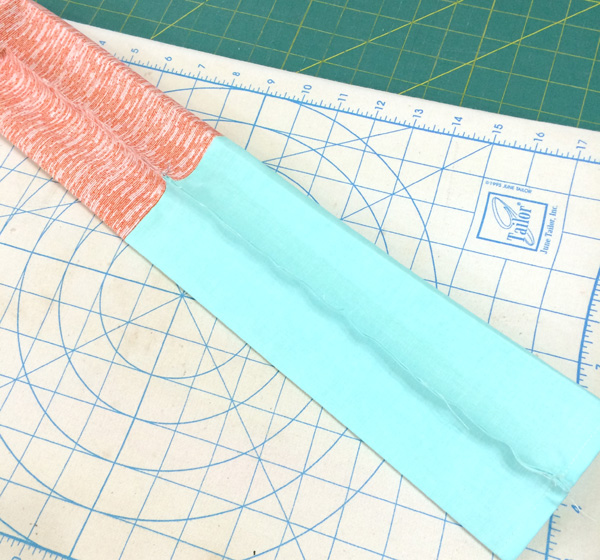
Place two strips right sides together at a 90 degree angle. Sew them together at a 45 degree angle across the diagonal. Sewing mitered seams like this helps distribute the bulk. If needed, you can draw a straight line across the diagonal, or press one of the ends along the diagonal to form a sewing line.

bind_3If you are using solid fabric like me, it will be a little trickier to keep track of which is the “right” side. You can use a pin or piece of tape to designate the right side if you like. Be sure to trim the starting edge of your binding at a 45 degree angle, too.

bind_4

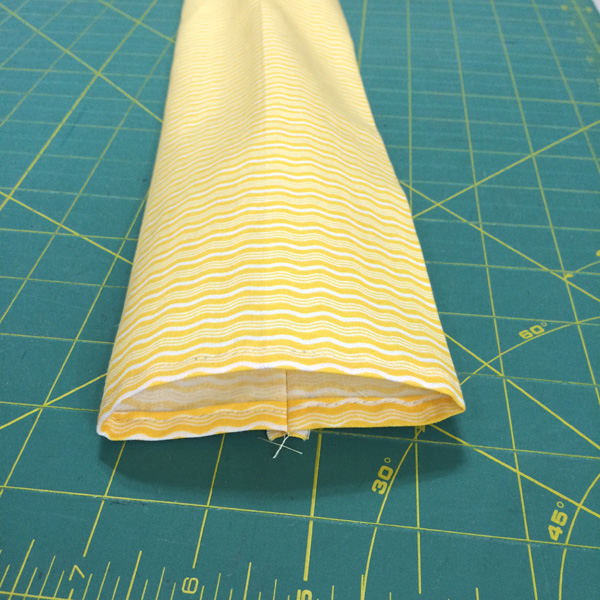
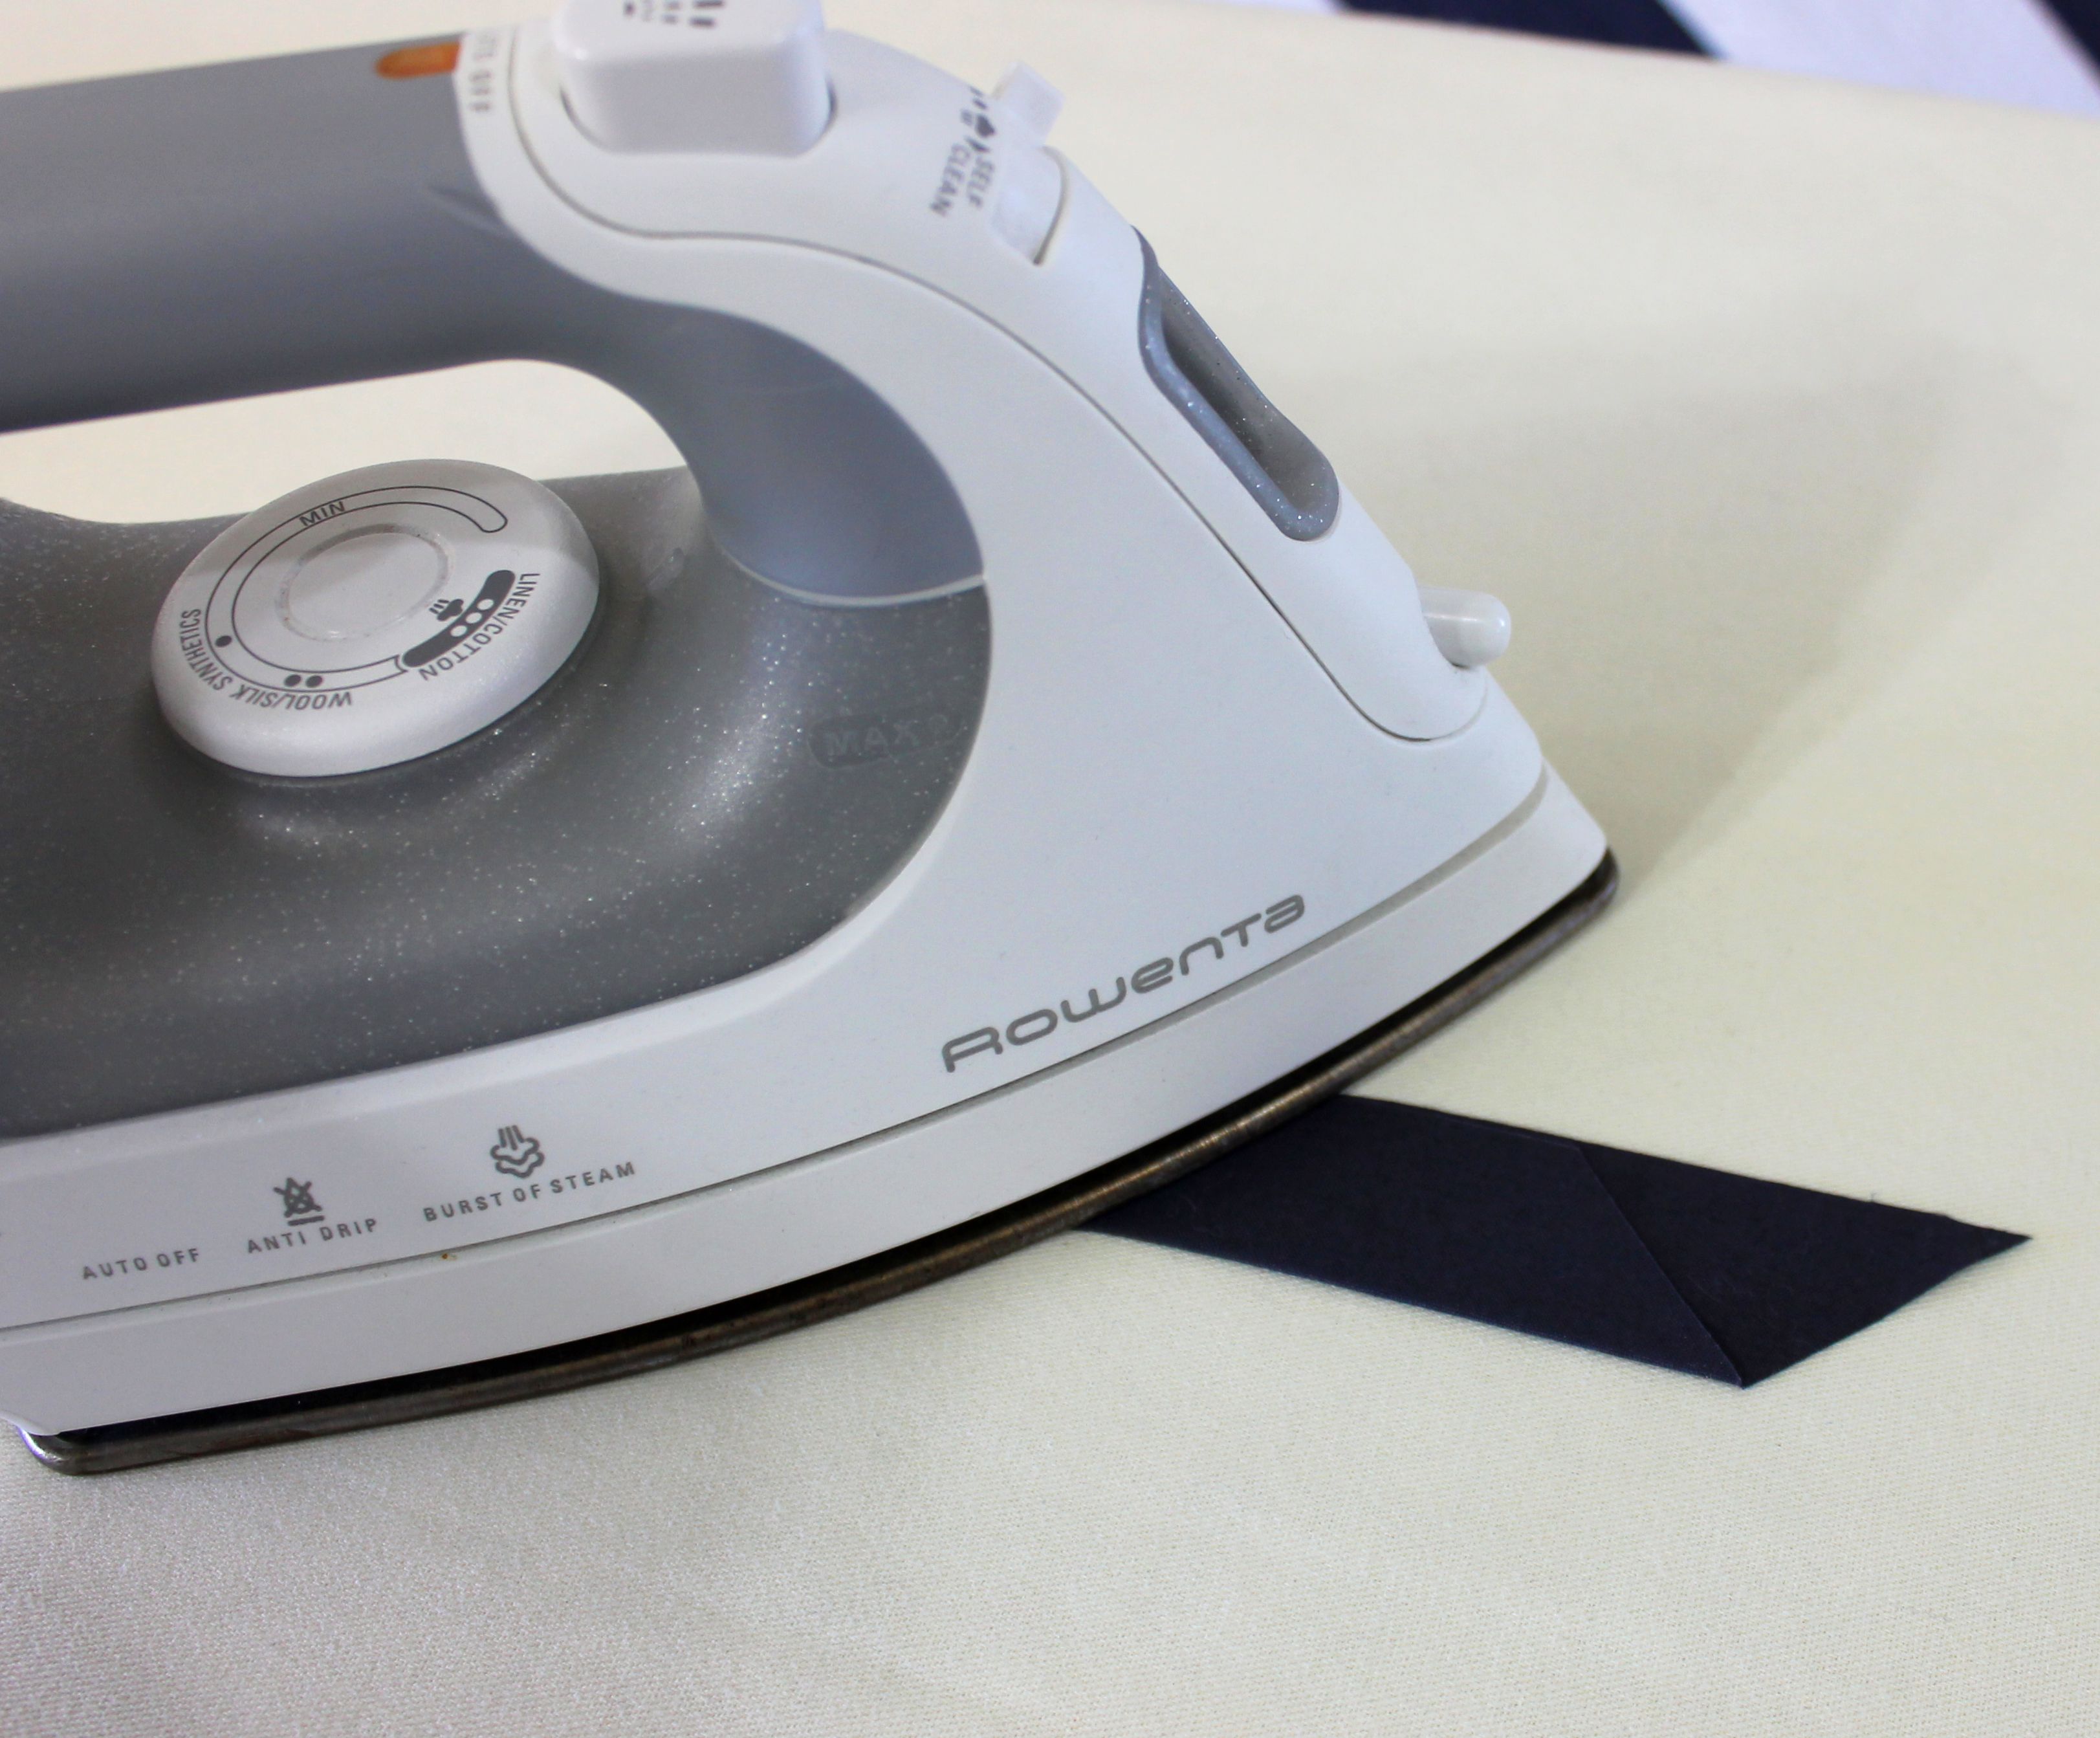
Step 3 – Press the binding

Press the binding wrong sides together along the entire length.

bind_6
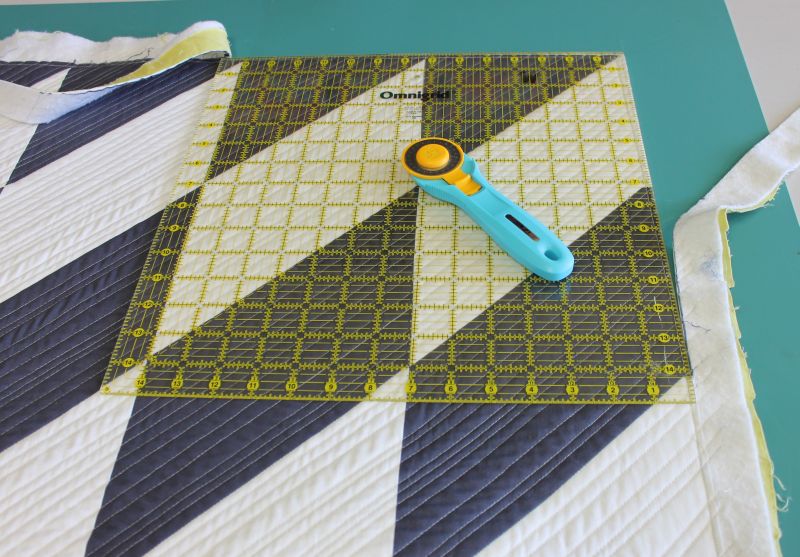
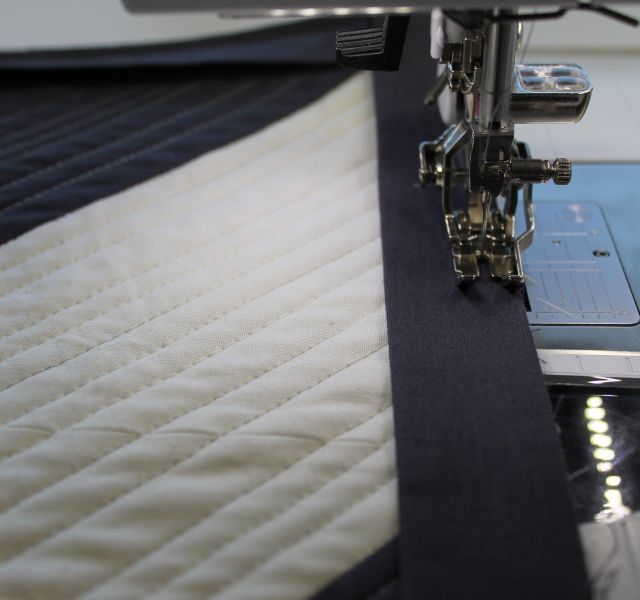
Step 4 – Attach the binding to the quilt

Trim off the excess backing and batting before you attach your binding. I use a large square ruler for the corners, and a long straight ruler for the sides.

bind_5Quickly run your binding along the perimeter of your quilt to ensure you won’t have any seams falling in the corners. If you do – move the binding up or down a few inches to avoid seams at the corners.

bind_7Starting at least 6″ – 8″ away from the corner, place your binding on the front side of the quilt and leave a tail of about 6″ – 8″. Line up the open binding ends with the edge of your quilt. The folded edge should be facing towards the quilt.

bind_8Starting at the pin shown in the previous photo above, stitch the binding onto the front of the quilt with 1/4″ seam allowance. Use a walking foot or even-feed if possible. When you get to a corner, stop stitching 1/4″ away from the corner and sew off the corner.

bind_9
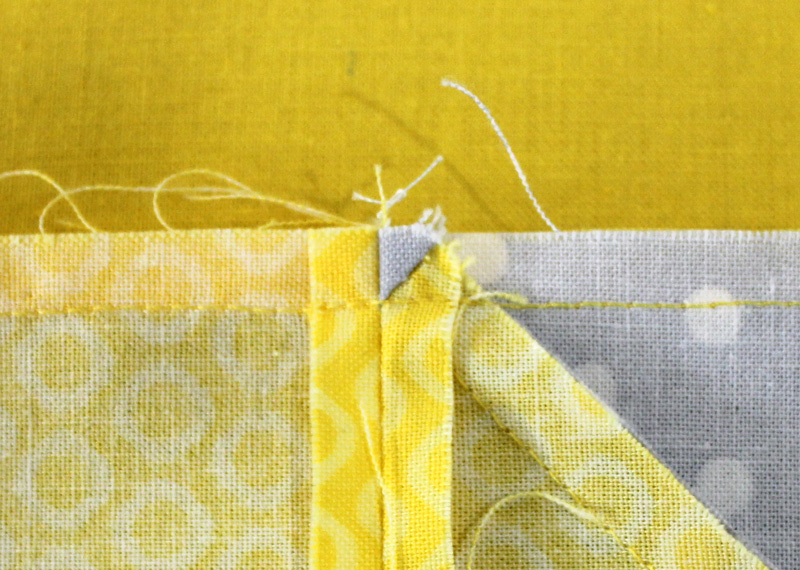
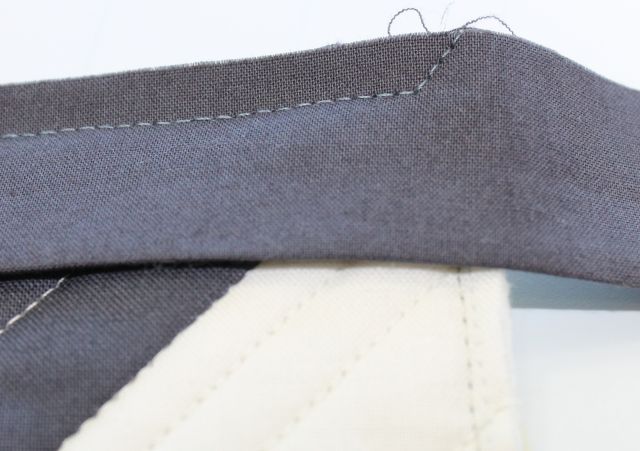
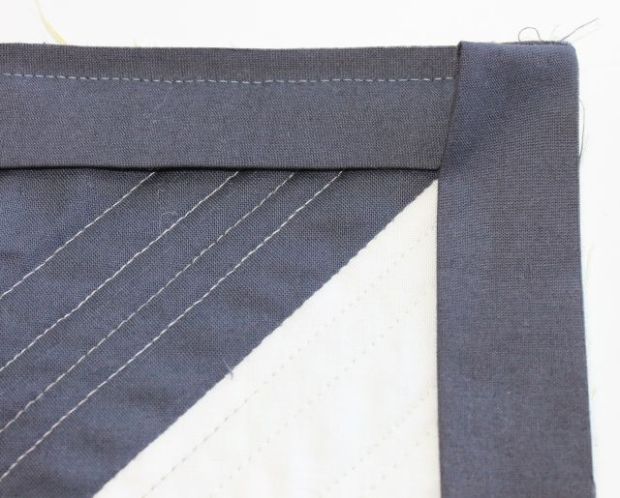
At this point, your corner should look like this:

bind_10Take the quilt off the machine and fold the binding up and away from the quilt as shown. Keep the edge of the binding in line with the edge of the quilt as shown.

bind_11
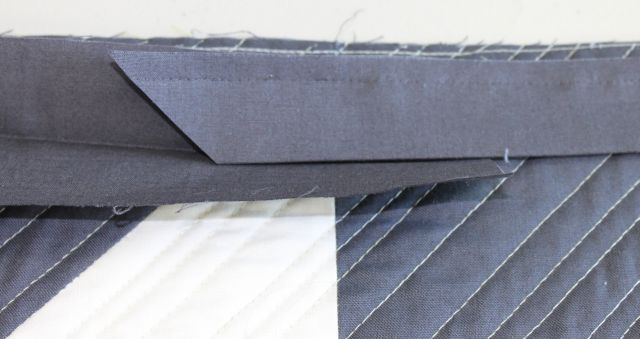
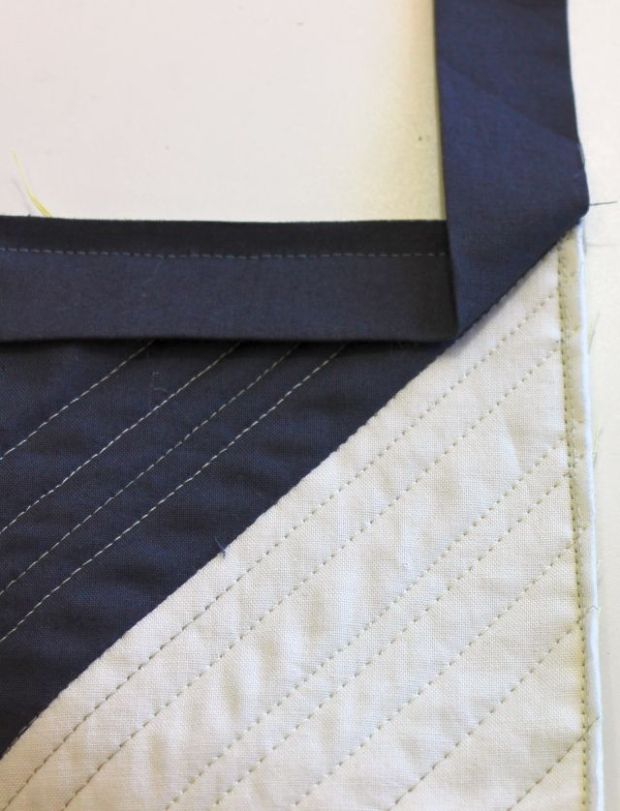
Bring the binding back down, creating a tuck of fabric underneath. This will form the miter on the front of the quilt.

bind_12Starting from the edge of the quilt, stitch the next side of binding down until you reach the next corner and repeat this process for all four corners.

bind_13Leave an ending tail of 6″ – 8″ of binding. Trim off the excess leaving a few inches of overlap to work with. Open up the end of binding and place the beginning tail inside it.

bind_14

Using the cut angled end as a guide, lightly mark a line right up next to it. Then cut 1/2″ away from this measurement to account for seam allowances on both ends.

bind_15Put the two tail ends right sides together, and sew with 1/4″ seam to complete the continuous loop of binding.

bind_16Close up the binding and finish stitching it down on the front of the quilt. You are now ready to finish stitching the binding down on the back of the quilt.

bind_17
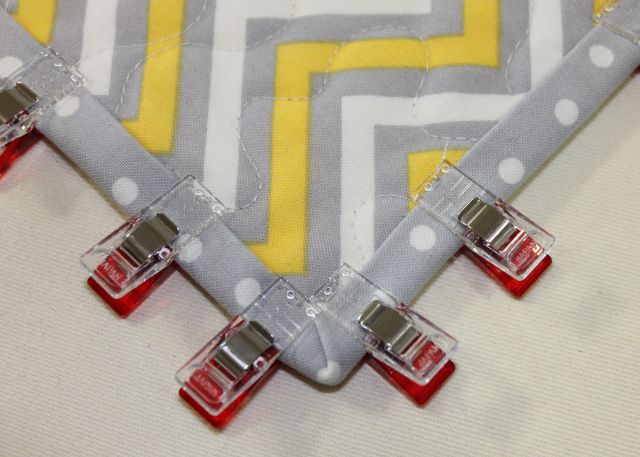
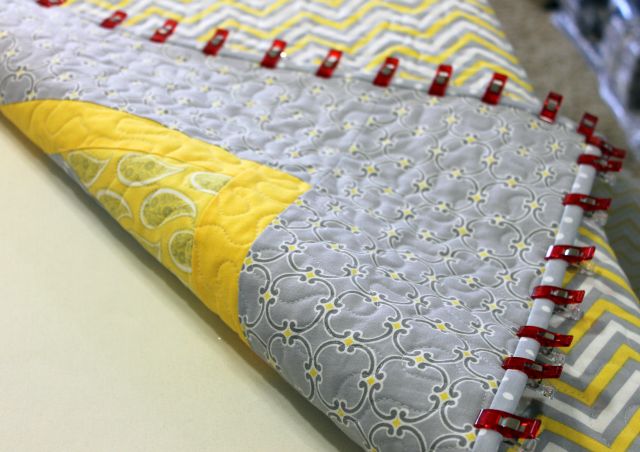
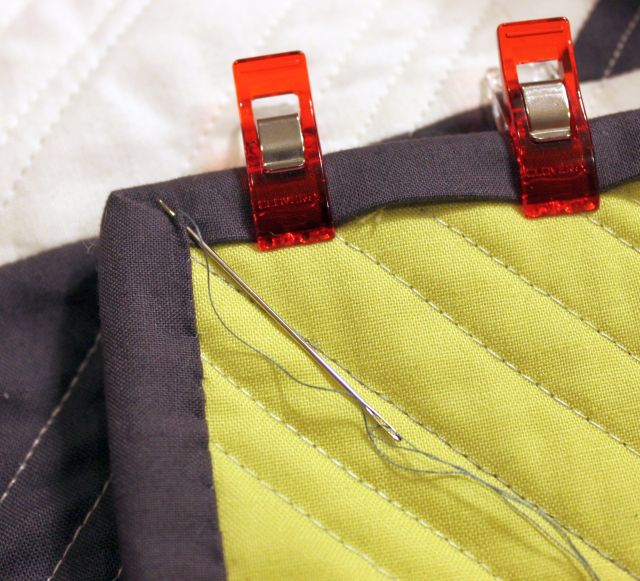
Step 5 – Secure with clips

I find it easier to completely secure the binding to the back of the quilt with clips before I begin hand-stitching it down. For a throw sized quilt it takes about 100 wonder clips to go all the way around the quilt. Pins or hair clips work well, too.

bind_18Step 6 – Hand stitch the binding on back

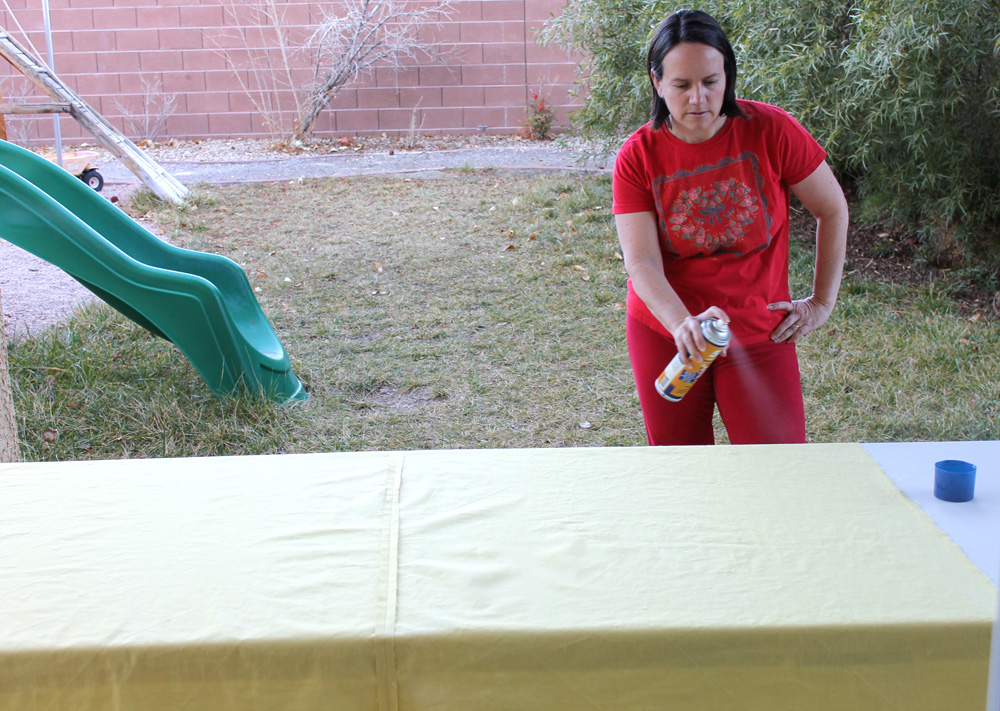
Put on a good movie and enjoy the relaxing process of hand work for a pretty finish.

Don’t want To Hand Stitch? machine binding tutorial Here.

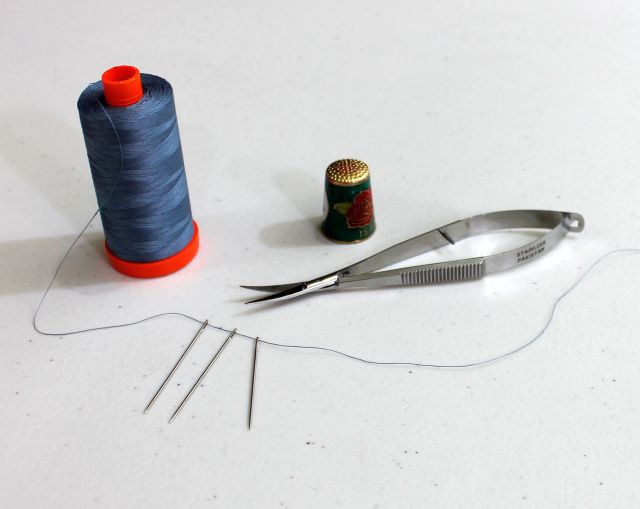
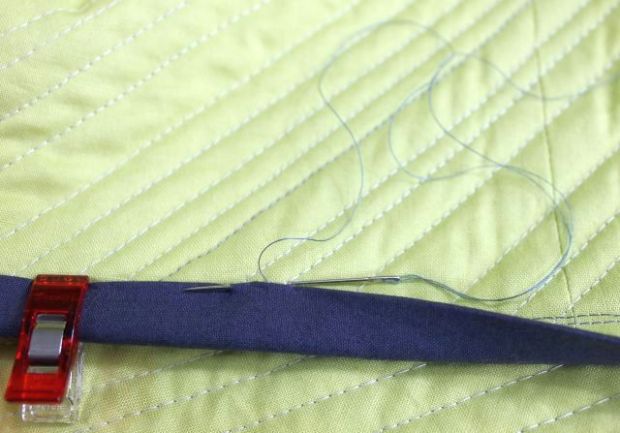
Thread several needles using the same cotton thread you used to sew on the binding. Clip off about 18″ of thread to use at a time. Wrap the thread around the needle 3 times and pull it to the end of you thread to create a quilter’s knot. You can double your thread for extra strength and durability.

bind_19I use a thimble to help push the needle through the fabric when needed.

Tuck the knot underneath the binding, then grab a bite of the backing of the quilt and then a bite of the binding to complete each stitch.

bind_20Continue forming each stitch by bringing the needle in behind each previous stitch and pushing it out ahead of the last stitch. Pull the thread slightly taut as you go.

bind_21When you get to the corners, be sure to sew them closed. Take a few stitches on the back to close the miter. Push the needle through to the front, stitch the front of the miter closed, then push the needle to the back again.

bind_22When you are near the end of a length of thread, make a knot, then take a stitch through the backing and batting only, pop it through the backing and cut off the excess. Continue in this manner until you’ve sewn down the entire quilt.

Congratulate yourself on a great finish!

20140404_dqn_modern_x_2nd


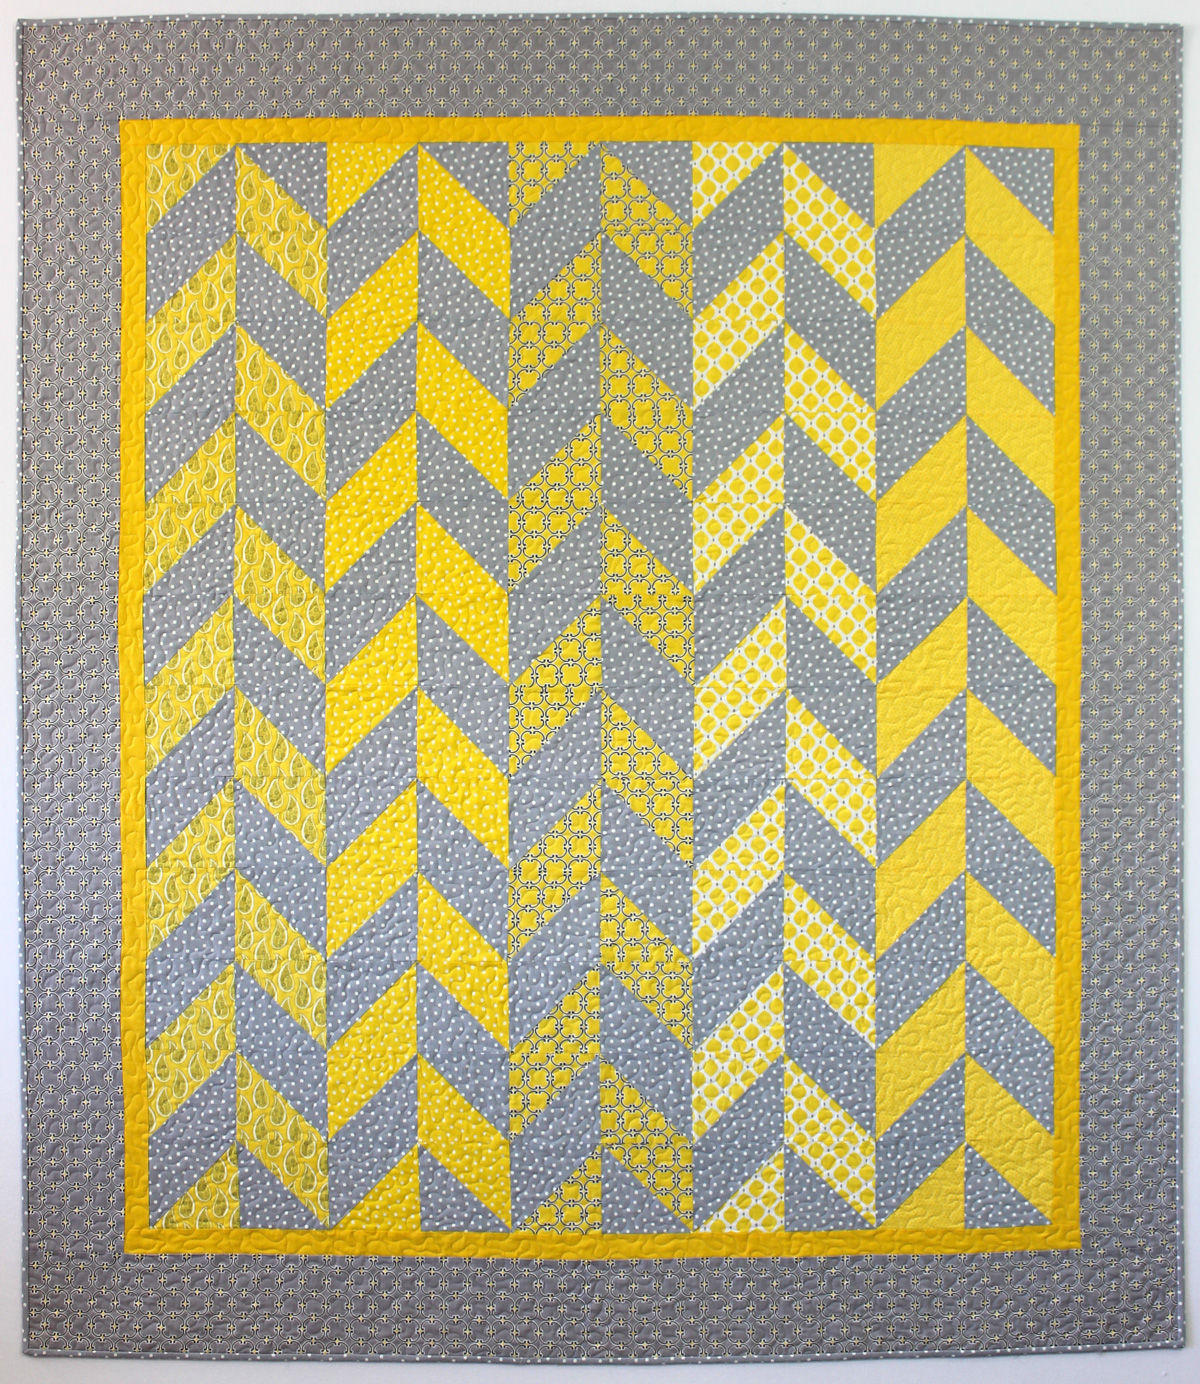
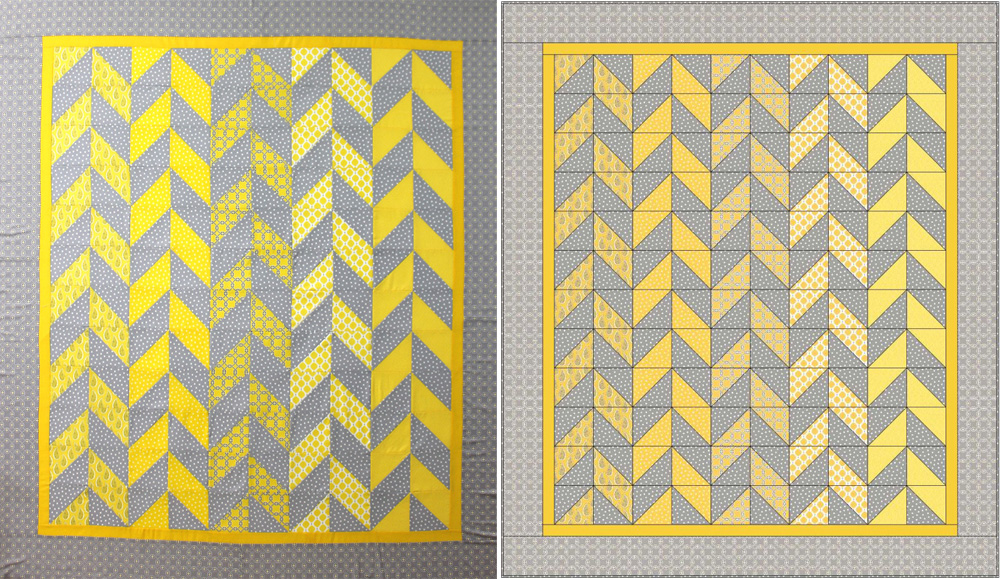
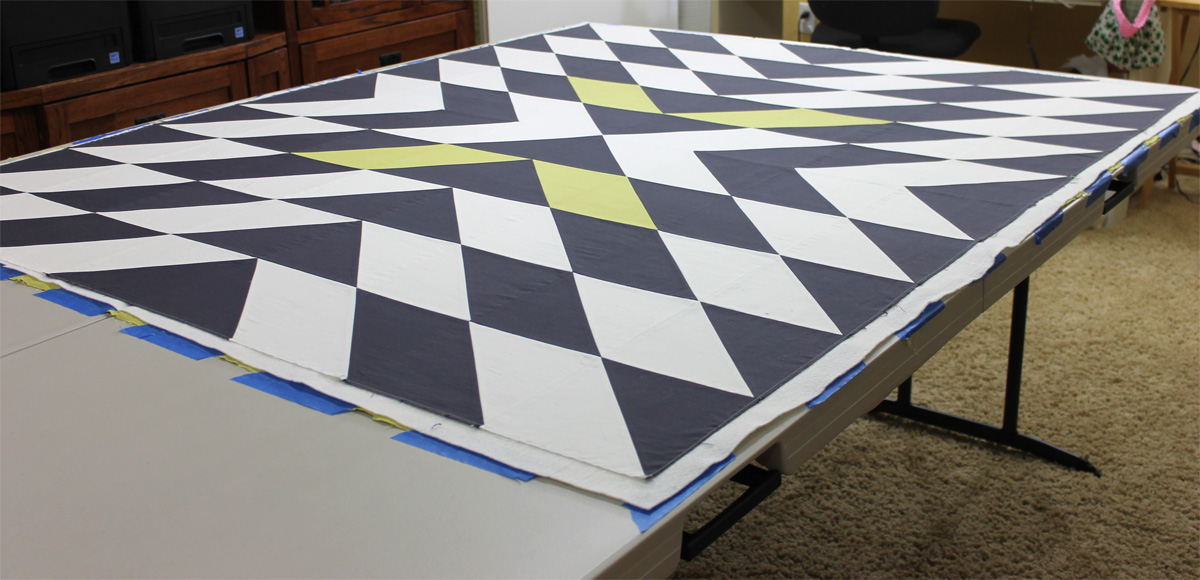
Modern X Pattern is available for purchase here.

Tutorial and Tips: How to Spray Baste a Quilt

2018 Spray Basting Update

I’ve updated this method to show I use my design wall to assemble the layers.
Click here for the updated tutorial.

Original Tutorial (From 2014):

I have been dabbling with using 505 basting spray to hold the three layers of my quilt together while quilting. I’ve learned a few things along the way and would like to share them with you. Thanks to Ann Petersen for introducing me to this method of basting.

spray_basting_0Yes, you get to see my ugly backyard during this tutorial. Yay, you!

Tips Before You Begin

First of all, when basting a quilt with spray, it is best to use pre-washed 100% cotton fabrics. The spray make not stick as well to other fibers. Also, if you like to starch the back of your quilt to make it slicker and aid in machine quilting, wait to do this until after you have spray-basted the quilt.

For best results, choose a natural fiber batting made of cotton, silk or wool (or a blend that is mostly cotton) because the adhesive tends to stick better. Finally, be sure to use the spray adhesive outside, or in an extremely well ventilated room with the doors and windows open.

Now on to the Tutorial

Begin by setting up one or two tables on which to work. Alternatively you can place a sheet on the ground, or even drape your fabrics over a wall if needed. Lay out the backing of your quilt first, wrong side up. You will be applying the spray to the wrong side of the fabric.

spray_basting_1Working outside is best so that fumes can dissipate.

Not shown in the photo: place a towel or two on each end of the table under the backing to protect it from over-spray.

Shake the can well before beginning. I have only used the 505 spray, so I cannot speak to the effectiveness of the other brands. Starting on one end of the quilt, spray the adhesive smoothly back and forth across the surface of your quilt. It should be very tacky to the touch. Set the backing aside and move on to the quilt top.

spray_basting_2Not a very flattering picture, but I’m keeping it real!

Lay out the quilt top and use the same method to apply spray evenly over the wrong side of the top and set it aside. I sprayed the center section of the quilt top and then went back and sprayed the sides. I didn’t move the top; I just sprayed the edges while they were hanging off the table.

spray_basting_3Lay out your quilt top wrong side up.

I usually hang my top and backing wrong side up over a railing while waiting to assemble them. You can also fold them up and open them later as needed. The quilt pieces will be tacky but can still be opened up if the sticky ends touch each other.

spray_basting_4I drape my quilt tops over a railing in my sewing room.

Using a large surface (like a couple of long plastic tables pushed together), spread the backing wrong side up and tape or clamp down the edges. Next, place your layer of batting on top.

spray_basting_5Tape the backing down with painter’s tape, wrong side up.

It is really helpful if you can grab an assistant to help you place the batting directly on top of the backing without having to move it around too much. Grab the quilt top, again with help, and place it on top of the other two layers, right side up.

Take some time to smooth out all 3 layers until it is nice and flat. Once you have worked out any wrinkles, take the whole sandwich over to your ironing board and press it together from the back of the quilt. This will help set the adhesive and works best with natural fiber battings. If needed, press the front side as well.bastingYou are now ready to quilt!

The quilt shown is Modern X, made as a free pattern for members of the Modern Quilt Guild. Pattern available for purchase here.

Valentine’s Table Runner Tutorial on Craftsy

Hi all. Just in case you haven’t gotten a chance to see my Love table runner tutorial, I’ve posted it for free on the Craftsy blog.

Love by Christa

Love by Christa Watson 12″ x 30″

You can make it into a table runner as is, or play around with different layouts to come up with your own design. It would make a super cute pillow, or you could even make several blocks for a larger sized quilt.

Love SquaredClick here for the tutorial and enjoy!