Virtual Designer Hop Part 2 of 2

Stay at Home and Hop With Us!

The word is to stay at home so why not just stay at home and hop with us!?! These are extraordinary times we are living through and many of us are no doubt stitching up a storm at
home! Last week I shared the first part of a long list of designers’ sites for you to explore. This week I’m back with the res of the list below. Have fun exploring and take your time to look around!

https://www.lonestarpatternworks.com

  • Powered by Quilting

https://www.poweredbyquilting.com

  • Cottage Rose Quilt Patterns

https://www.cottagerosequiltshop.com

  • The Cloth Parcel

https://www.theclothparcel.com

  • Faith and Fabric

https://www.faithandfabricdesign.com

  • Linen Closet Designs

http://www.linenclosetdesigns.com

  • Designs by Sarah J

https://www.designsbysarahj.com

  • Rona the Ribbiter Quilts

https://www.ronatheribbiter.com

  • Quilt Fox Designs

https://www.quiltfox-design.com

  • Seam to Be Sew

https://www.seamstobesew.com

  • Studio R Quilts

https://www.studiorquilts.com

  • Toadally Quilts

https://www.toadallyquilts.com

  • From Blank Pages

https://www.fromblankpages.com

  • Cotton Street Commons

http://www.cottonstreetcommons.com

  • Puppy Girl Designs

http://www.puppygirldesigns.com

  • Phoebe Moon Quilt Designs

https://www.facebook.com/phoebemoondesgins

  • The Devoted Quilter

https://www.devotedquilter.com

  • Stitched by Susan

http://www.stitchedbysusan.com

  • Tamarinis

https://www.tamarinis.com

Virtual Designer Hop Part 1 of 2

Stay at Home and Hop With Us!

No doubt like me, all of your upcoming quilty events have been postponed or cancelled and you find yourself now stitchin’ up a storm at home!  Why not take a break and join me on a virtual pattern designer shop hop? Come join the fun and virtually hop on over to some of my favorite friends in the quilting industry!!

Starting today, which happens to be International Quilting Day,  I’ll invite you to explore the newest inspiration from over dozens of my designer friends.  All of them have something unique to offer to you – our virtual shop hoppers !

Because the list is so large I’ve broken it up into a couple of posts so you don’t get overwhelmed. Follow each of these links below to explore my friends’ websites or other social media, and then stay tuned for another post next week where I share the rest!

  • Beaquilter

https://www.beaquilter.com/shop

  • Presto Avenue Designs

https://www.prestoavenuedesigns.com

  • Hissyfitz Designs

https://www.hissyfitzdesigns.com

  • Anjeanette Klinder Designs

http://www.anjeanettek.com

  • Pat Sloan – The Voice of Quilting

https://www.blog.patsloan.com

  • Said With Love

https://www.saidwithlove.com.au

  • Orange Blossom Quilt Design

https://www.orangeblossomquilt.com

  • DaySpring Quilt Company

https://www.dayspringquiltcompany.com

  • Ms P Designs, USA

https://www.mspdesignsusa.com

  • Stitchin’ at Home

http://www.stitchinathome.com

  • Sew Joy Creations

https://www.sewjoycreations.com

  • Ships & Violins

https://www.shipsandviolins.com

  • Patti’s Patchwork

https://www.pattispatchwork.com

  • Your Sewing Friend

https://www.etsy.com/shop/yoursewingfriend

  • The Geeky Bobbin

https://www.geekybobbin.com

  • Colourwerx Designs

https://www.colourwerx.com

  • Kate Colleran Designs

https://www.seamslikeadream.com


Creative Spaces Blog Hop Week 6 – Organizing Rulers

Can you believe that the Creative Spaces Blog Hop wraps up this week? (I’m posting a couple days late due to my Dot ‘n’ Dash quilt along which just stared on Friday). If you have missed any of the Creative Spaces posts, be sure to click the links of all the designers listed the end of this post, and scroll back through their feeds to catch them all.

Creative Spaces Blog Hop Week 6

Previous Creative Spaces Blog Posts

Here’s a link of the other 5 posts I wrote for the hop if you’d like to check them out:

How I Organize My Rulers

This week, we are chatting about organizing our rulers and tools. I’m not much of a gadget gal, but I do love me some acrylic rulers! I have a lot of them: short ones, long ones, various size squares and specialty shapes. In the past, I used to organize them with small wooden racks that had grooves cut in them like this:

Acrylic ruler holder

This worked for a time, but I found it to be a bit too clunky and it took up too much space. So recently, I’ve switched to storing the smaller rulers in a plastic drawer in my storage closet like this:

Storing small acrylic rulers in a drawer

A bin of plastic drawers works well for my small acrylic rulers.
You can see some of my Aurifil Thread spools peeking out from the other drawers.

I hang my larger rulers using small command hooks attached to the outside of my storage closets. I like the small 1/2 pound size because the silver hooks easily fit in the holes of my rulers. Each hook can hold up to 2 rulers with no problem.

command hooks for organization

Command hooks are an inexpensive and versatile storage solution.

I have two of these storage closets shown below, so it provides lots of space on the outside for my rulers. They are easy to reposition if I need to change my configuration. I also use the command hooks to store some of my show ribbons which bling up my space nicely. 🙂

Storing Acrylic Rulers

I’m in my sewing space 8-10 hours each day so I make use of every nook and cranny for storage!

I routinely purge my rulers and other tools if I find I haven’t used them in awhile. A general rule for decluttering I try to employ is this: if you aren’t sure you want to get rid of something, put it in a box in a closet for 6 months. If you haven’t touched it in that time, you probably never will, so get rid of it!

Be sure to check out the other blog hoppers for tips and tricks on how they store their rulers and other tools. And leave me a comment below letting me know how you control the clutter in your sewing room.

Creative Spaces Blog Hop Participants

Mondays

Tuesdays

Wednesdays

Thursdays

Fridays

Saturdays

Sundays

Creative Spaces Blog Hop

Creative Spaces Blog Hop Week 4 – Fabric!

This week on the Creative Spaces Blog hop, 16 of us are discussing how we deal with our fabric stashes. Scroll to the end of this post for links to everyone  on the hop.

For me, the first step in cleaning and organizing my fabric stash was going through it and deciding what I wanted to keep and what I didn’t. I’ve been quilting for nearly 25 years and as you can imagine, that’s a lot of fabric accumulation! My tastes have changed over the years and a few years ago, I finally decided it was ok to let go of things that no longer interested me.

My quilt Stash

This was my stash before my great studio cleanup of 2013-2014.

During my last big studio cleanup and what I called the great destash of 2013, I got rid of over half of my fabric stash. The image above is my “before” picture of my stash that filled two large shelving units.

In the image below, I invited a friend of mine who was just starting her quilting journey to come over and pick out as much fabric as she wanted to jump start her own stash. She took home enough to get her started on several quilts – and it barely made a dent in my stash!

Raiding the Stash

This was during the great destash of 2013

So then I decided it was time to either sell or donate as much fabric as I could. I stuffed big boxes full of prints I no longer wanted by colorway and offered them up for a very low price both on instagram and on my website. There’s a hashtag on instagram that most folks use – #thegreatfabricdestash – when wanting to get rid of unwanted fabric.

Whatever I didn’t sell was donated to a friend of mine who runs a chapter of Project Linus in her area. In fact she’s the mother- in-law of my friend above, and she’s my go-to person whenever my scraps and unwanted fabric accumulate beyond a reasonable amount. I like knowing that my fabric is finding a good home and being made into quilts that help comfort kids in need.

Fabric Destash

Getting rid of fabric I don’t use. My discards are someone else’s treasures!

Selling and donating tons of fabric helped immensely and I was now left with about half of my original stash, and stuff I actually wanted to use. I organized it by color and everything was able to fit into one shelving unit, behind closed doors. The second shelving unit now houses my notions and supplies, books and extra batting scraps.

My Quilting Stash after the big cleanup

My stash organized by color, with works in progress in buckets and bins.
You can definitely see I prefer bright colors, with a healthy dose of neutrals.

Although my stash is now tame and manageable, I’m starting to feel the need to cull it again. Now that I’m designing my own fabric, I’m not as interested in working with fabrics that aren’t mine. At first I kind of felt weird about it, and thought maybe I was losing my creative mojo, then I started noticing that a lot of designers only work exclusively with their own stuff. Whew! That makes me feel better!

When I released my first line of fabric, Modern Marks last fall, I took over one shelf for my own personal collection of the line. Of course I had to consolidate some of my other stash to make room for the new arrivals. I bought some comic book boards to wrap the unwashed yardage on and you can see some of the washed pile of Modern Marks peeking out to the left in the image below.

Christa's Fabric from Benartex Contempo Modern Marks and Fandangle

Modern Marks and Fandangle play very nicely together!

Now that my second collection – Fandangle – is out there in the world, I’m taking up nearly two shelves of my fabric storage area.

What I will probably do is keep most of my regular stash until the volume of fabric I designed takes over. I was really tempted to just buy a full bolt of each to keep, but I know that would quickly take over the house once I’ve got a few more collections under my belt, LOL!!

I’m curious – how do you manage YOUR stash? Leave me a comment and let me know!

Creative Spaces Blog Hop Participants

Mondays

Tuesdays

Wednesdays

Thursdays

Fridays

Saturdays

Sundays

Creative Spaces Blog Hop Week 4

Creative Spaces Blog Hop Week 3 – Organization!

This week on the Creative Spaces blog hop, we are discussing organization. This is one of those topics where I realize that sometimes my perfection stands in the way of me being as organized as I should. I can be an all-or-nothing type person: if I can’t organize every last bit, I’ll let everything fall into disarray, LOL!! You can see that here in my “before” pic about my sewing room cleanup!

Creative Spaces Blog Hop Week 3

For my stop this week, I thought it would be fun to share my wish list for the things I want to get to help me be more organized in my sewing room. The last time I did a major renovation of my creative space was back in 2013 and it’s high-time for another one!

They recently built an Ikea here in Las Vegas and the sad thing is I haven’t been yet. In fact I’ve NEVER even stepped foot in one, but I’m planning and scheming and making a shopping list of things I want to get to make my sewing room a little more organized.

Drawer Unit

First up is this set of drawers. I think it will fit nicely in the space underneath my sewing table.
In the older picture below (which was before I got my new fancy sewing machine), there’s a spot under the table to my left where I think these drawers would fit perfectly.

When I first got my sewing desk way back in 1999 or 2000 it came with an option to add a set of drawers there. The biggest regret I have is not making that purchase back then. I don’t even remember the brand of table it is and sadly, the shop I bought it from is long gone.

Sewing Table

This older image was from before my first sewing room redo in 2013.

Next up, I’ve been checking out Pinterest and Google for ideas on making a customized cutting table. The basic idea is to get 2-3 shelving units with wheels and put them together, then add a piece of wood on top. I need it to be mobile because it would go in the center of my space and I’d need to move it out of the way when we do photography.

ikea shelving unit

Here’s one possible shelving unit above that would work. This will definitely take more time and research, but just like any large project, that’s part of the fun, right?

Finally, the biggest purchase I’ll need to make is some larger shelving units that can fit end to end along one wall of my room. I’ve been getting recommendations that lots of folks really like the Billy Bookcases from Ikea, and this image from their site has piqued my interest:

Billy Bookcases from Ikea

Image from Ikea

So those are the 3 major things I want to purchase for my sewing room to make it more organized and usable. I’m in the very early stages of planning and I know it will take time and money to make this happen, but I’ll be sure to keep you posted on how it’s going!

Be sure to check out all of the other stops on the hop for additional ideas on how you can organize your own creative space!

Creative Spaces Blog Hop Participants

Mondays

Tuesdays

Wednesdays

Thursdays

Fridays

Saturdays

Sundays

Creative Spaces Blog Hop

Creative Spaces Blog Hop Week 2 – My Favorite Tools

Are you enjoying the Creative Spaces blog hop so far? I know I am! Scroll to the end for a list of all the stops on the hop and get motivated to organized your creative space! This week, 16 of us are sharing our favorite tools. It’s fun to see the ones we all love as well as picking up ideas for new things to try!

Creative Spaces Blog Hop - Favorite Tools

For my post, I thought I’d do a roundup of some previous blog posts when I shared about some of my favorite notions and tools.  I did a series of “favorite tools” several years ago and it is surprising to see how many of them are still at the top of my list. Click the link below each image to read more about why it’s (still) my favorite:

My Favorite Tools for Quilting

batting scissors

Batting Shears

Tri Recs Tools

Tri Recs Tools

Lint Roll

Lint Roller

Painters Tape Quilting

Painter’s Tape

Christa Watson, BERNINA ambassador

My BERNINA – of course!!

(The link above is from 5 years ago when I got my first 7 series machine!! Little did I know then that it would lead to my national teaching career and becoming an ambassador. It’s a fun walk down memory lane….)

Cut 'n Press

Cut n Press Mat

Big Board

Starch and a Big Board

Shout Color Catchers

Color Catchers

Squiggles work in Progress

My Design Wall

Supreme Slider 2 Sizes

Other Machine Quilting Essentials (from a previous blog hop)

You can definitely go down a rabbit hole reading all the blog posts I’ve written about my favorite tools, and this barely scratches the surface! What are some of yours?

Blog Hop Stops

Remember to check out all of the stops on the hop each day  through August 19th!

Mondays

Tuesdays

Wednesdays

Thursdays

Fridays

Saturdays

Sundays

Creative Spaces Blog Hop

Fandangle Fabric Blog Hop over at Sew in Love (Benartex’ Blog)

Exciting news! I just got word that Fandangle fabric stars shipping to stores this week, so those the pre-ordered fat quarter bundles and kits should from me should be getting them soon!! In other fun news, this week also kicks off the fun and inspiring Fandangle blog hop over on Benartex’ blog: Sew in Love with Fabric.

Fandangle Blog Hop

Today starts with an introduction of the fabric line over on the Benartex blog along with an interview I gave explaining some of my thoughts and inspiration behind the collection. Tuesday through Friday, nine talented designer friends will be sharing the projects they made from my fabric. Saturday will wrap up with a virtual trunk show of my patterns featuring Fandangle, again over on the Benartex blog.

There will be prizes and tons of beautiful projects!

Each of the stops will include a winner who will get a prize pack of 8 assorted Fandangle fat quarters (US shipping only due to high shipping costs.) So be sure to scroll to the end of this post for the complete schedule and bookmark each stop for your chance to win!

Fandangle Fabric Bundle by Christa Watson

Click here to purchase Fandangle fabric bundles.

And to make it even more exciting – I’m throwing in a bonus prize bundle, too. I’ll choose 3 winners who will each win a bundle of my three newest patterns: Sparkling Stars, Pearl Pendants, and Surplus Strips. Of course, these patterns will look great in any fabrics you choose!

To enter leave me a comment letting me know if you prefer PDF patterns, or print patterns – or both!!

US winner swill get their choice of PDF or print version. International winners will receive the PDF version. I’ll choose 3 random winners on Saturday at the end of the hop and announce their names here on the blog on Monday.

Fandangle Quilt Patterns

Click here to view all of my quilt patterns – print version
Click here to view all of my quit patterns – PDF version

Here’s the Full Blog Hop Schedule:

Monday

Benartex Blog: Sew in Love with Fabric Interview

Tuesday
Heather from Quilt-achusetts; IG: @quiltachusetts

Nancy from Masterpiece Quilting; IG: @masterpiecequilting

Wednesday
Thursday
Annie from By Annie; IG @patternsbyannie
Friday
Tina from Mod Geometry; IG: @sashikostyle
Paige from Quilted Blooms; IG: @quiltedblooms
Saturday
Sew in Love with Fabric Virtual Trunk Show
Fandangle Fabric by Christa Watson

I’ll be offering Fandangle fabric bundles for a limited time, so grab yours while they last!

I’m so excited to see what everyone makes from my fabric! Be sure and use the hashtag #fandanglefabric on socila media so I can see what you’re making, too!

Creative Spaces Blog Hop Week 1 – My Sewing Room

Welcome to Week 1 of the creative spaces blog hop! Scroll to the end for links to everyone who has posted about their spaces this week – I’m sure you’ll love it, be inspired, and hopefully, feel good about your own creative space!

Creative Spaces Week 1

This week, we are blogging about our sewing spaces, and sharing before and after pics.

I like to keep a tidy room, but whenever I travel, things can become a hot mess. I’m usually trying to finish up some deadline at the same time and my sewing space can often look like this:

I have a big space in our upstairs loft area. There’s a big table in the middle where I do most of my computer work, cutting and organizing of projects. It tends to attract all the mess when I’m in a hurry to leave on a big trip.

When my studio is tidy and clean and I’m able to efficiently use every space, it looks more like the image  below (taken a couple of years ago for a feature on someone else’s blog):

Christa's Sewing Room

I’ve got a quilt under the machine on the back wall with another quilt top on two tables in the middle of the room. My design wall on the right is big enough to hang a large quilt top. It now doubles as my basting area and my photography studio.

I can fit a full size ironing board with a big board on top, and there’s a desk where my daughter can also sew if she’s interested. You can barely see the couch peeking behind the railing where I like to drape a couple of quilts in progress.

Photographing Sparkling Stars Quilt

Jason does all of the flat photography for me since that’s definitely not my skill set.
Here he’s photographing Sparkling Stars, my newest quilt pattern featuring Fandangle.

Probably my favorite thing in my sewing room is the design wall because I use it all the time. Whenever I’m working on a new quilt, or even a new fabric line I’ll hang up whatever I’m looking at and step away, to see what it looks like at different angles.

It also servers as my photography studio to take flat shots for pattern covers. We (meaning Jason) build the design wall back in 2013 the last time I did a major studio renovation. You can read about our process here.

Clean Sewing Room

I’m lucky to have a large space with enough room to put everything away when I clean up.

My least favorite thing in my sewing space is the hand-me-down wooden entertainment center. It doesn’t match anything in the room, but it was free and fits the space well. It also holds a ton of stuff, including our big ugly office printers (one for black and white printing & labels – the other for color printing.)

One of my goals during this six week blog hop is to replace that ugly brown monstrosity with something nicer from Ikea. We recently got one in our town, and it’s sad that I haven’t even been there yet! But I’m hoping I can assemble a series of smaller units and bookcases (in white) that will make the space look a whole lot nicer! I’d also like to replace my plastic work table with a taller table on wheels that I can use for cutting.

Christa Quilts

I’m definitely in my happy place when I can quilt in a clean, organized room. My sewing machine is against a wall with a window so that I have lots of natural light steaming through while I quilt during the day. My favorite thing to do is listen to a podcast or audio book while I quilt. It relaxes me and I can get into a good flow while I work.

Other Stops on the Hop

Be sure and visit these other stops on the Creative Spaces Blog hop and see how my quilty friends deal with taming their creative spaces:

Mondays

Tuesdays

Wednesdays

Thursdays

Fridays

Saturdays

Sundays

Creative Spaces Blog Hop


Creative Spaces Blog Hop Starts Next Week!

Want to get to know some fun, talented friends of mine? Then join us for the Creative Spaces blog hop which launches on Monday, July 9th, 2018!

Creative Spaces Blog Hop

Hosted by Tammy Silvers and Cherry Guidry, 16 of us are going to write a weekly post for 6 weeks about fun, creative topics in the quilting community. Think of it as getting to know some new friends and learning a few tips along the way!

Inspiring Content!

Here are the scheduled topics we’ll be covering:

  • Week 1: Studio Clean Up – before and after pics
  • Week 2: Favorite Tools
  • Week 3: Organizing Tips
  • Week 4: Dealing with Scraps and/or Fabric
  • Week 5: Dealing with Embellishments/Buttons/Thread
  • Week 6: Dealing with Tools/Rulers

Creative Spaces Blog Hop

Meet the Makers!

Here’s the list of participants and the days of the week they’ll be posting. Click the links to each of their blogs below and follow them, or bookmark their sites so you can check out what each has to say every week!

Mondays

Tuesdays

Wednesdays

Thursdays

Fridays

Saturdays

Sundays

Creative Spaces Blog Hop

Modern Plus Sign Quilts Book Hop – Transparency Chains in Modern Marks

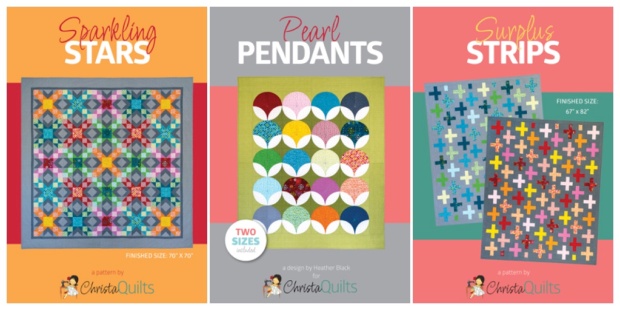
I’m excited to be a part of my friends Cheryl Brickey & Paige Alexander’s blog hop for their brand new book, Modern Plus Sign Quilts!

Modern Plus Sign Quilts

Modern Plus Sign Quilts is published by Stash books, a division of C&T Publishing.

Not only is it a fabulous book, but it was my turn to help share the love since Cheryl has been an active participant on both of my previous book blog hops. (Check those out here and here.) And maybe the three of us just might have had a conversation at QuiltCon about them doing something fun with my next fabric line…so stay tuned for more awesome Cheryl & Paige inspiration!!

But back to their book…

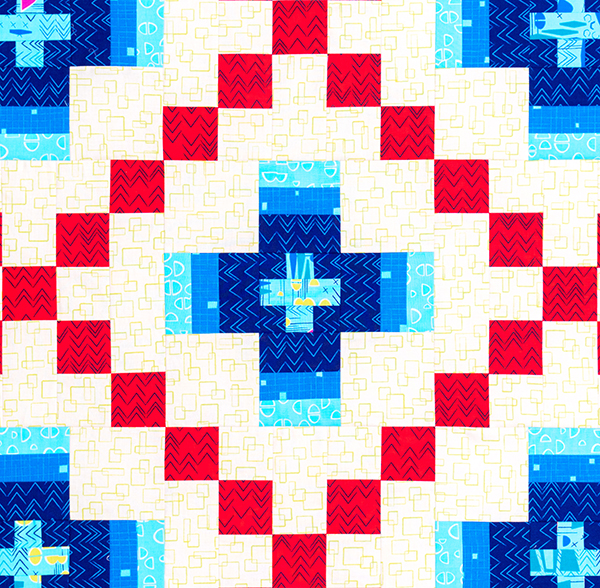
I chose their pattern, Transparency Chains to work on, because I love a good Irish Chain design!! I chose to go with a modernized Americana color scheme for this quilt, because I’m sorely lacking in red/white and blue quilts for 4th of July!! (Not that I actually need to cuddle up under one in the heat, but I love to add accent colors in my home for the holidays year ’round.)

Transpareny Chains in Modern Marks

My version of Transparency Chains, made with Modern Marks fabric

So far, I’ve only completed the quilt top shown above, but now I’m really excited to quilt it and will share more about the quilting process once I get to it.

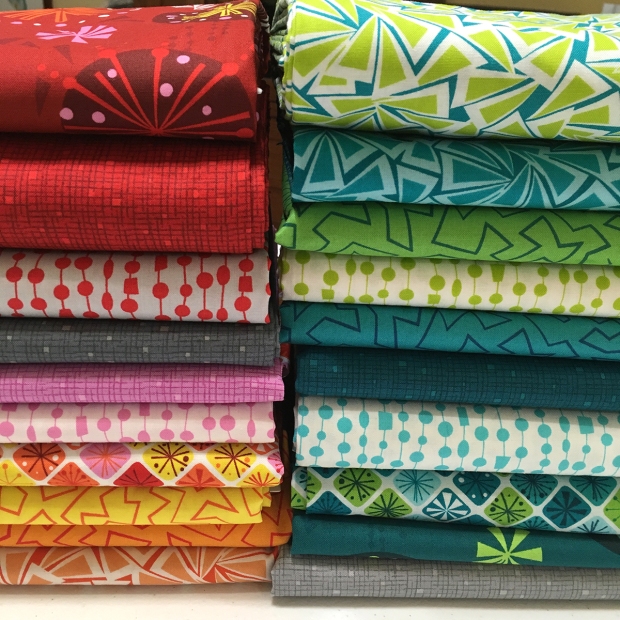
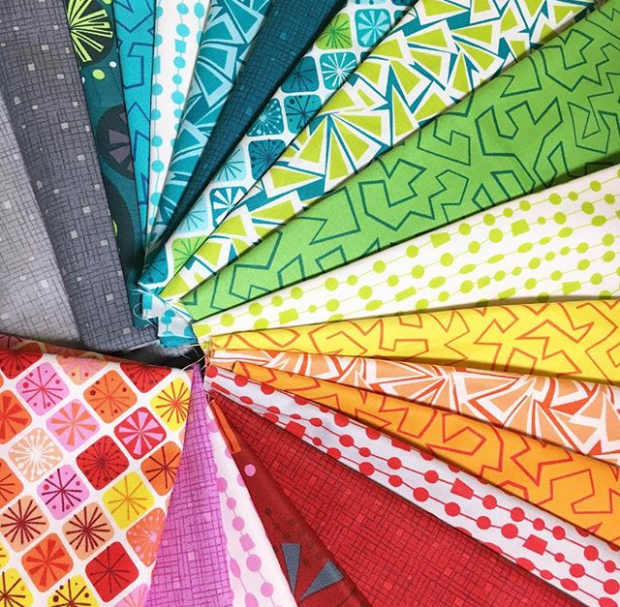
Here’s a little bit more about the process of making the quilt top. I couldn’t resist the chance to sew with my own fabric, and after making a ton of rainbow colored quilts lately, it was fun to go with a more limited palette of red, creamy yellow, and shades of blue.

Modern Marks Fabric Red Blue

I chose Modern Marks in blues, with a pop of red contrast and the light yellow boxes print for the background. It was fun to work with a limited palette rather than every color!

The instructions were well written and easy to follow. I love getting everything cut out ahead of time and I love it when a well-written pattern makes that easy to do. I especially liked not having to think about how much to cut, or do any of the math.

Modern Marks Fabric Pieces

I love looking at a stack of yummy fabric strips that are ready to sew!

I’ve realized that I love the process of making a quilt as long as I’m not rushed. So here’s a tip: try not to “binge” sew if you can help it. I spread out the making of the top over several weeks so I never felt rushed.

I washed the fabrics one day, ironed them a different day, cut them later and then took several days to sew the individual units below. I took pics along the way and shared them in real time on instagram so I never felt rushed or bored with the project.

Modern Marks Transparency Chains in Progress

The stacks are starting to turn into something fun!!

Plus blocks with modern Marks

Aren’t these the cutest little plus blocks ever??

At first, I was worried that the main Modern Marks print wouldn’t show well enough because the light blue pieces were so small, but I love the effect you get when you chop up an interesting overall print. It’s fun to see lots of pops of color all over the quilt!

Sewing in Progress

I love pressing seams open so that the blocks will lie rally flat.

I printed off a copy of just the Transparency Chains pattern from the book so I could keep it right by my sewing machine as I sewed. I could also make notes on the printout and check off each step as I completed it. I love the feeling of accomplishment each time I sit down to sew!

Pressing the quilt

I have a “big board” that I use for pressing my quilts. Once I press from the back side, I always press again from the front to keep the quilt as flat and crisp as possible.

Here’s a pressing tip: sew several of the rows together into chunks and then press the long seams before you join the two halves together. Then you only have one more seam to press once the quilt top is complete, rather than wrestling with the entire quilt for each long seam.

Modern Marks Transparency Chains

I’m really pleased with this combination of fabrics and love the fun geometric texture that the modern, geometric prints provide.

Transparency Chains alternate version

Alternate colorway, re-colored in EQ8

When I was figuring out which fabrics to choose, I drew up the design in Electric Quilt software and auditioned several variations. The greener version above was a very close second, but ultimately I liked the high contrast of the red chains instead.

Red and Blue Transparency Chains

Modern, geometric prints are definitely my favorite – and it was fun to sew with my own fabric!

Now I have to decide how to quilt it – do I go with a simple allover design, or do I highlight the plus blocks and emphasize the chain structure? Choices, choices!! What would you do?

To see the original version that Cheryl made, plus link to other bloggers who remade this quilt in other colorways, head over to her blog at Meadow Mist Designs and Paige’s blog at Quilted Blooms. While you are there, check out all of the fun giveaways that are happening, and enter for your chance to win.

Click here for the complete list of bloggers and links to their site – plus tons of giveaways.

Click here to get your copy of Modern Plus Sign Quilts.