Infrastructure Week 4: Pieced Strip Rows 3 and 5

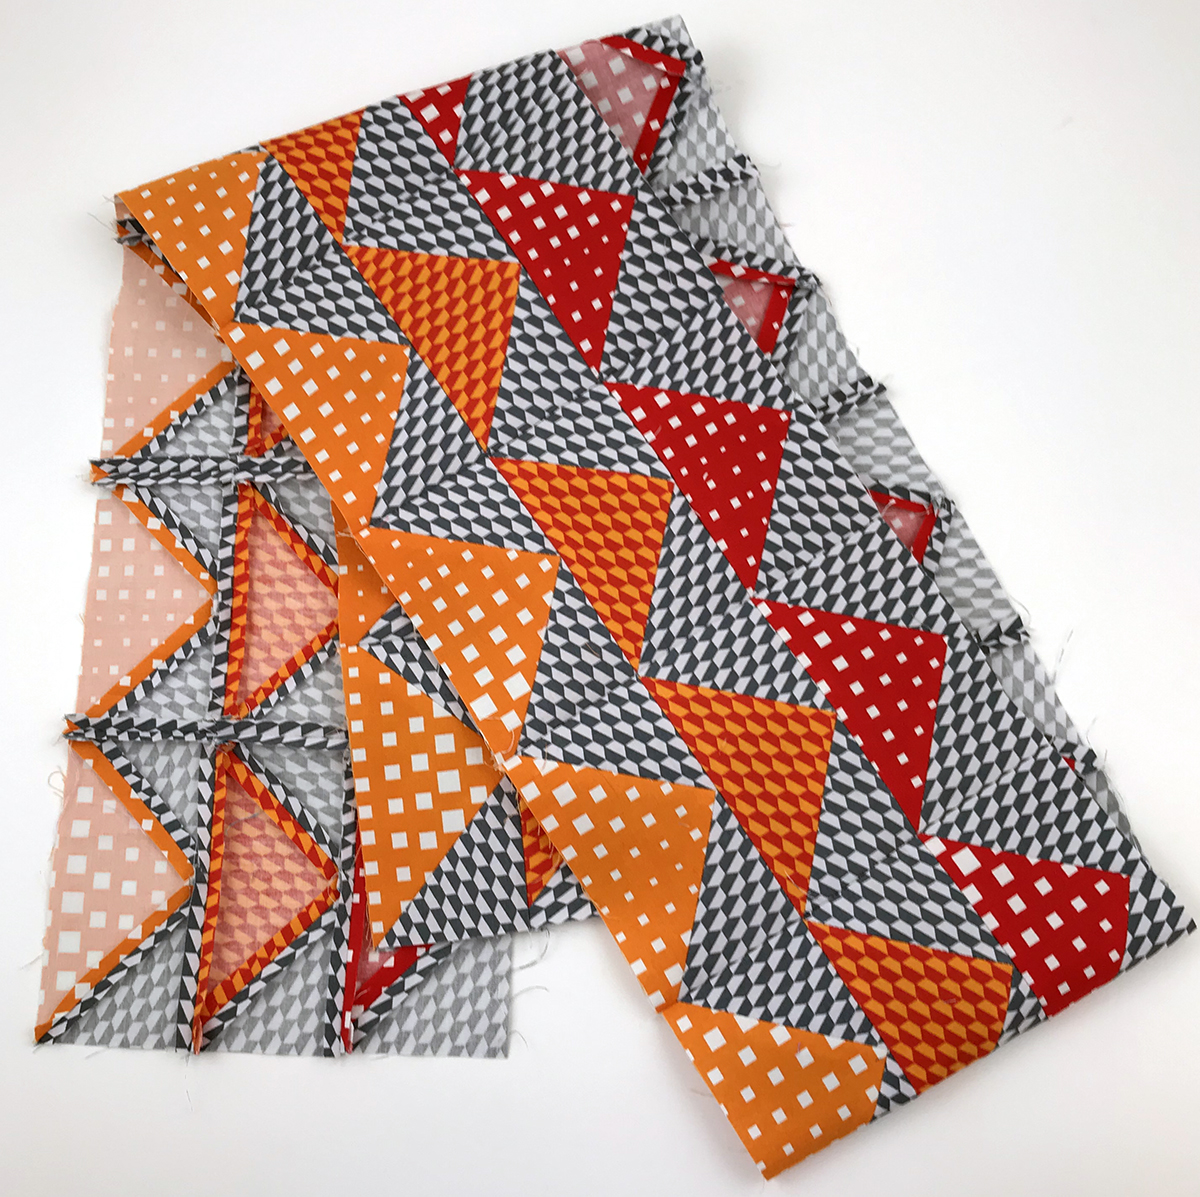
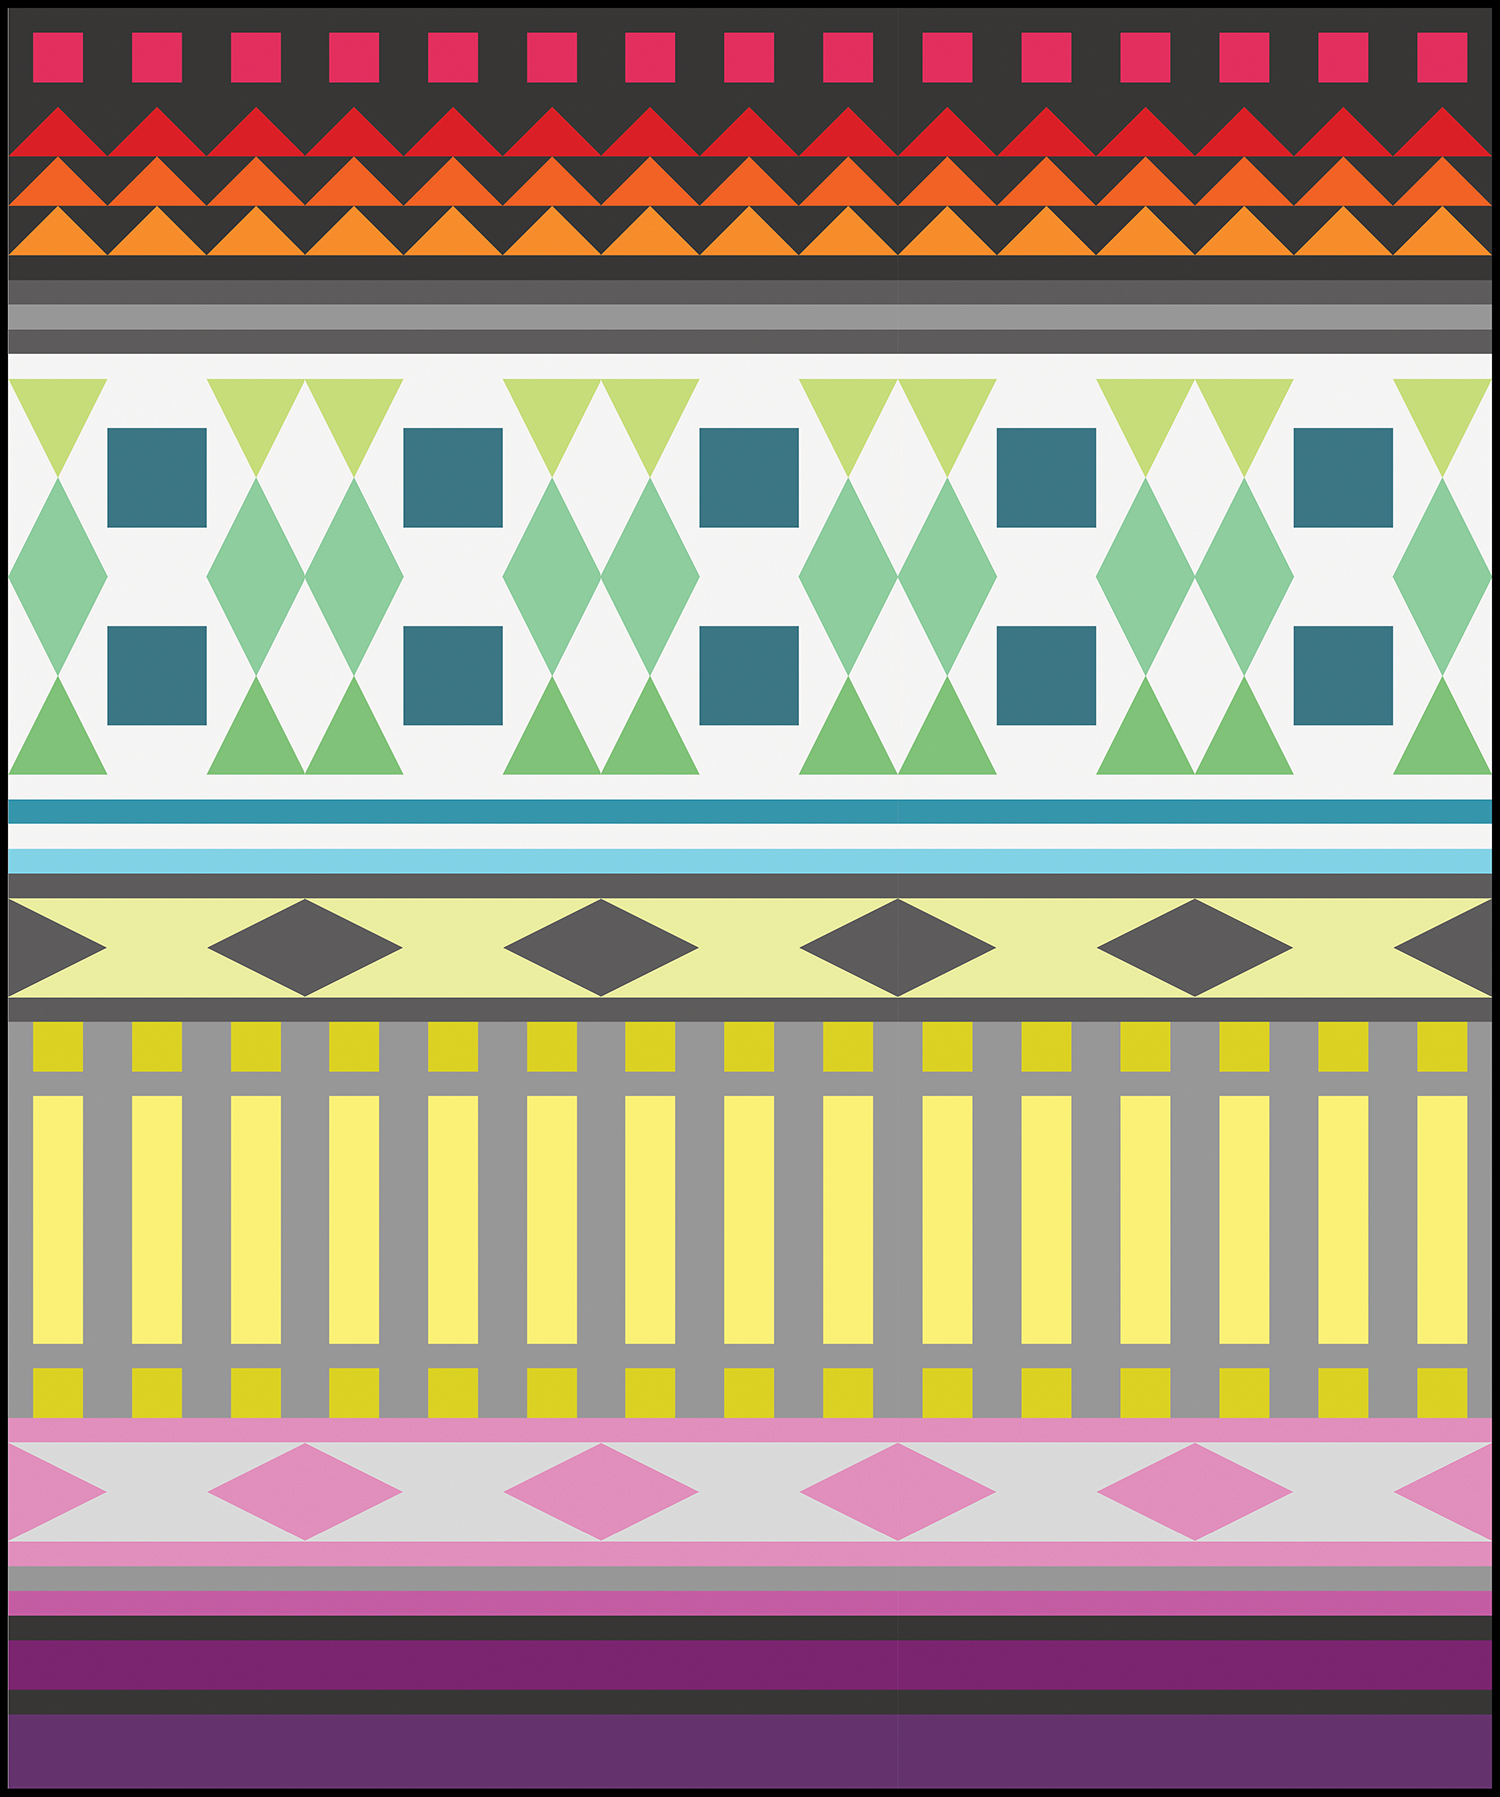
How is your Infrastructure quilt coming along? To recap, so far we’ve finished sewing rows 1 and 2 which included a lot of cutting and piecing. Scroll to the end for links to the previous QAL posts.Infrastructure Quilt Pattern

If your pieced rows aren’t exactly the same length, don’t worry.
When we join all the rows together in week 10, I’ll discuss how to fix that, so stay tuned!

So this week will be a nice break. We will be sewing rows 3 and 5 which are basically just sewing together long strips of fabric. It’s super fast and easy!

Infrastructure Row 3Infrastructure Row 5

Cutting the Rows

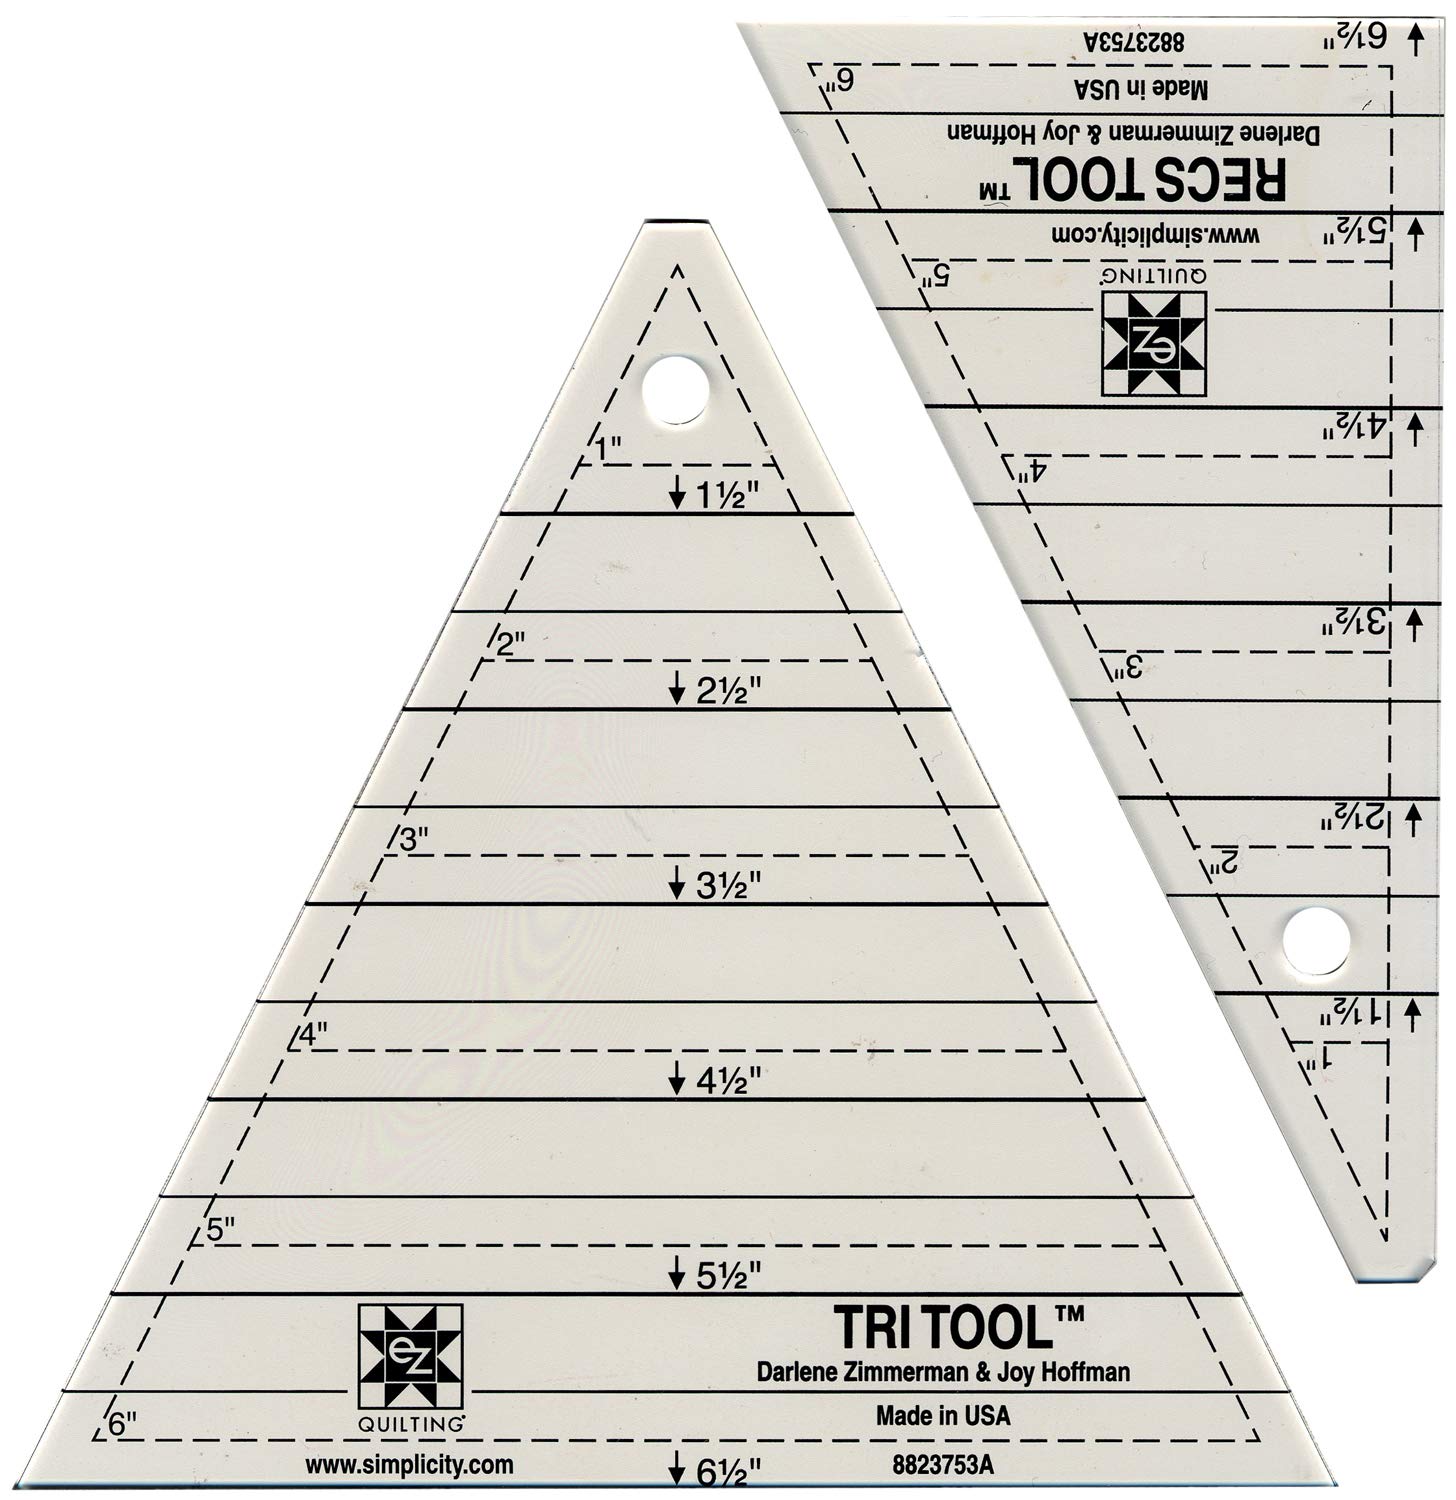
Instructions for cutting and sewing rows 3 and 5 can be found in the Infrastructure Quilt Pattern on pages 4-5, 9, and 11.

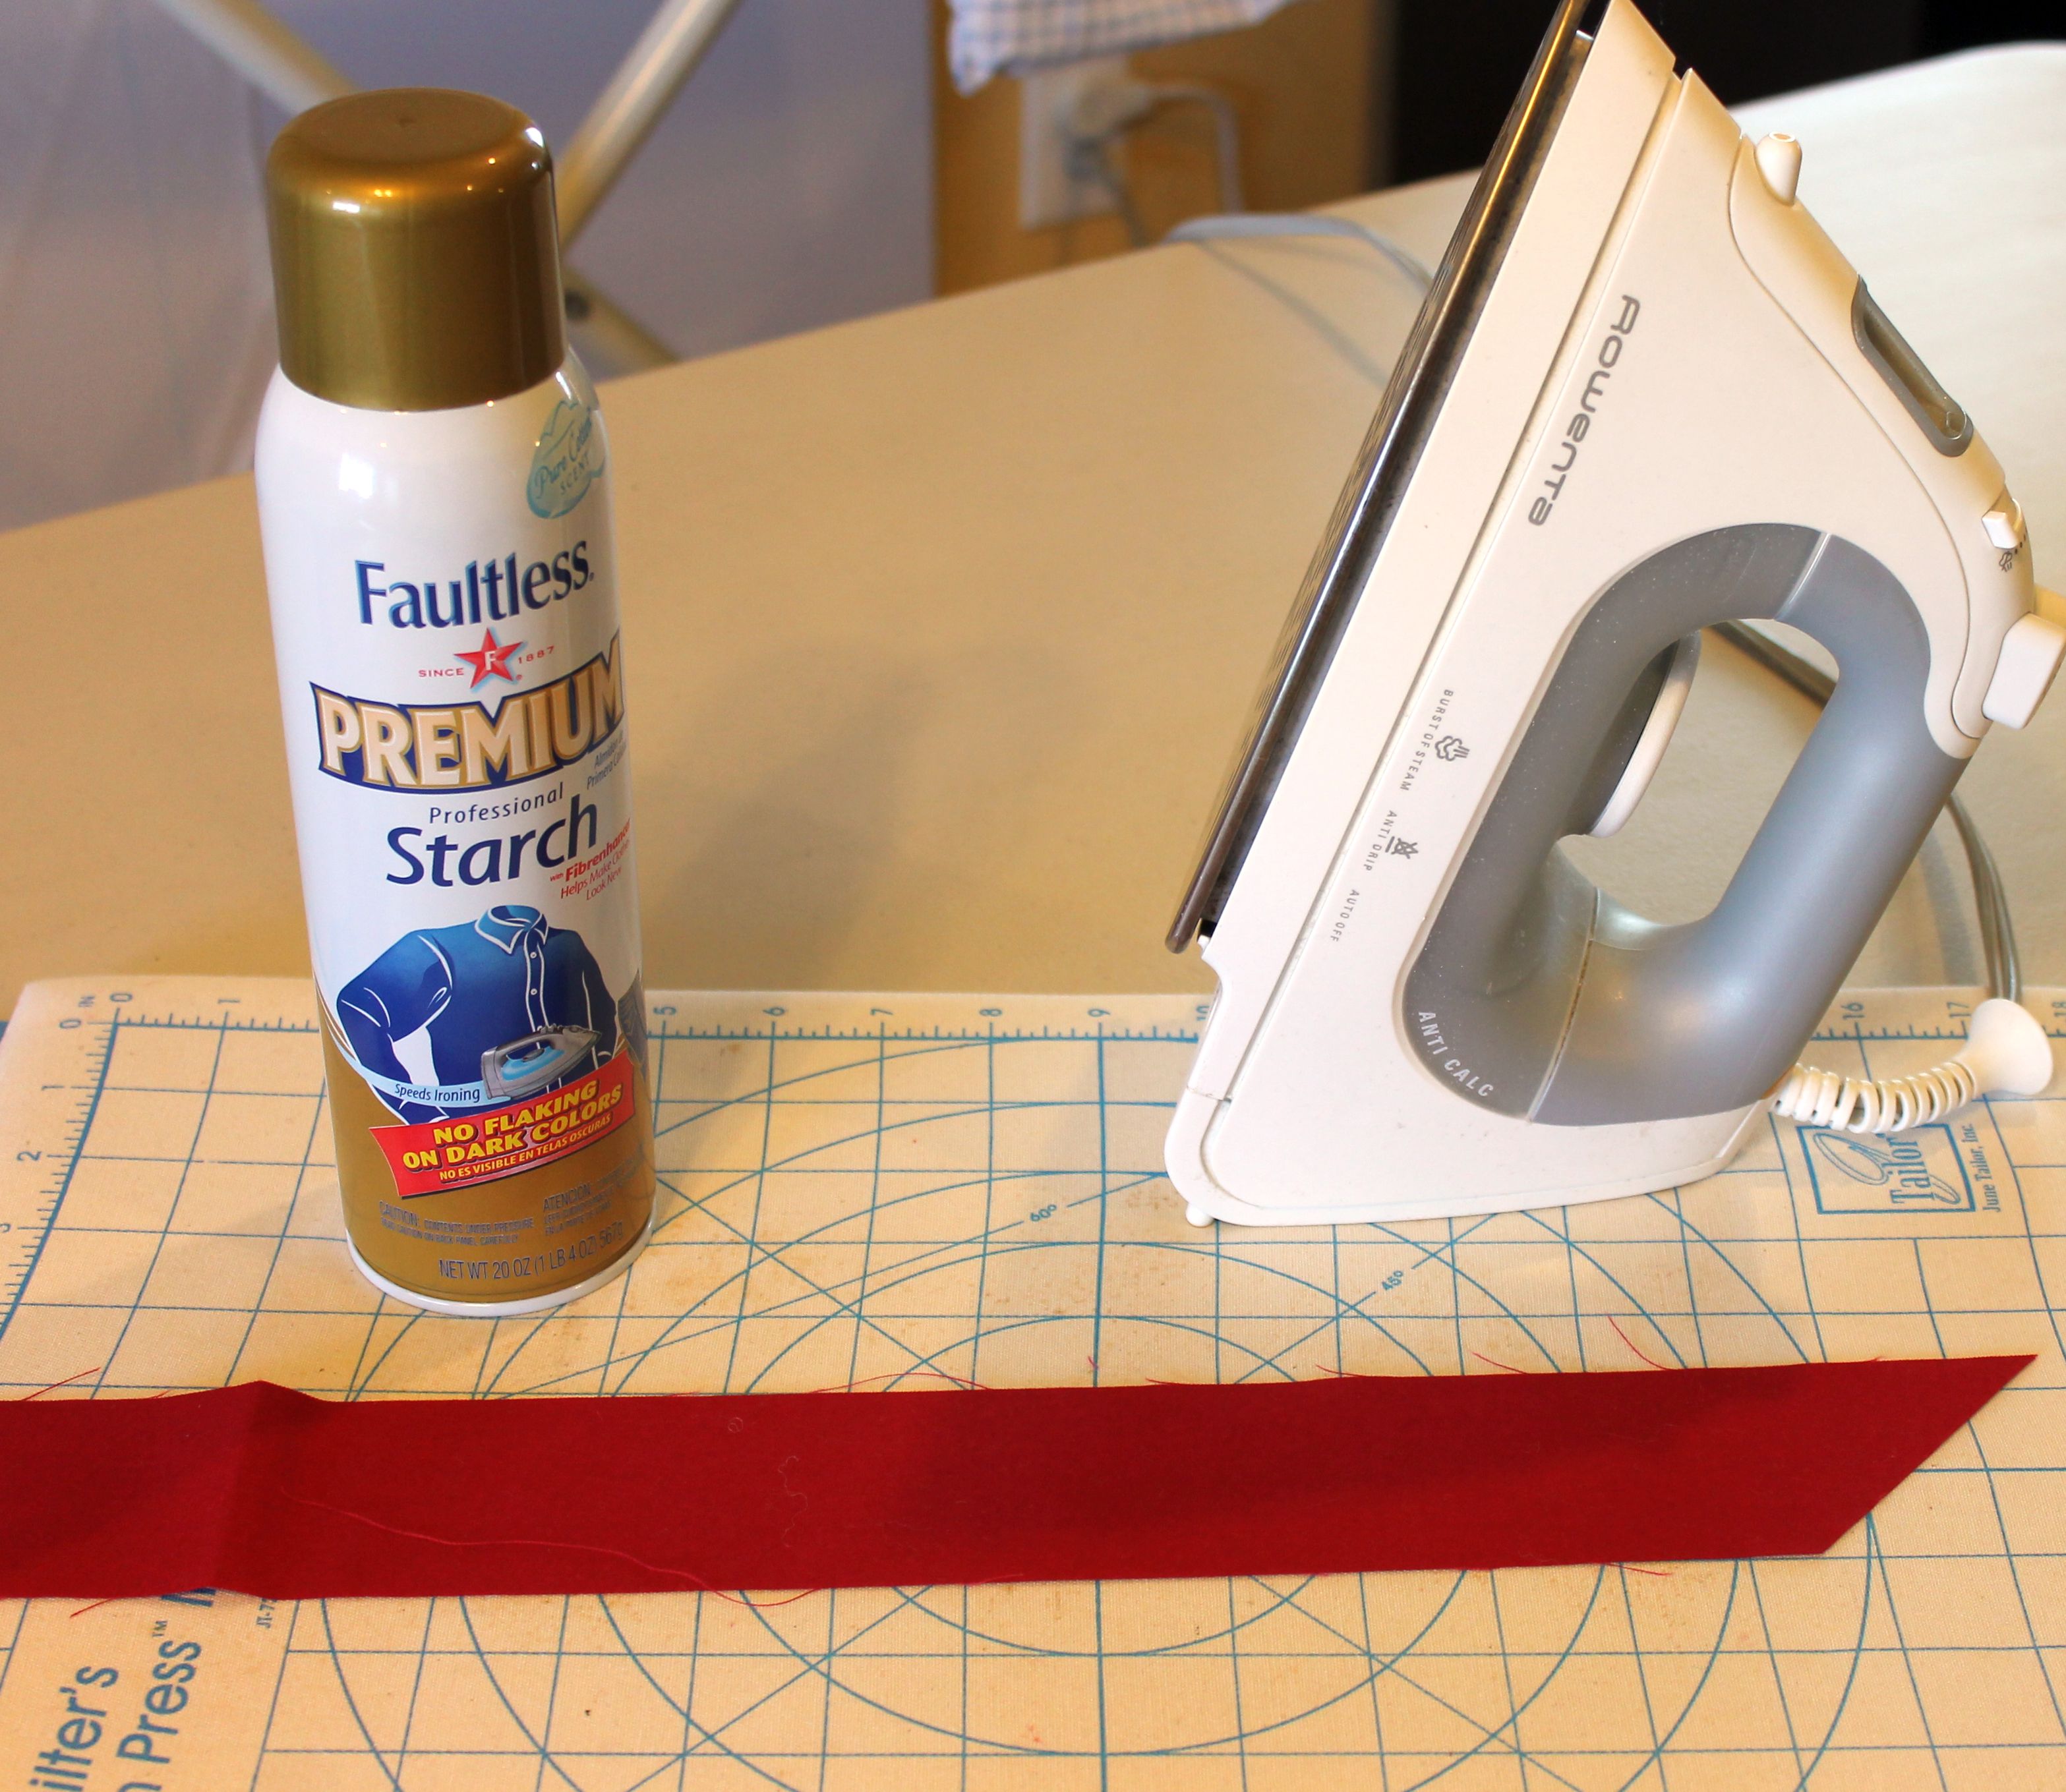
The most important thing to do when sewing together long strips of fabric is to measure what the cut size should be, and pining as you join the strips. If you don’t measure or pin, you have a good chance of creating “friendly” strip sets – in other words, long sewn segments that “wave” at you, LOL!! Friendly, wavy strips will make it hard for your quilt to lay flat, so let’s stick with being friendly to each other, not with our fabric, ok??

Geo Pop Strips

My strips are all cut from the  Infrastructure Quilt Kit.

You can either cut these strips from a larger piece of fabric, parallel to the selvage; or enough width of fabric strips (usually 40″-42″) and piecing them together, then trim to size. When sewing 2 strips together to get a longer length, sew with a straight seam (not a mitered one) so that you’ll have enough length. Also, be sure to measure your other pieced rows and double check that you are cutting your long skinny strips the same unfinished size.

Mosaic Dots from Geo Pop

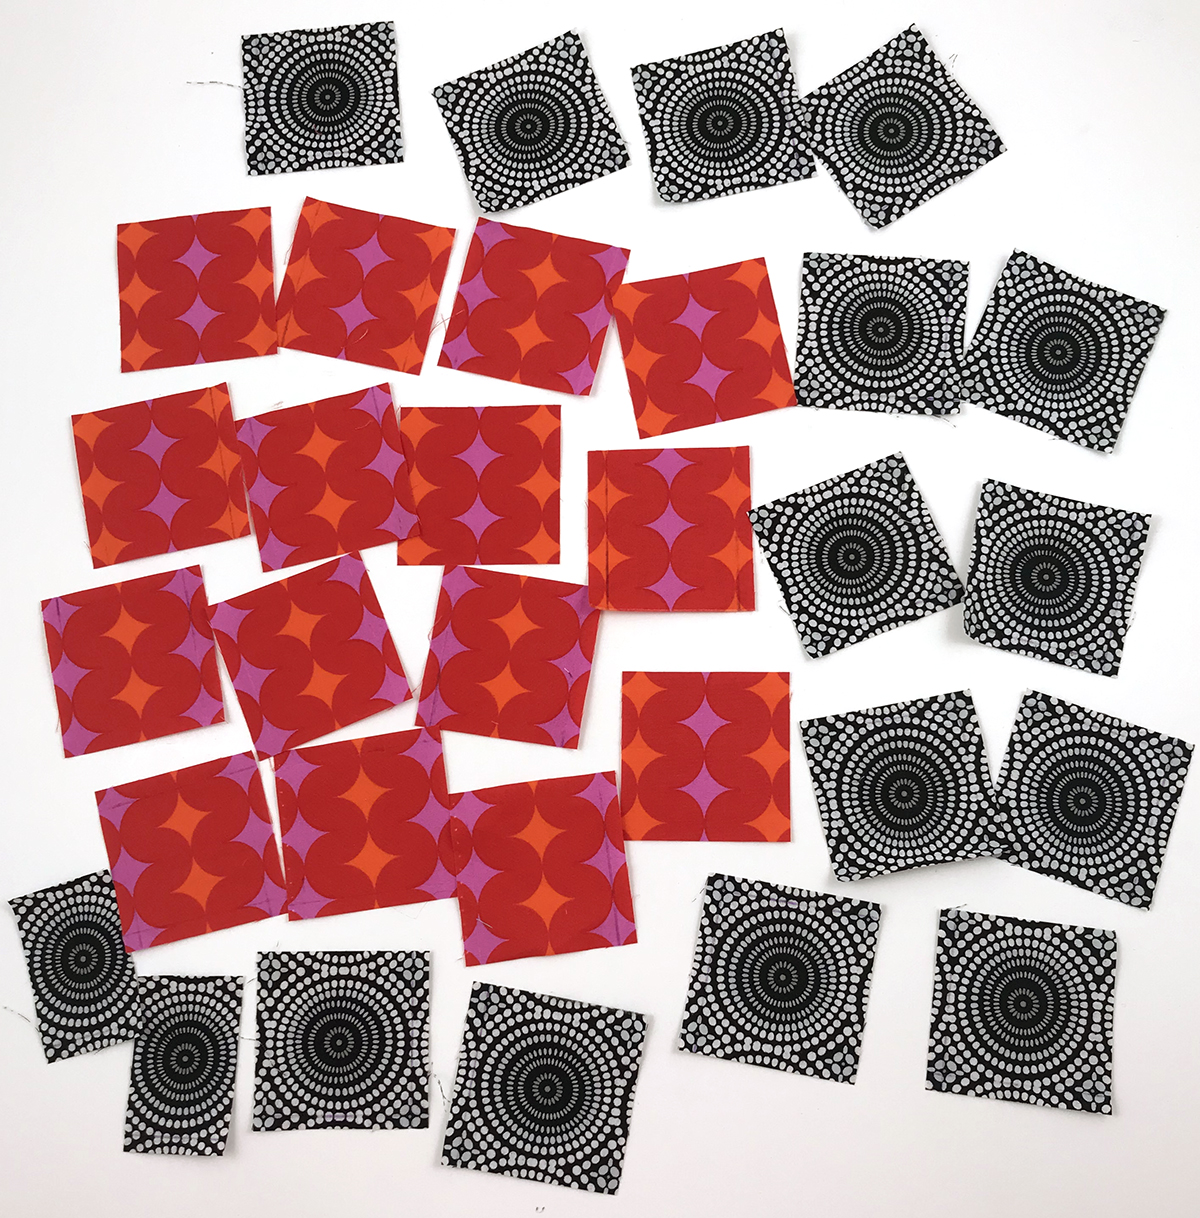
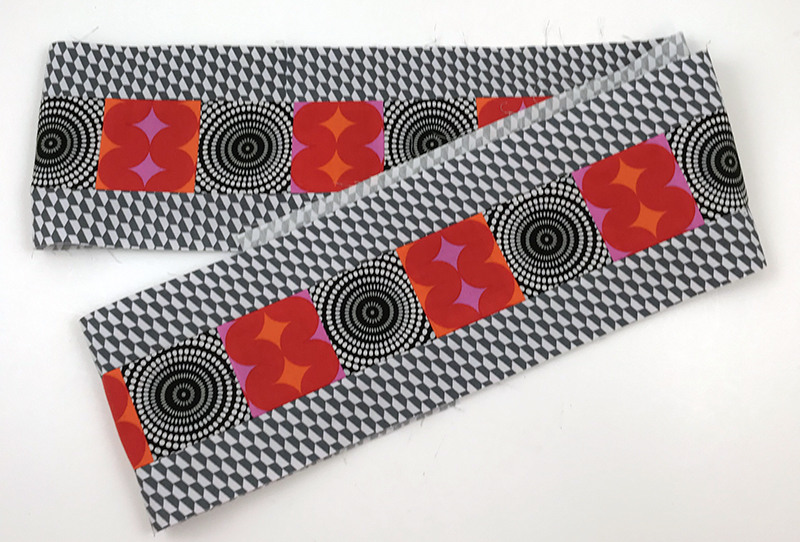
This is the Mosaic Dots print from Geo Pop – my fave!!!
Each circle is about 2″ in diameter.

You can choose to fussy cut the center of row 3 if you want, or let it be random. You can also choose to match up the pattern if you like. It’s not to hard too match the pattern – just pin and sew where the fabric repeats so the seam is less noticeable. Then trim off the extra fabric to 1/4″ seam allowance.

For my quilt, I fussy cut the center of row 3, but didn’t fussy cut any of the other strips since they were much skinnier. Refer to the QAL post from week 2 for tips on fussy cutting.
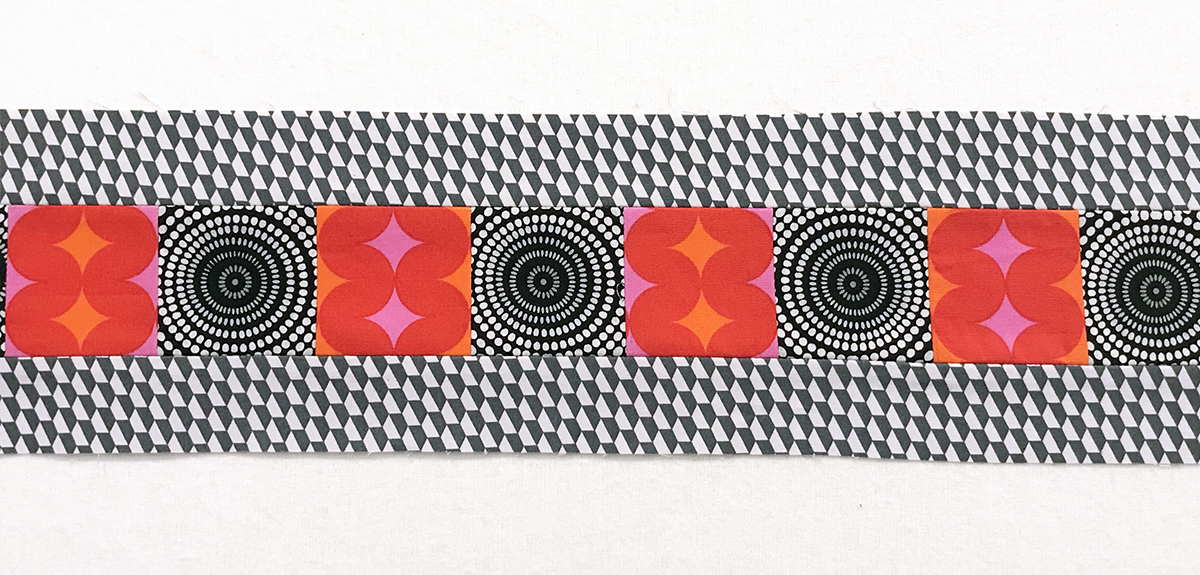
Sewing the Rows

To keep the long skinny strips for warping or stretching out of shape, sew the seams in opposite directions. An easy way to do this is to sew with the same fabric on top. So take a look at Row 3 below and notice the directions of the arrows:

Sewing DirectionSewing directions of each seam to prevent warping or bowing

If you sew with the black strip on top when sewing both long skinny strips to the center, you will automatically switch sewing directions as indicated by the arrows. You can also achieve the same result if you keep the center strip on top instead, sewing sewing both long seams. The choice is up to you!

Use the same technique with Row 5 and sew either with (1) the white strip on top for both seams or (2) the blue strip on top for both seams (even if it’s a slightly different fabric).

Switch Sewing Directions

Here’s a short, 1 minute video of me sewing the long skinny strips. I always start and end each sewing session with a scrap of fabric to catch stray threads. This prevents making a huge mess of thread on the back when you start sewing.

And there you have it – 2 more rows of our Infrastructure quilt!

Infrastructure Quilt Rows 3 and 5

GIVEAWAY & HEATHER’S VERSION

Pop over to Heather Black’s blog at Quiltachusetts to see her version of rows 3 and 5 made from Benartex Superior solids. While you are there, enter this week’s giveaway: an Accuquilt Go! Me Kit & Triangle Dies. You can also find out who won last week’s prize and remember, there’s a new fabulous prize each and every week from one of our sponsors!

Relevant Links:

Infrastructure Quilt

Infrastructure Quilt, designed by Heather Black and Made by Christa Watson

Infrastructure Quilt Along: Cutting and Sewing Row 2

This week we are working on Row 2 of Infrastructure Quilt Along which is making Fast Flying Geese. The basic unit is the same for all 3 colors of row 2, and I use a method called “4 at a time” that leaves very little waste and works perfectly, no matter what size units you need to make.

Infrastructure Fast Flying Geese

You need to make a total of 15 geese, which means you’ll have one of each left over which you can always sew into something else. Refer to page 4 (Row 2) of the Infrastructure Quilt Pattern for the correct size squares to cut, then follow the step outs below to make your geese.

I didn’t worry about fussy cutting any fabric in this row because the prints are pretty small scale to begin with and I especially love how the Op Squares print looks when it’s cut randomly.

Geo Pop Infrastructure Squares

So I used 3 different fabrics from Geo Pop to make the color gradation: Op Squares in Orange and Red, and Tiny Hex in Orange. I paired them up with Tiny Hex Gray for the background. If you wanted to go wild and crazy, you could make scrappy geese in similar colors. You could even use the same fabric for all of the geese if you wanted to tone it down – the choice is up to you!

With these highly geometric prints, I’m not at all worried about the direction of the design so I’m not trying to keep the gray background squares going all the same way.

Sewing Fast Flying Geese

Follow the instructions in the pattern on pages 8-9. I’ve shared step-by-step pics of the process below:

Two smaller squares are placed on top of one larger colorful square, right sides together, so that the marked lines match up.  You’ll be sewing on both sides of the marked line, 1/4″ away. For speed and efficiency, I like to chain piece by sewing all of one side of the units, and then all of the other side of the units.

Geo Pop Infrastructure

Once the seams are sewn, cut all sewn square units on the drawn line and press the seams so that you have a bunch of funky looking shapes that sort of look like a heart. Remember – I like to stitch with a shorter stitch length (2.0 instead of my machine’s default of 2.5) and press my seams open so they are nice and flat!

Infrastructure Geo Pop

Add another smaller gray square to the opposite side, and then sew on both sides of the marked line. Again, repeat for all of the units you are making.

Infrastructure with Geo Pop

Once you cut the unit on the marked line, you’ll have two complete flying geese units! Press the seams and trim off the dog ears. Notice in the picture below, the top flying geese unit hasn’t yet been cleaned up. The bottom one is ready to sew into the larger triple-geese unit.

Fast Flying Geese

Once you’ve sewn all of the geese units, group them into sets of 3 and join the three units together to create one pieced geese segment. I always press after the end of each round of sewing to keep my work nice and flat as I go.

Triple Geese in Geo Pop

When joining the geese, be sew to sew right through the point at the tip so they line up correctly. I’ve put a pin next to the point in the image below:

Fast Flying Geese Point

Pin generously and sew in opposite directions to keep the long pieced row from warping out of shape. Here’s what a section of it looks like with all of the seams pressed open:

Seams Pressed Open

Join all of the triple geese units to complete Row 2 of Infrastructure.

Finished Flying Geese

Here’s a quick video tutorial basically going over everything I wrote above:

Next week will be a bit of a break. We will be sewing two of the long strip rows together which will be easy peazy!! So if you are just starting, or haven’t even begun, not to worry – we are taking it nice and easy so you can sew along on your own schedule!

Geo Pop Infrastructure Geese

Giveaway & Heather’s Version

Pop over to Heather Black’s blog at Quiltachusetts to see her version and enter this week’s giveaway: a 6 month subscription to Make Modern Magazine!!

Make Modern

OTHER IMPORTANT LINKS

Fast Flying Geese

Don’t forget to share your progress! Tag us on Instagram @christaquilts  and @quiltachusetts and use the search hashtag #infrastructurequilt in your post so others can see, too! You can also share pics and ask questions in my Facebook group.

Infrastructure Quilt Along: Cutting and Sewing Row 1

Now it’s time to get down to the nitty gritty of making this amazing quilt design by my talented friend Heather Black! Scroll to the end for links to her version of the quilt as well as links to all of the quilt along posts.

Infrastructure Quilt

Click here to get the Geo Pop quilt kit, while supplies last.

If you’d like to work ahead and cut everything at once you are welcome to do that. However, I’ll be cutting and piecing each section, one week at a time. Today’s task is to make Row 1, below, shown on page 3 of the Infrastructure Quilt Pattern. Refer to cutting on page 4 of the pattern and sewing on page 8. If you would like to fussy cut your squares like I did, it will take a little more time, but it can give really cool results!Infrastructure Row 1

What is Fussy Cutting?

“Fussy” cutting means cutting your fabric in such a way that you are getting the exact part of the print that you want. You can do this by marking lines on your fabric where you will cut, or line up your ruler in the exact same spot when cutting. Usually, I don’t worry about the design of the print or the direction and all of the pieces end up looking random. However, with this quilt I thought it would be fun to take advantage of the strong geometrics in Geo Pop and cut around specific shapes to create a really cool effect.

Here’s a fast 4 minute video I created, showing how to fussy cut the Diamond Pop squares. Where you decided to fussy cut is up to you!

Important note: If you are fussy cutting the black/gray squares from exactly 1/3 yard of Mosaic Dots, you’ll need to first cut the strips to create row 3 (see pattern page 4). Then you’ll have just enough leftover to fussy cut the bullseye squares below.

Here’s what my fussy cut squares look like when they are all done. Remember, you can cut different areas of the fabric for less waste.

You can rotate the diamonds so they are all going the same way, or let them go in different directions for a more whimsical look! The bulls-eyes were cut from the Mosaic Dots print in black.

Sewing Row 1

The sewing is pretty straight forward and instructions are given in the pattern, but here are a few bonus tips:

Infrastructure Row 1

  • I’m using a shorter stitch length to piece (2.0 on my BERNINA instead of 2.5). This will make the seams a little stronger and will  help prevent the thread from showing through the seam. I’m also using a 1/4″ patchwork foot for precise seams and sewing slowly at the ends so that my seams don’t veer off as I come to the end of the unit.
  • I’m “chain piecing” which means I’ll sew two pieces together and then the next two without breaking thread in between. I recommend starting and ending a sewing session with a scrap of fabric to catch any stray threads.
  • I use a straight stitch plate when piecing. It seems to make a better stitch and prevents the fabric edges from getting sucked into the machine.
  • I’m using 100% cotton, 50 weight thread from my Aurifil Neutrals collection for piecing. It blends into most of the fabrics and is thin but strong.
  • I’m pressing ALL of my seams open. It takes a little longer to do, but the results are nice flat blocks which will create a nice flat quilt.
  • When sewing the block units together, I’m keeping the dark gray fabric on top at all times. This will automatically ensure that each of the seams is sewn in opposite directions so the row doesn’t warp out of shape.
  • I’m using lots of pins as I sew the top and bottom strips to the center section. Pin at the ends and then along the middle so that everything matches up. The number one cause of distortion in your quilt is when you ease in extra fabric when joining long pieced sections with strips.

Here’s another quick 2 minute video tutorial showing how I press my seams open:


Once the row is complete, I’ll give it a quick final press again from the back and also from the front. Then I’ll set it aside where I can keep it nice and flat. My design wall works great for this, but you can also hang it up on a hanger in your closet folded in half over a thick rounded clothes hanger.

Here’s a closeup of Row 1 so you can see how fun it looks when the fussy cut squares are all sewn together!

Infrastructure Row 1

Giveaway Time & Heather’s Version!

This week’s giveaway is sponsored by Benartex. They are giving a way a few bundles of their brand new Superior Solids. These are the fabrics that Heather is using in her version of the quilt. So pop over to her blog to see what her version Row 1 looks like in solids. While you are there, be sure to enter the giveaway and see who won last week’s prize!

Benartex Superior Solids

Share Your Work

Be sure to share pics of your progress on instagram by tagging us @christaquilts  and @quiltachusetts and use the search hashtag #infrastructurequilt in your post so others can see, too!

You can also share pics and ask questions in my Facebook group (whether or not you are making the quilt!)

Infrastructure Row 1

Finished Row 1 made from Geo Pop fabric.

Other Important Links

Next week we will make Row 2 – I can’t wait!

Infrastructure Week 1 – Quilt Design and Fabric Prep

It’s finally here!! The start of our Infrastructure Quilt Along!! I love sharing quilt alongs with you because I get such joy out of encouraging others to make a complete quilt from start to finish. To kick off the QAL first we’ll discuss a bit about the design and then prep our fabric so we are ready to start cutting and sewing next week.

Infrastructure Quilt

Infrastructure Design

This was a fun collaboration between me and my talented friend Heather Black of Quiltachusetts. I asked Heather to design a modern block of the month type quilt without any curved piecing (her specialty) that would really showcase my Geo Pop fabric line. I was thrilled when she came up with this design and then I had the fun of breaking it down into sections and writing up the pattern.

Because Heather is such a fabulous designer, she had two ideas of how it could go together, either in blocks or rows. I decided that rows made more sense and figured that if we divided the design into 9 rows, that would work well to create the top row by row. Here’s an overview of each section of the quilt, which is explained step by step in the quilt pattern.

Infrastructure Diagram

You’ll notice there are some piece-heavy rows and some fairly simple pieced strip rows. This will allow us to keep up the interest while putting the quilt together over the 12 weeks, but also give us a few breaks so we don’t get burned out. You’ll also get to try out lots of different piecing techniques along with some optional fussy cutting!!

I highly recommend using the Tri-Recs ruler set for cutting the anvil blocks and diamond blocks. The pattern includes full size templates, but the ruler is so much faster and easier  – and I use it for lots of quilt patterns that I design.

Tri Recs tools

Prepping the Fabric

Geo Pop Bundle

I’m using all 25 Geo Pop fabrics for my  version of Infrastructure. Of course you can make any fabric substitutions that you like – see the back cover of the pattern below for similar colors to use.

Infrastructure Supply List

I’m a big advocate of prewashing because I’ve seen too many accidents occur even with high-quality fabric. I recommend separating lights and darks, and washing the fabrics using a couple of dye magnet sheets like Shout Color Catchers in the wash. This will help catch any excess dye and will prevent it from redepositing onto your fabric in places where you don’t want it to be.

Shout Color Catcher

If you are working with smaller chunks of fabric like less than 1/2 yard, you can put the fabrics in a mesh laundry bag to keep them from getting all tangled up.

After my fabric is washed, I iron it and starch it. I use a hot, dry iron on the highest setting and cheap starch from the grocery store. My favorite brand is Faultless premium starch.Binding

Starching Tips

To prevent flaking, I spray starch completely on one side of the fabric I’ll be using. I let it rest for a few seconds, and then flip the fabric over to the back side to iron (the non starched side). Once that’s done, I starch the side I just ironed, and then flip it over to the previous side and press again. So I’m adding starch to both sides and ironing both sides, but the iron doesn’t burn the starch since I’m pressing from the opposite side. The starch makes the fabric stiffer so that there’s less stretch while manipulating it.

Check out this short video on how I starch and press my fabric:

Share Your Fabric Pull

Once you’ve decided on which fabrics you’ll use, be sure to tag us on instagram @christaquilts  and @quiltachusetts and use the search hashtag #infrastructurequilt so we can all admire your pretties!!

You can also share pics in my ChristaQuilts Facebook group and ask questions as you are getting ready. We’ll dive in and make Row 1 next week and I can’t wait to see your progress!

Enter the Givewaway!

Head over to Heather Black’s blog at Quiltachusetts to see which fabrics she’s working with and enter this week’s giveaway. The prize is a copy of EQ8 software from Electric Quilt! I use EQ8 for ALL of my quilt designs. In fact, I was able to take Heather’s original sketches, redraw them in EQ8 and easily recolor the quilt pattern using swatches of Geo Pop.  Now I can’t imagine making quilts without it!

Electric Quilt 8

Important Links

Infrastructure Kit

Infrastructure Prize Sponsors, Giveaways, and Geo Pop Digital Download

Infrastructure quilt along begins next Monday, Sept. 9th so today is a great time to tell you about our sponsors! My co-host Heather Black (aka Quiltachusetts) has rounded up some fabulous prizes that will be given away on her blog each week.

Infrastructure Sponsors

Because Heather is super organized (like me) she’s scheduled out the prizes for the entire quilt along. Check out the schedule below and be sure to head over to each company’s website to give them some love!! I can’t wait for you to see what’s up for grabs each week!!

Click here for the Infrastructure quilt along schedule & supply list.
We can’t wait!!
Infrastructure QAL

Geo Pop Digital Images Available from Electric Quilt

For those of you who love and use Electric Quilt software like me, you can now download digital images of Geo Pop right into your program. Each month, my friends at EQ offer a images of a brand new line for free, so this is a great time to play around with the fabric swatches and make virtual quilts to you heart’s content!

Click here to get Geo Pop digital images.

Geo Pop EQ

From now until the end of the year you can use the promo code GEOPOP to receive 20% off their whole site, including 20% of the EQ quilt design software!

Infrastructure Supply List and Quilt Along Links

Click here to be notified about the QAL each week via email.

Are you excited to make Infrastructure? Heather Black and I will both hosting the quilt along and sharing tips and tricks for making the quilt on our blogs each week. See below for the supply list along with links to all of the quilt along posts as they go live.
Infrastructure Quilt

Infrastructure designed by Heather Black of Quiltachusetts, pattern written by Christa Watson

Infrastructure Supply List

Infrastructure Quilt Pattern:
Recommended Ruler Set:

Tri Recs Tools


Fabric Requirements:

Infrastructure Supply List

Other Recommended Supplies:
  • Natural fiber batting such as Hobbs Cotton or Wool
  • Olfa Rotary Cutter with brand new blade
  • Cutting mat and a variety of acrylic rulers
  • 505 basting spray if you choose to spray baste your quilt
  • Sewing machine in good working order
  • Brand new needle
  • Hand sewing needle and thimble for binding by hand
  • Thread for piecing and quilting – I recommend my Aurifil 50 weight thread kits
  • ***If using a die cutter instead of the ruler or included template, I recommend the  Accuquilt Triangle in a Square 4″ Finished Square Die # 55409***

Piece and Quilt Collection Aurifil Thread by Christa Watson

Click here to get my Piece and Quilt thread collections from Aurifil.

Alternate Color Way in Solids

Heather will be making her version using Superior Solids by Benartex.

Infrastructure in Solids by Heather Black

Click here to follow Heather on her blog at Quiltachusetts

Infrastructure Quilt Along Schedule

Both Heather and I will share our process as we make the quilts. She’ll be custom quilting hers on a longarm machine and will bind by machine. I’ll be quilting mine using a decorative stitch with my walking foot and will bind by hand. Links to both of our blogs will go live below after each step has been posted.

Infrastructure QAL

Share Your Progress on Social Media

We can’t wait to get started! So gather your fabrics and get ready to make a complete quilt from start to finish!!

Infrastructure Kit

Click here to get the Infrastructure Quilt Kit while supplies last.

Save the Date: Infrastructure Quilt Along Begins September 9

I’m thrilled with the reception that my Color Weave quit along received this spring/summer, and now it’s time to get ready for the next one! If you want to learn how to make an entire quilt from start to finish, click here to join the fun, and I’ll send you a reminder once the next QAL begins.

Infrastructure QAL

Infrastructure is a Modern Row Quilt designed by my friend Heather Black of Quiltachusetts. I wrote the pattern based on her design and now I’m excited to make it using my brand new Geo Pop fabric which has just started arriving in quilt shops!!

Heather is going to make her version using using Benartex Superior Solids which will look just as fabulous! I’ll be quilting mine on a domestic sewing machine while Heather will quilt hers on a longarm so you’ll learn lots of tips and tricks for doing both.

Infrastructure Quilt

Heather originally designed this pattern in Adobe Photoshop. I was able to redraw in EQ8 software enabling me to break down the design and the write a comprehensive pattern.

Infrastructure Quilt Along Overview

The quilt along will run for a total of 12 weeks: we’ll spend 9 weeks cutting and piecing the rows and assembling the quilt top. Then we will spend 3 weeks basting, quilting and binding. You’ll have plenty of time to follow along will and you’ll actually have a finished quilt by the time we are done! Along the way, you’ll learn how we approach making the quilt and I’m even going to throw in some video tutorials, too. I can’t wait!!

The quilt along itself is completely free; all you need to purchase is a copy of the quilt pattern using one of my links below:

I’m also offering Geo Pop quilt kits while supplies last. Click here to grab yours.

If you’d like to choose your own fabrics, see the materials requirements from the back of the quilt pattern below. Just pick fabrics in similar colors to get the same look as mine. You can click the image to enlarge:

Infrastructure Supply List

There Will Be Prizes!!

Heather will be coordinating weekly giveaways during the quilt along, from a wonderful group of sponsors shown below. Think of it as a great incentive to keep on going throughout the entire event!

Infrastructure Quilt Along Sponsors

I’ve gathered my fabrics and the first thing I’ll do is prewash, starch and press them. Prewashing is a matter of personal preference, but I do it to wash out any chemicals, preshrink the fabric, and get out any excess dye with fabric color catchers. I’ll meet you back here with an update at the end of the month. In the meantime, let me know if you plan to join, and click here to sign up for my quilt along newsletter!

Geo Pop Bundle

Click here to get Geo Pop fabric, bundles and kits.

New Quilt Patterns Featuring Geo Pop!

I’m excited to release three new patterns that I created to showcase my new fabric line, Geo Pop which will be shipping to stores in August/September. Just like all of my quilt patterns, they will look great in any fabrics you choose! And they are available in either print or PDF.

Bling – Fat Quarter Friendly

Bling Quilt Pattern by Christa Watson

Bling comes in three sizes and is made from 20 fat quarters plus background. I loved the design so much I had to make it twice! The key to color success is choosing a very high contrasting background. I wanted to show off the black and white prints from Geo Pop and I love how they turned out!

Optical Illusion – 3 Colors, Fun to Look At!

Bling Quilt Pattern by Christa Watson

It only takes 3 fabrics to create this stunning Optical Illusion! Scroll up and down to watch the lines play tricks on your eyes. Yes, they really are straight!! I’ve made my version using geometric prints in black, white and gray, but I’d love to see this made up in other colors, too! I’ve included instructions for 3 sizes and like all of my patterns, it also includes machine quilting suggestions.

Infrastructure – a Modern Row Quilt

Infrastructure Quilt Pattern

This stunning quilt is a collaboration between me and my very talented friend Heather Black. I sent her digital images of Geo Pop early on and asked her to come up with a fun modern design with straight piecing (rather than the curves she’s well known for). I think she knocked it out of the park with this design while cleverly using every fabric in the line. I love this quilt so much that it will be my next quilt along in September, once the fabrics have been released. I can’t wait!!

Once Geo Pop hits stores later this year, I’ll share more about the making of each quilt. Remember – I’m here to cheer you on every step of the way so that you enjoy making these quilts as much as I did!