Earlier this week, I shared my Infrastructure quilt finish, along with links to all of the quilt along tutorials. Today I’m back with more inspiring versions of this quilt made by others. I love to see the same design made up in different fabric, don’t you??
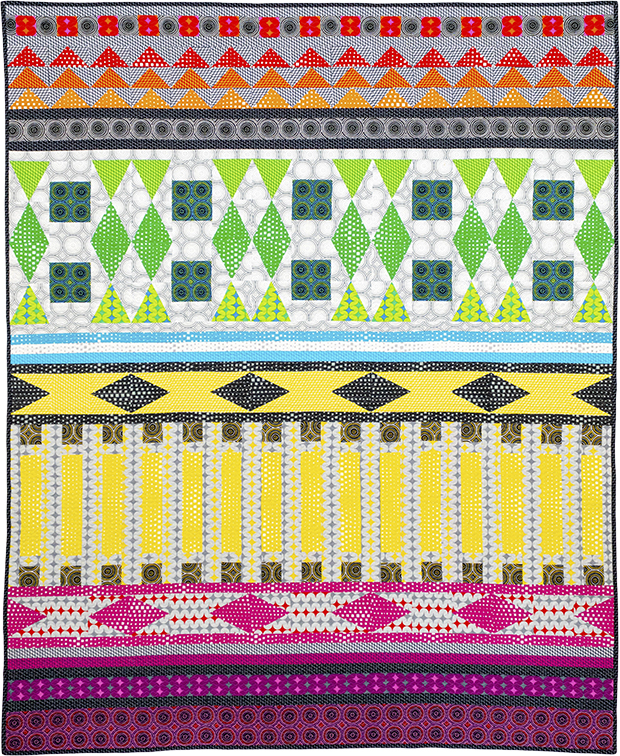
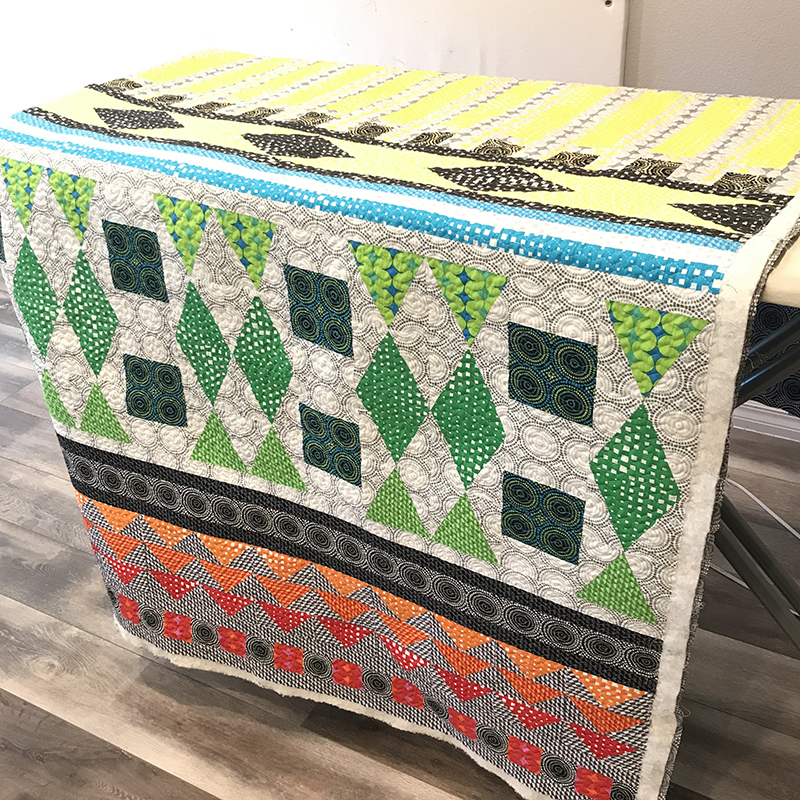
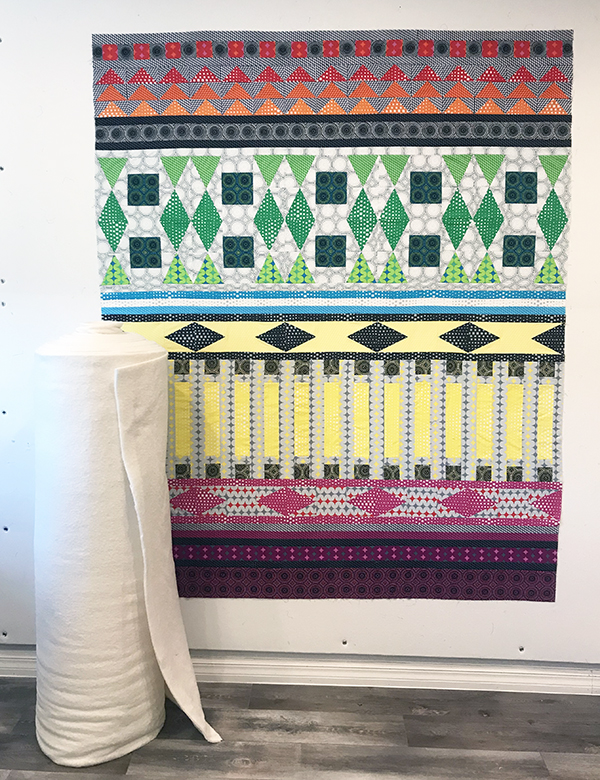
My version of Infrastructure quilt made with Geo Pop fabric.
Heather Black’s Version Made from Solids
Heather Black originally designed this quilt for me to show off my Geo Pop fabric line. But then she made her own version using Benartex Superior Solids. The color placement is basically the same, but the solids really allow her amazing machine quilting to shine!
Whenever I do a quilt along, I always emphasize that I want everyone to work at their own pace. But it was really fun to follow two of the participants on Instagram as they kept up each and every week. Check out their beautiful versions of Infrastructure below:
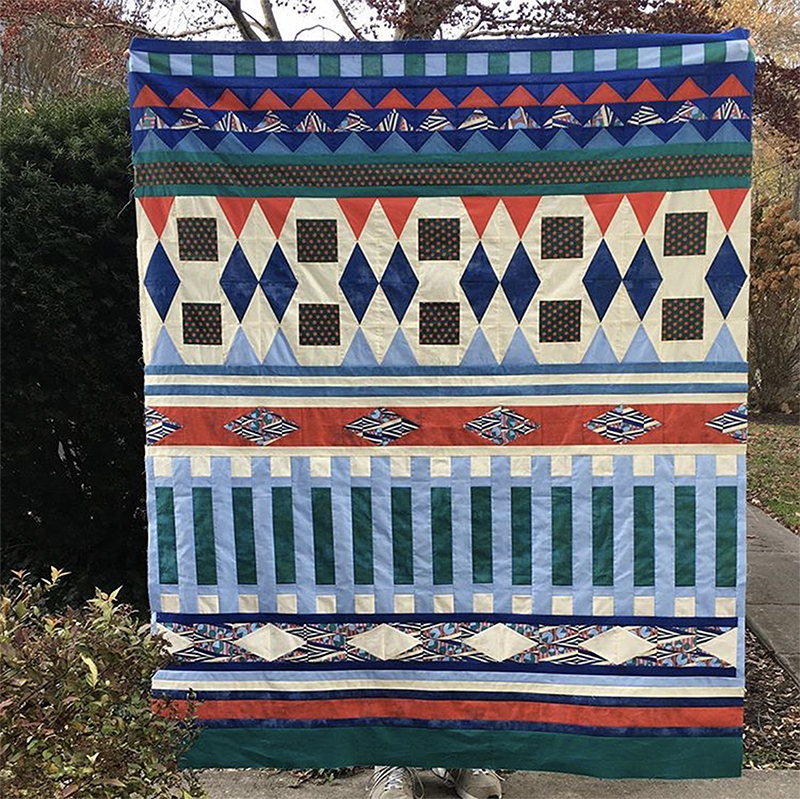
This lovely quilt top was made and shared by Margaret Fleisher on Instagram. I love her color choices and clever use of fabric. Now I’m excited to see how she quilts it!
If these have inspired you to make more quilts in the new year, be sure to check out my quilt along web page. It’s a roundup of all of the quilt alongs I’ve done so far. You may just find the perfect quilt you’ve been looking for!
I had the most amazing time making my Infrastructure quilt and sharing each step of the process with you. I’m excited to share more pics of the finished quilt along with links to all of the previous quilt along tutorials and videos. I hope it inspires you to make your own version!
I want to continue to be a cheerleader for “Start to Finish” quilting. Although I know that everyone has their favorite part of the quilt making process, I’m happy to guide you through the entire journey.
Have you enjoyed following along with Infrastructure? Remember, even if you haven’t even started your quilt, you can make it anytime and I’m here to help cheer you on! We’ve come to the very last step of making the quilt and I’m “sew” excited to share my tutorial for binding by machine.
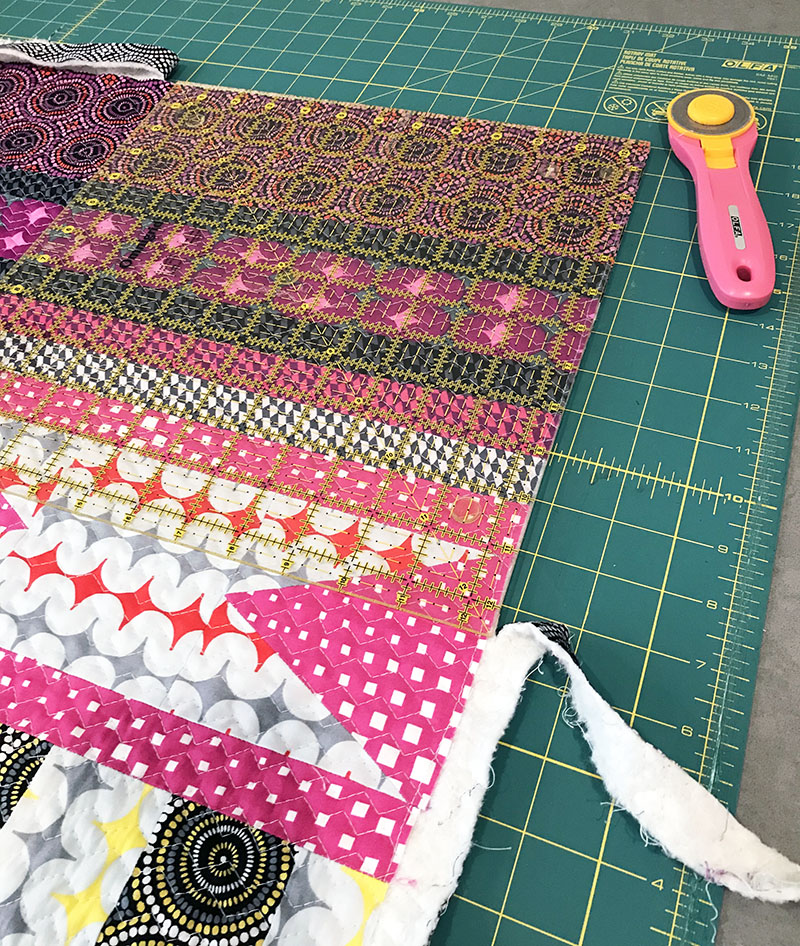
I like to use a large square ruler at the corners and along straight ruler for the sides. I trim the extra batting and backing flush with the edges of the quilt so that I can get a nice, tight binding. I’ll sew with an accurate 1/4″ seam and try not to cut off any points along the edges.
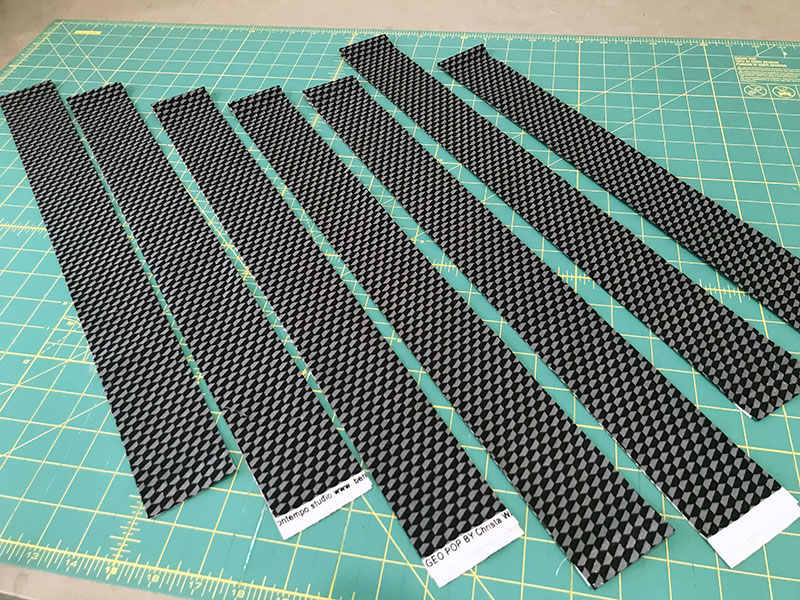
Step 2 – Cut the Strips and Sew Continuously
The length to cut your strips is a personal preference. For this quilt I experimented and cut them out at 2 1/2″ wide so it would give me enough room to finish by machine. But I usually like to cut them narrower at 2″ so I get a nice tight binding that’s even on both sides. Here’s an easy way to calculate the # of strips you’ll need. Take the perimeter of the quilt and add 10″. Then divide that number by 40″ and that will tell you how many strips to cut.
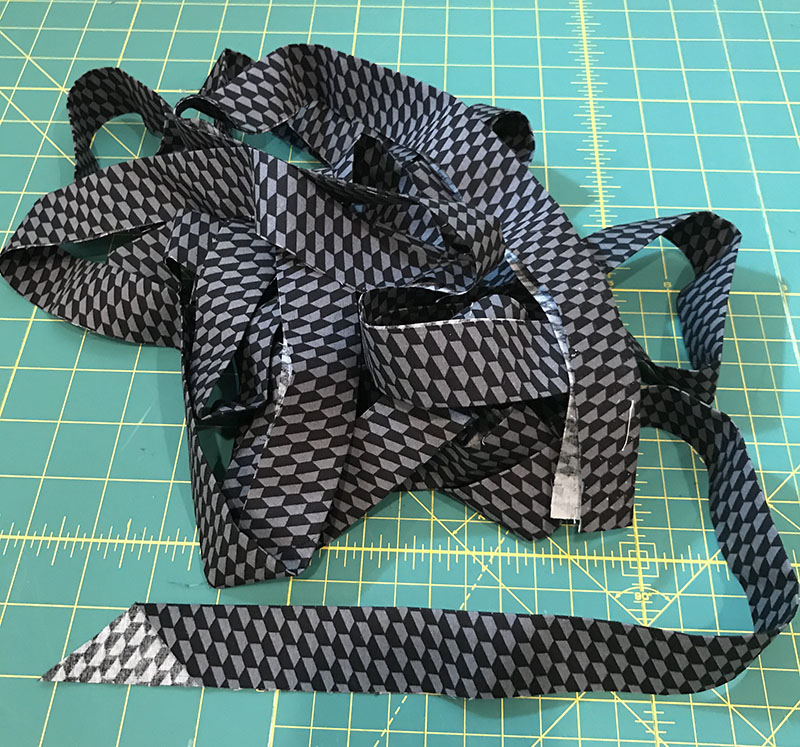
Sew the strips together end to end, mitering each of the corners so you get a long continuous strip. Cut one end at a 45 degree angle so the end and beginning are hidden. Then press the entire binding in half, wrong sides together.
Step 3 – Bind by Machine
Sew the binding to the BACK of the quilt and then secure it to the FRONT of the quilt with a decorative stitch so that it becomes part of the design!
Watch me sew the Binding & Follow Me on YouTube!
I’ve put together a short 6 minute video showing how I sew the strips and attach the binding by machine.
The difference between hand binding and machine binding is which side of the quilt I sew it on. I sew it to the back and finish by front by machine. Or I sew it to the front and finish on the back by hand. But whichever technique you choose is completely up to you!
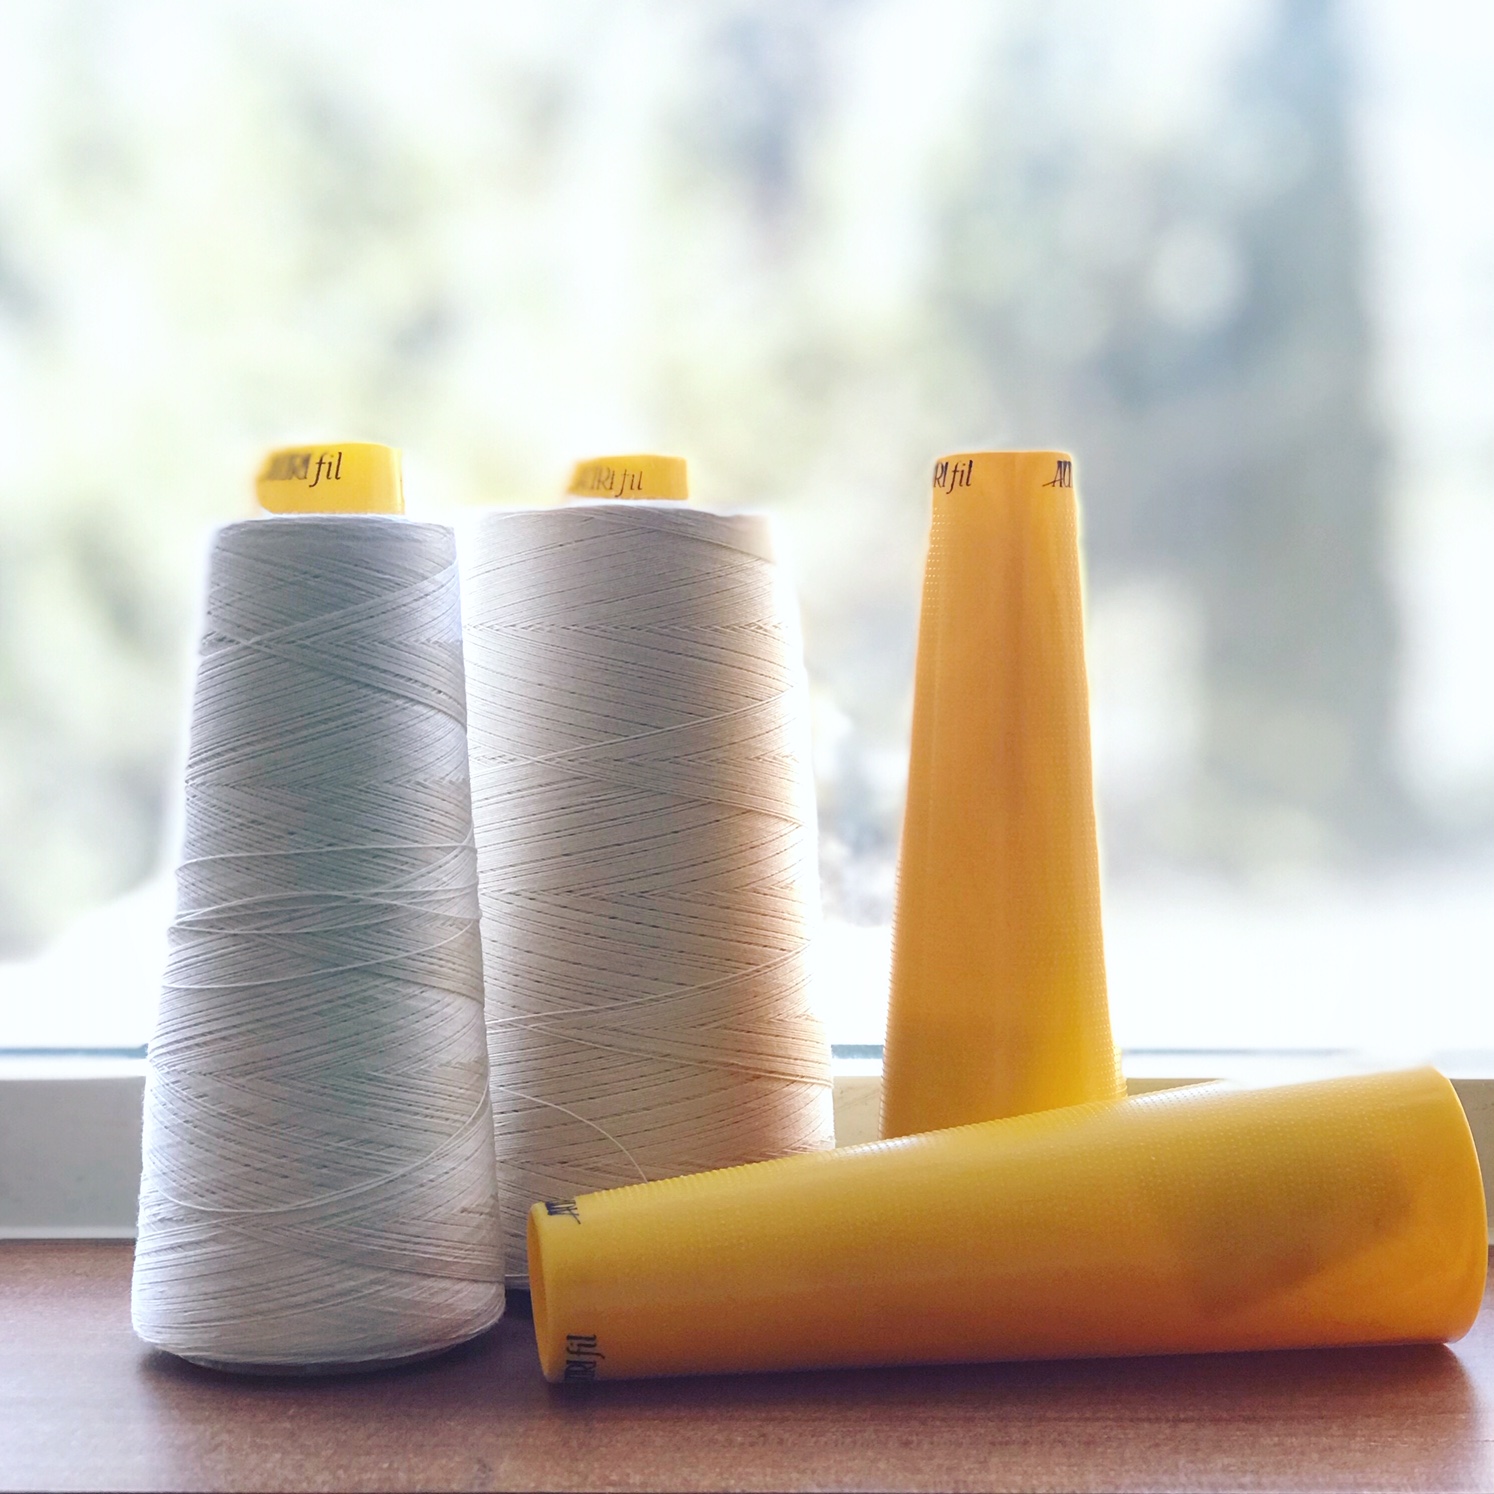
While you are there be sure to enter the giveaway on Heather’s blog. Aurifil is giving away two large cones of their 40 weight, 3 ply thread in fave colors of dove and light beige.
I sure love seeing everyone’s progress pics. You can also share on instagram by tagging us @christaquilts and @quiltachusetts and use the search hashtag #infrastructurequilt in your post so others can see, too!
And now we get to my favorite part of making a quilt – machine quilting!!! There are so many different ways to quilt this quilt. Heather Black did an amazing job custom quilting hers, and I took the opposite approach with one of the simplest designs you can do – decorative machine stitching.
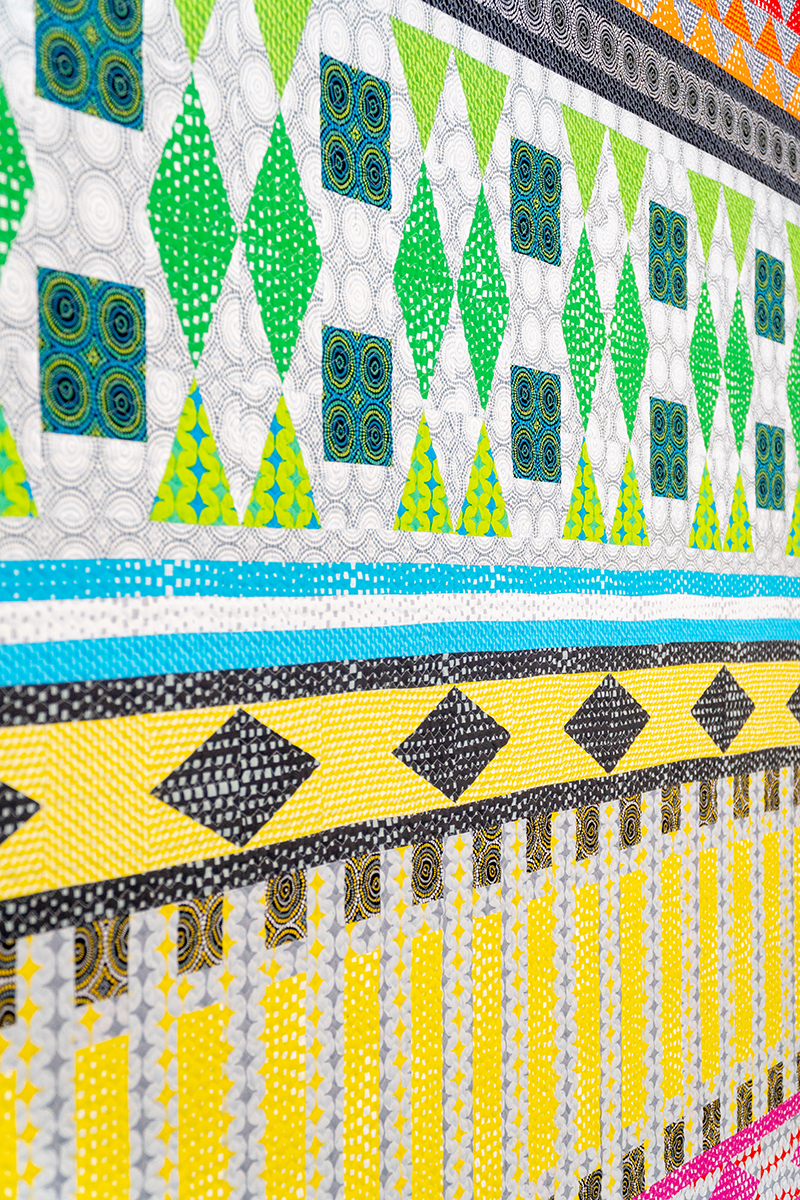
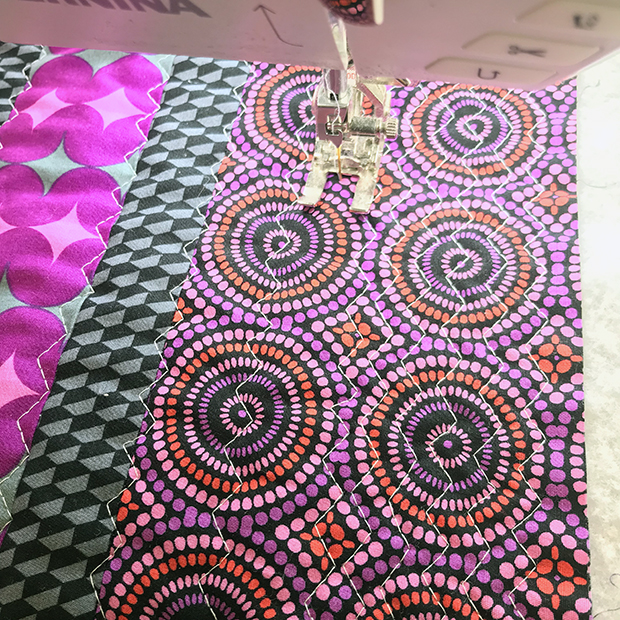
Infrastructure Machine Quilting Detail Using a Decorative Stitch
So the first thing to do is choose the thread you’d like to quilt with. I piece AND quilt all of my quilts using Aurifil, 50 weight, 100% cotton thread from my 3 thread collections. It’s thin, yet strong and blends into my quilts so all you see is the yummy texture. I use leftover bobbins for piecing my next quilt and I never have to worry about which bobbin matches which spool since they are all the same weight!
I like to use the same color thread in top and bobbin so that I don’t get “pokies” on my quilt – those little dots of thread that appear when your tension is the tiniest bit off and you are using highly contrasting thread.
I used Aurifil #5007 light gray/blue from my Neutrals thread box. It’s one of my favorite go-to neutrals because it blends with nearly every color. When I’m doing an allover edge-to-edge quilting design, I don’t want to have to stop and switch thread colors while I’m quilting.
Because the spools hold so much thread on them, it took me less than one spool to quilt the entire quilt, including the front and back.
Make a Quilting Plan
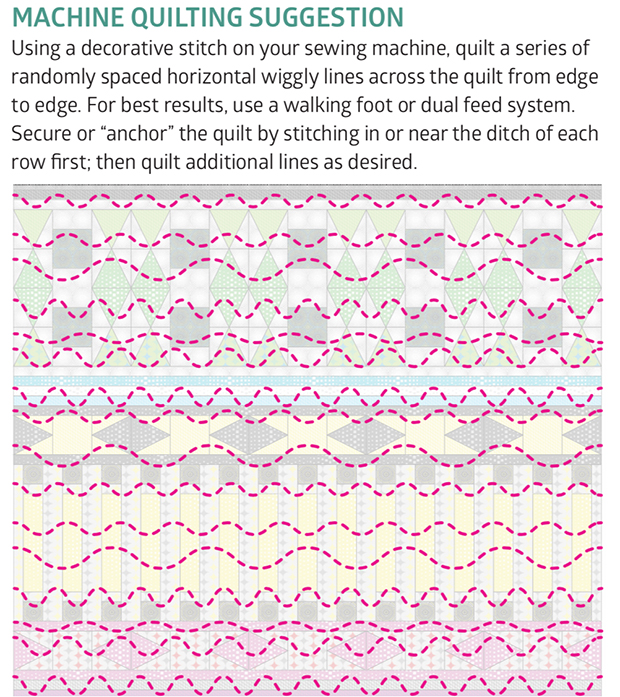
I love figuring out HOW I’m going to quilt ahead of time, so I don’t have to think too much. I will usually print out a copy of the quilt top from the pattern (you can photocopy the pattern cover for personal use, OR you can take a picture of your finished quilt top). Then I draw all over it until I come up with something I like. I include quilting suggestions in ALL of my quilt patterns to help you out with each quilt you make.
Above is the illustration that’s included in my Infrastructure Quilt Pattern. Here’s the basic idea: choose a decorative stitch on your sewing machine and quilt a series of lines across the quilt from one side to the other.
Make them as light or dense as you like and use my “divide and conquer” method: quilt one set of lines “near” the ditch instead of IN the ditch for each row. Then go back and quilt additional passes across the quilt, shrinking up the open spaces until the entire area is filled.
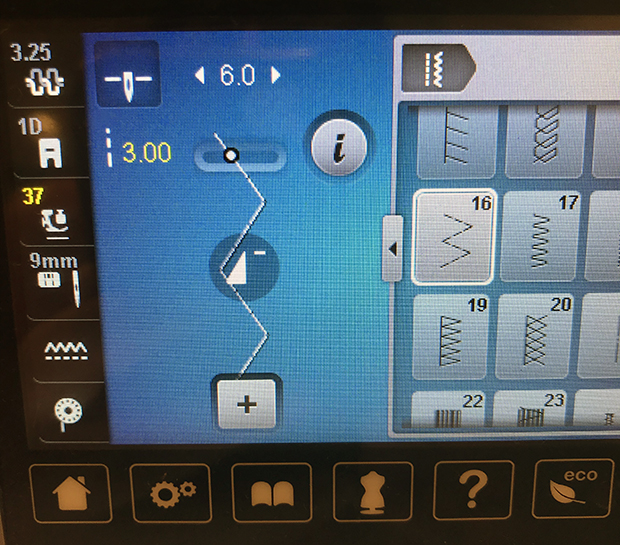
You can use ANY decorative stitch on you sewing machine. Play around with length and width settings until you find something you like, and stitch on a practice sample before you quilt on the real thing. Here’s a picture of the settings I chose on my machine, a BERINA 770 QE:
I’m using decorative stitch #16 which is known as a running stitch or a broken zig-zag. It creates several stitches each time it zigs and zags, so you can make it bigger than the default settings and it still looks great! I adjusted my width to 6.0 and my length to 3.0 because I like the way it looks. Don’t forget to use a zig-zag needle plate so you don’t break a needle when it moves back and forth!!
The Quilting
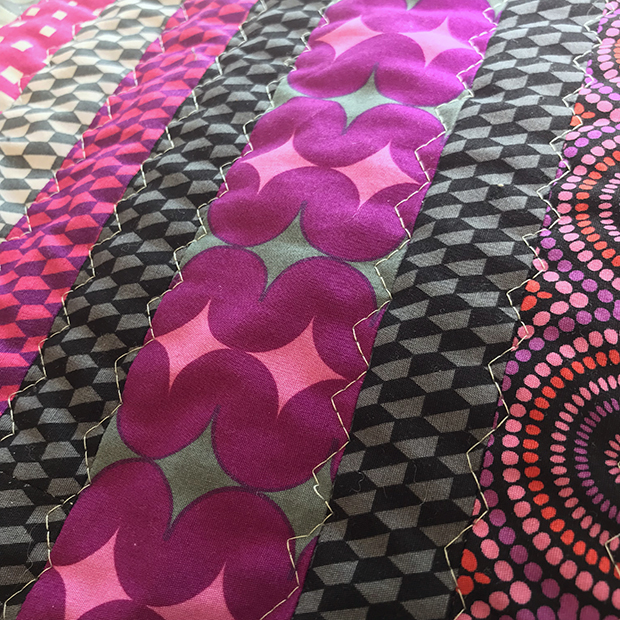
Here are some beauty shots of the decorative stitch quilting in process. I made sure to NOT try to line up the quilting lines perfectly because I love a more organic look. The more quilting I did, the more beautiful texture it added to the quilt and the more the thread blended in. After all, the best way to hide imperfect stitches is to surround them with MORE imperfect stitches!!
Here’s what it looks like when I’m stitching “near” the ditch in each row. You can see all the imperfections up close, but fortunately they get hidden when more quilting is added.
I’m filling in the spaces between the first pass with randomly spaced lines. I’m using the 20D foot on my BERNINA with the integrated dual feed. It works just like a walking foot and I don’t have to mark anything. I’m using the edge of the foot as a guide for some of the lines.
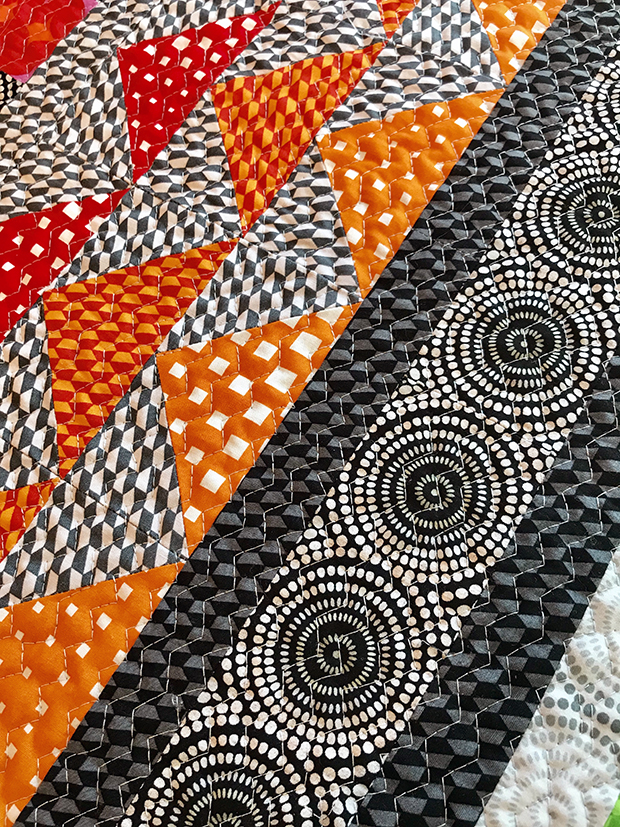
What this section looks like when it’s completely filled in.
None of the lines match up and some are a bit irregular – I love this look!!
Another section complete. Look how well the stitching blends in to the quilt!
This is one of my favorite designs because it adds great texture to ANY quilt!
See it In Action
Here’s my latest YouTube video, showing me quilting this decorative stitch on my quilt. It did take a few hours to accomplish, but I just worked on it a few minutes at a time over several days. It’s my joy and my zen when I get to do mindless quilting like this, and once you let go of perfection, it’s really quite fun!
Next week we’ll finish up with machine binding, including another video tutorial – so stay tuned!!
This Week’s Giveaway & Heather’s Version
Heather did some amazing custom quilting on her computerized long arm machine. Pop over to her blog at Quiltachussetts for more about how she chose her designs.
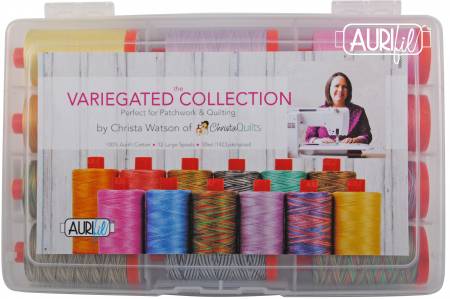
While you are there be sure to enter the giveaway on Heather’s blog. One lucky winner will receive one box of my Variegated thread collection, courtesy of Aurifl!! How cool is that???
How is your Infrastructure quilt coming along? Just remember, you can work at your own pace and if you are new, you can start this quilt any time! This week is quilt top assembly plus a complete basting video on YouTube. Keep reading for more….
Tips for Quilt Top Assembly
Once all 9 rows of Infrastructure have been sewn, it’s time to sew them together. They may look a little wavy, but if you sew each section in opposite directions, that will help eliminate some of the waviness.
If your rows are not all the same size, you can add coping strips, trim off some of the excess, or use lots of pins to ease in any fullness. Always sew with a “baggy bottom” which means sew with the longer strip on bottom and the feed dogs will help compensate. If needed, you can always go back and increase or decrease the seam allowance of some of the rows to get them all the same size.
Once the quilt top is sewn together, you want to take a “victory lap!” Sew about 1/8″ from the perimeter on both sides of the quilt to secure the edge seams from splitting open. This isn’t necessary for the top and bottom of the quilt since those are long strips of fabric without seams. When your top is finished, give it a final pressing and you are ready to baste!
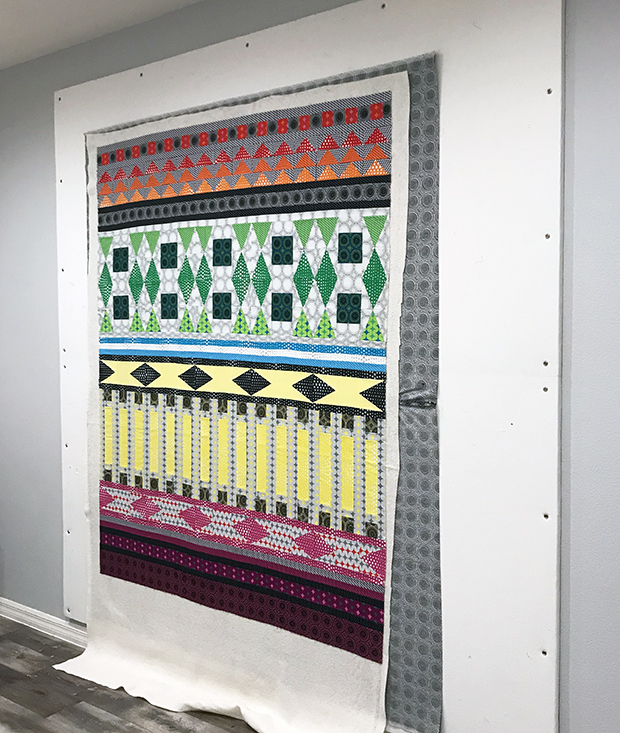
Basting the Quilt – Quick Overview
I baste using my design wall and 505 basting spray. I make sure my batting and batting are bigger than my quilt top and I trim away some of excess after it’s been basted. I spray the top and backing outside separately, then assemble all the layers on my design wall, taking care to smooth each layer as I go.
Once everything looks nice and flat, I’ll roughly trim the edges so that only and inch or two remain around all 4 sides. I cut off as much extra as I can to prevent it from tucking under the back and quilting the quilt to itself!!
The final basting step is to iron the quilt on both sides to set the glue and smooth everything out one final time.
Full length Basting Tutorial on YouTube
Here’s the complete step-by-step basting process. The total video is just under 7 minutes because I’ve sped it up in several parts so that you don’t have to watch it in real time. In reality it still didn’t take very long – only about 45 minutes from start to finish to baste my quilt.
GIVEAWAY & HEATHER’S SOLIDS VERSION
Pop over to Heather Black’s blog at Quiltachusetts to see her week 10 post, made from Benartex Superior Solids. While you are there, be sure to enter the giveaway. One lucky winner will receive some Hobbs batting – which is the same batting I used to make my quilt. My favorites are the cotton/wool blend or the 80/20 cotton poly. It’s easy to work with and makes the quilt soft and cuddly!!
Both Heather and I would love to see how you are progressing, even if you make this quilt long after the quilt along is over! Here are all the ways you can share with us:
Leave a comment here on the blog, and add a link to anyplace you want to post pics
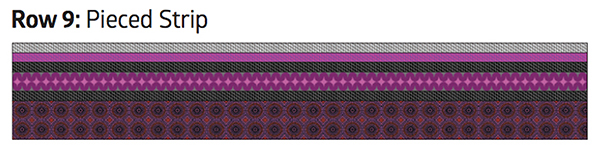
This week we are making the last row of Infrastructure quilt – can you believe it??? Row 9 features simple pieced strips and it’s another great chance to fussy cut the Geo Pop fabric if desired.
First I’ll walk you through the process to piece this row, then you can take a look at the bonus YouTube video I created while making this row.
Cut the Strips
You want to cut nice straight strips according to the pattern instructions on page 6. If you are fussy cutting, you’ll want multiple strips of the same fabric to be cut at the same point so that you can match up the patterns.
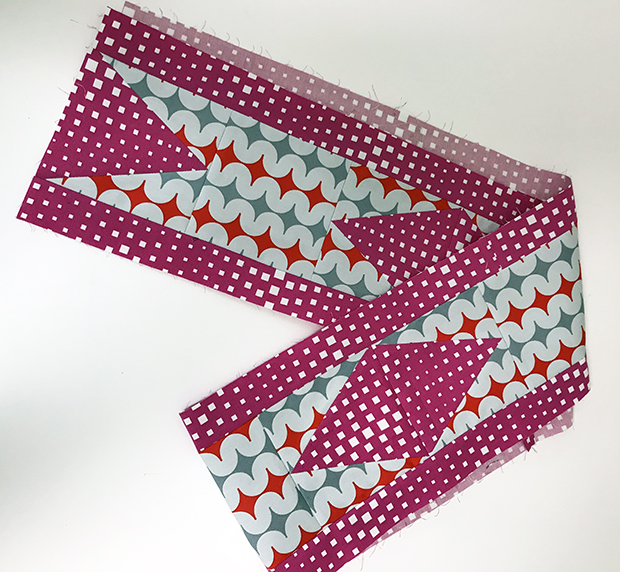
To match patterns, I found the same spot on the fabric and pinned it in place so that I could sew right where the design repeats. In the image below, that darker shadow in the photo is where I’ve folded over the fabric so that the pattern will be continuous.
Once I sew the seam from the backside, it won’t be noticeable on the actual quilt. The seam allowance will be larger on the back when I sew it; I’ll trim it down to 1/4″ after it’s sewn.
Sew in Opposite Directions
When sewing long skinny seams, they can bow or warp out of shape. So I make sure that I switch the sewing direction to compensate. Here’s how I do it. There are 6 rows here, so I sew two pairs at a time. The first pair will have the Grey Tiny Hex fabric on top. The next two pairs of strips will be sewn with the Black Tiny Hex fabric on top.
When I join the sewn rows, I’ll continue to sew with the black fabric on top, and that will automatically switch the sewing direction each time.
Don’t forget to sew with a shorter stitch length and press those seams open! I press each time I sew a seam so that task stays easily under control.
Bonus YouTube Video
I’ve prepared a 4 minute-long YouTube video walking you through the above steps, plus a couple of fussy cutting tips thrown in. Hopefully this will help you cut and sew long strips with ease. In this video, I’m narrating the entire time so you can follow along with what I’m doing. Be sure to subscribe to my channel. If there’s continued interest, I’ll make more videos in the future!
Click the “Play” button below to watch the video on YouTube.
Row 9 Finished
Row 9 is finished and now the entire quilt top is ready to assemble next week. As you prepare to join the pieced rows, check their length. You can use lots of pins to ease in any rows that aren’t exactly the same.
If some of your heavily pieced rows have ended up longer than they should be, go back and stitch wider seam allowances to shrink them up. You don’t have to rip out the original seam allowance to do this. You want all of the rows to be the same size before you sew them together.
GIVEAWAY & HEATHER’S Solids VERSION
Pop over to Heather Black’s blog at Quiltachusetts to see her version of Row 9 made from Benartex Superior Solids. While you are there, be sure to enter the giveaway. One lucky winner will receive some Hobbs batting – just in time to baste your quilt!
I use Hobbs batting in all of my quilts and I’m using Hobbs 80/20 Heirloom cotton/poly for this quilt. It will give me just the right amount of loft I need it doesn’t bunch up when you quilt it.
This week we are making Row 8 – more Anvil Blocks. This is a great catchup week because this row is cut and sewn exactly the same as Week 6 Row 6, but with different fabrics.
You can follow along in the Infrastructure Quilt Pattern on pages 6 and 13 for specific instructions on making this row.
Here are the cut pieces all laid out and sewn into one Anvil block:
I used the Tri Recs tools to cut the units to make the Triangle in a Square blocks. In case you missed it, I created a YouTube tutorial on how to make these blocks back when we were making Row 4.
Once the Anvil blocks are sewn, it’s easy to add spacer rows to the top and bottom of the pieced row. Here’s a tip: measure the length of your row before trimming the long strips.
One more row down, and one to go! It’s been so fun using my Geo Pop prints to make this quilt!
GIVEAWAY & HEATHER’S VERSION
Pop over to Heather Black’s blog at Quiltachusetts to see her version of Row 8 made from Benartex Superior solids. While you are there, be sure to enter the giveaway! One lucky winner will get a 6 month subscription to Make Modern Magazine – one of my faves!!
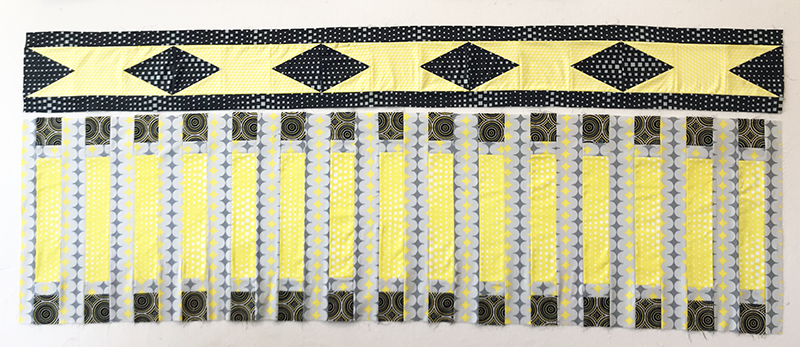
This week we are making Row 7 – the Fence Post blocks. You can follow along with the cutting directions on page 5 and the sewing directions on pages 12-13 of the Infrastructure Quilt Pattern.
This is a simple row to put together and you can choose to fussy cut parts of the design if you wish. I didn’t worry about fussy cutting this row, but simply let the pattern design fall randomly.
Here are all my cut pieces using black, gray and yellow Geo Pop prints:
For speed and efficiency, I like to stack up all of the units in order next to my sewing machine, and chain piece as much as possible. Here’s what it looks like with the units in position. It’s always amazing to me how much a block shrinks up once it’s sewn!
I’m continuing to press my seams open as I sew them, and use a shorter stitch length so you don’t see the thread poking through the seams. Here’s a short bonus video showing how I press the seams open:
Here’s what it looks like once the complete row is sewn. I put it next to the finished row from last week and I love how it’s coming together!
This has been such a fun quilt to put together so far. By just working on it one row at a time, it’s really easy to sew!
GIVEAWAY & HEATHER’S VERSION
Pop over to Heather Black’s blog at Quiltachusetts to see her version of Row 7 made from Benartex Superior solids. While you are there, be sure to enter the giveaway! Two lucky winners will each receive a brand new rotary cutter from Olfa. I use the Olfa brand from all my cutting and I love how their cutters look and feel. It makes the job so much easier!!
Here’s how my rows look so far, They are bit wrinkly and wonky on my design wall because I put them up in a hurry, and an un-quilted top is always flimsy and unfinished looking. I can’t wait to sew the top together! Just two more rows to go!!
This week we are making Row 6 – the Anvil Blocks. This row is super simple because we are making more Triangle in a Square blocks using the Tri-Recs tools. Follow along in the Infrastructure quilt pattern on page 5 for the cutting instructions, and on page 12 for the sewing instructions.
So this time, I’m using the yellow Tiny Hex print in yellow for the anvil blocks and Op Squares charcoal for the background.
Here are all of my cut out units to make the anvil blocks.
When sewing the units, don’t forget to stitch with a shorter stitch length and press seams open to keep the blocks nice and flat.
The Anvil block is made from two Triangle in a Square blocks with a square in between:
Here’s the finished row!
Watch It on YouTube!
Heres a quick 1 minute youtube video showing the stepouts above plus a little bit of the sewing. I’ve been practicing how to make YouTube videos along with making this quilt. This week I learned how to add voiceover to my videos.It’s been fun to learn a new editing skill each week!
Quick Links:
If you need to catch up, this row goes together super fast and it’s actually the same row repeated again for row 8 – so feel free to work ahead if you want!
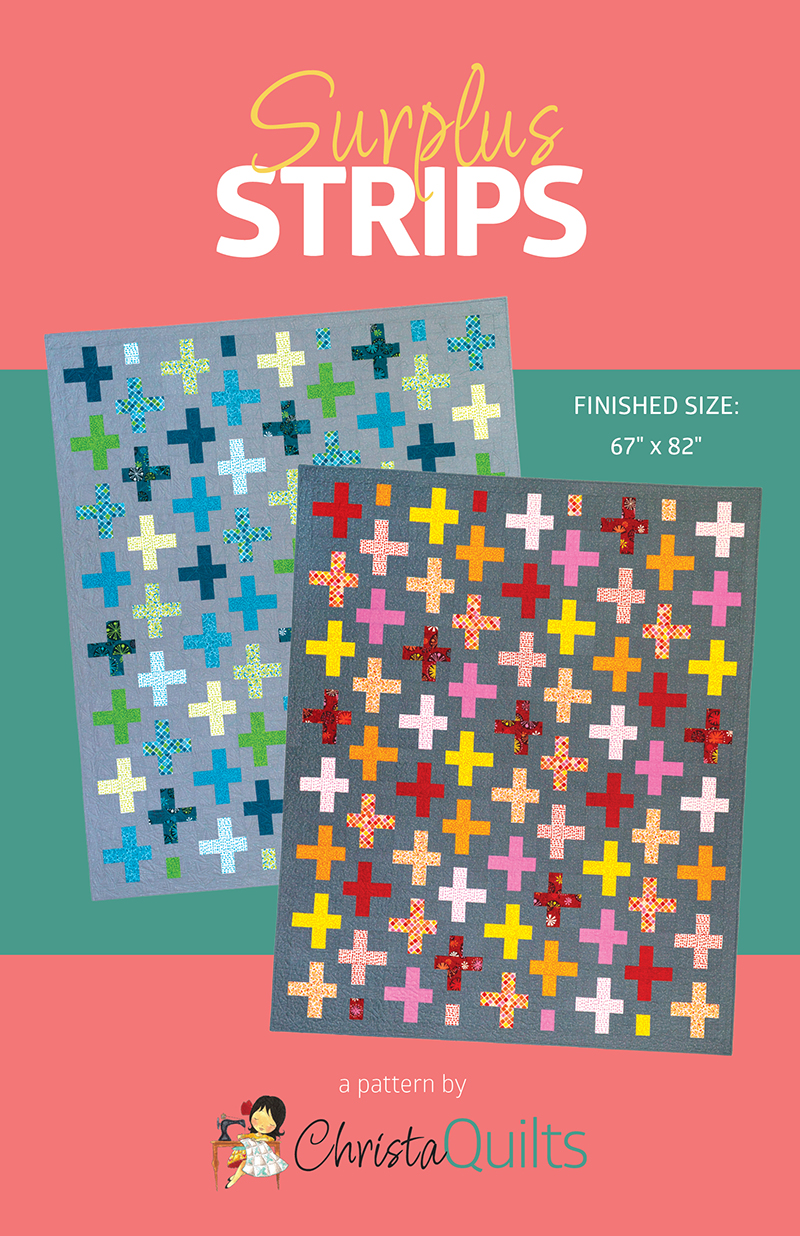
Pop over to Heather Black’s blog at Quiltachusetts to see her version of Row 6 made from Benartex Superior solids. While you are there, be sure to enter the giveaway. I’m the sponsor this week and one lucky winner will get a strip-roll of my Geo Pop + a fun jelly roll quilt pattern: Surplus Strips! You can color block it like I did, or use up your leftover (surplus) precut strips!
Just 3 more rows to sew and we’ll start putting the finishing touches on this quilt – I can’t wait!!
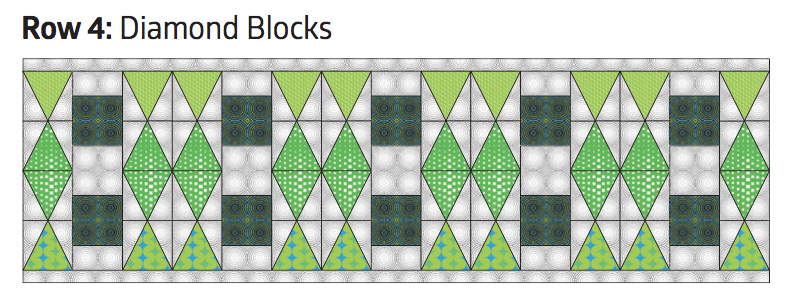
This week for the Infrastructure quilt along, we are sewing Row 4 which looks a bit intimidating, but it really isn’t. True, it does have a lot of piecing, but it’s a great opportunity to play with fun shapes.You can fussy cut your fabric so that the patterns match up if you want, but it’s certainly not necessary. My #1 tip for cutting this row is to use the Tri-Recs Ruler set. The Infrastructure quilt pattern includes full size templates, but honestly, it’s faster and easier to use the specialty rulers.
Follow along in the quilt pattern on pages 4, 6-7 and 10-11 to make Row 4. It’s sewn from Triangle in a Square blocks, fussy cut squares and background fabric.
Here’s a video tutorial on how to cut and sew Triangle in a Square blocks using the Tri-Recs Ruler set. It’s 11 minutes long and walks you through the entire process, so click below to watch the entire thing. If you’d like more videos, be sure to subscribe to my YouTube Channel!
Full Color step-by-step diagrams with exact measurements to make each row are given in the pattern.
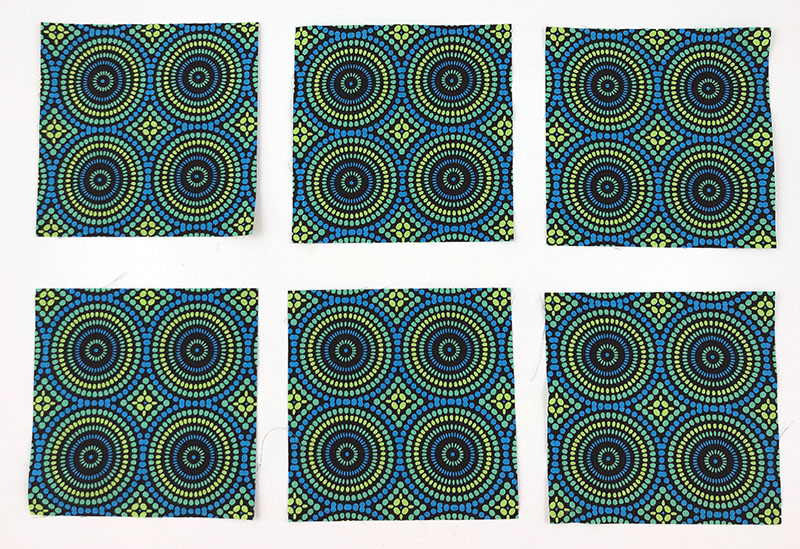
I chose to the fussy cut the squares of green Mosaic Dots, but not the background fabric.
And here’s a closeup of finished row after it’s been sewn together:
This row was a little more cutting and piecing, but the results are well worth it!
GIVEAWAY & HEATHER’S VERSION
Pop over to Heather Black’s blog at Quiltachusetts to see her version of Row 4 made from Benartex Superior solids. Heather is actually our prize sponsor this week and she’s offering 2 lucky winners a Tri-Recs tool set + 2 of her patterns that also use this shape. Aren’t they fab??
Heather is such an amazing pattern designer and longarm machine quilter and I can’t wait until the final reveal of her quilt! After all, she designed both versions of Infrastructure (solids and Geo Pop prints) and I can’t wait to see what she comes up with next!
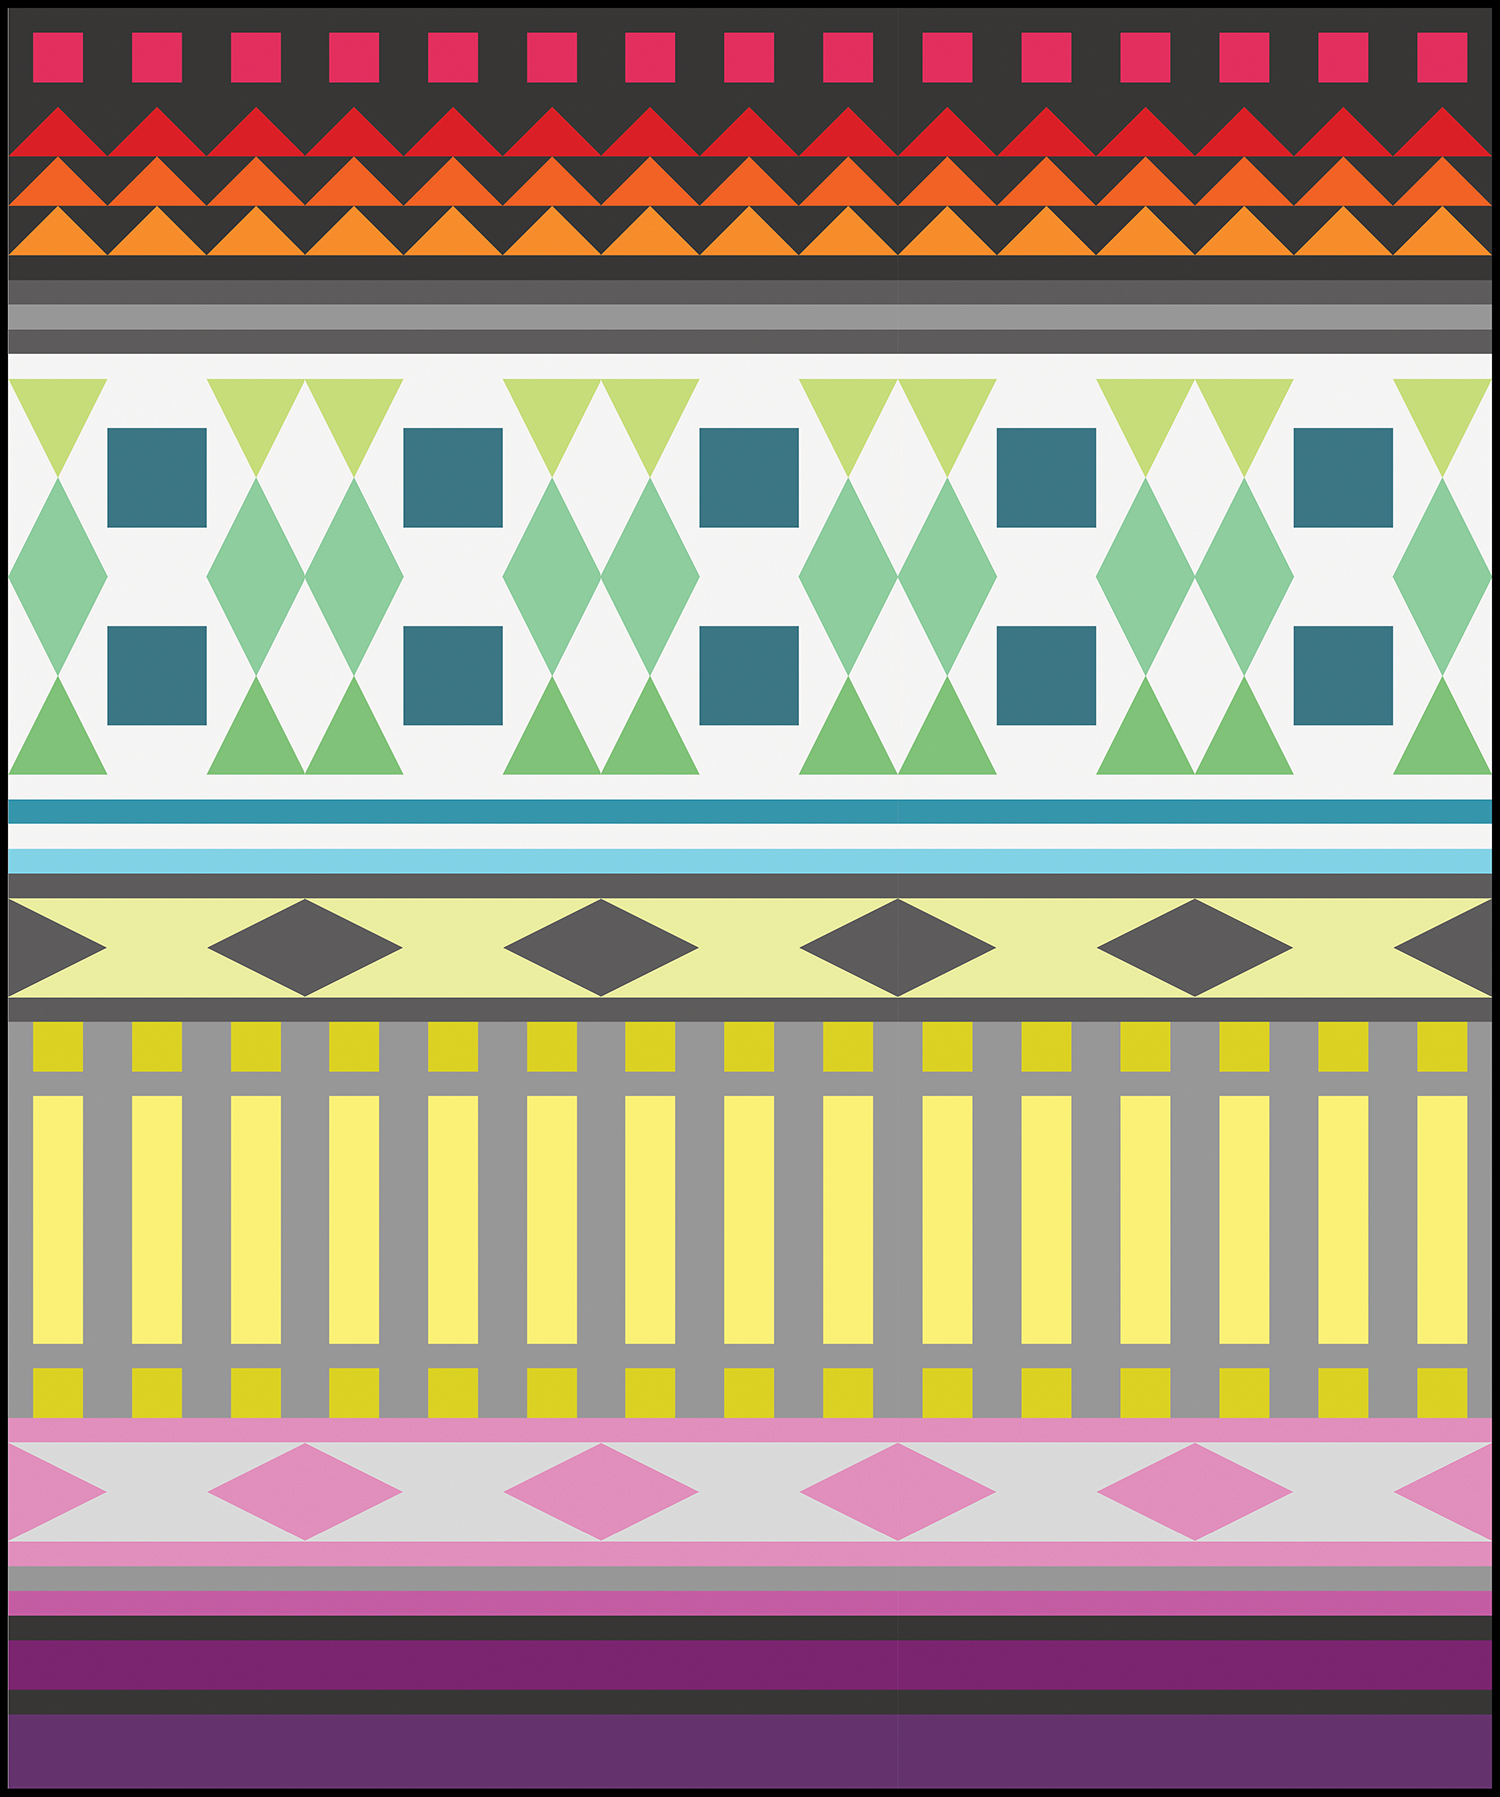
Heather’s recoloring of Infrastructure using all solids.