Feathered Chevrons Finish

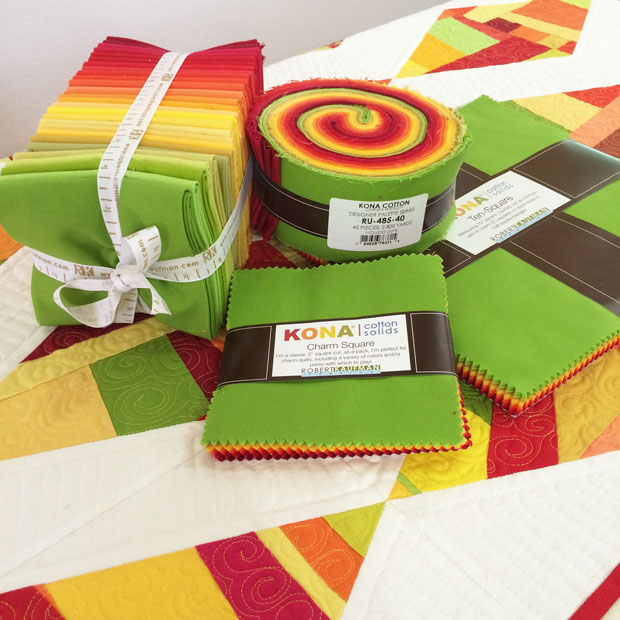
I’m so happy to have finished another version of my Charming Chevrons pattern! This layout is called Feathered Chevrons, and I made it using my Kona Designer series charm packs, plus Kona Coal.

Feathered Chevrons is an alternate of my Charming Chevrons quilt pattern.

Feathered Chevrons by Christa Watson, 64″ x 80″

This is the third version of Charming Chevrons I have made, and all three layouts are available in the original pattern, along with 4 different sizes.

Click here to purchase a PDF pattern of Charming Chevrons.
Click here to purchase a print pattern of Charming Chevrons.

feathered-chevrons-backing

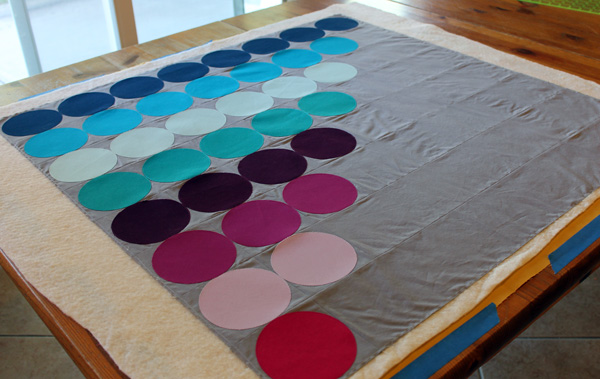
I love it when the quilting shows up well on the back.

I used some leftover chunks of Kona solids to make a pieced backing. I love how the quilting really shows up on the back. I stuck a label on the lower back corner before I put the binding on so I would only have to hand-sew it along two of the sides.

quilting_practice

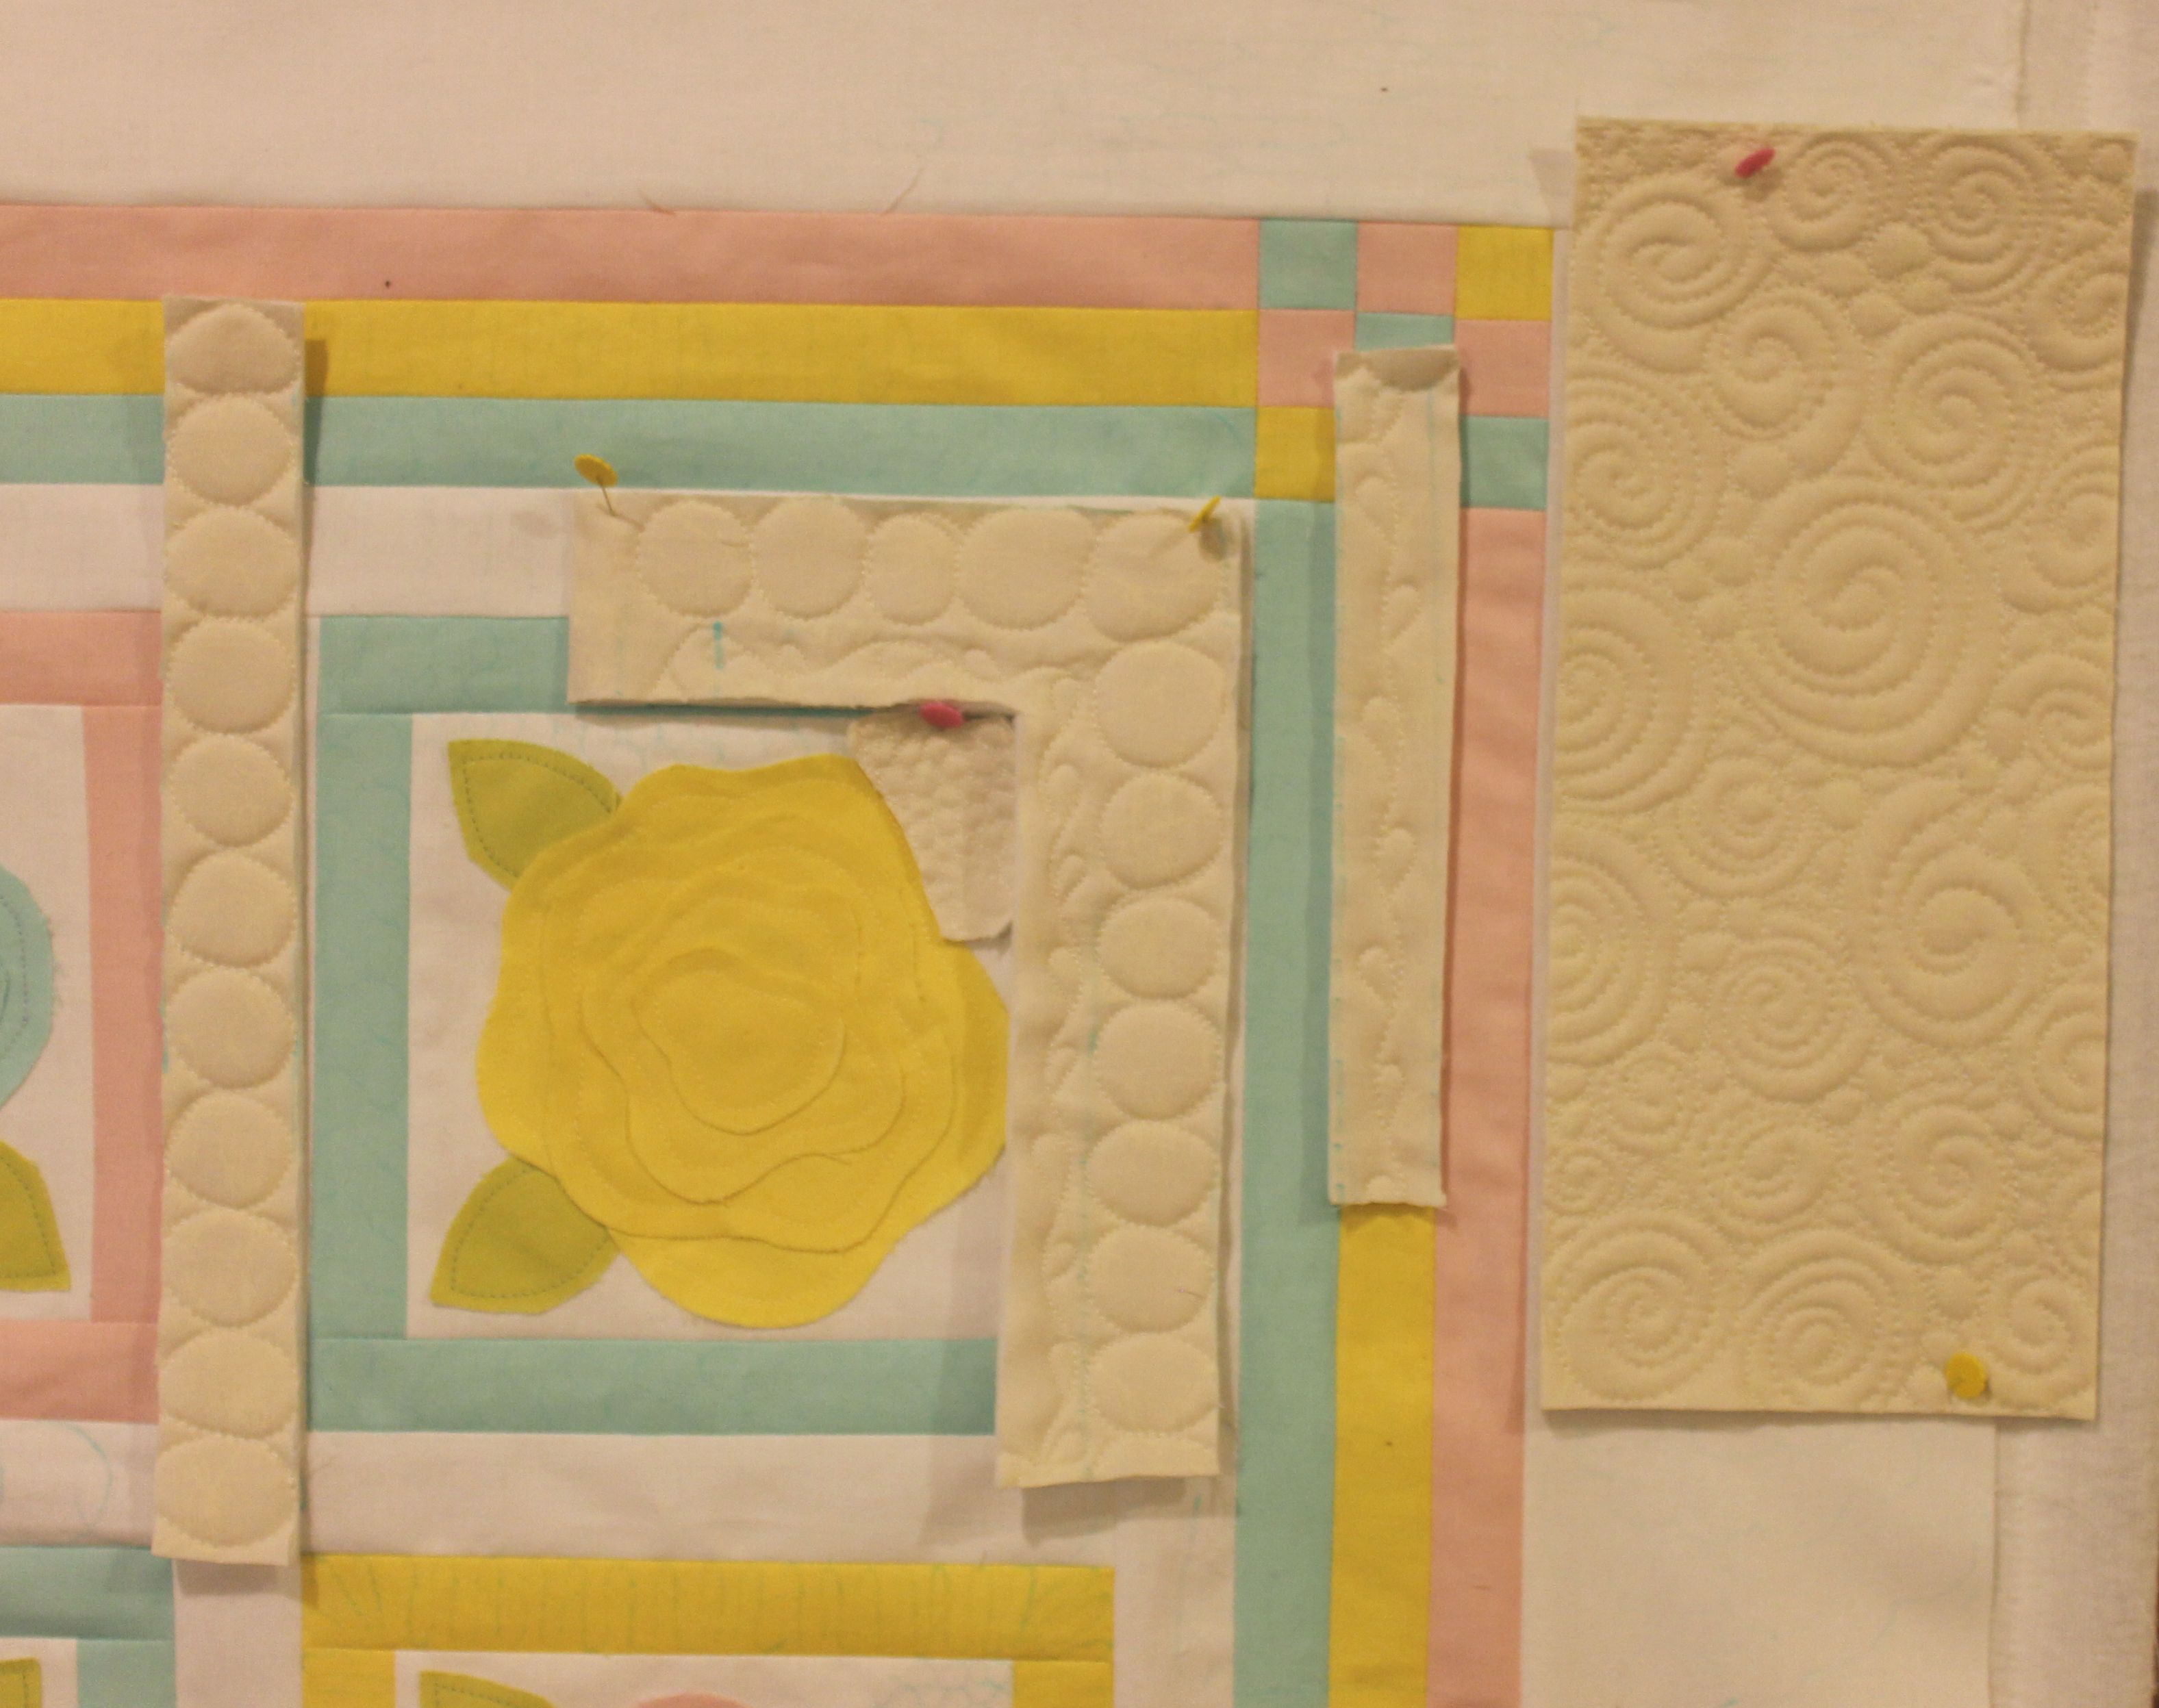
On the test sample, I quilted the swirls flowing in opposite directions. On the quilt, I quilted them all flowing in one direction. Other than that, I stuck to the original plan.

Like I do for most of my quilts, I made up a test block so that I could see how the quilting design and thread color looked before diving in. Even though it’s a little more effort to do this, it saves me a lot of aggravation in the long run. If I like how this piece looks, then there won’t be any surprises when I’m quilting the quilt, and I can just relax and enjoy the process.

quilting_switchbacks

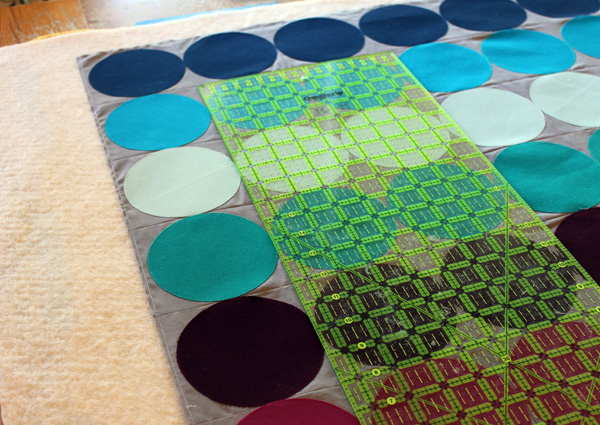
I filled in all of the gray background areas with switchbacks, one of the motifs I teach in my book Machine Quilting with Style. Notice how I stitched an area of relief inside the block, by quilting straight lines about 1/4″ away from the seams. This allows the different sections to pop, and also shrinks up the amount of area I need to quilt.

swirls_pebbles

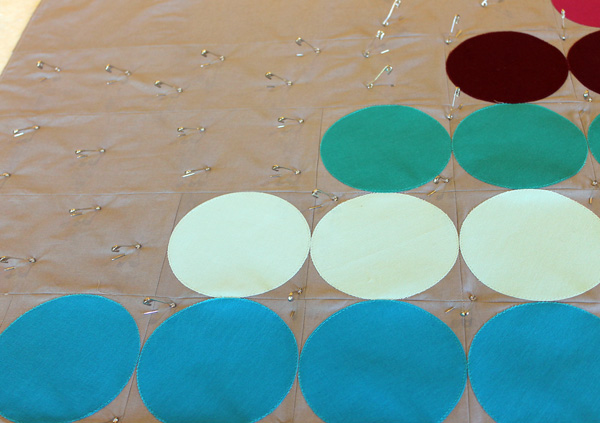
Next, I filled in the chevrons with a motif I call “swirl-feathers.” It’s a new design for me, made up of swirls that branch off of each other rather than filling in the whole space. Then I filled in the spaces in between the swirls with pebbles.

I quilted it entirely on my BERNINA 770 QE. I anchored the quilt by quilting straight lines with my integrated dual feed (which works like a walking foot) and then the free-motion sections with my BSR (BERNINA stitch regulator.)

Aurifil-Thread

You’ll be hearing more about some of my favorite Aurifil thread colors in the coming months.

I love to use Aurifil 50 weight cotton for piecing and quilting all of my quilts. It’s lightweight yet strong and I never have any issue with thread breaks. I used  Aurifil 2920 Light Brass for the swirls and 2605 Grey for the background.

feathered_chevrons_quilting_detail

If you make your own version of Charming Chevrons, please share it in my Facebook group: Quilt with Christa. I’d love to see you progress! I’m also happy to chat about machine quilting over there and answer your questions in the group for all to see.

Save

Save

New Work in Progress – Feathered Chevrons

I’m super excited to start working with my Kona Cotton designer palette from Robert Kaufman. I’m revisiting my Charming Chevrons design in a new way, something that has been on my to-do list for awhile.

feathered_chevrons_precutsChrista Watson designer palette plus Kona solids in Coal

I’m going to turn the precuts above into the quilt below and I can’t wait to get started! I’m using 4 charm packs of my designer palette along with 4 charm packs of Kona Coal to make a nice throw-sized quilt measuring 64″ x 80″.

chevrons6Feathered Chevrons Layout from my Charming Chevrons Pattern.

I just love how the bright citrus colors pop against the dark grey background – don’t you? My designer palette will be available this October in quilt shops everywhere. 🙂


Introducing My Very Own Kona Designer Palette

I have exciting news to share today! I’ve been working with Robert Kaufman to curate my very own Kona Cotton designer palette in my favorite shades of red, orange, yellow and green.

Christa Watson Designer PaletteChrista Watson Designer Palette – Kona Solid Precuts Coming Soon!

I chose these fabrics for the  Facets quilt from my book Machine Quilting With Style. You can see a sneak peek of the quilt in the photo above.

Christa Watson Designer PaletteI never thought I would see my name on precuts – such a dream come true!!

My precut palette will include 5″ charm squares, 10″ ten squares, 2 1/2″ wide roll ups and a 28 piece fat quarter bundle. They will be available for purchase in quilt shops everywhere this fall, including my precut store.

Probably one of the best things about having my own precut bundle is being able to explore the possibilities. I already have two additional quilts I will be making, and I will share my progress with you – so stay tuned!

Christa’s Quilt Along – Abacus Week 4: Basting

Good news: Abacus is now available as a stand alone pattern for just $4.95! Click here to purchase. (You don’t need the pattern for the quilt along, but I know many of you would prefer to print it off and keep by your sewing machine.)

abacus_quilting_finished

Basting is probably everyone’s least favorite part of the quilt-making process, and I think I know why. Recently I helped my friend make a small baby quilt and we basted it on her kitchen floor because she didn’t want to scratch up her table. What an awful process! I would never do that again, LOL!!

spray_basting_5Tables are the best for basting – use one, two, or your kitchen table – just not the floor!

Yes, it takes up a lot of room to baste on a table, and in my friend’s case, you may not want to scratch up your table. I suggest getting some plastic folding tables like those above that can be stashed in a garage or closet. Or keep some large pieces of cardboard to protect your kitchen table if needed. You don’t need a huge table – you can move the quilt around as needed, but please, get up off the floor! 🙂

For today’s basting tutorial, it took me a total of 1 1/4 hours to safety pin baste the three layers. Click here for my tutorial on spray basting (outside or in a well ventilated room – on a table!)

Step 1 – Prepare your batting and Backing Fabric (1/2 hour)

You want to make sure there are about 2-3 extra inches of backing and batting around all 4 sides. My quilt top is 32″ x 32″. Therefore my batting should about least 34″ x 34″ and my backing should be about 36″ x 36″.

table_baste_1Dining Room Table Basting – Checking to see that my backing is bigger than my top.

If using cotton batting, give it a quick press to work out any wrinkles. You want the quilt sandwich to be as flat as possible. Also, starch your backing fabric before you baste to make it extra slippery. This will come in handy when machine quilting.

Step 2 – Pinning the Quilt (3/4 hour)

Lay your backing right side down on a table. Tape down the edges of the quilt with masking tape or painter’s tape. You can also use binder clips if your table isn’t too thick. You want the backing to be secure but not taut. Only tape down the backing, not the other layers.

table_baste_2All 3 layers ready to go for basting! I will smooth out the wrinkles next.

Lay your batting on top of your backing. Get someone to help you if possible, so you can lay it down smoothly. Add your top, right side up. Before pinning, take a few minutes to smooth out the layers with your hands or a long ruler.

table_baste_3Using a ruler to smooth out the wrinkles and align the rows into place.

Starting anywhere on your quilt, drop a bunch of safety pins on the top to work with. I recommend using size 1 nickel plated safety pins. I left them open from the last quilt so they are ready to go. The usual recommendation is to pin about 5″ apart. However, I find that I get fewer tucks and wrinkles when I pin closer, about 2″-3″ apart. For this quilt I only pinned in the background sections, not in the circles.

table_baste_4Pin an entire section, then go back and close the pins. This quilt was small enough that I pinned the entire top before closing the pins. A Kwik Klip comes in really handy for this. Click here to see how to use one.

Work you way across the quilt, pinning one section at time. When the quilt is fully pinned, remove the tape and check the backing to make sure you haven’t pinned in any tucks. Then trim off some of the extra batting and backing so there’s less bulk under the machine.

table_baste_5Now you are ready to quilt! There, now,  that wasn’t too bad, was it? Remember, I encourage you to work at your own pace. However, if you finish your quilt (or even just the top) by November 10th, I’ll be happy to feature it on my blog in my parade of quilts! 🙂

Click here for all of the Abacus Quilt Along Tutorials.


Sew and Tell Baby French Roses #5 – Basting

I have been basting up a storm this week! I finished basting my Hugs ‘n Kisses Quilt Along as well as my French Rose Buds quilt. I am itching to start stitching both of them this weekend as soon as I get all of my other “quilty chores” done. 🙂

French Rose Buds Basted

Basting as you know is probably one of the least fun tasks of making a quilt. But whenever it’s time to baste, I set aside a whole day, put on some relaxing music and try to keep my distractions to a minimum. No, it doesn’t take me a whole day to baste (usually just an hour or two), but it does take a while to get in the mood to baste.

Bolt of Wool Batting

I start off by pulling down my big ol’ bolt of batting and laying the quilt on top of it so I know how much batting to cut. I leave a couple extra inches on all four sides which I will trim down later. My favorite batting to use is wool because it shows off the quilting and helps my quilts to hang flat nice and flat.

Binder ClipsPearl Bracelets backing


I use a couple of long banquet tables and random binder clips to secure my quilt backing. If the quilt doesn’t stretch across the whole table, I secure the loose ends with painter’s tape. I also starch my backing first as well as my quilt top.

Quilt Sandwich

I love the soft look of the Kona pastels on the front of my Baby French Roses. So I chose a low-volume fabric to go on the back: Pearl Bracelets in Cotton Candy Pink.

I’ve tried several different ways to baste such as thread basting (no thanks), spray basting (too hard to ventilate properly) and using all sorts of gizmos to help close the safety pins (too clumsy to figure out).  I even used plastic pinmoors to cap off my straight pins and while they are terrific to take out, I’m not sure they hold as well as I’d like.

Safety Pin Basting

So I’m back to using plain jane regular old safety pins, and quite a lot of them! I do have the fancy schmancy quilter’s curved pins, but this week I was scrambling to find as many safety pins around the house as I could so I’d have enough to baste two quilts at the same time. I ended up using a variety of pins in my quilt and they all work just fine.

Here are a few tips I’ve learned from basting scores of quilt tops:

  1. When using a lot of white fabric on the front, use a clean white polyster or wool batting, or a bleached cotton batting or a blend. Regular cream cotton may have little flecks or seeds that will show through to the top of the quilt.
  2. Use a backing that will not show through (shadow) through to the front of your quilt.
  3. Take the time press both the quilt top and back of your quilt before basting – and don’t be afraid to use starch. The flatter your pieces, the easier it will be to baste and quilt.
  4. Use lots of pins! The more pins you have in your quilt, the less it will shift while quilting. Sad, but true. Ask me how I know!

French Roses kits are available in my store for a limited time. You can see my progress and read my previous post here.

Sew and Tell Baby French Roses #4 – FMQ Practice

I am moving right along on my French Rose Buds quilt. This week I practiced some free-motion quilting designs which I will finalize shortly. I decided to enter the quilt top into the weekly Quilting Gallery contest so I’d love for you to vote for it!

Vote here and you can be entered to win the Quilting Gallery’s weekly giveaway!

French Rose Buds Top

French Rose Buds Quilt Top 36″ x 43.5″

Before I jump right into quilting this puppy, I decided to take some time and plan out my quilting. Since this quilt is for my brand new niece, I want to make it extra special. I also think it’s a great quilt to show off some fun free-motion quilting texture.

Swirls Quilting

I started by drawing out some quilting designs on paper and then making up a few practice sandwiches to test it out. I’ve always wanted to try swirls ever since taking Angela Walters’ quilting negative space class at QuiltCon and on Craftsy. (Even though she quilts on a long-arm I was able to adapt her techniques to my domestic machine.)

Quilt DoodlingQuilting Audition

Next I tried starting sketching out possible designs directly onto the quilt top.

That didn’t give me enough of an idea so I pinned my quilted practice piece onto the quilt top for a better perspective. So far so good. Now I want to try swirls and pebbles.

Swirls and Pebbles

I really like this! I think combining two designs makes it more fun and whimsical. I stitched out a couple more practice sandwiches, cut them to size and pinned them to the top so I could see how they would really work in the quilt.

Quilting AuditionMy plan is to quilt each section in matching thread so all you see is the quilting texture, not the thread. Hopefully I will have time to baste and start quilting this weekend. I will post more of my progress next week.

By slowing down and only working on this quilt a little each week, I am able to get all of my other projects accomplished without feeling overwhelmed!

You can read about my previous Baby French Roses progress here.

Sew and Tell Baby French Roses #3 – Top Done!

I am finally starting to feel like I’m having more personal time to sew. Perhaps I’m being more efficient, or maybe I’m just not getting distracted by things that waste my time.

Whatever the reason, I am loving it. I was able to finish up my French Rosebuds quilt top this week and I’m very pleased with how it turned out. French Roses kits are available using these exact same fabrics. You can see my progress and read my previous post here.

French Rose Buds Top

French Rose Buds Quilt Top 36″ x 43.5″

French Rose Buds Pattern

French Rose Buds Pattern

I changed a few things from the original French Rosebuds pattern to make it a little more sassy.

First of all, I chose pastel Kona Solids for a fresh, modern look. I also widened the frames and borders.

The pattern calls for the frames around each block to be the same color as the roses. I thought that by switching up the colors, it looks a little more lively.

Finally, I added small 9-patch blocks in the border corners to give it a little more pizzaz. This actually made the borders easier to sew, too.

Whenever you make a quilt from a pattern or a kit, you can still change it up and make it your own!


Seam Roller

During construction, I pressed all of my seams open.

My new favorite tool, a wooden seam roller came in handy for this task.

I rolled each seam first to open the seams.

Then I went back and pressed each seam with a hot dry iron from both the back and the front to keep them open and flat.

This nifty tool is really nothing more than a wooden wallpaper roller. I originally bought it for paper piecing but use it now for all of my “finger pressing.”


Now I am excited to baste this puppy and start quilting!

Rosebuds Detail I’m thinking I want to stitch a small filler around the roses and then quilt the white sashing with pebbles – sort of mimicking a path or stone wall surrounding the roses.

Then I think I’ll free-motion quilt some sort of floral motif in the outer borders. When I took Angela Walter‘s FMQ class at QuiltCon, she showed us how she quilts her free-form feathers and flowers. So I’ll practice on some scraps first and see what I can come up with.

Angela Walters at QuiltCon

Angela Walters at QuiltCon

Angela Walters' Flower Quilting

Angela Walters’ Flower Quilting

Now it’s back to work so I can earn a little more free time sewing this weekend!


Follow my blog with Bloglovin