Good news: Abacus is now available as a stand alone pattern for just $4.95! Click here to purchase. (You don’t need the pattern for the quilt along, but I know many of you would prefer to print it off and keep by your sewing machine.)

Basting is probably everyone’s least favorite part of the quilt-making process, and I think I know why. Recently I helped my friend make a small baby quilt and we basted it on her kitchen floor because she didn’t want to scratch up her table. What an awful process! I would never do that again, LOL!!
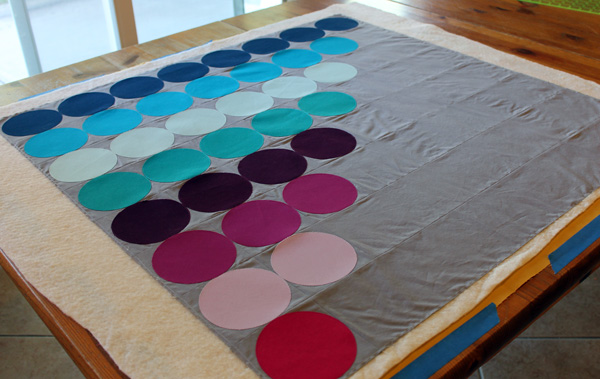
 Tables are the best for basting – use one, two, or your kitchen table – just not the floor!
Yes, it takes up a lot of room to baste on a table, and in my friend’s case, you may not want to scratch up your table. I suggest getting some plastic folding tables like those above that can be stashed in a garage or closet. Or keep some large pieces of cardboard to protect your kitchen table if needed. You don’t need a huge table – you can move the quilt around as needed, but please, get up off the floor! 🙂
For today’s basting tutorial, it took me a total of 1 1/4 hours to safety pin baste the three layers. Click here for my tutorial on spray basting (outside or in a well ventilated room – on a table!)
Step 1 – Prepare your batting and Backing Fabric (1/2 hour)
You want to make sure there are about 2-3 extra inches of backing and batting around all 4 sides. My quilt top is 32″ x 32″. Therefore my batting should about least 34″ x 34″ and my backing should be about 36″ x 36″.
 Dining Room Table Basting – Checking to see that my backing is bigger than my top.
If using cotton batting, give it a quick press to work out any wrinkles. You want the quilt sandwich to be as flat as possible. Also, starch your backing fabric before you baste to make it extra slippery. This will come in handy when machine quilting.
Step 2 – Pinning the Quilt (3/4 hour)
Lay your backing right side down on a table. Tape down the edges of the quilt with masking tape or painter’s tape. You can also use binder clips if your table isn’t too thick. You want the backing to be secure but not taut. Only tape down the backing, not the other layers.
 All 3 layers ready to go for basting! I will smooth out the wrinkles next.
Lay your batting on top of your backing. Get someone to help you if possible, so you can lay it down smoothly. Add your top, right side up. Before pinning, take a few minutes to smooth out the layers with your hands or a long ruler.
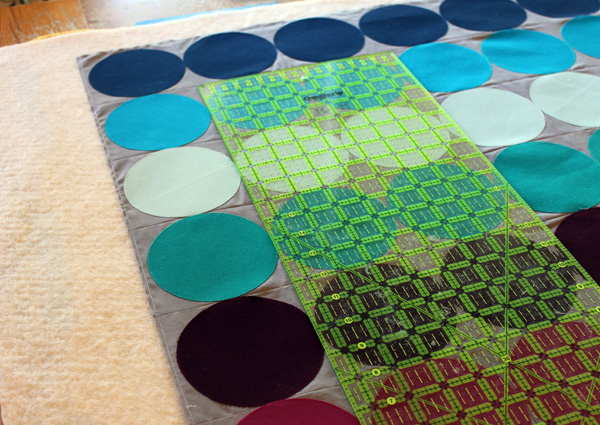 Using a ruler to smooth out the wrinkles and align the rows into place.
Starting anywhere on your quilt, drop a bunch of safety pins on the top to work with. I recommend using size 1 nickel plated safety pins. I left them open from the last quilt so they are ready to go. The usual recommendation is to pin about 5″ apart. However, I find that I get fewer tucks and wrinkles when I pin closer, about 2″-3″ apart. For this quilt I only pinned in the background sections, not in the circles.
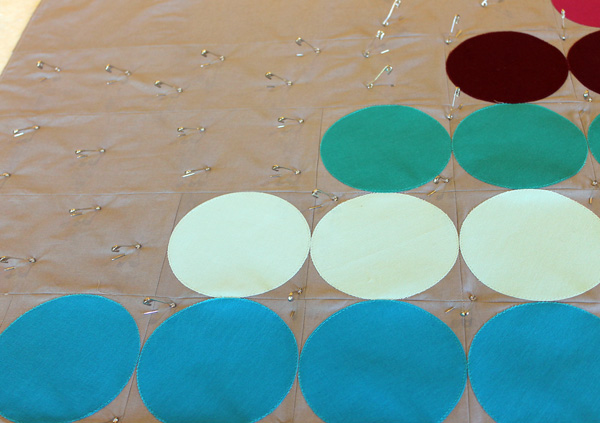 Pin an entire section, then go back and close the pins. This quilt was small enough that I pinned the entire top before closing the pins. A Kwik Klip comes in really handy for this. Click here to see how to use one.
Work you way across the quilt, pinning one section at time. When the quilt is fully pinned, remove the tape and check the backing to make sure you haven’t pinned in any tucks. Then trim off some of the extra batting and backing so there’s less bulk under the machine.
 Now you are ready to quilt! There, now, that wasn’t too bad, was it? Remember, I encourage you to work at your own pace. However, if you finish your quilt (or even just the top) by November 10th, I’ll be happy to feature it on my blog in my parade of quilts! 🙂
Click here for all of the Abacus Quilt Along Tutorials.

I purchased one of the fold-up cardboard pieces to protect my dining room table, and use binder clips to fasten backing to it. The piece is the one with grids that also helps in lining up. It usually takes me two days to pin most anything as this is not necessarily back friendly. I also use a crochet hook to fasten and unfasten the pins. These were tips from friends who have been long-time quilters. Another suggested using the tables in the fellowship hall at our church. I am fairly new to your blog but find it most helpful and enjoyable. Thank you!
Of course table basting would be ideal, but when you live in a tiny apartment, that is often not an option… in fact you’re lucky if you can even find the floor space. You often have to “baste and roll” on a tiny limited floor space which does leave room for error. You also have to get up for many breaks and often span the process over 2 days just to save your back if it’s a large quilt. Seriously limited options with city living.
(And no, LQS will not let you use their space for this purpose. I’ve asked around. They just say they don’t allow it. My guess as to the reason is either that they want you to pay for their quilting services, or that they, too have limited space, or that they are afraid if other customers see you doing it then it opens the flood gates for everybody to do it.)
Love the grey background of your quilt! It really complements the circles.
I agree – it is hard to baste you when don’t have the space!