My Fabric Design Process – An Ask Me Anything Discussion

In one of my early Ask Me Anything episodes in the Christa Quilts Group on Facebook, lots of folks were interested in my fabric design process. So I’ve put together some images and files to share a peek into how the process works for me, and my experience in designing fabrics for Benartex.

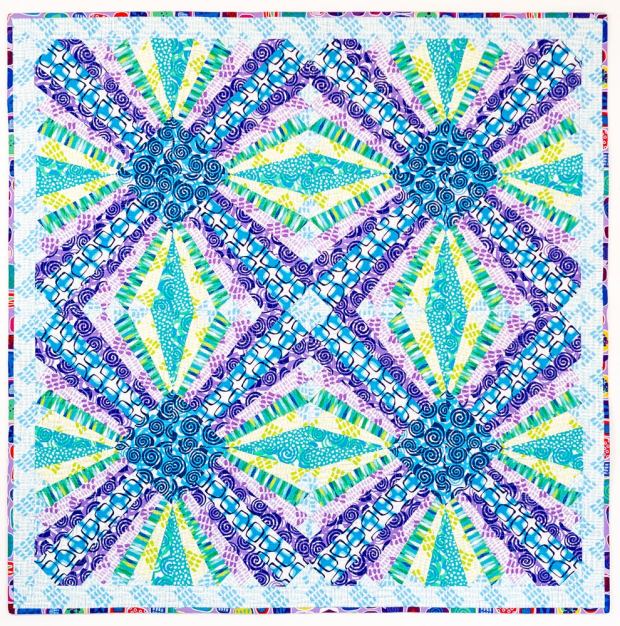
GRIDWORK at Quilt Market Fall 2019

Quilt Market Fall 2019 GridworkMy Gridwork fabric line, shown at fall market last year.

About five years ago, I decided to get serious about designing fabric. As part of that goal, in 2016 I went to an industry event sponsored by Sara Lawson @sewsweetness and Brenda Ratliff @pinkcastlefabrics. It was called Sew Pro and it was only held that one time.

It was geared to helping people understand the different ways you could get involved behind the scenes of the industry. After that event, I decided to give myself five years to figure it all out, find a fabric company, pitch my ideas, learn the technical aspects and so on.

Two days later, the most unusual thing happened. (Really and truly, this almost never happens.) Benartex called and said they wanted to produce some modern-type fabrics under their Contempo label, and would I be interested in designing for them.

“Um…YES!”

But in the same breath I said, “I don’t really know how to do that.”

Now before I tell you the rest of the story, I should explain that I had already established myself as a Martingale author and a Bernina ambassador. I’d spent years developing a network in the industry, so while it was completely out of the blue for them to call me, it also wasn’t completely out of the blue for them to call me.

Bernina actually owns Benartex as well as a distributor called Brewer Sewing, so my connections in other parts of the industry helped me break in to the fabric design arena. 

Now Back to the rest of the Story:


As it turns out, there are at least three different ways to design fabric.

  1. 100% of the work is done by the designer
  2. Designer collaborates with a team at the fabric company
  3. Design work done by a team at the fabric company, designer’s name is attached to the fabric


My work with Benartex falls under #2 above: It’s a design collaboration.

When I told them I didn’t know how to design fabric, their response was, “No problem!” They assured me they had people skilled in the technical aspects and that we could work together.

So I jumped in, and Good Vibes (out in July) is my sixth collection for Benartex! (Cannot wait to show you all the fun things we’ve made with it!)


The Design Process

Before anything else can happen, I come up with ideas for prints and make rough sketches with notes. (Side note: Ideas are everywhere! One print in Gridwork was inspired by a bath mat in a hotel.)


The first thing we did with Modern Marks was to establish a “look.” (And by the way, that look is something I have continued through all of my lines.) When the first samples (below) came back to me, I thought they were beautiful, but they were not the look I was after. They were blendy and batiky and I wanted a flat, geometric, modern feel.


The first paper swatches that came back from Benartex


I got more descriptive about what I wanted, and we worked our way closer. This is how it happens.

A more evolved concept for Modern Marks on paper—we were getting closer!


We go back and forth as I share my ideas and vision, and they continually refine it and bring it closer and closer to what’s in my mind.

They create the repeats and together we work on getting the colors just right. The stylist and the graphic designers have the technical expertise and they help me bring my ideas to life!


Then comes The hard part…


Quirky Triangles made the cut, but Donuts did not.

Eventually we have prints and colors I’m happy with and then comes a really difficult part: narrowing it down. My collections are usually from 20 to 25 prints, which means I always have to weed out a few.

Heartbeat was cut from Modern Marks, but Herringbone stayed in.

It is so much fun when the final swatches are done! I usually only see the line on paper until I get the actual fabric months later. But this is the culmination of much hard work, many twists and turns and a few tricky decisions! It’s all worth it when you see the collection together!

Final swatches for Modern Marks

The Good News

Fortunately, just because an idea doesn’t work for one collection doesn’t mean it won’t ever work. I tuck all of the rejects away, literally (in a drawer) and figuratively (in my head) because they make great starting points down the road. More on that a little later.

My first computer drawings for Fandangle were reminiscent of Spirograph as a kid.


For Fandangle, I had the childhood concept of Spirograph in my mind and wanted to do a little more of the computer work myself. Above are the early images I created in Illustrator.


The design starts to evolve for the main Fandangle print.


Just above are some of the paper swatches that came back to me as we collaborated.


The final design of the main or “hero” print for Fandangle


And these are the final look for the main print in Fandangle. There are many steps that happen between these images, but you’re getting the idea of how it works.

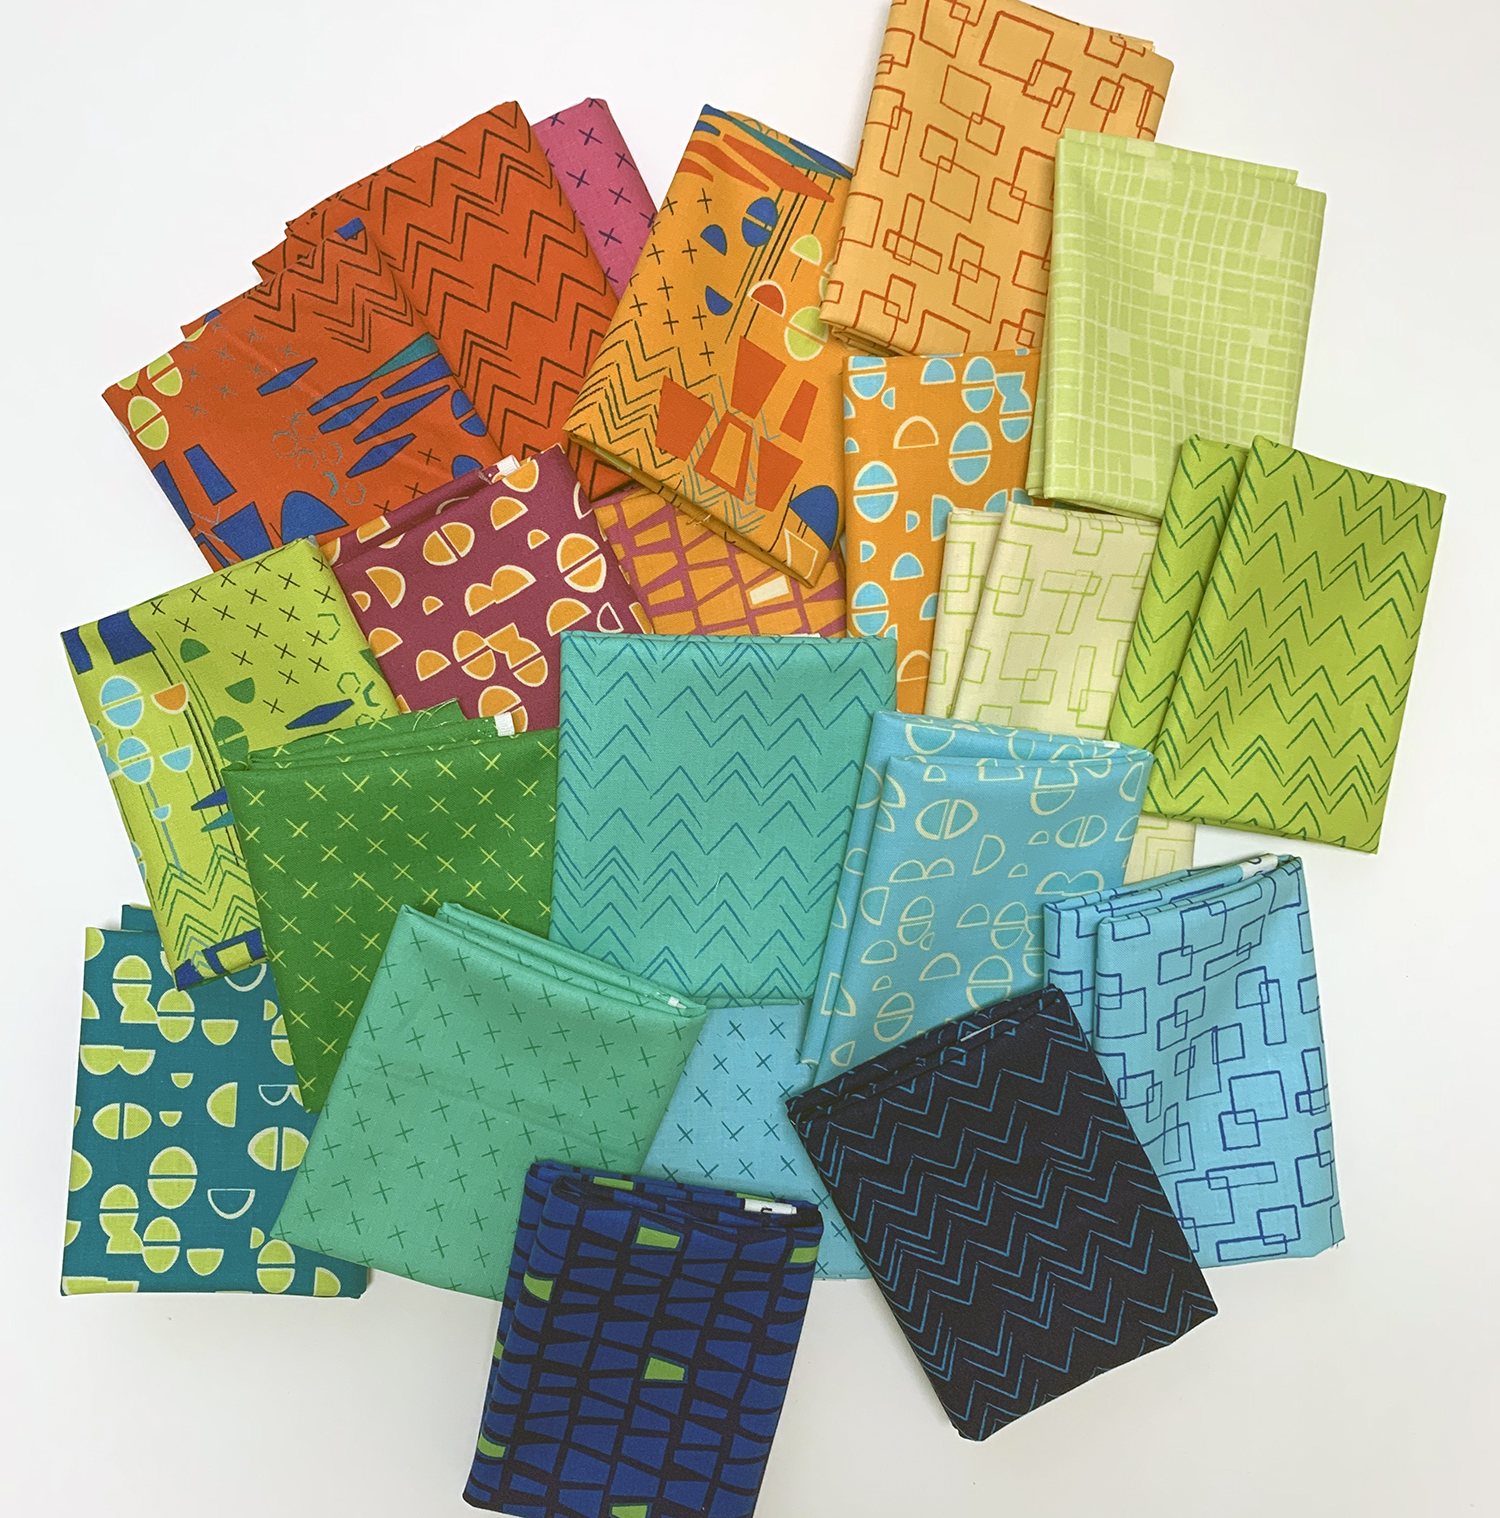
Let’s circle back to the idea of rejects being useful down the road. On the right in the photo above is my upcoming line called Good Vibes. On the left are some low-volumes I wanted for Modern Marks that didn’t work out.

The main idea for Good Vibes was soft and loud: low-volume prints and bold, saturated prints together. The low volume idea was something I had to scrap from Modern Marks, but I held on to it and half a dozen collections later, it’s going to be one of my very favorites! Good Vibes will ship to stores in July; ask for it at your local quilt shop!

Mockup of the promotional folder for Modern Marks

One of the last things that happens is the creation of the promotional materials. The Benartex people send me a mockup (above) and later the final folder, which is used to show the fabric to potential buyers during quilt market, and by sales reps visiting quilt shops around the country.


It’s still amazing to me that from my simple drawings such a beautiful thing can appear! If you’ve read this far, I want to offer you a deal.

Use Code Gridwork for 10% off GRIDWORK BUNDLES

There are bundles of Breeze and Citron Gridwork fat quarters in the shop. Use the code GRIDWORK to get 10% off. And thank you for being here!

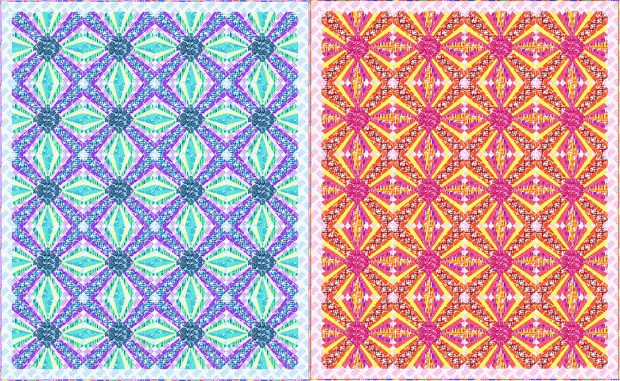
Click here to get the Gridwork Citron Bundle (shown above). 

Click here to get the Gridwork Breeze Bundle (shown below). 

Use the code GRIDWORK to get 10% off.


For a little more of an in-depth discussion of fabric design from my perspective, watch Ask Me Anything on video below.

And join me every Tuesday in the Christa Quilts Group on Facebook for “Ask Me Anything” at 3 pm Pacific time.

Here are links to several of the quilts/patterns/fabrics mentioned in the video below:

Click here for the free quilt pattern Rainbow Taffy.

Click here for the paper version of Surplus Strips.
Click here for the instantly downloadable pdf of Surplus Strips.

Ask Me Anything: Fabric Design Discussion on Video

Thanks for being here! I’m so grateful for you guys!

Check out my Custom Color Bundles: Fat Quarters from ALL of My Fabric Lines!

I’ve been working hard over the last few weeks, creating 11 gorgeous color bundles spanning all of my fabric lines for Benartex. A few weeks ago I got a request from some followers in my Facebook Group to create these custom color bundles, and I’m pleased to say they are now finally ready!

So let’s take a look at these beauties:

Reds: 12 Fat Quarters

Christa's Custom Color Bundle

This custom color bundle includes 12 fat quarters in pretty reds and pinks with a touch of other colors for added sparkle. Each fat quarter measures approximately 18″ x 21″.

Oranges: 10 Fat Quarters

Christa's Custom Color Bundle

This custom color bundle includes 10 fat quarters in warm shades or orange.

Yellows: 10 Fat Quarters

Christa's Custom Color Bundle

This custom color bundle includes 10 fat quarters in yellow with a touch of orange, white and gray for added depth.

Limes: 10 Fat Quarters

Christa's Custom Color Bundle

This custom color bundle includes 10 fat quarters in shades of luscious lime and chartreuse.

Greens: 10 Fat Quarters

Christa's Custom Color Bundle

This custom color bundle includes 10 fat quarters in shades of luscious green from mint to kelly.

Teals: 8 Fat Quarters

Christa's Custom Color Bundle

This custom color bundle includes 8 fat quarters in rich teal and turquoise with a hint of lime.

Light Blues: 8 Fat Quarters

Christa's Custom Color Bundle

This custom color bundle includes 8 fat quarters in light blues and aquas.

Dark Blues: 8 Fat Quarters

Christa's Custom Color Bundle

This custom color bundle includes 8 fat quarters in cool blues from sky to royal and navy.

Pinks: 9 Fat Quarters

Christa's Custom Color Bundle

This custom color bundle includes 9 fat quarters of pinks including lilac and fuchsia.

Purples: 12 Fat Quarters

Christa's Custom Color Bundle

This custom color bundle includes 12 fat quarters in sparkling purples from lilac and grape to magenta and plum.

Neutrals: 20 Fat Quarters in Black, White and Gray

Christa's Custom Color Bundle

This custom color bundle includes 20 fat quarters in light, medium and dark neutrals. These blacks, whites, and grays include fabulous patterns and interesting textures that will draw your viewers’ eyes deeper into any project you create!

Aren’t these all just so delicious??? One of the main reasons I love being a fabric designer is so that I can create colors, patterns and textures for my own personal stash! I’m so happy that I’ve been able to fill out a rainbow of color with my fabrics and I can’t wait to show you what’s yet to come!

Click here to see all color bundles at a glance.

Which colorway is *YOUR* favorite??

Christa Quilts Clearance Sale: Fabric & Patterns & Kits, Oh My!

The start of summer is a perfect time for a sale. I have reduced prices on many items in my online shop—take a look. There are some real treasures!

Kit Clearance

The sale includes kits for Surplus Strips in warm colors of red, orange and yellow from my Fandangle fabric line from Benartex.

Click here to get the Surplus Strips quilt kit on sale. 

Most of my kits include the pattern plus all of the fabric needed for the quilt top and binding.  All of the kits on clearance have been reduced by 25% off the original price with no coupon required!

Next up, Lattice Work features charm packs from my Abstract Garden fabric line with light and dark neutrals to make those bright colors pop! This kit includes fabric for the top and binding in the throw size at 74″ x 82″.

The beginner-friendly design is quick to piece and fun to make. The bright, colorful fabrics make it interesting enough for anyone to enjoy!

Cool things off with my Pieced Primrose quilt kit on sale.  As of this writing, I have one of these left in the wall size kit for 25% off the original price – no coupon required!

If you’d like a larger version, the throw-size Pieced Primrose in warm or cool colors is also on clearance. It’s 4 times as big as the wall size and with the clearance sale, you’ll save over $50 on this kit – what a deal!

Finally, I have one left of my popular Infrastructure quilt kit. It features my entire Geo Pop fabric line with a modern, geometric quilt pattern designed by my talented friend Heather Black of Quiltachusetts.

Infrastructure Geo Pop Fabric

Click here get the very last Infrastructure Quilt Kit.

I hosted a quilt along awhile back to make this quilt and you can still access all of that free content here on my blog. I even included YouTube videos of my basting, quilting and binding process which you can apply to any quilt you make!

Click here to access the Infrastructure Quilt Along – it’s free!

Not a care in the world when the fabrics are neatly packed into a convenient kit, ready for you to have all the fun!

Pattern Clearance

Positive Direction paper pattern is on clearance.

A number of paper patterns are on clearance including Positive Direction. The soft neutrals let the plus signs take center stage in this modern quilt design.

Pearl Pendants paper pattern is on clearance.

Maybe you’re up for a challenge!? Then Pearl Pendants fits the bill. Make the crib size at 50″ x 60″ or the throw at 60″ x 72″. The paper pattern is on clearance.

More paper patterns on sale at just $4.95:
Click here to view them all!

Modern Marks Fabric Clearance

I have fond memories of creating my very first fabric line, but now it’s time to clear out the old to make way for the new. I know you’ll love Modern Marks at just $8.95 a yard while it lasts. Much of it is sold out already, but you can still grab yardage of the remaining prints to stock your stash or add a pop of color to the back of your quilt.


Click here to view everything on clearance.
And remember, all US orders ship for a flat rate of $5 – no matter how much you buy.

Sale prices valid while supplies last. I can’t wait to see what you make! 

Save $2 Per Yard on Modern Marks Fabric – Now Just $8.95 Per Yard

During these crazy times, sewing is such great therapy! Nothing warms my heart like seeing so many of you sewing masks (especially from my fabrics), making beautiful quilts, and sharing and encouraging each other! I’m currently working behind the scenes on quilts made from my next fabric collection coming later this summer. (See the sneak peek below!)

good vibes by christa watson for Benartex

My next fabric line is called Good Vibes and will be available in July 2020!

So naturally, this means it’s time to clear off some shelf space to make room for the new arrivals! I’ve just reduced the yardage price on my first fabric line, Modern Marks. It’s now only $8.95 per yard, with no coupon required!

Click here get Modern Marks Fabric by the yard for $8.95 each.

I hope you are all staying safe and sound, and finding time to sew. 🙂

Happy Turkey Day!! Save 20% on My Fabric Collections by the Yard!

Happy Thanksgiving everyone! This officially kicks off the holiday shopping season, so I figured I’d join the crowd of business owners and get it on the Black Friday frenzy! From now through the end of the month, you can save 20% off all of my fabric lines by the yard, when you use code TURKEY during checkout at shop.ChristaQuilts.com.

Modern Marks – My Very First Line from 2017!!

Modern Marks by Christa Watson for Benartex

Click here to shop Modern Marks fabric.

It was such a thrill when Benartex contacted me three years ago and invited me to become one of their fabric designers for their Contempo division which features modern and contemporary prints. They told me they loved my work and would love for me to infuse my funky geometric style into fun colorful fabric. Modern Marks was the result and it’s been a wild ride ever since!!

I still have a bit left of each of the 26 Modern Marks fabrics, and most are now out of print. As you can see below, all of my groups mix and match and are a riot of color and texture!

Fandangle – Debuted in 2018

Fandangle by Christa Watson for Benartex

Click here to shop Fandangle fabric.

I continued to fill out the rainbow in my fabric stash with this line, and decided I needed not one, but two background grays to go with them. Because Benartex reprints hot selling fabrics, the grays have been printed over, and over, and over again. They are literally, the “perfect” neutrals!!

Fun fact: most people mistake the word Fandangle with Fandango, but hey have two completely different meanings. Fandango is the dance, but Fandangle means decorative ornamentation – which is why I included fun fabric names like Beaded Curtain, Triangle Trinkets, and Baubles and Bits. Sometimes naming the fabrics is as much fun as designing them!!

With this group, you can separate them into warm and cool, but as you can see above, each print looks great with every other piece in the line. I have yardage of all 20 bolts of Fandangle available, and with this special deal, you can stock up on your faves!!

Abstract Garden – Spring of 2019

Abstract Garden by Christa Watson for Benartex

Click here to shop Abstract Garden fabric.

Can we say purple?? With each line I create, I want it to stand on its own as a complete color story. But, I love adding new things that will mix and match with what came prior. In Abstract Garden, I made sure to include purple, plus four great pastels that would serve as light, or “low volume” backgrounds.

Abstract Garden consists of 20 prints, many of which are loosely based on some of my favorite machine quilting motifs. The name is a tongue in cheek nod to the fact that I can’t really garden, OR draw floral motifs. Be sure to check out the signature print of the line, “Raised Beds.” It’s little plots of my most favorite geometric shapes!!

Geo Pop – Newest Release, Fall 2019

Geo Pop by Christa Watson for Benartex

Click here to shop Geo Pop fabric.

With four fabric collections under my belt, I decided I really needed a line of modern basics. This is my largest line yet at 25 pieces, but with only 4 different prints. I’m thrilled that I was able to include more neutrals – plenty of black, white, and gray in this group to go along with the bright saturated colors.

With Geo Pop, you can have fun fussy cutting the geometric stripe, and can create some really cool effects with the eye catching Mosaic Dots print.

Shop, Save, and Share!!

For your viewing pleasure, here’s my stash of all four collections that I’m offering for sale by the yard. I keep these in my overflow fabric room, I mean guest room!!

When you create with my fabrics, be sure to send me pics or tag me on social media using @christaquilts or #modernmarksfabric #fandanglefabric #abstractgardenfabric and #geopopfabric. I absolutely love to see what you create!!

Click here to shop all fabric lines by the yard.

Don’t forget to use code TURKEY at checkout to save 20%! Shipping is a flat $5 to the US, and I’m happy to refund excess International shipping charges, too!!

Blooming Wallflowers Quilt Revisited – See 3 Different Versions

I wanted to do a quick throwback to my Blooming Wallflowers quilt because I’ve made it twice and digitally recolored it a third time, using 3 of my fabric lines. When I design a quilt, I love iterating to see what it will look like in different fabric/color combos!

Blooming Wallflowers in Modern Marks

Blooming Wallflowers Modern Marks

Click here to get the Blooming Wallflowers quilt pattern – PDF version.

Above is the original version, made completely in Modern Marks fabric. I originally made it for a magazine to promote my first fabric line when it came out. I had fun selecting the 12 rainbow prints from the line and pairing them up the light blue accent and dark navy background.

Blooming Wallflowers in Abstract Garden

Blooming Wallflowers quilt

Click here to get the Blooming Wallflowers quilt pattern – print version.

Once the publishing rights reverted back to me,  I decided to self-publish the pattern with a new cover to show case my third line of fabric, Abstract Garden. Again, it was fun to mix and match the prints and arrange them in a pleasing order. I used the navy herringbone print from Modern Marks again because it really made the other prints pop!

Blooming Wallflowers in Geo Pop

Blooming Wallflowers Quilt in Geo Pop

Click here for the free Blooming Wallflowers quilt along.

Now that my fourth line of fabric, Geo Pop officially releases next month, I wanted to see what the quilt would look like in the new fabric, with a different colored background. Thanks to Electric Quilt, I can upload jpegs of my fabric swatches and easily recolor it. It was fun to play around with different fabric combinations and I was happily surprised with how good it looks when pairing it with the yellow/gray Diamond Pop print and the charcoal Op Squares print for background. I may have to add this one to my “to make” list!!

What do you think? Which colorway is YOUR favorite?

Get the Supplies!

If you are new to the blog and haven’t seen this quilt before, click the links below for more info about the quilt pattern, fabric, and a recent quilt along to make it:

Free Fat Quarter with $50 Purchase!

I was cleaning and organizing my sewing room and realized I have a TON of leftover fat quarters from quilts in progress, bolt ends, and fat quarter bundles from all four of my fabric lines: Modern Marks, Fandangle, Abstract Garden, and Geo Pop.

Christa Watson FQ's

Don’t they look like colorful candy?? This is just a small sampling of my freebies for you!!

Rather than trying to cram them in somewhere and let them collect dust, I’d rather give them to you!! So from now on, all orders of $50 or more from my little online store at shop.ChristaQuilts.com will get one of these beauties as a surprise in their package!

Modern Marks Fabric swatches

Click here to shop all remaining Modern Marks fabric.

Fandangle fabrics

Click here to shop all remaining Fandangle fabric.

Abstract Garden by Christa Watson for Benartex Contempo

Click here to shop all remaining Abstract Garden fabric.

Geo Pop by Christa Watson

Click here to preorder bundles of Geo Pop fabric.

I’m very much a minimalist, and although I’m keeping plenty of yardage of all my collections on hand for personal use, I have a hard time storing smaller pieces of fabric. So I’m excited to send them your way instead! 🙂

Click here to shop my fabrics, patterns, books, and thread at Shop.ChristaQuilts.com.

Blooming Wallflowers Week 10 – Binding to Finish

Can you believe we’ve come to the end of the Blooming Wallflowers quilt along? I’m so excited to see all of your finishes and encourage you to continue working at your own pace, even if you finish weeks (or months) later.

Blooming Wallflowers quilt

I was literally finishing the hand binding of this quilt on the way to quilt market last fall, so I didn’t get any pics of my binding in progress. However, I’ve written several other binding tutorials, and my process is exactly the same, no matter which quilt I’m making. So choose your favorite method – hand or machine, and enjoy this last step of the process!

Modern Marks binding strips

I cut matching binding strips from my Modern Marks Navy Herringbone print.

Here’s a bonus tip for binding: I like to cut my strips out at 2″ wide and attach them with an exact 1/4″ seam using my BERNINA dual feed (which acts like a walking foot but I can use skinnier feet on it). This gives me a precise finished binding of 1/4″ and it’s even on both the front and back. Many times, I like to use the same background fabric as the binding so that it looks like the design is floating on the surface, rather than being interrupted by a contrasting fabric.

Here’s Blooming Wallflowers hanging in my booth at quilt market last November, along with the other quilt patterns I made to showcase my Abstract Garden fabric.

Christa Watson Abstract Garden

My booth with Benartex at fall quilt market in Houston, November 2018
Other quilts shown are LatticeWork and Geese in the Garden.

And just for fun, below the is the original Blooming Wallflowers quilt I made a couple of years earlier for a quilt magazine to promote my first line, Modern Marks. As you can see, this quilt is fun to make no matter which fabrics you choose!

Blooming Wallflowers in Modern Marks

Blooming Wallflowers Modern Marks

The Modern Marks Navy Herringbone print is one of my all-time faves!

I hope you’ve enjoyed making this quilt with me. And if you are worried about having quilt-along withdrawal, stay tuned for the next quilt along, coming soon!! It features a brand new quilt that I haven’t shared on the blog yet, and I’m sure you’ll love it just as much!

IMPORTANT LINKS

Blooming Wallflowers Week 8 – Machine Quilting Part 2

How is your Blooming Wallflowers quilt coming along? Some of you have completely finished while others are just getting started and that’s perfectly fine. I love to encourage everyone to participate at their own pace. In cased you missed it, click here for quilting part 1 including 4 short You-Tube videos showing exactly how I quilted the blocks.

Blooming Wallflowers made with Abstract Garden and Modern Marks

Today I’ll go over how I quilted the background using one of my favorite filler motifs – jagged stipple. In the quilting plan below, I quilted jagged stipple in the background areas after all of the blocks were quilted. I love filling in a quilt this way: as long as you can trace an unbroken line around your quilt, you can quilt the design continuously without any starts and stops.

Blooming Wallflowers Block Quilting Plan

Quilting all of the blocks first is what I call “anchor quilting” which means that the quilt is secure and won’t shift as I scrunch and smoosh it under the machine to finish up the rest.

I recommend practicing drawing out the design freehand on a blank sheet of paper, and even quilting a practice block to get a flow for the design. The jagged stipple is very forgiving and is basically a series of abrupt jaggedy lines going in every direction.

Machine Quilting Jagged Stipple

I quilted Jagged Stipple on a larger scale for my Improv Squares Quilt Pattern.

There’s really no wrong way to do it! In fact, I love the jagged stipple design so much, that it inspired one of the prints from my previous fabric line – the “Paper Cuts” print from Fandangle.

Fandangle Fabric Paper Cuts

Click here to get yardage of the paper cuts print from Fandangle.

Here’s another short video showing how I move back and forth and all around to quilt this design. I especially love the look of texture on texture when I quilted the jagged lines on top of the navy blue Herringbone print from Modern Marks.

Because I’m using a matching blue Aurifil thread (from my Piece and Quilt Collection – Colors), it’s hard to see the actual stitching, which is usually a good thing so you won’t see all of the wobbles and bobbles as I quilt.

Here’s a detail shot where you can just barely see the quilting. I like quilting textural designs on busy quilts because I want my quilting to enhance the quilt rather than being the star of the show!

Blooming Wallflowers quilting detail

So give this fun design a try – whether you quilt it on this quilt or another WIP (work in progress).

IMPORTANT LINKS

Blooming Wallflowers Week 7 – Machine Quilting Part 1

Now we get to my absolute favorite part of the quilt-making process – machine quilting!!! I’m breaking this section into 2 posts so you’ll have plenty of time to get ‘er done! And thanks to all of you who keep sharing your progress, no matter what step you are on. It’s so inspiring to see all of the fantastic Blooming Wallflowers out there!! Remember to scroll to the end of this post for links to all of the quilt along steps and other important info.

Blooming Wallflowers Quilting

Above is my sewing machine setup. I have a drop in table so that my sewing machine lies flush with the table. I’ve also put another table to my left, forming an “L” so that the quilt has plenty of room and won’t fall off the table. I’ll sit in the chair and scrunch and smoosh the quilt out of the way as I quilt.

Make a Quilting Plan

I always have a plan when I’m going to quilt a quilt. That way there are no surprises and I can enjoy the quilting process. Here’s my basic quilting plan that’s included in the Blooming Wallflowers quilt pattern:

Blooming Wallflowers Block Quilting Plan

I’m quilting 3 different designs: chevrons in the print triangles, pebbles in the light blue triangles, and jagged stipple in the background. I can quilt all of the triangles per block at once without stopping; then I’ll go back and quilt the navy blue background later. I used a light blue thread from my Aurifil Piece and Quilt collection Neutrals on the triangles, and will use a darker blue thread from my Colors collection for the background.

Free Motion Quilting Blooming Wallflowers

Here’s what the back side of the quilt looks like after quilting all of the triangles. I always use the same color thread in top and bobbin so that if there are any tension issues, it won’t show. I don’t mind seeing the quilting on the back of the quilt. In fact, I actually like how it shows up!

Notice how my actual quilting deviated slightly from the plan. I decided to quilt a few more lines in the chevrons, and I embellished the chevrons with an extra row of pebbles and some zig-zags to jazz it up a bit.

Step by Step Quilting Videos

Here are a few short videos of me quilting the blocks so you can see how I did it. Be sure to enlarge the screen for a better view:

First, I stitched in the ditch very carefully around one light blue triangle.

Then I filled in the light blue triangle with pebbles. I’m using a thicker ruler foot because I’m doing the pebbles and ruler work all at the same time.

Next, I used a special acrylic ruler to quilt straight line chevrons. I didn’t worry about the lines being equal in distance or hitting the points exactly. I don’t actually love doing ruler work because it’s a little too fussy for my taste. But I’ll use it to quilt straight lines as long as they don’t have to be exact.

Once the chevrons were quilted, I embellished one section with free-motion zig-zags. I quilted each section of triangles (the Abstract Garden prints and the light blue background) in one pass, with only one start and stop for the whole block.) In other words, I did all of the pebbles in one triangle and then went straight into the chevrons.

To start and a line of stitching, I take about 6-8 teeny tiny stitches and then start quilting normally. When I’m done, I end with 6-8 teeny tiny stitches to hold it in place and cut off the excess threads. Starting and stopping in a seam makes it less noticable.

Next week, we’ll quilt the background! I recommend trying out the quilting designs on a scrap of fabric and batting first, before applying them to your quilt.

IMPORTANT LINKS