How is your Blooming Wallflowers quilt coming along? Some of you have completely finished while others are just getting started and that’s perfectly fine. I love to encourage everyone to participate at their own pace. In cased you missed it, click here for quilting part 1 including 4 short You-Tube videos showing exactly how I quilted the blocks.

Today I’ll go over how I quilted the background using one of my favorite filler motifs – jagged stipple. In the quilting plan below, I quilted jagged stipple in the background areas after all of the blocks were quilted. I love filling in a quilt this way: as long as you can trace an unbroken line around your quilt, you can quilt the design continuously without any starts and stops.
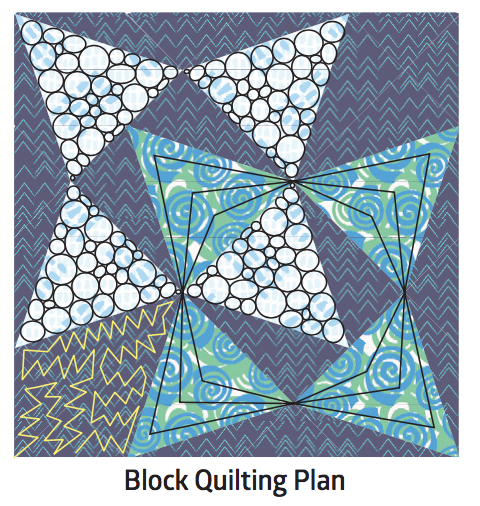
Quilting all of the blocks first is what I call “anchor quilting” which means that the quilt is secure and won’t shift as I scrunch and smoosh it under the machine to finish up the rest.
I recommend practicing drawing out the design freehand on a blank sheet of paper, and even quilting a practice block to get a flow for the design. The jagged stipple is very forgiving and is basically a series of abrupt jaggedy lines going in every direction.

I quilted Jagged Stipple on a larger scale for my Improv Squares Quilt Pattern.
There’s really no wrong way to do it! In fact, I love the jagged stipple design so much, that it inspired one of the prints from my previous fabric line – the “Paper Cuts” print from Fandangle.

Click here to get yardage of the paper cuts print from Fandangle.
Here’s another short video showing how I move back and forth and all around to quilt this design. I especially love the look of texture on texture when I quilted the jagged lines on top of the navy blue Herringbone print from Modern Marks.
Because I’m using a matching blue Aurifil thread (from my Piece and Quilt Collection – Colors), it’s hard to see the actual stitching, which is usually a good thing so you won’t see all of the wobbles and bobbles as I quilt.
Here’s a detail shot where you can just barely see the quilting. I like quilting textural designs on busy quilts because I want my quilting to enhance the quilt rather than being the star of the show!

So give this fun design a try – whether you quilt it on this quilt or another WIP (work in progress).
IMPORTANT LINKS
- Click here to get the Blooming Wallflowers Quilt Pattern (print)
- Click here to get the Blooming Wallflowers Quilt Pattern (digital PDF)
- Click here to purchase the optional kit while supplies last.
- Click here to share your progress in my ChristaQuilts Facebook group.
- Click here to receive quilt along updates via email.
- Click here for the supply list and links to previous quilt along posts.

As always,your quilting is amazing. Now a few questions: I have started using starch and I do like the results, so thank you for getting me onto it. Now the ?? I have fabrics to be used in a quilt and I only need a piece that is half of what I have, do I starch the whole piece? And second, I need a new iron. What brand do you use? Thanks Christa.