Paper Pieced Primrose Quilt Along Starts Next Week!!

Are you planning on learning to foundation paper piece in the new year? With my Pieced Primrose pattern, learning this skill is much easier than you’d think!! Be sure to let me know in the comments if you’ve done paper piecing before, or if this will be your first experience with it.

Pieced Primrose Quilt Pattern

The fun begins on Monday, January 6th with weekly posts to keep you on track for finishing by the end February. But you can still work at your own pace, and I’m here to cheer you on, no matter how long it takes!

Next week’s introductory post will talk a little bit more about the tools and supplies and general foundation  paper piecing tips. Then we’ll dive into cutting the following week, so you still have plenty of time to gather your fabrics and supplies.

Click here for the complete quilt along schedule and supply list.

Paper Piecing Notions

Click here to get my favorite notions for successful foundation paper piecing.

We’ll take extra time to piece the blocks and will finish up with basting, machine quilting and binding. After all, if you’ve done a quilt along with me before, you know how much I detest these three little words, “quilt as desired!”

Pieced Primose Quilt Abstract Garden Cool

Pieced Primrose shown in the Cool colorway of Abstract Garden above.
Pieed Primrose shown in the warm colorway of Abstract Garden below.

Pieced Primrose Abstract Garden Warm

My Pieced Primrose quilt pattern is super versatile and you can sew up as many blocks as you like with several different layouts. And it looks fabulous in ANY fabrics you choose to use. So I hope you’ll join the fun and consider me your cheerleader for “Start to Finish” quilting!!

The Splendid Sampler Block – Scrappy Happy Heart

Welcome to my stop on the Splendid Sampler 100 blocks tour! Today is a very special day. Not only because I get to share my special block with you, but it is also my anniversary! 23 years ago I married my best friend and he’s supported my quilting habits ever since! Sharing my heart block with you now has extra special meaning and today I’m dedicating this block to Jason – the love of my life!

scrappy_heart_finished

Scrappy Happy Heart – for Jason –  the love of my life who’s also my #1 fan!

I love the “structured improv” look so I chose to paper piece this block, to contain the crazy pieced chaos. I took some step by step pictures while making this block that can help you with your paper piecing efforts.

Click here for Splendid tutorials on paper piecing.

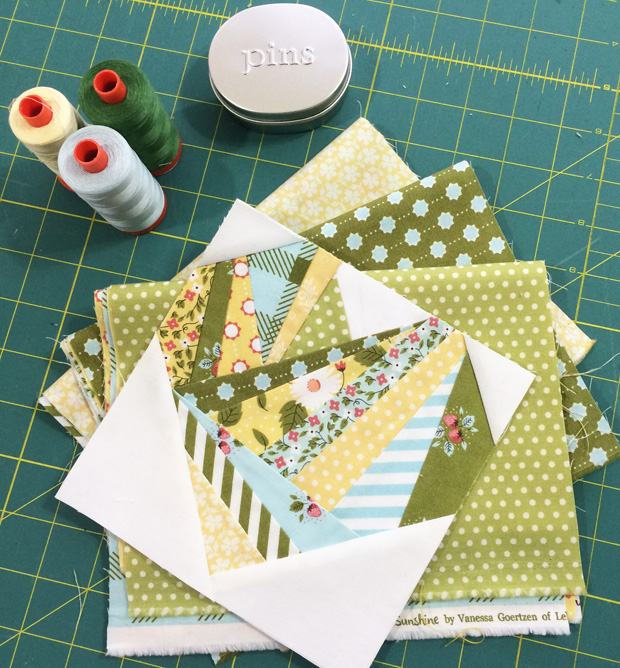
I was very lucky to get to work with the Little Miss Sunshine collection by Vanessa Goertzen of  Lella Boutique for many of the fabrics. Click here to get the precuts to make a similar block. 🙂

Step 1

Comb through your stash for pretty scraps that work well together.

scrappyheart_1

Thanks to Moda Fabrics for supplying me with such a sweet palette to work from!

Step 2

Cut the pieces according to the cutting chart given in the Splendid Sampler block pattern.

Step 3

Sew the first section of pieces starting with the white background square; press and trim after each piece. It will look somewhat like the hot mess below!

scrappyheart_2

 Step 4

Add the corner triangle to the first section. Remember, all this time you are sewing onto paper following the printed lines on the front of the paper.

scrappyheart_3

Step 5

Repeat the piecing, pressing and trimming process for the second section of the block.

scrappyheart_4

This is what the front looks like – I fold each line I am going to sew next and use an add a quarter ruler to trim off the excess smoothly and neatly.

scrappyheart_5

Step 6

Add the last section of heart in the same manner. It will look so good once it’s all trimmed!

scrappyheart_6

Step 7

Add the last two background corner triangles to complete the heart shape and trim to size. Now the best part – gently remove all the paper!

scrappyheart_7

Step 8

Stop and admire your beautiful handiwork. Now is a great time to start thinking about the threads you will use to machine quilt your beautiful blocks. My favorite thread for both piecing and machine quilting  is Aurifil – 50 weight cotton.

scrappy_heart_styled

All of that mess miraculously turns into a beautifully finished block!

Click here to go to the Splendid Sampler Block Page

Here’s my block in other colorways, made by some of the other Splendid Sampler designers. 🙂

Splendid Sampler Heart Blocks

Made by Pat Sloan, Julie Karasek, Jane Davidson, Lynette Anderson, Joan Ford, Melissa Corry

New around here?

Thanks for visiting! Be sure to sign up for Friendly Threads, my email newsletter and get a free PDF pattern plus other fun weekly tidbits!

Book Review – Intentional Piecing by Amy Friend

I’m excited to tell you about a brand new book by one of my quilting buddies, Amy Friend of During Quiet Time. It’s called Intentional Piecing: From Fussy Cutting to Foundation Piecing. As the title implies, it’s all about making thoughtful choices to make truly dynamic quilts.

Intentional Piecing

“Fussy Cutting” is isolating a specific motif in your fabric and intentionally cutting around the motif so as to place it exactly where you want it in your quilt or block.

Amy’s quilt, Tell Me a Story, is the perfect design to showcase a favorite collection of fussy cut pieces. To get you excited to make this quilt, or even a block or two, Amy is hosting a fun contest on Instagram to celebrate the release of her book. To enter, make a block, or group of blocks using this pattern in the book and then share them using the hashtags #intentionalpiecingbook and #tellmeastoryquilt. Then share the fun story behind your blocks!

Tell Me a Story Blocks

Each instagram post with those hashtags will be entered into a drawing for two fabric bundles, and Amy will randomly choose a winner on June 1st – so you have plenty of time to make and enter your blocks. Above is a sampling of just a few blocks that are currently being shared on Instagram. They are so fabulous!

The rest of the book includes patterns for 6 additional quilts, 6 smaller projects, and 10 paper pieced blocks that you can play with to create an infinite variety of designs! All of the needed templates are included in a 40+ page section at the back of the book indicating enlargement percentages.

Circuitry Quilt

I think my favorite quilt in the book is actually one made from selvages. Something about the arrangement and color-blocking of the selvages really appeals to me. It’s called Circuitry and comes with helpful tips on working with selvages.

In fact, the entire book is sprinkled with helpful hints throughout, including a section on paper piecing essentials and tips on what to stash and how to work with the fabrics you already have.

Intentional Piecing Blocks

Finally, even if you are the type that usually likes to design your own projects, the beautiful photography in the book is sure to inspire you! Shot on location in New England, this book can also serve as a coffee table book, ensuring a visual treat each time you peruse it.

Pick up your copy of Intentional Piecing today!

Paper Pieced Quilt Along #12 Machine Quilting Linear Echoes

New to my site? Be sure to sign up for my email newsletter and get a free PDF pattern!

Today we are back to using the walking foot or integrated dual feed (IDF)  to quilt straight lines of texture around the blocks. In my book Machine Quilting With Style, I call this quilting technique “Linear Echoes” because you are basically stitching echoing lines around the patchwork to help outline the piecing design and make it pop.

linear_echoes_1Start the first linear echo with the foot right next to the seam line. Vary the spacing if desired.

I did not mark the lines, but instead used the edge of my foot as a guideline when quilting each line. I was able to start and end each line of quilting off the edges of the quilt, in the batting, so I didn’t have to worry about burying my threads at either end.

linear_echoes_2Use the width of your foot as a guideline for spacing. Wider spacing means fewer lines to quilt.

You can quilt one or more lines around the blocks, depending on the type of look you want to achieve. So far I have quilted three lines around each row of blocks, each approximately 1/4″ apart. Rather than using a walking foot, I used my quarter inch foot for spacing, combined with the integrated dual feed on my BERNINA.

linear_echoes_3I’ll fill in the rest of the negative space with more lines, or a different FMQ design.

Here’s a tip – quilt a couple of stitches on a practice sandwich and measure them so you know how many stitches you are doing per inch. I only need to quilt about 2-3 stitches per quarter inch. That comes in handy when you need to echo quilt beyond the first line.

linear_echoes_backingThis is what the backing looks like so far. I love all that texture!!

So far I’m quilting my lines in black thread to match the background fabric on the top. I only want to see a little bit of the texture rather than the stitches so I’m ok if my quilting blends in at this point. I used an invisible thread from Aurifil for the bobbin so that the black thread wouldn’t be so stark on the lighter backing fabric.

For the next tutorial, I plan to add in a little more decorative free-motion quilting, probably with a contrasting thread. I’ll start on that now so I’m ready for the next QAL post!

Share your progress

Be sure to share your version in my Facebook group: Quilt With Christa.

Click here for all of the Paper Pieced Quilt Along Tutorials.

Paper Pieced Quilt Along #8 – Spray Basting Tutorial

I have been a quilter for over 20 years, but I’ve only been using basting spray on my quilts for about the last 2 years and it’s now my favorite go-to method. Although there are a few drawbacks: it’s more expensive, you need to do it outside or in a well-ventilated area, the convenience of not having to remove pins while machine quilting more than makes up for it!

Be sure to share your progress in my facebook group: Quilt With Christa!

qal_basting_spray

I can usually baste about 2-3 throw sized quilts from one can of basting spray.

Tips before starting

  • My spray basting method works best for quilt batting that is mostly or all cotton.
  • I use 2 large plastic tables that fold up and out of the way for storage. You can also use just one table for this method.
  • Make sure your batting is at least 2″ all around all four sides of the top (4″ larger than the finished measurement).
  • Make sure your backing is at least 3″ bigger all around (6″ larger than the finished quilt top).
  • If using a lot of black like I did, consider using a black batting (I used an 80/20 blend).
  • Grab a helper and a long acrylic ruler to help smooth things out.
  • If the quilt top or backing sticks to itself, you can easily pull it apart to reposition as needed.

Step 1

Press all 3 layers – quilt top, quilt backing and batting with a dry iron. This works best for 100% cotton or a cotton blend, but yes, you can iron your quilt batting. If you are worried about the batting sticking to your iron, put a piece of clean fabric on top of the batting and iron on top of that. If you have stubborn wrinkles, lightly spray the batting with water before pressing.

Step 2

Cover your table or work surface with a clean bed sheet or cardboard to protect the table from overspray. If it’s not windy outside, you can place pieces of white paper around the edges of the fabric and then remove them easily once the top and backing have been sprayed.

qal_basting_top

Spray outside to let the fumes dissipate. I used sheets of paper to catch the overspray.

Lay out the quilt top, wrong side up on a large table outside. Gently and evenly spray the entire top with 505 basting spray. (This is the brand I recommend.) I will usually spray in sections, following the pieced design of the quilt. Set aside the quilt top.

qal_basting_top_detailYou want the adhesive to completely cover the back side of the quilt top – just don’t overdo it.

Step 3

Lay out the quilt backing wrong side up and repeat the process to spray the entire backing. If the backing hangs over the edges, spray the center first and then the sides. Remove the bed sheet or papers and leave the backing on the table.

quilt backingBy using paper to catch the overspray, it’s easy to remove and leave the backing in place.
Dead summer grass and dirty concrete patio optional!! 🙂

Step 4

With a helper, lay the batting on top of the quilt backing. It may help to fold the backing in half and then in quarters first. Lay it on the corner of the backing and then unfold it and smooth it out as you go.

With a long acrylic ruler, smooth the batting across the backing, working out any lumps and bumps.

Step 5

With a helper, lay the sticky top right side up on top of the batting and backing piece. Again, smooth it out with a long ruler if needed. Flip the quilt sandwich over to ensure there are no wrinkles on the back and that the entire top has batting and backing underneath. Trim the excess batting and backing with batting shears leaving only an inch or two all around.

basting a quiltSmooth the layers out the best you can with your hands and a ruler.

Step 6

Bring all 3 layers inside and iron it from the back of your quilt to set the glue. If you have an oversized board that fits on top of your regular ironing board, this comes in really handy! Once the backing is smooth, flip the quilt over and iron it again from the front side.

If spray basting isn’t your thing, here’s a link another quilt along with my pin-basting tutorial. 🙂

You are now ready to quilt! Start choosing  your thread colors and meet me back here August 26th to begin the quilting. Or get a jump start on it now if you can’t wait!

Click here for all of the Paper Pieced Quilt Along Tutorials

New to my blog? Be sure to sign up for Friendly Threads – my email newsletter!

Paper Pieced Quilt Along #6 – Sewing the Top

I have a simple method I employ when sewing nearly all of my quilt tops. I lay out my blocks on a design wall, join them into rows, and sew the rows together to complete the top. For this lesson, I’ll share a few tips on how I make that go more smoothly. (Visit my Paper Pieced QAL page for links to all previous tutorials.)

finished_blocks I chose to leave this picture uncropped so that you can see I usually have several things happening on my design wall at the same time.

Step 1

First I throw up the blocks on my design wall. Although I will place the blocks into position, I don’t care too much about the color balance yet. I constantly refer to a picture or printout of my design so I can lay the blocks out in the correct position.

Step 2 (not shown)

After I have laid out all the blocks and background squares, I will play around with the arrangement until it feels right. For this quilt, I had just a few pops of light green and a couple of darker colors purposely out of order to give a little interest. I made sure to balance those out a little when I chose my final layout.

Step 3

sewthexHere’s another thrifty hint: I tend to use up leftover colored cotton bobbins in my piecing.

I take a picture with my camera phone and then begin sewing individual rows, two blocks at a time. As I joined the blocks, I pressed all of the joining seams open. I also pressed each row of blocks open to reduce the bulk.

Tip: use the seam line intersections as a guideline when matching points. For the sides of the block, I sewed just a few thread widths narrow of the intersection between the two seams shown above. When matching up blocks point to point, I pinned generously and sewed through the “x’s” that were formed by intersecting seams.

Step 4

I sewed all of the block rows individually, pressed each open, and put it back into position on the design wall. Then I sewed together two rows, pressed them and put them back on the wall.

block_rowsI made 5 sets of 2 row pairs, then joined those into 2 sections of 4 rows and 6 rows. Finally I joined the rows together to complete the quilt top.

Step 5 – The “Victory Lap”

Once the top is complete, I will secure the perimeter edges by sewing 1/8″ in from the edge of the quilt top, around all 4 sides. Someone jokingly referred to this as the “victory lap” on instagram and I got a kick out of that!

edge_stitchingStay-stitch around the perimeter to secure the edges for basting and quilting.

Now, we are ready to baste! Remember to share your work-in-progress on my Facebook group: Quilt With Christa, or on Instagram #paperpiecedqal.

Copyright and Permission Granted

I am very happy to share my knowledge with you free of charge during this quilt along. However, this information is for your personal use as a loyal reader of my blog. Please do not make copies of any part of this quilt along to distribute it to your friends. If you’d like to tell them about it, simply share my QAL site link with them and encourage them to come on over and join us: ChristasQuiltAlong.com

If you’d like to share links to my site on Facebook or on your own blog, that is great, too!

At the conclusion of the quilt along, I will be happy to edit down all of the content and turn it into a pattern for sale, so that others can use my pattern as a teaching aid in the future. 🙂

Modern Block Finalist and a Free Paper Pieced Download

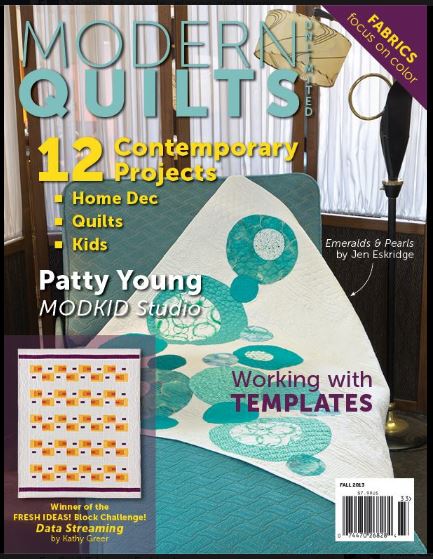
I was so excited when my block, Parallel Lines was chosen as a finalist in the Modern Quilts Unlimited Fresh Ideas block challenge. The 9 finalists and 3 winners’ names were listed in the Fall 2013 issue (page 26).

Parallel Lines

Parallel Lines Block Designed by Christa Watson

You can view pictures of all the finalist blocks on MQU’s website. Each of us finalists gets a free one year subscription to the magazine, so that’s not a bad deal for a fun bit of designing. (Who else loves to quilt for for freebies?!)

The three winners got a few extra goodies and are each having their quilts patterned in current and future MQU issues, so congrats goes out to each of them. 🙂 The first one was amazing and I can’t wait to see the other two!

MQU

Modern Quilts Unlimited Fall 2013 – I love this magazine!

I designed and made my 12″ Parallel Lines block using paper piecing techniques. However, I’ve been toying around with the idea of what it would look like as a 6″ block repeated over the surface of the quilt.

Here’s a quick sketch I came up with showing what a quilt would look like using my block. I like to keep things simple, so I’ve chosen a clean grey/white color scheme. But wouldn’t these be fun to make in a rainbow of colors?

Parallel Lines Quilt

Parallel Lines Quilt Design, 36″ x 36″

Click here or the picture below for a free download of the paper pieced block template in the 6″ version. You can print it off as many times as you like to make the number of blocks needed. You can also enlarge it on a photocopier to a bigger size, if desired.

When you click the image below, it may not show correctly in Firefox. Be sure to save it to your computer first and view it in another pdf viewer (like Adobe Reader, etc.).

Parallel Lines

Parallel Lines – Click above to download the paper pieced template.

I’m not calling this a pattern because I haven’t included any instructions on how to paper piece it – but there are many wonderful blog tutorials out there including this paper piecing tutorial from the Quilter’s Cache.

EQI’ve also included an EQ7 download for the block and quilt here.

If you decide to play around with this block or make a quilt, please be sure to share it on my flickr group: Christa’s Quilt Along.

Modern Dresden Block – Paper Pieced Pattern

Pattern Update

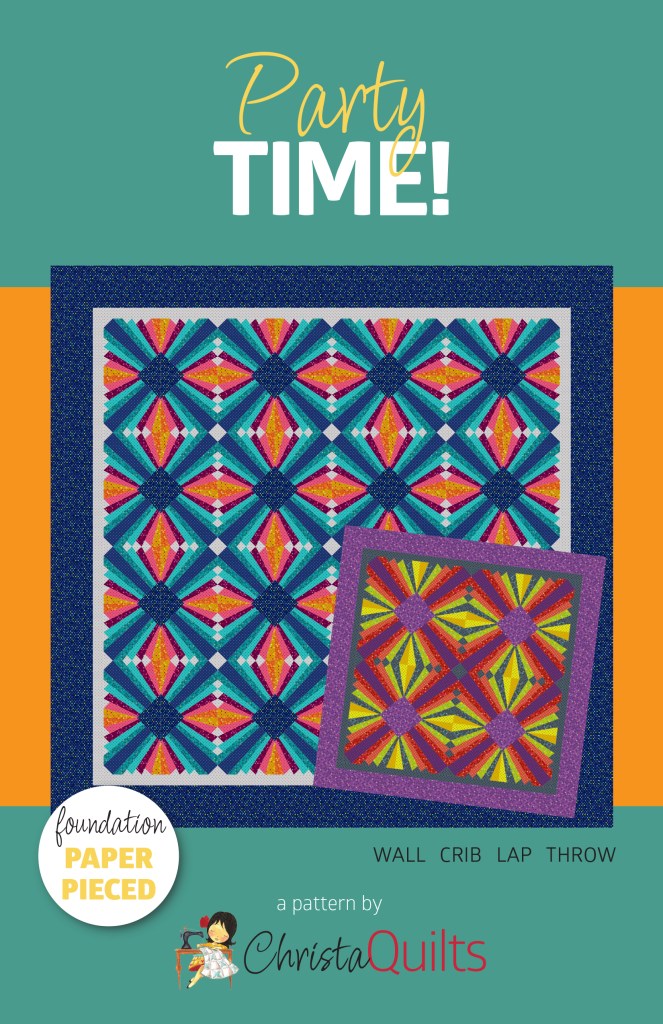
I have now turned this block tutorial into a full-fledged foundation paper pieced pattern called Party Time. It includes multiple sizes, the foundation pattern to photocopy & quilting suggestions.

Click here to purchase the Paper Pieced PDF Download.

Original Design Idea – Modern Dresden

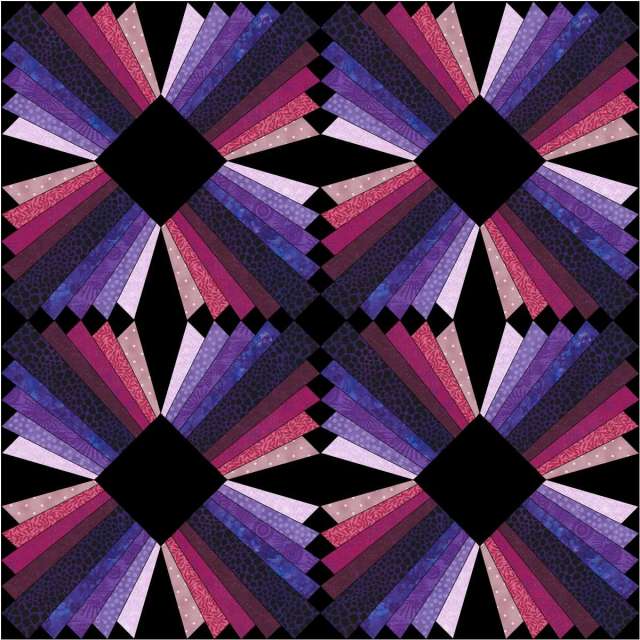
This my contemporary interpretation of a Dresden Plate block.

Modern Dresden in OrangeI started with the idea of “plates” or “wedges” radiating out from a center. But instead of classic curves, I wanted to keep my design straight and angular. So I played around with lines and angles in EQ and this is what I came up with.

And just for the fun of it, here’s the same design in purple. It really sparkles by using lighter hues of the same color at the edges of the blocks.

Modern Dresden in Purple

Paper Pieced Wreath Berry Christmas – Part 1 of 2

Paper Pieced Log Cabin WreathThis is a Christmas Wreath quilt I designed and made from paper-pieced Log Cabin blocks.

Since I can’t make anything anymore without feeling the need to write a tutorial for it, here you go:

I will demo making the log cabin blocks today. Part 2 covers completing the top and machine quilting.

The finished block size is 3″. The finished mini quilt (or table topper or pillow) is 18″ x 18.”

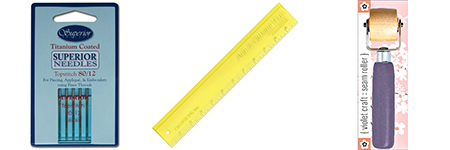
Step 1 – Gather Your tools and supplies. These are not a necessity, but as with any project, they make the job easier!

  • Rotary Cutter
  • Wooden Seam Roller for pressing
  • Add a Quarter Ruler for neatly trimming while piecing
  • A straight edge surface such as a postcard or piece of template plastic
  • Vellum Tracing Paper to print the foundations on
  • 1/2 yard of red fabric for centers, borders and binding (or scraps to equal that much)
  • 1/4 yard of cream to tan fabric for light half of log cabin blocks (or scraps)
  • 1/2 yard total of assorted green fabric scraps for log wreaths and border
  • FQ of green for outer border
  • Size 90 sewing needles for sewing through paper foundations
  • Small scissor snips for trimming
  • Cotton Thread for piecing
  • Your choice of decorative thread for machine quilting

Step 2 – Cutting all the logs. I prefer to have everything cut out before I begin my sewing. The pieces are cut bigger and will be trimmed later. Although there are 4 sizes of  light logs and 4 sizes of dark logs, I cut only 2 sizes for each. It wastes a tiny bit more fabric, but it’s easier to keep things organized, especially if I change my mind on fabric placement.

A little note on cutting pieces to fit – measure the finished size of your pieces and add 3/4  inch to this measurement (more if working with triangles). The units used for paper piecing have the extra 3/4 inch added in already.

Fabric cuts are based on 20-22″ long strips for working with fat quarters.

From the red fabric cut (if you cut very carefully you can get it all from just one fq):Red Fabric
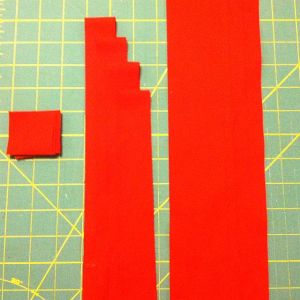
  • 16 – 1.75″ squares for centers
  • 4 – 1.25 ” x 16″ strips for inner borders (to trim down later)
  • 4 – 2 .25″ strips for binding (2 strips if using 42″ wide fabric)

From assorted white, cream, or tan scraps, cut 10 – 1.25″ wide Cream Fabricstrips. Cross-cut into:
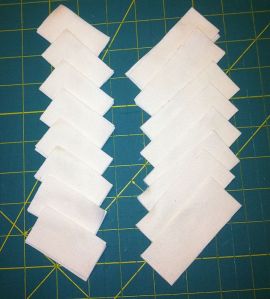
  • 32 – 1.25″ x 2.25″ rectangles
  • 32 – 1.25 x 3.25″ rectangles

From assorted green scraps, cut 12 – 1.25″ wide strips. Cross-cut into: Green Fabric

  • 32 – 1.25″ x 2.75″ rectangles
  • 32 – 1.25″ x 3.75″ rectangles

From green border fabric, cut 4 – 2.25″ x 22″ strips (trim later)


Step 3 – Printing the Paper Foundations

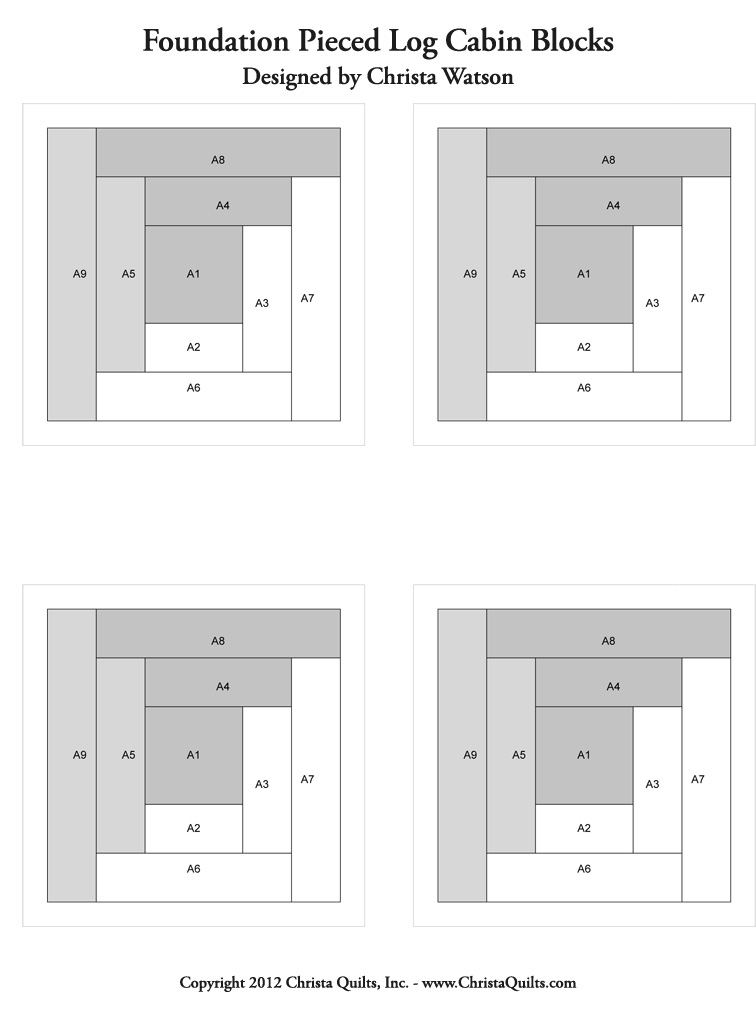
You can download the paper pieced log cabin block pattern by clicking the image below. There are 4 per page, so you would need to print 4 pages for a total of 16 blocks. Be sure to set your printer to print the PDF at actual size, not print to fit.
Paper Pieced Log Cabin Blocks

You can print on copy paper but it is much easier to see what you are doing if you use see-through paper (vellum) instead. Cut apart your paper foundations leaving a seam allowance all around. It is printed in grey-scale so you can tell which side of the block is light and which is dark. The blocks are printed as a mirror image for this technique.

Step 4 – Sewing the Paper Pieced Log Cabins

There are a lot of pictures for this next section so I have shrunk them down in order. Just click on any picture to enlarge so you can see the details.

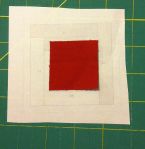
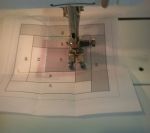
Line up your red square so that the BACK of the fabric touches the BACK of the paper. (Kind of tricky with solids – I know!) With right sides together, line up your first short white log on top of the red square, with about 1/4 inch overlapping your sewing line.

This first two pictures show the back side. You will be sewing from the front.
Log Cabin 1

Log Cabin 2

Log Cabin 3

You can see a shadow where the fabric is sticking out far enough for the seam allowance.

Remember to start and end 1/8 to 1/4 inch before and after the line. Use a smaller stitch length and a larger needle. Sew on the line between A1 and A2.

Log Cabin 4

Log Cabin 5

Log Cabin 6Log Cabin 7

Remove the block from the machine and clip threads. Use a wooden seam roller to press the newly sewn piece to the side. Flip the block back over to the front and using a straight edge (like a business card), fold over the paper on the next sewing line (between A1 & A3).

Log Cabin 8

Log Cabin 9Log Cabin 10Log Cabin 11

The excess seam will be exposed. (You may need to tug the fabric from the paper a bit to get it to lie flat.) To trim it neatly, use the add-a-quarter ruler to create a ridge on top of your block, paper, and straight edge. Trim off the excess. Flip the block over and add your next light log along the newly trimmed edge. Sewing on the printed side, sew the next seam.
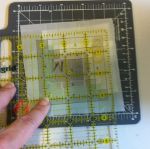
Log Cabin 12

Log Cabin 14Log Cabin 15Continue sewing in this manner until all of your logs have been added. Remember to Sew, then Press, then Trim each seam.

Once the block is complete you can trim off the excess leaving 1/4″ seam allowances.

Make your first block completely to test your process. Once you are satisfied with the results,  Repeat to make a total of 16 blocks. You can sew all of the same steps at the same time to speed up the process. When you are done with the blocks, you may remove all the foundations, or keep them on until your complete your top.

Weekend Workshops

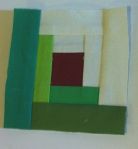
On Friday and Saturday several guild members and I took two fabulous classes from award-winning quilter Deb Karasik.  From choosing fabrics to improving my paper piecing and binding skills, the entire weekend was a blast. The best part about it was no traveling!
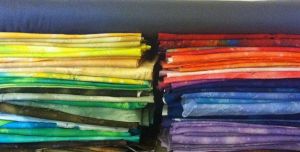
Friday morning I headed off to class with these two stacks of fabric in tow, an assortment of Fossil Ferns from my stash and a stack of Kona Solid fat quarters, along with some grey.

Fossil FernKona Solids

Friday Class

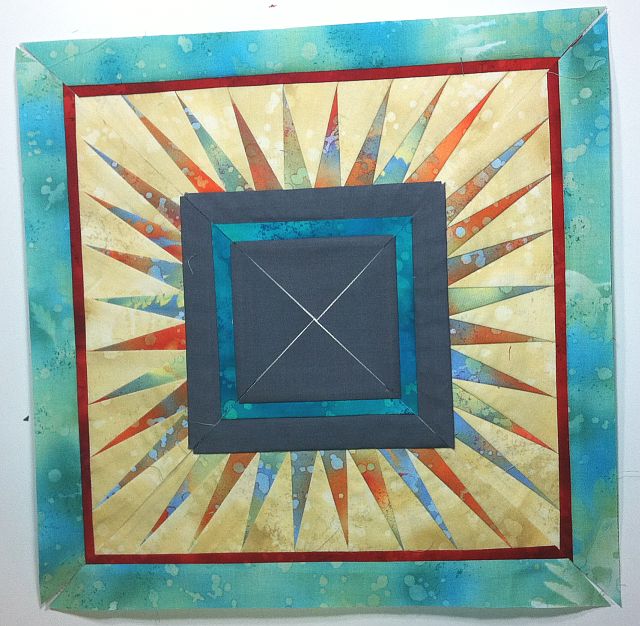
For the first quilt, I finished 4 triangle segments which will form the quilt center.

I tried to mix in grey with the Fossil Ferns, but as you can see, they just didn’t work well together.

I’m going to take the grey out and swap it for either black or white.

Or I may remake these blocks with the Kona Solids and grey.

What do you think?

Saturday ClassFor the next quilt, I was feeling more confidant because it didn’t require the use of any backgrounds – just lots of great contrast.

I was originally going to use my solid fat quarters but I stuck with the fossil ferns instead.

I really wanted to modernize these quilts but I’m not sure the block designs have the right “look” for a modern quilt.

That’s ok – it was still a great learning experience anyway!

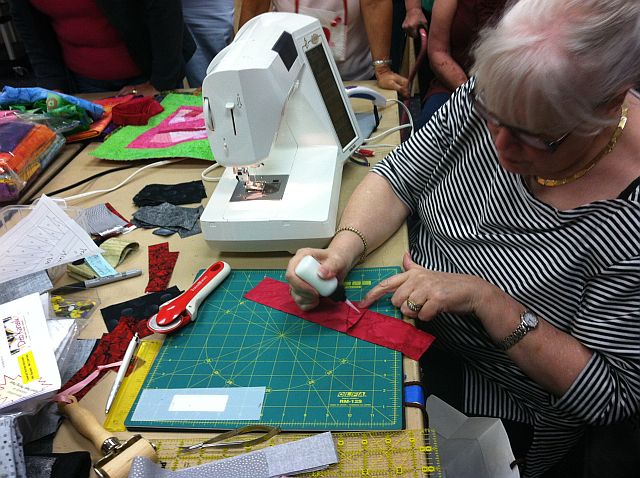
As you can see, we didn’t get a ton of blocks done, but I did learn that starch is my friend and I’m not afraid of paper piecing.

Fun with GlueDeb even did a excellent demo about applying binding with glue first before sewing it down. You can see a wonderful binding tutorial on her website.

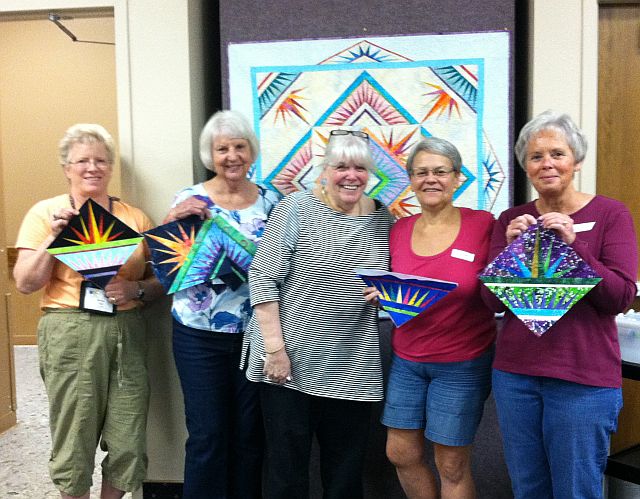
Below is a photo of some fellow quilt guild members with a finished block from Friday’s class. They are standing in front of Deb Karasik’s class sample for the day.

Friday's ClassAnd here is a picture from Saturday’s class. I’m the shortest and I get the least done in class, but I still think I have the most fun!! There were about 20 students in each class each day and a few of us took both classes. It will be fun to see everyone’s finished quilts!

Saturday's ClassA couple of gals laid their blocks down next to each other just for fun. Don’t they look great?

Finished Blocks

This pattern looks amazing in any colors. Thanks for the great weekend, Deb!