New Around here?
Be sure to follow my blog so you can notified each time I write a new post! Just enter your email address in the box on the right side bar (or scroll ALL THE WAY to the bottom of your screen if using a mobile device). That way you’ll never miss a new tutorial or quilting inspiration!
Hubs recently earned some extra brownie points by helping me create a brand new HUGE design wall for my sewing room. In my nearly 20 years of quilting I was fine using the floor, tables, portable walls or what have you.
However, now that I’m getting a little more serious about showing and sharing my quilts in public and online, I realized I needed a better solution. I want a larger space so that I can design and photograph bigger quilts.

2 Sheets of Foam Insulation
We started by purchasing 2 huge pieces of foam core from the home improvement store. Each measures 4′ x 8′ and the space we are covering is about 7.5′ x 8′.
After wrestling them in the SUV and taking them home, we cut off about 6″ with a utility knife so it would be the right size.

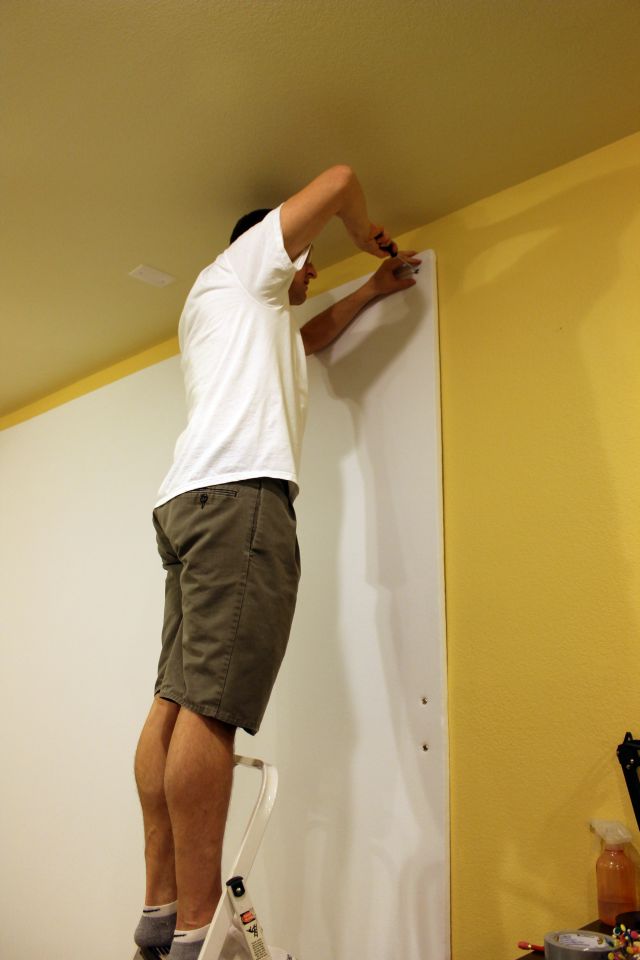
Jason putting my rulers to work!
Jason drew the straight lines, while I did the cutting. It wasn’t a perfect cut, so we decided to put this side on the bottom where no one would see it. In retrospect, I should have tried my rotary cutter, but this stuff if pretty darn thick! (We tried to get them to cut it at the store but they said they couldn’t. Bummer!)

I’d rather use a rotary cutter than a utility blade, any day!
We then taped the two pieces of foam core together with duct tape on the white side. The other side, the silver side is the “front”.

Tape the Pieces
Next was the hardest part. We bought a king-sized flannel sheet and covered the entire wall by stapling the flannel to the back side. The problem we ran into is that the sheet was not square or even so we had to yank on it quite a bit to make sure it would be nice and smooth on the front. We pinned it to the foam sheet first, then stapled like crazy!

Staple the Sheet
We pulled it so it would be taut and attached it with a ton of staples. The corners were the hardest to finagle so that they would look smooth on the front.

Stapling the Corners
We used my basting tables to work on but you could also do this on a smooth floor if you have enough space. It reminded me of basting a quilt but not as fun, LOL!!
Once everything was in place, it was time to mount it to the wall. Jason did this by attaching it with screws and decorative washers to make it look a little less “industrial”.
Mounting the Wall
I am so happy that I have larger space to design. It adds such a pretty element to my sewing space. Now need to keep some WIP’s on there all the time!

Finished Design Wall, 8′ wide by 7.5′ high.

I’m thinking of making a design wall similar to yours. Why did you cut part of the board off?
I cut it down so that it would fit the height of my wall. I hope that makes sense!
Christa Watson Instagram @christaquilts website/blog: ChristaQuilts.com Click here to join my facebook group: Quilt with Christa
On Fri, Dec 15, 2017 at 4:20 PM, Christa Quilts wrote:
>
My one suggestion to make the cutting of the board easier is an electric knife. It should go through it like butter.
I love your design wall and will be making one like it, what kind of screws and washers did you use to put it up? A name or picture would help. Thanks!
The foam insulation I bought has smooth sides and hard to stick reg. straight pins into. So I glued w/ construction adhesive, a sheet of 5/8″ white styrafoam on it. This is the kind that produces tons of little balls when you cut it. Then I covered both with white flannel purchased at the fabric store. I used Gorilla tape to hold the flannel on. I use the back side to put my quilts on when I block them. I use T pins to hold them in place and those pins are not hard to stick in the pink insulation board. My design wall is free standing. It leans against my bi-fold closet doors. I can easily slide it over to get in the closet.
when you cut bead board, put a piece of painters tape at your line so youre cutting through the tape first. see if that helps.
I also used insulation board 1/2″ thick, but since I don’t have a wall to mount to they are freestanding. My neighbour added aluminum U-channels around the edges for some stability before I covered in flannel. Lightweight to move around but still sturdy, and kept separate in 2 pieces. Now they just store behind a door and I pull them out and prop in front of a window temporarily when needed.
I used a king-size fleece blanket from Wally World. I also bought a pair of replacement tent poles, the kind that have elastic and fold up. Ran the poles through the opposing hems of the blanket and mount to the wall with cup hooks. Today, I’d use Command hooks but they weren’t available at the time.
I recently took over the ‘living room’ and it’s now the studio. Used same concept for design walls. I used 1″ insulating board and created large, snug sacks for each board out of a kingsized plush fleece sheet I found on clearance. I did strip off the film that is on each side of the board. Don’t know if that was a mistake or not yet. I hang them with double hooks over the existing 1980’s oak entertainment center. That makes them movable to get to the storage the entertainment center provides … and also I can use the backs just as easy as the front. So I can have multiple projects at one time. Because that’s how I roll!
I used a butcher knife to cut my board and another time an electric knife; my DH uses this at work and suggested. I do love my board and decorated the edges with a measure yard stick…Do love the idea
What a great idea…👍
We did with a frame created from furring strips, but I like your method much better Christa. There is nothing but air behind my flannel and that isn’t so great for pinning. We’re having a ceiling put in the basement, where the design wall is, so it has to come down now. I think we’ll redo the new one with foam insulation. Thanks for the great tutorial!
I did something similar years ago using foam board from a big box home improvement store. I covered each individually with warm and natural batting. I recently removed the batting which was stapled to the back and replaced it with white flannel. I find covering each 4 x 8 foam board separately makes it very easy. I abutted them and nailed them to my wall using white finish nails. It has never fallen and I’ve had my wall for design wall for about 10+ years. I did move it from one house to another. Again easier to do if you have each board separate. Just a thought!
You need a new home improvement store. Mine cut that extra length off for me without batting an eye. I love having a design wall and you are going to love it, too.
We did the same ❤ my 'floor to ceiling – wall to wall' design wall!
Could you tell me what thickness your insulation board is. The boards come in 1/2, 3/4, 1, 1 1/2, and 3 inch thicknesses. If I wanted the design wall/board to rest on the floor and lean against the wall would this material be thick enough and strong enough to do the job. I love the idea of using a flannel bottom sheet for the covering.
It’s the 1 1/2″ inch size I believe.
A possible alternative to the flannel sheet is synthetic felt. Instead of staples, I mitered & stitched the corners so it could slip on and off the core board (as time goes on, things get dusty) so removal is easy, machine wash and dry and back on the foam core. I made two separate panels, not bolted to the wall so I can move these around. I have one in the guest room (for visiting quilters) and one in my sewing studio. Of course, I use them both. There is need for brackets at the upper corners as the core board tends to want to bend away from the wall. Brackets keep the upper corners in place.
Think you will love your new design wall. My husband and I did a similar project about two years ago. We used the same type of foam core. We sat up a cutting table outside. Then used black batting for our covering. To hang we used several of the jumbo sized Command picture hangers. This way when the day comes that we decide to move, the wall should be in good shape.
I live in a real log cabin so it is very challenging as I have no real walls in woman’s world ,but this a great tutorial.
Thank you ,
Patty
I did this 2 months ago and I love my big wall! I hung my 2 so the long sides were parallel to the floor, leaving a apace at the bottom where I can still use my electrical outlet. The top edge goes to the ceiling.
I have two seperate ones I made almost the same way. I used a fitted flannel sheet and duct tape instead of staples. I did not secure it to the wall, because my sewing room is small. I have bookcases on the wall and I stood these in front of them and I could slide them back and forth or move them around. A design wall is a must!
This will be so nice for you. I know mine has been game-changing. Please share at my linky: http://quiltingmod.blogspot.com/search/label/Lessons%20Learned%20Linky
Nice if you have the space!
Love this will have to do this project after my son leaves home and I take over his room for my sewing room. Now I will be on the lookout for the king sized flannel Sheet.
Lucky you! Maybe I’ll have one someday
great tutorial Thanks This is something we might actually be able to make.
I hung a king sized flannel flat sheet on the wall. The person who originally built our house must’ve loved chair railing because it’s in nearly every room except the bedrooms. But the upside is I have a design wall that’s 9 x 9 feet!