Machine Quilting Tips and Tricks Part 2: Tools of the Trade

To be successful with machine quilting, especially on a home sewing machine, the right tools can make all the difference. Below, I’m sharing some of my favorite tools and supplies that make the job easier. This is by no means an exhaustive list. And if you have a tool or tip you love that’s not listed here, please be sure to share it in the comments so we can all learn from each other!

Sewing Machine with Drop in Table

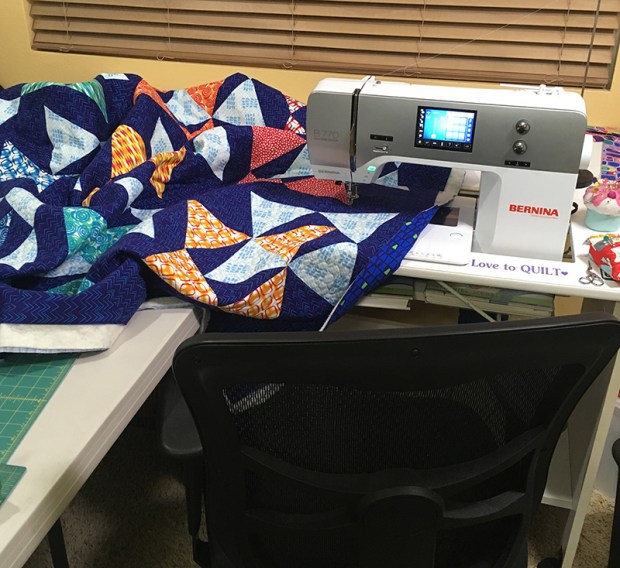
Having a large work surface will help as you scrunch and smoosh your quilt through the machine. My table is about 20 years old and originally held a different machine, so you can see that the hole in the middle doesn’t really fit my new machine. However, by placing the extension bed on top of it and adjusting the height of the drop in table, it works great!!

Sewing Machine Feet

Machine Quilting PracticeFor “Walking-Foot” style quilting you can use a walking foot made for your machine. Or if your machine has a built-in dual feed like mine does, you can use an open-toe dual feed foot instead. Both types of feet perform the same function which is feeding the bulky quilt through the machine evenly so you don’t get puckers on your quilt.

free-motion-quilting

For free-motion quilting, you’ll need to use a specialty free-motion foot that looks like a circle or an oval, along with dropping the feed dogs on your machine. This will allow you to move the quilt and stitch in any direction. Just like with the walking foot, I prefer an open toe so that you can see the needle better. This makes it easier to see where you are stitching.

Recommended Sewing Machine Features

Here’s a quick list of bells and whistles that make the job easier:

  • Stop with the needle in the up or down position
  • Wider throat space (8″-10″ is ideal. Most standard machines are 6″.)
  • Ability to adjust presser foot pressure; less pressure is great when walking foot quilting.
  • Knee lift or hover feature to raise presser foot without having to use your hands
  • Full shank feet rather than snap ons so it’s fast and easy to switch out the feet
  • Straight stitch throat plate – for free-motion quilting
  • Decorative stitches (with zig-zag plate) for walking foot quilting effects
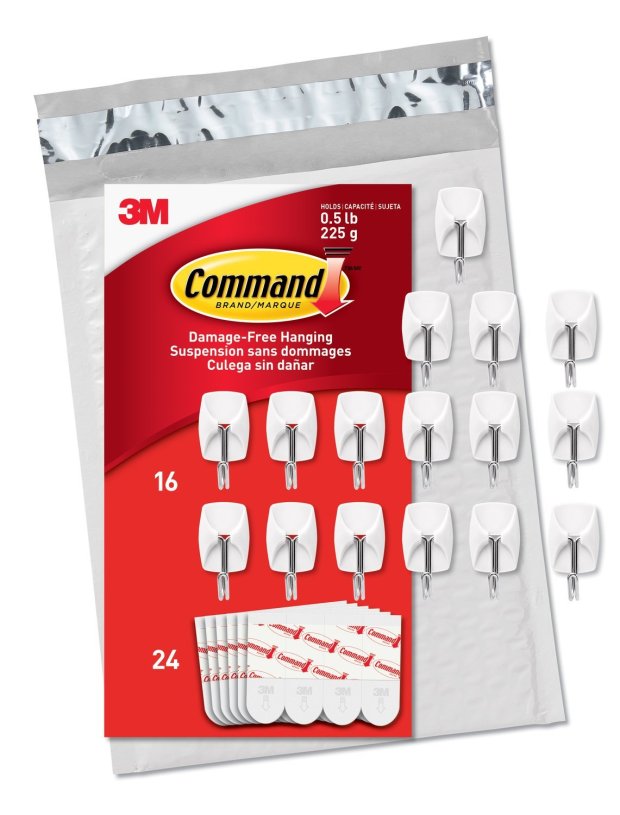
Quilting Notions

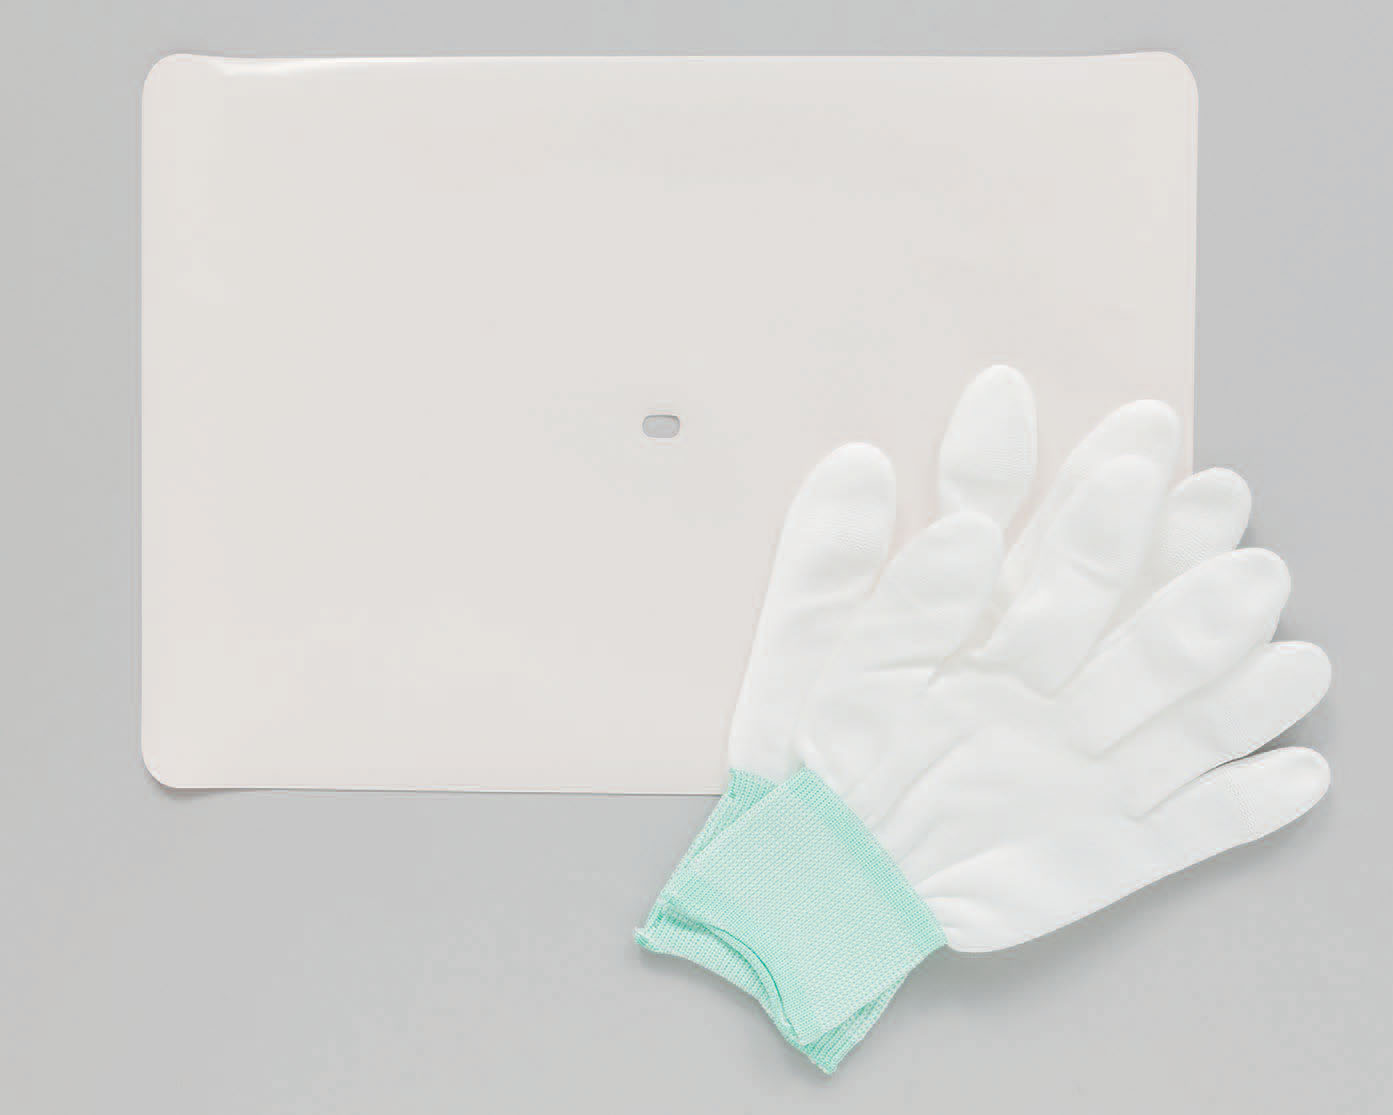
When free-motion quilting, I place a Supreme Slider on the bed of my machine to make it more slick. This makes it easier to move the quilt around. The gloves give me a better grip on the quilt while I scrunch and smoosh it through the machine.

Marking Tools

quilt marking tools

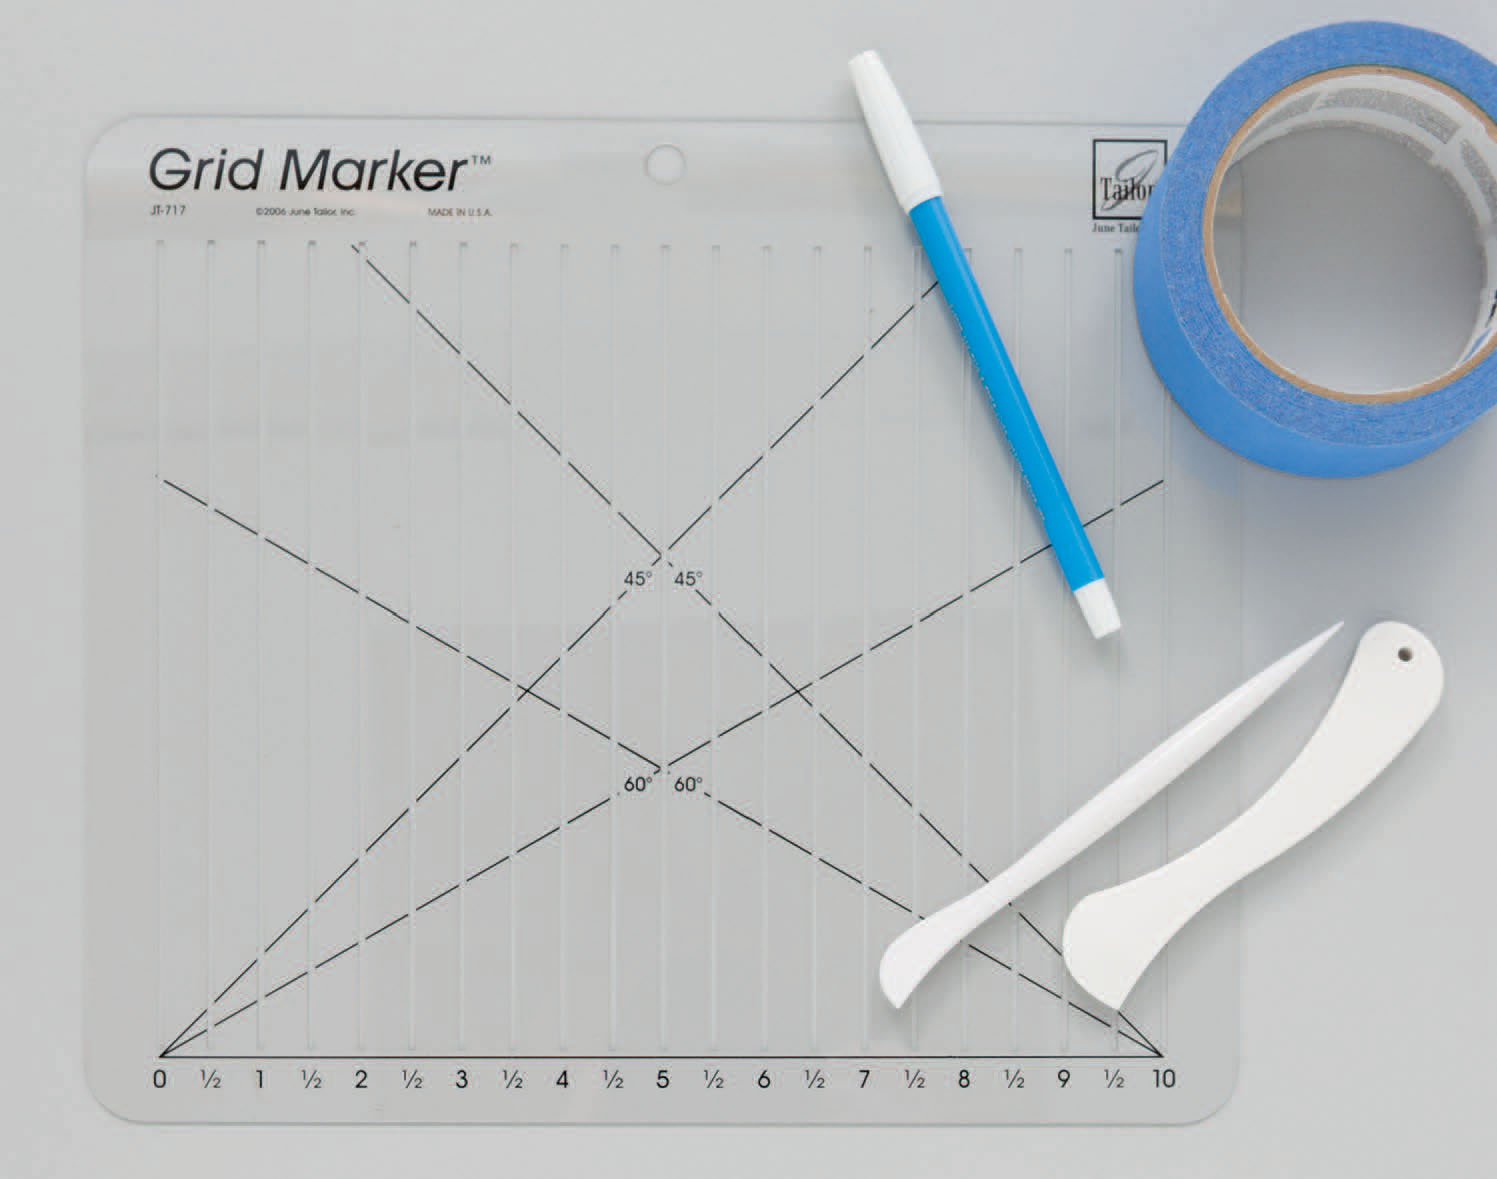
I don’t like to mark my quilts very much, but when I do, I’ll use painters tape to create a straight edge. Or I’ll use a white plastic hera tool to create a crease on my quilt that I can follow. If I want to mark out evenly spaced lines, I’ll use a grid marker with the hera tool, or a water soluble marking pen to mark the lines.
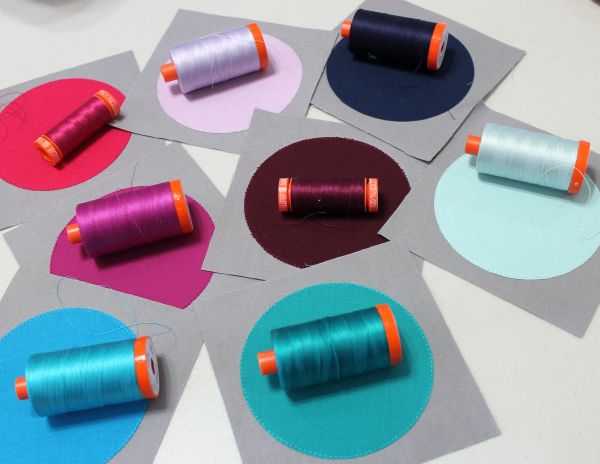
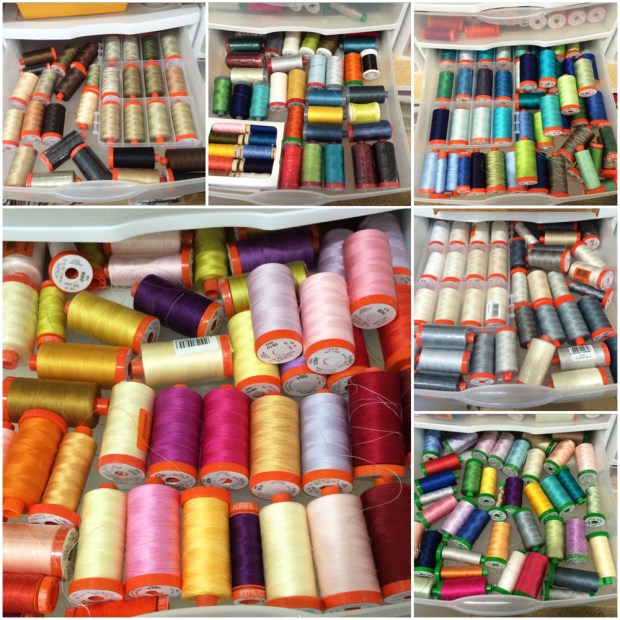
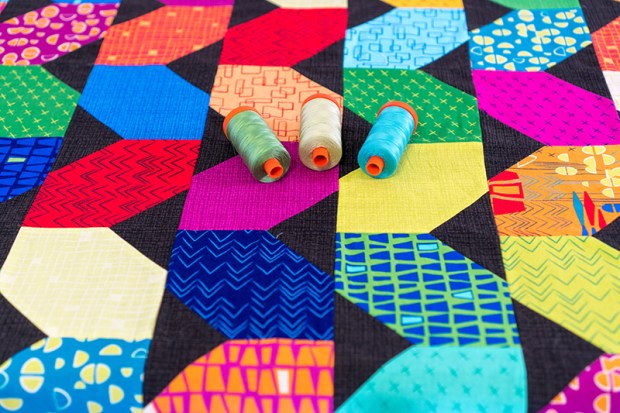
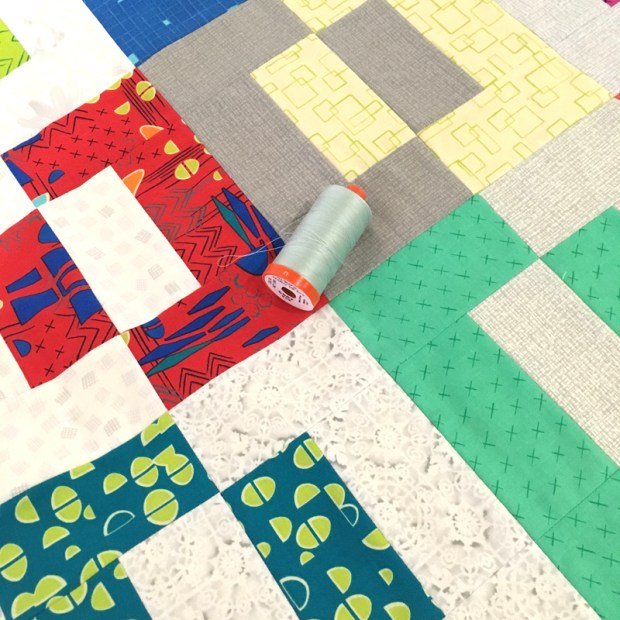
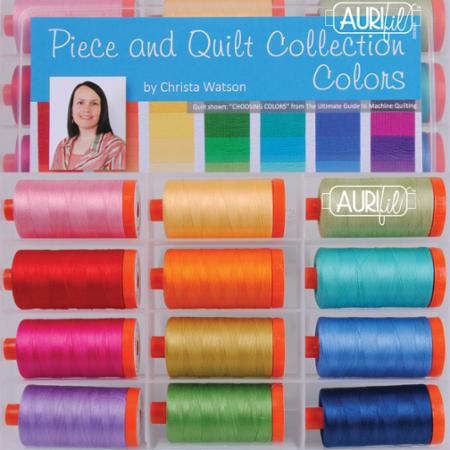
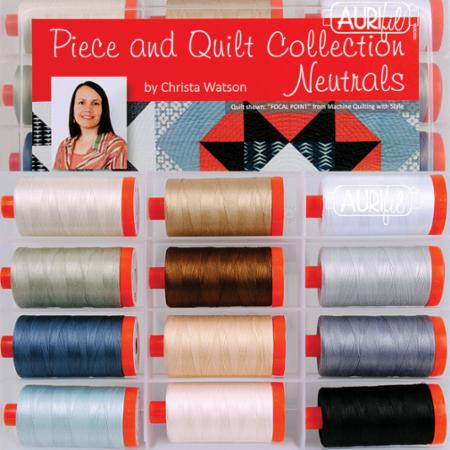
Thread

Aurifil Thread by Christa Watson

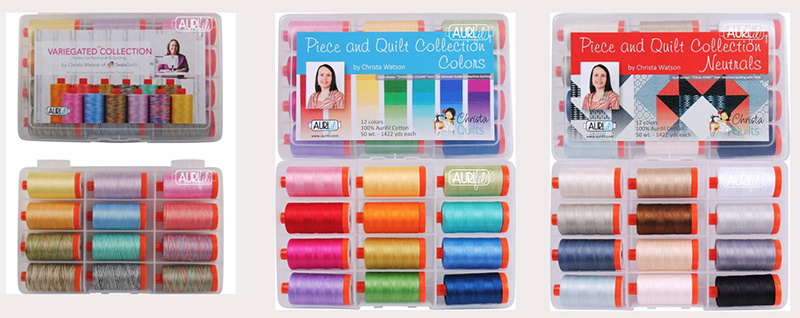
I prefer to piece and quilt all of my quilts with Aurifil, 50 weight 100% cotton thread. It’s thin, yet strong and comes in a wide variety of colors. Because it’s cotton, it won’t make my quilts stiff when I quilt them heavily. And I can use up the leftover bobbins when piecing my next quilt!

Needles

Superior Threads Needles

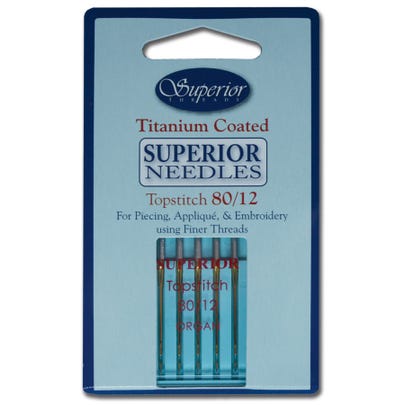
To go along with the size 50 weight thread, I prefer size 80/12 topstitch needles. The titanium coating makes them stronger so they last longer than regular needles. I use the blue package above for both piecing and quilting.

Stack of practice sandwiches

Free-Motion Quilting practice samples

Make a stack of practice pieces with 2 squares of fabric and batting in between. Around 10-12″ is good so you have plenty of room to practice your designs. You can try a variety of fabrics, a variety of battings, and even use up some leftover quilt blocks. You can also use leftover fabrics and long pieces of batting that have trimmed off when you basted your quilt. Put those scraps to work!!

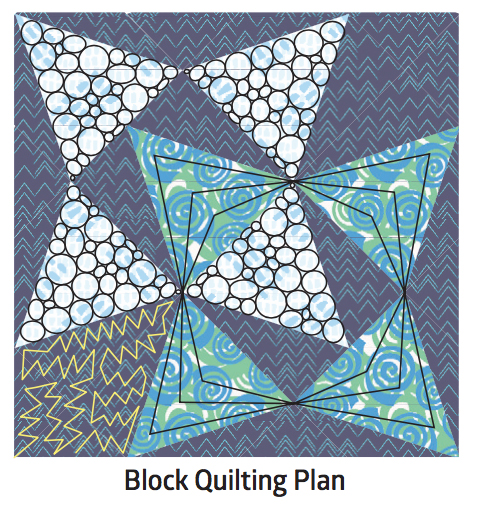
Pen and Paper for Sketching

FMQ Demo

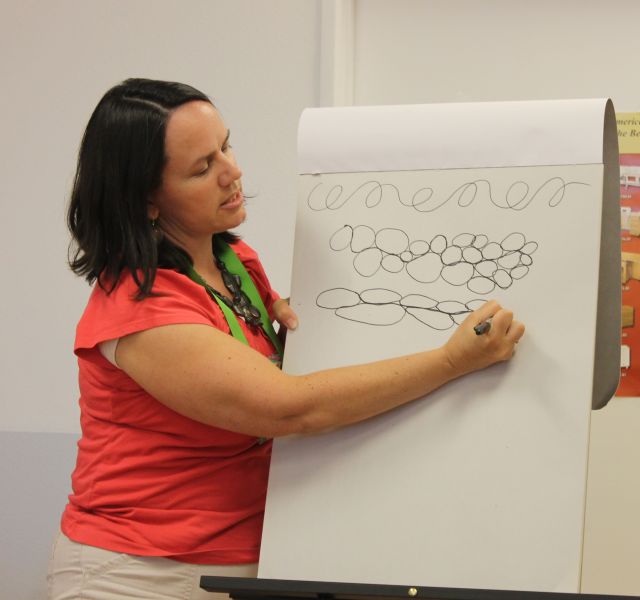
A small notebook will do but it’s important to sketch out your designs on paper before you try them out on the real quilt!

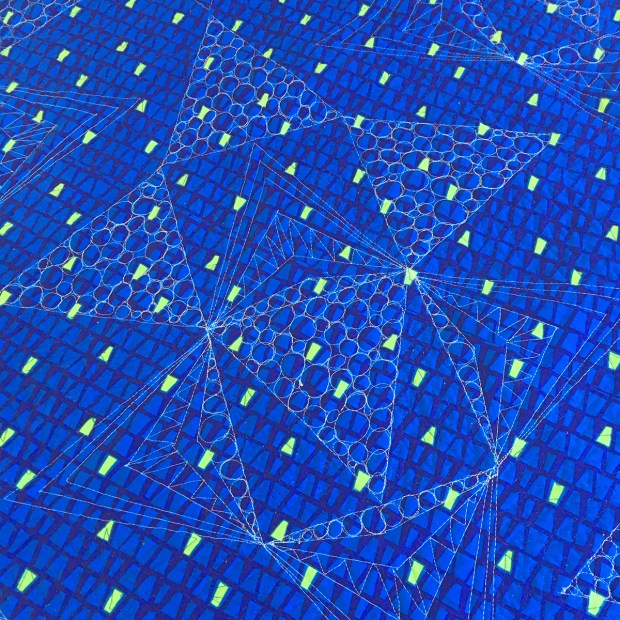
Inspiration pics and quilting ideas

99 machine quilting designs

Click here to get your signed copy of 99 Machine Quilting Designs

My latest book, 99 Machine Quilting Designs is chock full of quilting motifs for you to practice! You can sketch each one or follow the line drawings to see how each design is formed and it includes alternate ideas on each and every page. It includes dozens of ideas for walking foot and free motion quilting!

So that’s pretty much it when it comes to machine quilting supplies. I’m a minimalist when it comes to tools needed, but these above items serve me well for all of the quilts I make.

Just remember, the most important thing you need in your quilting toolbox is a “can-do” attitude. After all, this is supposed to be fun!!

Click here for my full series of Machine Quilting Tips and Tricks.

Machine Quilting Tips and Tricks Part 1 of 9: Introduction

Today I’m excited to kick off a 9 part series on Machine Quilting Tips and Tricks. This is something I’ve been wanting to do for a long time, especially since I’ve written and taught on this topic extensively over the last few years. This week’s post will serve as an introduction to the series, and also as the landing page where I’ll update each of the links below as they are written.

Christa Quilts

I’m also happy to answer your machine quilting questions. So don’t be shy – ask you questions in the comments and I’ll include answers in a future post! So first off all here’s the schedule:

  • Week 1 – Introduction
  • Week 2 – Tools of the Trade
  • Week 3 – Preparing the Quilt
  • Week 4 – Practice, Practice, Practice!
  • Week 5 – Make a Quilting Plan
  • Week 6 – Easy Walking Foot Designs
  • Week 7 – Easy Free Motion Designs
  • Week 8 – Custom Quilting
  • Week 9 – Wrap up and Your Questions Answered

Sewing Machine – Longarm vs. Sit Down

The very first question you’ll want to decide is whether you want to quilt on a regular home sewing machine (like I do), or if you want to purchase a specialty machine like a sit-down free motion machine or a stand up long-arm machine.

I like the feel of “scrunching and smooshing” my quilt through a regular machine, so that’s what I’m most comfortable with. Also, I like the freedom to quilt “walking-foot” designs with my feed-dogs up, or “free-motion” designs with my feed-dogs down. A free-motion only machine can be limiting, but it provides more room to quilt and can usually quilt a lot faster than a domestic home machine.

Domestic Machine Quilting
Christa Quilts

This throwback pic is from 2013 just after I got my first upgraded machine, but I still quilt the same way – in my studio while listening to music or a quilting podcast!

My recommendation is to try out both and do what feels most natural for you. Many quilters start quilting on their regular home sewing machine, then upgrade to a larger machine as they improve their skills. I’ve tried both and I prefer the feel of domestic machine quilting, so that’s mainly what the rest of this series will be about. However, if you are a longarmer, stick around – many of my tips and ideas can be easily adapted to your situation!

A great place to try out sit down “domestic” machines is at your local sewing machine dealer. I recommend visiting all of the dealers in your area and bringing in your own practice samples (or even a full sized quilt) to try out. Although I am a BERNINA ambassador and that’s my machine brand of choice, a good reliable dealer will go along way towards helping you be successful with home machine quilting. I don’t recommend buying a machine online or at a big box store, because you’re just not going to get the level or service you’ll need.

Long Arm Quilting
Vicki Ruebel Orchid Owl Quilts

My friend Vicki Ruebel of Orchid Owl Quilts in her longarm shop in Las Vegas

For long-arm machines, I highly recommend testing out all of the major brands at local or national quilt shows. They’ll usually have a full-size machine set up that you can test out, and it will be prepared with a quilt already on the machine that you can practice on. Most shows will also have great deals on machines if you purchase it at the show. So keep that in mind and don’t be afraid to attend multiple shows until your mind is made up.

Many local quilt shops now offer longarm rental service so that’s also a great way to get your feet wet before making such a large purchase.

If you want further reading on the differences between machine quilting with a longarm versus a domestic machine, be sure to check out mine and Angela Walters’ book The Ultimate Guide to Machine Quilting. It’s where we get to share the best of both worlds!The Ultimate Guide to Machine Quilting by Christa Watson and Angela Walters

Click here to grab a signed copy of our book, The Ultimate Guide to Machine Quilting.

Here are  two other fabulous longarmers I recommend following on social media: my friends Heather Black of Quiltachusetts and Vicki Ruebel of Orchid Owl Quilts. Check out their websites and instagram accounts for some fabulous long-arm quilting eye candy!

In next week’s Tools of the Trade segment, I’ll share about the specific features I prefer to have on my domestic machine that make it much easier to get the job done, so stay tuned!

Paper Pieced Primrose Quilt Along Starts Next Week!!

Are you planning on learning to foundation paper piece in the new year? With my Pieced Primrose pattern, learning this skill is much easier than you’d think!! Be sure to let me know in the comments if you’ve done paper piecing before, or if this will be your first experience with it.

Pieced Primrose Quilt Pattern

The fun begins on Monday, January 6th with weekly posts to keep you on track for finishing by the end February. But you can still work at your own pace, and I’m here to cheer you on, no matter how long it takes!

Next week’s introductory post will talk a little bit more about the tools and supplies and general foundation  paper piecing tips. Then we’ll dive into cutting the following week, so you still have plenty of time to gather your fabrics and supplies.

Click here for the complete quilt along schedule and supply list.

Paper Piecing Notions

Click here to get my favorite notions for successful foundation paper piecing.

We’ll take extra time to piece the blocks and will finish up with basting, machine quilting and binding. After all, if you’ve done a quilt along with me before, you know how much I detest these three little words, “quilt as desired!”

Pieced Primose Quilt Abstract Garden Cool

Pieced Primrose shown in the Cool colorway of Abstract Garden above.
Pieed Primrose shown in the warm colorway of Abstract Garden below.

Pieced Primrose Abstract Garden Warm

My Pieced Primrose quilt pattern is super versatile and you can sew up as many blocks as you like with several different layouts. And it looks fabulous in ANY fabrics you choose to use. So I hope you’ll join the fun and consider me your cheerleader for “Start to Finish” quilting!!

Infrastructure Supply List and Quilt Along Links

Click here to be notified about the QAL each week via email.

Are you excited to make Infrastructure? Heather Black and I will both hosting the quilt along and sharing tips and tricks for making the quilt on our blogs each week. See below for the supply list along with links to all of the quilt along posts as they go live.
Infrastructure Quilt

Infrastructure designed by Heather Black of Quiltachusetts, pattern written by Christa Watson

Infrastructure Supply List

Infrastructure Quilt Pattern:
Recommended Ruler Set:

Tri Recs Tools


Fabric Requirements:

Infrastructure Supply List

Other Recommended Supplies:
  • Natural fiber batting such as Hobbs Cotton or Wool
  • Olfa Rotary Cutter with brand new blade
  • Cutting mat and a variety of acrylic rulers
  • 505 basting spray if you choose to spray baste your quilt
  • Sewing machine in good working order
  • Brand new needle
  • Hand sewing needle and thimble for binding by hand
  • Thread for piecing and quilting – I recommend my Aurifil 50 weight thread kits
  • ***If using a die cutter instead of the ruler or included template, I recommend the  Accuquilt Triangle in a Square 4″ Finished Square Die # 55409***

Piece and Quilt Collection Aurifil Thread by Christa Watson

Click here to get my Piece and Quilt thread collections from Aurifil.

Alternate Color Way in Solids

Heather will be making her version using Superior Solids by Benartex.

Infrastructure in Solids by Heather Black

Click here to follow Heather on her blog at Quiltachusetts

Infrastructure Quilt Along Schedule

Both Heather and I will share our process as we make the quilts. She’ll be custom quilting hers on a longarm machine and will bind by machine. I’ll be quilting mine using a decorative stitch with my walking foot and will bind by hand. Links to both of our blogs will go live below after each step has been posted.

Infrastructure QAL

Share Your Progress on Social Media

We can’t wait to get started! So gather your fabrics and get ready to make a complete quilt from start to finish!!

Infrastructure Kit

Click here to get the Infrastructure Quilt Kit while supplies last.

Learn to use Electric Quilt with my Free Handouts & other Resources

I love using Electric Quilt software, and I use the program for each and every quilt and pattern I design. I often get asked about the best way to learn the software, and the simple answer is to learn by doing. Whenever I need to learn a new technique, I google, “How Do I….. in EQ” and I always find a tutorial to help me out!

As an EQ artist and ambassador for the company, they’ve featured me in several of their ad campaigns over the years which is always fun to see!

If you want to learn how to use EQ I recommend checking out the class resources at ElectricQuilt.com. EQ offers yearly hands-on classes, online classes, as well as resources for teachers. You can also find workshops at most major quilt shows, or reach out to your local quilt shop or guild to see which teachers are in your area.

You can also reach out to the folks at Electric Quilt directly via their help line at techsupport@electricquilt.com. They really want to help you succeed in learning the software and using it to it’s fullest potential!

Electric Quilt 8

Electric Quilt recently released EQ8 with a much easier interface.

I’ve taught others how to use the software over the years, but with my busy quilting career I don’t have room in my schedule to teach it anymore. So I thought I’d do the next best thing: – share two handouts that my friends at EQ helped me create.  Check out the links below. They were written for EQ7 but are very similar to the functionality you’ll find in the newer version of EQ8.

Click here to access my handout – getting started with EQ
Click here to get my handout – designing modern quilts in EQ

When I taught EQ at QuiltCon a few years ago,  they showcased several of my EQ designed quilts in their booth. All of the quilts in my books and patterns were designed in EQ, including the two shown below, from my book Machine Quilting with Style.

Christa and EQ at QuiltCon 2017

Everything I make is first designed in EQ!

Electric Quilt is a very comprehensive program with a bit of a learning curve, but my handouts will help get you started. And trust me, the more you use the software, the easier it gets. For those of you who already have EQ, I also have a resource page where I’ve shared the files for several of my free quilt patterns. That way you can download the files, and open them up in EQ to change colors, layouts, sizes etc. Be sure to check out the additional links below:

Important Links

Happy quilting and learning!!

Blooming Wallflowers Week 7 – Machine Quilting Part 1

Now we get to my absolute favorite part of the quilt-making process – machine quilting!!! I’m breaking this section into 2 posts so you’ll have plenty of time to get ‘er done! And thanks to all of you who keep sharing your progress, no matter what step you are on. It’s so inspiring to see all of the fantastic Blooming Wallflowers out there!! Remember to scroll to the end of this post for links to all of the quilt along steps and other important info.

Blooming Wallflowers Quilting

Above is my sewing machine setup. I have a drop in table so that my sewing machine lies flush with the table. I’ve also put another table to my left, forming an “L” so that the quilt has plenty of room and won’t fall off the table. I’ll sit in the chair and scrunch and smoosh the quilt out of the way as I quilt.

Make a Quilting Plan

I always have a plan when I’m going to quilt a quilt. That way there are no surprises and I can enjoy the quilting process. Here’s my basic quilting plan that’s included in the Blooming Wallflowers quilt pattern:

Blooming Wallflowers Block Quilting Plan

I’m quilting 3 different designs: chevrons in the print triangles, pebbles in the light blue triangles, and jagged stipple in the background. I can quilt all of the triangles per block at once without stopping; then I’ll go back and quilt the navy blue background later. I used a light blue thread from my Aurifil Piece and Quilt collection Neutrals on the triangles, and will use a darker blue thread from my Colors collection for the background.

Free Motion Quilting Blooming Wallflowers

Here’s what the back side of the quilt looks like after quilting all of the triangles. I always use the same color thread in top and bobbin so that if there are any tension issues, it won’t show. I don’t mind seeing the quilting on the back of the quilt. In fact, I actually like how it shows up!

Notice how my actual quilting deviated slightly from the plan. I decided to quilt a few more lines in the chevrons, and I embellished the chevrons with an extra row of pebbles and some zig-zags to jazz it up a bit.

Step by Step Quilting Videos

Here are a few short videos of me quilting the blocks so you can see how I did it. Be sure to enlarge the screen for a better view:

First, I stitched in the ditch very carefully around one light blue triangle.

Then I filled in the light blue triangle with pebbles. I’m using a thicker ruler foot because I’m doing the pebbles and ruler work all at the same time.

Next, I used a special acrylic ruler to quilt straight line chevrons. I didn’t worry about the lines being equal in distance or hitting the points exactly. I don’t actually love doing ruler work because it’s a little too fussy for my taste. But I’ll use it to quilt straight lines as long as they don’t have to be exact.

Once the chevrons were quilted, I embellished one section with free-motion zig-zags. I quilted each section of triangles (the Abstract Garden prints and the light blue background) in one pass, with only one start and stop for the whole block.) In other words, I did all of the pebbles in one triangle and then went straight into the chevrons.

To start and a line of stitching, I take about 6-8 teeny tiny stitches and then start quilting normally. When I’m done, I end with 6-8 teeny tiny stitches to hold it in place and cut off the excess threads. Starting and stopping in a seam makes it less noticable.

Next week, we’ll quilt the background! I recommend trying out the quilting designs on a scrap of fabric and batting first, before applying them to your quilt.

IMPORTANT LINKS

Creative Spaces Blog Hop Week 6 – Organizing Rulers

Can you believe that the Creative Spaces Blog Hop wraps up this week? (I’m posting a couple days late due to my Dot ‘n’ Dash quilt along which just stared on Friday). If you have missed any of the Creative Spaces posts, be sure to click the links of all the designers listed the end of this post, and scroll back through their feeds to catch them all.

Creative Spaces Blog Hop Week 6

Previous Creative Spaces Blog Posts

Here’s a link of the other 5 posts I wrote for the hop if you’d like to check them out:

How I Organize My Rulers

This week, we are chatting about organizing our rulers and tools. I’m not much of a gadget gal, but I do love me some acrylic rulers! I have a lot of them: short ones, long ones, various size squares and specialty shapes. In the past, I used to organize them with small wooden racks that had grooves cut in them like this:

Acrylic ruler holder

This worked for a time, but I found it to be a bit too clunky and it took up too much space. So recently, I’ve switched to storing the smaller rulers in a plastic drawer in my storage closet like this:

Storing small acrylic rulers in a drawer

A bin of plastic drawers works well for my small acrylic rulers.
You can see some of my Aurifil Thread spools peeking out from the other drawers.

I hang my larger rulers using small command hooks attached to the outside of my storage closets. I like the small 1/2 pound size because the silver hooks easily fit in the holes of my rulers. Each hook can hold up to 2 rulers with no problem.

command hooks for organization

Command hooks are an inexpensive and versatile storage solution.

I have two of these storage closets shown below, so it provides lots of space on the outside for my rulers. They are easy to reposition if I need to change my configuration. I also use the command hooks to store some of my show ribbons which bling up my space nicely. 🙂

Storing Acrylic Rulers

I’m in my sewing space 8-10 hours each day so I make use of every nook and cranny for storage!

I routinely purge my rulers and other tools if I find I haven’t used them in awhile. A general rule for decluttering I try to employ is this: if you aren’t sure you want to get rid of something, put it in a box in a closet for 6 months. If you haven’t touched it in that time, you probably never will, so get rid of it!

Be sure to check out the other blog hoppers for tips and tricks on how they store their rulers and other tools. And leave me a comment below letting me know how you control the clutter in your sewing room.

Creative Spaces Blog Hop Participants

Mondays

Tuesdays

Wednesdays

Thursdays

Fridays

Saturdays

Sundays

Creative Spaces Blog Hop

Creative Spaces Blog Hop Week 5 – Organizing my Thread

Are you having a fun time getting organized with your creative space? Even if you are only virtually following along, that can be tons of fun, too! Be sure to scroll to the end of this post for links to all 16 creatives on the Creative Spaces Blog Hop. I’m getting inspired, and hope you are, too!

Creative Spaces Blog Hop

This week we are discussing ways to organize our embellishments: buttons, trims, thread, and what have you. Here’s a not-so-secret truth about my work: I’m a minimalist and I don’t really embellish my quilts. (FYI, that’s why I find it hilarious that I named my current fabric line Fandangle  – a real, but silly-sounding word that means excess embellishment or ornamentation, LOL!!)

But anyway, back to today’s post! I choose to decorate my quilts with quilting and thread rather than bling them up with buttons or beads, so I’ll share a bit about the thread I love to use.


I love being able to get an exact thread match, no matter which fabrics I choose! This is an in-progress shot when I was making my modern Abacus wallhanging – (PDF pattern available here).

My favorite thread is Aurifil 50 weight cotton and I use it for everything: piecing, quilting, binding and machine applique. It comes in every color of the rainbow and I love mixing and matching thread colors to the fabrics I use.

During my last huge quilting cleanup I decided that it was high time to organize my thread stash. I sold or donated anything that wasn’t Aurifil and I keep all of my threads in plastic drawers sorted by color. The drawers are located in a shelving unit with doors so that the threads are kept away from heat and light (just like my fabric).

I have drawers full of Aurifil thread to choose from, sorted mostly into warm and cool hues.

The picture above is actually an older image that shows a small collection of other weights, too. But since then, I’ve gotten rid of those, too. I really only use 50 weight now for everything.

Aurifil Thread Squiggles

I love taking the time to “audition” my threads to see which will work best. Above is an image from a recent quilt along I did to showcase my first fabric line, Modern Marks.
Quilting it was just as much fun as sewing the top!

One of the main reasons I chose to simplify my thread stash is for purely logistical reasons. I didn’t want to have to keep track of all the different types of thread, in all the different sizes, and worry about which bobbin matches which thread!

Once I find something that works, I tend to stick with it and don’t really need to veer outside my comfort zone. Besides, since I piece and quilt with the same thread, I know what to expect performance-wise in each and every quilt that I make.

Aurifil Cotton Thread

If I’m not sure which thread to pick, many times I’ll choose a soft neutral with just a hint of color!
This is a detail shot of Modern Puzzle, one of the free quilt patterns I offer.

The nice thing about being able to piece AND quilt with the same thread is that I can always use up leftover quilting bobbins whenever I piece my next quilt, especially if it’s scrappy.

In fact, I’m so gung-ho on thread being able to do double duty that I curated a collection of my favorite threads with Aurifil – the Piece and Quilt Collection in Colors and Neutrals.

Piece and Quilt Aurifil thread by Christa Watson

My threads with Aurifil have been hot sellers for several years now because they cover all the basics! Want to go wild and colorful? Choose the Colors collection.

Piece and Quilt Neutrals Aurifil Thread from Christa Quilts

If you prefer to tone it down, choose the Neutrals collection. I love storing these in the Aurifil thread boxes, because that helps keep the clutter under control when it comes to thread!

I’ve been quilting with Aurifil exclusively since around 2013. I’ve tried many brands in the past, but none of them gave me satisfactory results. I tried other brands that friends raved about, only to be disappointed with how they performed in my machine. So my biggest piece of advice when figuring out what you like is to get a small spool, quilt it on a real quit and see what you and your machine like best!

How do you like to store YOUR threads, or other embellishments? Leave me a comment and let me know!

Mondays

Tuesdays

Wednesdays

Thursdays

Fridays

Saturdays

Sundays

Creative Spaces Blog Hop

Piece and Quilt with Precuts Quilt 7: Twinkling Diamonds

Wow! We are over halfway through the blog hop and the inspiration keeps on coming! Even though I designed and made all of the quilts from Piece and Quilt with Precuts, there are so many that I want to remake after seeing the beautiful color combinations my friends are making!

Today’s featured quilt is Twinkling Diamonds, made from some beautiful Alison Glass fabric.

Twinkling Diamonds by Christa Watson from Piece and Quilt with PrecutsTwinkling Diamonds Photography courtesy of Martingale/That Patchwork Place and Brent Kane.

Piece It

Twinkling Diamonds is made from fat quarters of colorful prints and fat eights of contrasting light fabrics, plus a dark background. The method I use teaches you to trim off the edges to get the nice crisp diamond points and the best part is, all of the leftovers can get turned into the S.W.A.K quilt featured a bit earlier in the book. (Click here for the blog post about S.W.A.K.)

I chose bright saturated prints and a dark navy background it so that it looks like diamonds twinkling in the sky. However, this quilt would look just as great with a lighter background, and softer, less intense prints.

Twinkling Diamonds Detail quilting

I quilted the background using “jagged stipple” one of my favorite new motifs!

Quilt It

I know that all of that negative space can be a bit intimidating to quilt, but here’s my tip: choose an interesting free-motion design. and meander your way around the blocks to add some texture to the quilt.

Twinkling Diamonds from Piece and Quilt with Precuts

I quilted irregular wavy lines in the bright section of the blocks and “cursive L’s” in the white areas. Each quilt includes step by step instructions plus a detailed quilting plan so you can follow along and get the same look!

Twinkling Diamonds Detail

I quilted all of the quilts in the book using my Aurifil thread collection – it’s my favorite!

More Twinkling Diamonds inspiration

Check out more beautiful ways to make Twinkling Diamonds blocks, and be on the lookout for who’s including a giveaway on their stop!!

Anjeanette Klinder

Twinkling Diamonds table runner

Take a look at what Anjeanette decided to do for her version of Twinkling Diamonds. Don’t you love how she fussy cut the centers??

And who says you can’t mix hand and machine quilting in the same quilt! I think she did such a beautiful hob. Be sure to see more inspiring pics and read more about how she made it her own,  over on her blog.

Jessica Caldwell – Desert Bloom Quilting

Twinkling Diamonds Blocks and Aurifil Thread

Don’t you love Jessica’s stunning color combination? I love how orange can be a neutral – don’t you? She picked out a gorgeous selection of Aurifil threads that she plans to quilt with so I’ll be keeping an eye on her blog to see how it turns out!

Head over to her blog for more pretty in-progress pics!

Jessee Maloney: Art School Dropout

Jesse's Twinkling Diamonds Blocks

I’m a sucker for turquoise and gray, and I love how Jesse shows that either solids or prints will work for the diamond centers. Notice how she added extra fabric around each block? Pop on over to her blog to read more about what she plans to do with these beauties!!

Here’s a tip – if you are just getting started with machine quilting, just make a block or two and practice quilting it. Then turn that block into a pillow, wallhanging, or one block mini. It’s also a great way to give a hand made gift that won’t take too long to create!

Today’s Gift – Win My Aurifil Thread

Today’s giveaway is super exciting. If you’ve read my blog for any length of time, you’ll know how much I love piecing and quilting with Aurifil 50 weight cotton thread. I love being able to use one type of thread for everything I do, and then stocking up on ALL the colors!

It was fun to work with Aurifil on a thread collection that includes all of the basic colors I use. Together, we decided to include two groups in the collection – colors and neutrals. All of the quilts in the book were pieced and quilted using my Piece and Quilt Collection, and I included exactly which threads I used AND how much for each quilt in the book!

Piece and Quilt Collection Aurifil Thread by Christa Watson

Click here to see which threads are included in my Aurifil thread collection.

Two lucky winners will win my thread, generously sponsored by Aurifil – one winner for each thread kit. Pop on over to Aurifil’s blog to enter, and good luck!!!

Save

Save

Save

Save

Save

Save

Save

Save

Save

Save

Save

Save

Save

Save

Save

Save

Save

Save

Save

Save

Save

Save

Save

Save

Save

My Aurifil Thread Collections are Now Available

One of the biggest reasons for going to quilt market this year was to launch my Piece and Quilt Thread Collection for Aurifil. This has been a dream of mine a couple of yeas in the making and it feels so great to finally share them with the world!
christa-and-alex

Christa and Aurifil CBDO Alex Veronelli at Fall Quilt Market 2016

I first began using Aurifil 50 weight cotton back in 2013 after trying out numerous brands, thread weights, and fiber contents. After making dozens of quilts for publication and for family and friends, I can definitely say these threads are prefect for everything I do: piecing, machine quilting, machine applique, and binding.

My favorite thing about sticking with the 50 weight cotton for everything, is that I always have the right color on hand. Plus, any leftover bobbins from machine quilting can get used up when I piece my next scrappy quilt!

The Piece and Quilt Collection comes in both Colors and Neutrals and I really took my time choosing them. I wanted to make sure I offered enough variety that you could literally piece and quilt any quilt with just these two collections:
piece-and-quilt-colors-box
piece-and-quilt-colors-thread

Piece and Quilt Colors Include:

2425 Bright Pink
2250 Red
4020 Fuchsia
2520 Violet
2130 Medium Butter
1133 Bright Orange
2920 Light Brass
2884 Green Yellow
2886 Light Avocado
1148 Light Jade
2725 Light Wedgewood
2783 Medium Delft Blue

piece-and-quilt-neutrals-box

piece-and-quilt-neutrals-thread

Piece and Quilt Neutrals Include:

2311 Muslin
5021 Bamboo
1246 Dark Grey
5007 Light Grey Blue
2326 Sand
2372 Dark Antique Gold (Brown)
2315 Pale Flesh
2405 Oyster
2024 White
2615 Aluminium
2605 Grey
4241 Very Dark Grey

Color selection tips:

  1. When you don’t have an exact match, go a shade or two lighter with your thread. A lighter thread on a darker fabric will blend in better than a darker thread on a lighter fabric.
  2. Use very dark grey instead of black on black fabrics so you can see the texture of the thread rather than having it disappear.
  3. Use the darker neutrals when piecing dark or very highly saturated fabrics.
  4. Try out the lighter neutrals like oyster and bamboo (in addition to white and muslin) when piecing lighter to medium colored fabrics.

both-collections

Ask for my Piece and Quilt Collection at your favorite quilt shop, or get them directly from me at ThePrecutStore.com. I look forward to seeing what you make with them!