This weekend I finished my Love table runner. Today I will show you how to applique and quilt it all at the same time! Scroll to the end of this post for links to the previous tutorials.
If you have followed along so far you will have a top that may look something like this:
 The letters were traced and applied to the background fabric with Steam-A-Seam 2, my favorite type of fusible web. Now it is time to applique them down.
Step 1 – Baste your Quilt
You can use safety pins, or my favorite basting tools – straight pins and pinmoors. I chose a scrap of thin cotton batting (Warm-N-Natural) because it lies very flat which is what I want.

Step 2 – Choose Your Thread and Decorative Stitch and Practice First
 I use an open toe foot with a wide needle plate. The open toe allows me to see my work so that I can be more precise.
I prefer to use silk thread in a color matching my fabrics for the applique. It is so thin that it nearly disappears into the fabric. A lightweight cotton works well, too. If you don’t have a thread color that’s an exact match, go with a darker thread color rather than a lighter color.
I like to use a buttonhole or blanket stitch rather than a thready satin stitch because it’s much lighter on the quilt and more forgiving to stitch out.

Practice with a few decorative stitches on scrap fabric until you find one you like. You can use a regular straight stitch, too, sewn closely to the edge of your fabric pieces. You need to learn the “rhythm” of your stitch so you can anticipate where the needle will next pierce your fabric. Sew slowly and “count” how many movements it takes to complete the decorative stitch.
Step 3 – Appli-quilt Your Letters
Since you will be stitching through all the layers of your quilt, you don’t need a stabilizer. I suggest using the same thread color in the bobbin as well as the top to hide any less-than-perfect stitching or tension issues.

Start in the middle of your letter and bring the bobbin thread up to the top. Take a few small straight stitches to lock your threads. Then switch to the decorative stitch on your machine. You may need to scoot your quilt over so the needle position lines up correctly.

Anticipate where your needle will pierce the fabric on each movement of the stitch. Turn the top slowly and smoothly as needed so as to avoid stitching outside the letters into the background. If you have the “needle down” function on your machine, use it. Always stop with your needle down before turning your quilt. Pivot when needed.

When you have an inside turn, try to land your stitch right in the middle. Don’t be afraid to pivot every stitch or two when needed to completely outline the letters.

When you reach the beginning, change back to a straight stitch and end with a few small locking stitches. Clip your threads close. When you get to the ‘O’ stitch the inside first.
Finish stitching all of the letters the same way.
Step 4 – Finish Quilting Your Quilt
Now you can have fun quilting the rest of your quilt however you like. I like a lot of quilting, and the background fabric can give you a chance to add a lot of texture.

I stitched in the ditch with a thin matching polyester thread, quilted paisleys in the backgrounds with high-sheen polyester in cream, added a fun heart loop motif in the border with high-sheen heavy polyester and quilted the straight brown accent lines in cotton. I use whatever thread I have that will match best!
Step 5 – Bind Your Quilt and Check off Another UFO!!
Using your favorite method, bind your quilt and finish stitching either by hand or machine. Megan from Canoe Ridge Creations has recently put up a wonderful double-fold binding tutorial here on her blog.
My table runner measures 12″ x 30″. I am pleased to add a little more LOVE to my home!

For my fabrics I “borrowed” a few strips of BasicGrey’s Kissing Booth from a jelly roll I have set aside to begin my next quilt-along (starting in 2 weeks). I cut the letters from a fat quarter of Pearl Bracelets in watermelon. The binding and backgrounds were from my stash.
Here is the complete mini-quilt along schedule. Click the links to go to each section.
- Part 1 Supply List
- Part 2 Sewing the Top
- Part 3 Machine Applique and Quilting – Today’s Post
Please join my ChristasQuiltAlong flickr group to share pictures of your work-in-progress.
If you make any of the other arrangements below, or even a pillow or larger quilt, I’d LOVE to see it! Or if you are inspired to go in a different direction I’d love to see that, too. 🙂
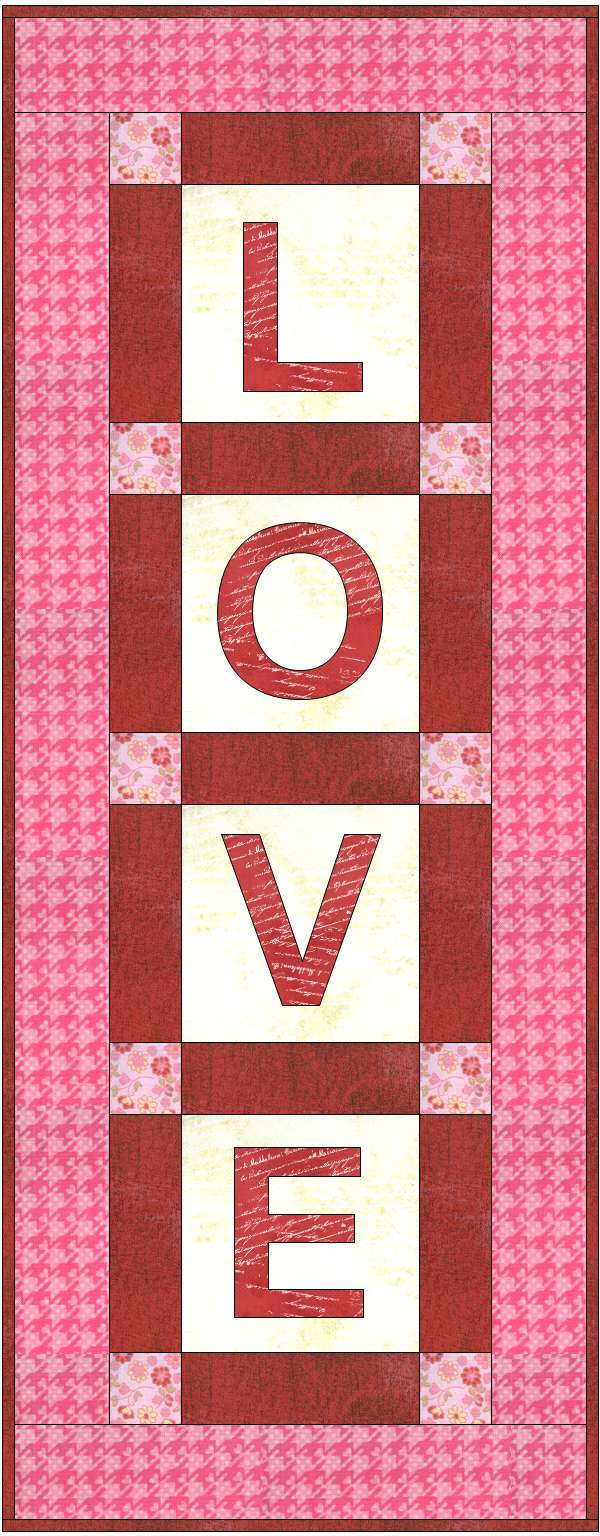

The vertical love wall banner uses the exact same directions as the table runner except that the letters are arranged vertically instead of horizontally. The love block would make a great wall-hanging, pillow, or center of a larger quilt.

Oh another teaser for the new QAL! I just LOVE what you have done with this project, lol..Okay a little Cheesy maybe, but its true!
Really sweet mini! I have yet to try blanket stitch for applique – but it looks so pretty!
Ah! Fantastic Valentine finish. I don’t really have any Valentine decorations, and I really should. At age 2 and 4, my girls are really interested in this holiday!
This quilt is so cute! I love the quilting you did, and your tutorial is fab!
Really cute! Did you widen the stitch for your machine blanket stitch or is that the default width? The default on my machine seems to be much more narrow and I like the width of yours. Thanks for sharing!
Thanks Gwen! Yes, I did widen it a little.
What a great tutorial. Thanks!
What a fun tutorial, looks great!
very nice! thank you for the tut.
How cute and great tutorial Christa! Thanks for sharing.
Freemotion by the River Linky Party Tuesday
Wonderful tutorial – thank you so much for linking up today! I will definitely refer back to this one 🙂
That is a really cute table runner! I love it!
Great project Christa 🙂
Great tips / instruction for machine applique! This is such a cute project.
That little mini is too cute!