New Around here?
Be sure to follow my blog so you can notified each time I write a new post! Just enter your email address in the box on the right side bar (or scroll ALL THE WAY to the bottom of your screen if using a mobile device). That way you’ll never miss a new tutorial or quilting inspiration!
Hubs recently earned some extra brownie points by helping me create a brand new HUGE design wall for my sewing room. In my nearly 20 years of quilting I was fine using the floor, tables, portable walls or what have you.
However, now that I’m getting a little more serious about showing and sharing my quilts in public and online, I realized I needed a better solution. I want a larger space so that I can design and photograph bigger quilts.

2 Sheets of Foam Insulation
We started by purchasing 2 huge pieces of foam core from the home improvement store. Each measures 4′ x 8′ and the space we are covering is about 7.5′ x 8′.
After wrestling them in the SUV and taking them home, we cut off about 6″ with a utility knife so it would be the right size.

Jason putting my rulers to work!
Jason drew the straight lines, while I did the cutting. It wasn’t a perfect cut, so we decided to put this side on the bottom where no one would see it. In retrospect, I should have tried my rotary cutter, but this stuff if pretty darn thick! (We tried to get them to cut it at the store but they said they couldn’t. Bummer!)

I’d rather use a rotary cutter than a utility blade, any day!
We then taped the two pieces of foam core together with duct tape on the white side. The other side, the silver side is the “front”.
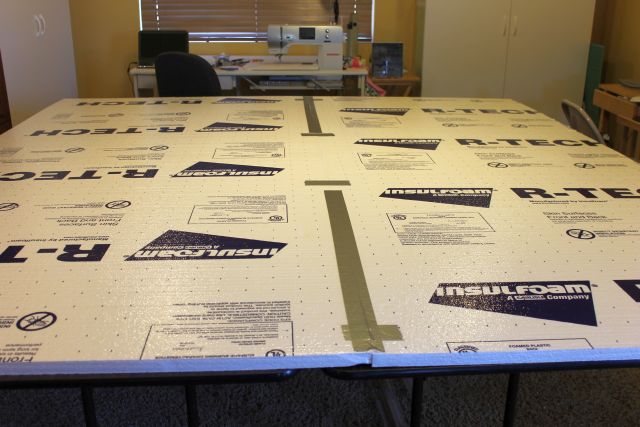
Tape the Pieces
Next was the hardest part. We bought a king-sized flannel sheet and covered the entire wall by stapling the flannel to the back side. The problem we ran into is that the sheet was not square or even so we had to yank on it quite a bit to make sure it would be nice and smooth on the front. We pinned it to the foam sheet first, then stapled like crazy!
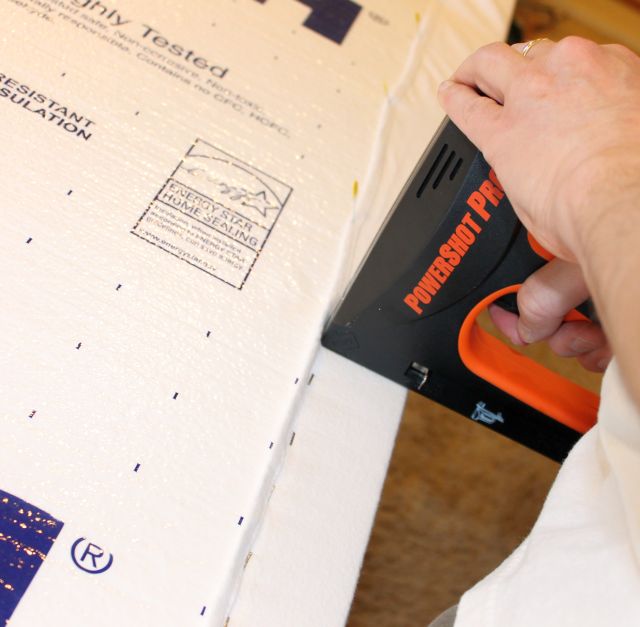
Staple the Sheet
We pulled it so it would be taut and attached it with a ton of staples. The corners were the hardest to finagle so that they would look smooth on the front.
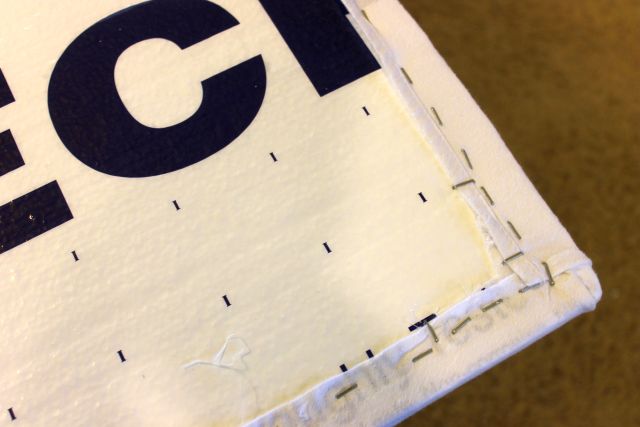
Stapling the Corners
We used my basting tables to work on but you could also do this on a smooth floor if you have enough space. It reminded me of basting a quilt but not as fun, LOL!!
Once everything was in place, it was time to mount it to the wall. Jason did this by attaching it with screws and decorative washers to make it look a little less “industrial”.
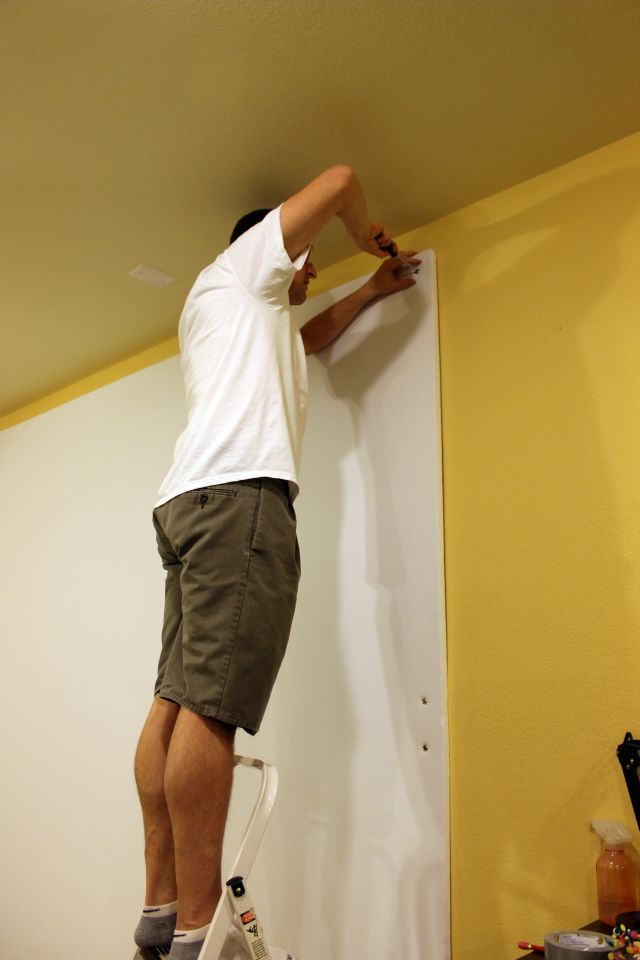
Mounting the Wall
I am so happy that I have larger space to design. It adds such a pretty element to my sewing space. Now need to keep some WIP’s on there all the time!
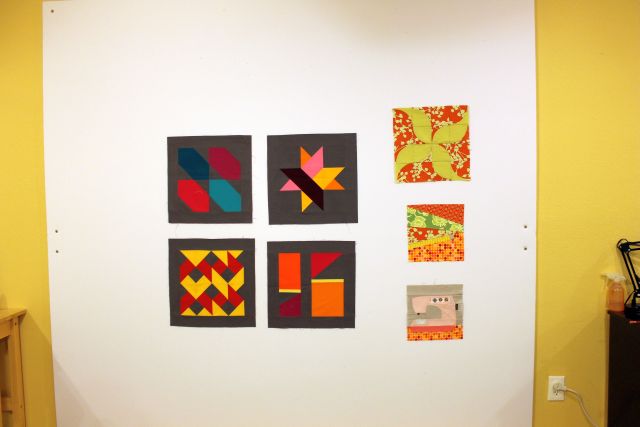
Finished Design Wall, 8′ wide by 7.5′ high.

What a cool idea. I will have to talk to the hubby and see if we can do something similar. Thanks for sharing.
My 8 foot by 8 foot design wall is just like this. Don’t know what I did before the hubs and I made it. It is super for laying up the 99 blocks as I make them for a quilt along I’m doing.
Now that is a NICE design wall! Can I borrow your hubby? LOL!!! Mine may actually try something like this is he saw how it was done. Will get him to check this out. Thanks for sharing.
Great idea! I have several small design walls and used batting rather than flannel and love them.
I recall that the old “electric knife” used to be handy when cutting large sheets of styrofoam. I wonder if one of those would work to cut a better edge on these boards? Just a thought, if you have an old electric knife laying around.
I made one similar but made the tape hinge on the front so I can fold it in half and transport it when I need d a huge design wall that is portable.
What a fantastic design wall! I wish I had the space for one similar. Oh well, maybe someday!
A couple of weeks ago I talked to a roller shade/blind company in North Vancouver, BC, Canada, and discussed their ability in making quilters a roller shade/blind with flannel backing that could be utilized as a design wall. They are talking to the Supervisors/Managers in their manufacturing area, and indicated they would be getting back to me with the results of this submission. (I sent them pictures of mine, and was told they make roller shades up to 103 inches in width and 70 inches in length – so this may be a solution for many quilters)
Recently did the same thing, but I used flannel that has a grid pattern.
I did something very similar. I also used the leftover piece to make a smaller design board that I hung over a table. I sewed plastic rings to the back and used picture hooks for hanging the small one. It’s handy for small projects.
It looks great! I would love to have a design wall simply to have a nice backdrop for taking pictures of my work. Laying things out on the carpet or trying to take pictures of one or two blocks outside just doesn’t work quite as well. 🙂
That’s great! I’ve got a 4×8 in my quilting space and I love it.
Huge congrats on your new project completed!! It is really super and will make things so much easier for you!!! Hugs…..
This is FAB. Haha, I never have fun basting a quilt 😉 😉 How much does the foam core usually run?
Oh how fabulous. I envy you.. One day I hope to get one.
Very nice! A design wall is on my xmas list from my husband.
Nice wall. I have always wanted one and my hubby could do it for me. We moved here last May and now we are moving again and I’m sure we will move again. It has too many stairs. But someday…
Great job, enjoy your design wall!
Great job! Where is your step stool??????
Tucked away and out of sight!
That looks awesome! I need to make one of those for me! Want to send your husband to my house? 🙂
Sooo much nicer than the large piece of batting I have stick pinned to my wall. I am inspired to do better!
wow this is great. So wonderful to have a husband that is willing to help us with our craft. My husband is the same way.
That looks amazing!! Lucky you that your husband is a good sport and supportive of yur quilting.
It looks fantastic Christa! It really made a hug difference in my quilting when I made myself a design wall 🙂
It looks fabulous and I like the idea of a flannel sheet. Well done by both of you.
Great easy design wall tutorial! I have a smaller wall in my studio – I went the old “wrong side of a flannel backed tablecloth” – and I will say it’s a great motivation having some inspiration pieces and WIP’s up all the time, plus a lifesaver for laying out big stuff. Hope to see you enjoying lots of use out of yours in upcoming posts ; )
Awesome!!! One day when there’s less people living in my house, I WILL have this done!
It looks really good! I am so ready to do something a little more permanent. Right now, my flannel sheet is hanging from a curtain rod and is taped to the wall with duct tape…Not exactly easy on the eyes, but Hubs has convinced me to bare with it until we move next year and then he’ll build me something more like what you have now. It’s only 6 more months…
This is pretty much what I used in my house and put up the same way. The only difference is I used Felt yardage for the backing. It may not stick quite as well as flannel but I didn’t think of that and pins work just fine so I pin anything that is going to stay long. It doesn’t take much to poke a pin in. I also had an outlet in the way of where we needed to put my design wall. We cut that out and wrapped the fabric around it so it’s covered and I didn’t lose the outlet. I have never appreciated any quilting accessory as much as this wall! I don’t know what I did before I had one.
Just perfect!! That is going to be so much fun for you!!!
This is exactly what I’ve been thinking I need and I’ve got the perfect place for it too! Thanks for the little tutorial (did you even know you did that?)!
Lots of work!! Look the end result. Great idea!! Thank you for sharing!!!
I wish I had a wall in my house that was that big! (silly old houses and their windows!!) I love it!!
Wow! That is a design wall!, fantastic.
Pretty and practical! I can see how this would be such a huge help for designing!
Wow! What a major undertaking. Kudos to you and Jason. I still use my table. Putting things up on a wall is a different challenge for me as the cats would think it it a scratching post. As it is all my projects are in bags to minimize the cat hair
Looks great!! Can’t wait to see your ‘new’ designs on your wall!!
I loved reading how you did this, Christa! I have not put up any design wall in my workroom, and realize that I need one! My walls are smaller…thinking of using flannel to “cover” a large closet…
Just finished my renodel and clean out..I started my first project today…but it is so large I I am working on my dining table. Great though. .I know where everything is.
Lucky you! Looks great.
What a great idea! And a great hubby to do this for you!
Fantastic Christa! I’m so happy for you to have that huge white space to create. Looks like your blocks stay there without any pins. x Teje
What a clever idea. You are lucky to have such a helpful husband to work with you. Mine was like that too and it was a real blessing.
Brilliant!! Now I want one too!
Very nice looking design wall! I know you are pleased:) Nice WIP too!
Great job!! I need to make a portable one.
Nice! I was looking at insulation board recently to do this. My space is limited, so I will probably do one board and not permanently affix it so it could be moved, if necessary.
Great design wall! I will have to keep this in mind with my new sewing space.
Looks great! Every time I’m dragging my blocks back and forth to the spare bed, I remind myself that I need to get this done too 🙂
It looks wonderful! You and your hubby did a great job. I’m sure you’ll enjoy it and we will be able to see even more fantastic quilts from you! 🙂
I’m completely jealous of your design wall! It looks fantastic. You and your husband did a great job!