Bling Quilt Along Part 5 – Binding to Finish and Ta-Da It’s Done!!

Have you been enjoying following along to make Bling? Scroll to the end for links to the entire quilt along. This week we will be binding our Bling to finish it up!

Bling Quilts with Geo Pop

Roundup of binding tutorials

Because I pretty much bind my quilts all the same way (either by hand or machine), I have a LOT of binding tutorials that I’ve shared over the years. So here are 3 for you to try – use whichever method you like best!

Bonus Binding Tips

When I first began my binding adventures, I cut my strips 2 1/4″ wide. However, that meant that if I attached my binding with 1/4″ seams, it would be bigger on the back than the front. So over the last couple of years, I’ve started cutting my strips 2″ wide and that gives me a more even finish on both sides.

To avoid ending up with a seam in the corner, I will roughly “walk” my binding around the quilt and if any seams fall in the corners, I will adjust the whole binding by and inch or two before I start sewing. If worse comes to worse and I STILL get a seam on the corner, I’ll simply cut off part of the binding and sew a new seam to move it!

Homework

Finish quilting and binding your version of Bling and share it in my ChristaQuilts Facebook Group. I can’t wait to see your fabulous finish!

Bling Quilt Pattern by Christa Watson

QUILT ALONG LINKS

Bling Quilts White or Black

Bling Finished Stats

  • Finished size: 67″ x 83″
  • Designed using Electric Quilt 8 software
  • Pieced and quilted by Christa Watson on my Bernina 770QE
  • Fabric collection: Geo Pop by Christa Watson for Benartex
  • Pattern: Bling  by Christa Watson
  • Batting used: Hobbs Cotton/Wool
  • Thread used: Aurifil 50 weight cotton in black/white variegated and bright pink
  • Quilting designs: wavy grid (white) and straight line grid (black)
  • Completed: May of 2019

Modern Logs Quilt Along Schedule and Supply List

Modern Logs has been one of my most requested quilt alongs ever and I’m so excited for it to begin! To get you ready, I’m sharing the full supply list and schedule today; then next week I’ll include a bonus post on choosing fabrics. The QAL will kick off on Wednesday, September 2nd.

For a limited time, I’m offering Modern Logs Quilt kits in all 3 sizes including the pattern!

Click here to get the Modern Logs Quilt Kit while supplies last.

Modern Logs: Scrappy Improv Front and Back

As part of the quilt along, I’ll include bonus tips and tricks on how to make a pieced backing if you so desire. But I’ll include a tutorial on sewing a regular back if that’s your preference too. For my Throw size, I paired up a couple yards of the Good Vibes Gumballs print with my leftover strips plus a few other pieces from my scrap stash.

Pieced Quilt Backing

I love using up lots of leftover scraps on the back. It’s a unique piece of art every time!

Modern Logs is the perfect pattern to learn a little bit of improv piecing, but in a structured way. I continued that theme by using up as many scraps as I could on the back. Although it’s a bit of improv, there’s a method to my madness that keeps everything under control.

Modern Logs Pattern and Materials List

Modern Logs Quilt Pattern

Click the image above to enlarge for details.

This quilt is really easy to chose fabrics for. All you need is an equal number of lights and darks. You can select fat quarters as shown in the pattern above (10 of each light/dark for crib, 20 each light/dark for throw and 30 each light/dark for queen). Or you can use leftover precut strips and other scraps. Pretty much any cut of fabric will work, and no two quilts will end up looking exactly the same.

Good Vibes fat quartersClick here to view all Good Vibes fabrics.

I’m using Good Vibes fat quarters for my quilt shown above, and I’ll be using duplicates so that I have enough fabric for the larger size. But this pattern is extremely flexible in which fabrics you choose (more about color selections next week).

Other Recommended Supplies

  • Sewing machine in good working order. We will do an easy free-motion quilting design, so make sure you have a free-motion foot to fit your machine. Of course I love my BERNINA 770 QE with its wider throat space and lots of bells and whistles.

BERNINA 770QE

Click here to see all the features I love on my BERNINA 770QE

  • Brand new sewing needles. Always, clean, de-lint and oil your machine before starting a new project, and change the needle. My favorite needles are Superior Titanium Coated needles, size 80/12. I use these for both piecing and quilting:

Superior Threads Needles

  • Quality thread for both piecing and quilting. My preference is Aurifil 50 weight 100% cotton. This pairs well with my favorite needles above. And if you piece and quilt with quality cotton thread, your quilt will NOT get stiff when you quilt it. I’m using my Piece and Quilt Collection Colors for the entire quilt:

Piece and Quilt Aurifil thread by Christa Watson

Click here to view my favorite threads and supplies.

  • Acrylic rulers: 6″- 8″ wide by  24″ long ruler, and 12 1/2″ x 12 1/2″ square ruler. These rulers will really come in handy. I use the long ruler for cutting an entire length of a fat quarter. The square rulers are for squaring up your blocks so they are all a consistent size.

Modern Logs Quilt Along Schedule

The links below will go live as each part is posted. Bookmark this page and refer back to the schedule anytime in the future to work on this quilt at your own pace. So gather your supplies and get ready to sew!

Modern Logs by Christa Watson

Get your Modern Logs Pattern and Supplies below:

Modern Logs Quilt Detail

Bonus Help!

For any questions, sharing your progress, and bonus help and support of your fellow makers, be sure to join my ChristaQuilts Group on Facebook. You can also share your makes on social media using #modernlogsquilt.

Want to get notified each time the quilt along step is posted? Enter your email address in the sidebar to automatically follow my blog. This can be found either to the right of your screen on a computer or laptop. Or scroll allllll the way down to the bottom of this page to see it on your mobile device.

I can’t wait to see what YOU create!!!

It’s Mid August – Let’s Have a Fabric Sale!

Well, in a normal year, these would be called the “Dog Days” of summer, which are named so because of the star Sirius which is was the brightest star in the constellation Canis Major (which means “large dog”). But in THIS pandemic, it’s hard to know what day you are on, let alone which month, LOL!! So to break up the monotony, let’s have sale!!

Gridwork Fabric & Fluevog Shoes

My Gridwork fabric line on display at International quilt market, fall 2019. 
Quilt Market was cancelled this year for both fall and spring.
I can’t wait until next year when it (hopefully) picks up again!!

From now through the end of the month, use code GRIDWORK to save 20% off my entire Gridwork line over at Shop.ChristaQuilts.com. You MUST enter the code at checkout to get the discount, so be sure to click the + and make sure it gets applied before you finalize payment.

This bold, bright, colorful collection came out earlier this year and is a perfect complement to my previous collections. Now that I’ve got 6 fabric lines under my belt, it sure has been fun to watch others mix and match fabrics among my various groups.

Gridwork by Christa Watson for Benartex

Gridwork includes a total of 27 prints in 3 pretty colorways of Amethyst, Breeze and Citron.

The sale applies to EVERYTHING in my Gridwork category: fabric by the yard, fat quarters, kits, and precuts too. So stock up on your faves and make the most of this crazy time!!

Click here to view my entire Gridwork line. Use code GRIDWORK at checkout for 20% off!

Gridwork Fabric by Christa Watson

Gridwork in Amethyst by Christa Watson for Benartex

Gridwork in Amethyst

Gridwork Breeze by Christa Watson for Benartex

Gridwork in Breeze

Gridwork Citron by Christa Watson for Benartex

Gridwork in Citron

Bling Quilt Along Part 4: Machine Quilting Option 2: Wavy Grid

This week I’m super excited to give you additional options for machine quilting your Bling quilt. I quilted both of my versions with two different walking foot quilting designs. Last week, I shared my basting tutorial along with option 1; and I wanted to add one more plug for pressing your seams open:

When you press your seams open, not only will the quilt lie flat and make it much easier to quilt, but you wan’t get any “shadowing” of the seams, which is when a darker fabric shows up under a lighter fabric seam. The darker fabric always goes to the darker side, and the lighter fabric always goes to the lighter side.

But here’s a bonus tip when working with lighter background fabrics such as in this version of Bling: be sure to clip off any excess darker threads underneath so you don’t see them from the front of the quilt. If this does happen, you can always use a needle or tiny crochet hook to grab any pesky threads that show underneath the quilt top.

Machine Quilting Wavy Grid

To recap both both machine quilting options mentioned in the Bling quilt pattern, check out this short video below which shows me quilting wavy lines on the white version and a straight-line grid on the black version:

Check out more fun tutorials on my YouTube channel.

The basic idea for either quilting plan is to “divide and conquer” – quilt one pass of lines in both directions all the way across the quilt. Then quilt additional passes across the quilt until you like the density. You can do this with straight lines, or irregular wavy lines. I’ve even used a decorative stitch on my sewing machine using the same process!

Choosing Thread

For the white version of Bling, I went with a more subtle thread than the hot pink I chose for the black version. I like to take a picture of the thread I’m using on the quilt so I can document it to know which one I used. This black/white/gray thread is included in my Variegated Thread Collection from Aurifil. 

I prefer to quilt with 50 weight, 100% cotton thread from Aurifil.

1st pass across the quilt

So let me break it down for you a little bit in photos. In the first pass across the quilt, you can barely see any quilting. I’m quilting an organic wavy line “near” the ditch rather than “in” the ditch and it really blends in. The lines are really widely spaced apart, in between each of the block rows.

Click the image above to enlarge. Can you spot the quilting lines?

To quilt wavy lines, my machine is set up for regular straight line stitching, but I gently move the quilt from side to side to form the organic looking wavy lines.

2nd pass across the quilt

The next quilting pass is roughly through the center of the blocks. I use the seam lines as a guide for where to quilt. The wavy lines are fast and easy to quilt because you can eyeball where you are going and the lines don’t have to be perfectly spaced.

It helps to have a large work surface and a drop in table to hold the weight of the quilt.

The wavy lines are actually must faster, and it’s my go-to design when I’m in a hurry! In fact, by quilting wavy lines “near” the ditch, instead of “in” the ditch, it’s a great choice when your ditches (seams) don’t line up perfectly.

Quilt in both directions

To keep the wavy grid as evenly spaced as possible, you will want to quilt in both directions – horizontally and vertically with each pass. Just rotate the quilt in the direction you need to go!

Now the yummy quilted texture is starting to appear!!
Just remember, the more lines you quilt, the less your imperfections will show!

use the seamlines as a guide

Here’s a really good example where you can see how I lined up the wavy lines with the pieced seams in both directions. The block design is a little off center so the lines aren’t all evenly spaced, but that’s hardly noticeable. This allows me to avoid marking because much easier to eyeball the wavy lines rather than straight ones.

Keep Quilting more lines!

By the time I’m finished, my lines will be quilted about 3/4″ to 1″ apart in both directions. This is completely a personal preference and it’s up to you how dense you’d like to quilt. Just remember, if you are using natural fiber materials (ie cotton fabric, cotton thread, cotton batting), the quilt will NOT get stiff the more you quilt it. And the more you love it, use it and wash it, the softer it will become!

I eventually lost track of how many passes I quilted, but I kept going until I liked the results!

Additional QAl resources for Bling

New Paper Patterns are Here and Sneak Peek Quilt Along News!

I’m happy to finally announce that my 2 newest patterns – Modern Logs and Charming Chevrons, (both made from Good Vibes) are now available in print! Due to the virus, shipping delays at the printer caused these to come a little later than expected, but they were worth the wait!Modern Logs Quilt

But now for the best news! I’ll be doing quilt alongs for both coming up this fall. First we will kick off the Modern Logs quilt along in September.

To make Modern Logs exactly as shown above, all you need is the quilt pattern plus 2 Good Vibes fat quarter bundles. The patter includes a total of 3 sizes and it’s super easy to scale up or down as needed.Charming Chevrons

For the lap size Charming Chevrons shown above, all you need is the quilt pattern plus 4 Good Vibes charm packs (5″ squares).

For the twin size shown below, pick up a copy of my Charming Chevrons quilt pattern, plus  2 layer cakes (10″ squares) of Good Vibes.

Charming Chevrons

My Charming Chevrons quilt along will begin in October (once Modern Logs ends), allowing you to finish these fun and fabulous quilts just in time for the holidays! Stay tuned for schedules and more info to follow. In the meantime, stock up on your quilt along supplies below:

Get the Quilt Patterns

Charming Chevrons Modern Logs by Christa Watson

Get the Fabric

Good Vibes fat quarters

Good Vibes Charm Squares

Good Vibes Layer Cake


Bling Quilt Along Part 3: Machine Quilting Option 1 – Random Crosshatch Quilting

And now we get to my favorite part of making a quilt – machine quilting! Because I made two versions of Bling, and quilted them with 2 different walking foot quilting designs, I’m excited to share both options with you over the next 2 weeks. And the best part is, you can use these tips and tricks on ANY quilt you wish to make.

Bling Quilt

For the version of Bling with the Black background, I used my walking foot/dual feed to quilt straight-“ish” lines in a crosshatch pattern following the design of the blocks.

Choose Your Thread Color

Because I wanted the thread to stand out on this vibrant colorful quilt, I chose a bright pink from my Piece and Quilt Collection – Colors from Aurifil Thread.

Piece and Quilt Colors by Christa Watson

I chose the bright pink which is the first column, third row down in the image above.
Click here to get this thread box for just $99 while supplies last.

But, before you dive into quilting your quilt, first you need to baste it. I use the same method to baste ALL of my quilts: spraying 505 adhesive on the wrong side of the quilt top and backing outdoors or in a well-ventilated area.

Prepping the Quilt

Bling quilt in progress

Then, I assemble the quilt layers together on my design wall indoors. You can also use a table if you don’t have a design wall.

Bling quilt in progressBasting in process on my design wall.
I can’t wait to share more about the quilting of this version of Bling next week!

The “magic” part of my spray-basting method is ironing the basted quilt on both sides – front and back to squish it all together and set the glue.

Iron the basted quilt to set the glue

Get the Bling kit – in white or black – while supplies last!

Click the image below to watch a super speedy basting video from my Infrastructure quilt.

Once you have basted your quilt and are ready to begin machine quilting, be sure to clean and oil your machine and put in a fresh needle.

I really like the Superior brand Titanium needs in size 80/12 to go along with my 50 weight cotton Aurifil thread.

Click here to get some of my favorite notions and thread.


Make a Quilting Plan

In all of my quilt patterns, I like to include quilting suggestions and a quilting plan. It’s very easy to “divide” and conquer the straight line quilting by first quilting in the ditch between each of the blocks in both directions. This will create a grid that’s equal to the size of the quilt blocks. This will anchor or stabilize your quilt for additional quilting.

Bling Quilting Plan

One of the quilting plans included in the Bling quilt pattern.

Once you have anchored your quilt, you can quilt lines randomly across the quilt in both directions. You can quilt as light or as dense as you would like.

At first I thought I would quilt my quilt more densely, but once I quilted a few passes in both directions, I was happy with how it looked so I stopped. That’s the beauty of “divide and conquer” when it comes to quilting. You can stop whenever it feels finished!

Bling machine quilting detail

Here’s a bonus tip: if you want your lines to stay straight, but you don’t have seam lines to follow, use a piece of painter’s tape as your guide.

YouTube Quilting Videos

I have a super short video below where you can see how I used the tape while quilting this version of Bling, plus a sneak peek of how I quilted the white version, too:

If you would like to quilt your quilt more densely, continue quilting lines in both directions, one pass at a time until you like how it looks. You can see a densely quilted version of random crosshatch on my Color Weave quilt.

View the youtube video play list below. It’s a series of shorter videos strung together while quilting my Color Weave quilt. (Click here to get the Color Weave quilt pattern):

Now I can’t wait to see how you quilt yours! Keep sharing your makes with me on instagram #blingquilt and in my ChristaQuilts Facebook group.

Bling Machine Quilting Detail

Quilt Along Links

Bling Quilt Along Part 2: Sewing the Quilt Top

How are your Bling quilt blocks coming along? Be sure to see the end of this post for links to the introductory post and QAL schedule if you are just getting started!

Bling Blocks

I love a stack of freshly pressed blocks!!

If you are following along and arranging the blocks as shown on the pattern cover, you’ll want to sew your sets of bling blocks into 4’s like my pics below.

Geo Pop Bling

Geo Pop Bling blocks with Op Squares white background

At this point, don’t worry where each fabric goes. I think it’s more fun to let the blocks be random than trying to overthink it too much.

Geo Pop BlingGeo Pop Bling blocks with Tiny Hex Black background

In the Bling quilt pattern, I’ve given 4 more layout ideas for you to explore if you wish. There are plenty more iterations you can try depending on how much you rotate each block!

Bling Alternate layouts

Sewing “Homework”

Your homework this week is to finish your blocks and sew them into larger groupings of 2’s or 4’s, then sew those into rows. If you get that far and are feeling gung ho – go ahead and finish up your “flimsy” (aka unquilted top).

Bling Quilt Top in Progress

In the versions above and below, I’ve sewn my blocks into random groups of four according to the orientation on the front pattern cover. I’m using my design wall to lay out the larger blocks into a pleasing arrangement.

Black Bling Blocks

Bonus Tips!

I try to speed things up as efficiently as I can. I’ll chain piece by sewing pairs of blocks together without clipping threads in between, and I give myself plenty of room to work. I’ll also take a pic of my final layout with my phone so I can refer to it as I sew each row.

Bling Blocks in progress

I’m enjoying see the progress of those who share on instagram (#blingquilt) and in my ChristaQuilts facebook group!

Helpful Links

Quilts Made by You!! Gotta Love the Inspiration :-)

Nothing makes my day more than seeing what you all are making with my fabrics! And I love seeing when you’ve used one of my patterns for your latest project. With so many options, it’s an honor to see these beautiful quilts and works in progress “in the wild!” 🙂

Christa Quilts Patterns

So today I thought it would be fun to do a little roundup of what you all have been making with my designer products. It makes my day to see these pop up on social media 🙂

This gorgeous photo shows Kathleen Hetzler Riordan with quilts on her beautiful white fence. She says, “My street had a pop-up quilt show today and four of us who are quilters put our quilts out on our picket fence, and neighbors walked, drove and golf carted by to see them! It was very impromptu but lots of fun! Christa’s Puzzle Box is on the far left!” 

Click here to get the free Puzzle Box quilt pattern.
Kathleen Hetzler Riordan on Smith Mountain Lake, Virginia

I love this outdoor image—it shouts “Summertime!” Kathleen lives in Virginia and the quilt show took place on May 24, 2020. I’m sure it was a source of joy for many people during the pandemic. 

Sally J. is currently working on a baby quilt with my Color Weave pattern and Abstract Garden prints. This design is great for 2.5 strips—maybe you have a favorite sitting around just waiting to be used?! Or maybe you’d like to treat yourself to one of my colorful modern strip sets!


Megan G. used purple for her Optical Illusion quilt and I love it! This design works in so many great combinations. Pay attention to the instructions for the values of each fabric so that your illusion shows up nicely.

Here are links to all of the steps in the Optical Illusion Quilt Along that we recently wrapped up! My QAL blog posts stay up indefinitely so you can sew on your own timeline.

Optical Illusion QAL steps:

Here’s another one in progress from Kate S. I love that red and aqua combo!


Debora L shared her success in quilting continuous spirals on her black, white and gray version shown below:

 Kate S. is gets bonus points for combining fat quarters from ALL of my fabric lines to make this colorful project below:

I can’t wait to see more!!

And I see Good Vibes fabrics in her stacks of Flying Geese. I wonder where this is going? I’m sure it will look amazing when finished!

How about this scrappy house quilt? Judy A. posted it in my Christa Quilts Facebook group and had this to say about it:

This is my “Village” (Miss Rosie’s Quilt Co). Mostly Christa’s fabrics plus some Patrick Lose, Allison Glass, and my stash. I can honestly say that working on this made me SO happy. 

I sure love it when I see my fabrics playing so nicely with others!!

Sandi S. in Australia is making this bright and happy number with Geo Pop fat quarters and half-square triangles. That’s some gorgeous eye candy, isn’t it?!

Nancy Mahoney Modern Fans

Last but not least for today, I just love this beauty above made by Nancy Mahoney. She combined a bunch of my fat quarter color bundles along with Op Squares in white from Geo Pop for the background. You can actually find the pattern for it in the July/August issue of Love of Quilting Magazine.

I so appreciate all of you! Thank you for making this the best job under the sun!

New Quilt Patterns: Buy 2, Get 1 Free (Charming Chevrons and Modern Logs)

Today I’m thrilled to be reintroducing 2 of my most popular patterns ever – Modern Logs and Charming Chevrons. These were 2 of the first patterns I ever released and I always knew I’d remake them once I had my own fabric lines.

Charming Chevrons Modern Logs by Christa Watson

Both quilts use an equal number of light/dark fabrics, so when I designed Good Vibes with its saturated/low volume combo, they were very much top of mind! Both quilt patterns come in multiple sizes, and they are conveniently made from precuts so it’s easy to get the fun, scrappy look I like without breaking the bank.

Charming Chevrons – made from 5″ or 10″ squares

The biggest change with my Charming Chevrons remake is that you can now make them from charm packs OR layer cakes! There are a few different layouts to choose from, and 4 different sizes.

The lap size shown below is made from 4 Good Vibes charm packs (5×5 squares) plus 1/2 yard of the Gumballs print in coral for the binding.

Charming Chevrons

The twin size shown below is made from 2 Good Vibes layer cakes (10×10 squares) plus 3/4 yard of the Gumballs print in Turquoise for the binding.

Charming Chevrons

The pattern even includes machine quilting diagrams and detailed pics for BOTH layouts!! I dislike it when a pattern says “quilt as desired” so I will always include machine quilting suggestions in my patterns. After all, I want you to actually finish your quilt! 🙂

Modern Logs – made from Fat Quarters

I updated Modern Logs pattern so that it works perfectly with a 20 fat quarters where half are light and half are dark, and leftovers are used for the binding.

For the throw size below, I used 2 Good Vibes fat quarter bundles.My improv technique works best with actual fat quarters, rather than 1/2 yard cuts. This means you can go as scrappy as you like and it will look fabulous!!

Modern Logs Quilt

After teaching this pattern for many years, I updated the instructions and images so that you can make use of any leftover odd bits in your blocks. I call these blocks – “super” improv. Can you spot a few of them above?

I also include a simple stippling diagram and quilting details so you can get this quilt finished in a flash!

Here’s How to Buy 2 – Get 1 Free

I offer both of these patterns either as printed patterns that I can mail, or PDFs that you can download instantly. When you add both to your cart and select a third pattern, you’ll get that one for free!

To purchase the paper version from me:
Click here to add 3 or more patterns to your cart.
Use code PATTERN at checkout. Click + to apply the discount to your order.

To purchase the PDFs on Etsy:
Click this special link and add 3 patterns to your cart.
The discount is automatically applied.

Here are the full pattern covers below so you can start planning which prints you’d like to use. Click the images below to enlarge:

CharmingChevrons cover spreadModern Logs cover spread

Be sure and tag me on social media @christaquilts so I can see your progress. Use #charmingchevronsquilt and #modernlogsquilt.

I sure hope you enjoy making these quilts as much as I did!!

Bling Quilt Along Part 1: Cutting and Sewing the Blocks

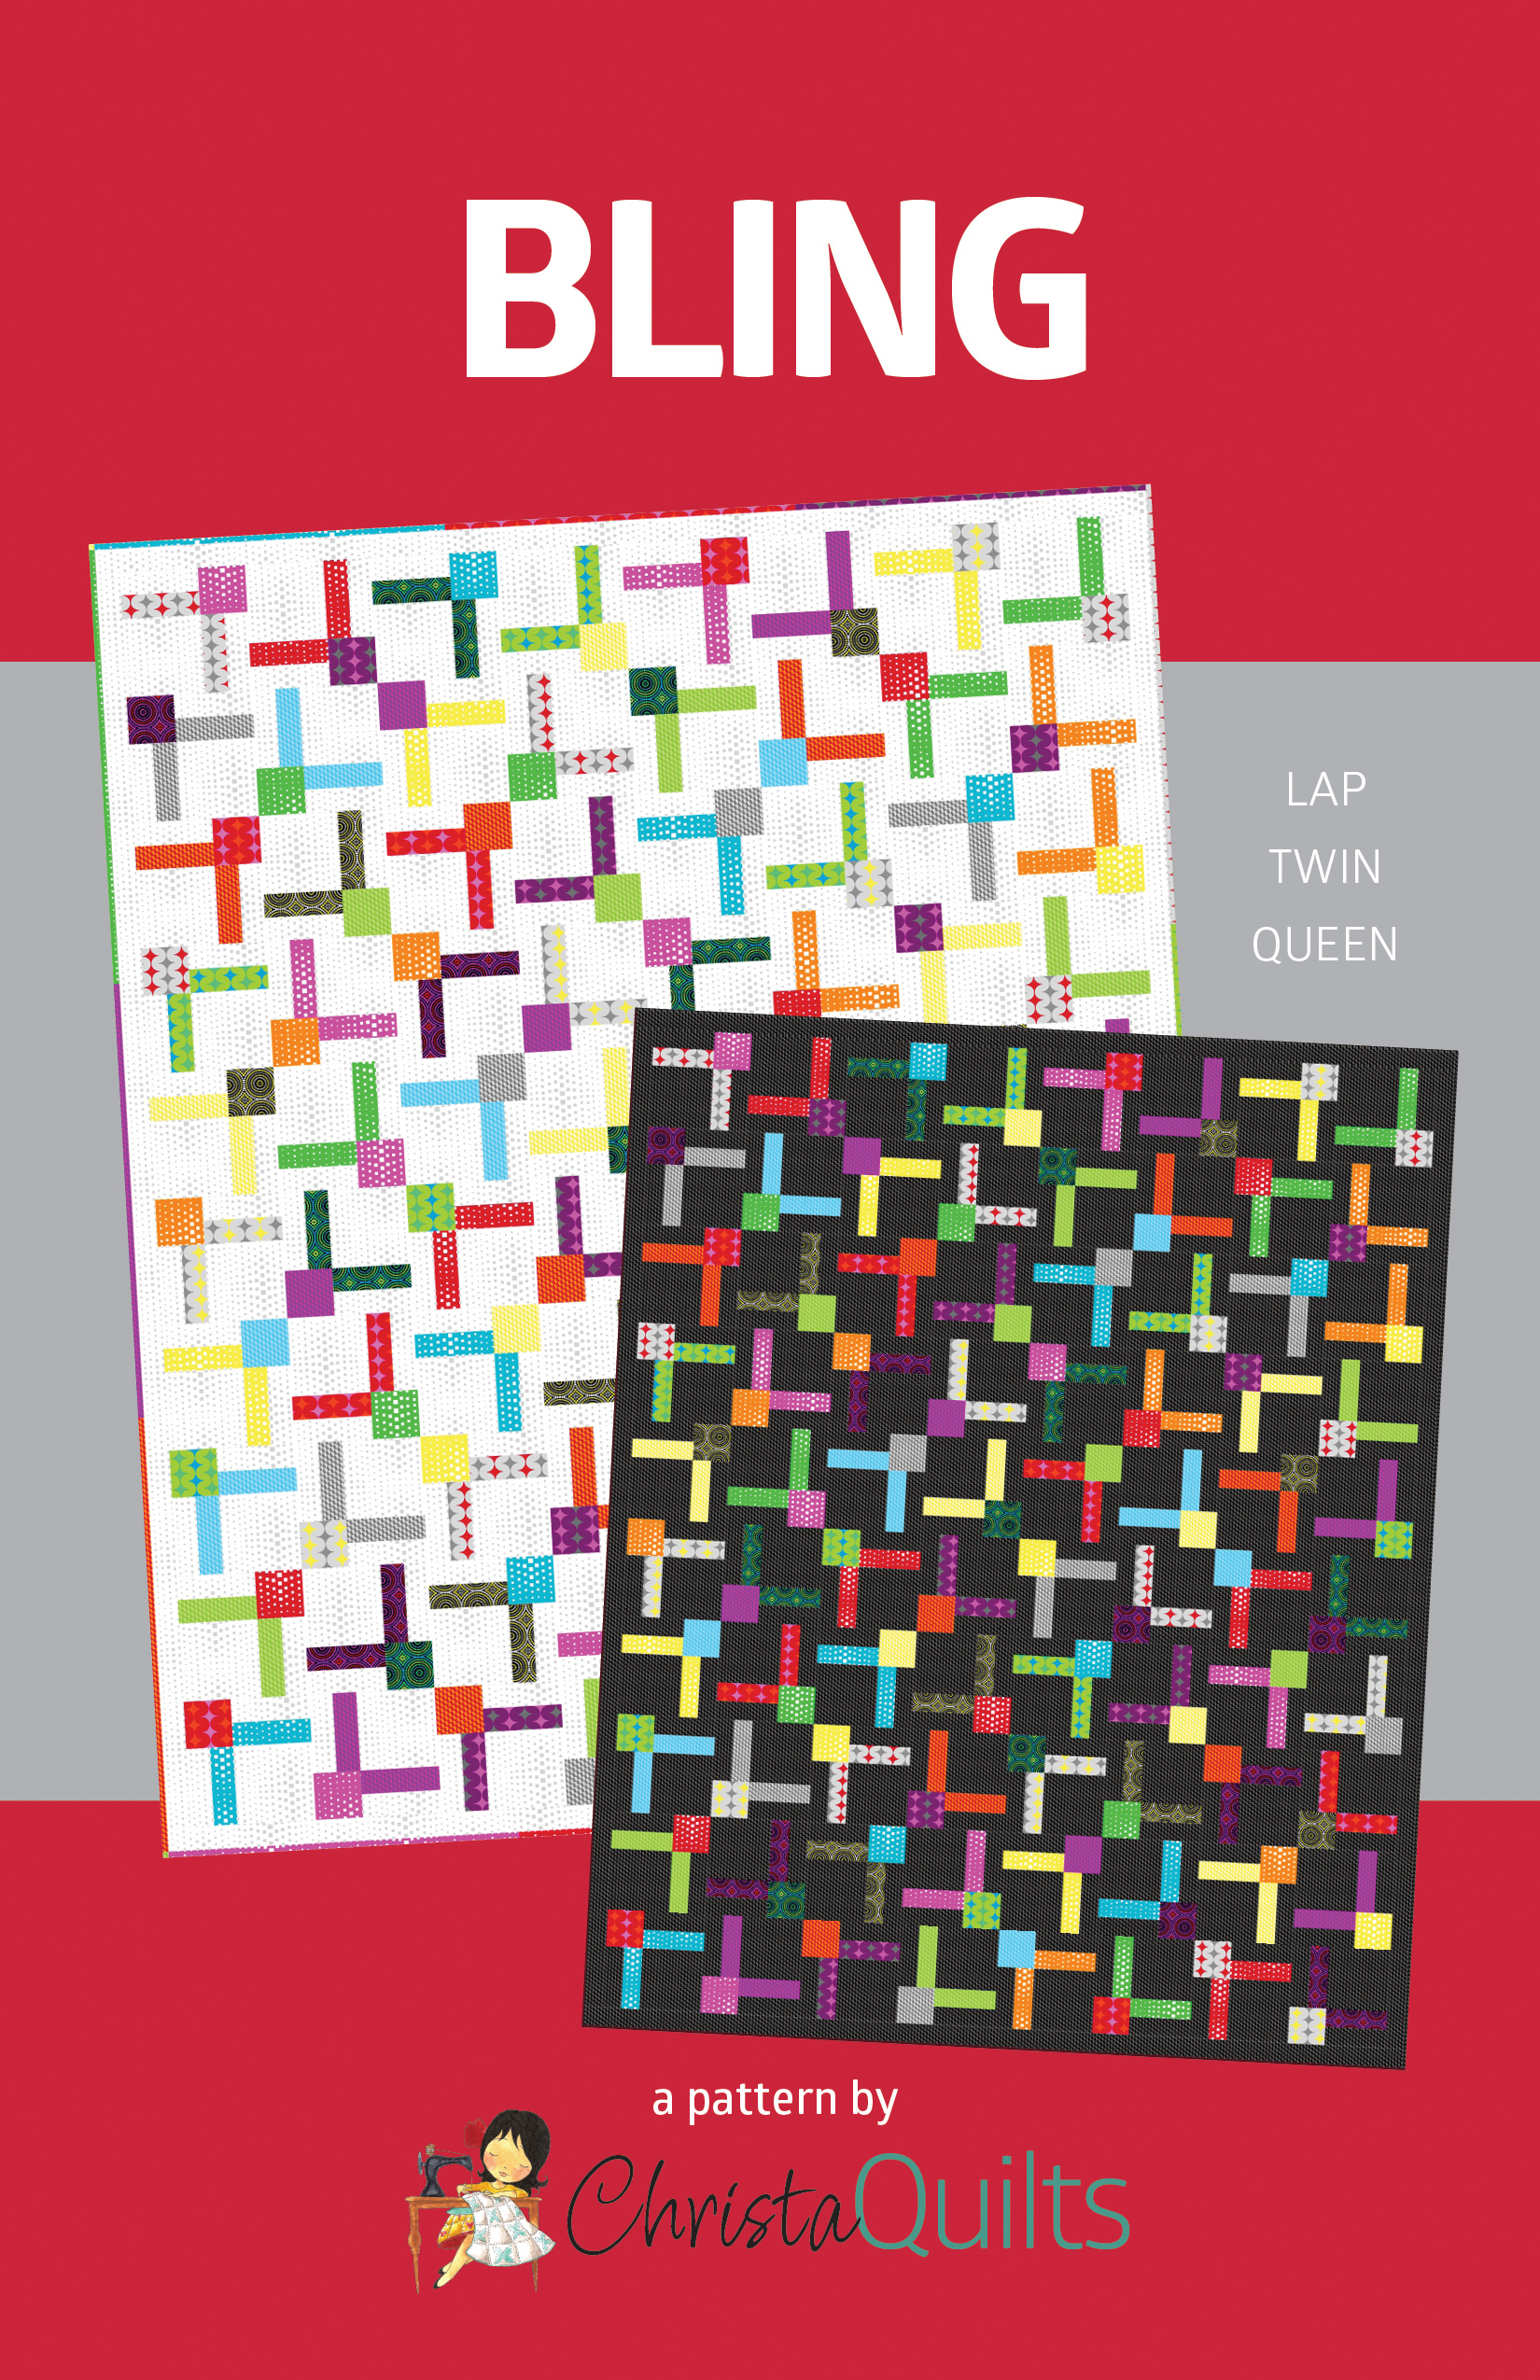
It’s Bling quilt along time – whoo hoo!! This quilt is so fun and fast to make you’ll want to sew more than 1! We will move through this quilt along quickly – but just remember, these posts will stay up indefinitely, so you can refer back to them anytime.

Bling Quilts with Geo Pop

Bling on display in my Geo Pop quilt market booth a few seasons ago.

Whether you want to follow along and make this quilt IRL (in real life) or just virtually in your head, I’m excited to share tips and tricks over the next 5 weeks that will help you make better quilts, no matter which quilt pattern you are sewing. So let’s get started!!!

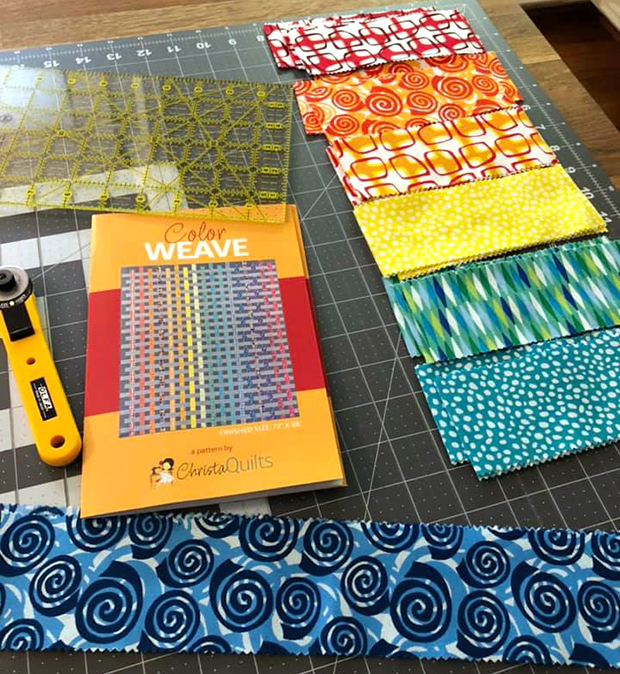
Bling Cutting Options

Geo Pop fabric for Bling quilt by Christa Watson of Christa Quilts

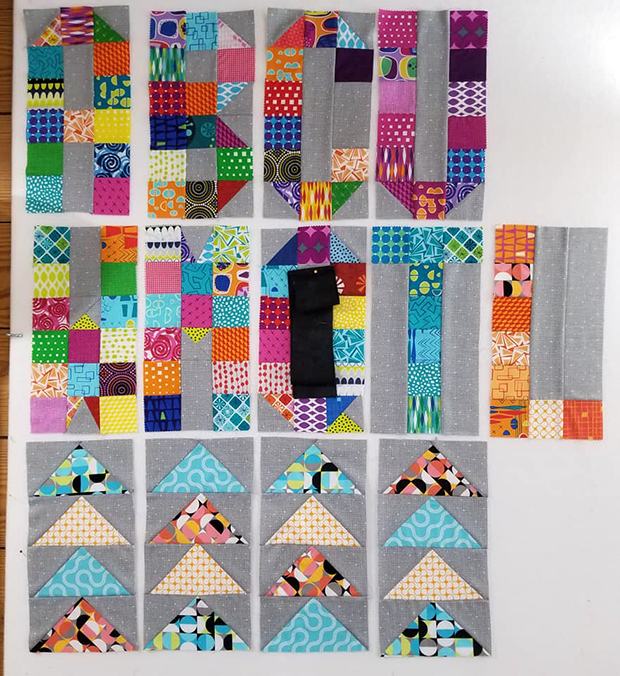
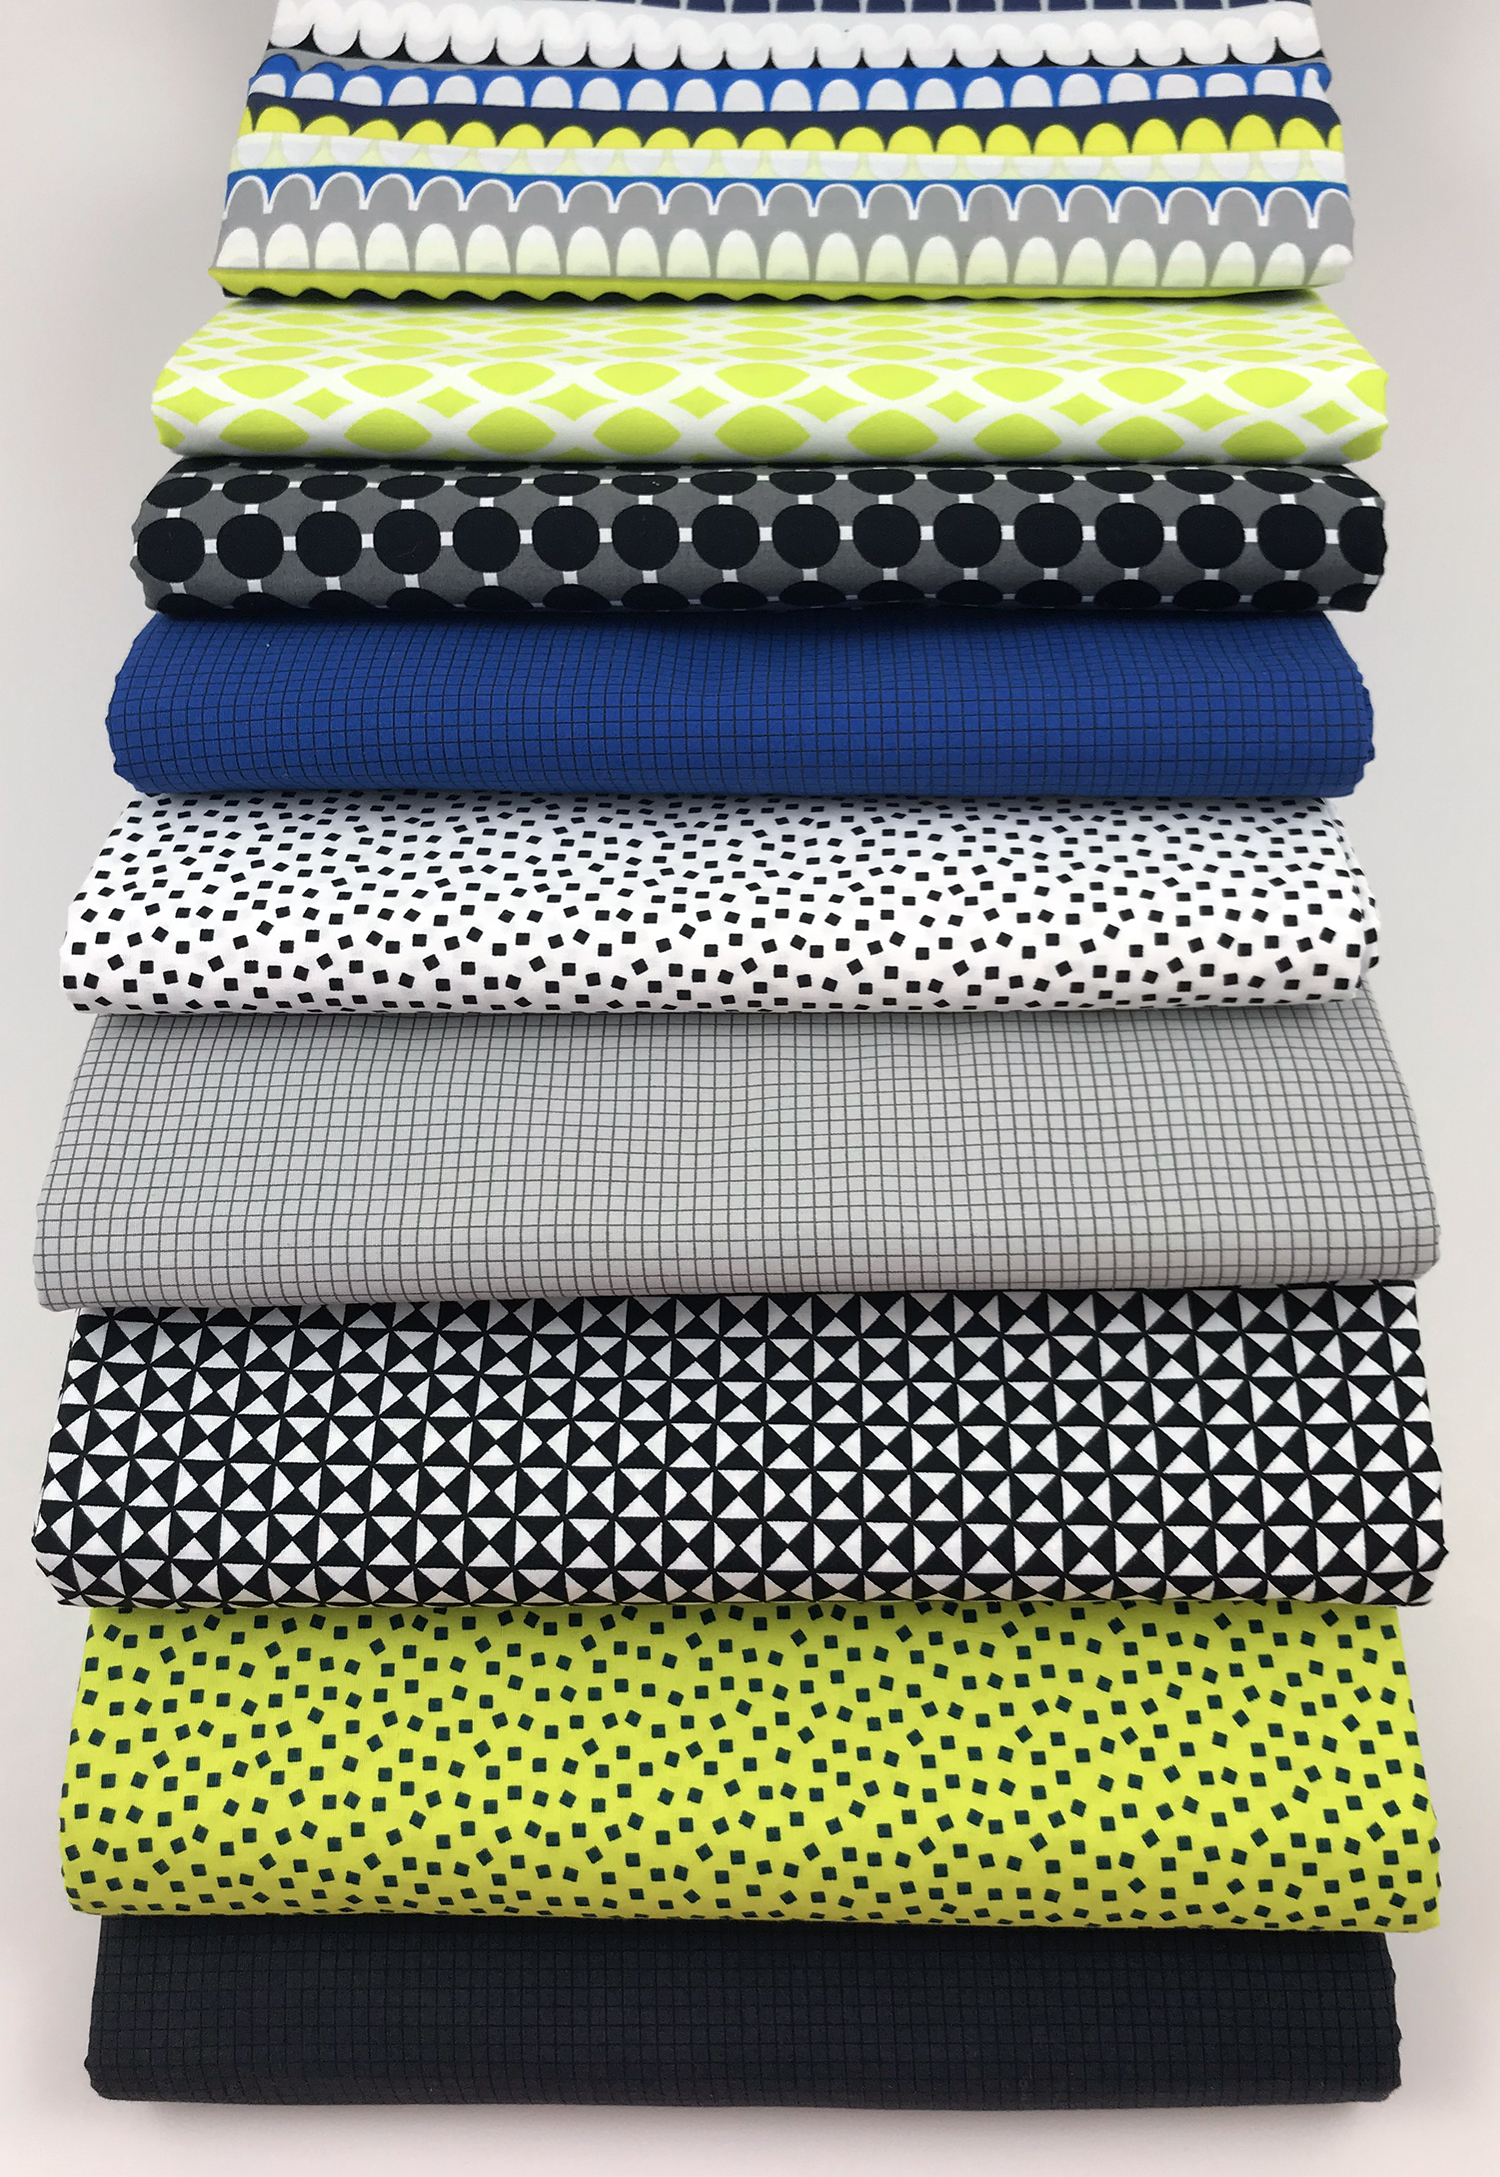
Above is all of the cut units for Bling made from Geo Pop with Tiny Hex black background.

Start by cutting your fat quarters into subunits as listed in the Bling quilt pattern on page 2. I’m making the twin size, but follow along by cutting the number of units as indicate for your size (lap, twin, queen).

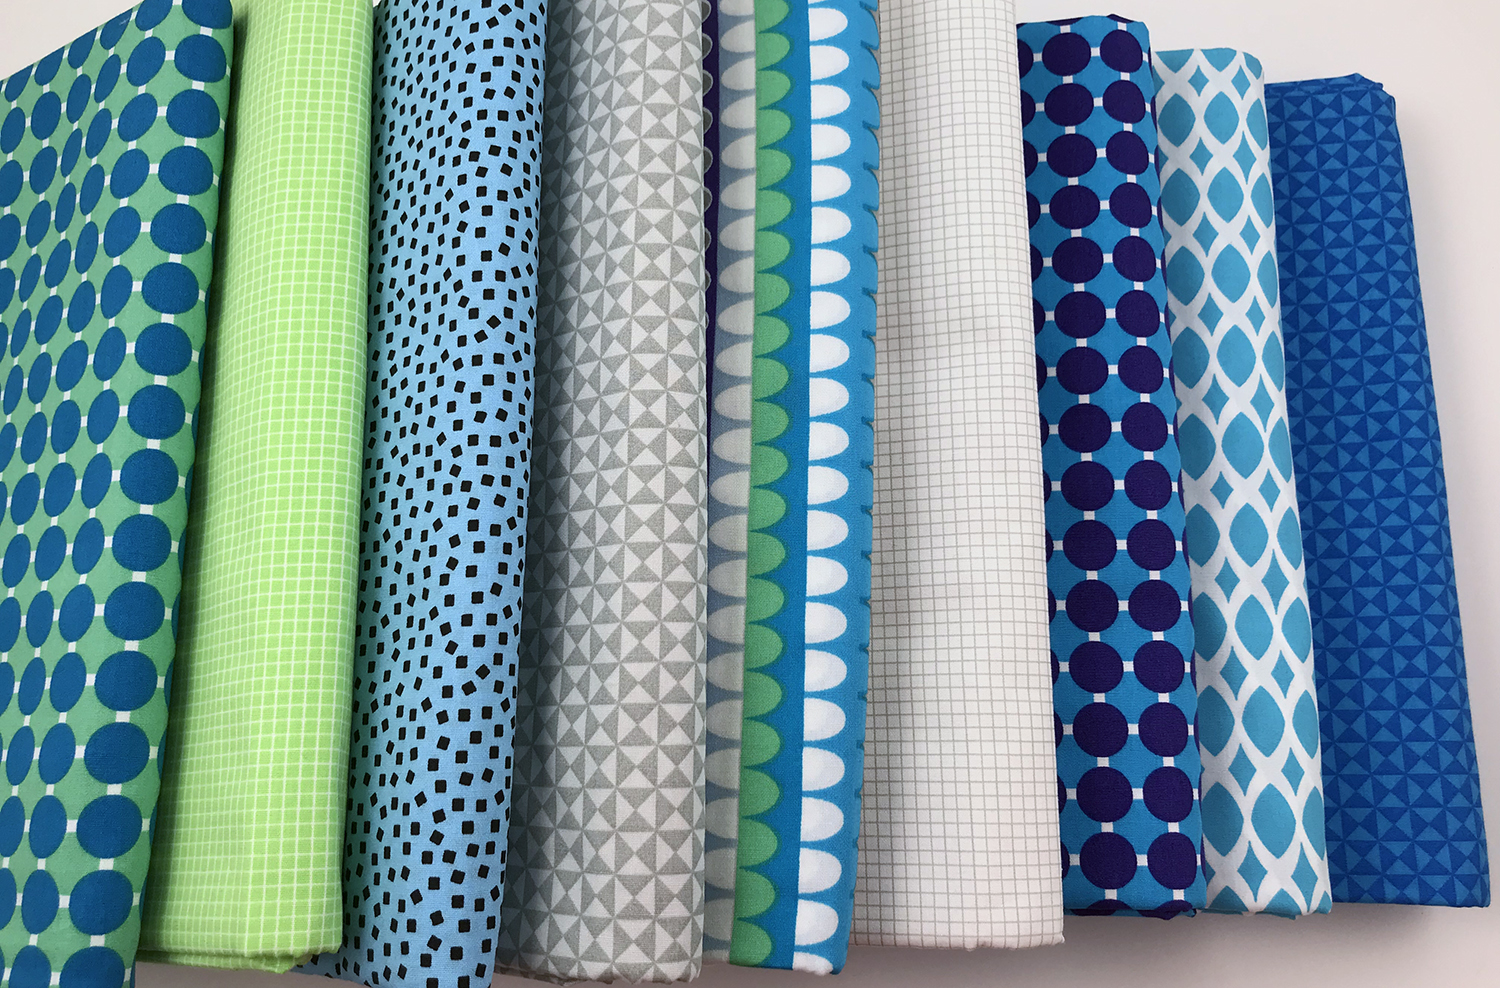
Below is all of the cut units for Bling made from Geo Pop with Op Squares white background.

Geo Pop Fabric for Bling Quilt by Christa Watson

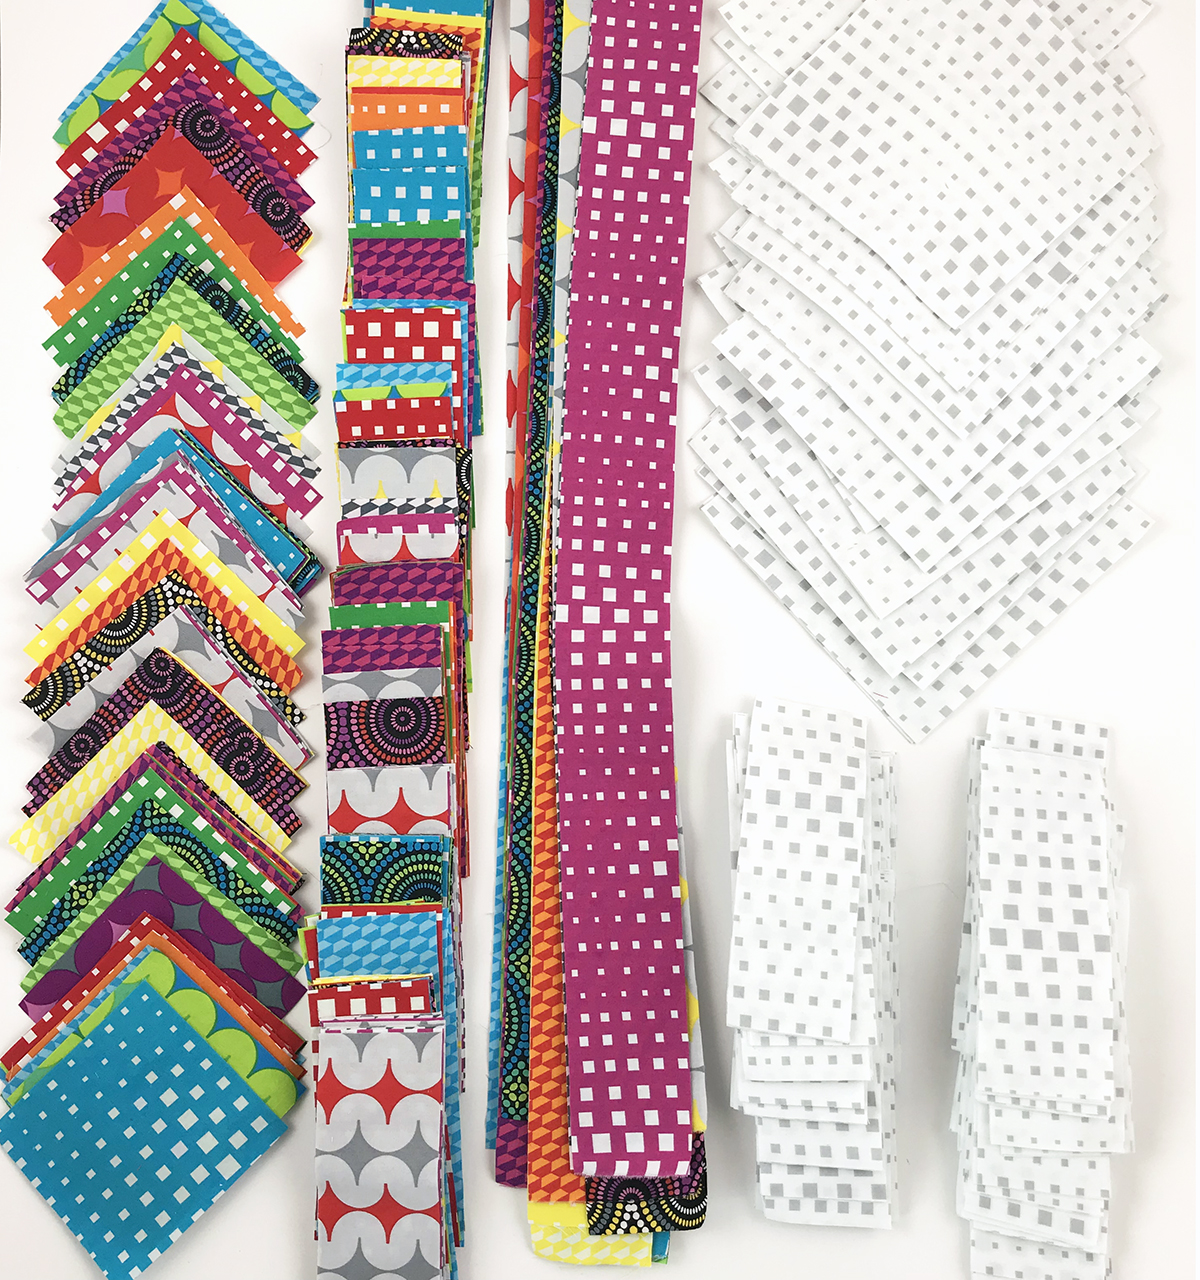
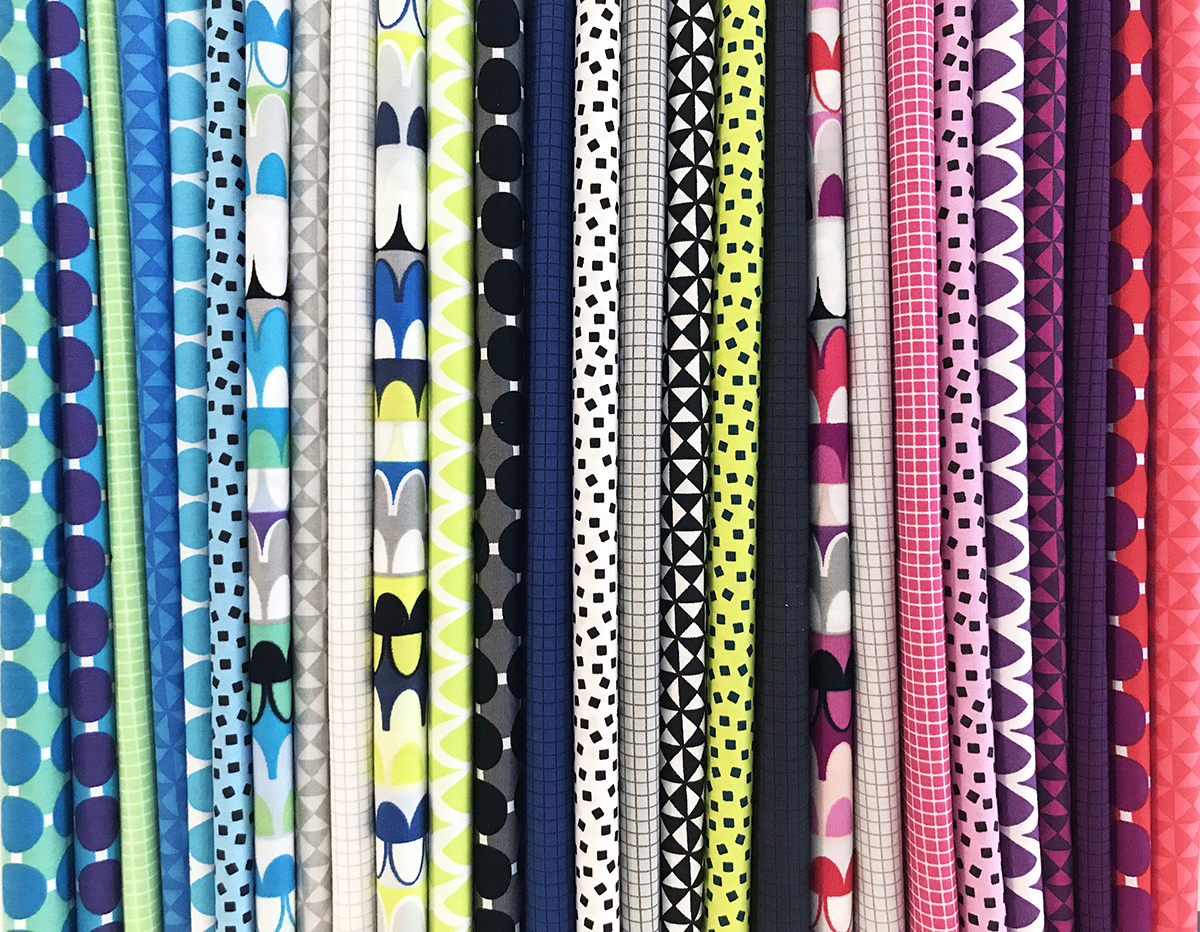
You can use all of the same background fabric as shown in my pictures above, or you can go scrappy if you wish (see other color ideas here). Just remember to cut out the correct number of total pieces as listed in the pattern for your size.

Bling in Good Vibes

For example, if you want a scrappy background version shown above, you can cut out each block background from a different low volume print. In my example, I used half yard bundles of Good Vibes in low volume and saturated prints to get this look, but you could use up lots of scraps this way, too.

Be sure to pair up the “legs” of your block units if you want them to match (but they certainly don’t have to). You can even mix up the backgrounds within each block to go “super” scrappy, too. Just remember – the choice is up to you because you are the boss of your quilt!

Thread Options

I prefer to sew with a shorter stitch length (2.0 instead of 2.5) and press ALL seams open so my blocks lie nice and flat. Sewing with a shorter stitch also prevents the seams from splitting open, and it makes it harder to see the thread in between the seams.

Aurifil Thread and Geo Pop fabric

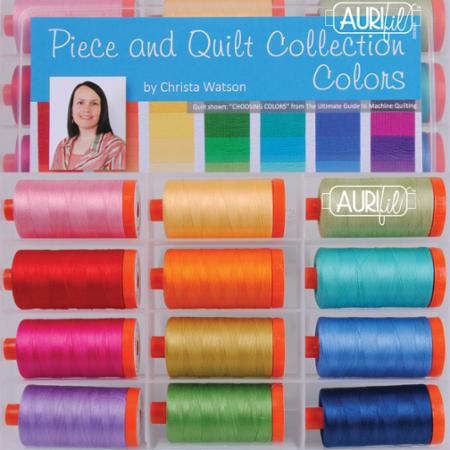
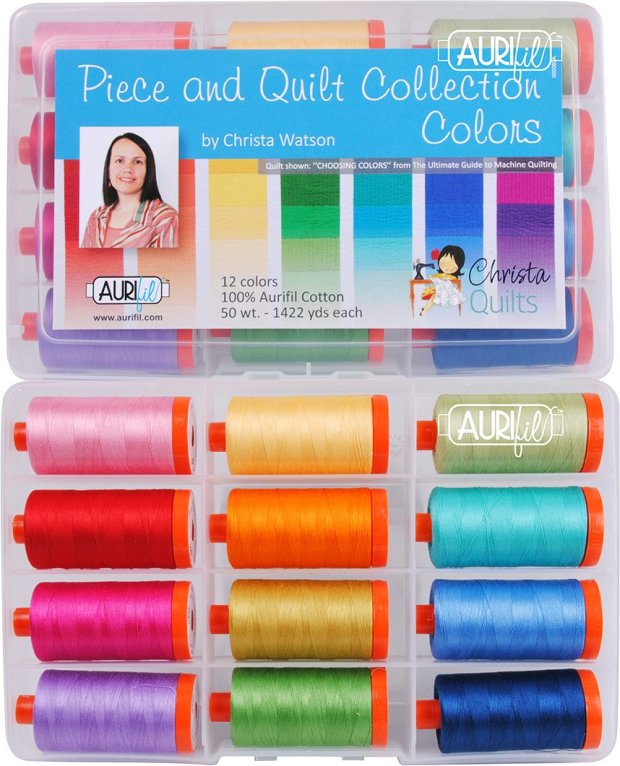
I used up lots of leftover thread in making these quilts. I prefer to piece and quilt with Aurifil 50 weight cotton, and I used up lots of leftover bobbins since this was such a colorful quilt!

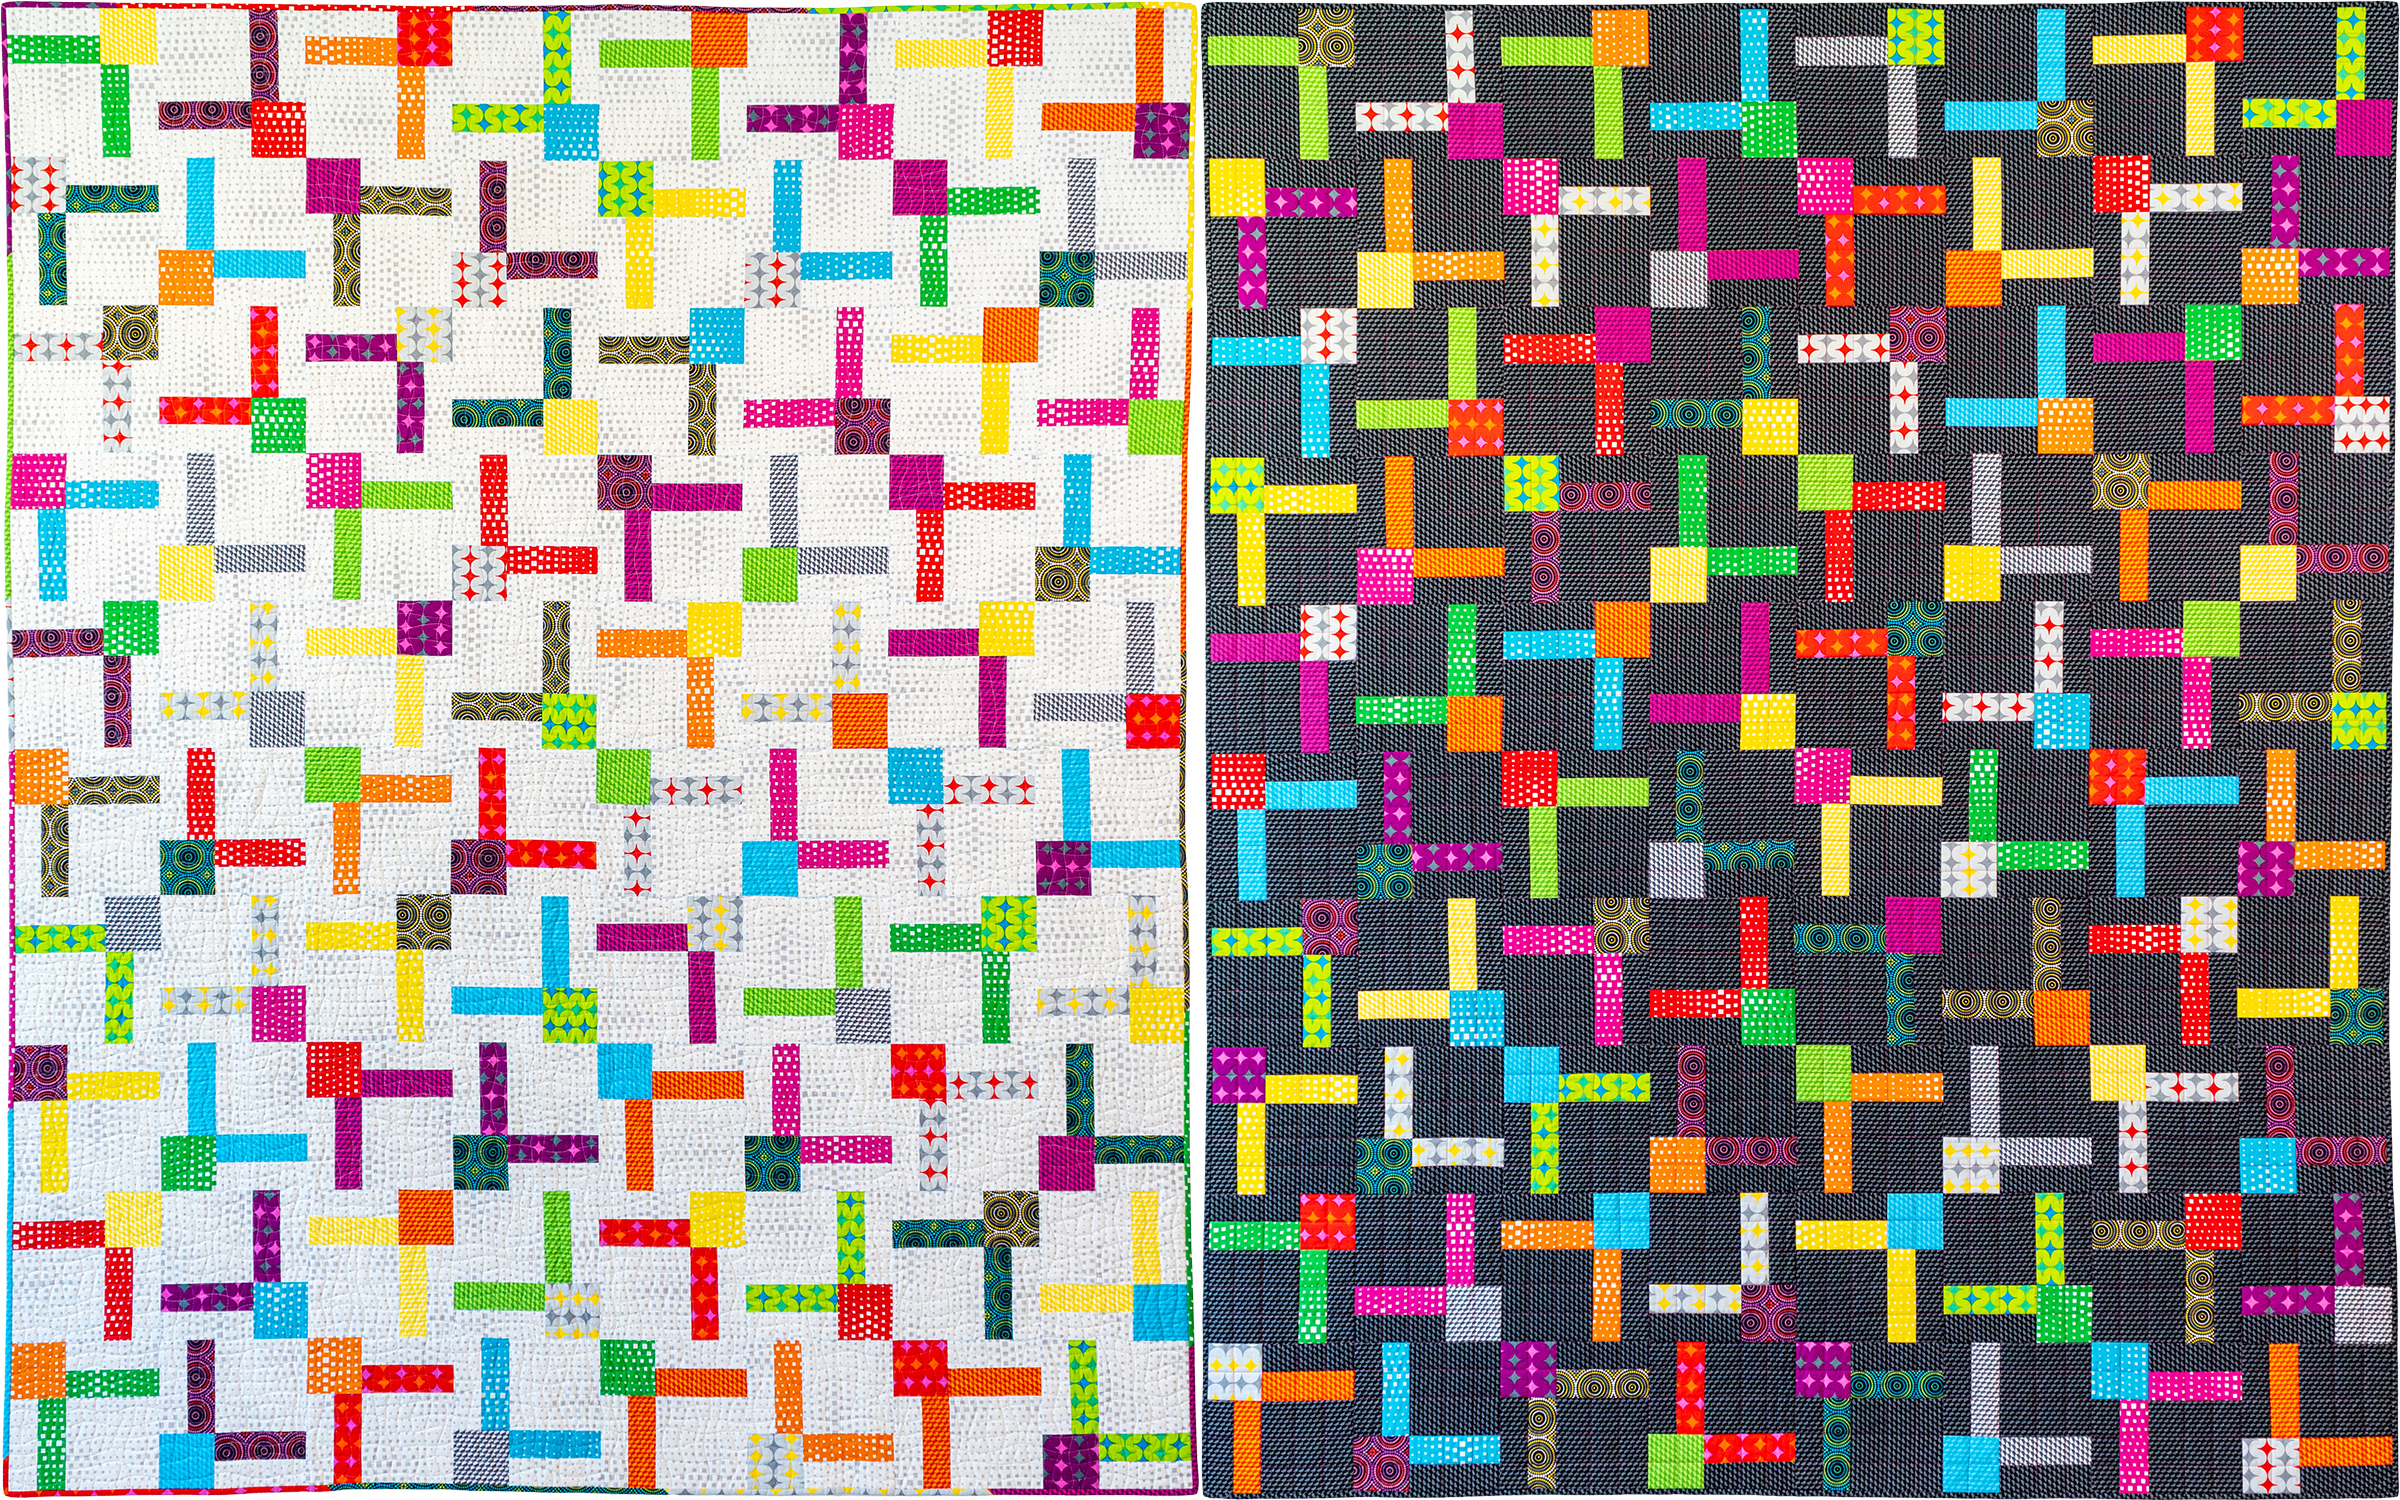
I used lighter colored piecing threads for the version with the white background, and darker threads for the version with the black background. Aurifil Thread and Geo Pop Fabric

Whenever I’m making a scrappy, colorful quilt, I’l try to use up as many spools as possible that just have a little bit of thread left on them.  Who says you have to use the same exact color of thread throughout? I love finishing up a spool of thread – don’t you??

Block Sewing Options

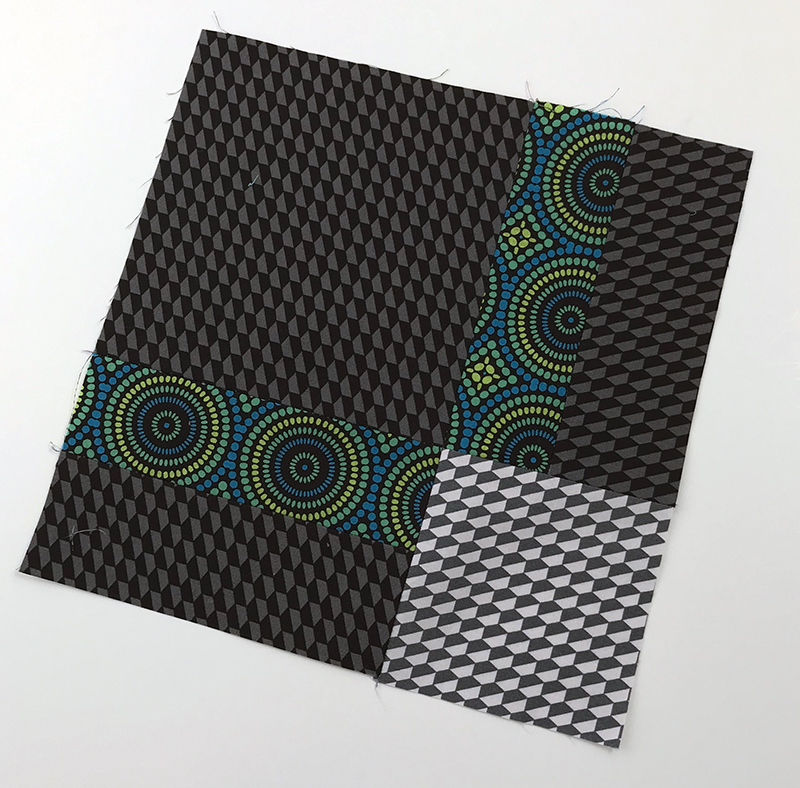
Follow the pattern instructions on pages 2-3 to create the basic Bling block below. I recommend sewing one block first, to make sure it turns out correctly, then chain piecing a whole bunch of units at once for speed and efficiency.

Bling Block

The fun part about making this block is mixing up the different fabric combinations. There’s no right or wrong way to pair them up. Just go for it and don’t over think it!!

Below is the back side of one of my blocks with those nice flat seams. This will make quilting sooooooo much easier, because the quilt top will be smooth and flat in the end.

Bling Block White

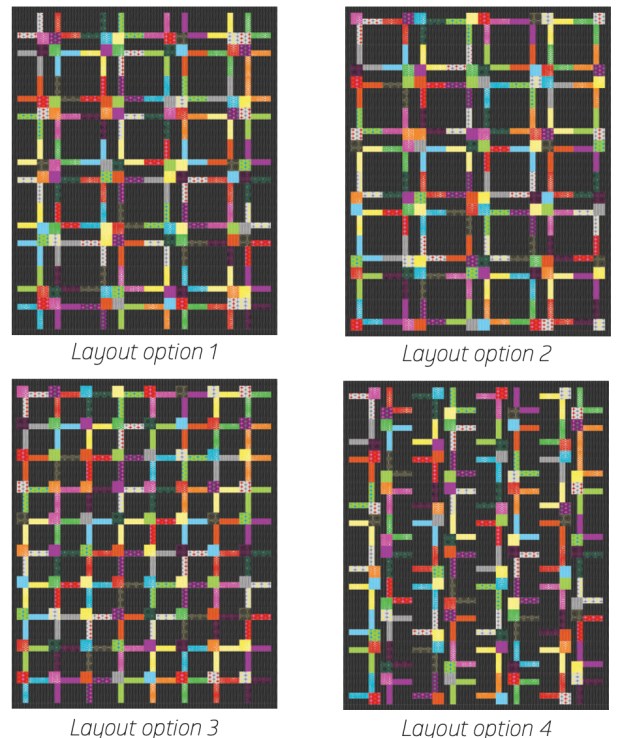
If you’d like to be a bit adventurous, here are a couple of bonus ideas on how you can sew your block units:

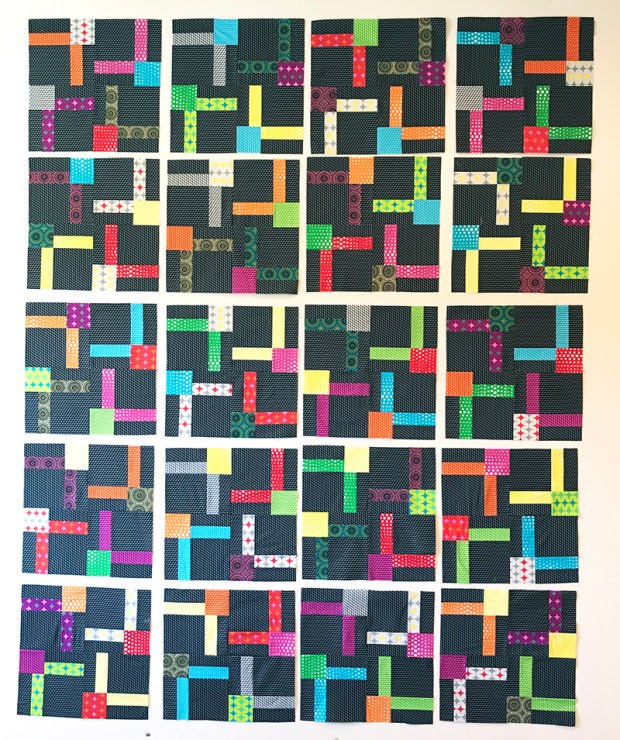
In the option below, I’ve rotated the position of the rectangle units.

Geo Pop Bling

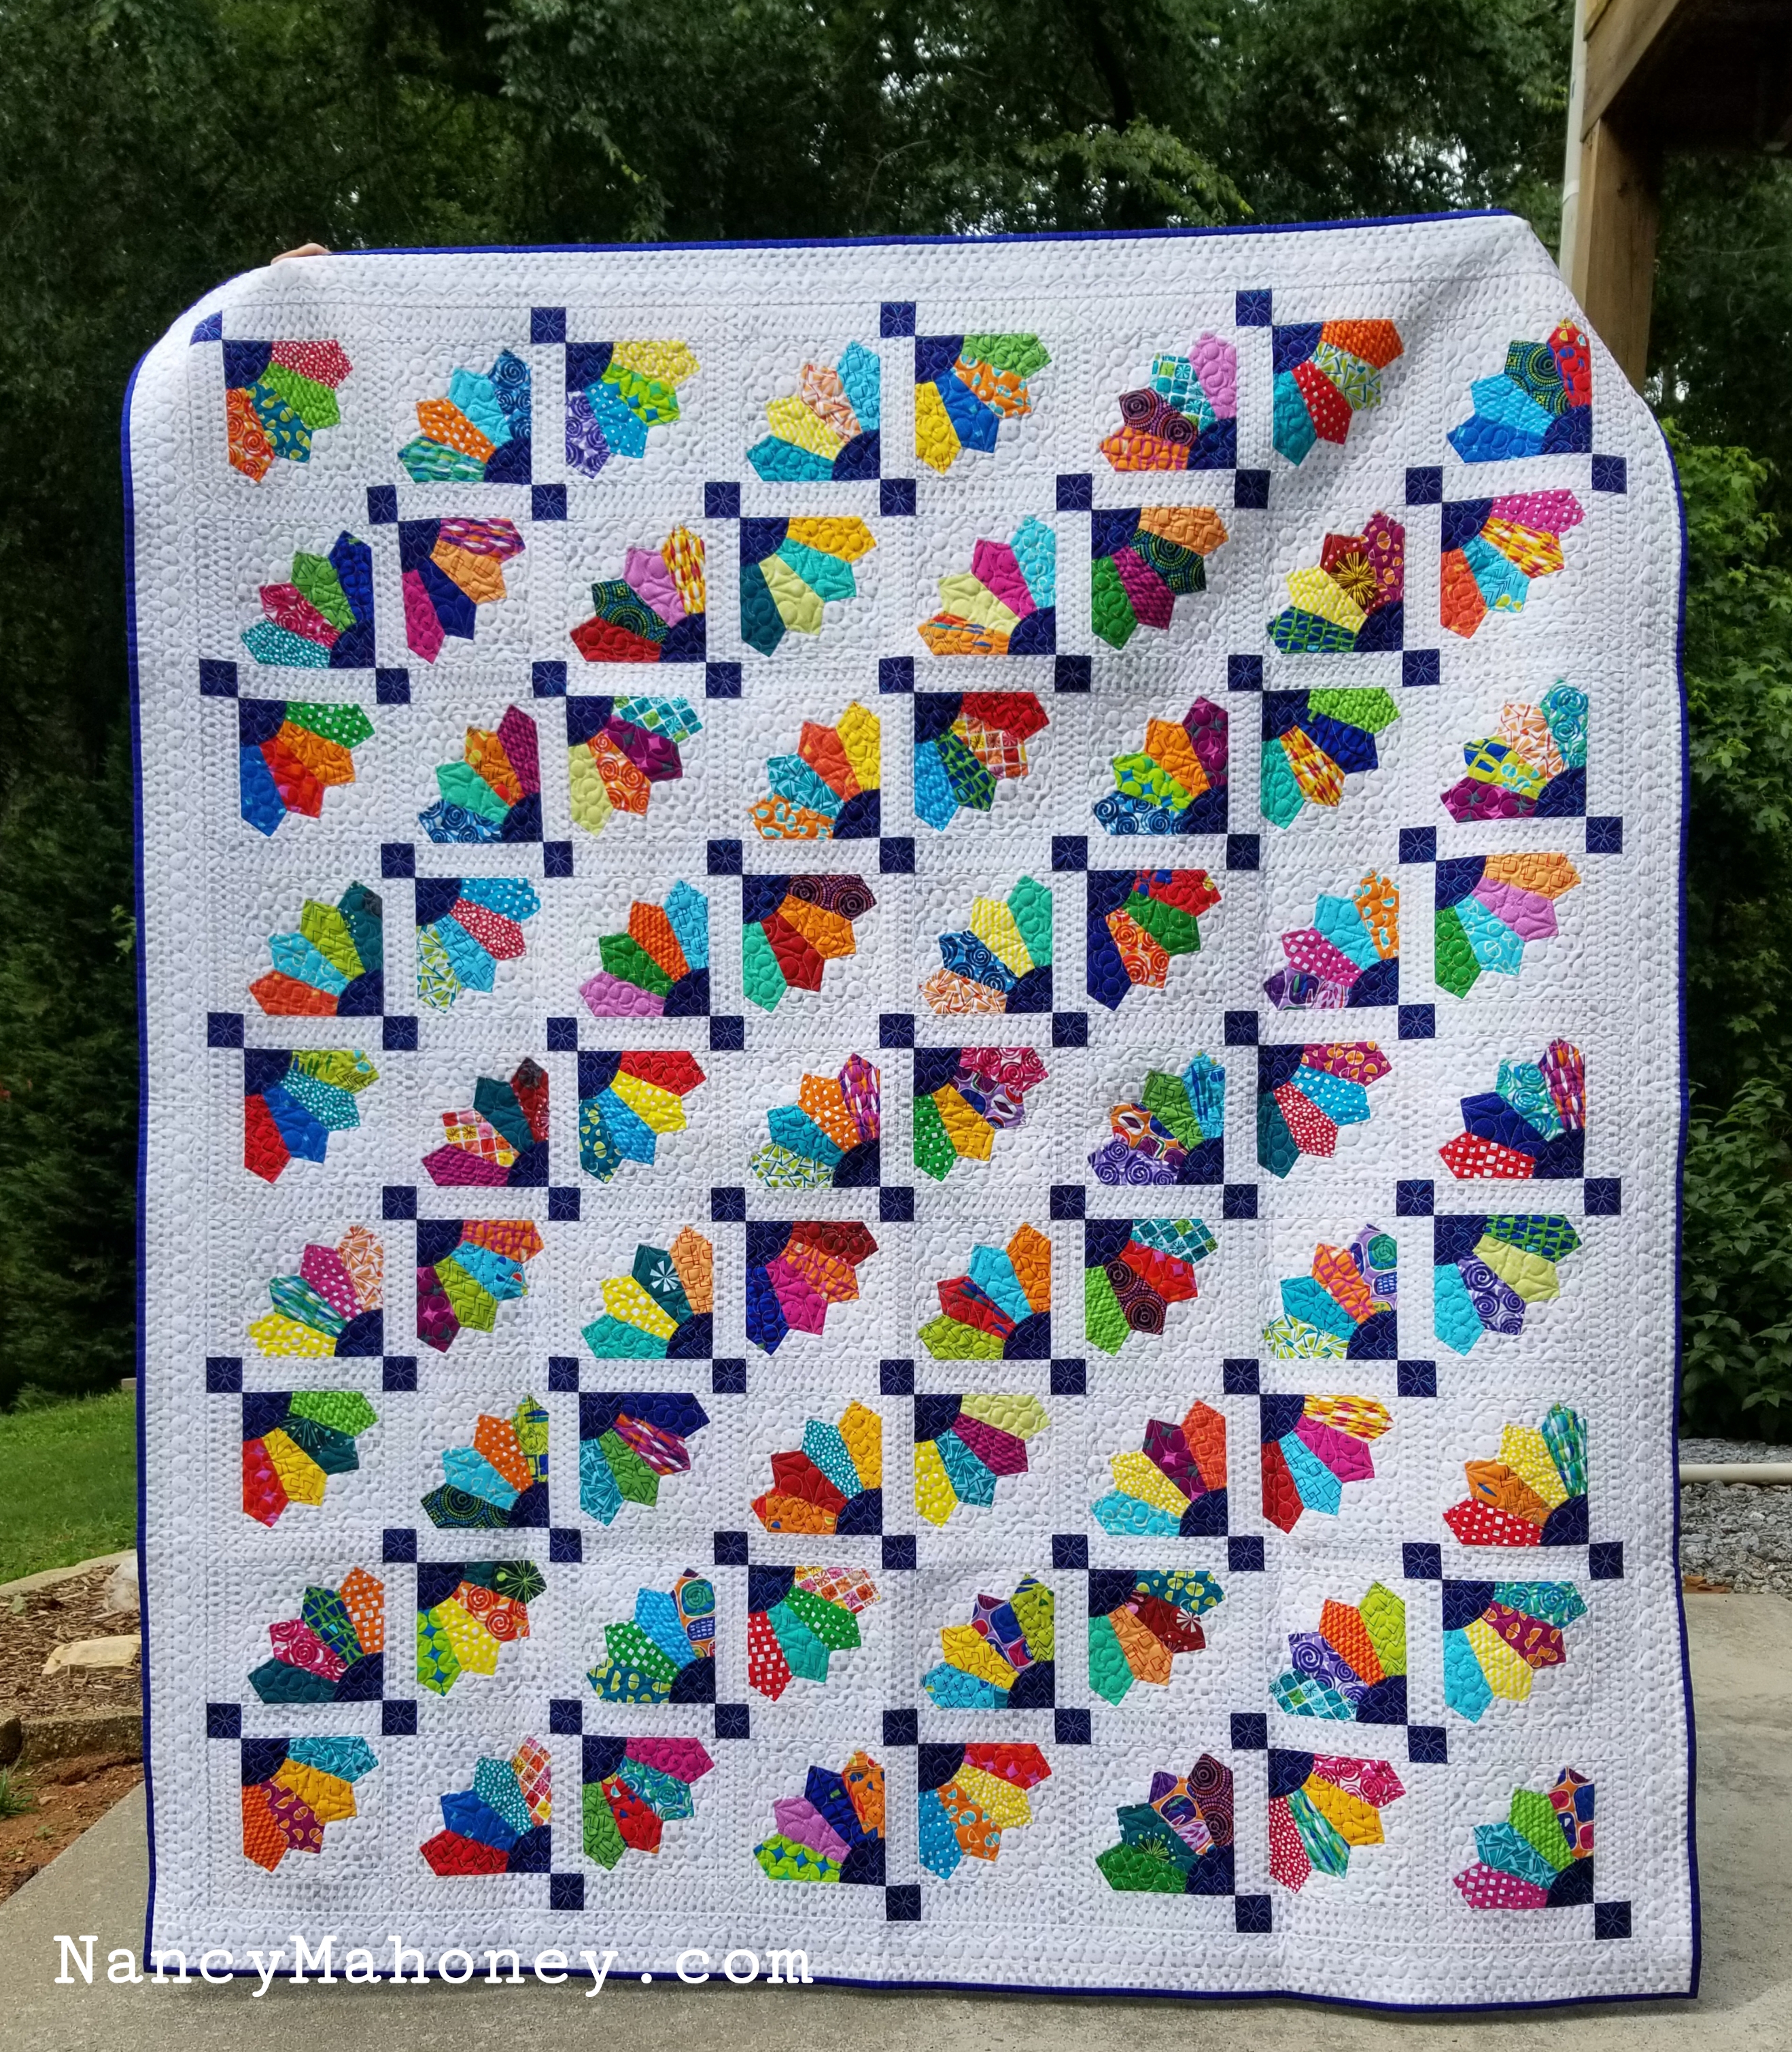
Here’s what the blocks above will look like (in the white version) if you repeat this option throughout the entire quilt. The math and number of blocks is all the same, but what a huge variation one small change will create!!

Bling Alternate Blocks

Here’s another option to try: go super scrappy by using 3 prints in each block, rather than 2. Again, there’s not much thinking involved in this change.

Sew all of the rectangle units first (see the Bling pattern, page 2) and then decide if you want to make coordinating or super scrappy blocks. Or maybe a mix of both!

Geo Pop Bling

You can also try the other extreme: using all of the same print for the main part of the block!

Isn’t it fun to have choices????

Bling block same fabric

Whichever way you choose to sew your blocks – they will look fabulous!

Homework: Sew all of the Bling Blocks

Quilty “homework” is the best kind of homework!! Now that you have several options to try, work on sewing all of your Bling blocks this week. Don’t worry if you fall behind – just work on a few blocks a day, and you’ll have them done in no time!

Bling Blocks

Remember, I’m here to help and cheer you on – even after the quilt along is over. Check out the resources below to help enhance your quilt along experience:

Additional Resources