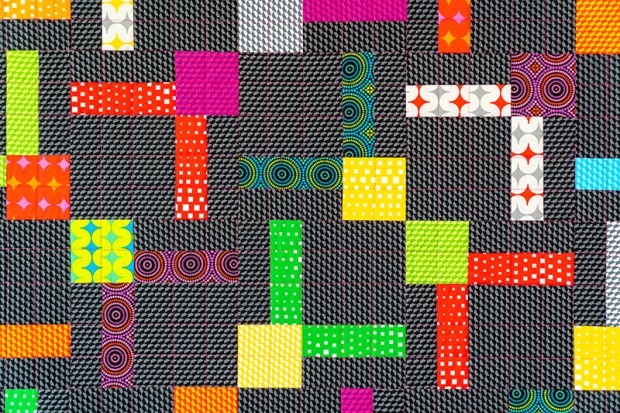
And now we get to my favorite part of making a quilt – machine quilting! Because I made two versions of Bling, and quilted them with 2 different walking foot quilting designs, I’m excited to share both options with you over the next 2 weeks. And the best part is, you can use these tips and tricks on ANY quilt you wish to make.

For the version of Bling with the Black background, I used my walking foot/dual feed to quilt straight-“ish” lines in a crosshatch pattern following the design of the blocks.
Choose Your Thread Color
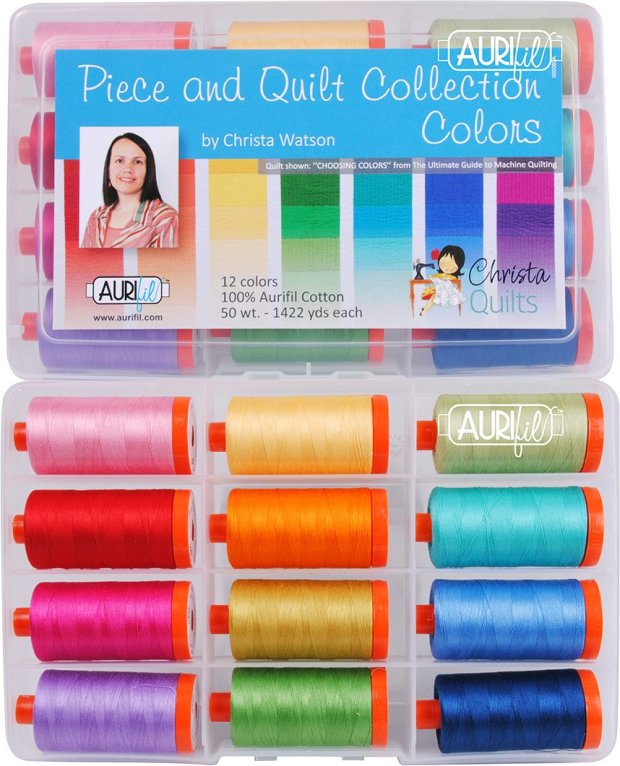
Because I wanted the thread to stand out on this vibrant colorful quilt, I chose a bright pink from my Piece and Quilt Collection – Colors from Aurifil Thread.

I chose the bright pink which is the first column, third row down in the image above.
Click here to get this thread box for just $99 while supplies last.
But, before you dive into quilting your quilt, first you need to baste it. I use the same method to baste ALL of my quilts: spraying 505 adhesive on the wrong side of the quilt top and backing outdoors or in a well-ventilated area.
Prepping the Quilt

Then, I assemble the quilt layers together on my design wall indoors. You can also use a table if you don’t have a design wall.
 Basting in process on my design wall.
I can’t wait to share more about the quilting of this version of Bling next week!
The “magic” part of my spray-basting method is ironing the basted quilt on both sides – front and back to squish it all together and set the glue.

Get the Bling kit – in white or black – while supplies last!
Click the image below to watch a super speedy basting video from my Infrastructure quilt.

Once you have basted your quilt and are ready to begin machine quilting, be sure to clean and oil your machine and put in a fresh needle.
I really like the Superior brand Titanium needs in size 80/12 to go along with my 50 weight cotton Aurifil thread.
Click here to get some of my favorite notions and thread.
Make a Quilting Plan
In all of my quilt patterns, I like to include quilting suggestions and a quilting plan. It’s very easy to “divide” and conquer the straight line quilting by first quilting in the ditch between each of the blocks in both directions. This will create a grid that’s equal to the size of the quilt blocks. This will anchor or stabilize your quilt for additional quilting.

One of the quilting plans included in the Bling quilt pattern.
Once you have anchored your quilt, you can quilt lines randomly across the quilt in both directions. You can quilt as light or as dense as you would like.
At first I thought I would quilt my quilt more densely, but once I quilted a few passes in both directions, I was happy with how it looked so I stopped. That’s the beauty of “divide and conquer” when it comes to quilting. You can stop whenever it feels finished!

Here’s a bonus tip: if you want your lines to stay straight, but you don’t have seam lines to follow, use a piece of painter’s tape as your guide.
YouTube Quilting Videos
I have a super short video below where you can see how I used the tape while quilting this version of Bling, plus a sneak peek of how I quilted the white version, too:
If you would like to quilt your quilt more densely, continue quilting lines in both directions, one pass at a time until you like how it looks. You can see a densely quilted version of random crosshatch on my Color Weave quilt.
View the youtube video play list below. It’s a series of shorter videos strung together while quilting my Color Weave quilt. (Click here to get the Color Weave quilt pattern):
Now I can’t wait to see how you quilt yours! Keep sharing your makes with me on instagram #blingquilt and in my ChristaQuilts Facebook group.

Just wanted to say, I have never thought of ironing the quilt top and back after spray basting. I have been spray basting for many years and it usually has been sufficient to stay together. But there are still places that may “lift”. I am now going to try ironing it as you have shown. I have used fusible basting way back when I first started quilting and I do not like it. Thanks for the info.