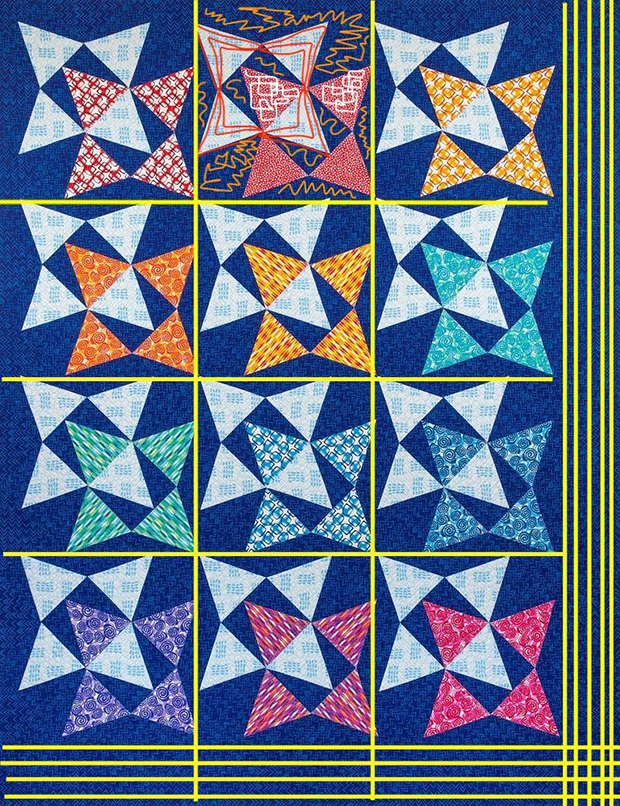
I’m so excited to share with you the cover art for my brand new book, 99 Machine Quilting Designs, coming soon! I don’t have a release date yet, but once I do, I’ll open up pre-orders with some bonus incentives and freebies for those who order early. So stay tuned for more info!!
Get my Current Books for just $19.95 Each!
While supplies last, I’m giving you a chance to stock up on my previous books to complete your machine quilting library. I’m offering these for a price way below the retail price, AND I’m happy to sign a personal message to you – just leave me a note with your order!
Over the years, I’ve hosted several quilt alongs from my books to help you gain confidence in making a quilt from start to finish. Here’s a roundup of some of them that you can still access anytime, on your own schedule. All you need is a copy of the book for the pattern and I’m here to cheer you on every step of the way!
If you loved trying out Improv Piecing while making Modern Logs, you will love this take on it, too! Use up your smallest scraps to create this gorgeous quilt! I was thrilled that it won a ribbon in a national show a few years ago, and it’s still one of my favorite quilts!
Dot ‘n’ Dash is my modern version of a jelly roll quilt! I used precut strips of my Fandangle fabric line for this remake version, but you’ll find a different inspiring colorway in my book, Piece and Quilt with Precuts. No matter how you slice it, it looks great every time!
I really enjoyed remaking Squiggles from charm packs of my bold and colorful prints. The original pattern in the book uses a softer color palette which just goes to show this design looks great no matter which fabrics you choose!
I sure enjoy being a cheerleader for do-it-yourself quilting and can’t wait to share more about the new book. In the meantime, I hope the projects above will keep you busy!!
I’ve invited Nancy to come on the blog to tell you more about this fabulous quilt in her own words…..
From Nancy Messuri:
I am honored Christa gave me the opportunity to guest blog as I am a huge fan all her fabric lines, books, and easygoing teaching style, so I was very excited when she asked me to guest post, as there is lots to share about this quilt!
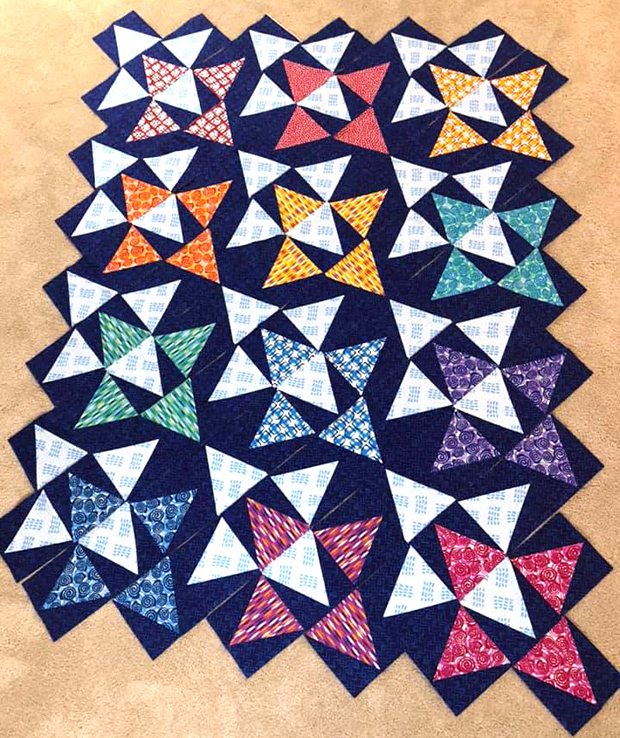
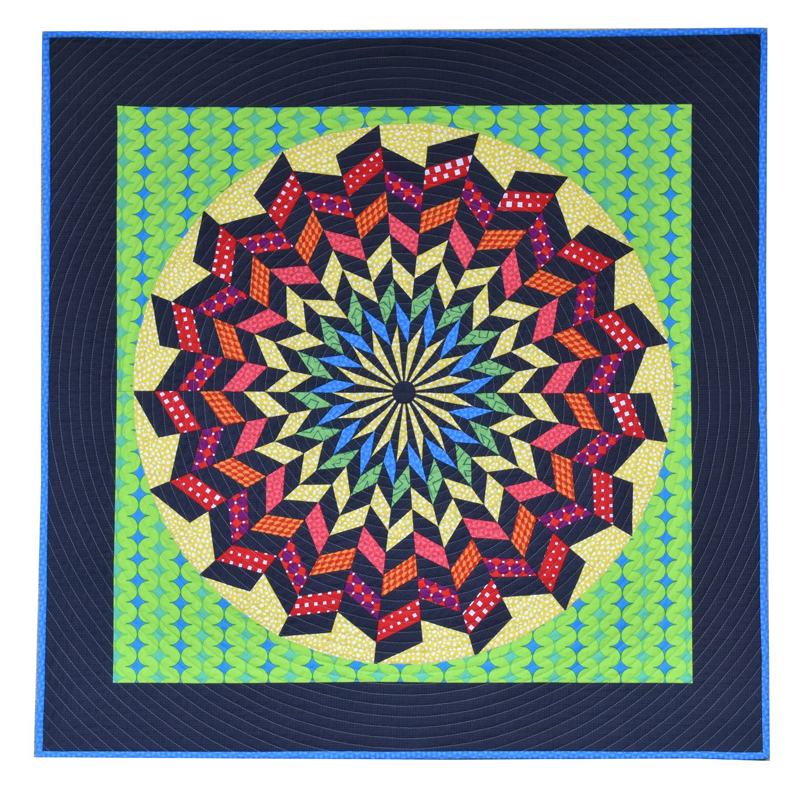
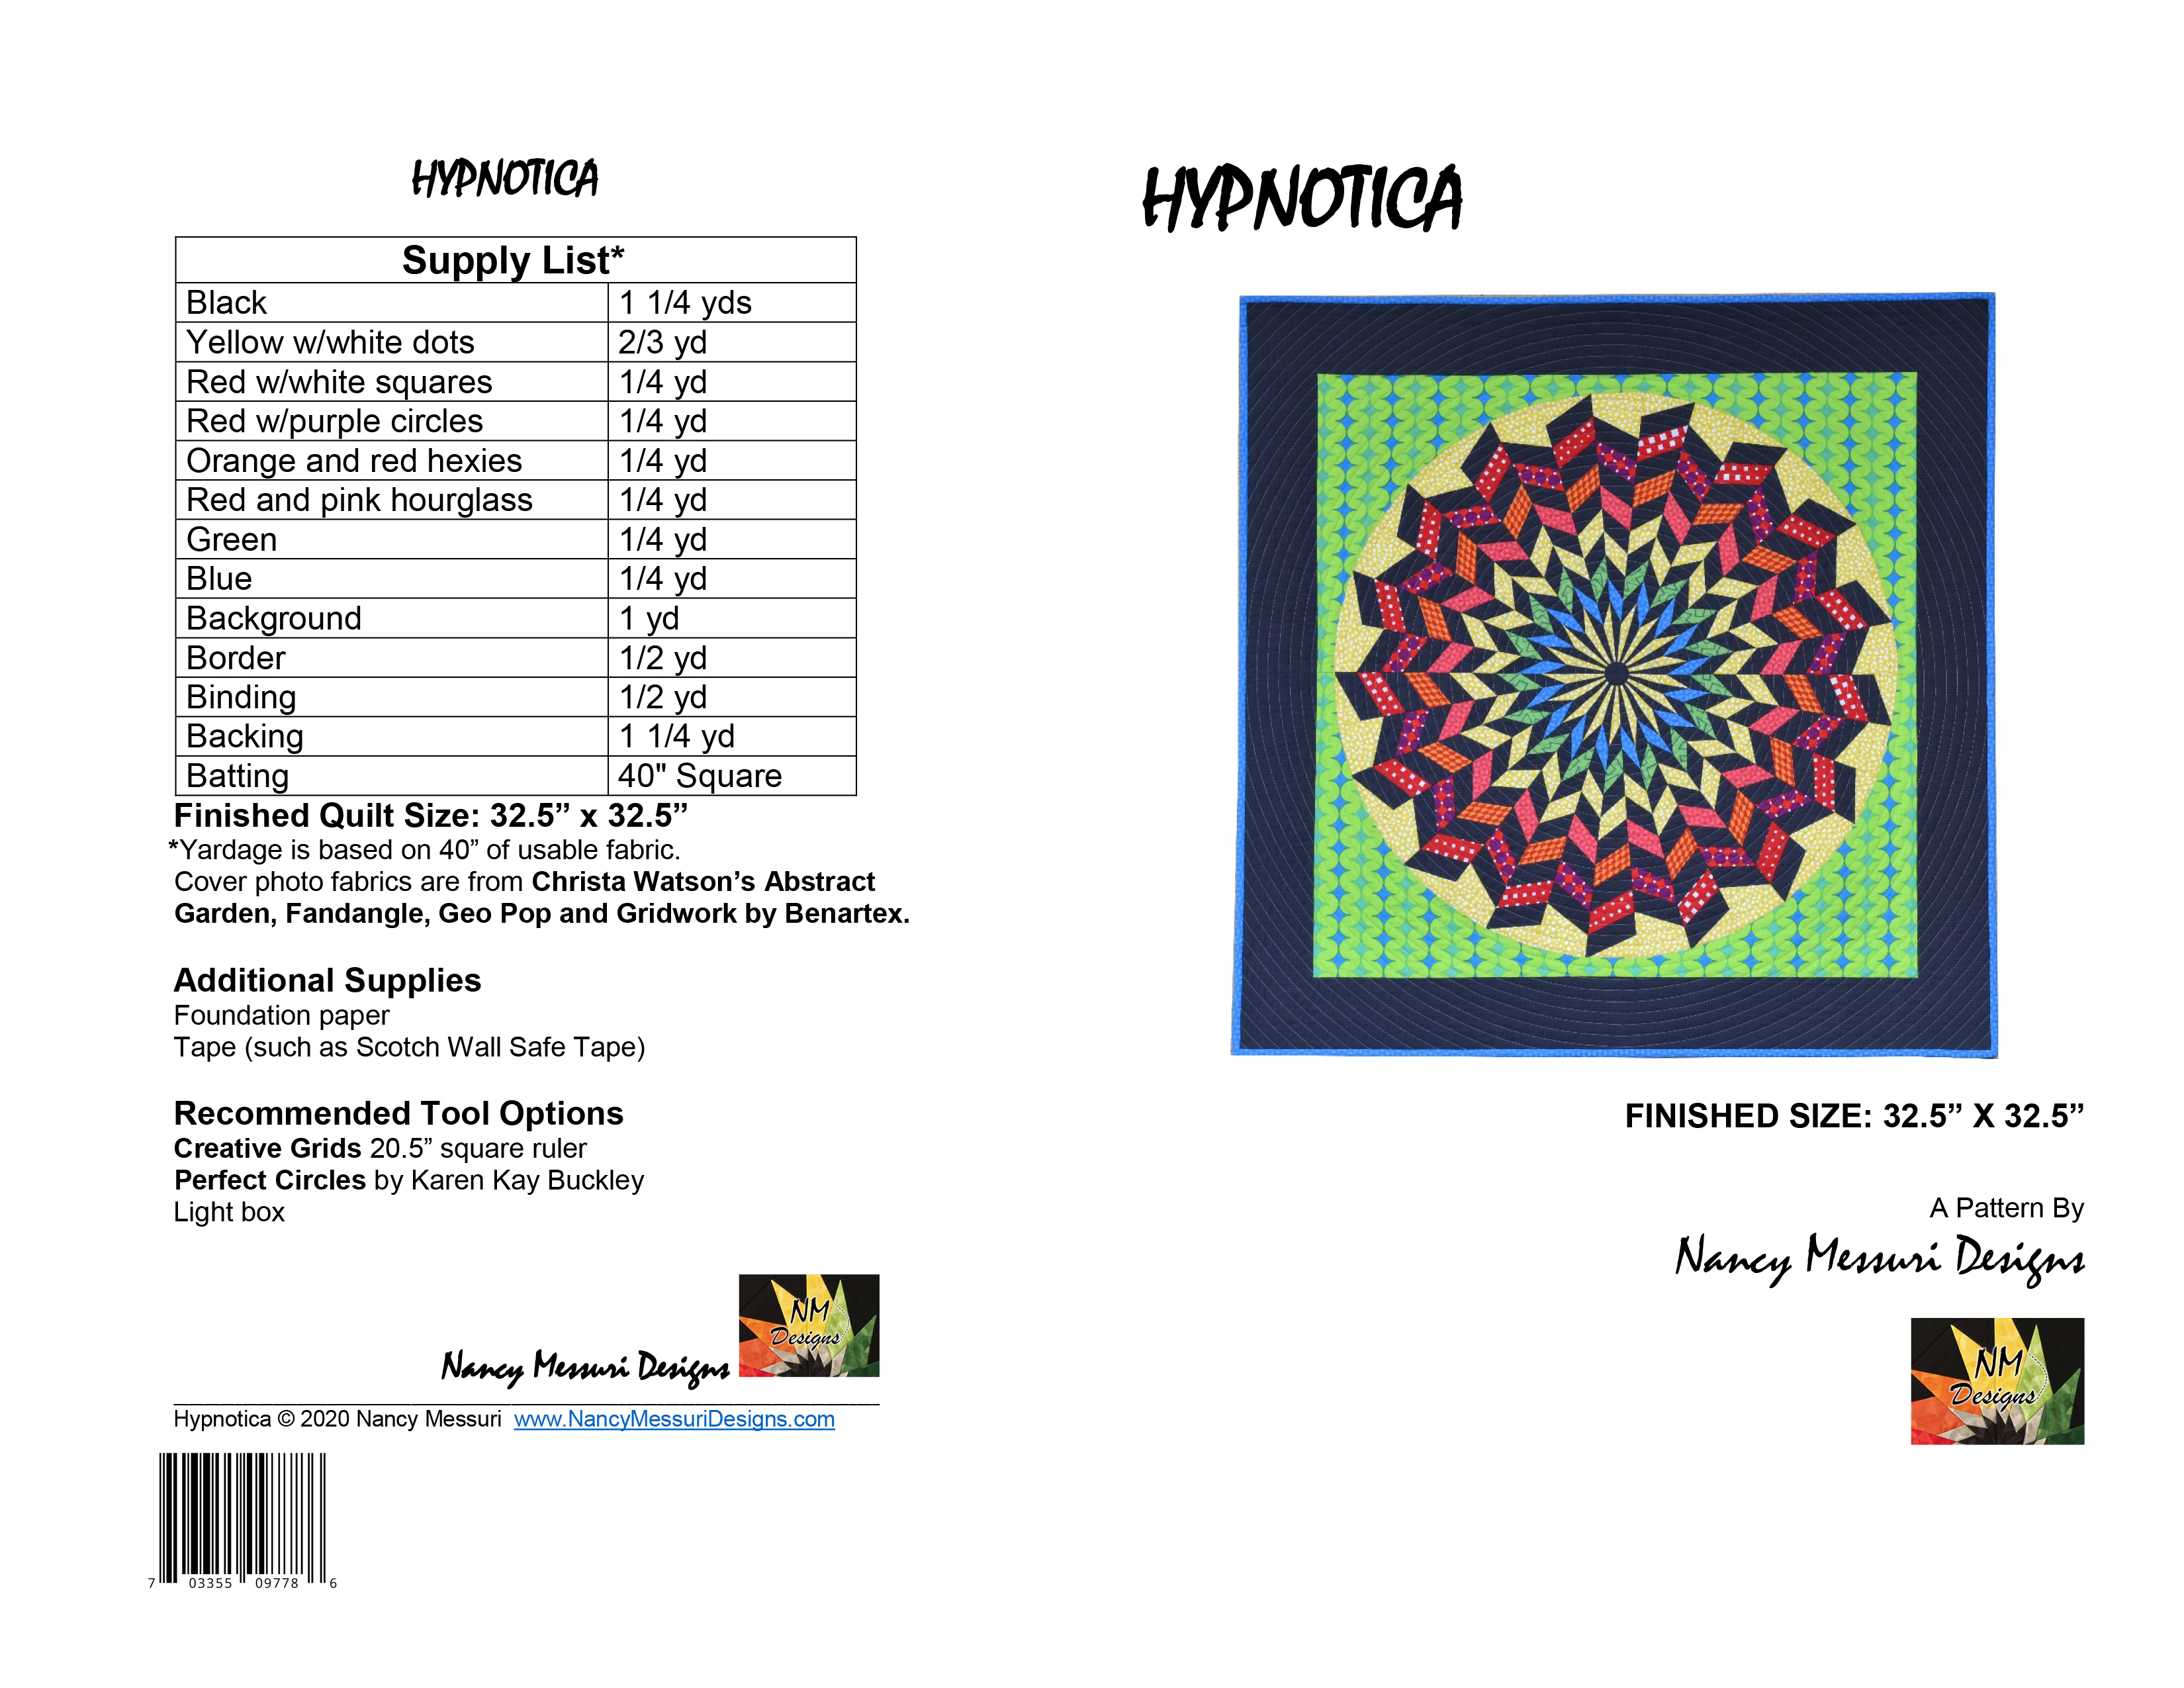
Hypnotica started off as a study in black and white and I had no intention of making it into a quilt. It was simply a personal design challenge in Electric Quilt 8 (EQ8). After playing with some initial coloring though, I found the design quite interesting. I saw it had potential to be very striking. My geometric quilt designs often mesh with Christa’s sense of line and color, so I placed a few of her fabrics into my design. And wow, did it ever come to life!
I started thinking about possibly piecing Hypnotica, but the fact that all 34 wedges meet at the center point was daunting. However, I continued playing with fabric placements in EQ8 using Christa’s fabrics. When I found a grouping that really stood out I decided I had to give this quilt a try.
Construction of the quilt center was actually easier than I expected it to be. The entire circle is made up of only two different wedges which alternate around the quilt. I printed patterns for the foundation paper pieced wedges from EQ8, then did a few test runs of sewing patches into wedges and sewing wedges together.
After I felt confident with the tests, I was ready to use Christa’s beautiful fabrics and pieced together the two semi-circles. I quickly learned not to sew too fast over multiple layers of fabric as wedges were added; especially when nearing the center of the quilt. Hypnotica is definitely a “slow and steady wins the race” kind of quilt!
The two background pieces are sewn to each semi-circle before sewing the two halves of the circle together. If you are new to curved piecing, this is an easy curve to start with as the seam is sewn in a long, gentle curve. A few test runs of curved piecing with scrap fabric can give lots of confidence!
The moment of truth arrived; matching up all the points of the two halves while dealing with all the layers meeting up at the center point. I listened to my own advice and sewed very slowly and I am happy to say I nailed it on the first try! (There may have been a happy dance or two after that.) At that point, I knew a pattern had to be created for Hypnotica.Click the image above to enlarge. Click here to order Hypnotica Quilt Pattern.
I would love to see your interpretations of Hypnotica on my Facebook page, Nancy Messuri Designs! The pattern is available on my website, NancyMessuriDesigns.com. There are new patterns in the works, so I hope you pop in from time to time. Or better yet, sign up for updates so you won’t miss a thing!
Thanks so much Nancy for sharing your beautiful quilt!! Now I can’t wait to see what she creates next. 🙂
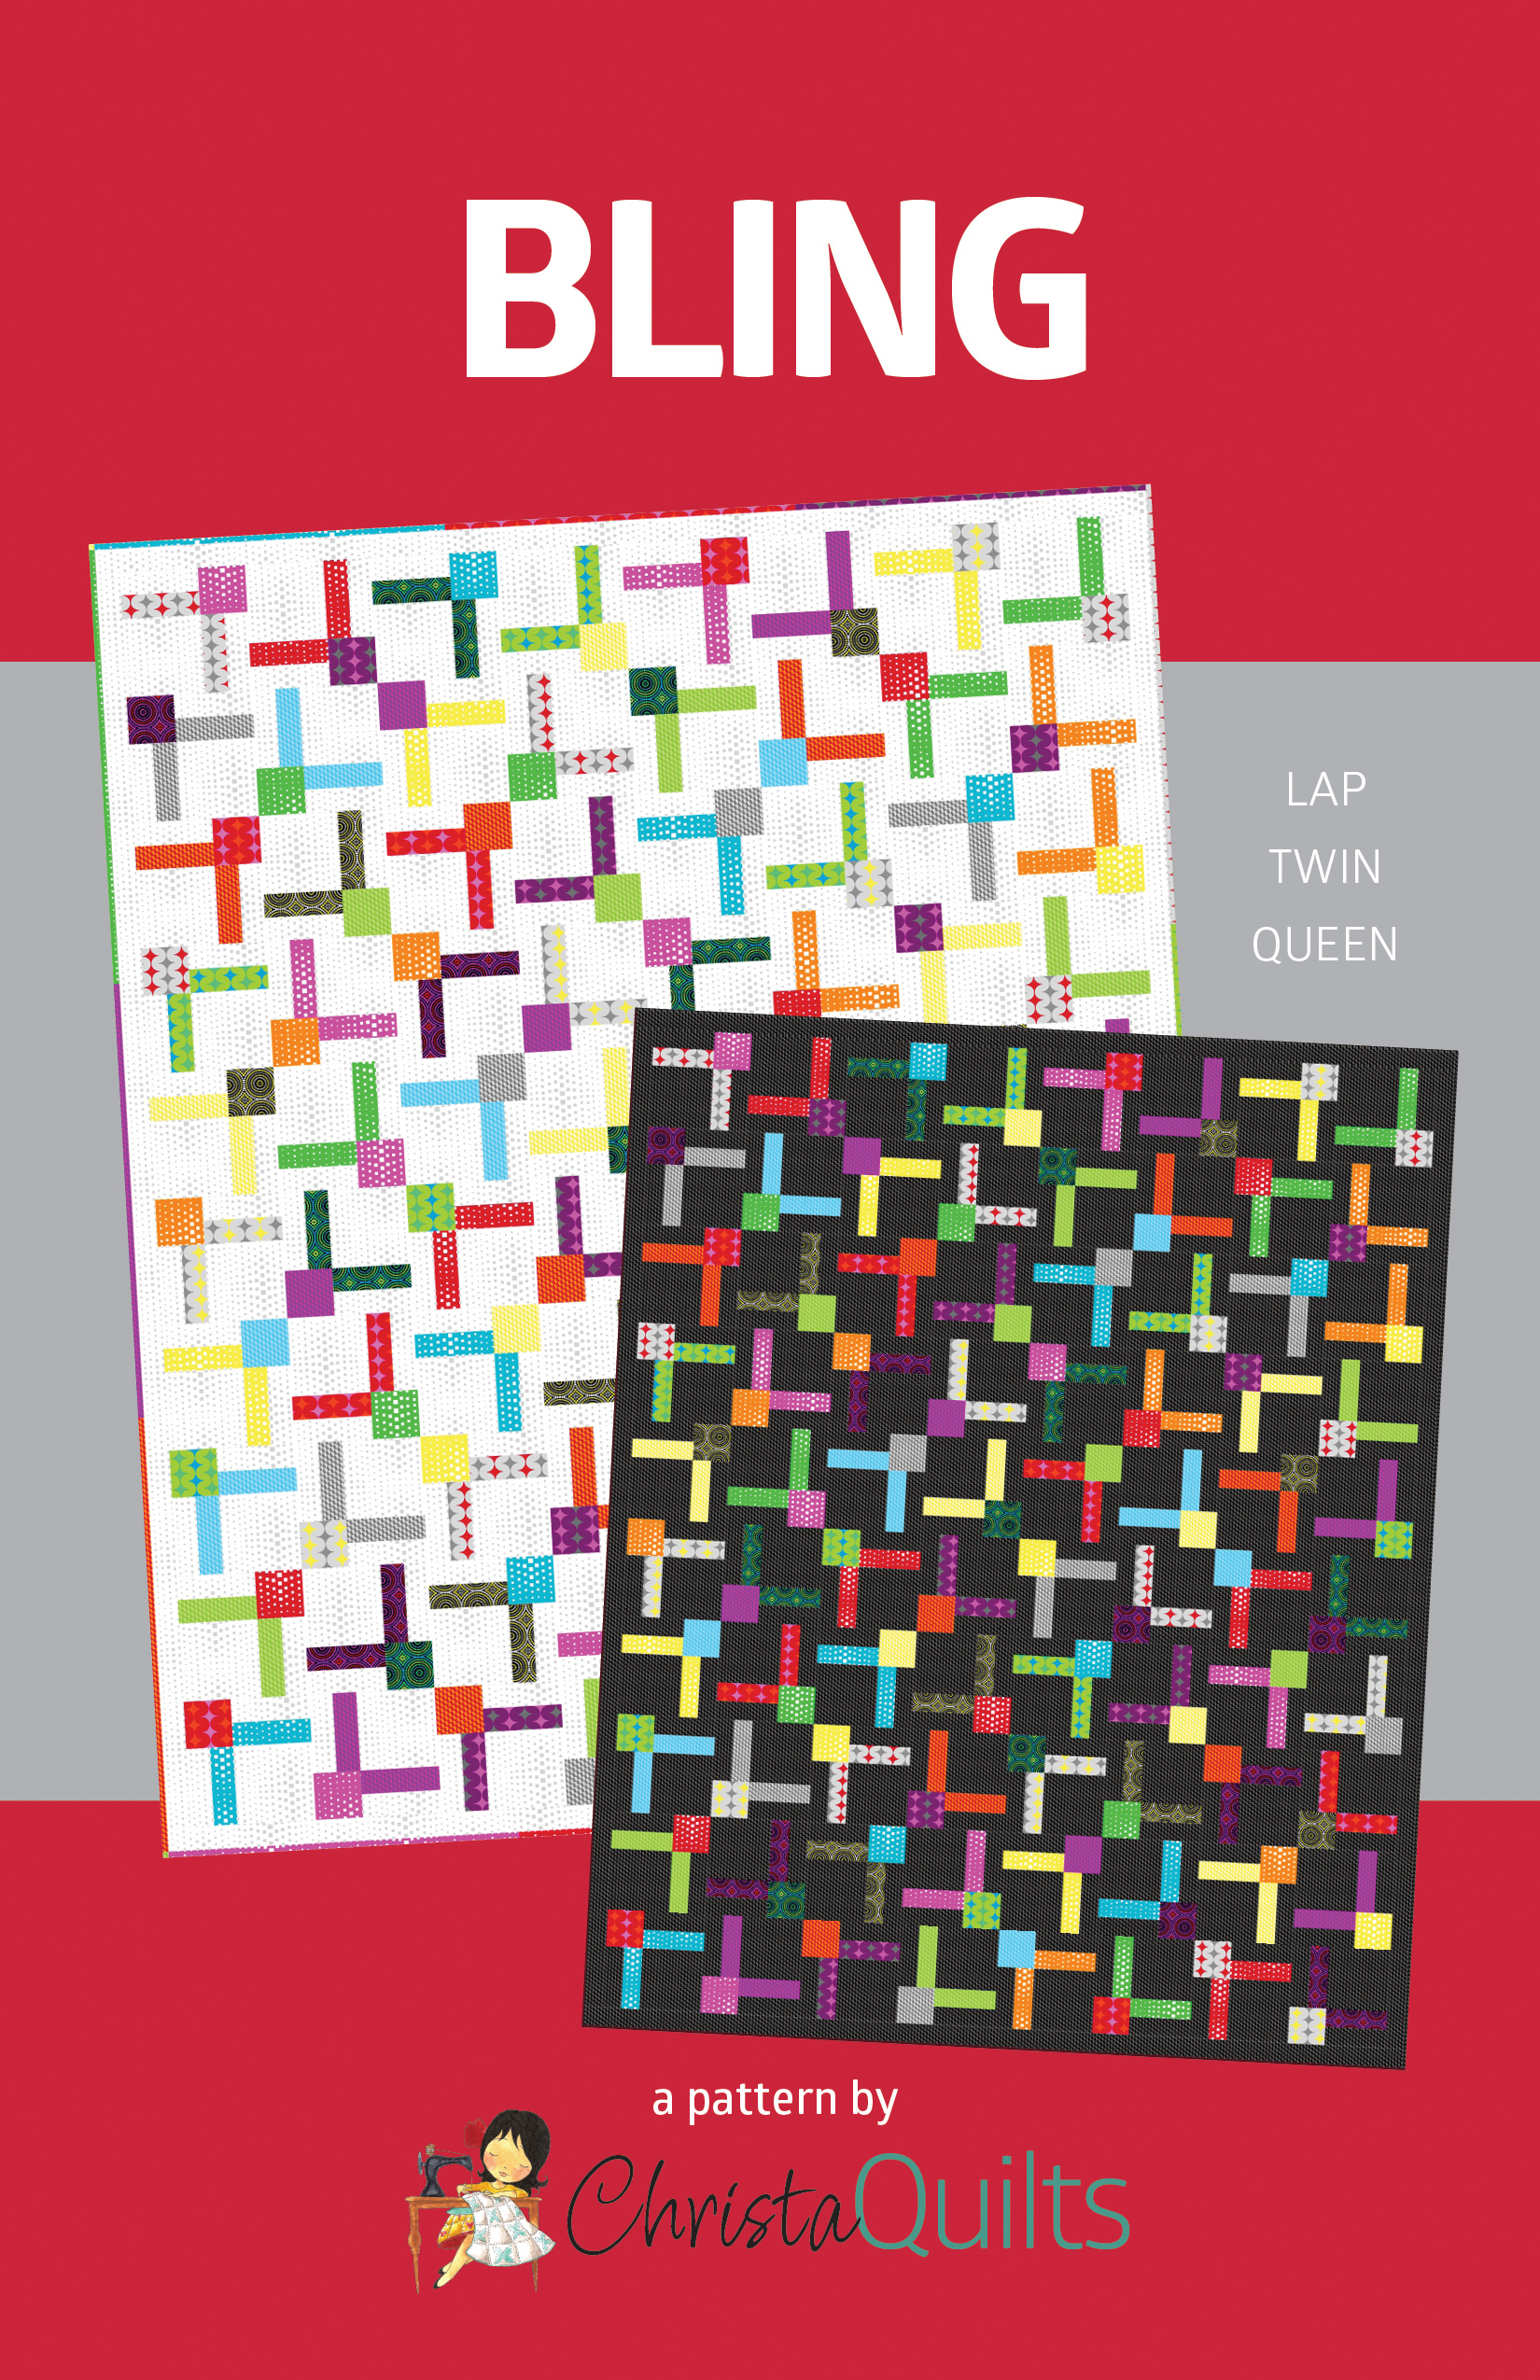
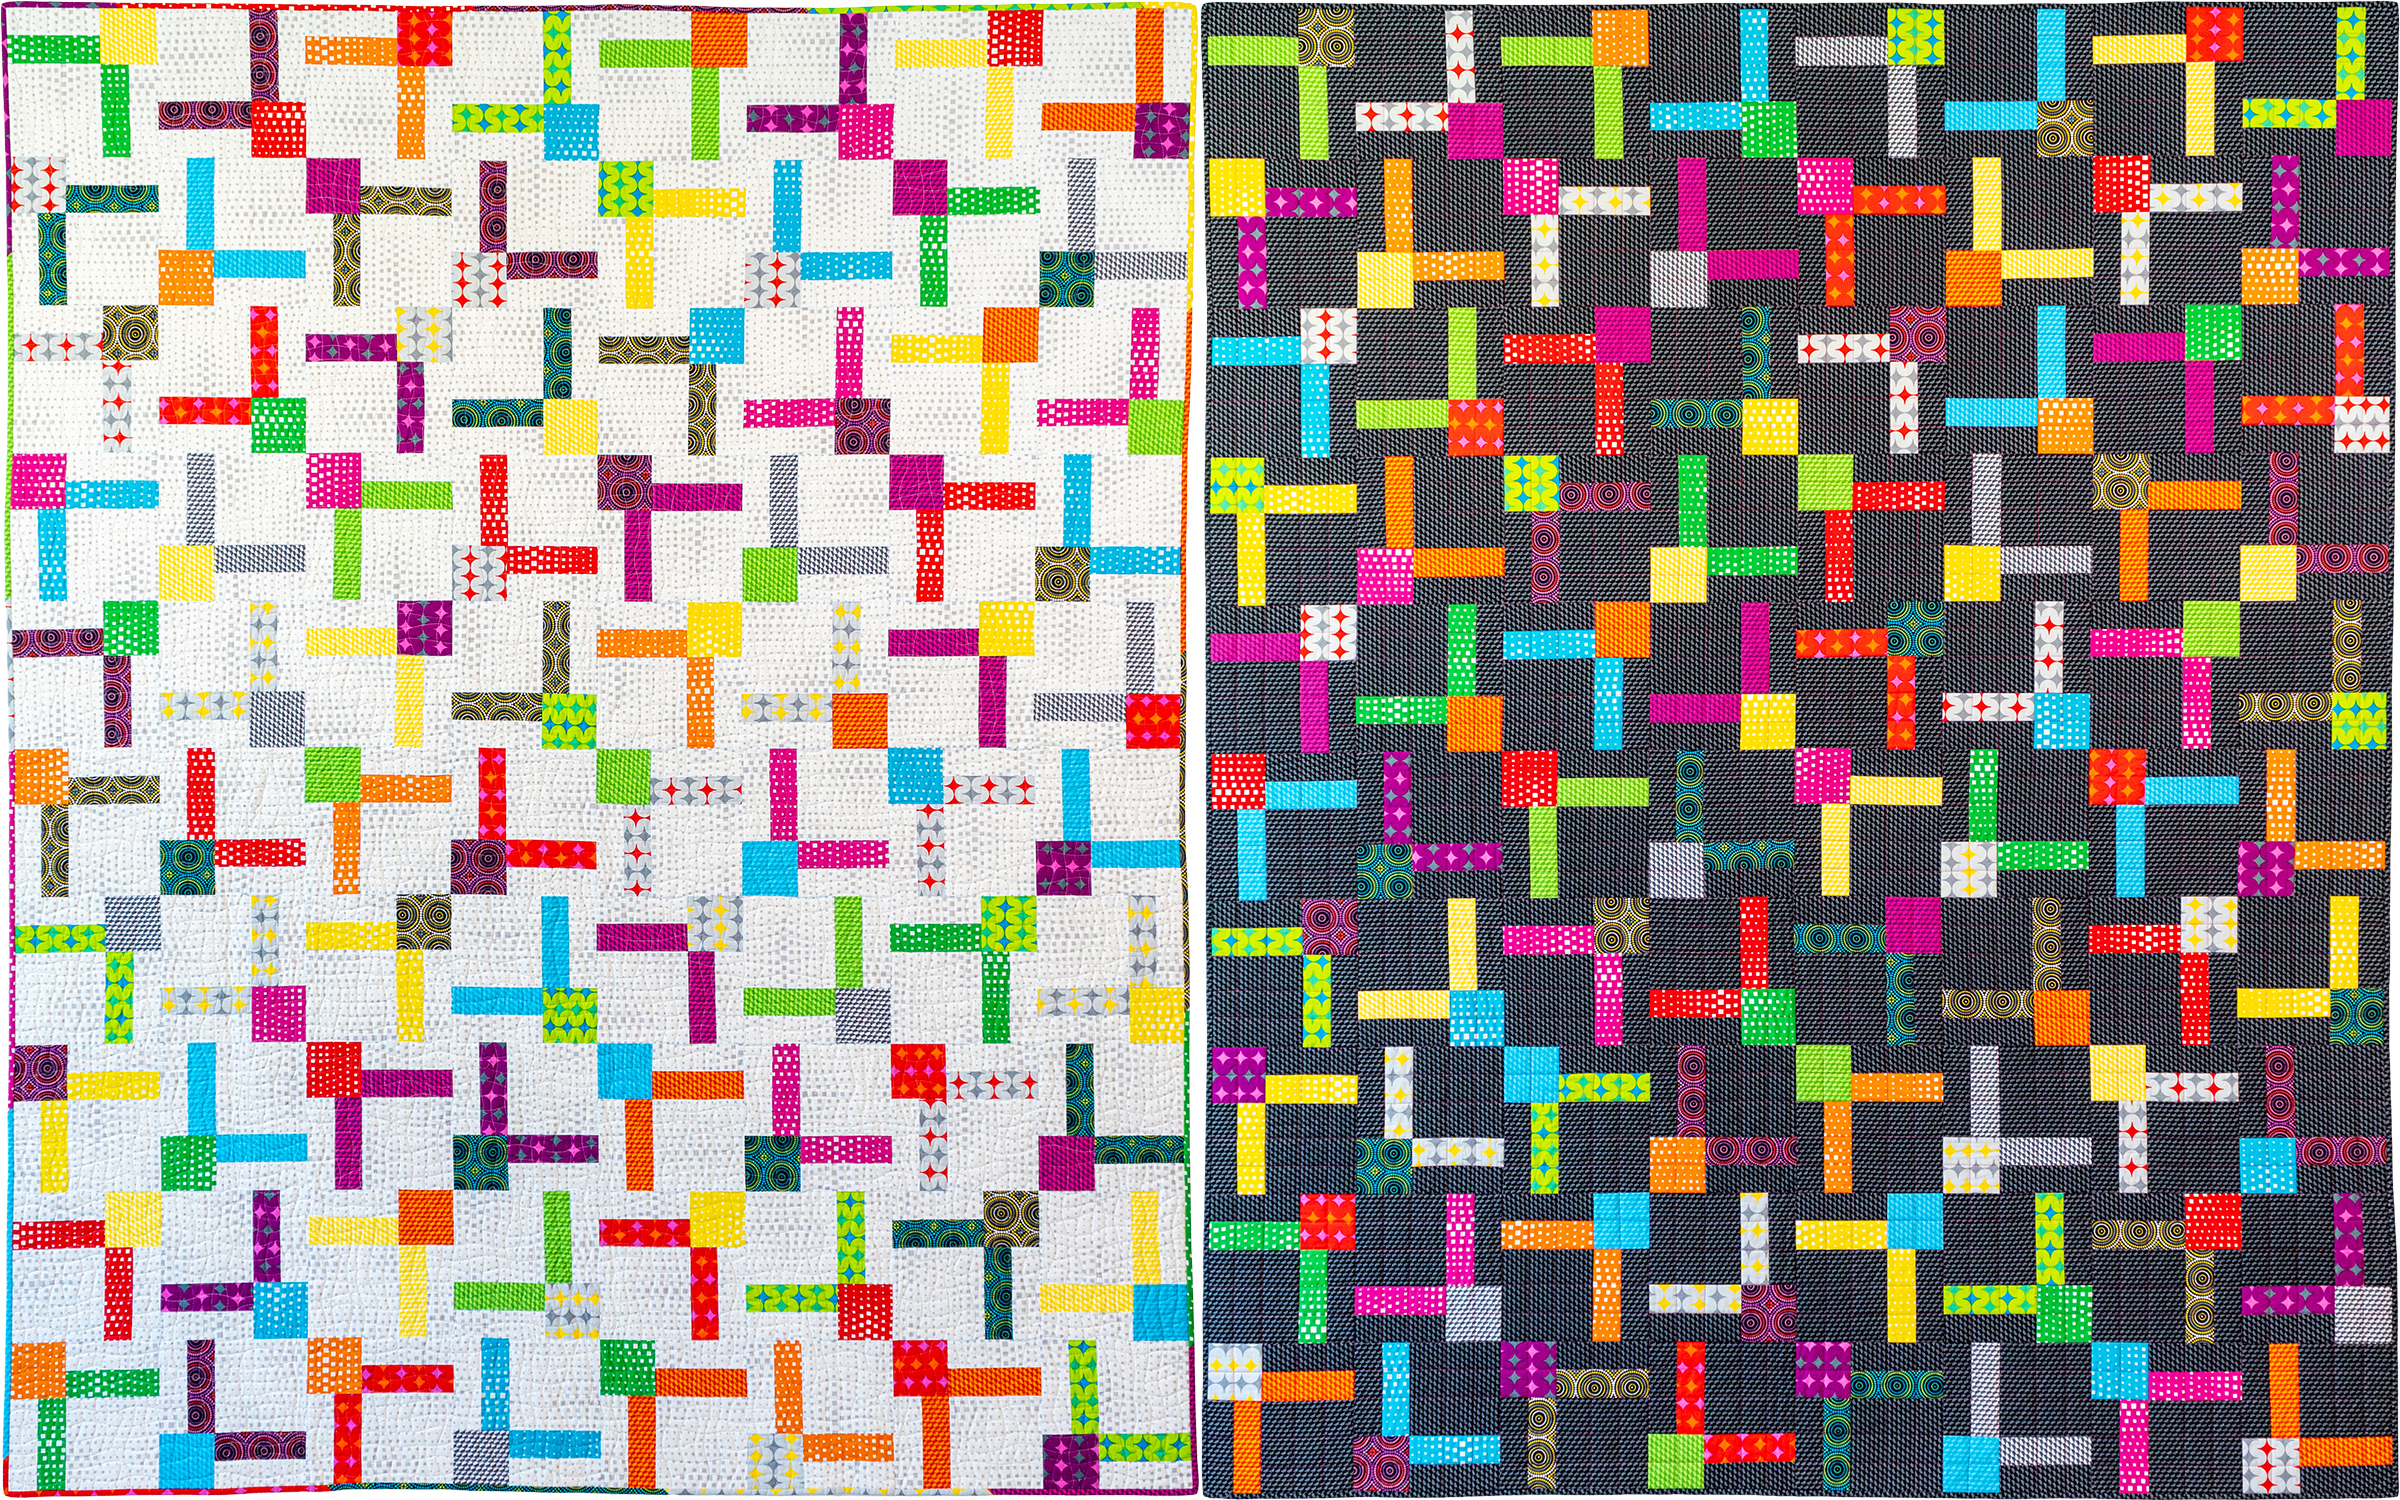
Have you been enjoying following along to make Bling? Scroll to the end for links to the entire quilt along. This week we will be binding our Bling to finish it up!
Roundup of binding tutorials
Because I pretty much bind my quilts all the same way (either by hand or machine), I have a LOT of binding tutorials that I’ve shared over the years. So here are 3 for you to try – use whichever method you like best!
When I first began my binding adventures, I cut my strips 2 1/4″ wide. However, that meant that if I attached my binding with 1/4″ seams, it would be bigger on the back than the front. So over the last couple of years, I’ve started cutting my strips 2″ wide and that gives me a more even finish on both sides.
To avoid ending up with a seam in the corner, I will roughly “walk” my binding around the quilt and if any seams fall in the corners, I will adjust the whole binding by and inch or two before I start sewing. If worse comes to worse and I STILL get a seam on the corner, I’ll simply cut off part of the binding and sew a new seam to move it!
Homework
Finish quilting and binding your version of Bling and share it in my ChristaQuilts Facebook Group. I can’t wait to see your fabulous finish!
I love reading quilt magazines that are more than just a bunch of patterns. So when QuiltFolk debuted in 2016 it was a no-brainer for me to get a subscription and I’ve enjoyed every issue since then!
Imagine my pleasant surprise when editor in chief Mary Fons called me up earlier this year (before the world went a little haywire) and asked if she could feature me as one of the stories in their Nevada issue which published earlier this month.
Now, for those of you who don’t know, this amazing magazine tells stories about quilters all over the country, region by region. I was wondering when they would get to Nevada, and it was interesting read about the experience from Mary’s perspective on her Paper Girl blog here:
The original Charming Chevrons making its second magazine appearance.
But, I’m getting ahead of myself. I do actually know Mary quite well as she used to be editor-in-chief of the now defunct Quilty magazine, in which my first ever published pattern (the first iteration of Charming Chevrons) appeared on the cover back in 2013. I’ve kept in touch with her over the years and it was so wonderful to actually have her in my home before she came for a visit, back in March, literally, the day before everything here shut down (talk about timing!!)
Jason’s first (and probably last) magazine appearance!!
So the issue was extra special for me since they included a pic of me and Jason in what I lovingly now call “the fabric room.” (Anyone who knows him knows that he prefers to stay AWAY from the limelight as much as possible). We chatted about quilts and things, my new home, and a little bit of my regret that quilting has taken over soo much of my life that other hobbies (like running) have taken a back seat.
Jason took this action shot of me chatting with the QuiltFolk team in my studio!!!
But it was fun to be photographed as Mary and her team poured over my quilts and artfully took pics of them around my home. Mary even told me “thanks for having so many quilts here – that makes my job easy!!”
Of course there are some other amazing stories as well and it was fun to see that every other person or group they mentioned from Las Vegas is actually someone I know. I’m a member of the guilds that are mentioned in the magazine, and I’ve taught for both of the quilt shops featured in the issue as well. If you look closely, there’s also a closeup shot of my quilts included in the article about The Las Vegas Modern Quilt Guild on page 130.
Closeups of my “Vegas” Themed Quilts
I specially loved reading the stories about Nevada quilters I didn’t know about in northern Nevada, since they like to cover the entire state as much as possible.
If you’d like to get your hands on this issue or any other, you can check them out here. Fortunately QuiltFolk sent me an extra copy for publicity so I’d like to share that with you. One lucky US winner can win a copy of the magazine (or should I say journal is it’s quite heft for a quilting magazine. It’s more like a book)!
One of the feature photos they took with the updated Charming Chevrons behind me.
Just leave a comment telling me which state you’d love to visit to learn more about their quilting history. I’ll select one winner at random a week from now so be sure to comment by the end of the day on Thursday, August 6, 2020. I’ll notify the winner via email, sign the copy where my article is, and ship it directly to you!!
Nothing makes my day more than seeing what you all are making with my fabrics! And I love seeing when you’ve used one of my patterns for your latest project. With so many options, it’s an honor to see these beautiful quilts and works in progress “in the wild!” 🙂
So today I thought it would be fun to do a little roundup of what you all have been making with my designer products. It makes my day to see these pop up on social media 🙂
This gorgeous photo shows Kathleen Hetzler Riordan with quilts on her beautiful white fence. She says, “My street had a pop-up quilt show today and four of us who are quilters put our quilts out on our picket fence, and neighbors walked, drove and golf carted by to see them! It was very impromptu but lots of fun! Christa’s Puzzle Box is on the far left!”
I love this outdoor image—it shouts “Summertime!” Kathleen lives in Virginia and the quilt show took place on May 24, 2020. I’m sure it was a source of joy for many people during the pandemic.
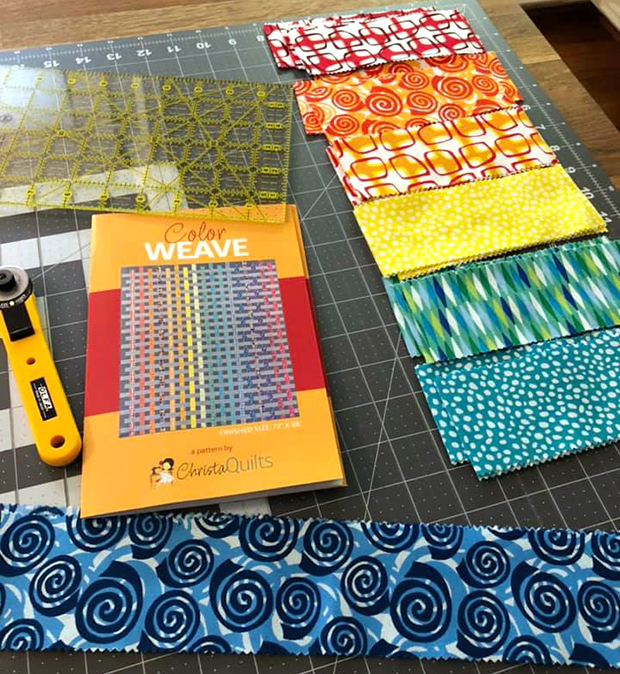
Sally J. is currently working on a baby quilt with my Color Weave pattern and Abstract Garden prints. This design is great for 2.5 strips—maybe you have a favorite sitting around just waiting to be used?! Or maybe you’d like to treat yourself to one of my colorful modern strip sets!
Megan G. used purple for her Optical Illusion quilt and I love it! This design works in so many great combinations. Pay attention to the instructions for the values of each fabric so that your illusion shows up nicely.
Here are links to all of the steps in the Optical Illusion Quilt Along that we recently wrapped up! My QAL blog posts stay up indefinitely so you can sew on your own timeline.
And I see Good Vibes fabrics in her stacks of Flying Geese. I wonder where this is going? I’m sure it will look amazing when finished!
How about this scrappy house quilt? Judy A. posted it in my Christa Quilts Facebook group and had this to say about it:
This is my “Village” (Miss Rosie’s Quilt Co). Mostly Christa’s fabrics plus some Patrick Lose, Allison Glass, and my stash. I can honestly say that working on this made me SO happy.
I sure love it when I see my fabrics playing so nicely with others!!
Sandi S. in Australia is making this bright and happy number with Geo Pop fat quarters and half-square triangles. That’s some gorgeous eye candy, isn’t it?!
One of the best things about designing fabric is seeing how people use it. It’s absolutely inspiring for me when I notice your work using my fabric out in the world. It makes my day! Here are some recent examples.
Geo Pop Beaded Lanterns
Beaded Lanterns by Leesa Burr-Bates; pattern by Christa Watson.
Leesa Burr-Bates shared her Beaded Lanterns quilt top in the Christa Quilts Group on Facebook. If you’re not yet a member of the Group, you’re invited to join us!
Leesa used my Geo Pop fabrics from Benartex. I think she did a great job, and I can’t wait to see this one quilted up!
Bonnie Eicher pieced Blooming Wallflowers from a kit, and it turned out really well! Then she used a simple drawing app on her tablet to try out ideas for quilting.
If you’re a friend of felines, check out these Mod Cats made from a variety of my fabrics. Mod Cat was designed by Linda and Carl Sullivan of Colourwerx in Palm Desert, CA. If you’d like to make one-color cats, my brand new bundles would make it easy:
New York Lattice by @sewjess, from a kit in Geo Pop from @timefliesquiltandsew
Jess @sewjess posted her New York Lattice quilt top recently.
The fabrics are from my Geo Pop line. Jess made the shop sample for @timefliesquiltandsew. I appreciate it when a shop puts my fabrics into a kit, thank you very much!
Quick Zip Cases in Geo Pop fabrics, pattern byAnnie.com
These Quick Zip Cases are so handy for storing all kinds of items. And aren’t they cute in Geo Pop fabrics? The contrasting zippers are a nice added pop. The pattern for Quick Zip Cases is from byAnnie.com, and it’s just five dollars!
When you use my fabrics from any collection, please post it to your social media with the @christaquilts tag and #christaquilts, or send photos my way using christa@christaquilts.com. I’d love to see what you’re making!
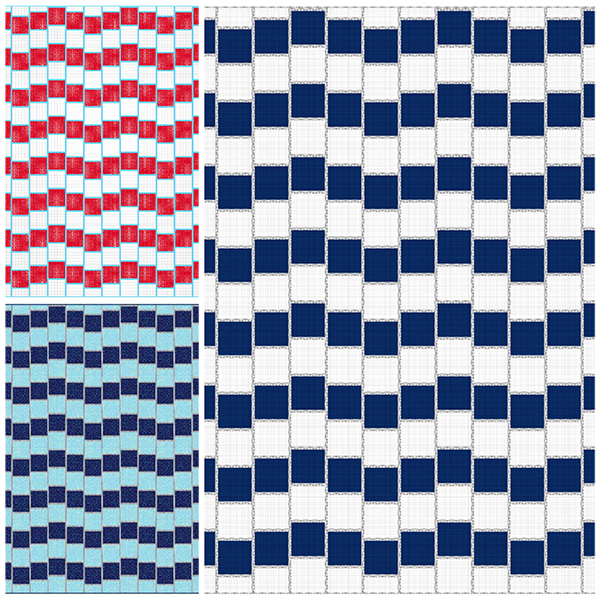
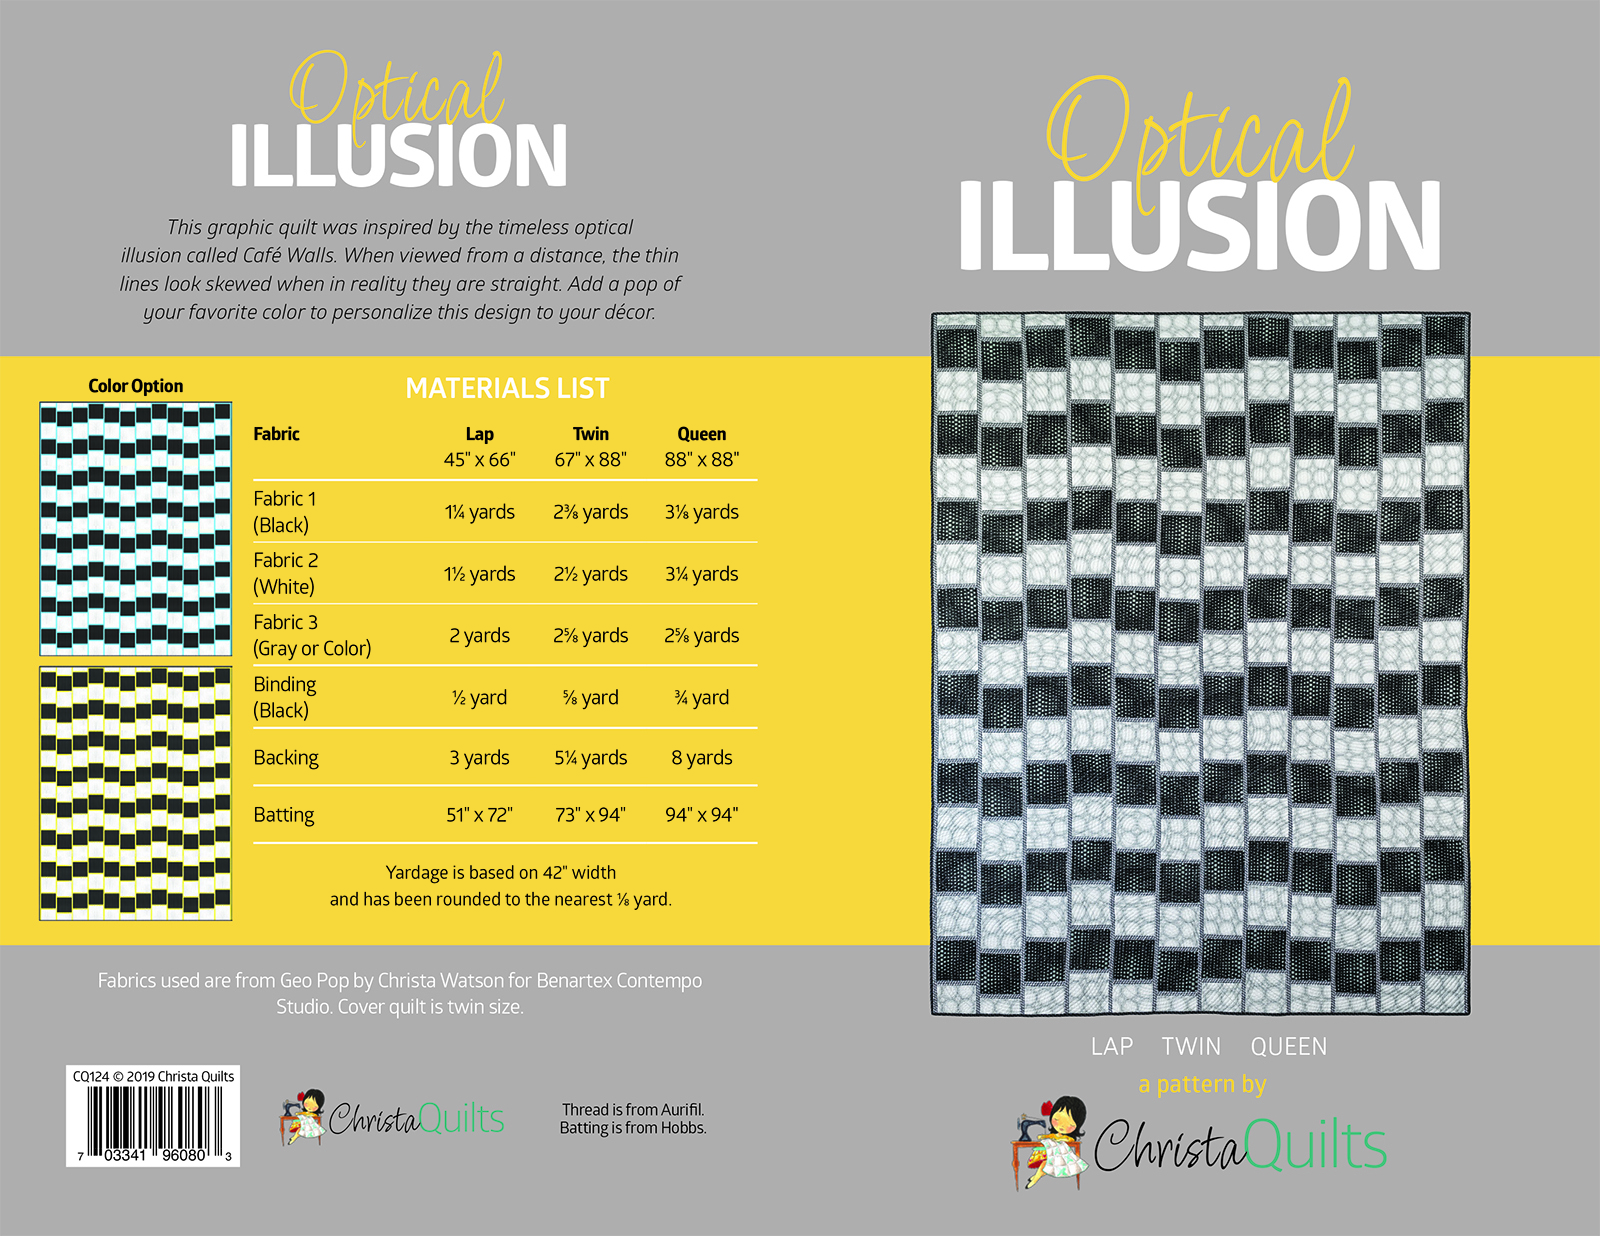
Are you ready to join me for the adventure of a lifetime? Or at least a fun sewing escapade over the next several weeks? I’m excited to guide you as we make my Optical Illusion quilt from start to finish. All you need is a copy of the Optical Illusion quilt pattern and a can-do attitude!
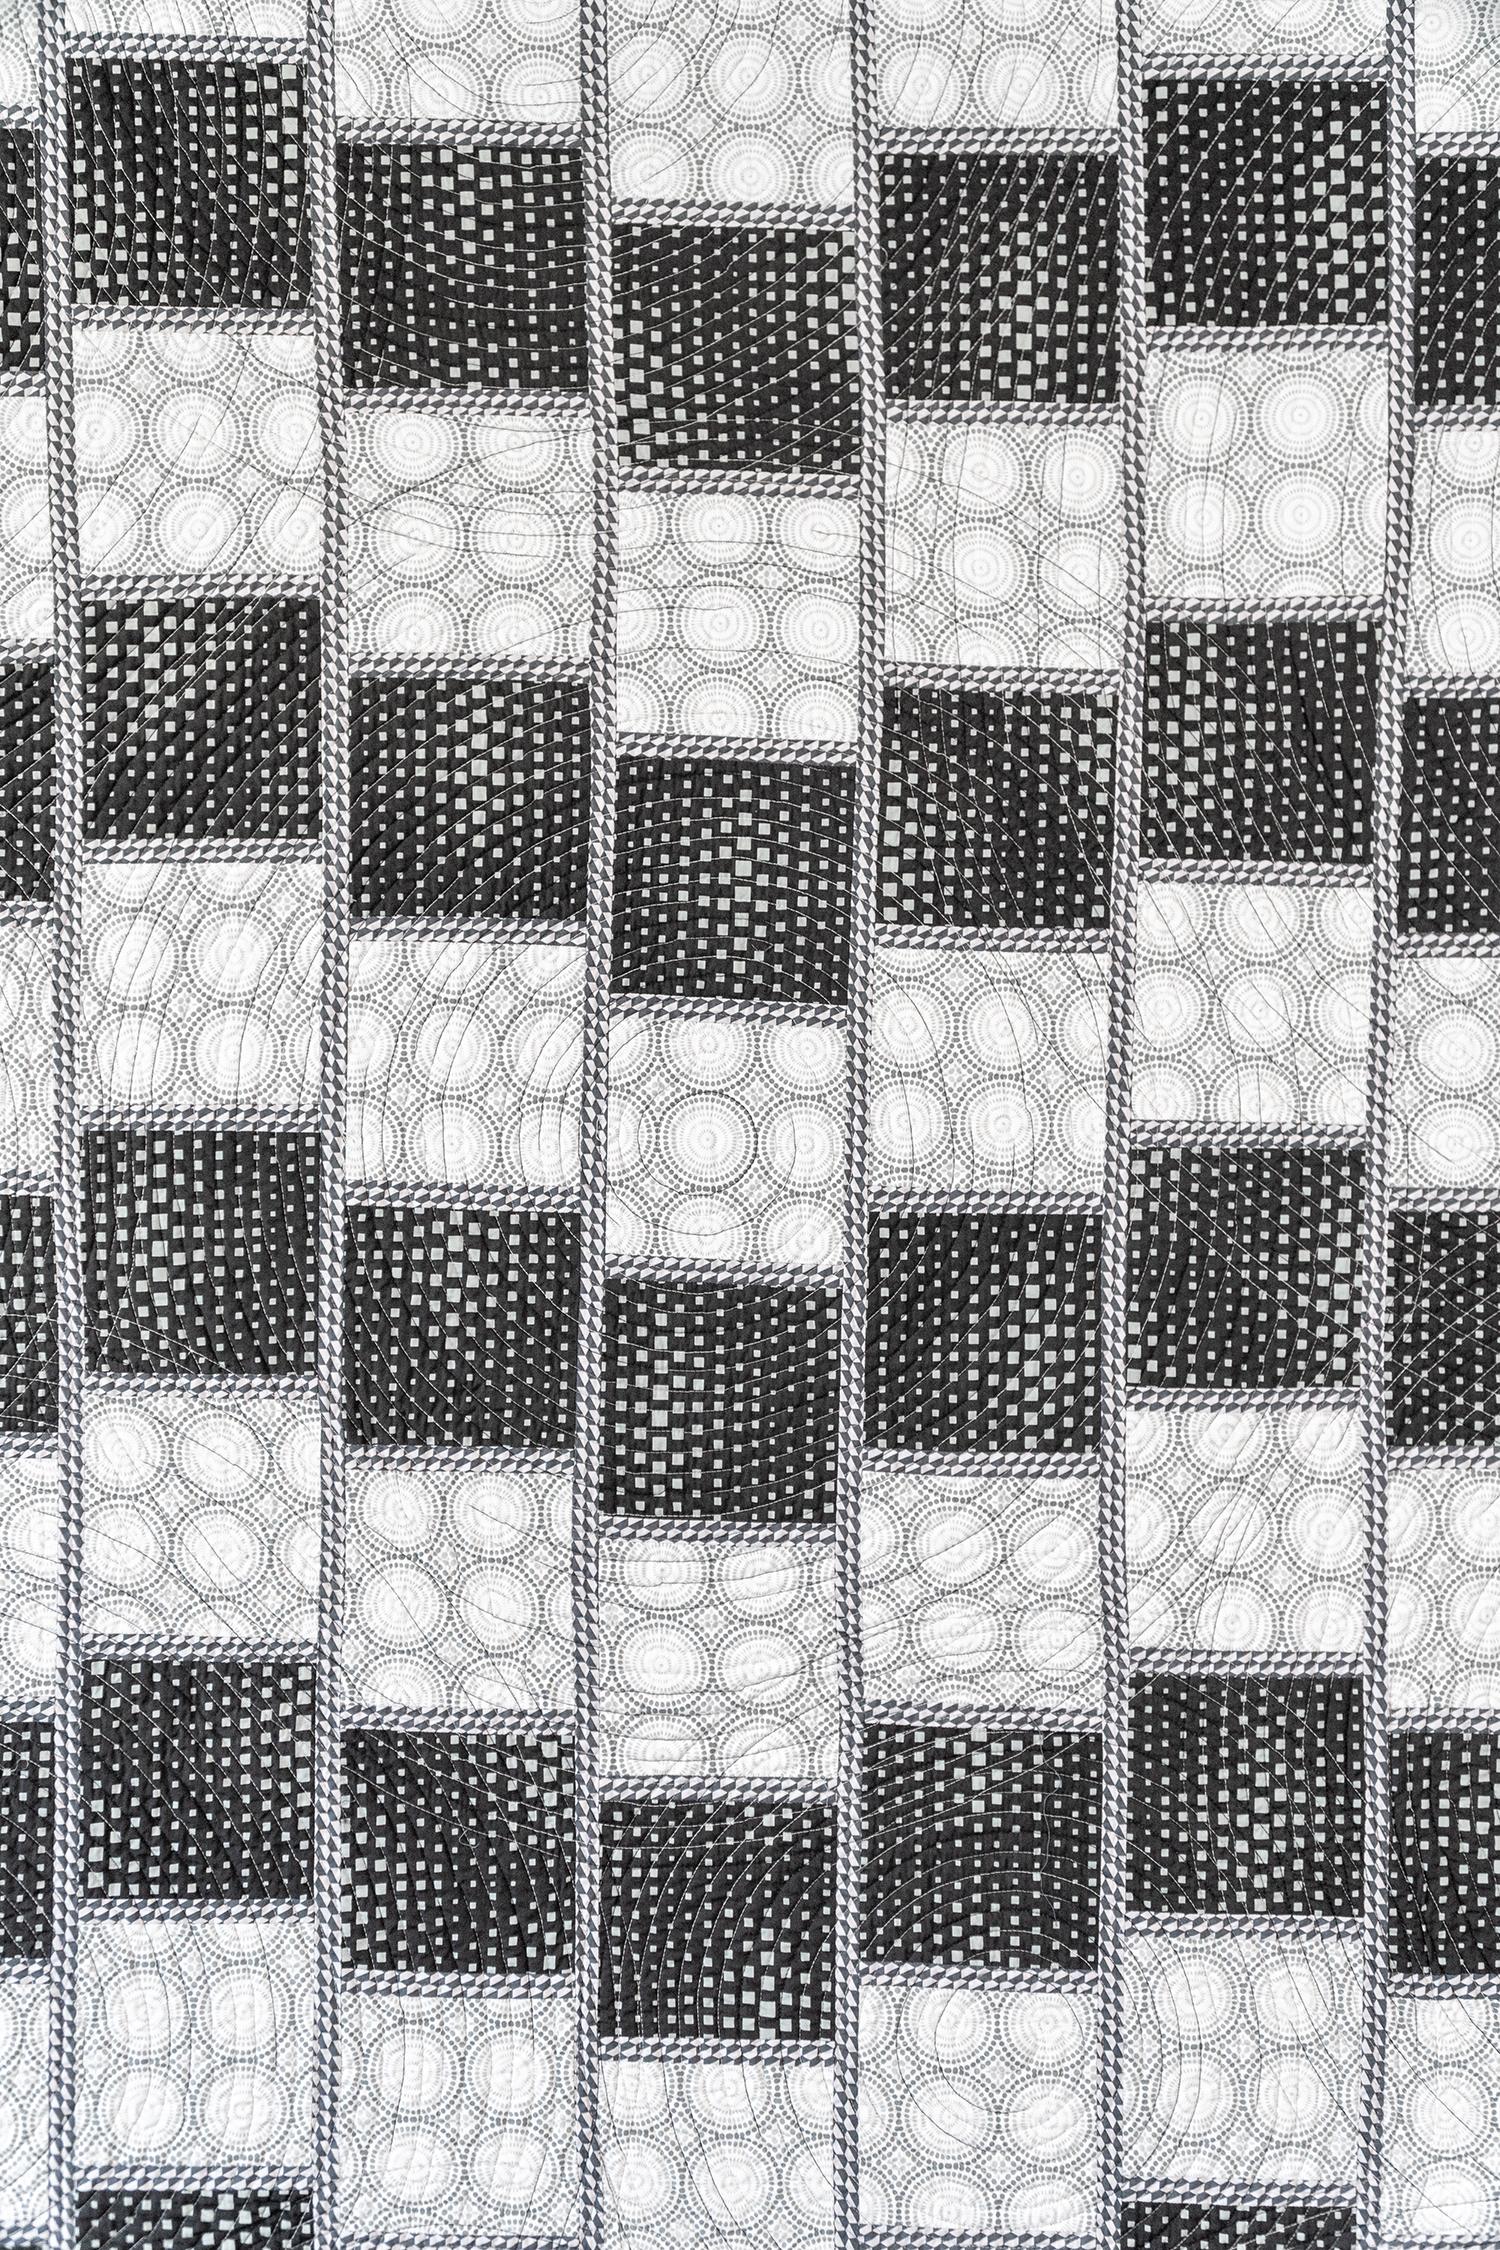
Optical Illusion made from Geo Pop, 67″ x 88″
Scroll this image to see the lines move!
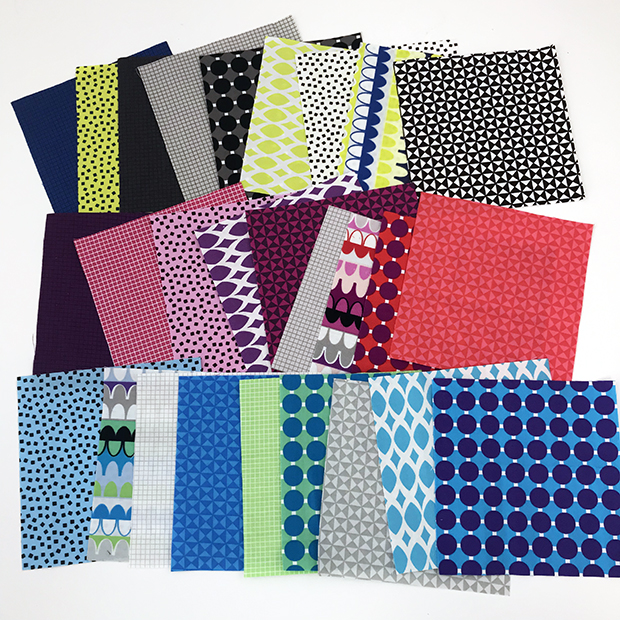
My original version was sewn up in bold black, white and gray from my Geo Pop fabric line. I had requests to see how it would look in other colorways, so thank goodness for EQ8 software which allowed me to quickly recolor lots of fun combinations!
I made some of them into quilt kits which you can pick up if you desire, or just use them as a color guide and pick something similar from your stash.
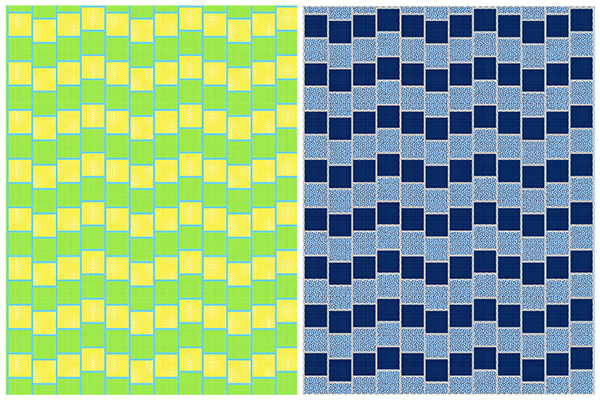
Color Play: Choose Light, Medium and Dark
The trick to making the design work is the interplay of the values. Value is just the lightness or darkness of a fabric compared to its neighbors. For this design to work you need three fabrics that read as light, medium and dark.
So take a look at these color combos and scroll your screen up and down to see the illusion of the lines waving back and forth. Pretty trippy right?
The illusion works because the medium fabric is ALWAYS used for the skinny strips whereas the light and dark color combos are used for the squares.
Here’s another group of colors that also showcases the illusion with some interesting color combos:
Solids, or fabrics that read as a solid look best for the bold, graphic design, but that doesn’t mean you can’t use prints. Just be sure you choose something that is mostly one color or color family per print. Here’s another color grouping that works well:
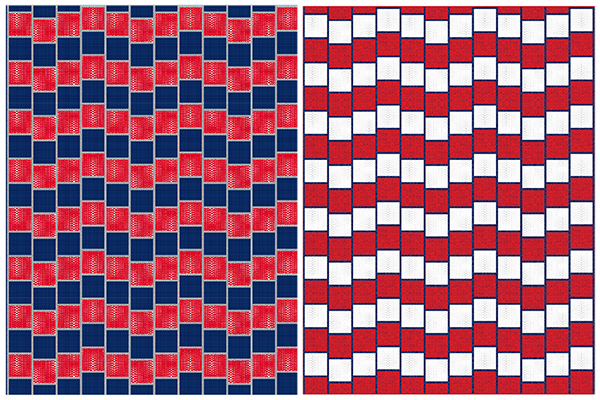
Remember, for best results, use the lightest and darkest fabrics are for the squares, with the medium for the skinny strips. To test the value of your fabrics, take a picture set on gray scale from your camera phone. Then you can easily tell which should be classifued as light, medium or dark.
That’s a dozen different combinations that WORK! (Many are available as kits for the Quilt Along.) I have no idea why our brains read it this way, but it sure is cool, don’t ya think??
Now…
Watch what happens when the skinny strips are LIGHTER or DARKER than the two colors in the squares. It creates too much contrast and doesn’t give the illusion.
These 4 colorways above and below still make a nice looking modern quilt, so don’t despair if your color combos don’t work exactly as you thought. Part of the fun is learning new things, right??
For further discussion and some more examples, check out this video from my Facebook Live “Ask me Anything” series. Click the image below to play. It’s just under and hour and I go through color combinations as well as other quilty tips and advice asked by the audience. (I do these live sessions each wee k and have started posting them on YouTube so be sure to subscribe!)
In my examples, I’ve used mostly prints that read as one color for the best results. But don’t worry—the modern quilt design looks cool whether the illusion works or not!
Optical Illusion Supply List
Start thinking about the colors and fabrics that you would like to use, and gather up the needed supplies. The quilt pattern comes in three sizes. Click the pattern image below to expand.
Here’s what you need for the Twin size quilt top (67″ x 88″), which is what I made:
I can’t wait to show you how to quilt the walking foot spiral design!
Quilt Along Schedule
The links below will go live as each part is posted. Bookmark this page and refer back to the schedule anytime in the future to work on this quilt at your own pace.
If you’re an Instagram junkie (like me!), please tag me at @christaquilts and use the hashtag #opticalillusionquilt so I can see what you are doing and cheer you on!
If you’d like to ask questions or need additional help, please participate in my Christa Quilts Group on Facebook. It’s a great place to encourage your fellow makers and get additional ideas for fabric choices and a quilting plan!
Sign up for Email Notifications
Be sure to enter your email address in the box on the sidebar of this blog. If you are viewing this on your phone or tablet, scroll aaaaaaaallllllllllllll the way down to the bottom of the page to find the email address box.
So the biggest casualty for me in this whole quarantine situation is getting out and chatting with fun folks like you! Don’t get me wrong, I enjoy working from home and am grateful for the flexibility that my job in the quilting community allows. However, I miss teaching quilting and I miss talking about quilting and I miss being with quilters. So I wanted to try out an experiment….
Starting on Monday, April 27th at 2 PM PST (5 PM EST) I’m going to host “Ask Me Anything” using Facebook Live in my ChristaQuilts facebook group.
It’s going to be very casual and unscripted, mostly so I don’t have to plan too much ahead of time. And I’d like to keep it at about 30 minutes so it doesn’t take up too much of your time. This will be a great chance for you to ask me ANY questions you have, quilting related or not!
I might even share some behind the scenes sneak peeks of the “secret sewing” I’m currently working on, and maybe some general thoughts about life or anything else that naturally comes up.
If it goes well – meaning people show up for some fun conversation – I’d like to make it a weekly thing. So think about what you’d like to ask me and let’s have a fun conversation. I can’t wait!
I’m sorely missing quilt market, teaching, and other live events, so hopefully this will be the next best thing. Click here to join my Facebook Group and I’ll see ya on Monday!!
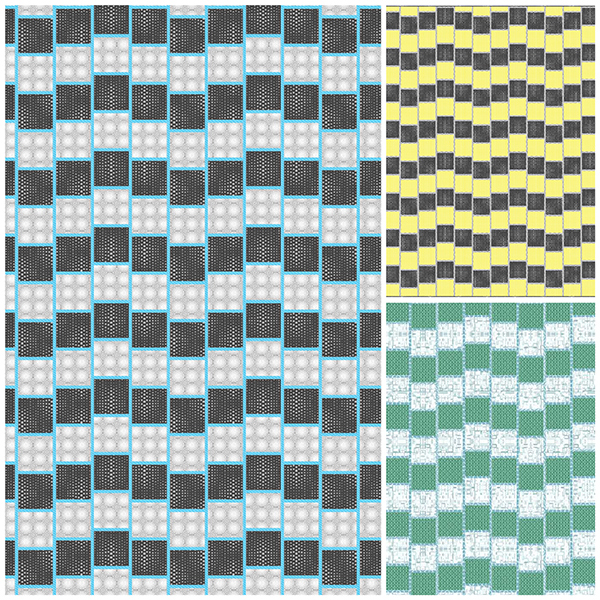
This part of the quilt along is always my favorite!! I’m excited to share how I free-motion quilted my Block Chain Quilt with a fast, fun and forgiving modern design I call “Geometric Chains.”
The basic idea is to quilt an allover design, one line at a time across the entire quilt. Below is the basic motif diagram shown in the Block Chain quilt pattern.
To get a feel for how this design is stitched, draw a series of geometric lines, similar to those shown below on a blank piece of paper. Start with a straight-ish line, then sketch a series of geometric shape such as circles, triangles, squares, spirals, hearts, etc. The sky’s the limit when it comes to ideas!!
To get around each shape and make the next one, you can backtrack (stitch over a previous part of the design), or you can echo part of the design. There’s no wrong way to do it! To avoid marking, make the shapes roughly the size of a pieced block unit. Notice how the middle spiral chain above is roughly the width of the center of the block.
Once you’ve sketched out a few shapes you like, stitch them out on some practice scraps before quilting them on your actual quilt. Be sure to test out thread colors so you are happy with the results.
In the closeup image below, you can see I used a colorful thread from my Aurifil Variegated thread collection. Because the quilt has such a high contrast, I didn’t want to have to change threads as I quilted – so I made the colorful quilting a part of the final design!
When it comes to quilting the quilt, I use my “divide and conquer” method. I start on the right side of my quilt and begin stitching at the top of the quilt, in the batting sticking out around the edges. Then I quilt one “anchor” line of quilting through each block. This will hold each pieced row together so it won’t shift after basting. Then I go back and fill in all of the quilting in each row of blocks.
Click the play button below to watch a short, 2 1/2 minute video of me quilting a couple of the “chains” in this quilt. I’m only showing the closeups, but I’m just quilting one section at a time, and taking my time. I’m able to quilt an entire chain from top to bottom without having to tie off threads at either end.
Click here, or above to view my Block Chain quilting on YouTube. (Be sure to subscribe!)
The image below is a cross section details of the quilt. Notice how all that quilting adds a somewhat whimsical texture to the quilt. Click the image below to enlarge for detail.
You can definitely apply the Geometric Chains quilting motif to any quilt, and there are several ways you can change it up, too! How about using ONE geometric design across the entire quilt? Or mix up each “chain” of quilting so it looks like a geometric sampler.
Instead of quilting straight lines with each shape, try wiggly lines, or do an allover meander with the shapes instead. No matter how you quilt it, I’d love to see your variations! Be sure to share them in my ChristaQuilts Facebook group. Or tag me on instagram @christaquilts and use #blockchainquilt so I can see your progress.
Next week it’s time to bind this quilt and then it will be complete! Be sure to check out my Quilt Along landing page for past quilt alongs and new ones coming in the future!
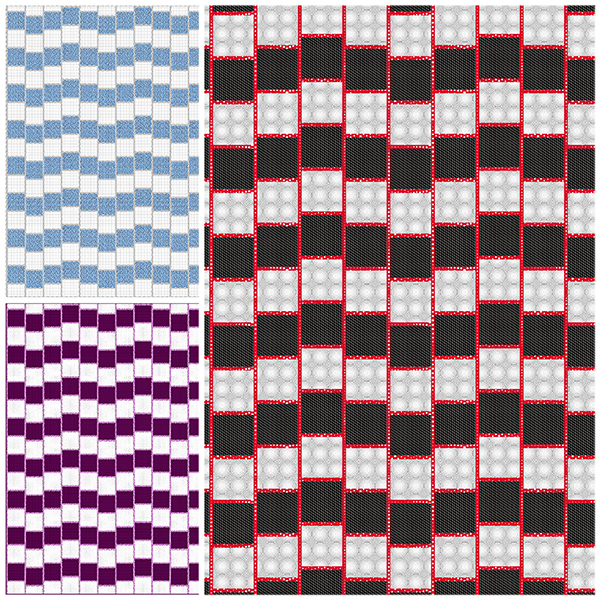
Welcome to the Block Chain quilt along! This week we will be cutting all the fabric needed to make this quilt. It will be super easy because the center of each block features precut squares which are already cut for you (one of the reasons I love working with precuts)!
You will need one charm square for each block in your quilt. Because the throw size consists of 36 blocks and my Gridwork charm pack includes 42 squares, I pulled out 6 squares of the black and gray prints. I like the random coloring below with just two of the black/white squares included for interest. Refer to the Block Chain pattern for the number of squares you’ll need for the smaller or larger sizes.
The important thing to remember is that as long as there is contrast between the squares and the surrounding frames (black in my quilt), it will still look good. Here’s another tip: if one of your squares is the same color as your background, it will look like there’s a hole in your block, so avoid that if possible.
Refer to the Gridwork quilt pattern on page 3 to cut out your accent, background, and binding strips. Here are closeup images of the fabrics that I used:
The black is called Square Grid. I included this one in the Gridwork line specifically for this quilt!!
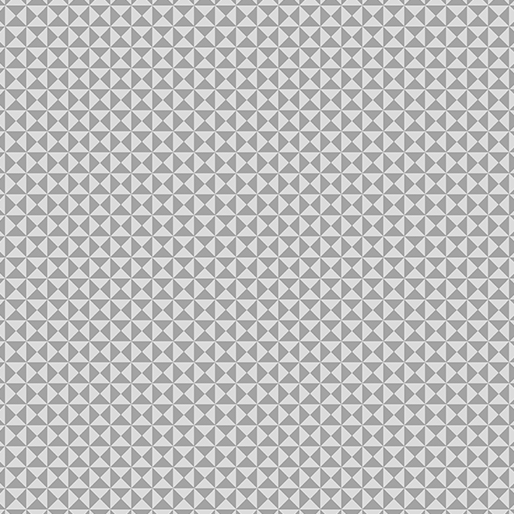
There are several great grays in Gridwork but I really like the look of the gray Hourglass print for the background. It gives the quilt just the right amount of interest and texture!
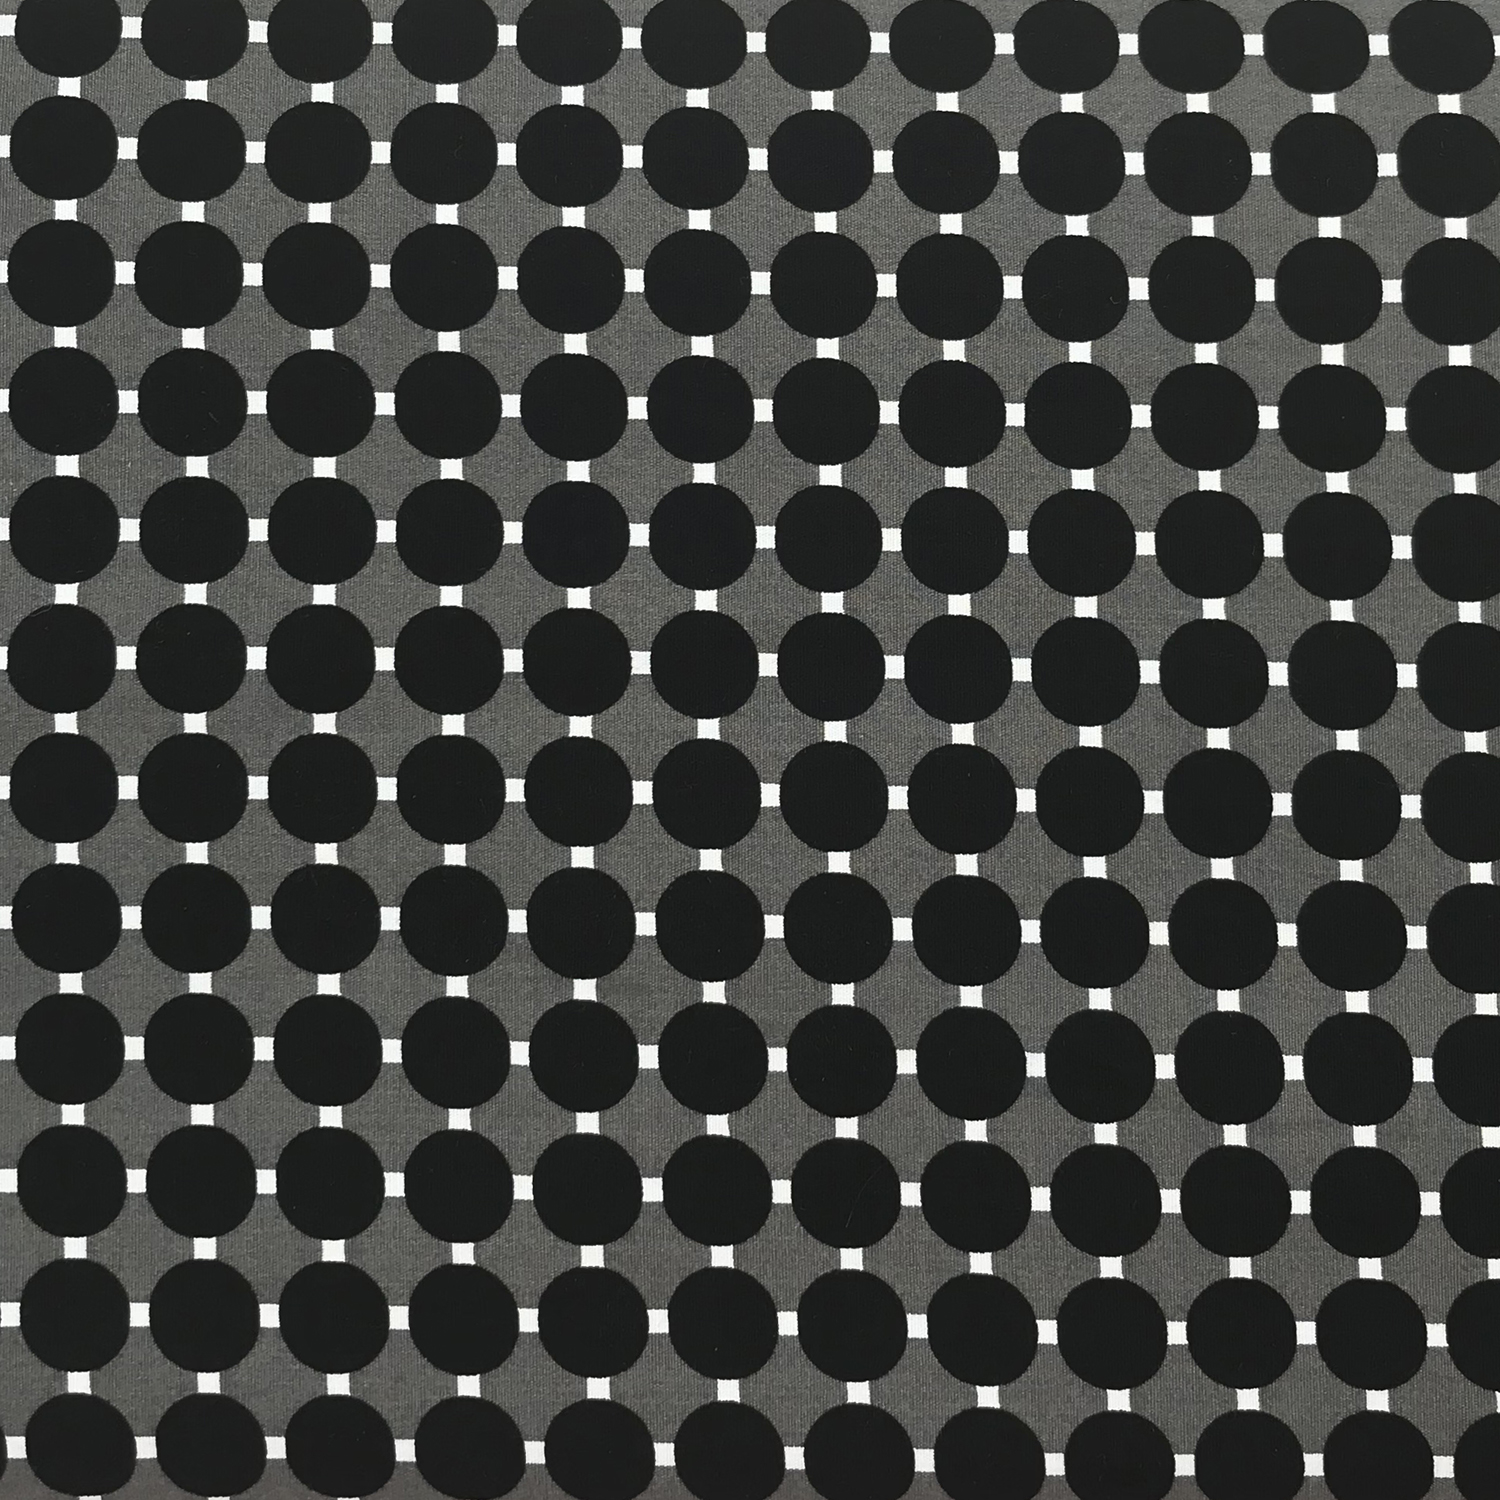
I especially love using fun geometric bindings for my quilts, so I picked the black Circle Grid print to finish off the edges of the quilt.
Here’s a tip to save for the end: if you want a super narrow binding thats finishes exactly 1/4″ evenly on front and back, cut your strips 2″ and sew the binding on with 1/4″ seam allowance.
Next week we will start sewing all of our cut units into blocks. Just remember, you can work at your own pace, faster or slower as you wish. I’m here to cheer you on each step of the way!


 Kathleen Hetzler Riordan on Smith Mountain Lake, Virginia