Making of Terrace Tiles Part 3 – Sewing the Top, Backing and Basting

My Terrace Tiles quilt pattern is quickly becoming a favorite because it is so fast and fun to make!! Last week I shared some tips on piecing the quilt blocks. Now it’s time to finish the quilt tops and get them ready for quilting.

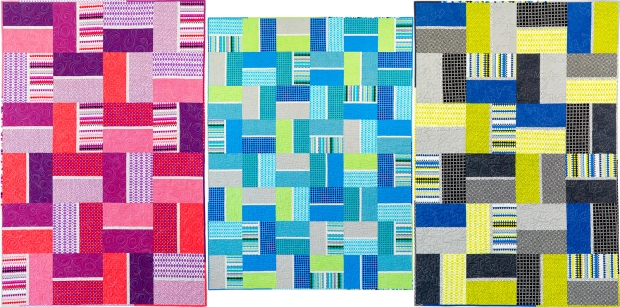
Terrace Tiles in Gridwork Citron Colorway
Citron Terrace Tiles Quilt

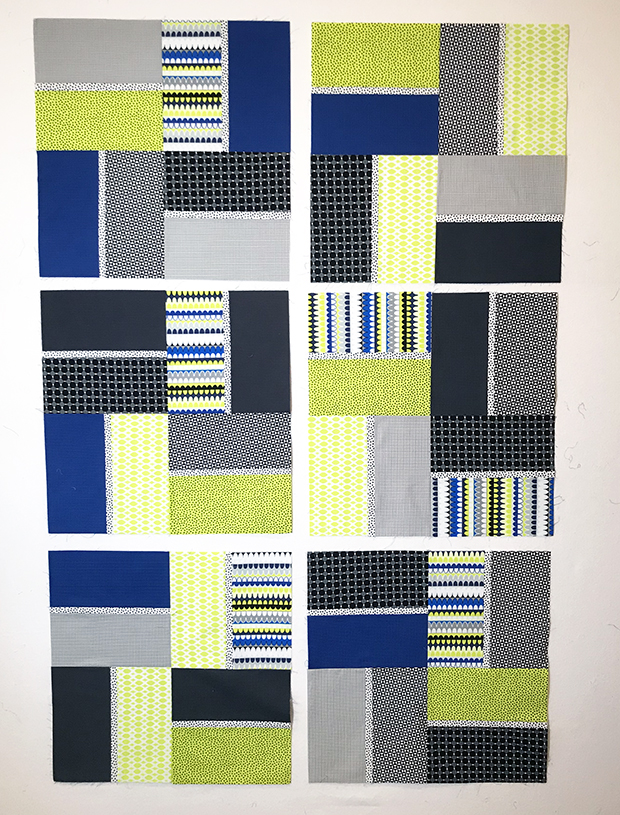
You can either arrange all the blocks on a design wall or other flat space; or you can sew them together into larger sets of 4 blocks like I did to speed up the process.  I’m not worrying about block placement at this point. The more random the better!

I’ll take a little bit of time to arrange them in a pleasing order, but I won’t overthink it.

Terrace Tiles in Gridwork Amethyst Colorway

Terrace Tiles Quilt Amethyst Colorway

I don’t worry too much if the blocks get a little wrinkly at this point. I’ve used spray starch on the fabric before I cut it which gives the blocks a tendency to wrinkle when handled. But that’s ok – once the top is sewn up and basted they won’t be as flimsy or prone to wrinkling. I also press each seam as I go to keep my blocks as flat as possible.

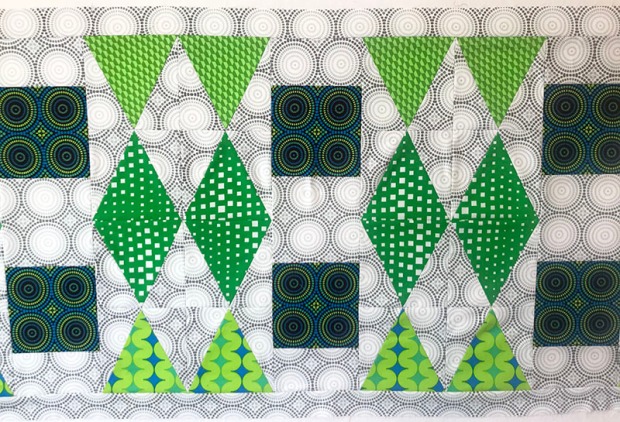
Terrace Tiles in Gridwork Breeze Colorway

Terrace Tiles Quilt Breeze colorway

I made the Amethyst and Citron quilts in the smaller crib size. For the Breeze colorway, I wanted to make it in the bigger throw size with more blocks.

Once the blocks are assembled into the quilt top, I take what’s called a “Victory lap:” I sew about 1/8″ around the edges with a longer stitch length to secure the edge seams from splitting open. If the quilt has borders, then you don’t need to worry about that step.

Prepping the Backing

The crib size calls for 2 yards of backing so that you can piece part of it if needed. However, you can get away with less fabric if you measure and baste carefully. As long as the backing is a couple of inches bigger than the quilt top on all sides, you’ll be ok. Below the backing just barely covers the finished quilt top on the left and right, but it’s still enough, thank goodness!

Gridwork backing fabric

Click here to get coordinating Arches Stripe fabric for backing.

I’ll make sure to pull up the backing from the floor so that it covers the entire quilt top; then I’ll trim off the extra fabric, and press it with starch before I baste.

I also like to take a picture of the batting with the quilt I so I can remember which one I used.

Quilt batting

Basting the Quilt

I like to set up a table in my back yard and apply 505 basting spray to the wrong side of the top and backing. It’s much easier to spray the top and backing separately and it uses less spray than spraying the batting instead. Below I’m basting the throw sized quilt so it requires a larger backing.

505 basting spray

After spraying outside, I bring the top and backing inside and assemble them on my design wall, one layer at a time.

Below, you can see how I pieced the backing for the throw size in the Breeze Colorway: two 2-yard pieces of the blue Hourglass fabric with a horizontal seam in the middle. Don’t worry too much about the small wrinkles – those will get ironed out at the end once the layers are assembled.

Quilt Batting

Click here to get the blue Hourglass fabric for backing of the Breeze Terrace Tiles quilt.

I prefer to work with Hobbs batting on a roll so I’ll roll out just enough batting to cover the top plus a few inches, then cut if off the roll and trim off the extra after it’s all basted. I smooth out one layer at a time on my design wall: backing, then batting, then quilt top.

A long acrylic ruler is handy to smooth out each layer. I use a separate one just for basting, since it tends to get sticky from the basting spray.

Quilt basting
Click here to get the Circle Grid fabric in purple/red for the backing of the Amethyst quilt.

Above is the Amethyst quilt after basting. I’ll trim off the extra batting and backing fabric so that there’s only about 1″ sticking out on all sides for quilting. That way the excess won’t accidentally get tucked under itself while quilting!!

The final step (not shown) is to iron the front and back of the basted quilt with a hot dry iron. This presses out any wrinkles and helps set the glue so things don’t shift while quilting.

Next week I’ll share some pics and videos the machine quilting I did for each quilt, so stay tuned!

Terrace Tiles by Christa Watson

LINKS AT A GLANCE:

Click here for the making of Terrace Tiles, Part 2
Click here to get the Terrace Tiles quilt pattern – paper version
Click here to get the Terrace Tiles quilt pattern  – PDF version
Click here to get the Terrace Tiles quilt kits + Gridwork by the yard

Foundation Paper Piecing Tutorial

Please note, this tutorial shows an earlier version of my updated Party Time Quilt Pattern. However the techniques are exactly the same. Notice how there are 3 separate sections you’ll need to create for each block. Just follow my step-by-step tutorial below and you can adapt this process to any foundation paper pieced (FPP) design you can think of!

Paper Piecing with Christa Watson

Preparing the Paper Foundations

One of our quilt along participants, Michelle Hanus recommends folding all of the sewing lines (the dark lines on the pattern) before piecing. That will make it easier to rip off the papers later on. Thanks for that great tip, Michelle!

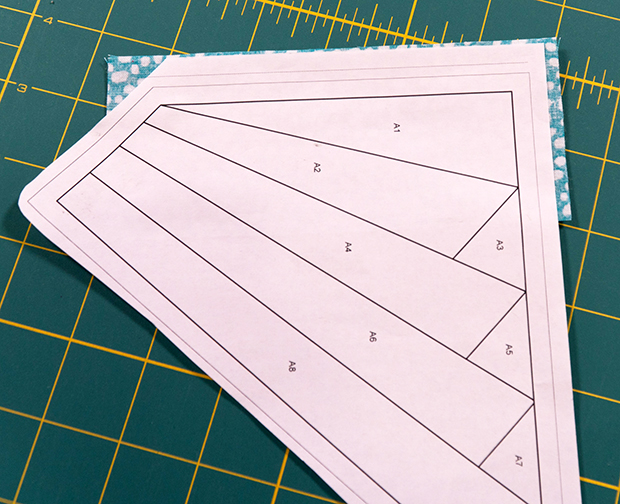
After photocopying the master template (one for each block you are making), roughly cut apart the two FPP sections (A and B), leaving a little bit of space around the dashed lines – those are your seam allowances for the outside edges of the blocks.

Foundation Paper Piecing

Above  is what the master template looks like. In the examples below, mine look slightly different because I was working from a draft before I finalized the pattern for printing.

I highly recommend making one test block out of scrap fabrics following the steps below. Then, once you understand the process, you can sew multiple blocks at the same time with your chosen fabrics. You can even chain piece the same sections if desired – just know that you’ll use a little bit more thread in the process, but that’s ok.

Fold, Trim, Sew and Press (FTSp)

This process might seem very awkward because it’s different then what you are used to with regular piecing. I’ve heard it described as dancing like Ginger Rogers – backwards and with high heels! But if you just follow the same “dance” steps each time, you’ll have no problems getting precise results every time!

Position the First Piece Into Place – A Units

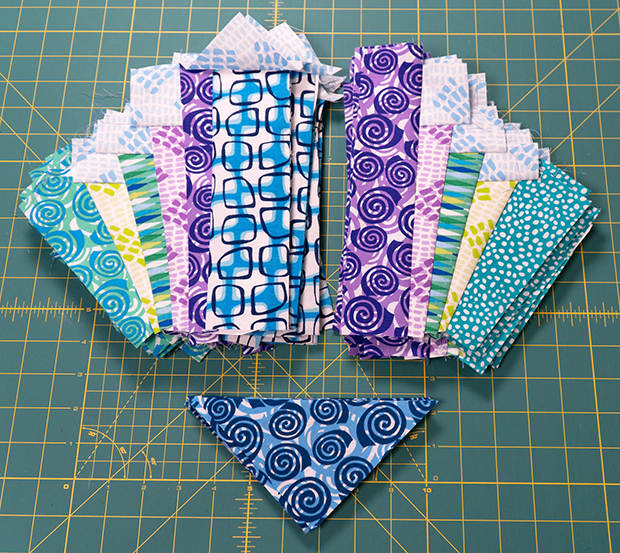
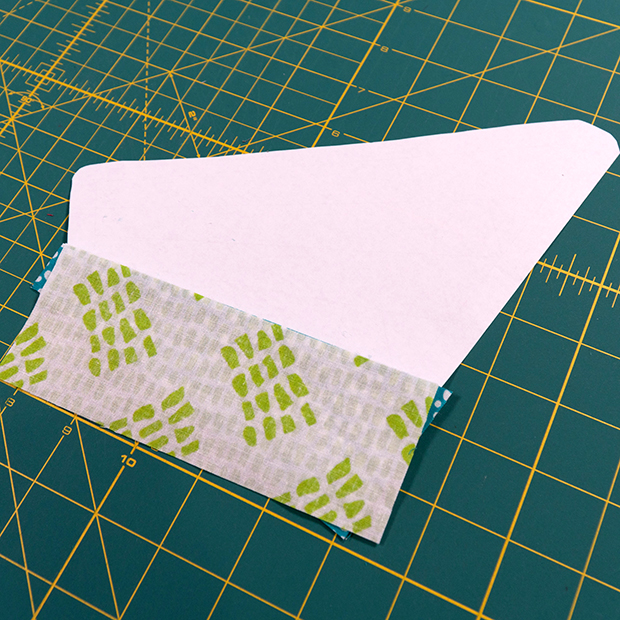
To begin, line up the wrong side of your A1 fabric piece underneath the A1 section so that there is fabric sticking out on all sides of the A1 unit. To keep it from shifting, you can pin it or add a dab of glue from a glue stick to keep it in place.

A rectangle works much better than a long skinny triangle so that you can ensure coverage of the entire piece. You will be sewing on the paper side with the printed lines facing up, just like the image below:

FPP by Christa Watson

Step 1 – Fold

Position a piece of cardstock (such as the pattern cover, or an index card) on the first line that you will sew (the line between A1 and A2 above). A piece of thin, rigid plastic works, too!

Fold the paper template over the piece of cardstock, exposing the extra fabric underneath. Remember that the wrong side of the fabric will be touching the blank side of the paper each time.

Paper Pieced Primrose

Step 2 – Trim

Keeping the fabric, cardstock, and paper template in position, place the Add a Quarter ruler on top with the lip securing everything in place. This will add 1/4″ seam allowance beyond the fold line.

Trim the excess fabric with a rotary cutter.

Doing it this way ensures that the long skinny triangle is positioned at the correct angle for sewing.

Pieced Primrose Quilt

Step 3 – Sew

On the non printed paper side, line up the freshly trimmed edge of piece A1 with the edge of piece A2, with the fabric right sides together. Align the raw edges ensuring that the A2 piece is long enough to cover the entire A1/A2 line plus 1/4″ seam allowances on both ends.

FPP by Christa Watson

Lower your stitch length so that it will perforate the paper, making it easier to tear off later. My default is 2.5 so I turn it down to 2.0 or even 1.8. Use a brand new needle for best results.

Sew from 1/4″ before the A1/A2 line to 1/4″ after the printed solid line to ensure you have seam allowances on both sides of the marked line.

Foundation Paper Piecing

Here’s what my piece looks like after sewing the first seam. It’s ok to go slightly beyond 1/4″ if needed. I do this especially when chain piecing multiple blocks at the same time.

Foundation Paper Piecing

Step 4 – Press

Open up the A2 piece so that both fabrics are right side up. With a wooden seam roller, press the the seam from the front of the fabric. This is easier to do for each step than using an iron.

Foundation Paper Piecing

repeat The Dance over and over until the unit is complete
A3: Fold and Trim

Reposition the cardstock again along the next line. For this example, it’s the very short line between A2 and A3. Click the image below to enlarge if needed.

Fold the paper template over again. Use the Add a Quarter ruler to add the 1/4″ seam allowances and trim the excess with a rotary cutter.

Tip: if the paper is stuck to the fabric, you can lift it away (gently) from the seam as needed.
Foundation Paper Piecing

A3: Sew

Sew the next piece in the same manner as before. Align the A3 edge to be sewn with the freshly cut edge. In the example below, the small blue square does not need to take up the entire space of the trimmed A1- A2 edges.

Position the fabric square in the middle of the area to be sewn as shown below. Flip the whole unit over if needed and hold it up to the light to ensure that the fabric square will cover the full line between A2/A3 plus seam allowances.

Foundation Paper Piecing

Below is what my unit looks like after sewing the line between A2/A3. It’s ok if the sewn line is slightly longer than 1/4″ on both sides. If you are worried about the seam coming apart at the ends, you can backstitch at either end.

Foundation Paper Piecing

A3: Press
A4: Fold

Repeat the prior steps: open up the A3 piece and press from the front with the wooden seam roller. Then fold over the next line (A2/A4) using the cardstock or other thin, hard edge for stability.
Foundation Paper Piecing

A4: Trim

Repeat the same step as before: use the Add a Quarter ruler to add 1/4″ seam and trim the excess.

Fold the paper template back into position and flip the paper over again so that you can see the proper angle to align the next piece (the green A4 rectangle).

Pieced Primrose Quilt

A4: Sew

Line up the A4 rectangle right sides together. Flip the paper over and sew on the line between A2/A4 with 1/4″ extra on either end of the drawn line. Below is what this next step looks like:

Pieced Primrose

A4: Press
A5: Fold and Trim

Repeat the same steps over and over again: press the green A4 rectangle (below left), fold the paper back (not shown), trim the excess (below right).

Foundation Paper Piecing by Christa Watson

A5: Sew and Press

Align the A5 square (light blue), sew the seam and press from the top.

Foundation Paper Piecing by Christa Watson

A6 and A7: Fold, Trim, Sew and Press!

Fold the paper, trim the excess, Sew A6 (light purple), press A6 (below left).
Fold, trim, sew, and press the A7 unit (light blue square, below right).

Foundation Paper Piecing by Christa Watson

A8: Fold, Trim, Sew and Press

This will complete all of the sewing for the A side of the block!

Foundation Paper Piecing by Christa Watson

Sewing the B Units

Now repeat the process for the B half of the block. It has a total of 10 units to piece. Remember to fold, trim, sew and press each and every unit, just like before!

Notice that I used a triangle instead of a square for the B10 unit. This made more efficient use of the fabric when cutting, but it’s still the same process as before.

Foundation paper piecing

Once you’ve sewn all of the Section A and Section B blocks, trim them along the outer dashed lines using a rotary cutter and ruler. Be sure you don’t trim off your triangle points! At this point, your paper should still be intact to keep the blocks stable.

Paper Pieced Primrose by Christa Watson

Sew the A and B unit together. Then sew the oversized corner triangle to the bottom of the block. It’s oversized so that you don’t have to line it up perfectly. (See below, left).

Trim the excess fabric from the triangle to match the rest of the block. (see below right).

Paper Pieced Primrose

After making one test block, continue in the same manner to sew the number of blocks you need for the size you are making. I’m creating this quilt in both the warm and cool colorways of my Abstract Garden fabric line, but the process is exactly the same!

Pieced Primrose Blocks by Christa WatsonAbove is the same block in warm and cool colorways of Abstract Garden.

Making of Terrace Tiles Part 1 – Quilt Design, Cutting Fabrics

Now that my Gridwork fabric line has started arriving in quilt shops, I want to share more about the quilts I made from it. Over the next 4 weeks I’ll share some detailed progress pics of the three Terrace Tiles Quilts I made in three different colors.

Terrace Tiles Quilts

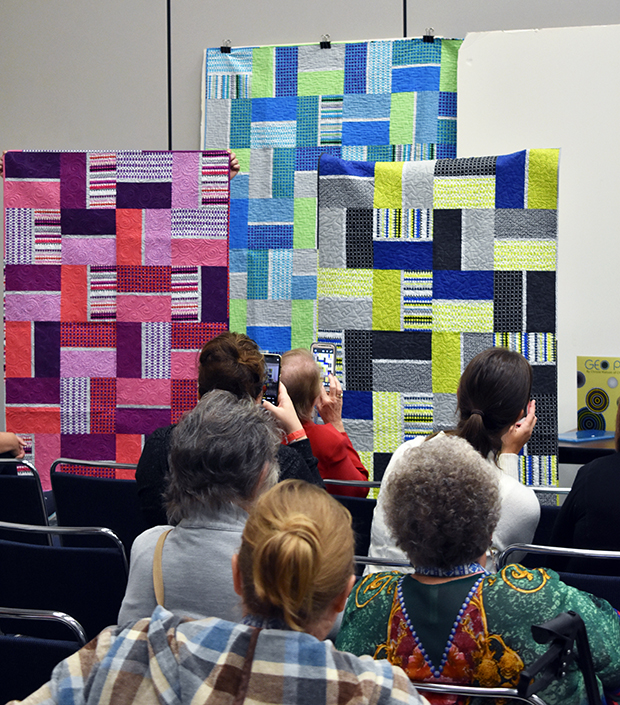
Terrace Tiles Quilts were first shown at Fall 2019 Quilt Market in Houston Texas

With 27 different fabrics in this collection, I wanted to make it easier to work with so I organized Gridwork into 3 distinct colorways with 9 fabrics each: Amethyst, Breeze, and Citron.

Gridwork by Christa Watson

All 27 fabrics from my Gridwork Fabric Line

I love designing fat quarter friendly quilts, and wanted to sew up some sample quilts that would effectively showcase the different Gridwork colorways. I also wanted to offer a quick and easy quilt that could be made entirely from any of the Gridwork fat quarter bundles.

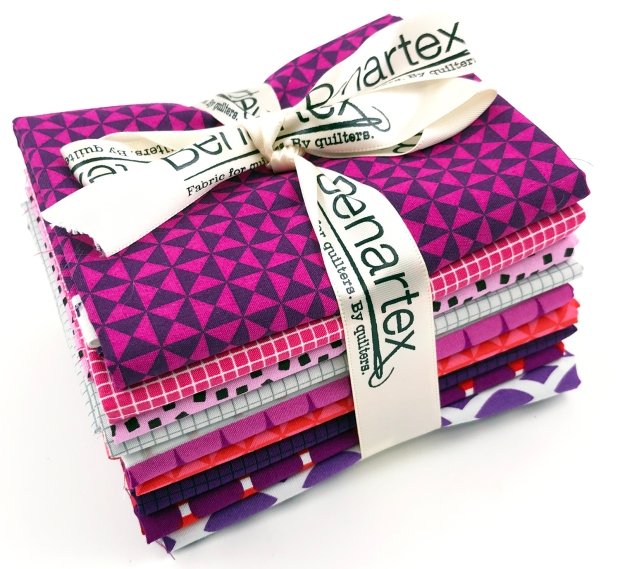
Gridwork by Christa WatsonGridwork 9-piece fat quarter bundles in Amethyst, Breeze, and Citron

The quilt sizes included in the pattern are Crib (1 FQ bundle), Throw (2 FQ bundles) and Twin/Full (3 FQ bundles). Each quilt size is completely made from fat quarters, including the scrappy binding. You can mix and match any of the fat quarters from the line to make a scrappy looking quilt, or you can use multiple bundles from the same color group for a more coordinated look. The choice is up to you!

Terrace Tiles by Christa Watson

Click here to get the Terrace Tiles Quilt Pattern – PDF Version
Click here to get the Terrace Tiles Quilt Pattern – Paper Version

Because I  wanted to show off this fun design in all 3 colorways, I decided to make three quilts: two of them are Crib size using one bundle each of Amethyst and Citron; and the third one is Throw size using two fat quarter bundles (or half yards) of the Breeze colorway. Here are all my yummy pieces, cut and ready to sew!

Amethyst ColorwayGridwork Amethyst by Christa Watson

Breeze Colorway

Gridwork Breeze Colorway by Christa Watson

Citron Colorway

Gridwork Citron Colorway

Click here to get fat quarter bundles or yardage of my Gridwork fabric.

Cutting tip: I love to assembly line cut and piece so I’ll usually stack 4 fat quarters on top of each other for speedy cutting. When making the scrappy binding, I’ll go ahead and cut one strip from each fat quarter at the same time I’m cutting the block units.

Stay tuned for next time when I show what the blocks look like when they are all sewn!

Gridwork is Here!! Free Shipping with $50+ Purchase (Use Code SHIP)

First of all – huge thanks and hugs to those of you who commented on my last post about my blogging goals for the new year. I’m so grateful to all of you who read this blog. Your kind thoughts really made my week!!

Today I’m excited to announce that my new Gridwork fabric is finally here – whoo hoo!! Gridwork by Christa Watson

Gridwork Bundles

Gridwork includes 27 prints divided into three colorways: Amethyst, Breeze, and Citron. Each colorway includes a total of 9 pieces  and they are available in fat quarters, half yards, or full yard bundles.

Use code SHIP at checkout on orders of $50 or more for a bonus free shipping discount!

By request, I also put together a Gridwork neutrals bundle – 8 pieces of the black, white and gray prints from among all three colorways:Gridwork Neutrals 8

Gridwork by the Yard

Of course, you can pick and choose your favorite prints by the yard, too! There are a total of 6 different geometric designs with several colors of each. Here they are grouped together by print:

Arches Stripe in Blue, Turquoise, and Fuchsia

Gridwork Arches Stripe

Gridwork Arches Stripe

Diamond Ovals in Citron, Purple and Turquoise

Gridwork Diamond Ovals

Circle Grid in Caribbean, Purple/Red, Grape/Blue, and Black

Gridwork Circle Grid

Gridwork Circle Grid

Hourglass in Gray, Black/white, Red/pink, Purple and Blue

Gridwork Hourglass

Gridwork Hourglass

Gridwork Hourglass

Square Grid in fuchsia, Lime, Navy, Grape, Black, Cloud, Lt Gray, Gray

Gridwork Square Grid

Gridwork Square Grid

Gridwork Square Grid

Square Dots in Pink, Sky, Citron and Black/White

Gridwork Square Dots

When Gridwork first arrived, I created an unboxing video on Youtube. It always feels like Christmas when I get new fabric, but these actually DID arrive right before Christmas and I couldn’t wait to dive into them!

Gridwork Precuts

Gridwork comes in all of the standard precuts, too: 5″x5″ charm packs, 10″x10″ squares, and everyone’s favorite: 2 1/2″ strip rolls which Benartex calls “Strip-pies.”

The Strip-pie includes 40 strips with 1-2 of each print as shown below:

Gridwork Strippie

The 5×5 Charm pack includes 42 squares with 1-2 squares of each print in the line:Gridwork Charmpack

The 10×10 pack, aka “layer cake” includes 42 squares that are 10″ x 10″, with 1-2 prints each:

Gridwork by Christa Watson for Benartex

Free Shipping on $50 or More – Use Code Ship

To thank you for being a loyal blog reader, I’d like to offer you free shipping on your Gridwork fabric purchase. Use code SHIP at checkout to get free US shipping on orders of $50 or more. International customers will get $5 off the shipping cost order and I’ll refund any excess international shipping charges.

I sure hope you enjoy Gridwork as much as I do! When you share your makes on social media, please use the hashtag #gridworkfabric so I can see what you are creating. I love to re-share and inspire others, too!

Now what will YOU make?

My Christmas Wish: To Partner with a Sewing Machine Table Company

Almost a year ago we moved into our new home and I began looking for a new sewing table to replace this one that I’ve had for over 20 years.

Christa's Quilt Studio

The quilt shown on the design wall is my Color Weave Quilt Pattern.

The main reason I want to replace it is because every single time I share a picture of it on social media, everyone wants to know where I got it from, and I don’t have an answer for them. I bought it from a dealer who’s no longer in business and I don’t even know the brand of table it is. I’ve looked long and hard through ALL the current companies out there and have never been able to find it again.

Christa's Sewing Table

Another view of my sewing room, before we installed the design wall.

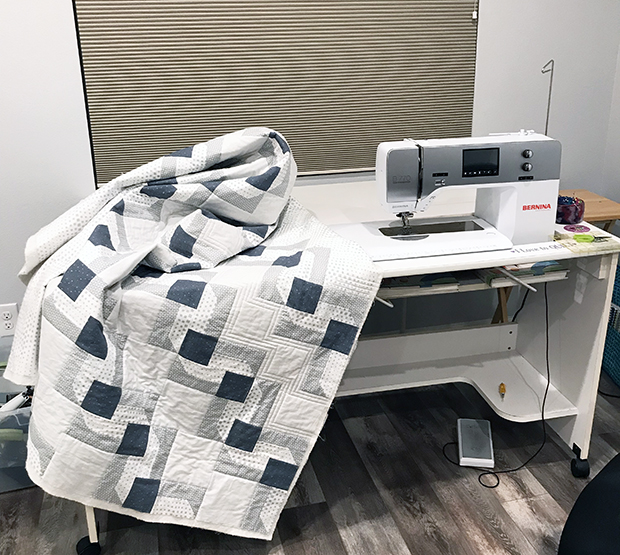
But more to the point, this table has served me well, but there are a lot of features I wish it had. For example, when I first set it up in the middle of my new larger studio space, it actually doesn’t work well here because there’s no ledge on the back of the table to keep the quilt from falling off while quilting. I quilted a few quilts like this but struggled to keep the quilt on the table.

So I moved my table to the back wall of my space, underneath the window in my sewing studio.

Christa's Sewing Room

This is a current quilt pattern I’m working on, so stay tuned for details in a few months!

Pushing my table against the wall works better because the wall can block the quilt from falling off the table. However, I’ve had to add small tray table in front of the table to form an L and hold up the quilt to my left. Of course this isn’t pretty and it also blocks access to the drawer, but it works in a pinch!

Here’s a similar setup from my sewing space in my old house that we moved from. I used a plastic table or ironing board to hold the bulk of the quilt on the left. Again, this is practical, but not very pretty:
Sewing Table in Use

This quilt is Beaded Lanterns, a free pattern using precut Fandangle Strips.

I’ve gotten lots and lots of suggestions for other tables to try , but here’s the problem: They either aren’t all that pleasing to look at, or they are way too big. Or they have too many bells and whistles which jack up the price to be more than the cost of the machine!

Below is my setup again, and notice how I’ve also added another small table to the right of the machine, tucked into the corner. This is to hold notions and things that would fall off the side of the table. As you can see, when there’s nothing to hold up the quilt in the front of the machine, it falls off the table again!

Christa's Sewing Table

This quilt in progress is made from neutrals from several of my fabric lines.

So one of my goals in the new year (or next several years) is to try and find a table manufacturer that wants to work with me to design and create the PERFECT domestic machine quilting table. To be clear, I’m not just looking for a “custom” solution for myself. I want to be an ambassador for THE PERFECT TABLE so that I can endorse it and share it with thousands of fans, followers, and machine quilting students. After all, one of my main reasons in being a quilting educator is to make the process easier for YOU!!

So here is what I’m looking for:

  • The piece should be a table that stays up all the time, NOT an overpriced cabinet.
  • It should measure between 60-66″ inches at the longest side. Anything larger than that and it simply wont fit in most quilters’ sewing spaces.
  • The depth should be about 36″-40″
  • It should have some sort of extension forming an L on the left
  • It should include an optional fly out leaf on the right to hold notions
  • The hole for the machine should be positioned as far to the RIGHT as possible,
    not in the MIDDLE!
  • It should have a lip on the back to hold up the quilt if needed.
  • It should retail for $2,000 or LESS.

Machine Quiltin Scrunching and Smooshing

I’m “scrunching and smooshing” my Infrastructure Quilt through the machine on my table.

I’m putting this out there to the universe in the hopes that the right partner will see this, or someone out there has connections to a company who’d be interested in working with me as their spokesperson. If I can find the PERFECT domestic machine quilting table, I’ll be singing their praises all day long!!

So how about you? What’s your wish for the perfect sewing table, or other studio furniture??

Make the Rounds Quilt Pattern and Kit Available

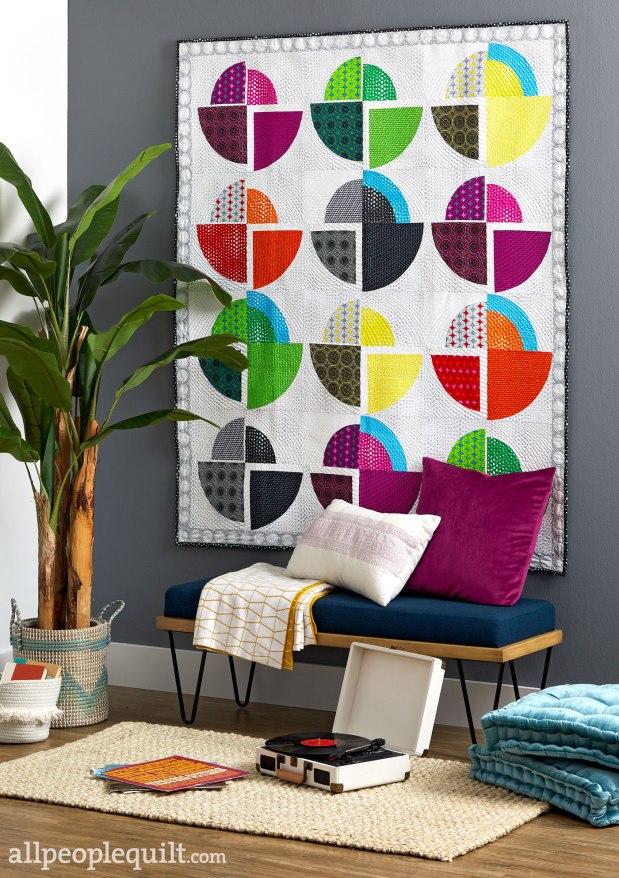
Did you see this amazing quilt, designed and made by my friend Heather Black? She used my Geo Pop fabric and it’s in the current issue of American Patchwork and Quilting (February 2020).

Make the Rounds by Heather Black

Click here to get the quilt kit for Make the Rounds.

Before the issue went to print, APQ magazine contacted me and asked if I’d be willing to offer kits for this quilt since it’s so eye catching. I immediately said yes and they were kind enough to mention my fabric and include a link to my shop in the magazine pattern.

Here’s a photo of the magazine cover, so you know which issue has the pattern:

American Patchwork and Quilting Cover Feb 2020

It’s no secret that I simply adore all of Heather Black’s quilt designs. She really makes my fabric look good, don’t you think??

This is what she had to say about the design of this quilt, “When making a quilt, I like to choose a theme, either literal or figurative to help guide my choices while picking fabrics and quilting. I wanted to convey a sense of movement, and the name of this quilt [Make the Rounds] helped me pair colors and choose how to quilt the top.”Make The Rounds Quilt by Heather BlackDesigned by Heather Black. Used with permission from American Patchwork & Quilting® magazine. ©2020 Meredith Corporation. All Rights Reserved. The kit includes the same fabrics shown here for blocks, borders and binding. The background behind the blocks consists of all one fabric.

Of course I’m biased because it’s using my fabric, but I just love the bold design and energy in this quilt! I think Heather did a fabulous job with color placement, and I love how she fussy cut the Mosaic Dots print to create a frame in the borders. Heather is an expert with modern pieced curved designs, and I can’t wait to see what she comes up with next!

Machine Quilting by Heather BlackQuilting detail on Heather’s quilt. 

Infrastructure Quilt Finish – Ta Da!!

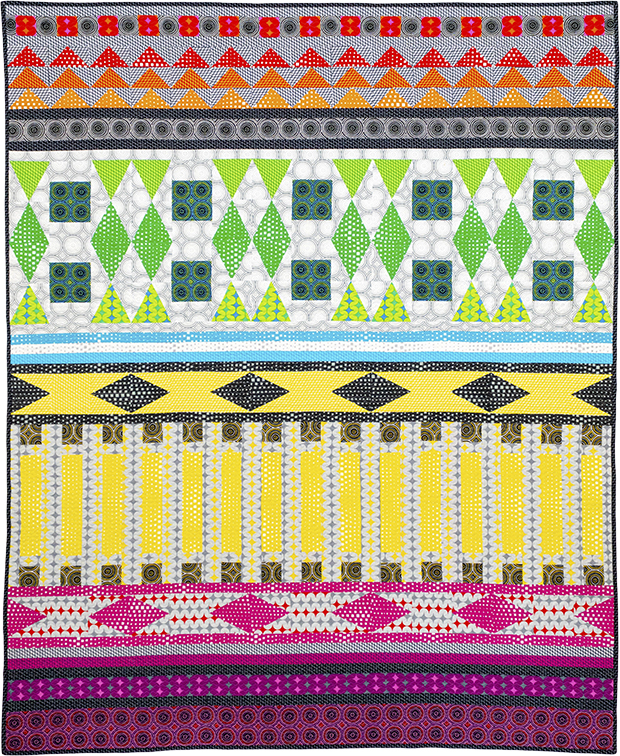
I had the most amazing time making my Infrastructure quilt and sharing each step of the process with you. I’m excited to share more pics of the finished quilt along with links to all of the previous quilt along tutorials and videos. I hope it inspires you to make your own version!

Infrastructure made from Geo Pop Fabric

Infrastructure Finished Stats:

Infrastructure Detail Pics:

You can really see how the bright geometric fabric and adds to the movement of the design.

Infrastructure Quilt Detail Geo Pop Fabric

Infrastructure Quilt Detail Geo Pop Fabric

Links to Quilt Along Tips & Tutorials

Stay Tuned for More!!

I want to continue to be a cheerleader for “Start to Finish” quilting. Although I know that everyone has their favorite part of the quilt making process, I’m happy to guide you through the entire journey.

Click here to be notified about future quilt alongs.

Infrastructure quilt, designed by Heather Black, made by Christa Watson

Infrastructure Quilt Along Week 11 – Machine Quilting

And now we get to my favorite part of making a quilt – machine quilting!!! There are so many different ways to quilt this quilt. Heather Black did an amazing job custom quilting hers, and I took the opposite approach with one of the simplest designs you can do – decorative machine stitching.

Decorative Stitch Machine Quilting

Infrastructure Machine Quilting Detail Using a Decorative Stitch

Thoughts on Thread

Christa Watson Aurifil Thread

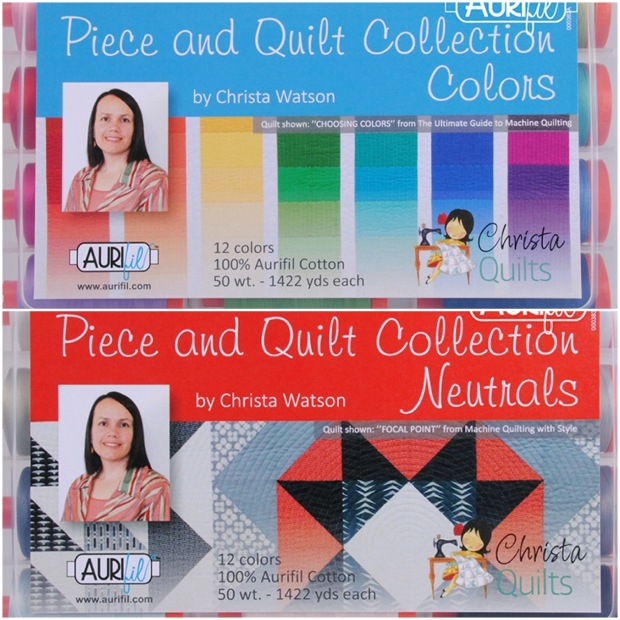
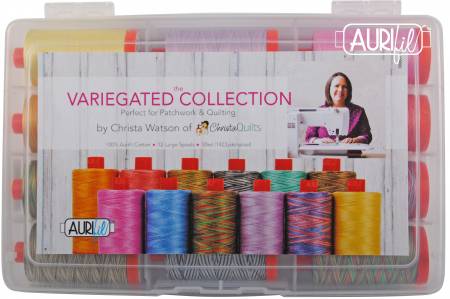
Click here to get my Aurifil Thread Kits in Colors, Neutrals, or my newest Variegated box.

So the first thing to do is choose the thread you’d like to quilt with. I piece AND quilt all of my quilts using Aurifil, 50 weight, 100% cotton thread from my 3 thread collections. It’s thin, yet strong and blends into my quilts so all you see is the yummy texture. I use leftover bobbins for piecing my next quilt and I never have to worry about which bobbin matches which spool since they are all the same weight!

I like to use the same color thread in top and bobbin so that I don’t get “pokies” on my quilt – those little dots of thread that appear when your tension is the tiniest bit off and you are using highly contrasting thread.

Aurifil Thread

The light gray/blue #5007 can be found in my Piece and Quilt Neutrals collection.

I used Aurifil #5007 light gray/blue from my Neutrals thread box. It’s one of my favorite go-to neutrals because it blends with nearly every color. When I’m doing an allover edge-to-edge quilting design, I don’t want to have to stop and switch thread colors while I’m quilting.

Because the spools hold so much thread on them, it took me less than one spool to quilt the entire quilt, including the front and back.

Make a Quilting Plan

I love figuring out HOW I’m going to quilt ahead of time, so I don’t have to think too much. I will usually print out a copy of the quilt top from the pattern (you can photocopy the pattern cover for personal use, OR you can take a picture of your finished quilt top). Then I draw all over it until I come up with something I like. I include quilting suggestions in ALL of my quilt patterns to help you out with each quilt you make.

Infrastructure Quilting Plan

Above is the illustration that’s included in my Infrastructure Quilt Pattern. Here’s the basic idea: choose a decorative stitch on your sewing machine and quilt a series of lines across the quilt from one side to the other.

Make them as light or dense as you like and use my “divide and conquer” method: quilt one set of lines “near” the ditch instead of IN the ditch for each row. Then go back and quilt additional passes across the quilt, shrinking up the open spaces until the entire area is filled.

You can use ANY decorative stitch on you sewing machine. Play around with length and width settings until you find something you like, and stitch on a practice sample before you quilt on the real thing. Here’s a picture of the settings I chose on my machine, a BERINA 770 QE:

BERNINA 770 QE

I’m using decorative stitch #16 which is known as a running stitch or a broken zig-zag. It creates several stitches each time it zigs and zags, so you can make it bigger than the default settings and it still looks great! I adjusted my width to 6.0 and my length to 3.0 because I like the way it looks. Don’t forget to use a zig-zag needle plate so you don’t break a needle when it moves back and forth!!

The Quilting

Here are some beauty shots of the decorative stitch quilting in process. I made sure to NOT try to line up the quilting lines perfectly because I love a more organic look. The more quilting I did, the more beautiful texture it added to the quilt and the more the thread blended in. After all, the best way to hide imperfect stitches is to surround them with MORE imperfect stitches!!

Infrastructure Machine Quilting

Here’s what it looks like when I’m stitching “near” the ditch in each row. You can see all the imperfections up close, but fortunately they get hidden when more quilting is added.

Infrastructure Machine Quilting

I’m filling in the spaces between the first pass with randomly spaced lines. I’m using the 20D foot on my BERNINA with the integrated dual feed. It works just like a walking foot and I don’t have to mark anything. I’m using the edge of the foot as a guide for some of the lines.

Infrastructure Machine Quilting

What this section looks like when it’s completely filled in.
None of the lines match up and some are a bit irregular – I love this look!!

Infrastructure Machine Quilting

Another section complete. Look how well the stitching blends in to the quilt!

Infrastructure Machine Quilting

This is one of my favorite designs because it adds great texture to ANY quilt! 

See it In Action

Here’s my latest YouTube video, showing me quilting this decorative stitch on my quilt. It did take a few hours to accomplish, but I just worked on it a few minutes at a time over several days. It’s my joy and my zen when I get to do mindless quilting like this, and once you let go of perfection, it’s really quite fun!

Next week we’ll finish up with machine binding, including another video tutorial – so stay tuned!!

This Week’s Giveaway & Heather’s Version

Heather did some amazing custom quilting on her computerized long arm machine. Pop over to her blog at Quiltachussetts for more about how she chose her designs.

While you are there be sure to enter the giveaway on Heather’s blog. One lucky winner will receive one box of my Variegated thread collection, courtesy of Aurifl!! How cool is that???

Variegated collection by Christa Watson

Quick Links

Infrastructure Quilt

Finished Infrastructure quilt on my design wall!! You’re almost there!!!

Preorder Bundles of My New Gridwork Fabric – It ships in January!

I’m at quilt market this weekend, showing off my newest fabric collection, Gridwork that will ship in January of 2020. I can’t believe it’s already my 5th fabric line with Benartex, and I’ve been having a blast designing fabrics and making colorful quilts from them.Gridwork by Christa Watson for Benartex

All 27 prints of Gridwork in 3 colorways: Amethys, Breeze and Citron

Gridwork by Christa Watson for Benartex

This is a larger collection, consisting of 27 different prints in 3 coloways: Amethyst, Breeze and Citron. Of course they mix and match nicely with each other, but it’s also fun to create color-blocked projects with them. Here are some more beauty shots of the individual colorways.

Amethyst Bundle – Pretty in Purple and Pink

Gridwork in Amethyst by Christa Watson for Benartex

Gridwork in Amethyst by Christa Watson for Benartex

Gridwork in Amethyst by Christa Watson for Benartex

Click here to preorder the Amethyst Bundle in Fat Quarters, Half Yards or Full Yards

Breeze Bundle – Calm and Cool in Blues and Greens

Gridwork Breeze by Christa Watson for Benartex

Gridwork Breeze by Christa Watson for Benartex

Gridwork Breeze by Christa Watson for Benartex

Click here to preorder the Breeze Bundle in Fat Quarters, Half Yards or Full Yards

Citron Bundle – Edgy in Black, White, Navy & Citron

Gridwork Citron by Christa Watson for Benartex

Gridwork Citron by Christa Watson for Benartex

Gridwork Citron by Christa Watson for Benartex

Click here to preorder the Citron Bundle in Fat Quarters, Half Yards or Full Yards

Each time I design a new line, I’m thinking about how it can relate to my previous collections but still stand on its own. It was really fun to do a larger line this time will a full range of light, mediums and darks that will make your quilts sparkle.

Gridwork by Christa Watson for Benartex

Click here to claim your Gridwork bundle – It ships in January!

Infrastructure Quilt Along Week 5: Sewing Row 4

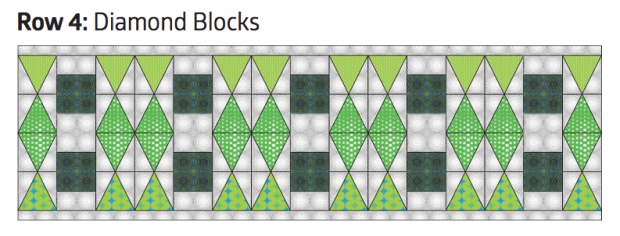
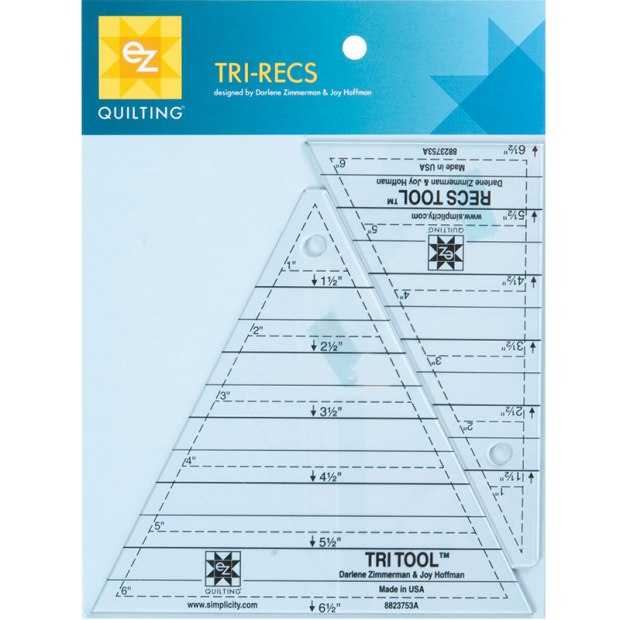
This week for the Infrastructure quilt along, we are sewing Row 4 which looks a bit intimidating, but it really isn’t. True, it does have a lot of piecing, but it’s a great opportunity to play with fun shapes.Infrastructure Row 4You can fussy cut your fabric so that the patterns match up if you want, but it’s certainly not necessary. My #1 tip for cutting this row is to use the Tri-Recs Ruler set. The Infrastructure quilt pattern includes full size templates, but honestly, it’s faster and easier to use the specialty rulers.

Tri Recs tools

Click here to get the Tri-Recs ruler set.

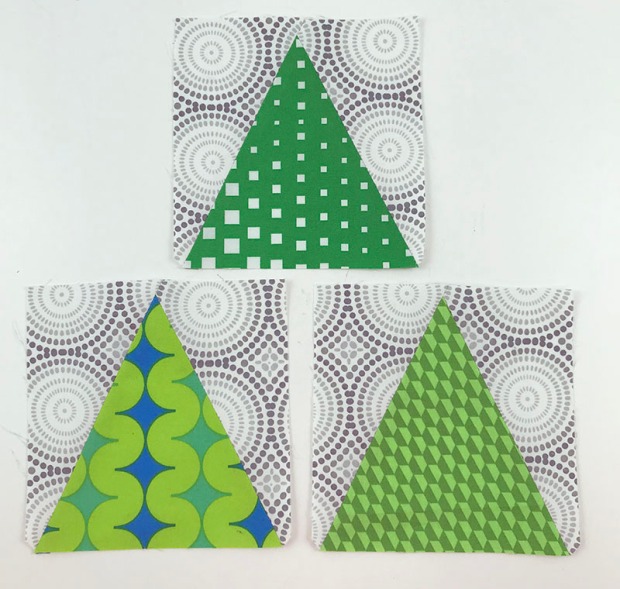
Follow along in the quilt pattern on pages 4, 6-7 and 10-11 to make Row 4. It’s sewn from Triangle in a Square blocks, fussy cut squares and background fabric.

Triangle in a Square Blocks

Here’s a video tutorial on how to cut and sew Triangle in a Square blocks using the Tri-Recs Ruler set. It’s 11 minutes long and walks you through the entire process, so click below to watch the entire thing. If you’d like more videos, be sure to subscribe to my YouTube Channel!

Full Color step-by-step diagrams with exact measurements to make each row are given in the pattern.

I chose to the fussy cut the squares of green Mosaic Dots, but not the background fabric.

Fussy Cut Squares

And here’s a closeup of finished row after it’s been sewn together:

Infrastructure Row 4

This row was a little more cutting and piecing, but the results are well worth it!

GIVEAWAY & HEATHER’S VERSION

Pop over to Heather Black’s blog at Quiltachusetts to see her version of Row 4 made from Benartex Superior solids. Heather is actually our prize sponsor this week and she’s offering 2 lucky winners a Tri-Recs tool set + 2 of her patterns that also use this shape. Aren’t they fab??

Heather Black Patterns

Heather is such an amazing pattern designer and longarm machine quilter and I can’t wait until the final reveal of her quilt! After all, she designed both versions of Infrastructure (solids and Geo Pop prints) and I  can’t wait to see what she comes up with next!Infrastructure in Solids by Heather Black

Heather’s recoloring of Infrastructure using all solids.

Important Links:

Infrastructure Row 4 Finished