Quilt Las Vegas 2017 – A Recap and a New Milestone

Quilt Las Vegas is the annual quilt show put on by my local traditional guild here in Las Vegas, Desert Quilters of Nevada. I’ve been a member of the guild for over 20 years, and I’ve been entering their show for nearly as long. It’s the show that gave me the confidence to start competing nationally. I’ve also learned a lot about what goes on in the judging room as a volunteer. As my quilting skills increased, it’s been reflected in the number of times I’ve gotten a ribbon. However, the show this weekend was a new milestone for me. It’s the first time that everything I entered received a ribbon.

Machine Quilting demo by Christa Watson

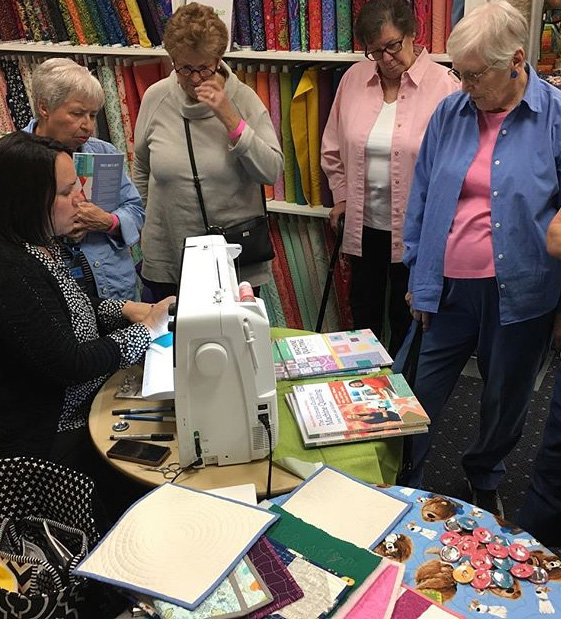
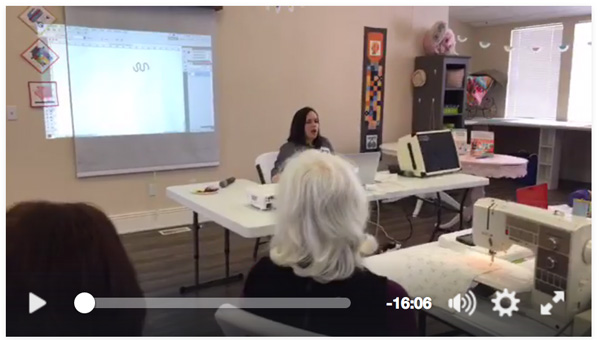
One of the show highlights for me was getting to share a machine quilting demo and book signing for one of the local quilt shops vending at the show, Sew Yeah Quilting.

Most of the quilts I make nowadays are usually for a book, magazine, or individual pattern, so I think it’s really helped me focus on doing the best quality work I can. Today, I thought I’d share pics of my quilts hanging in the show, include the judges’ comments, and let you know where the patterns can be found, if you are inspired to make on of your own. Plus there are a couple more that my friends made that I thought were super cool. Enjoy the mini-show!

My Quilts in the Show

Churn Dash Slide from I Love Churn Dashes

Churn Dash Slide, 1st Place, Pieced Large – Single Entrant Category

Β I was actually surprised that this one got a ribbon, let alone first place because the quilting on it is really simple. It’s just an allover swirl design. But the the fabrics really make it and I had a fun time taking a traditional design and freshening it up a bit.

Machine Quilting Detail by Christa Watson

Machine Quilting Detail on Churn Dash Slide

Here’s what the judge had to say about Churn Dash Slide:

  • Excellent piecing technique
  • Well balanced tension in machine quilting
  • Appropriate overall quilting design
  • Binding is securely and neatly attached
  • A crisp, clean and fresh approach to a traditional quilt pattern

The pattern for Churn Dash Slide can be found inΒ  I Love Churn Dashes, a compilation published by Martingale/That Patchwork Place (my awesome publisher). I enjoy submitting ideas for their books where they usually feature 14-16 different designers’ patterns all in one collection.

A block from my quilt made the cover of I Love Churn Dashes – so fun!!

Quatrefoil Applique by Christa Watson

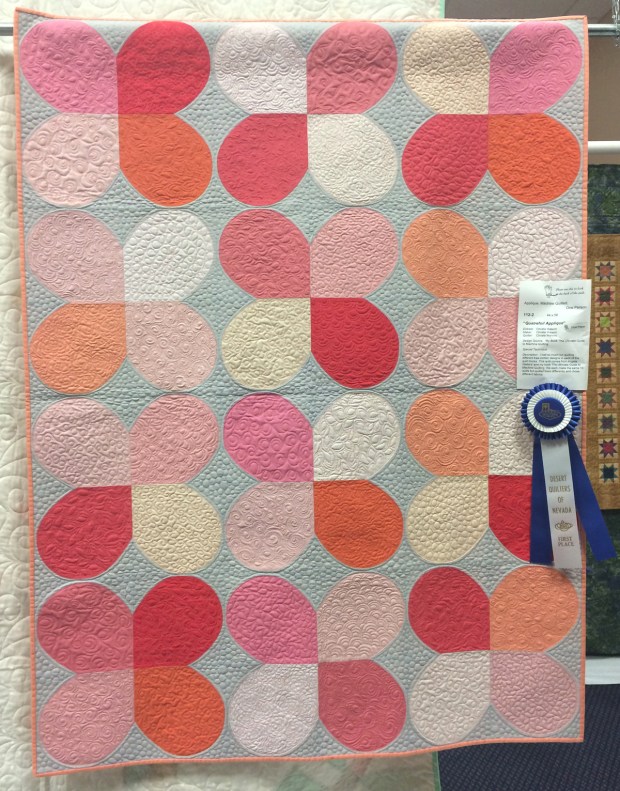
Quatrefoil Applique, 1st Place Applique

I made Quatrefoil Applique as a machine quilting sampler to show what some of my favorite quilting motifs would look like stitched out. I’m actually teaching how to make this quilt for the guild’s workshop this May, so it was cool to get a ribbon on it so the students could see it in the show. πŸ™‚

Here’s what the judge had to say about Quatrefoil Applique:

  • Piecing and applique are neatly and precisely executed
  • Excellent quilting technique and multiple patterns elevate simple piecing and applique to a higher level
  • Very good binding technique
  • Well balanced colors and values

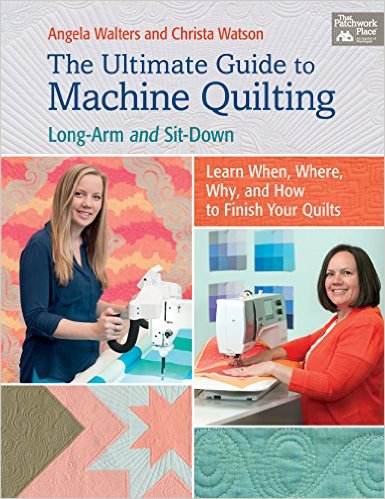
The patterns and machine quilting instructions for Quatrefoil Applique, and Swirling Butterflies shown below, are both included in the book I wrote with Angela Walters, The Ultimate Guide to Machine Quilting. I’m extra proud of that book now that some of the quilts are getting a bit more bling! (Last year another quilt from the book, Plumb Lines, got a ribbon at HMQS.)

The Ultimate Guide to Machine Quilting by Christa Watson and Angela Walters

Signed copies of this book are available from me, with both of our signatures.

Swirling Butterflies by Christa Watson

Swirling Butterflies, 2nd Place Open Category (Wholecloth, misc., etc.)

Swirling Butterflies is the only wholecloth quilt I’ve ever made, and it was pretty risky using such a high contrasting thread for the butterflies. But it also pushed me technically, and was super fun and meditative to quilt! The lighting at the show wasn’t super great, so you can see a better detailed closeup of the quilting below. I explored one of my favorite techniques – free motion improv – in the background areas of this quilt.

Detail free-motion_quilting

Free motion improv quilting detail.

Here’s what the judge had to say about Swirling Butterflies:

  • Very good binding technique
  • Excellent machine quilting with precise backtracking
  • An elegant presentation

Fractured Puzzle by Christa Watson

Fractured Puzzle, 2nd Place Modern

This is the second time Fractured Puzzle has been shown in a show and the second 2nd place ribbon! (It got a 2nd place in modern last year at MQX). I love how the red ribbon matches the quilt!

Here’s what the judge had to say about Fractured Puzzle:

  • Very good piecing technique
  • Well balanced machine tension but strive for consistently even stitch length
  • Quilting motifs fill the spaces evenly
  • Binding is securely and neatly applied
  • Strong visual impact

Fractured puzzle is my ultra modern take on the free Puzzle Box quilt pattern I offer for newsletter subscribers. I really pushed myself and went way out of the box by cutting it up and sewing it back together again. But it was a really fun exercise in “what if…??”

Puzzle Box Pattern

Remember – you can always take a pattern and make it your own!

Other Favorite Quilts from the Show

I was bummed that I had very little time to spend at the show, due to other obligations at the same time, but I was thrilled to see ribbons on many of my friends’ quilts. These two quilts really resonated with me:

Vicki Ruebel Machine Quilting

Argyle Gone Wild by Vicki Ruebel of Orchid Owl Quilts. She won 1st Place Pieced Small, AND Best Machine Quilting. I was so excited and proud of her! Click here to see more details of the quilting and making of this quilt. She does amazing work!

Viva Las Vegas by Melissa Curley

My friend Melissa Curley won 1st place Show Theme for her quilt “Lucky.” She names all of her quilts with first names which I think is pretty cool. Lucky was the name of Elvis’ character in the movie Viva Las Vegas. I love how she showed the iconic neon of Vegas, mixed with the more subtle side of “Sin City”

Machine quilting students

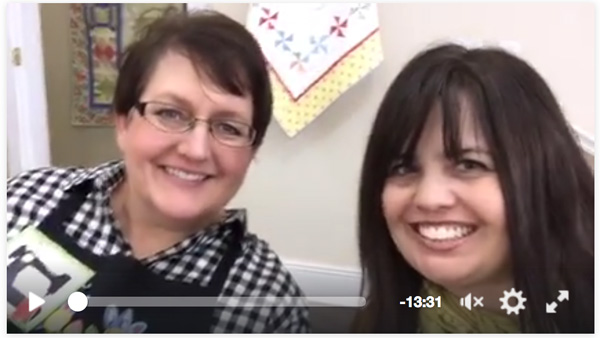
In addition to catching up with local quilting friends, it was a thrill to run into some former local students while I was demoing. Kathy and Ofelia shown above were some of my first students way back in 1999. It was fun to connect with them again at the show, and know that they are still prolific quilters! I told them thanks for being great students that allowed me to learn how to become an effective teacher. πŸ™‚

Now it’s time to go make (and enter) more quilts!

Save

Save

Save

Save

Save

Save

Save

Save

Save

Save

Save

Save

Save

Save

Craftsy Sale – All Machine Quilting Classes Under $20

I love a great sale don’t you? From now through the end of the day on Monday, March 13 (11:59 PM MDT), you can get all Craftsy classes on sale for under 20 bucks. How cool is that? I know many of you have signed up for my Craftsy class, The Quilter’s Path which is fabulous!! Thank you!! xoxo. If you enjoyed that one, here are some other quilting classes I’d highly recommend by the very talented Christina Camelli::

Machine Quilting ClassClick here to get The Secrets of Free Motion Quilting for $19.99

And

Wild quiltingClick here to get Wild Quilting for just $19.99

Of course, if you haven’t had a chance to sign up for my class yet, I’d recommend that, too!

Click here to get The Quilter’s Path for just $19.99!

Then learn how to make a quilting plan and coming both walking foot quilting with free motion motifs. Happy quilting, friends!!

Registration is Open for Panguitch Quilt Walk Festival – And I’m Teaching!

The next big show/event I’ll be teaching at is the Panguitch Quilt Walk Festival in Utah, June 7-10, 2017. I really enjoy mixing it up when I teach: traveling to guilds, shops and larger events to meet as may of you as I can!

Panguitch Quilt Walk Festival

Last year was the first time I taught there and when they asked me to return, I couldn’t turn it down because it was so much fun!

Click here to register for my classes

This year, I will be teaching three classes and and giving a trunk show. Here’s my schedule:

Modern Lanterns: Wednesday, June 7th, 2-5 PM

Modern Lanterns Quilt

We will learn how to piece this fun, modern quilt top, made from one Jelly Roll of my Kona Solids palette plus one Jelly Roll of Gray solid. Of course it will look great in other fabrics, too! It’s from a collaboration book with my publisher that releases the week of class, so my students will be the first to get their hands on a copy!

Click here to register for Modern Lanterns class.

Trunk Show: Thursday June 8, 12:15-1:45 PM

There will be trunk shows each day – Thursday through Saturday at lunchtime and they are free to all registered attendees. I’m excited to share the latest quilts I’ve been making!

free-Motion Fillers, Thursday June 8, 2-5 PM (Sold OUt)
2nd Session Has Been Added from 6-9 PM

Ultimate Guide to Machine Quilting

I’ll be teaching free-motion quilting from mine and Angela’s book The Ultimate Guide to Machine Quilting. Students can purchased signed copies of the book from me ahead of time at ChristaQuilts.bigcartel.com, or during the class.

Click here to register for the second session of Free-Motion Fillers

Walking Foot Quilting, Fri. June 9, 8:30-11:30 AM (Sold Out)
2nd Session Added Sat. June 10 8:30-11:30

Machine Quilting With Style

I’ll be teaching walking-foot quilting from my book Machine Quilting with Style. Students can purchased signed copies of the book from me ahead of time at ChristaQuilts.bigcartel.com, or during the class.

Click here to register for the second session of Walking Foot Quilting

In addition to the workshops and trunk shows there are all sorts of other fun events like a silent auction and chocolate fest, pioneer home tours, a parade and races, plus dinner theatre which reenacts the story of the famous Panguitch Quilt Walk. It’s great fun for the whole family!

Workshop with Christa Watson

Students in my Charming Chevrons workshop last year.

Click here for the complete workshop schedule. Classes are so reasonably priced that you could fly in and stay at a hotel for the price of workshops at other venues. I hope to see you there!

Three Pinwheel Quilts: From EQ Sketch to Finished Quilt

Welcome to my blog!! Click here for a free introductory quilt pattern and companion video!

For my recent Craftsy class that launched, I made the same Pinwheel quilt three different ways, with different fabrics and quilting designs. Now I’m back to share a little more up close and personal about each quilt.

Walking foot quilting from The Quilter's Path Craftsy ClassDetail of Walking Foot Quilting on Pinwheels Quilt #1.

As an EQ ambassador and artist, I pretty much do all of my quilt designing Electric Quilt.Β So I thought it would be fun to show you each of the quilts along with their original sketches that I drew.

EQ7 Drawing of Pinwheels QuiltThis is my sketch of the first pinwheels quilt shown in my online class, using 1930’s repro prints. I didn’t worry about the prints being an exact match. This sketch just gave me an idea of how busy prints would look against a dark blue background.

Pinwheels quilt, machine quiltied with a wavy grid design using a walking foot/dual feed

When it came to making the first quilt with a navy background, I actually had enough fabric to make two quilts. The version above was the finished sample shown in class. I made a second one shown below to stitch on during filming as I demonstrated one of the walking foot quilting techniques. Rather than making two of the exact same quilt, I divided the prints into two color schemes – patriotic and pastel.

Contrasting thread on pinwheels quilt. Quilted with BERNINA dual feed during Craftsy filming.

You’ll notice I quilted both quilts with a different colored thread. The patriotic one was quilted with a medium blue thread while the pastel one was quilted with a light yellow, both from my Aurifil Piece and Quilt Collection of 50 weight cotton threads.

I wanted to show the difference of what “blending” thread looks like verses “contrasting” thread. I think they both look great, and it’s a personal preference of whether you want your thread to show, or be more subtle. In either case, the quilting adds great texture to the quilt, don’t you think?

Pink Pinwheels quilt designed in EQ7

For the second quilt shown in class, I chose a pretty pink and white color scheme, using the default solids in the EQ palette. Many times I’ll design my quilt in solids and then add prints later. But more often than not, I really like the solid version, too! Again, I didn’t worry about the colors being an exact match – using a variety of pinks gave me the scrappy look I was going for.

You’ll notice I left my lines in the sketch this time so you can see how the blocks fit together. One of the options I love in EQ is being able to turn the seam lines off and on, depending on whether or not I want to view the quilt design that way.

Pink quilt with allover loopy machine quilting. From The Quilter's Path Craftsy class by Christa Watson.

Here’s the finished quilt using pink & white fabrics. For this quilt, I demonstrate how to quilt an allover free-motion design using the blocks as a guide to travel around the quilt. I used some of the leftover precut strips for the binding to add a touch of whimsy!

EQ7 sketch of teal/gray pinwheel quilt by Christa Watson

Finally, for the teal/gray version it was easy to swap out the colors from the original design. I will usually draw one design in one colorway and then try out lots of options until I find something I’m happy with. Sometimes I will start with a specific color scheme or fabric collection in mind and design around it. Other times, I’ll come up with my design and colors and then find fabrics to match.

Either way, my all-time favorite function in EQ is being able to import colors and fabric swatches if needed, so I know what the quilt will look like before I start! I prefer to do all of my thinking and planning ahead of time so that all I have to do is enjoy stitching once it’s time to actually make the quilt!

Finished Teal Pinwheels quilt

As you can see, the final quilt is more teal and less green than the sketch but it was close enough for what I wanted! I used a precut strip roll of blue and teal colors for the blocks with grey for the background and binding.

For this third version, I combined both walking foot quilting with free motion to create combined custom quilting. The trick is planning how to make your way around the quilt, also known as “finding your path!” In between each of the “real” quilts, I demonstrate many more quilting motifs on quilt blocks so you can see how to quilt around the seams.

When it came time to creating the Pinwheels pattern (included as a bonus freebie in the class materials), using EQ made it easy for me to isolate parts of the design to create the quilt pattern.

Free Pattern included in The Quilter's Path Craftsy Class by Christa Watson

Above is a sneak peek of one of the pattern pages using my drawings as stepouts. I’d be lost without it! Machine quilting is definitely my favorite part of making a quilt, so I’m glad I have good tools that help me design faster so there’s more time for sewing!

Christa Watson's Craftsy Class: The Quilter's Path

Learn how to quilt these quilts and more in The Quilter’s Path: Plan It, Stitch It, Quilt It.

Save

Save

Save

Save

Save

Save

Save

Save

Save

Save

Save

Save

Save

Save

Save

Save

Answers to Your Machine Quilting Challenges – Part 6

Welcome to part 6, the final post where I’ve been offering suggestions to some of my readers’ most challenging machine quilting issues. Get more tips by reading part 1, part 2, part 3, part 4 and part 5.

Craftsy Filming Behind the Scenes

On set during the filming of my Crafty class: The Quilter’s Path where I show you how to quilt many of the quilting motifs I write about on my blog and in my books and patterns!

Problem: I have a hard time getting ideas from my head into reality.
My suggestion: I used to have this same problem until I started creating a machine quilting plan for each quilt I make. I take a picture or make a printout of my quilt top and then I figure out the quilting path I need to take to work my way around the quilt. Below is the plan I made for my Positive Direction quilt pattern.

Positive Direction Machine Quilting Plan

Problem: I’m not sure which batting to use.
My suggestion: Try out a different batting for the next several quilts and see how each performs. Take note of the shrinkage, softness and what the quilting stitches look like. Some battings like cotton, will make the quilting appear more flat because it doesn’t have a lot of loft. Others, like polyester or wool will give a better stitch definition because they are more lofty, or puffy. My favorites are cotton, wool and soy.

Problem: Too much time passes between quilt projects and I feel like I’m losing my skills.
My suggestion: machine quilting is like learning a musical instrument: the more you practice, the more you’ll be able to “play.” If you are in between projects, keep a stack of small scraps of fabric and batting to stitch on for a few minutes each day. Just quilting for 5 min each a couple times a week will keep your quilting muscles in shape!

Machine Quilting Practice

Problem: I get discouraged whenever I compare myself to other quilters’ skills.
My suggestion:
Anyone who has just started their quilting journey will definitely go through this. It’s one thing to be inspired and another to feel inadequate. Just remember that it takes a lot of time and practice to get good at anything. I always encourage newer quilters to embrace walking foot quilting first because it’s pretty much fool-proof. Then, move onto tackling free-motion when you are more comfortable.

Walking Foot Quilting

I always teach walking foot quilting before moving onto free-motion. It’s virtually goof-proof!

Problem: How do I get out of the “stipple” rut?
My suggestion: I recommend collecting as many books as you can about machine quilting, taking a lot of classes, and seeing quilts up close and personal. Start sketching quilting motifs that appeal to you and try them on your quilts. If you have a toolbox full of 4-5 designs you really like, you can mix them up and quilt them in different areas of your quilt!

Problem: I want to try ruler-work quilting but I’m not even sure where to start.
My suggestion:
enroll in my friend Amy Johnson’s Craftsy classes on ruler work. She has two of them and pretty much covers all the basics. It’s amazing what you can do with specialty rulers on your domestic machine.

Quilting with Rulers on Your Home Sewing Machine

Click here to learn more about ruler work and see a class preview.

Problem: I don’t want to practice, because I hate wasting fabric on “learning.”
My suggestion: I don’t think “learning” is ever a waste. πŸ™‚ However if you want to make something practical out of your practice sandwiches, create a stitch journal. Try out different quilting designs on similar sized practice pieces. Write on each which thread you used and other details like stitch length, batting etc. Then get some grommets or a key chain and punch a hole in the corners of each sample to link them together. Whenever you are stumped on an idea, refer to your journal for inspiration!

Problem: I’m not coordinated when it comes to machine quilting. It feels awkward.
My suggestion: when I started quilting it felt weird too, and I still can’t get the hang of longarm quilting (which is why I stick to a sit-down machine). Try to position your quilt and yourself a few different ways to see if you can get in a comfortable position. Quilting is a skill that requires a different muscle movement than anything else so it can take awhile for it to feel more natural. Don’t give up! Also try different hand positions when quilting. Try keeping your hands flat, raised, or gripping the edge of the quilt to see which feels more comfortable.

All Craftsy Classes on SaleClick here to see which classes are on sale, including mine!

I hope you’ve enjoyed these tips! If you haven’t already done so, be sure and enroll in my Craftsy Class, The Quilter’s Path. All brand new Craftsy classes are on sale for $19.99 or less this weekend only! Sale runs from today through Sunday, so stock up on this massive sale!!

Machine Quilting Tips

Save

Save

Save

Save

Save

Save

Save

Save

Save

Save

Save

Save

Save

Save

Save

Save

Save

Save

Save

Save

Save

Come See Me at QuiltCon in The Electric Quilt Company’s Booth!

QuiltCon, the 4th annual modern quilt show put on by The Modern Quilt Guild is coming soon! It will be held in Savannah, Georgia from February 23-26, 2017 and I can’t wait! I’ll be teaching 5 classes and giving a lecture which are all sold out! However, if you are attending and didn’t make it into one of my classes, I’ll be doing a book signing and meet ‘n greet in The Electric Quilt Company‘s booth #337 on Friday, February 24, from 12-1 PM.

Amy Friend and Christa Watson at QuiltCon 2017

Following mine, you’ll get a chance to meet another EQ7 ambassador, Amy Friend who just released her second book! She’ll be in the booth on the same day from 1:30-2:30. If for some reason you won’t be there that day, you can still stop by the booth see some of our quilts “in the cloth.” They’ll be on display in booth #337 for the entire show.

During my book signing, I’ll have copies of both of my books available for purchase and I’ll be happy to sign anything else you would like as well (a quilt, my patterns, your arm…. the possibilities are endless!!) And you can even just stop by and chat for a few minutes if you want – it’s always fun to meet fellow quilt enthusiasts!!

Christa Quilts and EQ at QuiltCon 2017

Both Amy and I love to design in EQ7 because we can see what our finished projects will look like before we begin cutting! I designed 11 of the 12 quilts from Machine Quilting with Style in EQ7. (The 12th was actually designed by my husband on his iPad). When you stop by the booth at QuiltCon, you’ll get a chance to see my actual computerized renderings in the booth! I think it’s fun to see them side by side next to an image of the real quilt. In fact, my favorite feature of the software is being able to import swatches of any fabric I want so that I can see audition different possibilities ahead of time.

I have more “extra” events scheduled, so stay tuned for details and I hope to see you there!

Save

Save

Save

Save

Save

Save

Save

Save

Save

Answers to Your Machine Quilting Challenges – Part 5

Part 5 of Answers to Your Machine Quilting Challenges continues with more fun quilting problems to solve! Check out part 1, part 2,Β  part 3Β  and part 4 for more solutions!

Christa Quilts

Problem: Sometimes I get bored quilting the same thing over and over.
My suggestion: Break down the quilting into different designs and quilt them in different areas of the quilt. Also be sure to listen to something fun while you quilt! I love listening to audio books or quilting podcasts while I sew. It makes the time pass quickly and I feel like I’m being super productive at the same time!

Problem: My stitches vary in size.
My suggestion: You know what? So do mine, but that’s totally okay. When you step away, you won’t even notice. The only way to get perfectly sized stitches is with a stitch regulator and I know that’s not available on all machines, so I usually don’t even use one on my own work. Stitch length consistency will get better over time, but I wouldn’tΒ  stress about it too much. πŸ™‚

Problem: How do I quilt negative space other than with straight lines?
My suggestion: I show several different geometric variations in my “Plumb Lines” quilt from The Ultimate Guide to Machine Quilting. I quilted this quilt to answer that problem. Although straight lines are awesome, I wanted to give free-motion quilters some modern alternatives for straight-line quilting. Try out linear designs such as zig-zags and or other cool geometric shapes. Have fun experimenting or combine them together for even more ideas!

modern machine quilting

Detail of geometric/linear free-motion designs that you can quilt in negative space.

Problem: I don’t feel like I’m in control.
My suggestion: when begining your free-motion quilting adventures, embrace that fact that it will take awhile to get the hang of it. To put it more bluntly, yes, you are going to suck at it for awhile and that’s okay! Just like it took you a while to learn how to write, so too is machine quilting a brand new skill. Just be patient and keep at it and it will get better, I promise! One suggestion I offer my students is to make up 7 small practice pieces. Quilt one a day for a week and you’ll see a noticeable improvement!

Problem: How do I manage dealing with a bulky quilt?
My suggestion: scrunch and smoosh the quilt out of the way as much as possible while you quilt. There’s a brand new apparatus out there called “The Weightless Quilter” which I just got and can’t wait to try! It basically holds the quilt up of the table for you while you quilt.

weightlessquilter

Click here to see a video of the Weightless Quilter in action!

Problem: My machine is too light.
Solution: My guess is that this is more of a problem with the table than your machine. I suggest using the largest table you can, and embedding your machine into the table so it’s flush with the top.Β  If you don’t have a table you like, check out the affordable sewing tables that Leah Day sells. You can always add extra tables surrounding it to make your work area larger.

I hope you are enjoying these suggestions. I’ve got a couple weeks’ more worth of questions to go – so I’ll keep going until I answer them all. πŸ™‚

Save

Save

Save

Save

Save

Save

Answers to Your Machine Quilting Challenges – part 4

Welcome to part 4 of my series that helps you solve your most challenging machine quilting issues.Β  You can read part 1, part 2 and part 3 for more helpful advice.

Christa Watson shares tips and advice for domestic machine quilting

Publicity image for my Craftsy Class: The Quilter’s Path where I share more quilting tips!

Problem: I have health issues that don’t allow me to quilt as much as IΒ  would like.
My suggestion:
I totally understand! I recently had a bad fall and injured my left arm, so I haven’t been able to touch a machine in weeks. When my health is not up to par, I try to do other things that don’t wear me out such as playing with new designs on the computer, or getting inspiration from reading quilting books and magazines.

When I’m able to sew but feel like I don’t have the time or energy to do much, I set a timer for 15 minutes and get right to the machine. Even sewing one or two seams can give me a really satisfying feeling. Finally, if you can’t quite do the things you used to, that’s okay. See what you are able to do and don’t be timid about asking for help from others.

Problem: I do not like basting and always get puckers.
My suggestion:
Basting is definitely the least fun part of the process. It’s taken me many years to figure out how to baste without getting puckers. The key is to get all 3 layers of the quilt really flat before putting them together, and taking time to smooth them out as you layer them.Β  I prefer to use 505 basting spray and then iron the whole quilt after basting to smooth it out and set the glue. I’ve also had success with pin basting, too.

Tutorials on quilt basting for machine quilting

Students basting in a recent class I taught. Use a long ruler to help smooth out the quilt.

Click here to find several different tutorials I’ve written about the basting process. I’m sure one will work great for you! If all else fails, you can actually pay a longarmer to quilt long basting stitches on your quilt and then skip the process all together!

Problem: I don’t know how to use my new fancy machine.
My suggestion: I would say that’s a nice problem to have, LOL!! Whenever I teach newer quilters, I always recommend that they get acquainted with their machines right away. I know it’s kind of boring to do, but reading through the owner’s manual is really the best thing to do to get to know your machine. If you purchased it from a dealer, they should offer new owner’s classes for free. Another tip is to google, “how do I _______ on my _______ (make and model) machine” and fill in the blanks. I’m sure you’ll find a wealth of videos and tutorials to help you out!

Problem: I need help making pretty spirals (or other designs).
My suggestion:
Practice, practice, practice! It may not make perfect, but practice will make progress. Part of my teaching method is to have students draw out their motifs onto paper ahead of time to learn how the shapes are created.

Practice Drawing for free motion quilting

My drawings don’t look nearly as good as my quilting, but they are important to practice!

One thing to keep in mind is that most people will draw designs from left to right (if they are right handed), but quilting is usually done from right to left (starting on the right edge of the quilt). So keep that in mind and draw in many directions to get comfortable with the movement.

Problem: How do I get over my lack of confidence and fear of failure?
My suggestion: Just remember that you are learning a brand new skill and it takes time to learn a new muscle movement. Diving in and getting started is the best way to tackle any problem. If you are a brand new quilter, start with walking foot quilting first, and the move on to free-motion when you are most comfortable. Then remember this advice: the best way to hide imperfect stitches is with more imperfect stitches! One line of quilting will stand out like a sore thumb. But surround that line of quilting with more (imperfect) lines and all of a sudden you notice the overall texture, not the individual stitches.

Problem: I don’t know which thread to use for machine quilting.
My suggestion:
Grab my Piece and Quilt Collection from Aurifil! It’s 50 weight low-lint cotton that is perfect for sewing and machine quilting, as the name implies. The best thing about only using one type/brand of thread for everything I do is that I can stock up on tons of colors, without breaking the bank. Plus, any leftover bobbins from machine quilting can be used when piecing my next quilt!

Piece and Quilt Aurifil thread by Christa Watson

My Colors collection includes every color of the rainbow. The Neutrals group is versatile and includes way more than just black, white and gray. These two collections will provide blending thread colors for virtually any quilt you are going to make!

Click here to see which colors are included in each group.

Piece and Quilt Neutrals Aurifil Thread from Christa Quilts

Ask for my threads at your favorite quilt shop, or purchase online from The Precut Store.

Problem: How do I get an even stitch length?
My suggestion: That’s one of those things that will develop over time. When you are quilting with a walking foot (or dual feed system) the stitch length setting on your machine will work with the feed dogs to provide even stitches. Some newer machines with free-motion quilting include an option to use a stitch regulator. I learned the old fashioned way on a machine without a regulator and the key is to balance the rhythm of your hands moving the quilt through the machine with the speed at which you are quilting. It’s more of an art than a science and it’s like learning how to drive a manual car. But if you practice for 10 minutes a day, every day for a week, you’ll definitely see some improvement!

I hope you have enjoyed this week’s trouble shooting session. There’s still a whole bunch of problems to get through, so keep checking back each week for more! If you enjoy these tips and advice, don’t forget to pick up a copy of my machine quilting books that will help you put this advice into practice on real quilts!

Click here to purchase signed copies of my books, Machine Quilting with Style
and The Ultimate Guide to Machine Quilting.

Christa Watson Books

You can also find them on Amazon, from my publisher Martingale/That Patchwork place which offers a free e-copy with every print copy purchased, or from you favorite local quilt shop!

Save

Save

Save

Save

Save

Save

Save

See What it’s Like to Take a Class with Me

This past weekend, I had the most amazing time lecturing and teaching at My Girlfriend’s Quilt Shoppe in Logan, Utah. Being from the hot Las Vegas desert, it was also quite a treat to be there in the snowy winter where everything was blanketed in a pristine covering of white.

My Girlfriend's Quilt Shoppe in Logan, Utah

The Shoppe is large and beautiful, both inside and out!

I gave a trunk show of my current work on Friday night and then held two separate half day machine quilting classes on Saturday. It’s always so fulfilling when nervous students turn into confident quilters by the end of the day!

Christa's Quilts on display at My Girlfriend's Quilt Shoppe

A display of my quilts following the evening lecture.

During the day, owner Kris Thurgood shot a couple of videos to share on the shop’s Facebook page. You can click the links below to view them. If you haven’t yet taken a class with me, this will give you a little flavor of a typical class. Think of it as a mini class freebie. πŸ™‚

Facebook live with Christa Watson at My Girflriend's Quilt ShoppeClick here or above to view the first FacebookΒ  video, about 13 minutes long.

Whenever I teach, I like to remind students that it’s okay to be “perfectly imperfect” with their quilting. After all, the beauty of “hand-crafted” quilting as I like to call it, is that you can see the hand of the maker in your work so you’ll know that it was made by a person, rather than by a computer. Once I give permission that it’s okay to make mistakes, the students usually relax and are able to make much prettier stitches.

My favorite tip that I like to share is that the easiest way to hide imperfect stitches is with more imperfect stitches. That’s why I prefer to quilt my quilts so densely – to hide any mistakes!!

Facebook live with Christa Watson at My Girflriend's Quilt ShoppeClick here or above to view the second FacebookΒ  video, about 16 minutes long.

It was such a fantastic weekend, and it reminds me why I do what I do. I thank my lucky stars each day that I get to have the best job in the world!

If you like what you see, be sure and check out my Craftsy class: The Quilter’s Path for more machine quilting instruction via video! Click the image below for a quick 1 minute preview:

Christa's Craftsy Class PreviewClick here to see where I’m headed next!

Save

Save

Save

Save

Save

Save

Save

Save

Save

Save

Save

Save

The BERNINA Ruler Foot is Here!

I’m so excited!! At long last I have my hands on my very own ruler foot for my BERNINA 770 QE. It’s the #72 foot, called the adjustable ruler foot for use with the domestic machines. (It only fits on the newer 3-digit BERNINAs, not the older 4-digit models.)

adjustablerulerfoot

What it does is allow you to quilt along the edge of thick specialty rulers to achieve straight lines using free-motion techniques and smooth curves without marking. Until recently, this was a technique only longarmers could do.

ruler-work-accents-in-design

I own 2 ruler work rulers, from Accents in Design.

Now before you start asking me tons of questions, realize that I’m just starting my adventures in ruler work, so I won’t have those answers for you quite yet. I’ve only quilted one quilt so far using the rulers. I used it in combination with walking-foot/dual feed quilting in the center of Fractured, from mine and Angela Walters’ book, The Ultimate Guide to Machine Quilting.

Fractured_Squares_Christa_detail

I quilted the purple section of Fractured using ruler work and the BERNINA dual feed.

As a BERNINA ambassador, I’ll be getting up to speed with ruler work so that I can begin teaching my fellow BERNINA owners how to do it, but it will take some to figure out my methods and works best.

In the meantime, I’ve given myself some homework. I’ll be re-watching my friend Amy Johnson’s two Craftsy classes on ruler work. Click the links below to get my special Craftsy instructor discount when you purchase each class for yourself.

Click here to save 25% off Quilting With Rulers on a Home Machine

quiltingwithrulersonahomemachine_titlecard_cid5270
Click here to save 25% off Creative Quilting with Rulers: More Techniques & Motifs

creativequiltingwithrulersmoretechniquesandmotifs_titlecard_cid10616

I’m excited about the possibilities of this new technique and I’ll keep you posted on my progress!

If you haven’t yet picked up my Craftsy class, click here to save 50% on The Quilter’s Path. Watching all 3 classes should keep you busy for awhile! πŸ™‚