Pearl Pendants PDF Pattern Now Available for Purchase

Great news! While I’m in the throws of quilt market prep for next week, I was able to finalize the Pearl Pendants quilt pattern that my good friend Heather Black from Quilt-achusetts and I collaborated on. Heather designed and made this stunning quilt to showcase Fandangle in my booth at quilt market next week, and we both co-wrote the pattern.

Click here to purchase and instantly download the PDF pattern for Pearl Pendants

Click here to pre-order the print version (ships on or before June 1.)

Pearl Pendants pattern by Heather Black and Christa Quilts

I like to offer my patterns in both print and PDF versions because I know that some folks like to have instant access while others like to work with the physical pattern.

Check out a detail of the beautiful quilting the Heather did:

Quilting Detail for Pearl Pendants

She quilted a combination of straight lines, plus a spirograph/floral motif in each of the blocks. Didn’t she do such a stunning job?? The quilt is made from 20 fat quarters of Fandangle fabric plus background, but of course it would look great in other fabrics, too!

I’ll share  more pics of this quilt as soon as I get back from quilt market, so stay tuned!!

Writing Book 4 – Part 1: The Book Proposal

Guess what? I’ll soon be writing another machine quilting book! I thought it would be fun to take you behind the scenes of book creation from start to finish because I get a lot of questions about what it takes to write one. I figured the best way to answer that was to document my process in real time as it happens. My only caveat is you’ll have to be patient as I blog about my journey because it can take a long time from concept to publish date. But sharing this journey with you in real time will definitely make the months (and years) pass more quickly.
Books by Christa Watson

The 3 books I’ve written will be joined by a 4th (but not till 2020)!!

The first step is to submit a very thorough book proposal. Book publishers have their proposal submission forms on their website and most are very similar: they want to know the gist of the book, what makes it special or different, why it will sell (and how you plan to market it) along with what you envision the book to look like.

If it’s a project based book, they’ll want to see sketches of all the proposed projects including the fabrics you plan to use. They may request to see one or more finished quilts and a sample chapter from the book so they know that you can write and express yourself clearly.

They’ll also want a timeline of how long it will take you to complete the manuscript and make all the projects so they can assign it a production team and release date. FYI, most books take about 1 1/2 to 2 years to produce from the initial spark of an idea to publication.

Before a publisher is ready to give the thumbs up, they’ll do a thorough review, usually with an acquisitions committee. They’ll conduct a cost projection & market analysis to make sure that producing the book will be profitable. A publisher spends a lot of time and resources on any one book including a whole team of people to copy edit, tech edit, photograph, lay out, illustrate, and of course market it. To get an idea, open up any book you have from a major publisher and count the list of names that were involved in producing it.

Editing Machine Quilting with Style

Editing my first book, Machine Quilting with Style, back in 2015

The proposal for my first book, Machine Quilting with Style, took about 5 months to solidify my idea and then another 4 months to actually write the proposal which was over 40 pages in length. I first thought about the idea in February of 2013 after returning home from QuiltCon but didn’t submit the proposal until November of 2013. I completed the quilts and manuscript in August of 2014, and it was published in September of 2015, nearly 2 years later after I proposed it.

My current proposal was about 30 pages and took me 3 months to thoroughly think through my ideas – then another month to design the content and create the structure, outline and table of contents. Even after writing multiple books, getting the green light for the next one is never a guarantee and I had to complete a thorough submission each time.

Angela Walters and Christa Watson at Quilt Market

Promoting my 2nd book The Ultimate Guide to Machine Quilting with Angela Walters at Quilt Market in 2016. (Check out long my hair grew out in a year from writing to publication!)

I submitted the proposal for my 4th book to Martingale/That Patchwork Place in early April of this year, and just received the unofficial word that they want to go forward with my idea, after a bit of tweaking. (I waited to start writing this series in the off chance that they weren’t interested because then there’d be nothing to document, LOL!!)

Once my publisher received my submission, they discussed it at their monthly submission meeting, and came back with a “yes we want to publish it, but let’s tweak it a bit more before we give the official approval.” I’m always open to suggestions, and one of the keys to getting your book successfully published is flexibility.

I originally had two ideas for book #4 and pre-pitched them on both before I submitted the complete proposal, to make sure they were interested in seeing them. Although I incorporated both ideas into the current proposal, I emphasized that I wanted to go in one direction with it more than the other. However, my publisher felt that the second direction I had offered had a better chance of being successful, so I’m heeding their advice. After all, they know the market and their customers better than I do!

Box of Books - Piece and Quilt with Precuts by Christa Watson

It was such an exciting day when copies of my 3rd book, Piece and Quilt with Precuts arrived!

So the next step is to edit the proposal by emphasizing idea 2 over idea 1 and present the changes to them in person when we meet up at Spring Quilt Market. Because we are working as a team here, they’ll help me craft it in such a way that it will get the official approval when the committee meets again next month. We just need to get the final concept that we both agreed on written down into words and graphics that will illustrate exactly what the book will be about.

We also discussed timing. At first I thought I wanted it to come out in fall of 2019 but in order to do that, everything would have to be in turned in this August (of 2018) and with my current travel schedule, there’s no way I could manage that. So we are tentatively looking at Spring of 2020 which will give me the time I need to actually get everything done. Although that seems like a long way off from now, it will be here before we know it!!

Although I won’t really be able to discuss the specific content of the book, I’ll gladly take you along my journey as I write the manuscript and create the content. I’ll write another update once I get the official word, so stay tuned!

The Making of Surplus Strips Part 1 – the Blocks

I sure have enjoyed documenting more of my real-time progress as I create quilts to help promote my patterns, books and fabric. It’s so much more enjoyable to write about my process as I go, rather than trying to recapture the excitement months later!

Surplus Strips Quilt Pattern by Christa Watson

Click here to pre-order my Surplus Strips Quilt Pattern.

I’m currently making two versions of Surplus Strips – both in warm and cool colorways of my newest fabric line, Fandangle, which will be shown at Spring Quilt Market in Portland, Oregon, May 18-20. The pattern cover art above is shown using my digitally created images from EQ8 as a placeholder until the quilts are finished and photographed.

Once that’s done, I’ll send it off to the printer and release a PDF pattern, too. For now, you are welcome to preorder the print version which will ship on or before June 1, 2018.

Fandangle Fabrics Cool Colorway

Fandangle Fabric in the Cool Colorway

Although my timeline is tight, I’m still going through the regular process I use to create a well-made quilt. I like to prewash and starch all of my fabrics for two reasons: (1) it gets rid of the excess dye so there’s no chance of bleeding or ruining the quilt and (2) the starch makes the fabric stiffer so there’s less stretch while piecing.

My number 1 starching tip is to spray starch on one side of the fabric, then flip it over and iron the other side. Then repeat – starch the side you just ironed, flip it over again and press from the other side. The prevents the iron from burning the starch so you don’t get flakes! Starching and pressing both sides makes the fabric more crisp so it’s easier to work with. Also – I just use cheap starch from the grocery store and I’ve never had a problem with it.

Fandangle Fabrics Warm Colorway

Fandangle Fabric in the Warm Colorway

My Surplus Strips pattern is written for either precut 2 1/2″ strips or yardage. You can go super scrappy with a single jellyroll + background, or do a color blocked quilt like I’m doing. For yardage, It takes about 1/3 yard of 9 different fabrics plus 4 3/4 yards background + binding.

Surplus Strips Quilt Warm Colorway of Fandangle

I like stacking my pieces so they look pretty!

I paired up the darker gray confetti crosshatch print with the warm colorway of Fandangle, and the lighter gray with the cool colorway. If you are interested in using the same fabrics as me, you can preorder 1/2 yard bundles of Fandangle + 5 yards of either gray and you’ll be set, with a little leftover fabric.

Seams Pressed Open

Pressing seams open ensures flat blocks, and a flat quilt top.

I started cutting out the fabrics for both quilts while I was away on my last teaching trip. When I returned home, I finished cutting all of the pieces for the warm colorway and made all of the blocks in about two days. I used a shorter stitch length for piecing (1.8 instead of the default 2.0) and pressed all of my seams open (with a dry iron, no steam). This will allow the blocks to lie flat for domestic machine quilting.

Surplus Strips Quilt Block Warm Colorway of Fandangle

Surplus Strips Blocks in the Warm Colorway of Fandangle

After piecing the blocks in the warm colorway, I jumped into making the blocks in the cool colorway. I like making two quilts at a time, so I can assembly line the process as much as possible.

Surplus Strips Fandangle Fabric Cool

Units are cut and stacked and ready to sew!

Here are a couple more piecing tips that make the blocks go together smoothly and stay square: when sewing, I pieced with the gray units on top to ensure that I switched sewing directions each time I joined the units. When you join two seams in opposite directions, it helps prevent block distortion. It’s not a huge deal on smaller units, but if you are sewing long strips together, it can be more noticeable.

Lining up block seams

Step 1 for proper alignment – match up the fabric seams.

Also, in order to get the top and bottom of each plus block to line up correctly, I placed the top unit right sides together on top of the partially sewn block to see exactly where things needed to line up to keep the seams in alignment. The pressed open seams really help me see this part.

Aligning units for quilt blocks

Step 2 for proper alignment – fold back to make sure lines are straight.

Then, I folded it back up partially to make sure it’s in the proper position before sewing. I didn’t actually need to use any pins because the blocks were small enough and I used my fingers to keep the edges lined up at all times.

Surplus Strips Blocks Fandangle Fabric cool colorway

Click here to preorder bundles of Fandangle fabric by colorway + background fabric.
Click here to preorder the Surplus Strips quilt Pattern.

The blocks went together even faster this time around and I love the color distribution! Now it’s time to sew the blocks together and finish up the quilt top. I’ll make both tops and then have a little basting party to make that chore a little less painful, lol!! I’ll be using my spray basting method that you can read about here (wall basting) or here (table basting).

Stay tuned for the next update!

Spray Basting Tutorial – Using a Table

Recently I shared a tutorial on spray basting using a design wall. Today’s tutorial shows how to modify the spray basting process using a table instead. Note that my pictures are all taken outside but once the quilt layers have been sprayed outdoors,  you can assemble the quilt inside using any size table.

Improv Squares Quilt Using Modern Marks

Step 1 – Spray the back side of the backing and quilt top

Be sure to spray the layers outside, or in a well ventilated area. If you have sensitivity to chemicals, I recommend wearing a dust mask. I use 505 basting spray and a large sheet to protect the surface I’m spraying on.

I’m using a lightweight folding plastic table, so it’s easy to move. I just store it out of the way in the garage when I’m not using it.

Spray Basting

The table you are using doesn’t have to be bigger than the quilt. When I’m spraying, I cover the center section of the quilt first, and then the sides. For this step, you don’t even need a table; you can lay out a sheet or dropcloth on the ground or wherever you have room.

I used a small park near my home so that I’d have plenty of room, and also nice scenery for photography!

Hold the can an arm’s length away and spray evenly and generously. Make sure to get good coverage on the quilt. To ensure the can is spraying consistently and doesn’t get clogged, spray a few squirts on your dropcloth before applying it to the quilt.

Spray Baste

Although I pressed the top and backing separately before I began, you can see some fold lines on both layers. But not to worry – this gets pressed out at the end. If you spray the top and backing separately, it uses less spray than spraying the batting, and it’s easier to manage.

Once both layers have been sprayed, you can fold them up and bring them inside to finish the assembly process (or stay outside and set the layers aside like I’m showing here.) The layers will be sticky, but not stuck, and you don’t have to assemble them right away – the adhesive doesn’t dry out.

Remove the drop cloth or sheet from the table and then lay out the backing wrong side up.

Spray Baste

Step 2 – Add the batting

I like to fold the batting in half long ways so that I can put the fold line roughly in the center of the backing. You can see in the picture below that it’s not exactly even and that’s ok. As long as the batting and backing are bigger than the quilt top, you’ll have some wiggle room so that you don’t have to line things up perfectly.

In fact, my batting is actually a little longer than the backing so it’s easy enough to trim away the excess. Working on a table is great because it won’t hurt your back like the floor can.

Spray Baste

Open up the batting so you have coverage on all sides. Even if the sides hang down to the ground – that’s okay. The excess will get trimmed away.

Spend time smoothing out the backing. You can lift and reposition it if needed. Work out any wrinkles or bubbles, using your hands and a long acrylic ruler.

I’m using Hobbs cotton batting for this quilt. I like natural fiber battings because they cling to the fabric and they aren’t slippery. (Polyester has a tendency to slip while you are shoving the quilt through the machine which can cause puckers.)

Spray Baste

Once you smooth out the center section, adjust the layers so that you can smooth out the sides, too. Take your time here to really get it nice and flat. Smoothing out the layers also smashes them together so that they stick together better and don’t shift.

You can also iron your batting before you baste to get it nice and flat. I use a spray bottle and a dry iron. With cotton batting, you can put the iron directly on the batting. With more delicate battings like wool, you can cover the area you press with a piece of fabric. Be sure to use a dry iron so that it doesn’t shrink up the batting.

Spray Baste

Step 3 – Add the Quilt Top

Add the top in the same way that you added the batting – get it roughly in the center and make sure there’s coverage all the way around the edges. You can see it’s still a bit wrinkly from handling and moving it around. That’s okay – you’ll iron it again at the end.

Spray Baste

Trim away the excess batting and backing so you’ll have less bulk to deal with. If you have a super large quilt that touches the ground, you can always place two tables side by side to give you more room to work.

I use specialty batting scissors – they cut through the layers like butter, and trimming goes super fast! I only leave about an inch or two on all sides when I trim. That way it’s less likely that I’ll flip the quilt under itself and accidentally quilt through the extra layers!!

Spray Baste

Step 4 – Smooth Out the Layers

Smoothing out each layer as you add it is such a critical step. When your quilt sandwich is flat and smooth, it makes the machine quilting process so much easier! The reason I love using basting spray is that every inch of the quilt is stuck to every other inch. This prevents shifting of the quilt and greatly reduces the chances that you’ll get a tuck or pucker while quilting.

Spray Baste

Use the long ruler again to smooth out the center of the quilt. You can also use it to help line up the pieced seams and nudge things back into place if needed. It’s almost like pre-blocking the quilt before you quilt it.

Spray Baste

Once you’ve smoothed out the center, you can work on the edges. Roll up the excess so that it doesn’t drag on the ground as you shift the quilt around.

It usually takes me a good 20 minutes to smooth out each layer of the quilt, but it’s time well spent!

Spray Baste

Step 5 – Press the Basted Quilt on Both Sides

The secret to good spray basting is to press the quilt once it’s layered. The heat of the iron sets the glue and it smooshes the quilt together so it’s nice and flat. I press the back side first, working out any excess bubbles or wrinkles. Then I flip it over and press the front.

I use a big board which fits on top of my ironing board, giving me more room to work.

Spray Baste

I’ve developed this basting method over the last few years and I can honestly say it makes a huge difference in how my quilts turn out. Just remember, you are putting a lot of wear and tear on the quilt when you scrunch and smoosh it through the opening of your machine. But with this method, nothing shifts and it’s easy to just focus on one area of the quilt at a time.

Feel free to pin and share this tutorial with your friends. My goal is to get more people quilting their own quilts while enjoying the process from start to finish!

QuiltCon 2018 – It Was Amazing!

I just finished a whirlwind 3 weeks of fun travel – to QuiltCon in California, Craftsy in Colorado and teaching in Oregon. Now that it’s taken me a week to recover from my adventures I’m finally ready to share my QuiltCon experience with you. It was, in a word, Amazing!!

So far, I’ve been to every QuiltCon since it began in 2013, and I’ve been super lucky to get at least one quilt juried into the show each year. (This year I had two – see below.) I was fortunate to be invited to teach at two of the shows so far (2016 & 2017) and QuiltCon is one show I’ll continue to attend each year because it’s just THAT awesome!!

Christa and Laurie from Modern Quilts Unlimited

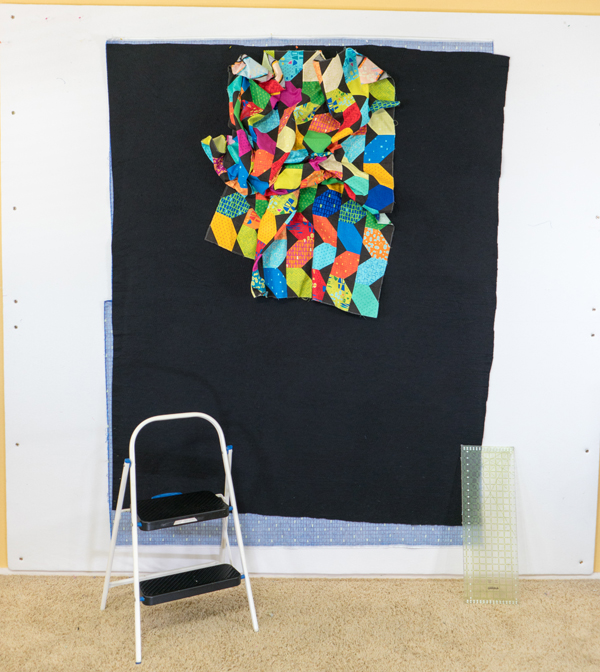
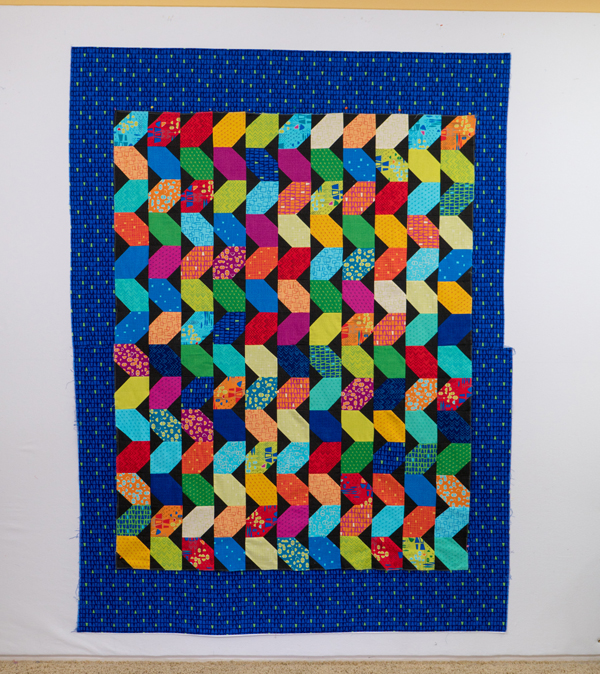
Color Weave was one of my quilts juried into QuiltCon for 2018. It’s made from 3 colors of precut strips with simple pieced blocks. The color placement creates a woven illusion.

Here I’m hamming it up with Modern Quilts Unlimited editor, Laurie Baker. It was fun to have my quilt Color Weave hang and get judged in the show. The pattern is from issue 21 of MQU. (You can even click here to download a bonus tutorial on how I did the quilting for this quilt.)

Judges comments for this quilt:

  • Woven illusion is successful
  • Treatment of pattern at top and left give breathing space and add interest
  • Quilting compliments patchwork perfectly

Color Weave Straight Line Quilting Detail

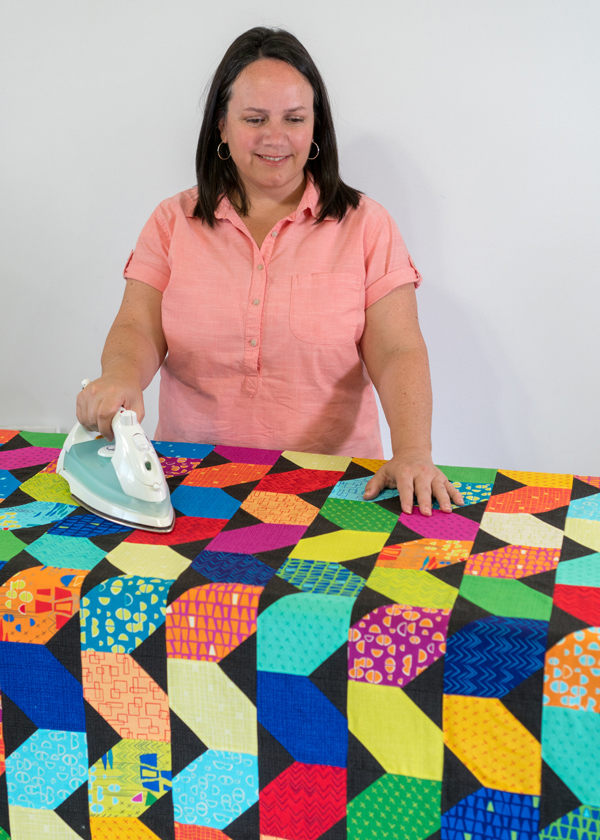
Quilting detail of Color Weave – it was all done with straight lines using my walking foot. I used the piecing structure as a guideline for the quilting and varied the width of the lines using the edge of my foot and randomly changing my needle position.

This year at QuiltCon, it was kind of nice to have a break from teaching so that I could actually see the show, meet up with friends, and spend time networking with many of my quilting industry partners (like Hobbs, BERNINA, & Aurifil) along with the various shops who carry my books, patterns, and fabric).

Quilting Demo with Hobbs BattingI had a great time sharing machine quilting tips and tricks with folks who stopped by the Hobbs batting booth on the first day of the show on Friday. I talked the entire hour I was in their booth, so it was hard to get a picture of me without a funny expression on my face!

Spools Quilt from Piece and Quilt with Precuts

I loaned my “Spools” quilt from Piece and Quilt with Precuts to Hobbs for a few weeks so  they could use it to display in their booth at several quilt shows in which they are a vendor, including QuiltCon. Letting companies borrow my quilts for promotion is a win-win for both of us: they get to decorate their booths with colorful quilts, and my quilts get seen by a wider audience.

In Town Quilter's Booth at QuiltCon 2018

Above, clockwise: Squiggles from Piece and Quilt with Precuts, mini samples of patterns by Sylvia Schaefer of Flying Parrot Quilts, and a hand pieced, hand quilted block showing how Modern Marks plays well with other fabrics.

In-Town Quilters hosted me for a book signing in their booth on Friday of the show and I was pleased to see such a nice display of quilts and minis using Modern Marks fabric. It still makes me giddy when I see my fabric paired up with other designers’ patterns!!

I also did events for BERNINA and Modern Quilts Unlimited magazine on Saturday, but because I was so busy chatting – I forgot to take pictures. Needless to say, it fills my bucket when I get to chat with other quilters who love modern quilts as much as I do!

HST Remix quilt at QuiltCon 2018

HST Remix was my other quilt that was juried into QuiltCon 2018. It was hanging in the overflow room which had great architecture and beautiful chandeliers.

Judges comments for this quilt:

  • Fabric choices render pattern well
  • Quilting patterns fill spaces well
  • Area of gray in middle is really interesting element but feels slightly disproportionate

I actually appreciate the comments that offer constructive criticism even more than the positive ones, because that’s how I learn more about modern design. I’m still a fledgling student in this area and love learning all I can about what makes a successful modern quilt! In fact, each year I attend QuiltCon, it confirms my love for modern quilts and I’m always thinking about how to push myself to create more modern designs.

Quilting on HST Remix

Quilting on HST Remix – this one is big enough that it now fits on our bed!

I’ve been attending QuiltCon since the beginning, and one thing that struck me this year was the variety of modern styles. I think quilters are really branching out, taking risks with their designs and doing a lot more experimenting. There were a good mix of solids and prints, bright and more muted tones, machine and handwork.

And I was pleased to see a lot more interesting free-motion quilting. Don’t get me wrong – I love geometric straight line quilting as much as anyone. But I’m glad to see that more quilters are embracing “modern free-motion” (perhaps after attending my classes and lectures for the last 2 years and realizing it’s ok to quilt swirls and feathers on their modern quilts?? LOL!!). I was also impressed with the quality of the workmanship.

QuiltCon Hashtag

To view most of the quilts that were at QuiltCon, be sure to check out the hashtag #QuiltCon on Instragram – or click here. Those little squares in the collage above mean that there were multiple images shared in the same post – tons of amazing eye candy!

To be sure, QuiltCon places more of an emphasis on design and originality than workmanship and I think that’s totally fine. I attend and teach at a lot of shows and while they are all unique, most other shows emphasize workmanship over original design. Again – nothing wrong with that either, it’s just a different point of view.

When QuiltCon first opened, I was worried that many quilters would be intimidated to enter because they had less quilting experience or couldn’t afford to pay for expensive professional long arm services to bling up their quilts.

But I was comforted by the fact that at that first show, and each show since, more and more quilters are actually doing all of their own work, from start to finish. It has been fun to see many of these newer quilters gain confidence and experience in their work, and just five years later you can see that their efforts have paid off.

QultCon 2018 hashtag

Search #QuiltCon2018 on Instagram for even more fabulous inspiration!

One last thing to share: I served on the judging committee for QuiltCon – a volunteer position I’ve helped with over the last few years. No, I had nothing to do with this year’s judging or jurying. I just helped rewrite some of the policies so they’d be easy to understand for all who enter. One big change we made for 2018 was limiting the number of acceptances for any one person to 5 quilts and I think that was a great decision because created a more dynamic show that seemed fair to everyone.

I hope you enjoyed reading about my experience this year I and I truly hope you get a chance to attend in the future, if you haven’t already. QuiltCon will be in Nashville, Tennessee in 2019 and then back in Austin, Texas in 2020, where it all began. You can bet I’ll be there again for sure!!

Click here to view all of the winners from QuiltCon 2018.

PS – Are You Following My Blog?

If you’d like to get an email each time I publish a new post, be sure to enter your email address in the box on the right-hand side bar. If you are viewing from a mobile device, you’ll need to scroll way, way, way down to the end of the page to see it.

Christa’s Soap Box – On Sharing (and a Sneak Peek of Craftsy Filming)

So it dawned on me the other day that sharing is an integral part of my process. I’ve been feeling a bit lost over the last year because although it’s been a whirlwind of activity – pattern writing, fabric designing, traveling  & teaching, workshop filming –  I haven’t taken as much time to properly document and share what I was doing.

So I hope you’ll indulge me while I write a bit of an essay on this subject. I’m weaving in some “behind the scenes” photos of my latest Craftsy shoot so this isn’t just a wall of text!!

Filming at Craftsy

My latest adventure – filming my upcoming Craftsy class, “Startup Project: Starry Path”

I’m pretty good at sharing real-time snippets on facebook and instagram, but I really, really, miss writing actual long-form paragraphs about what I’m doing. I’ve forgotten how much I enjoy that part of things!! Throw in a whole bunch of “secret” sewing and I’ve felt like I’m doing a whole lot but not actually getting anywhere with it, LOL!!

You know the old saying – if you make a quilt but there’s no one around to see it, have you really accomplished anything?? (Just kidding – I made that up but sometimes that’s how I feel.)

So I hope to change that up for the rest of this year.

I’ll still be as busy as ever – I like it that way and it keeps me out of trouble. But as much as I can, I want to share more of the process with you. I was actually looking through my contracts for a bunch of stuff I’m currently working on and you know what? They don’t actually say I can’t share!!

Stepouts off camera

What you don’t see off camera – stepouts for the class, organized in sequence of filming

Going forward, I’d like to combat one of those “quilting myths” – that as a designer, you have to keep everything secret until it’s ready for the marketplace, or else everyone will get tired of seeing it and won’t want to buy it when it’s time to sell. Just remember – the reality is that full-time designers like me have to sell what we produce, or we are out of a job, LOL!!

Well you know what? I’m willing to take that risk!! I hope you won’t get bored for example, if I actually document and share the process of making my next round of quilts for my next fabric line. Or share some behind the scenes pics of my latest Craftsy filming, even though the class won’t be available for a couple more months.

Filming in process

Checking out what it looks like from my producer, Evan’s point of view. Notice the clock on the wall says 6:35 PM. We started each day at 8:30 am. It take 3 full days to produce about 1 1/2 to 2 hours of content. Those were some long – but fun – hours!!

Although my latest projects won’t be available for mass consumption until at least this summer, how can I enjoy the next few months of sewing if I can’t even show you what I’m making?? Trust me, after writing 3 books, filming multiple Craftsy classes and now finalizing my latest fabric line, it’s killed me that I haven’t shared these things in “real” time. Not to mention all of the fantastic teaching trips I’ve been going on and fabulous people I’ve been meeting when I travel. I’m really feeling compelled to share more as a way to process my experiences.

The Camera Crew at Craftsy

Although I’m the only one you’ll see on camera, it takes a dedicated team to produce such high-quality Craftsy videos. Jim (left) and Tommy (right) were top-notch camera guys!!

Sure, writing up a post about  the finished quilt/class project months later is still fun, but I’ve somehow missed the magic that I like to capture in the moment when I document things in real time. I know part of the problem is that I got caught up in the social media rat race that I wrote about at the end of last year. My reduced social media presence since then has been great (see my follow-up post here).

But I think I’m ready to now strike the balance of doing a tad bit less production work, and in the process sharing more of what I do in-depth and in real-time here on the blog. I guess you could say I’m aiming for less quantity, and more quality both in my making and my writing.

Linda on set at Craftsy

My Craftsy editor, Linda has worked with me on all of my Craftsy classes. She’s become more than I colleague. I now count her as a dear friend, always willing to help me do my best!!

So be on the lookout for more process and adventure posts from me. Darn it, I haven’t even had time to write about my trip to QuiltCon yet this year, and just like the first time I went in 2013, it inspired me in ways that will impact my making for years to come. So – more on that soon – I promise!!

Until then, happy quilting, making, sharing, and processing!!!

Meet Me at QuiltCon 2018: My Schedule of Events

I’m super excited for QuiltCon 2018 which takes place next week, February 22-25 in Pasadena California. Although I taught there the last 2 years, this year I’m excited to take it a little bit easier by being a student and attendee, and I can’t wait. However, I’ll still be super busy with a full lineup! If you plan to attend, I’d love to see you at one of my events listed below:

Christa’s QuiltCon Schedule

Christa at QuiltCon with Hobbs

On Thurs. Feb 22, from 12:15-1:15 I’ll be in the Hobbs Batting Booth #122 for a meet ‘n greet. I’ll have some small samples on display and will be happy to answer your questions about batting, machine quilting, and anything else! Rumor has it, there might even be a giveaway!!
Later that day, I’ll be helping out as a general volunteer from 4-6 PM. I’m sure I’ll be wandering the show, pitching in wherever help is needed. Volunteering is truly one of the best ways to get the most out of any show!
Christa at QuiltCon with Hobbs
On Fri. Feb 23, from 12:30-1:30 I’ll be having a book signing with InTown Quilters at booth #624. They’ll have copies of Piece and Quilt with Precuts for sale and some Modern Marks precuts. If you know you’ll be at the show and want to reserve a copy of the book ahead of time, be sure and contact them right away before they sell out.
star Shadow by Christa Watson
Star Shadow, designed and made by Christa Watson, featuring Modern Marks
On Saturday, Feb 24 from 10-11:30 I’ll be hanging out tin the Modern Quilts Unlimited Booth #105. They will have my quilt Star Shadow on display, and you can get the pattern in their latest magazine issue! For those of you enjoying Quiltcon from home, click here to purchase the latest issue #22.
Christa at QuiltCon with BERNINA
Later that day, starting on Saturday at 1:15 PM, I’ll be performing a live machine quilting demo on stage, followed by a Meet ‘n Greet & book signing in the BERNINA booth #502. I’m pretty sure BERNINA will have a machine or two in their booth that you can try out and see why it’s my favorite sewing machine!
The MQG book
Finally, I’ll end my day on Saturday from 5:30-7:30 hanging out at The MQG Book Signing Party, to celebrate the launch of the new book Modern Quilts: Designs of the New Century. I was thrilled to have 2 of my quilts featured in the book, which you can read about here.
QuiltCon 2018
I have to say, QuiltCon is my absolute favorite event – it features over 300 modern quilts and tons of great vendors. So far I’ve gone to every single show (since the first one in 2013). QuiltCon changed the course of my quilting career for the better and I’ve been pleased to have at least one of my quilts included in the show each time. For those not able to attend be sure to follow #quiltcon on social media, and check out a fun event that will be happing at the same time: #quiltconfromhome.

check out My Other posts from Prior QuiltCons:

Squiggles Quilt Along Week 5 – Basting

Spray Basting the quilt

I prefer to use 505 basting spray for my quilts, but pin basting works, too. (Just be sure to use a LOT of pins so it doesn’t shift!) Although I’m going to show you how I basted Squiggles using my design wall, know that you can apply this method using a table, too. Just work from the center out and move the quilt as needed to secure the layers.

Step 1 – Spray the Backing

Spray basting a quilt by Christa Quilts

Use a large sheet as a drop cloth to catch any over-spray. It will also protect the quilt from the ground, too! Generously spray the wrong side of the quilt backing with basting stray, ensuring coverage in all areas. Work your way across the quilt from one side to the other. Your quilt will stick better and use less spray by spraying the top and backing separately, rather than spraying the batting as provided by the instructions on the can.

Although I’ve pressed both the backing and quilt top, some wrinkles and fold lines may reappear, but that’s okay. You’ll smooth everything out later.

Step 2 – Spray the Quilt Top

Spray basting a quilt by Christa Quilts

Spray the wrong side of the quilt top, just like you did for the backing. You can still use the same sheet as a ground cloth, and then wash it when you are finished. It’s easier to spray the top because you can use the blocks as a guide to help you remember which areas to spray. I usually spray row by row.

Step 3 – Fold up both layers and bring inside

Spray basting a quilt by Christa Quilts

Right now it will look like a bit of a sticky mess. But that’s okay – the layers are tacky to the touch but not stuck. You can easily peel them apart again. Your hands will get a little sticky during this process, but the glue easily washes off and won’t cause any problems while quilting. You don’t have to baste right away as it will still maintain its stickiness for awhile afterward.

Step 4 – Hang UP the Backing

Spray basting a quilt by Christa Quilts

Pin or stick the backing to the design wall, wrong side out. Start at the top and let gravity help you. I’m short so I use a step ladder to get up high enough and I’m not trying to center the backing perfectly. I’m just glad that this is a process I can do completely by myself, without help.  Notice how the backing might stick to itself and get a little scrunched up at the bottom. That’s perfectly fine for now – see the next step.

If you don’t have a design wall, you can use a table instead. Just smooth out the center of the backing, add the other layers and smooth out one section of the quilt at a time.

Step 5 – Smooth Out the Backing

Spray basting a quilt by Christa Quilts

Take about 10-15 minutes to completely spread and smooth out the backing. Work your way from top to bottom, smoothing it out as you go. Use a long acrylic ruler to help you. Think of it as an extension of your arm, giving you more coverage.

The acrylic ruler will get sticky over time, so I have an extra ruler that I use ONLY for basting. You want the backing nice and smooth before you add the batting.

Step 6 – Add the Batting

Spray basting a quilt by Christa Quilts

I’m using Hobbs 80/20 batting in black for this but natural is great, too!

Before I add the batting, I will actually iron it first to get out any wrinkles. If it’s cotton batting, you can iron right on the batting. If it has polyester or wool in it, you can protect it with a length of fabric. I use a hot, dry iron with no steam. You can iron wool batting with no problem – just use a lower setting and don’t press too hard. If you use steam, it might shrink or felt, so always test a small piece first.

Just like the backing, start at the top and place a few pins in the design wall if needed at the top to secure it. It’s okay to peel off part of the batting and re-position if needed.

Step 7 – Smooth the Batting

Spray basting a quilt by Christa Quilts

Take time to smooth out the batting, using your hands and the long acrylic ruler.  Notice how it’s getting a bit wonky. That’s okay as long as the batting and backing are larger than the quilt top – the excess will get cut away.

I like being generous in my batting and backing so I don’t have to try and line things up perfectly. That’s above my skill level for sure!! I guessed where the rough middle of the backing and batting are and like a good friend of mine says, “close enough is good enough!”

Step 8 – Add the Top

Spray basting a quilt by Christa Quilts

At this point, it looks a little bit like a hot mess, but don’t worry – it will all work out in the end! Fabric is flexible and it’s okay to smoosh things up a bit – your quilt can handle it. (Those that are familiar with my scrunch and smoosh method of machine quilting can relate!!)

Repeat the same process as before: add the quilt top layer and let it drop down the wall with gravity; take time to peel it apart, and smooth it out.

Step 9 – Smooth the Layers

Spray basting a quilt by Christa Quilts

Make sure there’s enough batting and backing sticking out on all sides and take plenty of time to smooth out the top. By smoothing each layer as you go, it will vastly eliminate the chances of puckers and wrinkles appearing on the back.

If you are too far off to one side or another, take off the top and try again.

Step 10 – Smooth Out Each Row

Spray basting a quilt by Christa Quilts

As you are smoothing out the quilt, use the long ruler to help ensure that each row is lined up vertically and horizontally. You can gently nudge the blocks into place if needed.

Step 11 – Roughly Trim off the Excess

Spray basting a quilt by Christa Quilts

Now it’s time to cut off all that extra bulk around the edges. I use these cutoffs for machine quilting practice later. Or you can wash the excess backing and throw it in your stash.

Notice that I trim it pretty close to the edge. You can leave more wiggle room if you like, by I usually only leave about an inch or two. This prevents the excess from getting flipped over underneath the quilt and accidentally stitched through while you are quilting.

I’m sure I’m not the only one who has done that, right??

Spray basting a quilt by Christa Quilts

I use batting shears to cut through the bulky layers quickly and easily! You can trim the quilt on the design wall, or take it off and do it on a table or the floor.

Step 12 – Press the Quilt

Spray basting a quilt by Christa Quilts

I just love the vibrant colors and geometric prints in Modern Marks!

This is where the magic happens! For the final step, iron the quilt on the back side and then on the front. Use a hot, dry iron – no steam. This is a final chance to smooth out any wrinkles and nudge things into place. The iron helps set the glue so that every single inch of the quilt is stuck to every other inch, making it a breeze to machine quilt!

I use a “Big Board” that goes on top of my ironing board to give me more work surface. Also, the basting spray will not gum up the needle or cause any problems while quilting. And it easily washes out once you are finished with the quilt.

Next week we’ll tackle my favorite part – machine quilting. I can’t wait!!

Relevant Links


Squiggles Quilt Along Week 4 – Batting and Backing

If you are just now joining the quilt along – click here for links to all of the previous posts.

Squiggles Quilt Top

I remade Squiggles from precut squares of Modern Marks, plus contrasting background.

Now that the Squiggles quilt top is finished, it’s time to prepare it for basting, which will be next week’s post. I decided to throw in an extra tutorial on backing since it’s the part that’s not talked about very much. This will also allow those of you just joining to catch up with your piecing. But remember – you can go at your own pace and quilt along at any time!

Calculating and Sewing the Backing

You want to ensure your backing is at least 4″ larger around the quilt on all for sides. For example, my version of Squiggles finishes at about 50″ x 63″. So my pieced backing should measure a minimum of 58″ x 71″.

Backing of Squiggles, Made from Modern Marks

When measuring backing, I put it up on m y design wall and make sure it’s wider than the quilt.

I always work with 40-42″ wide fabric so If I piece two lengths of fabric parallel to the selvage edges that will give me roughly 80″ of length. So that takes care of the 71″ measurement. More backing is fine because it can just get trimmed away later. For the other direction, 58/36 inches = 1.611 or approximately 1 3/8 yards of fabric. Since you need two of those, that’s a total of 3 1/4 yards of backing fabric, cut into two pieces.

Pieced Backing for Squiggles

It takes 2 lengths of fabric to completely cover the finished quilt top.

I chose to use the quirky triangles print in Navy for my backing. My recommendation is to use a busy backing with a colorful quilt so that whatever thread color you choose for quilting will blend in on the back of the quilt. Busy backs also help hide quilting imperfections, too!

Finished backing

Always double check that the pieced backing is bigger than the top on all four sides.

Tear or cut of the selvages and join the two pieces together with 1/2″ seam. Then press the seam open. It’s okay if the two pieces aren’t perfectly even because the excess will get trimmed away later.

A note about batting

I prefer to use natural fiber battings, like Hobbs cotton, wool or an 80/20 blend. Natural fiber batting will cling to the quilt better and reduce the chances that you’ll get tucks or puckers while you quit.

Hobbs 80/20 batting black

Bonus tip: take a picture of the batting with your quilt so you remember what’s in it!

I used black 80/20 batting for my quilt, because the colors were so bright and saturated, and the background is so dark. However, it slightly shadowed through the lighter fabrics. It’s not noticeable unless you get up really close. But each quilt I make is always an experiment!

Be sure to trim the batting down before you baste the quilt, but make sure it’s still an inch or two larger than the top on all sides. I use the floor for this and pair of specialty batting scissors. They cut through the batting like butter!

Squiggles - Trim the Batting

I’ll also take an extra step to iron m y batting so it’s nice and flat for basting. For natural fiber batting, I’ll spritz it with water and press with a hot, dry iron. For a more delicate batting, I recommend covering it with fabric while you press. As always, be sure and test a small piece first to see how it performs.

Share Your Progress

Click here to join my facebook group and share pics of your progress!
You can also share on instagram by tagging @christaquilts and #squigglesqal.

Click here for all of the Squiggles Quilt Along tutorials.
Click here to pick up a signed copy of my book to get the Squiggles quilt pattern.

Christa’s Soap Box – A Look Back at 2017

I debated on whether or not to do a “year end” blog post like so many do. But then I realized, it’s been a very busy year! Can I distill it down to just a few snippets? So I decided to focus on one memorable event for each month of 2017. Here’s a snapshot of what happened this year:

January – An Injury & A Visit

Angela Walters and Christa Watson

My buddy and co-author Angela Walters came to visit my local guild in January, so she got to see me sporting my fashionable elbow sling! Thank goodness I love to wear black and white, LOL!!
Click here to see the book we wrote together in 2016.

The year didn’t start off so great. After trying to get healthy and fit, I dislocated my left elbow when I fell from a climbing wall at the gym. This is an activity where you free-climb indoors without ropes and there’s padding on the floors to catch your fall. I was great at climbing, but not so great at falling. I’ve now learned that when you fall, it’s best to tuck and roll and NOT reach your arm out to break the fall!!

It’s taken the majority of the year for me recover and heal completely, but I’ve been working on a safer workout routine, and next year is shaping up to be the year I finally recover my fitness. Here’s to a healthy 2018!

February – Lots of Teaching!

Machine Quilting Student Work at QuiltCon 2017Student work from one of my classes at QuiltCon.
Click here to read my blog post about QuiltCon 2017.

I taught at QuiltCon for the second time in a row and loved it! The only downside is that I was so busy teaching, I barely had time to enjoy the show! I look forward to attending QuiltCon 2018 and NOT having to teach so I’ll have plenty of time to view each and every quilt! (They prefer to not book the same instructors more than a couple of years in a row, to give others a chance to teach.)

March – Lots of Ribbons!

Churn Dash Slide

Churn Dash Slide – 1st place single entrant category at DQN Quilt Las Vegas 2017.
Click here to read more about my local guild’s quilt show in 2017 and a new milestone.

I attended my local guild’s show and entered quilts as I do every year. It’s a fabulous show for a local event and I usually pull a ribbon each time I enter. This year was a new milestone for me as every quilt I entered (there’s a limit of 4) earned a ribbon. I consider this a win for domestic machine quilting since many of the quilts are judged against professional long arm quilting. It just goes to show that the machine you use doesn’t matter as much as your willingness to do good work, no matter the tools. 🙂

April – Lots of Patterns!

Christa Quilts Patterns

Click here to see my full collection of printed quilt patterns.
Click here to see my full collection of PDF quilt patterns.

After a few fits and starts, I released several new quilt patterns. Originally the goal was to release them on a regular schedule, but other, more exciting projects kept getting in the way. This was also the point at which I realized I do much better working with other companies to create new and exciting content rather than trying to do things entirely on my own. (Look for more patterns next year as I plan the releases to coincide with new fabric lines.)

May – An Anniversary Celebration

Christa & Jason at the Beach

Here’s to another 24 years of love and marriage!
This was us at the beach a couple of anniversaries ago and it’s still my favorite place to hang out!!

I celebrated 24 years of marriage with the love of my life, Jason. We’ve had our share of ups and downs over the last two decades and we feel like we are finally figuring out this marriage and work-at-home thing!! (Yes, we got married young – I hadn’t even turned 20 yet and he was almost 23. Now that we have children approaching that age, I realize how young that truly is!!)

June – Judging Beautiful Quilts

Best Modern Quilt Vermont Quilt Festival 2017

Best Modern Quilt at Vermont Quilt Festival by Anya Byam of Burlington, VT
Click here to read more about my judging experience at the show.

I judged my very first quilt show! I was brought into the Vermont Quilt Festival to add my modern voice to the talented pool of judges they solicit each year. It was amazing to get up close and personal with each and every quilt and see the detail and love stitched into each one. I was on my feet for 6 days straight – 2 days of judging and then another 4 days teaching, so I don’t know that I would be keen to combine both types of work in the future, but It was a fabulous experience nonetheless.

July – 2nd Craftsy Class Release

Startup Library Craftsy Class by Christa Watson

Click here to get 50% off my 2nd Craftsy class Startup Library: Quilting
Click here to get 50% off my 1st Craftsy class: The Quilter’s Path

I launched my second online Craftsy class, Startup Library – Quilting. This workshop is 3 times longer than my first class and was created as a basic introductory course for brand new quilters, or those who’d like to freshen up their quilting education. Working with the folks at Craftsy is such a treat, and they are so professional! They produce top notch videos and I plan to continue to work with them to launch additional classes in the future.

August – 3rd Book Release

Piece and Quilt with Precuts by Christa Watson

Click here to get your signed copy of Piece and Quilt with Precuts.

I released my third book, Piece and Quilt with Precuts. Just like my previous two books, it includes start to finish instruction for making the quilt top, plus strategies and step by step diagrams on how to quilt them. After writing 3 books in a row non-stop, I’m taking a little breather to catch my breath before starting on the next one!

September – More Teaching!

Teaching at MQX quilt show

Setting up for my class at the fall MQX quilt show.
Click here for info about next year’s shows – spring and fall.

I taught at MQX quilt show for the first time (and will be returning again in the spring of 2019). This show is special to me because it’s the first national quilt show where I received a ribbon. Back in 2013 I entered my String of Pearls quilt in their newly created “Quilting the Modern Way” category. I received an honorable mention but to me it felt like best in show!

October – First Fabric Release

Modern Marks by Christa Watson for Benartex

Click here to get a fat quarter bundle of Modern Marks, while supplies last.

I launched my first line of fabric, Modern Marks at international quilt market in Houston Texas. Fabric design has long been a dream of mine and it was so gratifying to achieve this goal. So far it has been well received and my hope is to continue designing 1-2 fabric collections a year for as long as it is sustainable.

November – Family Fun!

Watson Family Dia De Los Muertos

We get silly with the extended family at holiday time each year. My MIL creates an elaborate scavenger hunt and we all dress up based on a movie theme for the year. This year’s theme was “Day of the Dead” from the Disney movie Coco. We’re celebrating the fact that we’ll be headed to a fun family reunion in the Mexican Riviera next year and we can’t wait!

I spent a lot of time enjoying time with my family. 2018 will be a big transition year for us – the oldest heads off to college and the next oldest graduates from high school. The youngest who has been home-schooled the past 6 years wants to go to regular high school (for her sophomore year) to see what that is all about. We may actually have some time in 2018 where it’s just the two of us at home during the day – I can’t even imagine what that will look like, or how quiet it will be, LOL!!

December – More In-Person Quality, Less Online Quantity

Teaching at Quilt Addicts Anonymous

I love connecting with others face to face in class and at fun events.
Click here to read my post on simplifying social media.

I traveled to my last teaching event of the year at my friend Stephanie’s shop, Quilt Addicts Anonymous. It was a crazy busy, but fun year of teaching! I did a total of 17 multi-day teaching events in 2017 and realized that as much as I love it, that’s a bit too much. I’ve decided to slightly scale back and limit my travels to no more than 1 event per month, and I’m still booked solid for the next two years.

I also decided to simplify my social media to focus on more quality and less quantity. Although it’s only been a few weeks since I made the switch, I’m already enjoying more time and head space for me to truly do what I love – create!

I hope you had a fabulous 2017 and are looking forward to more quilty fun in 2018!!