QuiltCon – Award Winning Quilts Part 1

All I can say is wow! QuiltCon is as awesome as I thought it would be and more. The quilts, the friendly atmosphere, the lectures, classes and more are a dream come true. The show was so well organized that you could tell immediately which quilts were competing in each category. The ribbons are the cutest and most creative I’ve ever seen!

You can see pictures the rest of the quilts in Part 2 and Part 3.

Cute QuiltCon Ribbons

Cute QuiltCon Ribbons

So here they are – the best modern quilts. I tried to get pictures of all the ribbon winners so it will take me a couple of days to post them all. Enjoy the show! (See part 2 here.)

Best in Show

Best in Show – Double Edged Love by Victoria Findlay Wolfe
Quilted by Lisa Sipes, New York, New York

Best Machine Quilting

Best Machine Quilting – The Local Quilt by Carolyn Friedlander
Lake Wales, Florida

Judges Choice

Judges Choice – Adrift by Tina Michalik
Quilted by Susan Spencer, Santa Cruz, California

Quilting Excellence

Quilting Excellence – Sing It Out Loud! by Karen Anderson-Abraham
Santa Barbara, California

Applique Large 1st

Applique Large, 1st Place – Flying Saucer by Lisa Alexakis
Culver City, California

Applique Large 2nd

Applique Large, 2nd Place – Rainbow Rocks by Kathleen Baden
Kernersville, North Carolina

Applique Large 3rd

Applique Large, 3rd Place – Retro Modern Shapes
By Heather Davidson, Portland, Oregon

Applique Small 1st

Applique Small, 1st Place – Selfย  Study #1 by Chawne Kimber
Easton, Pennsylvania

Applique Honorable Mention

Applique, Small Honorable Mention – Needless by Laura Bisagna
Winchester, California

Dear Stella Challenge 1st

Dear Stella Challenge, 1st Place – Charm Squares Baby Quilt
By Melody Baker, Lenexa, Kansas

Dear Stella Challenge 2nd

Dear Stella Challenge, 2nd Place – Not Quite a Shadow by Susan Shore
Quilted by Jessica Sloan, Austin, Texas

Dear Stella Challenge 3rd

Dear Stella Challenge, 3rd Place – A Modern Day Mystery by Lisa Holk
Overland Park, Kansas

Group or Bee 1st

Group or Bee Quilt, 1st Place – Off the B.O.W.
Compiled and Quilted by Krista Fleckenstein, blocks by members of the Bee Liberated quilt group

Group or Bee 2nd

Group or Bee Quilt, 2nd Place – Kelsey’s Crosses
Kansas City Modern Quilt Guild, Missouri

Group or Bee 3rd

Group or Bee Quilt, 3rd Place – Confetti Amongst Friends
St. Louis Modern Quilt Guild, Missouri

And this is just the start! I can’t wait for more quilting goodness tomorrow!

Christa’s Quilt Along 4.9 – Sea of Squares Binding by Machine

Machine Binding

Today I am going to show you a quicker way to bind your quilt – by machine. Sometimes when I am in a hurry (like this week trying to finish all my quilting tasks before heading off to QuiltCon), a machine binding is just what I need!

It took me a total of 2 hours to bind this quilt using my home sewing machine. I love how it looked outside today with the quilt against the cloudy sky. A cool juxtaposition…

Sea of Squares Finished

Step 1 – Trim Your Quilt (10 Minutes)

Before binding, you want to start with a nicely trimmed edge, flush with your quilt. I don’t leave any batting peaking out. My method ends up with a fully stuffed, flat binding.

Using a large square ruler, I trim up all 4 corners first. If anything is out of alignment, I gently tug it back into place. Then I trim up all the sides with a long ruler.

Trim Corners FirstTrim the Sides


By starting with trimmed corners, I can match up the cutting lines so that things stay straight (as possible). You can throw your trimmings away or recycle them as pillow stuffing. ๐Ÿ™‚

Step 2 – Calculate the Length of Binding Needed & Cut Strips (10 Minutes)

My favorite binding is called double fold straight grain binding, and it is super easy to make. You start off with strips of fabric, cut them on the straight of grain, then fold them in half twice to get the double fold. It holds up well especially on quilts that get a lot of use.

Measure the Perimeter

First, measure the perimeter of your quilt and add on 10 inches for corner folding, seams and “insurance.” In this case, my Sea of Squares quilt measures 50″ x 58″. It shrunk about 2 inches due to the intensity of the quilting on it.

I need a total length of 226 inches (50+50+58+58+10). If I divide this by 40 inches (the length of a fabric strip), I end up with 5.65 strips which I round up to 6 binding strips needed for this quilt. I cut all my strips 2.25 inches wide.

Binding Strips

Cut Six 2.25″ Wide Strips

For those of you sewing along using one of my Sea of Squares kits, binding fabric is included.

Step 3 – Sewing the Binding Strips Together (5 Minutes)

Join all of your binding strips into one long piece. Sew the ends on a mitered angle so that the bulk of the seam will be distributed more evenly. Be sure to cut one end of the binding on the same 45 degree angle. Fold the strips wrong sides together and press along the length with a dry iron.

Sew Continuous StripsFirst Fold

Before attaching to the quilt, I will pin part of the binding to one side, starting somewhere in the middle. Loosely walk the binding all the way around the quilt to ensure there will not be any mitered seams falling on the corners of your quilt.

Step 4 – Attaching the Binding to the Quilt (30 Minutes)

Sew from the front.Whether finishing the binding by hand or machine, this part is the same. Using coordinating or matching thread in top and bobbin, sew the binding to the front side of the quilt.

Starting with the binding on the angled end, leave a few inches of unsewn “tail” and use quarter-inch seams.

Be sure that you are sewing with the raw edges of the binding and the raw edges of the quilt in the seam. These will be covered with you flip your binding to the back.

You may wish to add a few pins to secure.

When you near a corner, be sure to mark a line 1/4″ away from the corner. Stop sewing at this line, then turn your quilt 90 degrees and sew off the edge.

Stop 1/4 inch from end.

Sew perpendicular to edge.


Flip the binding strip to create a 45 degree angle, pinch the excess, and then fold it back down. This creates the excess fabric allowing for a nice miter on both front and back of the quilt. Begin sewing the next side starting at the corner of your quilt. Repeat for all 4 corners.

Flip binding up.Flip binding down.


Leave about 6 inches of tail when you finish sewing. This will be joined next to create a continuous binding.

Step 6 – Joining the Ends Together (5 Minutes)

This is probably the trickiest part of the whole binding process. You want the ends to be joined with a nice miter seam that does not give any extra slack.

Leave a Tail

Open the Blunt End


Open both tail ends. Place the angled tail on top of the blunt tail and draw an erasable line along the edge of the angled tail where it meets the blunt end. You will need to account for both seam allowances, so cut 1/2 inch away from this line, keeping the 45 degree angle.

Trace the Angle

Now join the two ends together with 1/4″ seam. Use pins if needed and offset each of the triangle tips by about 1/4″. Finish attaching the binding to the front of the quilt.

Cut 1/2 inch wider.Pin ends and sew.


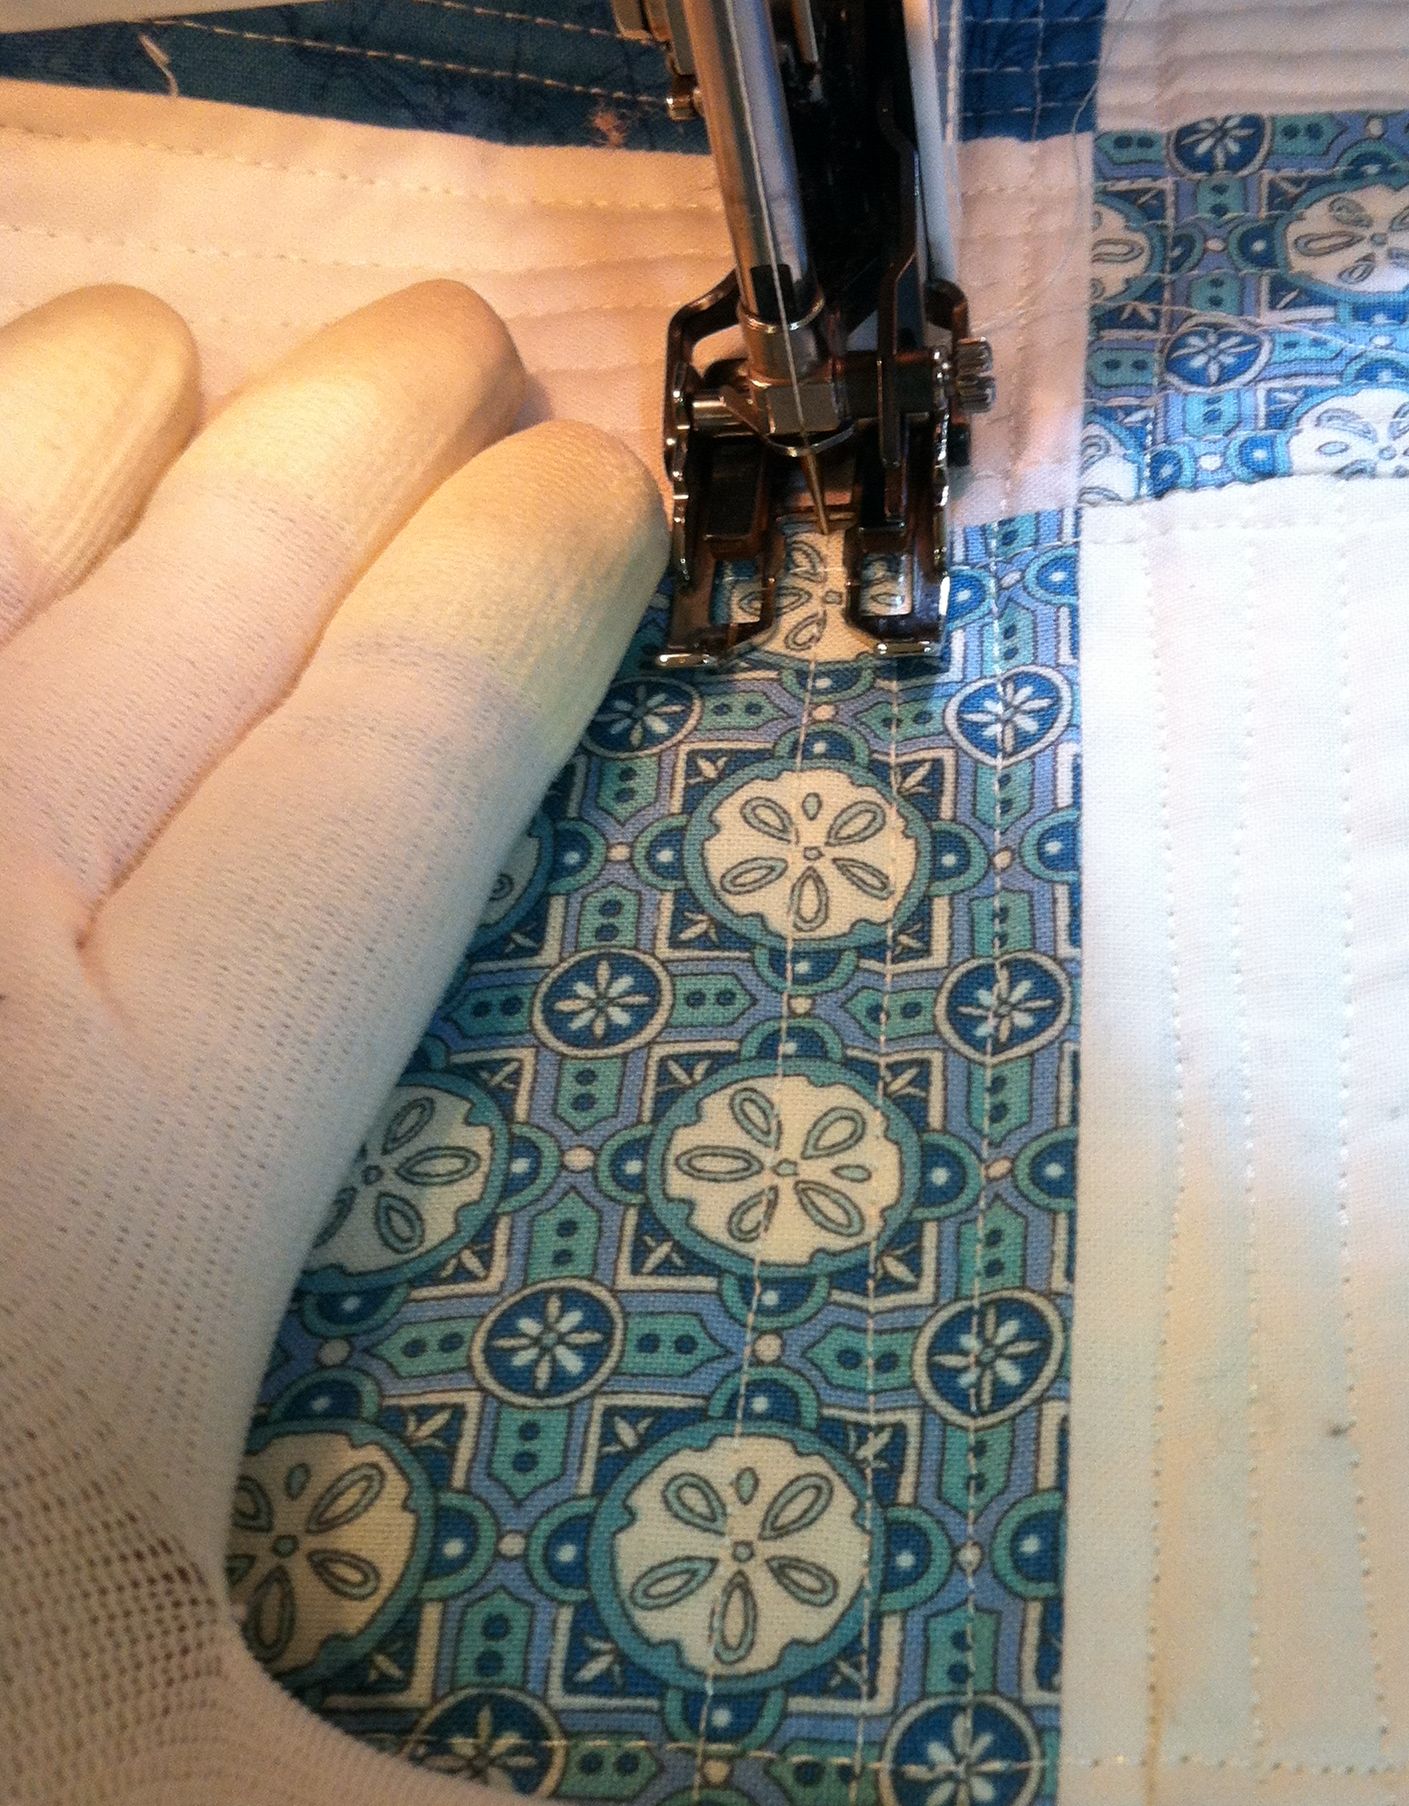
Step 7 – Binding by Machine (1 Hour)

I have a tendency to pull on my binding as I’m sewing, stretchingย  it and creating a wavy edge that needs to be blocked. By pinning first, this can eliminate most of the stretching.

Pin Binding

There are several different ways you can finish stitching the binding on by machine. For example, you can stitch in the ditch from the front side but only if you are absolutely sure you are catching the binding on the backside, too. You can stitch using straight lines or decorative stitches. Just sew slowly and be sure to catch the corners as you go around the quilt. A decorative stitch can hide a lot of mistakes!

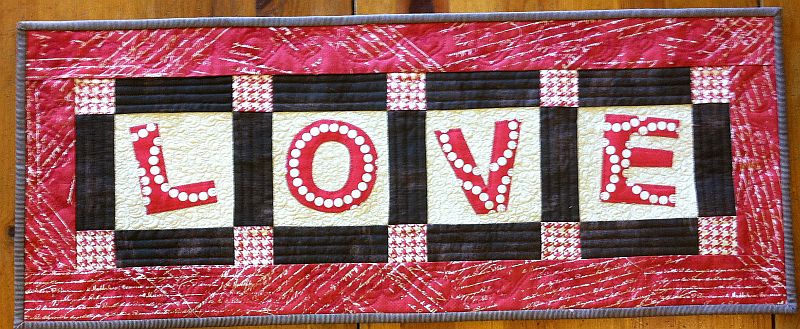
For Sea of Squares I chose to use a reverse blanket stitch (similar to the regular blanket stitch I used for my machine applique table runner). The stitching won’t line up perfectly on the back but if you use a blending thread it won’t matter too much.

Sea of Squares Binding

Often times I have finished by quilting a decorative stitch from the backside, too.The picture below shows the binding I did on my first quilt-along, the Jolly Jelly Roll Quilt. I used one of my favorite stitches on my machine, a wavy serpentine stitch.

Jolly Jelly Roll QuiltI hope you have enjoyed following along as I made my Sea of Squares Quilt. I learned a lot from it and I encourage you to give this quilt a try. If you are currently working your way through your own version of Sea of Squares, I’d love to see it! You can share photos of your work in progress on my flickr group: Christa’s Quilt Along.

Here is a picture of the back of Sea of Squares, showing all that machine quilted texture.

Backside of Quilt


Complete Quilt-Along Schedule for Sea of Squares
Click any of the links below and follow along at your own pace.

Sharing is Caring

Please share your work in progress in my facebook group: Quilt With Christa . ๐Ÿ™‚

Tuesday Tools and Techniques – Fusible Batting Tape

Fusible what you say? Fusible batting tape! It’s my favorite new little find. Since I like to quilt my own quilts, I accumulate lots of large chunks of leftover batting that it’s hard to do anything with. Sure, I use them for table runners, wall-hangings, pillows, and practice samples. But yet, I still end up with LOTS of leftover batting pieces.

Heat Press Batting Together

Heat Press Batting Together

Well, not anymore! By simply joining the straight edges of two lengths of batting with a few pieces of special “tape”, now I can use up chunks that are too large to throw away, but too small for a quilt on their own. I can even add a thin strip of batting if needed when my batting piece is just an inch or so too short!

So far, I’ve only used the tape on Warm-N-Natural cotton batting, but the instructions say it’s suitable for all types of batting. Just reduce the heat of the iron as needed and test on a scrap piece first. I used it when basting my latest Quilt-Along, Sea of Squares:

Fusible Tape

fusible tape


The best part about using this tape is that it’s soft and you can’t feel it at all in your quilt. It just feels like the rest of the batting (There are no sewing lumps made from zig-zag stitching two pieces of batting together like I used to do previously.)

I have to admit, I did not find out about this cool stuff all by myself. I saw it being demoed at a quilt show about a year ago. It just took me this long to finally order some and try it out. If you would like to check it out for yourself, you can order a roll of fusible batting tape here.

Christa’s Soapbox – Defining My Style

We took a quick trip this weekend to Knott’s Berry Farm so the kids could ride some roller coasters and we could have a fun little getaway.

Knott's Berry Farm

Knott’s Berry Farm

During the drive, and most of the time Jason and I were in line, we spent a lot of time talking business. We discussed our plans for the future, goals for our store, and most of all, what styles of quilting and fabrics I want to pursue.

First Quilts

First Quilts

I’ve been trying to find style or my “voice” for quite a while now. I’ve been quilting for nearly 19 years and started off very traditional. The first quilt I ever made was a flannel 9 patch and the second quilt I made was a scrappy log cabin.

Over the years I have tried nearly every technique or style to see what I like.

I have tried hand applique (too much work), hand quilting (not fast enough), paper piecing in the early 90’s (too messy), paper piecing in the new millenium (much more fun with better tools), art quilts (too abstract), contemporary styles (better), machine applique (now we are onto something here), machine quilting (in love with it) and finally modern quilting (by George, I think we’ve go it!).

My current focus is definitely on modern quilting, yet even within that style I don’t love absolutely everything. I’m not into hexagons, pixelated quilts, or too much improvisation. I really lean toward the “modern traditionalism” side of modern quilting. It’s everything I love about quilting: simple, clean lines, bright clear colors, with lots of negative space to show off gorgeous machine quilting. This style is “safe” enough to satisfy my need for order, yet versatile enough to let my inner artist come out.

First Modern Quilt

First Modern Quilt – Charming Chevrons

Now, how does this translate into what we will carry in our store? I recently read an industry magazine article for quilt shop owners reminding us not to try to be all things to all people. Going after too many “styles,” a shop owner can end up pleasing no one. That’s great advice which I’m taking to heart!

After much talking and soul searching, Jason and I just may have come up with a plan. (By the way, the kids were very well behaved and quiet during the drive – thank goodness for portable electronics!)

We summed up who we are I am in 3 words: Fresh, Modern, Eclectic. It may take a while for this to be apparent in the store, but it’s already showing up in my latest quilts. I feel much happier now that I have a focus, and I love what I do!

Love Quilt

Love Quilt

Christa’s Quilt Links – QuiltCon Sneak Peek

I’ve put together a little Sneak Peek of a few quilts going to QuiltCon. I do a LOT of blog surfing for inspiration and by chance have come across quite a a few blogs whose quilts have been accepted into this show.

Think of this as a mini show for those of you that cannot attend in person. I think this is only natural since the whole Modern quilting movement essentially started online. It only makes sense that we should all share.

This post is long, but I wanted to show a large enough of picture of each quilt so you can enjoy their beauty. All pictures are re-posted with permission of each quiltmaker.

Leanne from She Can Quilt:

Shattered

Shattered

Noise

Noise

Lee, from Freshly Pieced:

Modern Mirage

Modern Mirage

Shattered Spectrum

Shattered Spectrum

Lifesavers

Lifesavers

Faith from Fresh Lemons:

Off Centered Improv

Off Centered Improv

Belle Wave

Belle Wave

Kati From The Blue Chair:

From the Blue Chair

Unraveled, Broken Diamonds, NY Beauty Mini

(Unraveled was featured in the latest issue of Modern Quilting Unlimited – Yay Kati!)

Melissa from Happy Quilting:

Refracted

Refracted

Melissa has a tutorial on how to make this pretty quilt here.

Katie from Swim, Bike Quilt:

Desert Stars

Desert Stars, Dear Stella Challenge

Amy from The Cute Life:

Birthstones

Birthstones, Madrona Road Challenge Winner to be Displayed in Michael Miller’s Booth

Be sure to visit each of these quilters’ blogs for some fantastic inspiration and and to learn a little bit more about each quilt. To think that my quilt will be hung with these lovelies is a humbling thought. I couldn’t ask for better company.

I am also super excited about all of the classes and lectures being offered at QuiltCon. I will be taking Angela Walters’ machine quilting class and I look forward to translating her long-arm quilting techniques into domestic machine quilting on my Bernina.

There are two lectures that I am most eager to attend; one is on preparing a book proposal and the other is discussing how to get one’s work into magazines. Since these are listed as part of my professional quilting goals, I will be all ears!

Every time I turn around, one of the awesome modern bloggers I follow has gotten one of her patterns published in a magazine or is writing her next book. If that’s not inspiration and encouragement I don’t know what is. ๐Ÿ™‚

By the way, if any of you are going, here’s a link to my QuiltCon intro post with my picture. I’m pretty short (but feisty) so you can come on up to me in the halls or on the show floor and I’ll be glad to meet ya!

Christa’s Quilt Along 4.8 – Sea of Squares Extra Quilting

Can you believe this quilt is almost done? Next week I will show you how to bind it by machine. The following week I will start all over with another brand new quilt-along. Here’s a hint for my next quilt: it requires 1 Jelly Roll and a 1 1/2 yards of background.

Extra Quilting

This week I added tons more quilting to my Sea of Squares quilt. I spent an extra 7 hours gleefully quilting along, adding loads of texture withย straight slightly wonky lines using my walking foot. If I had planned ahead I would have quilted about an hour a day for 7 days. Instead, being the procrastinator I am, I did it all in one day, but it was still fun!

Step 1 – Quilting the Sash Rows (1 Hour 45 Minutes)

First I started with what was easy. I quilted parallel lines all going the same direction through all of the skinner sash rows. I worked my way across the quilt, one row at a time, flipping the quilt when there was too much bulk under the machine.

Quilt Parallel Lines

Step 2 – Quilting the Rest of the Rows (5 Hours, 15 Minutes)

Now it’s time to fill in the rest of the space. I quilted the rectangles with lines running perpendicular to the previous quilting lines. For the big squares I alternated directions. I quilted the print squares all one direction, and the solid squares the other way.

Quilt Perpendicular Lines

It was cold that day so I bundled up while quilting!

I wanted to try out the continuous reverse feature on my machine. I can push a button once and it will sew backwards until I push it again to stop (and I don’t have to keep my finger on the button). So I would quilt one line of quilting, then push the reverse button and quilt a line backwards without having to turn the quilt all the way around. It was great!

Reverse Quilting

It took about 1000 yards (2 spools) of thread just for the top. I used the same color in a thinner weight for the bottom so I wouldn’t run out of thread.

Quilting this quilt was very liberating for me. I did not mark the quilting lines because I wanted to add a touch of modernity to the quilt with more organic-looking texture. Once I let go of my perfectionist tendencies and got into the “waviness” of the lines, it set me free to enjoy the process. Jason is always telling me to go bold and let out my inner artist. So now I’m giving you the same permission!

Quitling Makes the Quilt

Be sure to take a look at my flickr group so that you can see the wonderful quilts being made by everyone else. And if you are working through any of my quilt-alongs, I’d love to see your progress!

In fact, Judith shared her version of Sea of Squares in beautiful brown and cream. Notice the wonderful quilting she did with wiggly lines across the surface and quilting motifs in the blocks. I love it when you can really make your quilt your own. Nice job, Judith!

Judith's Sea of Squares

Please share your pictures here:

http://www.flickr.com/groups/christasquiltalong/


Quilt-Along ScheduleLinks are Active at the Completion of Each Step:

Sharing is Caring

Please share your work in progress in my facebook group: Quilt With Christa . ๐Ÿ™‚

Modern Love Mini Quilt Along #3

This weekend I finished my Love table runner. Today I will show you how to applique and quilt it all at the same time! Scroll to the end of this post for links to the previous tutorials.

If you have followed along so far you will have a top that may look something like this:

Lover RunnerThe letters were traced and applied to the background fabric withย  Steam-A-Seam 2, my favorite type of fusible web. Now it is time to applique them down.

Step 1 – Baste your Quilt

You can use safety pins, or my favorite basting tools – straight pins and pinmoors. I chose a scrap of thin cotton batting (Warm-N-Natural) because it lies very flat which is what I want.

Pin Basting

Step 2 – Choose Your Thread and Decorative Stitch and Practice First

Open Toe FootI use an open toe foot with a wide needle plate. The open toe allows me to see my work so that I can be more precise.

I prefer to use silk thread in a color matching my fabrics for the applique. It is so thin that it nearly disappears into the fabric. A lightweight cotton works well, too. If you don’t have a thread color that’s an exact match, go with a darker thread color rather than a lighter color.

I like to use a buttonhole or blanket stitch rather than a thready satin stitch because it’s much lighter on the quilt and more forgiving to stitch out.

Practice Stitches

Practice with a few decorative stitches on scrap fabric until you find one you like. You can use a regular straight stitch, too, sewn closely to the edge of your fabric pieces. You need to learn the “rhythm” of your stitch so you can anticipate where the needle will next pierce your fabric. Sew slowly and “count” how many movements it takes to complete the decorative stitch.

Step 3 – Appli-quilt Your Letters

Since you will be stitching through all the layers of your quilt, you don’t need a stabilizer. I suggest using the same thread color in the bobbin as well as the top to hide any less-than-perfect stitching or tension issues.

Stitch the Letters

Start in the middle of your letter and bring the bobbin thread up to the top. Take a few small straight stitches to lock your threads. Then switch to the decorative stitch on your machine. You may need to scoot your quilt over so the needle position lines up correctly.

Pivot

Anticipate where your needle will pierce the fabric on each movement of the stitch. Turn the top slowly and smoothly as needed so as to avoid stitching outside the letters into the background. If you have the “needle down” function on your machine, use it. Always stop with your needle down before turning your quilt. Pivot when needed.

Inside Angle

When you have an inside turn, try to land your stitch right in the middle. Don’t be afraid to pivot every stitch or two when needed to completely outline the letters.

Finished Letter

When you reach the beginning, change back to a straight stitch and end with a few small locking stitches. Clip your threads close. When you get to the ‘O’ stitch the inside first.

Finish stitching all of the letters the same way.

Step 4 – Finish Quilting Your Quilt

Now you can have fun quilting the rest of your quilt however you like. I like a lot of quilting, and the background fabric can give you a chance to add a lot of texture.

Quilting Detail

I stitched in the ditch with a thin matching polyester thread, quilted paisleys in the backgrounds with high-sheen polyester in cream, added a fun heart loop motif in the border with high-sheen heavy polyester and quilted the straight brown accent lines in cotton. I use whatever thread I have that will match best!

Step 5 – Bind Your Quilt and Check off Another UFO!!

Using your favorite method, bind your quilt and finish stitching either by hand or machine. Megan from Canoe Ridge Creations has recently put up a wonderful double-fold binding tutorial here on her blog.

My table runner measures 12″ x 30″. I am pleased to addย  a little more LOVE to my home!

Love Table Runner

For my fabrics I “borrowed” a few strips of BasicGrey’s Kissing Booth from a jelly roll I have set aside to begin my next quilt-along (starting in 2 weeks). I cut the letters from a fat quarter of Pearl Bracelets in watermelon. The binding and backgrounds were from my stash.

Here is the complete mini-quilt along schedule. Click the links to go to each section.

Please join my ChristasQuiltAlong flickr group to share pictures of your work-in-progress.

If you make any of the other arrangements below, or even a pillow or larger quilt, I’d LOVE to see it! Or if you are inspired to go in a different direction I’d love to see that, too. ๐Ÿ™‚

Love Wall QuiltLove Squared
The vertical love wall banner uses the exact same directions as the table runner except that the letters are arranged vertically instead of horizontally. The love block would make a great wall-hanging, pillow, or center of a larger quilt.

Christa’s Quilt Links – Valentine’s Edition

Since Valentine’s Day is just around the corner, I thought I’d share a few links showing adorable valentine’s themed quilt projects and tutorials. All links and pictures are re-posted with permission. ๐Ÿ™‚

Twisting Heart TutorialFirst we’ll start off with Connie from Free Motion by the River with her wonderful Twisting Heart Tutorial.

She made her design into a mini-quilt with lots of gorgeous quilting texture. She says it could easily be made into a pillow as well.

I love it!


Heart PouchNext, the lovely Jennifer from Ellison Lane Quilts has this adorable drawstring pouch tutorial complete with an appliqued heart on it.

By the way, Ellison Lane Quilts is sponsoring SewSouth – a modern sewing retreat in the south. Too bad that I am too far away in the west for this one. ๐Ÿ˜ฆ


Patchwork Heart BlockMegan from Canoe Ridge Creations has created a patchwork heart block to share with you.

It’s made from 2 1/2 inch scrap squares in a variety of pretty pinks and reds.

I can see this as the center piece of a larger quilt, but it’s cute enough to stand on its own, too!


Heart PillowFor those of you that would like to add a touch of Valentine’s Day home decor, here’s a sophisticated, yet easy to make reverse applique heart pillow tutorial by Kati From The Blue Chair.

I love the subtle piecing and the linen background.


Finally, I will share the Love with you as I complete my Love Table Runner this weekend. This is part of a 3-step tutorial series that I started last month. My final reveal will be posted on Monday so be sure to watch for it!

Love Table Runner

Here’s hoping you can spread the (quilty) love next week and all year long!

Christa’s Quilt Along 4.7 – Machine Quilting Sea of Squares

For today’s post I will be showing how to quilt this quilt with a walking foot and straight lines. This is enough quilting to hold the quilt together and give it some definition. It took me a total of 5.5 hours to quilt this part of the quilt

I will be adding more quilting to my quilts because one of my quilting mottos is, “Quilt the heck out of it!” I will show that optional extra quilting next week.

Thread Choice

Thread ChoiceFor this quilt, I would like my quilt to have some definition but I don’t want the stitches to stand out too much. I selected a little bit heavier weight thread – a 40 weight polyester with larger quilting needle (size 90) to go with it.

I wound my bobbins with the same color but in a lightweight 60 weight polyester. I chose a cream thread because there is so much white in the quilt. The cream will blend into the white but It’s not quite as “stark” as white so it won’t be too bright against the blue fabrics.

Warm UpStep 1 – Warm Up Session (15 minutes)

It’s a good idea to practice on a scrap quilt sandwich first, even when quilting straight lines.

This way you can check tension, stitch length, and thread color before you begin.

Step 2 – Anchor Quilting (1 Hour, 15 Minutes)

Before you get into any fancy-shmancy quilting, it’s a good idea to “anchor” your quilt first by quilting a few of the major seam lines. This will help stabilize your quilt. While doing this anchor quilting, you want to stabilize your quilt in all four directions. Think of this as a large grid across the top of your quilt. I can quickly and easily pull out the pinmoors as I quilt.

Begin Quilting

With the quilt laid out horizontally, I started quilting on one edge of the quilt. Using my walking foot as a guide, I stitched about 1/4 inch away from the ditch. I used a slightly longer stitch length and quilted continuously in one long row from the top of the quilt to the bottom. Because the lines go all the way across the quilt and the edges will be covered by the binding, I did not need to lock my stitches or tie them off.

Anchor Quilting

When I got the the end of this first line of quilting, I “scooted”ย  over a whole block width to the right (leaving less bulk under the machine). I quilted 2 more rows in the same manner.
Don’t quilt the very edges of the quilt yet; you can do that at the end.

Next, it was time to rotate the quilt 180 degrees and quilt some anchor lines on the other half of the quilt. Again, I quilted them about 1 block width apart. Now the quilt has been quilted in 2 directions. By the way, I love the Machingers quilting gloves because they provide a good grip on the quilt while moving and squishing it under the machine.

Anchor Stitching

It’s time to rotate the quilt 90 degrees and quilt all of the vertical anchor lines now. Again, start in the middle and quilt about 3 rows, one block width apart. Then rotate the quilt completely and finish off the other side.

The quilting is now ready to be finished.

Step 2 – Stitching all the Vertical Lines (1 Hour, 45 Minutes)

I like the “stitch near the ditch” pattern so much that I am outlining every seam about 1/4″ away from the center. I’m not too worried about whether my lines are perfectly straight so I didn’t worry about marking. My other quilt motto is, “Finished is better than perfect!”

Quilting Vertical Lines

Now I can start in the middle of the quilt and quilt all of the vertical lines halfway across the quilt edge of the quilt. When there is too much bulk under the machine, I rotate and finish the other side of the quilt.

Step 3 – Quilting all the Horizontal Lines (2 Hours, 15 Minutes)

This section took a little longer because there were more rows to stitch. Again, I quilted half of the lines going one way, then rotated the quilt to stitch the other half.

Quilting Horizontal Lines

On the very last row which was near the edge of my quilt, I actually quilted 1/2″ away from the seam line rather than 1/4″. This is to take into account the seam allowance which will be covered by the binding.

Edge Quilting

This is now enough quilting for this quilt, but as I said at the beginning, I will add more. Join me next week to see how I finish the rest of the quilting.

If you’d like to try something a little jazzier than just straight lines, why not play around with the decorative stitches on your machine?

Wavy Quilting

The picture above shows me quilting my Jolly Jelly Roll Quilt which was my first DIY Quilt Along. I used a wavy serpentine stitch which would also work well for Sea of Squares!


Quilt-Along ScheduleLinks are Active at the Completion of Each Step:

Quilt Kits are available from my shop for a limited time in these two colorways:

Apple Jacks

Apple Jacks

Sea of Squares

Sea of Squares

And She’s Off!

I got my Charming Chevrons quilt shipped off to QuiltCon today. Making the quilt was fun. The bag to store it in however, was another story!Quilt Bag

Shipping Box


We were required to enclose our quilts in some sort of drawstring bag.

The only bags we have around here are small ditty bags (for holding misc. board gaming pieces) or larger nylon bags that hold our backpacking gear – hubby wouldn’t be too happy if I took those over.

DrawstringFabric Chunk


So, I improvised. I took out a piece of string from a pair of my comfy-cozy pants (they stay up anyway) and grabbed a hunk of fabric that I thought would be big enough. It totally doesn’t match my quilt but I’m going for utility here. ๐Ÿ™‚

Making the CasingDrawstring

With a bit of folding, ironing, pinning and sewing, I was able to sew up the sides and make a casing for the drawstring which I inserted with a safety pin and “fished”ย  around to the other end to close. I had to remember not to sew the openings closed. This is why I don’t make totes or “crafty” items- it’s hard for me to make it all line up when I’m working in 3D, LOL!!

In the future, I’ll stick to straight flat quilts instead and buy or trade for the rest. ๐Ÿ™‚ At least the hanging sleeve was a breeze to make following Jacquie Gering’s wonderful tutorial.

My final touch was to add a label. I don’t like adding labels (call the quilt police now!) mostly because I haven’t found a “pretty” way to make one. I first tried free-motion embroidering my name in colored thread, but that didn’t turn out so well.

Ugly Embroidery

Next, I tried printing text onto some fusible backed white fabric. I was afraid the glue from the fusible would either melt or harm my laser printer, but it actually turned out ok. I used a sheet of Light Steam a Seam 2 which has paper on both sides. I took off one side of paper, ironed it to the back of some solid white fabric, trimmed it down to 8.5 x 11 inches and ran it through the printer. So far so good!

Quilt LabelsFinished Label


I was able to print offย  two labels on one sheet of paper, a larger one for the bag and a smaller one for the quilt. I machined sewed the bag label and hand sewed on the quilt label.

I’ve never shipped a quilt to a show before, but I’m hoping the combination of wool and cotton batting I used will help relax the fold lines once it’s hung and give it a nice drape.

At least I can check that off my list for the week. Now for the next thing on my “to do” list…