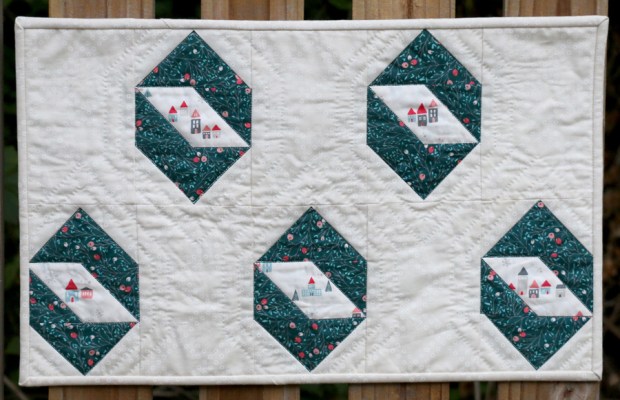
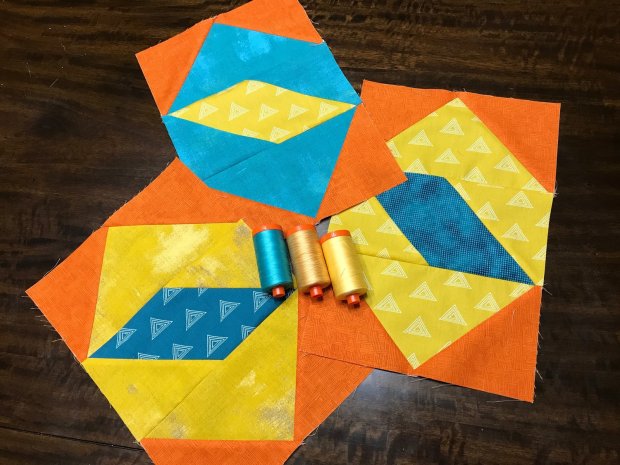
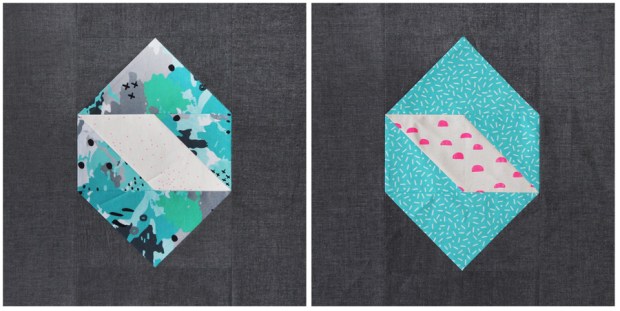
Quilt Along Announcement – See the Winning Quilt Design!

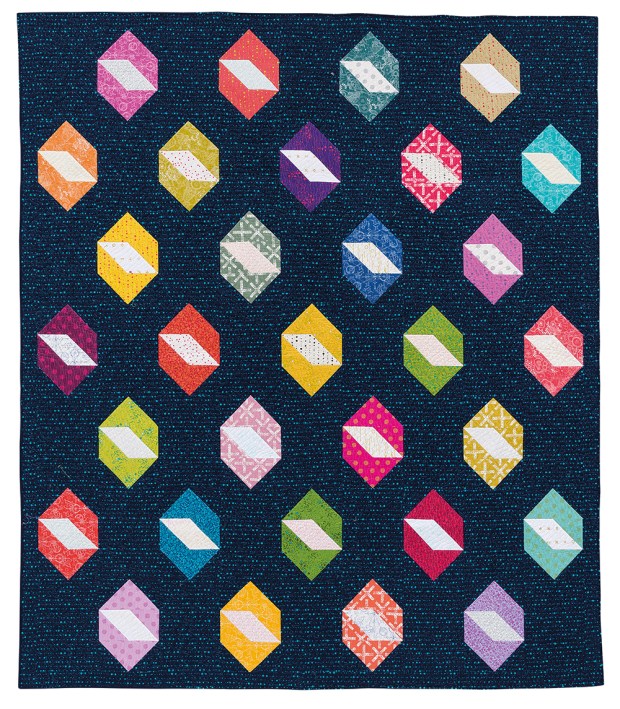
Thanks so much to all of you who voted for which quilt along you wanted to make from my new book, Piece and Quilt with Precuts. And without further ado, the design with this most votes is:

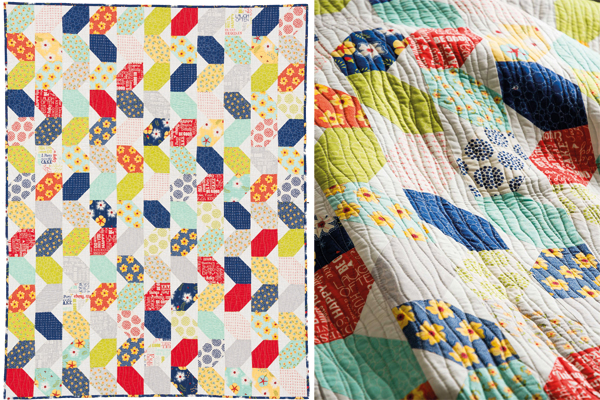
Squiggles Starting in January!!

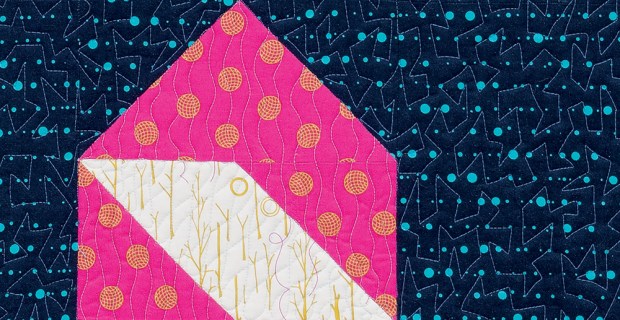
Squiggles recolored in Modern Marks

EQ7 design of Squiggles, recolored in my Modern Marks Fabric

Gridwork was the second most popular, followed by Dot ‘n Dash and then Arrows. I really wish I had time to make them all!!

Coming up soon, I’ll announce the blog hop schedule (starting in January) but here’s what you can expect. It will run for several weeks, giving you plenty of time to complete your quilt while I’m cheering you on. I’ll be remaking the quilt, too, so I’ll include some extra hints and tips along the way.

I’ll do a blog post for every step of the quilt-making process, including basting, machine quilting and binding. So even though you need to purchase the book to quilt along with me, you’ll get even more valuable bonus content, just by following along!

Piece and Quilt with Precuts by Christa Watson

Click here to get your signed copy of Piece and Quilt with Precuts.

Kits coming soon!

And now for the most exciting news (at least for me anyway), is that for the first time in my history of quilt alongs, I’m going to offer kits, made from my Modern Marks fabric! The beautiful thing about a kit is that although the fabric is the same in each kit, no two quilts will be alike because of your choice of color placement for the blocks. I love designs that work that way.

The fabric won’t arrive in stores until November, but once I get an idea of the pricing and delivery dates, I’ll offer Squiggles kits for pre-order.  Watch the blog for that announcement soon!

Modern Marks Kit Options from Piece and Quilt with Precuts

Other kit possibilities – Gridwork, Dot’n’Dash, Arrows (Navy or Aqua)

That brings me to my next idea. Please let me know if you are interested in kits for any of the other 3 quilts: Gridwork, Dot’n’Dash and Arrows (Navy or Aqua). There’s no obligation of course, but if I can get a rough idea of the interest, I may be able to offer kits for those, too. Just leave me a comment letting me know which kit you might be interested in, or you can always shoot me a private email at christa@christaquilts.com.

And just to reiterate, you can still quilt along with any fabrics you want to use! The kits are just a convenience for those who are interested. I’ll be selling them through my store at shop.christaquilts.com and I’ll be able to ship them internationally, too. I’ll make another announcement once they are available for preorder.

Summary Thoughts

So just to recap, I’ll be posting the Squiggles quilt along schedule later this month and will offer kits for 4 different quilts if there’s interest. And remember – there’s nothing that says you can’t make one of the others while we are making Squiggles. I love seeing your progress on any quilt you make!

Save

Save

Save

Save

Save

Save

Top 10 Tips for Quilting on a Domestic Machine

Welcome to Day 24 of the Back to School Blog Hop organized by Sam Hunter of Hunters Design Studio. If you are new to the hop, check out the end of the post for links to all of the “back to school” sewing tips!

Back to School Blog Hop - sewing tips

Top 10 Domestic Machine Quilting Tips

1. Baste Well

This is the least fun part of the quilt-making process but probably the most important. All three layers of the quilt (top, batting, backing) should be flat and smooth. I press seams open so they lie flat, and I also take the time to iron my batting. Spray basters can press the quilt after basting to set the glue and iron out any wrinkles; pin basters should double the amount of pins they would normally use.

2.  Use a Large Work Surface

Sewing Room

Buy a large sewing desk with a drop in table if you can. If not, put up an extra table behind your sewing machine and off to the left to hold the weight of the quilt. In my table above (which I bought 20 years ago from a company no longer in business) I added a couple of books under the machine to get it to the right height. You can also get a custom insert made to fit your machine. (Just google “custom sewing machine insert). Some companies also make large extension beds that go around your machine, giving you extra surface on any table.

3. Get tools that will help you grip and slip!
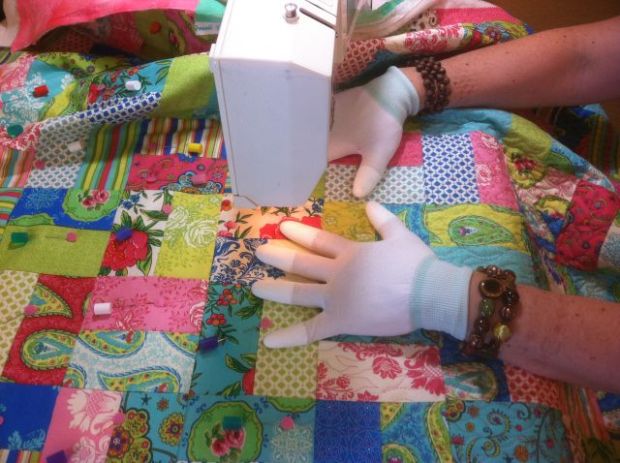
Machingers Quilting Gloves

Machingers quilting gloves help grip the quilt, and a supreme slider will make the bottom of the quilt slip and slide more easily under the machine.
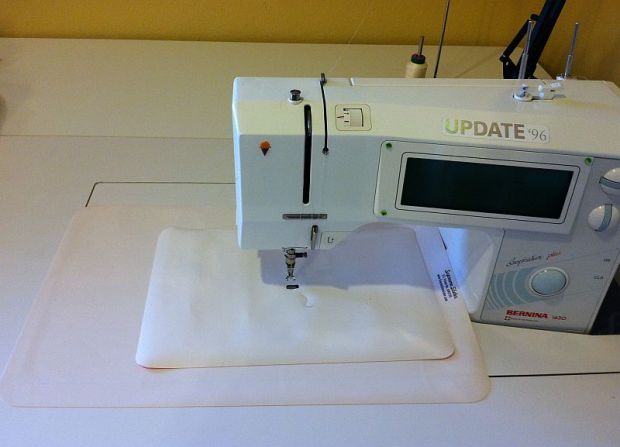
Supreme Slider 2 Sizes

Two sizes of Supreme Slider are shown above, on my older sewing machine: the regular size (that I accidentally stitched through years ago) and the larger, queen size.

A word of caution – the Supreme Slider is only for free-motion quilting, NOT walking foot quilting. If you use a walking foot, you may stitch through the slider (ask me how I know….)!

4. Choose the Proper Needle and Thread

Here’s a general rule of thumb for matching thread weight and needle size: use a size 80/12 needle with a size 40-50 weight thread, and a size 90 needle with a 28-30 weight thread. Sharp or topstitch needles will have a sharper point, which will allow better penetration of the layers. A “machine quilting” needle is fine, too, but it’s usually more expensive and I don’t notice a difference. A “universal” needle is ok, but it’s not as sharp as the others and is better meant for all purpose applications.
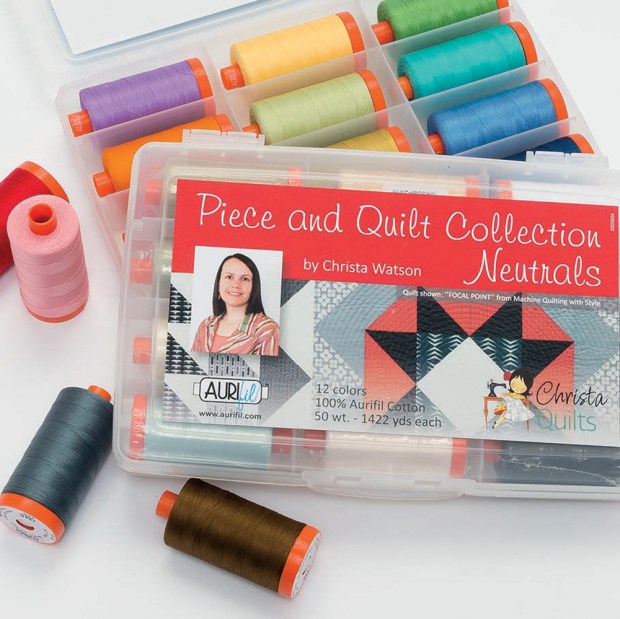
Piece and Quilt Collection Aurifil Thread by Christa Watson

My Piece and Quilt Collection is available at The Precut Store, or your favorite retailer!

You can use nearly any thread you like for machine quilting, but I my favorite is Aurifil 50 weight cotton. You can use it for BOTH piecing and quilting, and it’s strong yet lightweight so it really blends in nicely. Rather than owning ALL the threads in ALL the different weights, I like simplicty – 50 weight cotton for EVERYTHING I do: piecing, quilting, and binding.

5. Match the top and bobbin threads

When quilting on a domestic machine, I also prefer to use the same color thread in the top and bobbin. It will hide any tension issues, and avoid the problem with a contrasting thread color poking through on the top or back of the quilt. This means you need to think about which fabric you are choosing for the backing of your quilt.

Christa Watson free-motion quilting

Current quilt in progress – this is the back using the same thread in top and bobbin.

If you are are a beginner, choose a busy back that will hide mistakes and allow different thread colors to blend in. If you want to show off your quilting, use a solid colored back so you can really see the stitches.

6. Practice Sketching

Warm up before you quilt by sketching your quilting design on a piece of paper or on a photo or printout of the quilt top. If you understand the flow of the quilting path, you can mimic that motion on your actual quilt. I like to develop a quilting plan for every quilt so that I’m not stuck wondering what to quilt next.
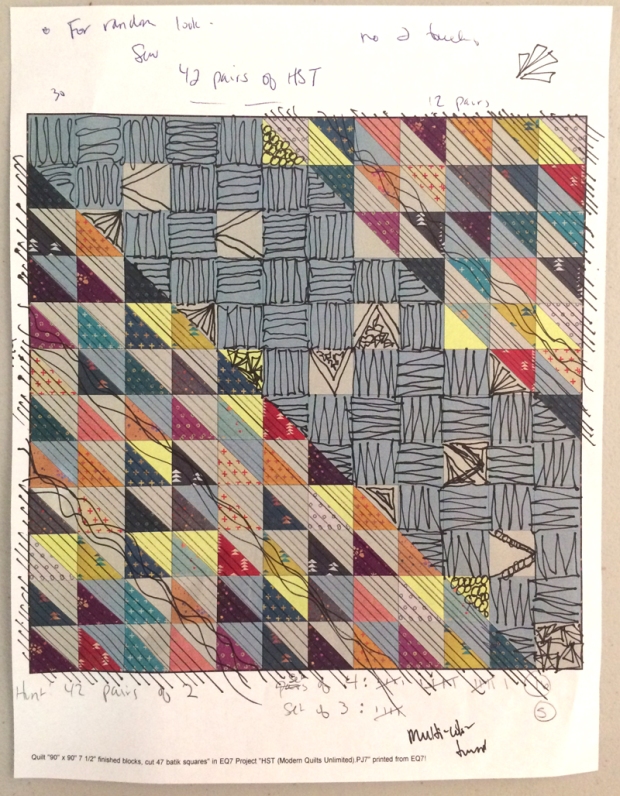
Possible Quilting Plan for HST Remix

Here’s a real life quilting plan for a quilt I’m in the process of remaking. It’s pretty messy with notes and thoughts as I figure things out, but I can print off multiple copies if needed until I’m satisfied and ready to quilt. Sometimes I will sketch out an entire quilting plan, while other times, I’ll just dooddle the quilting design to get the flow for how I’ll stitch it.

Check out my Craftsy Class – The Quilter’s Path to learn more about this method!
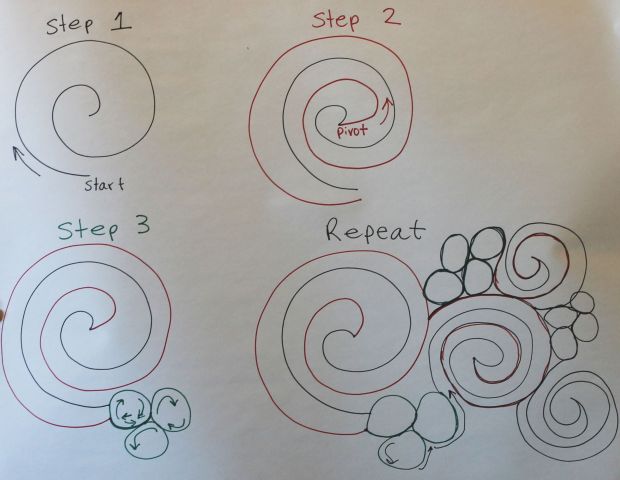
Diagrams

Practice diagrams for “swirls and pearls” – one of my favorite designs to quilt!

7. Practice Stitching

If you practice your “daily quilting exercise,” you’ll be a pro in no time! I always give my students homework when I teach – they are to make up a stack of quilt sandwiches (scrap fabric and batting) to practice on for 10 minutes a day for a week. After about 3-4 days of practice, they can see a noticeable improvement!
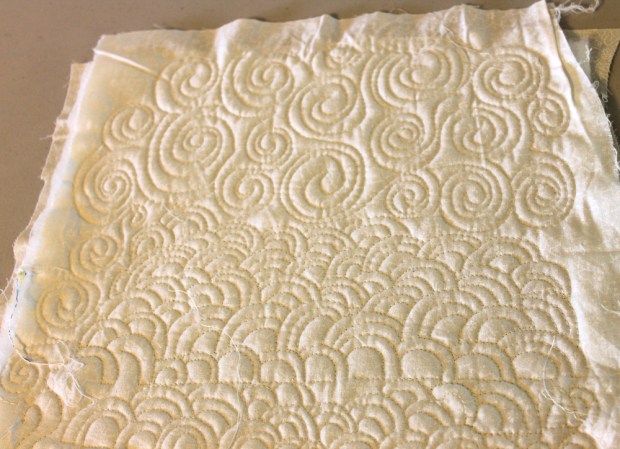
Free motion quilting practice

Fill up a scrap practice piece each day until you get the hang of the design!

Although I’ve been quilting for over 20 years, I still warm up every quilting session with a practice sandwich to test my tension for the day. I’d rather mess up on a scrap then on the real quilt!

8. Embrace both walking foot and free-motion techniques
Books by Christa Watson

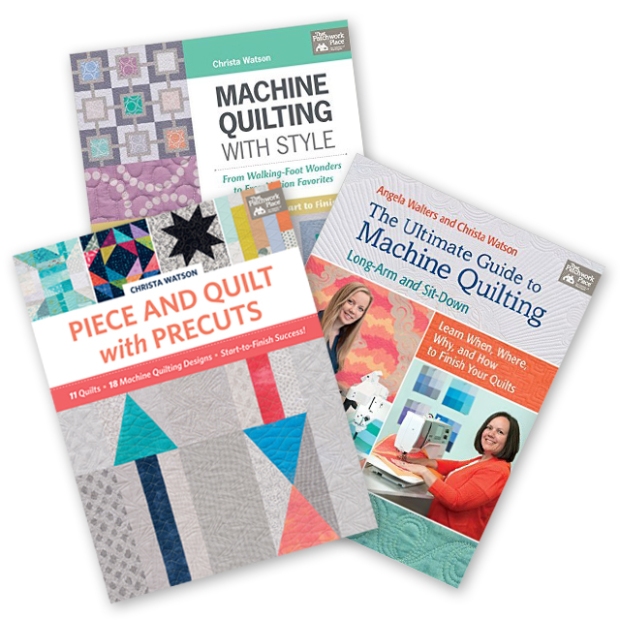
In all of my books, I include ideas for BOTH walking foot  AND free-motion quilting!

Many quilters think they’ll never be able to quilt because they expect to free-motion quilt perfectly the first time! In my books, video classes and live classes, I always have the students start off with walking-foot quilting first because it’s hard to mess up! Once they are confident that yest they CAN quilt, then we move onto free-motion. By using both techniques in the same quilt you can really achieve some interesting designs. Some students prefer to use the walking foot exclusively while others are more comfortable with free-motion work. Many times, you don’t know what you like (and don’t like) until you try!

9. Quilt on Real Quilts and Give Them Away

Practice may not make perfect, but it does make progress! What better way to learn than by practicing on a “real” quilt as a gift for someone else? The recipient won’t notice your imperfections and you won’t have to be constantly reminded of how far you’ve come! I’ve given away dozens and dozens of “perfectly imperfect” quilts over the years and never would have gained the level of experience I have now, if not for tons of gift-giving!

10. Your Most Important Tool: A Can Do Attitude!
Start to finish quilting

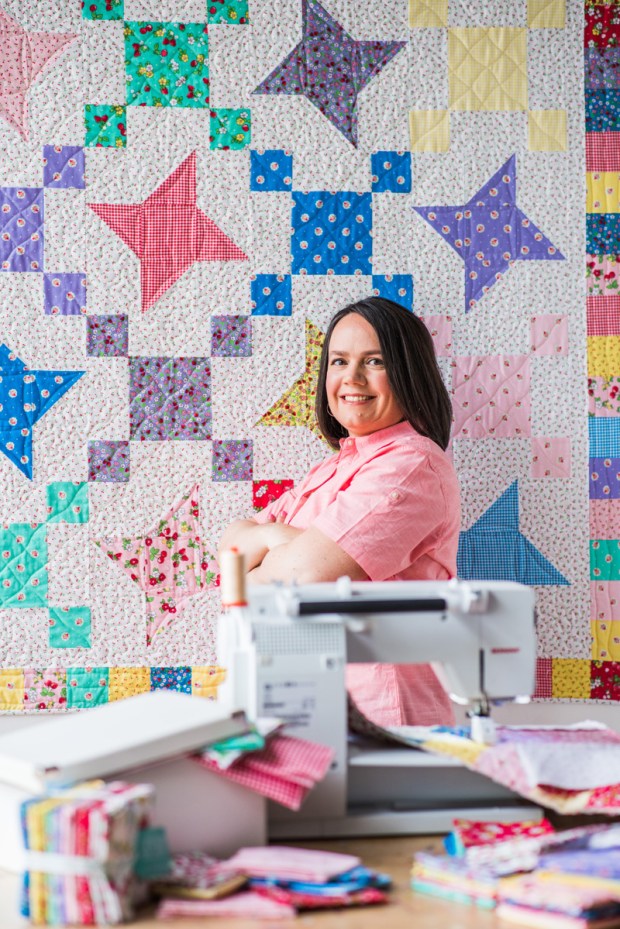
Yes – you CAN quilt it! And I’m here to help!
Image is from my comprehensive start-to-finish quilting class on Craftsy.

I started teaching others to quilt in the late 90’s and I noticed that the students who had the most success, weren’t necessarily those with the most expensive sewing machines and tools. (Shhh! don’t let my industry partners know I said that!!) What they lacked for in experience or top of the line equipment, they more than made up for with their determination to get ‘er done!

You know the old saying “whether you think you can or can’t, you are right”?  That applies to quilting as well. My goal since becoming a professional teacher, author and designer just a few short years ago (with 20 years of “practice” under my belt) has been to get others to realize that quilting on a domestic machine can be both fun and rewarding if you stick to it and just take it one step, (or stitch) at a time!

Check out These “Back to School” Basics:

Check out each of these stops on the back to school sewing blog hop. There’s so much information contained in these posts that you are well on your way to learn everything you need to know to make your sewing and quilting experience more enjoyable. Happy reading!!

Save

Save

Save

Save

Save

Save

Save

Save

Save

Save

Save

Save

Save

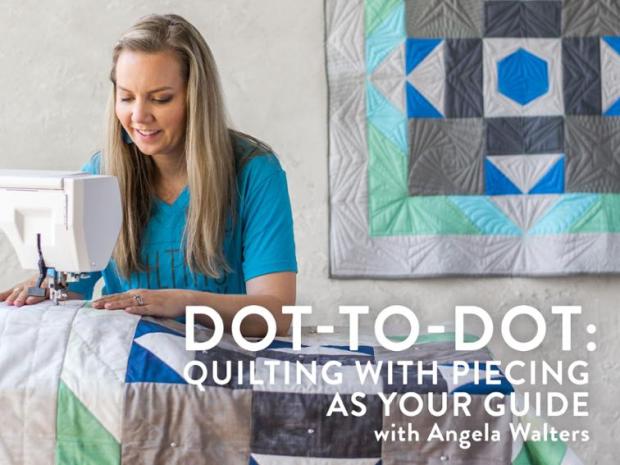
New Craftsy Class: Angela Walters’ Dot to Dot

As a Craftsy instructor, one of the privileges that I get is being able to watch any of the Craftsy classes from my fellow instructors. Of course, I don’t have time to watch all of the classes I’d like, but I’m always on the lookout for new classes that I think you all would benefit from. So when Angela Walters released her latest class, Dot to Dot: Quilting With Piecing as Your Guide, I knew I had to watch it as soon as I could.

Angela Walters Dot to Dot

Get Dot to Dot quilting for 50% off, through Friday September 8th.

I was even pleasantly surprised when she included one of the quilts from our book as an example, and even gave me a shoutout in class!! (Now you’ll really have to watch the class to see which quilt it is, LOL!!)

This class is fantastic and I found myself watching the entire thing in one setting. Although Angela uses specialty rulers to achieve the straight lines when quilting dot to dot, she also shows you a couple of other ways to accomplish the same task. I love it when there are options! The class includes a free pattern so that you can make the same quilt she’s working on, or you can practice her methods on your own quilt or practice blocks.

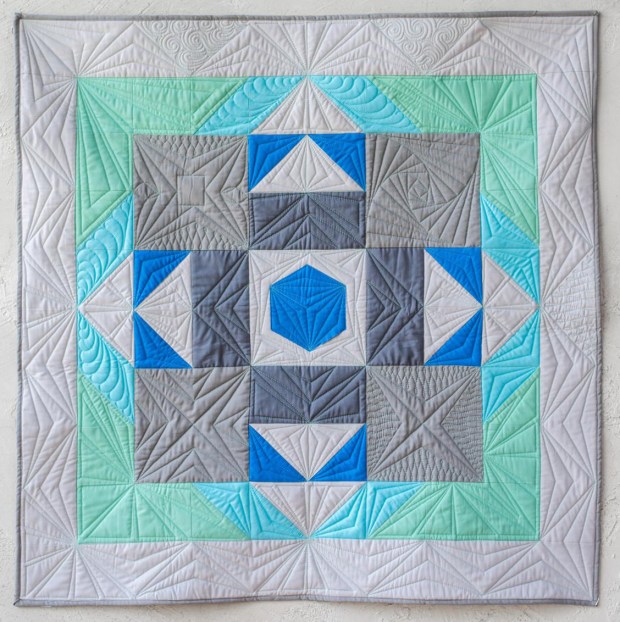
Angela Walters class quilt

Make this quilt to practice your dot to dot quilting. Free pattern included in class!

Here’s a quick breakdown of the class lessons, including the length of each segment:

1. Dot-to-Dot Quilting Overview (10:36)

Meet your instructor, stitch whisperer Angela Walters, and start class by finding the ‘dots’ on your quilt using the quilt top’s piecing. See how to stitch consistent straight lines whether you’re using a walking foot, free-motion foot or ruler foot and ruler.

2. Triangles (22:21)

Ready to try some basic dot-to-dot designs? Follow along with Angela as she stitches the simple V, triangle wedge and arrowhead in triangular shapes, showing variations along the way.

3. Squares (23:50)

Build on the designs you learned in the previous lesson with three more motifs that are perfect for square blocks, the most common shape in quilting. Watch as Angela reveals the square spiral, double V and double diamond designs. Then she shows you where to use them on your quilt to add the most impact.

4. Diamonds & Hexagons (15:35)

See how to quilt diamonds and hexagons as Angela shares three designs and variations: the spin wheels, alternating V’s and tumbling diamonds. You’ll learn how to find diamond shapes in your quilt, even if it wasn’t pieced with diamonds!

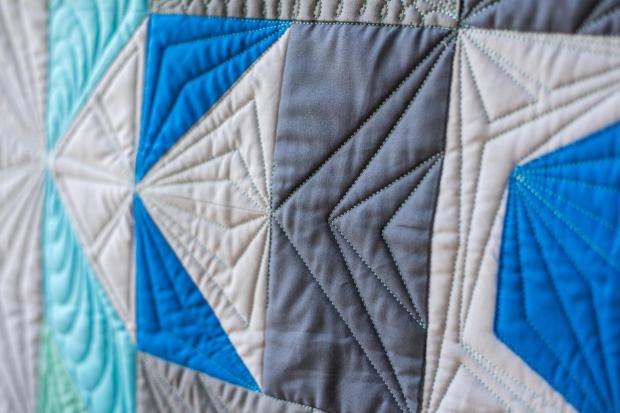
Angela Walters Quilting
 As Angela says – close enough is good enough!!

5. Uniquely Shaped Blocks (16:07)

Discover three ways to quilt uniquely shaped blocks such as polygons. Angela then shows you how to modify your designs, stitch a shape within a shape, and combine blocks so you know what to stitch next!

6. Borders & Corners (21:30)

Once you’ve gotten a handle on quilting within defined areas, you’ll tackle the borders. In this lesson, see how to quilt designs in areas with more negative space. Plus learn three ways to turn the corner without losing your design flow.

7. Dot to Dot Around the Blocks (17:50)

Finally, think outside the piecing and find out how to use dot-to-dot designs in any style of quilt. Angela demonstrates how to use the quilting to frame blocks, create secondary patterns and use wedge shapes as fillers to quickly quilt any space efficiently.

Dot to Dot: Quilting With Piecing as Your Guide really is a fabulous class. What I’ve really noticed in this class compared to her previous classes is that she’s really letting her personality show. If you are a fan of her Midnight Quit Show, you’ll see that she brings the same warmth and humor into her class. Even if you don’t even care to quilt, it’s just fun to watch and be entertained!
Dot to Dot Quilting with Angela Walters

This one is my favorite!!

Save 50% on This Class!

The best part about this class is that it’s on sale now, through Sept. 8th for 50% off the regular price. I love it that Craftsy makes their classes affordable and once you buy them, you own them forever!

Click here to get Dot to Dot quilting for 50% off the regular price.

Now, I’d better go practice my ruler work – it really is a fun way to quilt, once you get the hang of it!

Save

Save

Save

Save

Save

Save

Save

Save

Save
Save
Save
Save
Binge Watch Craftsy for Free Today – 24 Hours Only

Many of you know I’ve long been a fan of Craftsy’s online learning format even before I became an instructor for them. So I’m excited to share the news about something they’ve never done before – 24 hours of free video watching today only!!

The free day is now over – but you can get both of my classes for 50% off the regular price!

Click here to get access to your free 24 hours of Craftsy Viewing!

The Quilter's Path by Christa WatsonMy first class: The Quilter’s Path
2+ hours of machine quilting instruction using your walking foot, free motion or both.

The Fine Print

Today only from 12:01 AM through 11:59 PM (Monday, September 4, 2017) Craftsy is allowing streaming access to their site to check out their library of over 1200+ online classes. You’ll have access to any class for 24 hours, but you won’t be able to download or save them. And you won’t have access to the Q&A instructor forum or the class materials.

Christa Watson Startup Library QuiltingMy second class: Startup Library – Quilting
Nearly 6 hours of lessons that teach you how to make a quilt from start to finish!

This is such a fabulous way to “try out” a new class you’ve been thinking about, with no obligation. If you like the class, you can of course purchase it right there on the spot, and you’ll own it forever. If you haven’t seen my classes yet, I encourage you to check them out, but be warned – it’s over 8 hours of viewing between them both! And if you already own my classes, check out Craftsy’s lineup of quilting classes – it’s the most popular subject!

So click here to head over to Craftsy and let the binge watching begin!!

The free day is now over – but you can get both of my classes for 50% off the regular price!

Save

Save

Save

Save

Save

Save

Piece and Quilt with Precuts: Grand Finale Giveaway and Upcoming Quilt Along

Did you enjoy the blog hop for Piece and Quilt with Precuts? I sure enjoyed sharing all 11 quilts from the book plus 30 more variations made by my friends. To wrap up the blog hop, I have a few reminders, a peak of what’s coming next, and an epic giveaway! So be sure and read through to the end of this post so you don’t miss a thing! Thanks to your support, Piece and Quilt with Precuts is on pace to outsell my other two books, and I couldn’t be more pleased.

Piece and Quilt with Precuts by Christa Watson

Click here to get your signed copy of Piece and Quilt with Precuts, along with my other books.

Giveaway Winners and Free Bonus Pattern

Today I’ll be notifying all of the winners via email for the giveaways I hosted on my blog. Each of the blog participants will also be notifying their winners over the next few days, or at the conclusion of their giveaway. But not to worry, if you didn’t receive an email notice, you can still click here to get the free Baby Geese Quilt Pattern. Think of it as Quilt #12 from the book!

Baby Geese Bonus Quilt Pattern

Click here to get the free Baby Geese PDF Pattern – Bonus Quilt #12

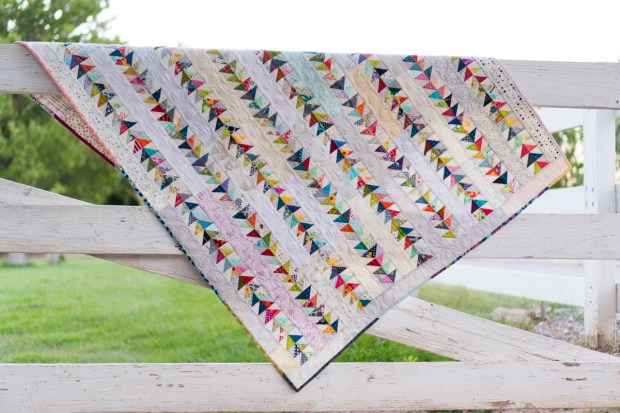
Baby Geese is made from leftover scraps and “bonus triangles” – those leftovers when you trim off corner triangles. Because we couldn’t fit it in the book, my friends at Martingale have included it on their website as a bonus for anyone following the hop, or purchasing the book (the link to get the PDF is also included in the book.)

Win My Baby Geese Quilt!

And now for the most epic giveaway, one lucky reader (from the US) will actually win this quilt! It measures 43″ x 54″, perfect for a baby gift or lap quilt. Although I love all my quilts and am a little sad whenever I give any of them away, I’d be even happier knowing it went to a good home!

Baby Geese Quilt by Christa Watson

The giveaway is tied in with my next big announcement below, so keep reading!!

Baby Geese Quilt by Christa Watson

I love it when quilts get used – for a picnic on the grass, or for cuddling up!!

Help Me Choose a Quilt for My Next Quilt Along!

And now, for the most fun news, let’s make a quilt together! It’s been awhile since my last quilt-along where I guided you through the complete quilt from start to finish. So don’t you think it’s time for another one?

I want to remake one of the quilts from my book, using my new Modern Marks fabric which will be available in November. You’ll need to purchase a copy of the book to quilt along, but of course you can choose your own fabrics, and change it up however you like.

Modern Marks by Christa WatsonI’ll be working with my new Modern Marks collection from Benartex. I’ll offer bundles & quilt-along kits for pre-order soon, just in case you want to use the same fabrics as me.

Now here’s where I need your help. Please answer these questions in the comments below and I’ll choose one of the answers at random to win the Baby Geese quilt mentioned above! Of course, there’s never any obligation to quit along, and you are welcome to follow along and not even make the quilt! (Or you can pretend to make it virtually in your head!!) But this will help me get started planning the quilt along.

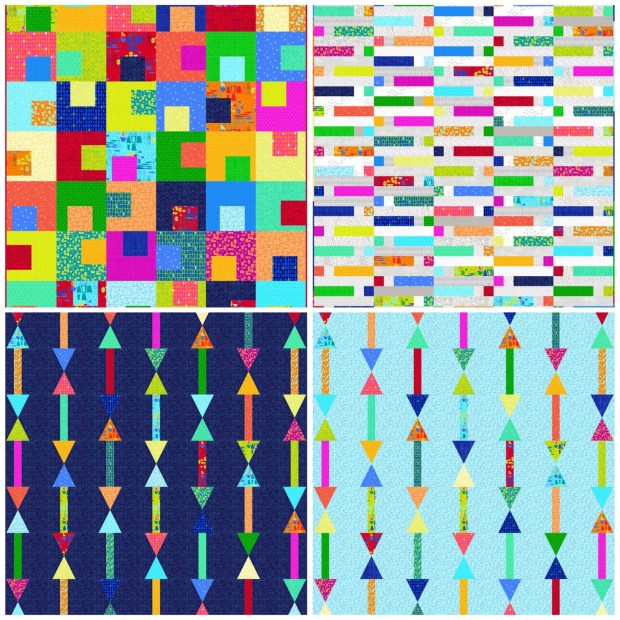
  1. Which of the four quilts below would you like to make along with me? I’m showing them mocked up in Modern Marks, but you can make it in any fabrics you like, of course!
  2. Would you rather start the quilt along in November (when the fabric hits the stores), or in January so we don’t have to worry about running into the holidays? I’m thinking it would be more practical to do it in January, but wanted to give you all the option to choose.

Whichever quilt and time frame gets the most votes (by commenting on THIS post) is the one I’ll choose for the QAL. I’ll leave the giveaway open for a full week (through next Thursday, Sept 7th) so you have enough time to choose. And feel free to share this blog post with your friends, so they can get in on the fun, too!

Which of the 4 Quilts Below Should We Make?

(1) Squiggles

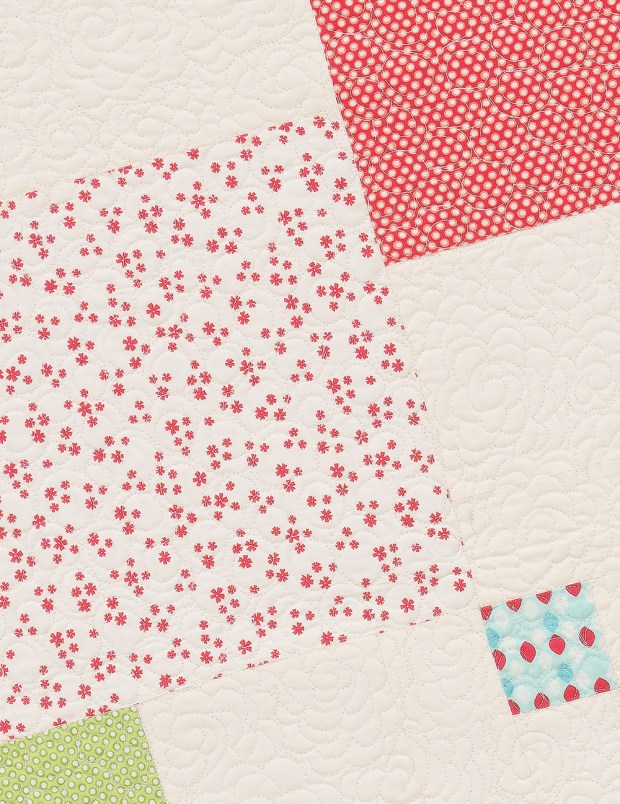
Squiggles Quilt from Piece and Quilt with Precuts by Christa Watson

This is the version from the book, made from 5″ or 10″ squares.

Squiggles recolored in Modern Marks

This is the version recolored in EQ7 using swatches of Modern Marks

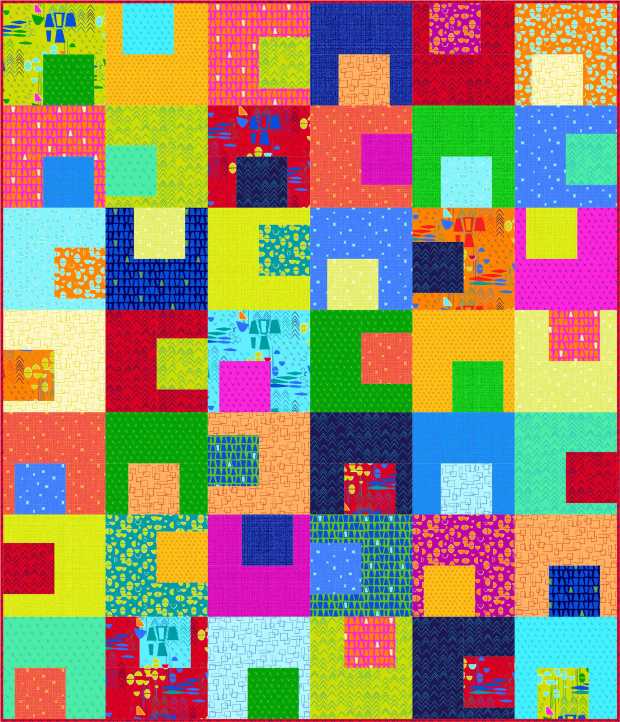
(2) Gridwork

Gridwork from Piece and Quilt with Precuts

Gridwork is made from one Layer Cake (10″ squares) and one Charm Pack (5″ squares)

Gridwork recolored in EQ using modern marks

Gridwork recolored in Modern Marks

(3) Dot’N’Dash

Dot 'n' Dash by Christa Watson from Piece and Quilt with Precuts

Dot n Dash from the book (above) – calls for 2 jelly rolls: 1 print, 1 background

Dot n Dash recolored in EQ7

Dot-n-Dash recolored with Modern Marks and Scrappy low volume backgrounds

(4) Arrows

Arrows from Piece and Quilt with Precuts by Christa Watson

Arrows from the book with a scrappy background – it require a specialty ruler so keep that in mind when you choose which one you’d like to vote for the QAL.

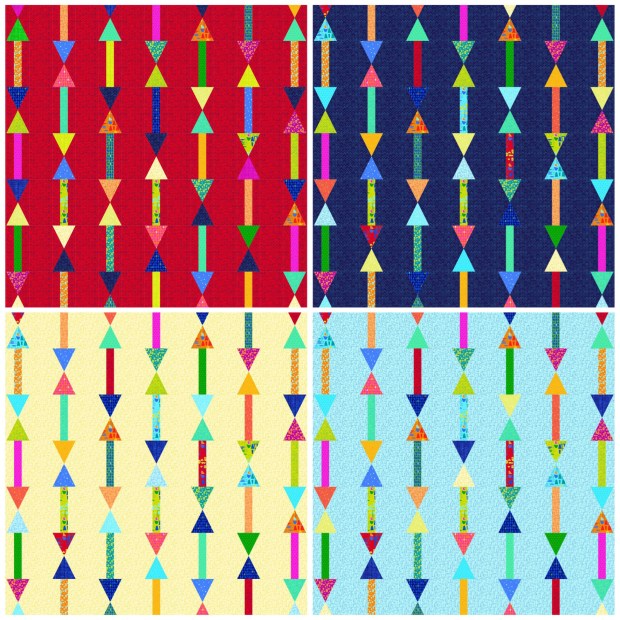
Arrows in 4 colors

Arrows with all one background. Which do you like better: red, navy, cream, or aqua?

Whew! I know that’s a lot of information for one post but I wanted to end this party with a fun celebration, just like it began. Thanks so much for following along, and be sure to keep in touch when you are making any of the quilts from the book. I’d love to cheer you on!

Save

Save

Save

Save

Save

Save

Save

Save

Save

Save

Save

Save

Save

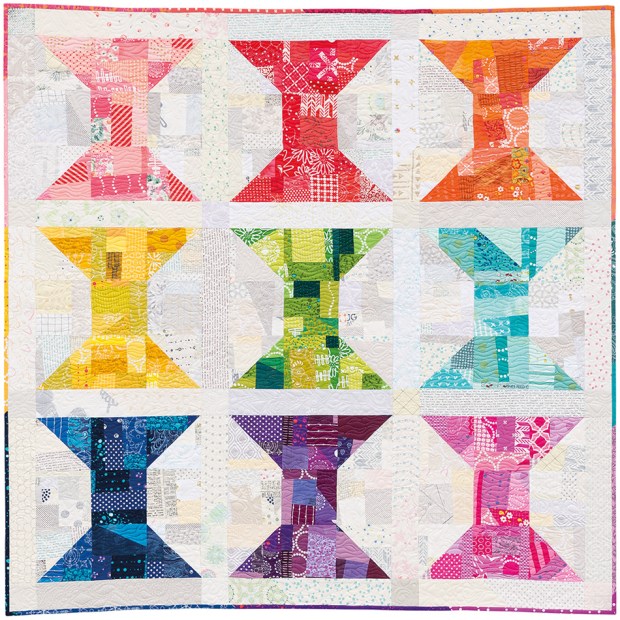
Piece and Quilt with Precuts Quilt 11 – Spools

Can you believe it? Today I’m sharing the last quilt from my book, Piece and Quilt with Precuts. Be sure and stick around for tomorrow’s blog hop wrap-up as I announce an epic giveaway (hint – it’s a QUILT!!!) and something fun to look forward to in the future!

Meet Spools, which is possibly my favorite quilt in the book. (I know – just like children you can’t really have a favorite, right???)

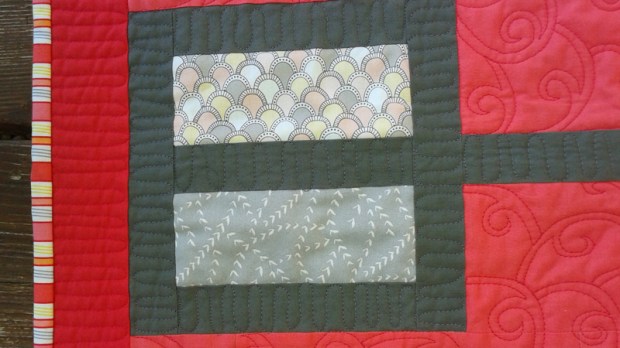
Spools by Christa Watson from Piece and Quilt with Precuts

Spools Photography courtesy of Martingale/That Patchwork Place and Brent Kane
Piece It

My favorite thing about this quilt is that it expands on a concept that I introduced in my first book. (Remember Facets from Machine Quilting with Style? Similar piecing concept, totally different design!!)

Spools uses many leftovers from other quilts in the book as well as scraps from my scrap bin. It was so fun to combine any sized pieces to create my own “made” fabric, and then cut them up into recognizable shapes – a process I call “structured improv.”

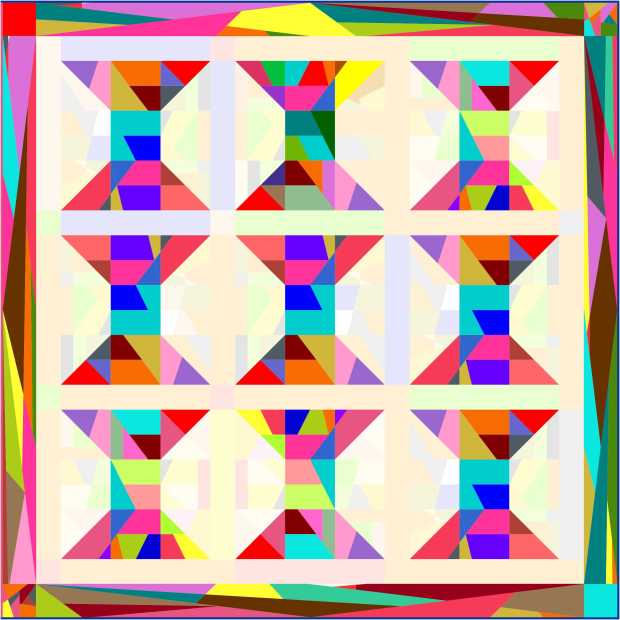
Original spools design in EQ7

Original EQ7 design concept  for Spools. I made each spool a different color instead.

When I originally designed this quilt I had thought of mixing up a bunch of different scraps to make each of the spool blocks along with a scrappy border. The image above was my original EQ7 design for the quilt. But as I was getting ready to make the quilt I had a last minute stroke of inspiration to make them color blocked instead. And instead of a scrappy border, I made a scrappy binding around the edges that matches the color of the spool blocks!

I much prefer the quilt I ended up making, where each spool is a different color of “thread” – don’t you?? Now after making this quilt, I feel like any scrap can work its way into a future improv-pieced quilt!

Quilt It

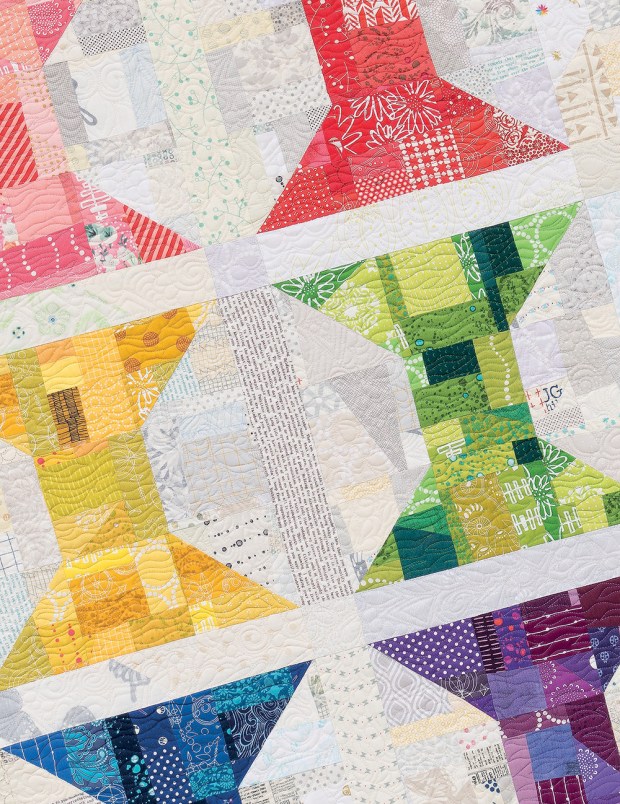
Machine Quilting on Spools

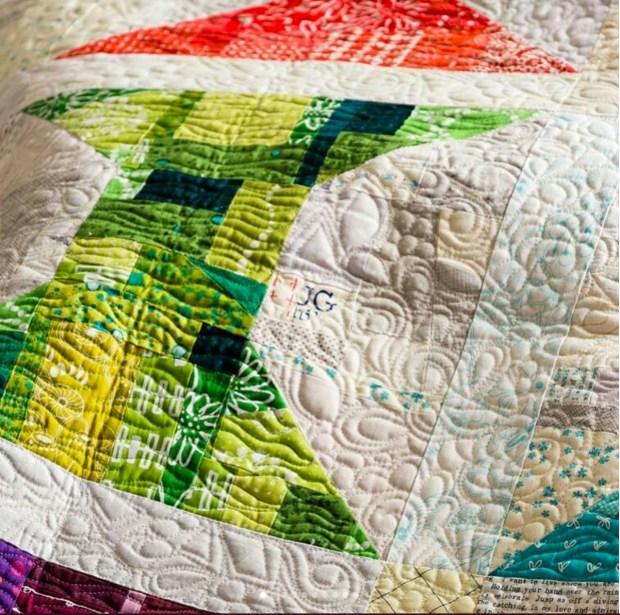
I used a combination of two quilting designs. In each of the spool blocks I quilted wavy textured lines using a matching Aurifil thread. Then in the background I combined another fun free-motion technique I teach called “free-motion improv.”

You basically combine several of your favorite free-motion motifs and mash them all up together in the same quilt, changing designs every 2-3 motifs. It’s a fun way to quilt that adds tons of interest and texture to the design.

Free Motion Improv on Spools

Machine quilting details on Spools.

One of the reasons I quilt my quilts so densely is to hide my mistakes. After all, when you quilt one line of imperfect stitches it really stands out like a sore thumb. However, if you surround it with more imperfect quilting, all you notice is the beautiful texture rather than the individual stitches!

More Arrows inspiration

Check out the bloggers below for their takes on Spools, and be on the lookout for giveaways! I hope you’ve enjoyed traveling to all of the stops on the hop for more ideas on how to make any of the quilts in my book!

Sandra Starley: Textile Time Travels

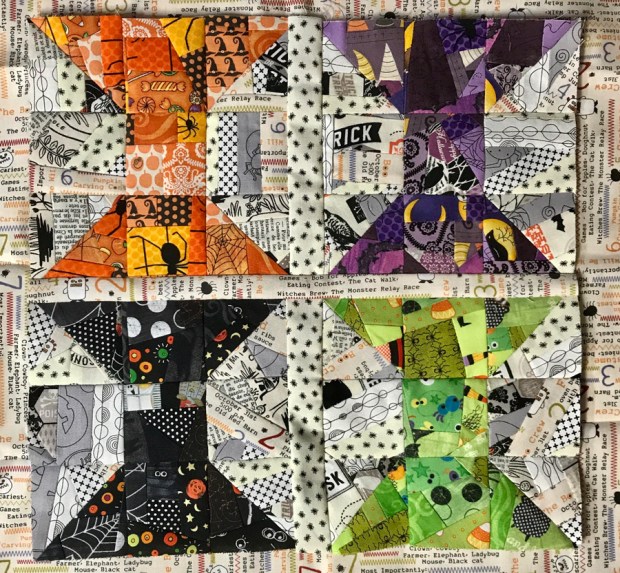
Sandra Starley Halloween Quilt -Spools

Who says you have to make rainbow colored blocks? Sandra decided to make mini-sized Halloween themed spools, complete with spooky background prints. Now this makes me want to make one for all the holidays! I mean, how cool would it look in reds and greens for Christmas, or red, white and blue for a patriotic quilt? This opens up a world of ideas for you to explore!!

Be sure and keep an eye on Sandra’s blog in the future to see how she quilts it!

Jen Shaffer: Patterns by Jen

Spools made by Jen

I love how Jen made her quilt similar to the original, but she totally changed up the quilting. She used a combination of “modern zig-zags” in the sashing which I introduce earlier in the book. Plus she combined it with “triangle texture”, a motif I teach in my first book.

Visit Jen’s blog to see some really great process pics showing how she approached the improv piecing. I’m proud of her for going outside her comfort zone! While there, you’ll even see the coordinating pillow she made with another machine quilting design from the book!

Today’s Gift: Win Scraps of My new fabric

Since we’ve been talking about how to use up your scraps, I thought it would be fun to offer a unique giveaway today. Many of you know I’ve been sharing sneak peeks of my new fabric line, Modern Marks, which releases this November from Benartex. Well, I’ve been working behind the scenes, making a bunch of quilts from the new fabric to show it off a bit later. That means that I’ve accumulated a ton of scraps, so I’ve decided to give them away to one of you!

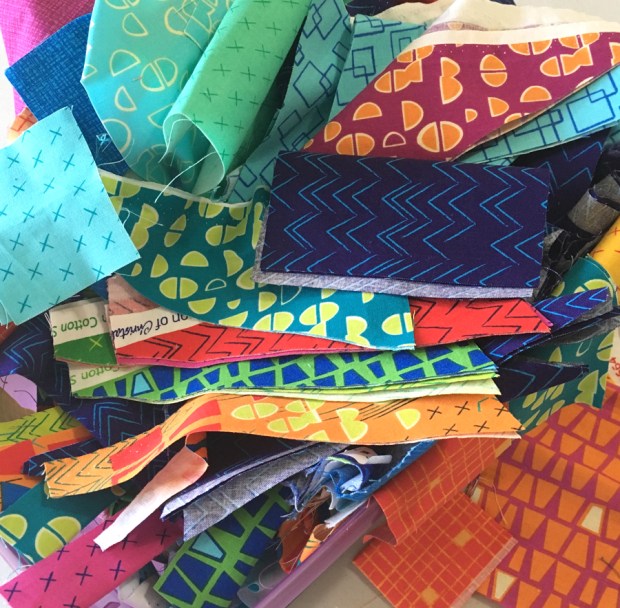
Modern Marks fabric scraps

This bundle of scraps could be yours! It’s Modern Marks by Christa Watson for Benartex.

This means that one lucky winner will be the first (other than me) to get their hands on my fabric, before anyone can even buy it!!! Now that you know what you can do with scraps, the sky’s the limit when it comes to using them.

To enter, leave me a comment letting me know which quilt from the book is your favorite. If you haven’t had a chance to see them all, click here for the blog hop schedule, with links to each of the quilts. I’ll choose a winner’s name at random on Monday morning and notify them via email. I’m happy to ship your box of scraps anywhere, with the understanding that an international winner will pay shipping (less the cost of shipping it to the US).

Piece and Quilt with Precuts Blog Hop

And finally, if you’ve enjoyed the blog hop, be sure to pick up a signed copy of my book. It’s been a joy to write, and even more satisfying to share all of the quilts with you. Be sure and stop by tomorrow to see what’s coming up next!

Update: Winner Selected and Comments Closed

Congrats to Brandy F.  who has been contacted via email.

Save

Save

Save

Save

Save

Save

Save

Save

Save

Save

Save

Save

Save

Save

Piece and Quilt with Precuts Quilt 10: Arrows

I’ve been having such a fabulous time sharing all the quilts from my new book Piece and Quilt with Precuts. In fact, once the blog hop ends, I’m going to be at a loss for what to do next! (But not for long I hope!) Take a look at Arrows, one of my favorite designs from the book, which just so happens to be on the cover!!

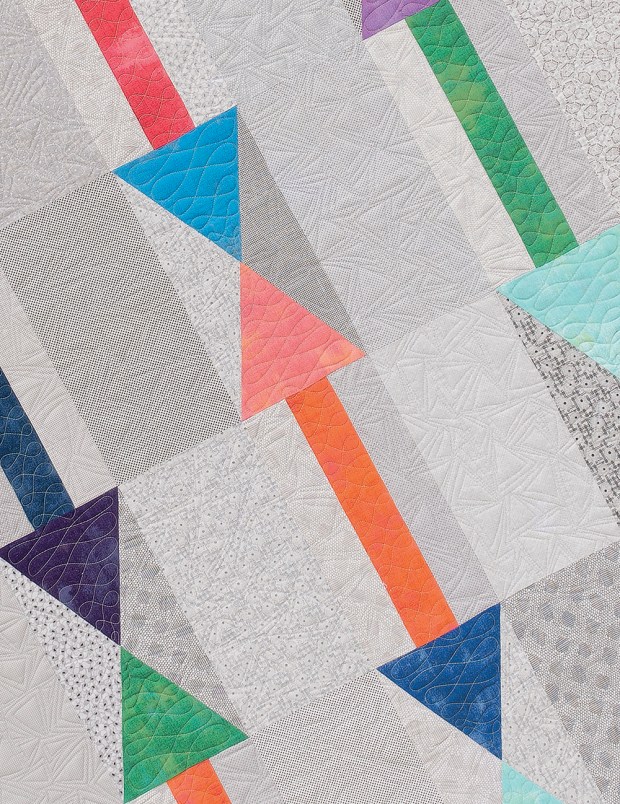
Arrows from Piece and Quilt with Precuts by Christa Watson

Arrows Photography courtesy of Martingale/That Patchwork Place and Brent Kane

Piece It

I had two goals when designing this quilt: I wanted to make it with a scrappy background, and I wanted to create a design that would use a fat eighth bundle for the focus design. While designing the quilt in EQ7, I also wanted to see what the quilt would look like if you decided to use just one fabric for the background, rather than going scrappy.

Check it out using a black background – doesn’t it make the colors pop?

Arrows Alternate Colorway designed in eq

Here’s what it would look like with a white print background and bright colors:

Arrows alternate colorway designed in eq7

As you can see, it’s such a versatile design! Whenever I make a quilt, I usually want to remake it using other fabrics because it ends up looking so different!

Quilt It

I actually designed Arrows just so that I’d have lots of negative space to quilt a dense free-motion design I named Arrowheads. I first taught this motif during a class at QuiltCon, and knew I had to use it in a real quilt!

Detail quilting of Arrows Quilt - design is called Arrowheads from Piece and Quilt with Precuts

I quilted a contrasting design called “Cursive L’s” in the arrows blocks. It’s easy to create contrast in the quilting when one of the motifs is a curved design and the other is linear or geometric. Cursive L’s is one of my “go-to” designs because it’s easy to stretch or shrink to fill any space!

More Arrows inspiration

Take a look at two more ideas for how you can change up the fabrics. I’m sure this will get your creative juices flowing to make your own version! And don’t forget to visit each blog looking for more fun giveaways!!

Lynn Kline: Monkey Needle

Arrows made by Lynn

For her version, Lynn used the same Arrowheads and Cursive L’s quilting as taught in the book. I also include a suggestion to echo quilt around the blocks to make the blocks pop even more, and I love how it looks on Lynn’s quilt!

Arrows made by Lynne Kline

Doesn’t Lynn’s version look great with the scrappy white background? Be sure and visit her blog to read more her progress and to find out which fabrics she chose. Plus she’s hosting 2 giveaways!!

Arrows quilting detail by Lynn

Look at all of that scrumptious quilting texture!! In her post, Lynn even mentions how long it took her to quilt – along with more gorgeous pics where you can really see the quilting. I know that if Lynn can do it – so can you!

Click here to read more about Lynn’s version of Arrows and enter her giveaways.

Kathy Bruckman: Kathy’s Kwilts and More

Kathy’s name should seem familiar since she was one of the first stops on the hop when she made Squiggles. After I shared the first quilt, Kathy made a coordinating Squiggles pillow from her leftovers of the first quilt!

Squiggles Pillow made by Kathy

Click here to read more about Kathy’s bonus pillow project.

She had so much fun making that first quilt that she wanted to make another one from the book. So pop on over to her blog to see her version of Arrows in progress.

Arrows in progress by Kathy

Don’t you love the crinkly goodness of a fresh batch of bright batik fabrics?
These will look so good once they are quilted up!

Today’s Gift: A Free PDF Pattern for all, plus Win The Set!

Christa Quilts Patterns

Just a few of the patterns I currently have available through Craftsy.

Although I currently have 6 patterns available in print, I offer a total of 10 PDF patterns in my Craftsy store, including one that’s totally free!! So pop on over there to get the freebie and check out the other 9. I’ll choose two winners at the end of the hop on Aug 31. Because these are delivered electronically, this giveaway is open to everyone around the world!

Click here to get the free Craftsy pattern and see the whole collection.

To enter, leave me a comment about your favorite way to quilt. Do you prefer walking foot, free-motion, or both? Or maybe you like to hand quilt, or even quilt “by check!” I’d love to know. 🙂

Piece and Quilt with Precuts by Christa Watson

Click here to get your signed copy of Piece and Quilt with Precuts.

Click here to see all of the stops on the hop.

Update: Winner Selected and Comments Closed

Congrats to Pat T. and Lynn T. who have been contacted via email.

Save

Save

Save

Save

Save

Save

Save

Save

Save

Save

Save

Save

Save

Save

Save

Save

Save

Save

Piece and Quilt with Precuts Quilt 9: Kites

Ready for a whopper of a quilt?? The take a look at Kites. It’s the biggest quilt patterned in Piece and Quilt with Precuts, and yes, I totally quilted it on my regular sewing machine!! The key is to only handle a small area of the quilt under the machine at one time. Then “scrunch and smoosh” the rest of the quilt out of the way, however you can!!

Kites Quilt from Piece and Quilt with Precuts by Christa Watson

Kites Photography courtesy of Martingale/That Patchwork Place and Brent Kane

Piece It

Kites is so big because it’s made from 3 different sized squares: 10″, 5″ and 2 1/2″. They can be all from the same collection as shown in my version, or your can mix them up to create more of a scrappy looking quilt. The background is made from one jelly roll (2 1/2″ x 42″ strips) and layer cake (10″ x 10″ squares) of the same light colored fabric. So this quilt uses up a LOT of precuts!

The blocks look sort of like an abstract representation of Kites (hence the name), but in the book I’ve also included an alternate layout that makes the quilt look completely different!

Quilting on Kites from Piece and Quilt with Precuts

Detail of quilting from Piece and Quilt with Precuts

Quilt It

The machine quilting is a combination of walking foot and free-motion. It uses my super simple divide and conquer process in 3 steps:

  • Step 1 – stitch in the ditch around the blocks with a walking foot. This will help stabilize the quilt for additional quilting later. It also allows you to jump around the quilt however you like.
  • Step 2 – quilt “something” in the background. And I literally mean any design you like!
  • Step 3 – quilt another “something” in the blocks – any one you choose!

Quilting detail on Kites from Piece and Quilt with Precuts

Choose any two free-motion designs you like and quilt them together in this quilt.

My “somethings” for this quilt are a combination of packed flowers and double circles. As long as the two designs you choose have different densities, they’ll look great together!

More Kites inspiration

Check out the inspiring pics below and don’t feel like you have to make the same queen sized quilt that I did (unless of course you want to). This design is so versatile that it looks great in any size! Simply make fewer blocks for a smaller quilt.

Pam Cobb: The Stitch TV Show

If you haven’t yet discovered Pam’s YouTube show, along with her partner in crime Lynn, then you are in for a real treat! Not only do the gals from The Stitch TV Show serve up an entertaining online show twice a month, they are quite prolific pattern designers in their own right!

Closeup of Kites made by Pam Cobb of The Stitch

Check out this closeup of Pam’s beautiful quilting. I think her packed flowers look even better than mine!! Pop on over to The Stitch to see the size of her finished version, and for more about her process.

Oh, and did you know that Pam’s name is really an acronym for how she gets so much sewing done while working full time and taking care of a family? It stands for making  Progress in Achievable Moments so she can actually get things done. Now I’m jealous that I don’t have an acronym for my name!!

Rashida Khanbhai:  No. 3 Quilt Studio

Rashida's version of Kites

Check out this baby-sized version of Kites made by Rashida. Don’t you love the bright colors? I love how she went way back to the beginning of the book to choose one of the walking foot quilting designs to finish her quilt quickly. As I’ve said throughout the hop, you really can mix and match any of the quilting designs on any of the quilts!

Visit Rashida’s blog to read more about her progress and see more inspiring pics. She actually made the quilt twice with two slightly different quilting designs. Check it out to see the variations!

Jen Rosin: A Dream and a Stitch

Kite "flimsy" in progress

Jen agrees with me – the full size pattern is BIG!! I wanted to include at least one queen sized quilt in the book to give you plenty of options to choose from.

I think Jen did a fantastic job making this pretty quilt top. Here’s a peek of just a few of the fabrics she chose. Click here to visit Jen’s blog to see the full quilt top and her work in progress. I love seeing all of the variations!

Today’s Gift:
Win a Bundle of your Choice from The Precut STore!

The Precut Store

My better half, Jason, manages the other part of our business at ThePrecutStore.com. He gets to decide which precuts to carry and how many to buy for the shop, while I’m out traveling and teaching. It works well for our personalities: he loves to stay home and away from social media, while I love getting out in the quilty world and meeting so many of you!!

We carry nearly any precut you can think of along with Aurifil thread in nearly all the colors. In fact, the main catalyst for focusing on precuts in this book was to answer the question we get so often: “What can I make from precuts?”

Precuts

Just a few of the precuts we stock in our store.

The best thing about running our shop is that we do it via Amazon’s storefront. That means Prime customers get 2 day free shipping, and satisfaction is guaranteed!

Today, one lucky winner will win a precut bundle of your choice from anything we stock in our shop. To enter, take a look at The Precut Store and pick out your favorite bundle that you’d like to win (up to $39.99 value). Then leave me a comment on this post letting me know what it is. At the end of the hop, on the morning of Aug. 31st I’ll choose a winner and notify them via email! This giveaway is open to all, as long as international winners are okay with paying shipping.

Free motion quilting jagged stipple

Quilting tip: practice new designs on a scrap of fabric and batting first!

If you’ve been inspired to make any of the quilts from Piece and Quilt with Precuts, be sure and share pics of your progress in my Facebook Group: Quilt with Christa. I’d sure love to see them, and other group members would, too!

Update: Winner Selected and Comments Closed

Congrats to Linda S. Who has been contacted via email.

Save

Save

Save

Save

Save

Save

Save

Save

Save

Save

Save

Save

Save

Save

Save

Save

Save

Save

Save

Save

Save

Save

Piece and Quilt with Precuts Quilt 8: Windows

There are just a few more quilts to share before I’ve finished showing you all of the designs from Piece and Quilt with Precuts. Today, take a look at Windows, made from Tula Pink True Colors:

Windows from Piece and Quilt with Precuts by Christa WatsonWindows Photography courtesy of Martingale/That Patchwork Place and Brent Kane
Piece It

Windows is made from 2 1/2″ strips, 1 1/2″ strips and a lot of background fabric. It uses fewer 2 1/2″ strips, so here’s where a smaller bundle of your favorite prints can be used effectively. And of course it will look dramatically different just by changing up the fabrics. As long as you have a strong contrast between the window frames and the background, you’ll have success with this design!

I always have a hard time naming my quilts and thought of several possibilities for this one. If you rotate the quilt, the blocks look like elevator doors. You could even use the same two fabrics in each block to look like equal signs. I love it when there are so many ideas!!

Windows quilting detail

The book includes my “no-mark” method of machine quilting. It’s all about the texture!

Quilt It

I recommend using a blending 50 weight Aurifil cotton thread with simple quilting for busy fabrics and save the “fancy” quilting for areas of the quilt where it will show. With my detailed diagrams and quilting plan, you’ll be able to quilt  the blocks continuously, with only one start and stop for each row!

More Windows inspiration

Think about other ways you can make Windows – what if you reversed the colors, or made it from solids, or chose a scrappy background? Clink the links below for even more ideas and be on the lookout for some bonus giveaways!!

Suzy Webster – Webster Quilt

Detail of Windows quilting by Suzy

Check out this scrumptious quilting by Suzy Webster. I love how she chose a solid red so that the quilting really shows up in the background. And look how she used “switchbacks” in both the frames and the border. It’s one of my go-to designs that I first introduced in my first book Machine Quilting with Style.

Head over to Suzy’s blog to read more about the making of her quilt and to see her final reveal! She’s hanging her quilt in a place I’d never thought of before, but it sure looks great!

Katie Joy Church – Wild Prairie Studio

Windows quilt in progress

You’ll be jealous when you see Katie’s studio view as she worked on her version of Windows. She’s also thrown in a few inspiration images and other eye candy. You’ll be able to see how large the quilt is when you see it in progress on a bed in a cabin by the sea – which is just lovely!

Be sure to visit her blog too see how she plans to finish.

Terri Vanden Bosch – Meanderings Along Lizard Creek

Windows Table Runner

Look at this beautifully styled photo from Terri. It’s so easy to make the quilts in my book smaller or larger simply be sewing more or fewer blocks. Her soothing color palette is perfect for this pretty room.

Check out more about Terri’s quilt-making process plus more beautiful photos on her blog. She even told me her husband said it looked like “windows” before he even knew the name of the design!

Today’s Gift – Win Goodies from American Patchwork and Quilting

My friends over at American Patchwork and Quilting have been so supportive of my work! I’ve been in their magazines a few times and I’m always inspired by what they have to offer. Plus here’s a fun fact: I discovered modern quilting back in 2012 when I saw a modern quilt in one of the summer issues of American Patchwork and Quilting. I was so excited that I stopped everything to find out more about modern quilting and it totally changed my career path (for the better!!)

American Patchwork and Quilting Giveaway

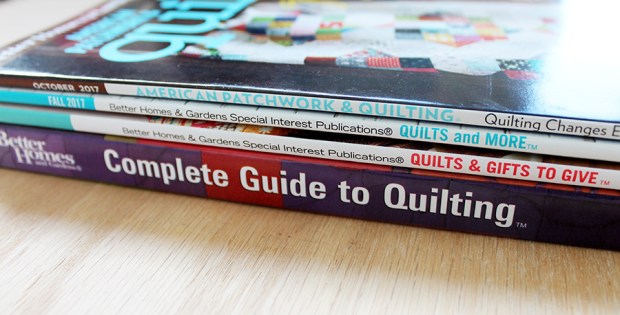
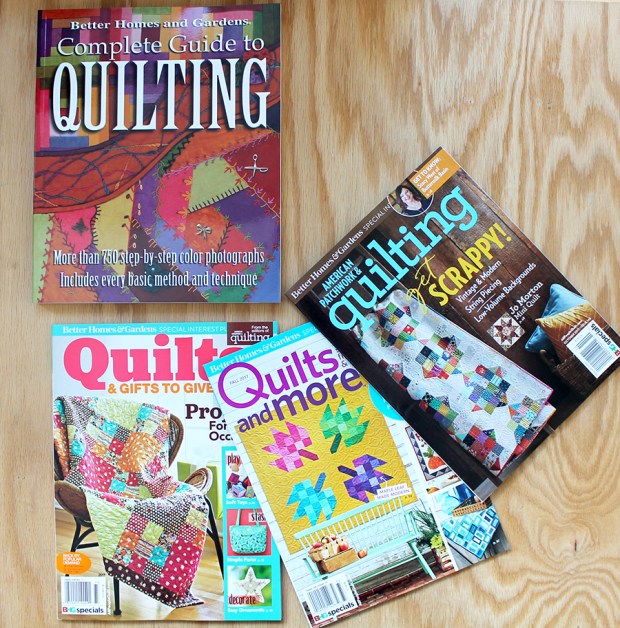
Today, they are offering up a nice prize pack – a copy of Better Homes and Gardens’ Complete Guide to Quilting, 3 of their latest magazine issues (notice a familiar quilt on the cover of American Patchwork and Quilting? Yep – that’s mine), plus 4 adorable quilting charms (not pictured.)

Due to shipping costs, this one will be open to US residents only. To enter, leave a comment on this post telling me how many magazines you subscribe to. (If you want to answer honestly, that’s totally up to you. I promise I won’t judge, LOL!!)

All Peopl Quilt

More inspiration will be given to one lucky winner at the end of the hop!

Truthfully, I rarely make an quilts from magazine patterns since I’m usually designing my own, but I love flipping through their pages for color and layout inspiration. I especially love reading technique articles, plus what’s happening in the quilty world. I’ll choose a winner the morning of Aug 31, the last day of the hop!!

Books by Christa Watson

If you are just joining me on the hop, click here to see all of the blog hop stops.
Then click here to pick up your signed copy of any of my books.

Update: Winner Selected and Comments Closed

Congrats to Ann O. who has been contacted via email.

Save

Save

Save

Save

Save

Save

Save

Save

Save

Save

Save

Save

Save

Save

Save

Save

Save

Save

Save

Save

Save

Save

Save

Save

Piece and Quilt with Precuts Quilt 7: Twinkling Diamonds

Wow! We are over halfway through the blog hop and the inspiration keeps on coming! Even though I designed and made all of the quilts from Piece and Quilt with Precuts, there are so many that I want to remake after seeing the beautiful color combinations my friends are making!

Today’s featured quilt is Twinkling Diamonds, made from some beautiful Alison Glass fabric.

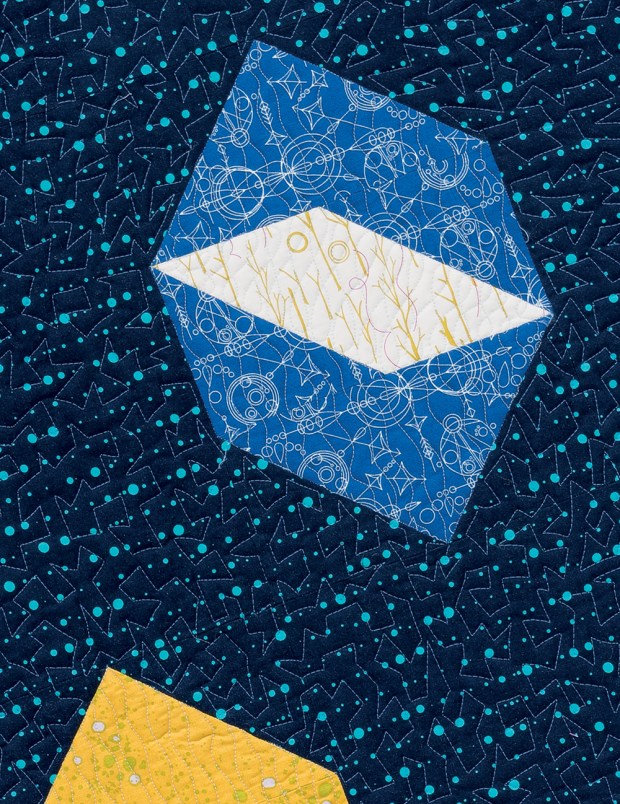
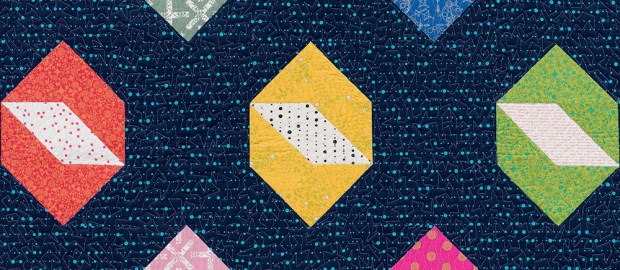
Twinkling Diamonds by Christa Watson from Piece and Quilt with PrecutsTwinkling Diamonds Photography courtesy of Martingale/That Patchwork Place and Brent Kane.
Piece It

Twinkling Diamonds is made from fat quarters of colorful prints and fat eights of contrasting light fabrics, plus a dark background. The method I use teaches you to trim off the edges to get the nice crisp diamond points and the best part is, all of the leftovers can get turned into the S.W.A.K quilt featured a bit earlier in the book. (Click here for the blog post about S.W.A.K.)

I chose bright saturated prints and a dark navy background it so that it looks like diamonds twinkling in the sky. However, this quilt would look just as great with a lighter background, and softer, less intense prints.

Twinkling Diamonds Detail quilting

I quilted the background using “jagged stipple” one of my favorite new motifs!

Quilt It

I know that all of that negative space can be a bit intimidating to quilt, but here’s my tip: choose an interesting free-motion design. and meander your way around the blocks to add some texture to the quilt.

Twinkling Diamonds from Piece and Quilt with Precuts

I quilted irregular wavy lines in the bright section of the blocks and “cursive L’s” in the white areas. Each quilt includes step by step instructions plus a detailed quilting plan so you can follow along and get the same look!

Twinkling Diamonds Detail

I quilted all of the quilts in the book using my Aurifil thread collection – it’s my favorite!

More Twinkling Diamonds inspiration

Check out more beautiful ways to make Twinkling Diamonds blocks, and be on the lookout for who’s including a giveaway on their stop!!

Anjeanette Klinder

Twinkling Diamonds table runner

Take a look at what Anjeanette decided to do for her version of Twinkling Diamonds. Don’t you love how she fussy cut the centers??

And who says you can’t mix hand and machine quilting in the same quilt! I think she did such a beautiful hob. Be sure to see more inspiring pics and read more about how she made it her own,  over on her blog.

Jessica Caldwell – Desert Bloom Quilting

Twinkling Diamonds Blocks and Aurifil Thread

Don’t you love Jessica’s stunning color combination? I love how orange can be a neutral – don’t you? She picked out a gorgeous selection of Aurifil threads that she plans to quilt with so I’ll be keeping an eye on her blog to see how it turns out!

Head over to her blog for more pretty in-progress pics!

Jessee Maloney: Art School Dropout

Jesse's Twinkling Diamonds Blocks

I’m a sucker for turquoise and gray, and I love how Jesse shows that either solids or prints will work for the diamond centers. Notice how she added extra fabric around each block? Pop on over to her blog to read more about what she plans to do with these beauties!!

Here’s a tip – if you are just getting started with machine quilting, just make a block or two and practice quilting it. Then turn that block into a pillow, wallhanging, or one block mini. It’s also a great way to give a hand made gift that won’t take too long to create!

Today’s Gift – Win My Aurifil Thread

Today’s giveaway is super exciting. If you’ve read my blog for any length of time, you’ll know how much I love piecing and quilting with Aurifil 50 weight cotton thread. I love being able to use one type of thread for everything I do, and then stocking up on ALL the colors!

It was fun to work with Aurifil on a thread collection that includes all of the basic colors I use. Together, we decided to include two groups in the collection – colors and neutrals. All of the quilts in the book were pieced and quilted using my Piece and Quilt Collection, and I included exactly which threads I used AND how much for each quilt in the book!

Piece and Quilt Collection Aurifil Thread by Christa Watson

Click here to see which threads are included in my Aurifil thread collection.

Two lucky winners will win my thread, generously sponsored by Aurifil – one winner for each thread kit. Pop on over to Aurifil’s blog to enter, and good luck!!!

Save

Save

Save

Save

Save

Save

Save

Save

Save

Save

Save

Save

Save

Save

Save

Save

Save

Save

Save

Save

Save

Save

Save

Save

Save