How to Prepare Your Quilt Backing, Batting and Basting – Optical Illusion Quilt Along Part 4

Welcome to Part 4 of the Optical Illusion Quilt Along! You’ve made it through the piecing, so congratulations! Now we come to what may not be your favorite part of the process: prepping the backing and batting, and basting the layers together in preparation for quilting.

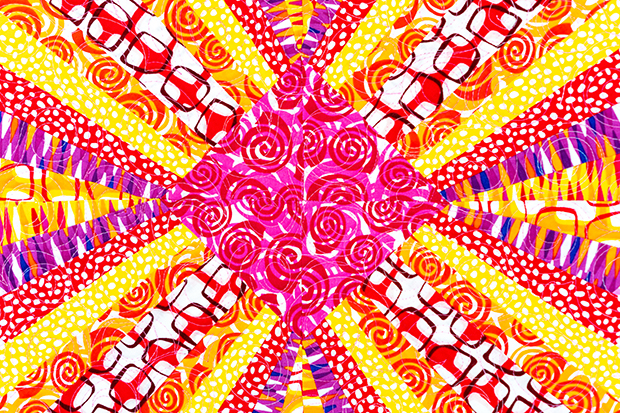
Above is one of the alternate colorways for Optical Illusion. You can make something similar with red, light blue, and white fabric from my online shop.

But if you’ll let me guide you through the next steps, I’ll share some tips to make it less painful and move you along to the quilting that much sooner.

Prep the Batting

The most important step in basting a quilt is to ensure that the batting and backing are several inches larger than the quilt top all the way around.

If you look at the back of the pattern, you’ll see that for the batting size, I have added 6″ to the length and width of the quilt top. For example, the lap-size top is 45″ x 66″. The batting needed is 51″ (45″ + 6″) x 72″ (66″ + 6″).

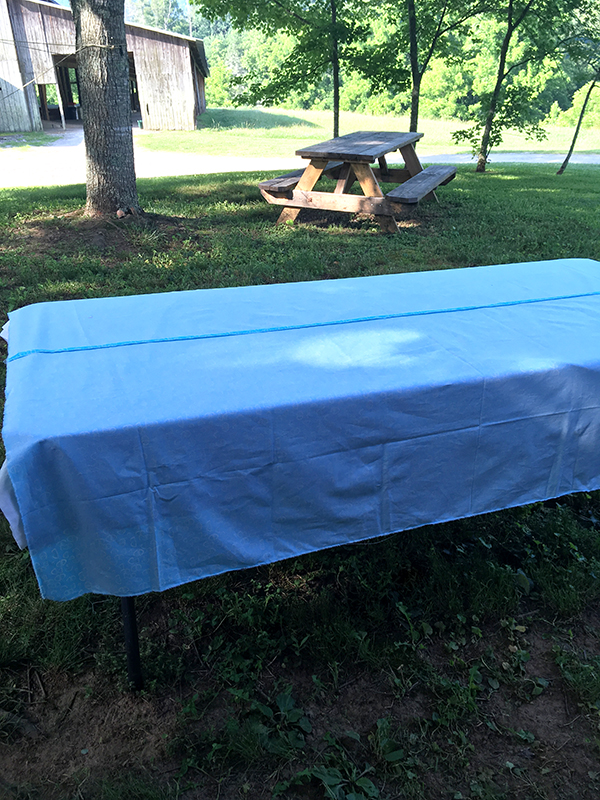
Example of measuring batting from a previous Quilt Along:

The batting should be several inches larger than the quilt top all the way around.

Click here for the Block Chain Quilt Along shown above.

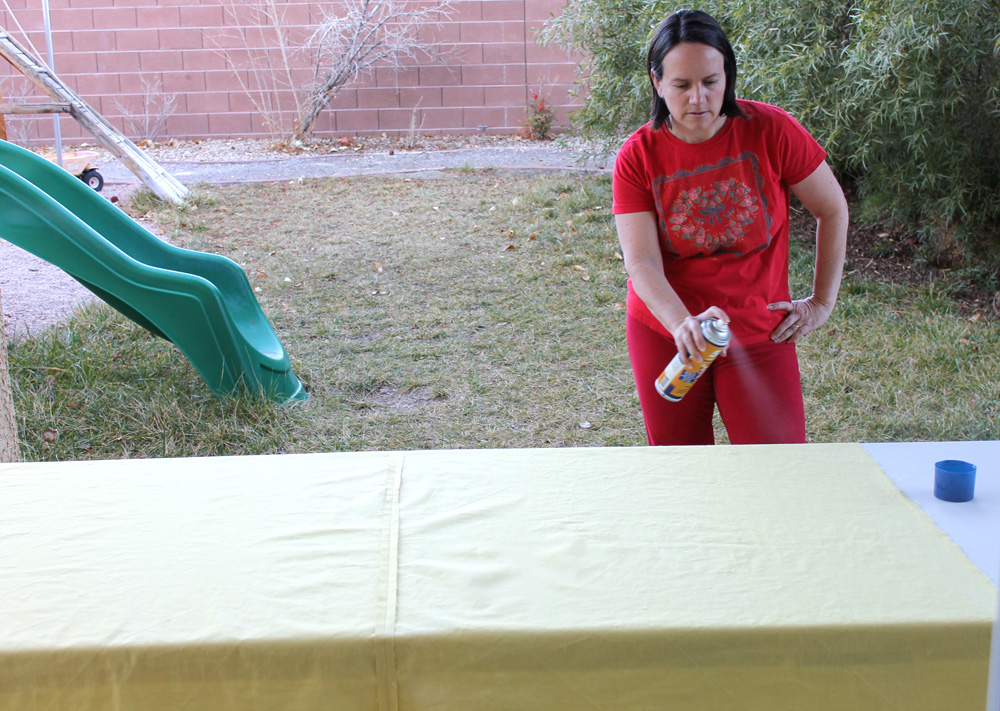
For me, the easiest way to measure the batting is to buy a roll of it, then unroll it across the width of the quilt top and roughly trim off the amount I will need. In the photo above, I’m using Hobbs Tuscany cotton/wool batting which is one of my favorites.

It’s 90″ wide and folded double on the bolt. So after I trim off a chunk from the bolt, I’ll lay the quilt top out and trim off several inches from the top of the batting. I save those chunks to make practice quilt sandwiches later.

Prep the Backing

I used Geo Pop Tiny Hex in black for the backing. Get Geo Pop Tiny Hex for your backing. 

Geo Pop Tiny Hex in black by Christa Quilts for Benartex/Contempo

Piece your backing so that it is a few inches larger than the batting size given on the back of the pattern.

For example, for the lap size, I would cut my three yard piece of backing fabric in half crosswise. This gives me two pieces about 40″ x 54″. I need backing a bit larger than 51″ x 72″.

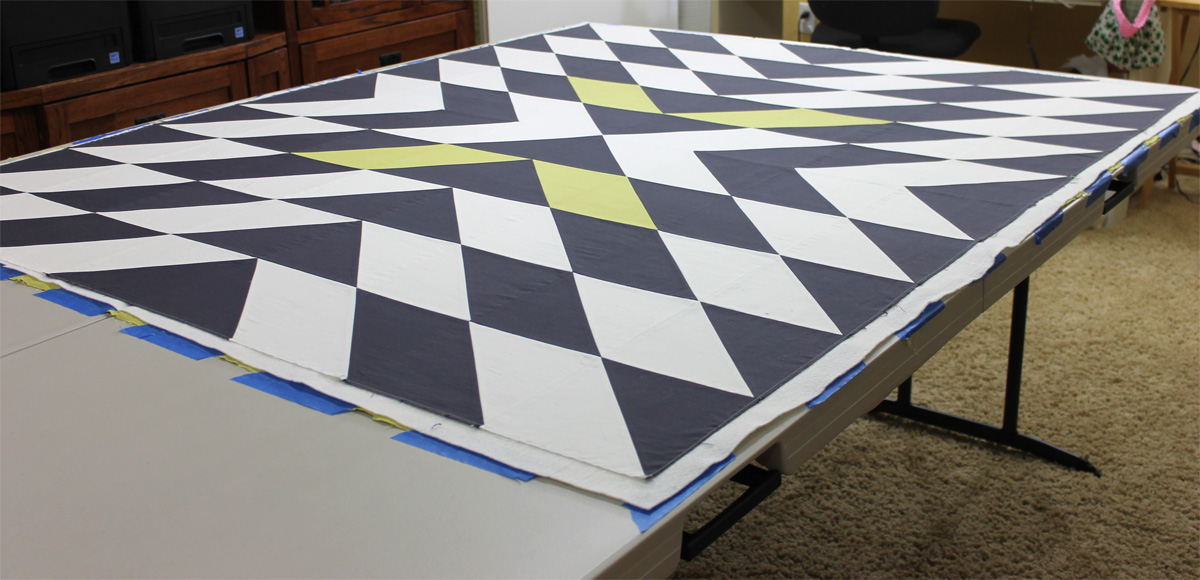
Backing, pieced horizontally.

I’ll sew the two pieces together for a backing that’s roughly 54″ x 80″. The seam will be horizontal across the quilt.

Now you are ready to baste!

Basting the Layers: Quick Overview

I baste using my design wall and 505 basting spray. I make sure my batting and batting are bigger than my quilt top and I trim away some of excess after it’s been basted. I spray the top and backing outside separately, then assemble all the layers on my design wall, taking care to smooth each layer as I go.

Once everything looks nice and flat, I’ll roughly trim the edges so that only and inch or two remain around all 4 sides. I cut off as much extra as I can to prevent it from tucking under the back and quilting the quilt to itself!!

The final basting step is to iron the quilt on both sides to set the glue and smooth everything out one final time.

I didn’t have a chance to take pictures of this process while making Optical Illusion, but here are links and tips from previous quilt alongs.

I spray outdoors but assemble the layers indoors.

Click here for a step-by-step photo tutorial of how I spray baste my quilts.

If you’d prefer a video, watch my video quilt basting tutorial instead. The video below was made as part of my Infrastructure Quilt Along.

See the same process on my Color Weave quilt. I love sharing a  few different photos and tips, which sometimes helps!

And if you have any more specific questions, you can alway post pics and ask questions in my Christa Quilts Facebook Group!

Next week I’ll include a video showing spiral walking foot quilting practice to get you ready for the most fun part of making this quilt!! I can’t wait!!

Optical Illusion Detail

Spiral Quilting on Optical Illusion can be done with a Walking Foot or Dual Feed system.

For More about this quilt along

Pieced Primrose Quilt Along Week 6 – Basting

And now we come to everyone’s least favorite part of making a quilt – basting!! But really, if you just set aside the time to do it’s not that bad! Here’s what both versions of Pieced Primose look like up on my design wall that also doubles as my basting area. Read on for helfpul ways to tackle this part of the quilt-making process. It’s easier than you think!

Pieced Primrose Quilts Basted

Get the Pieced Primose kits here – in cool or warm, large or small.

Because I wanted to include all 10 warm or cool fabrics from Abstract Garden in both colorways of Pieced Primrose, I used 9 fabrics for the blocks, and then the multicolor print “Raised Beds” for the backing and binding. The wall size kit includes the backing; for the larger size you’d need 6 yards of either color.

Abstract Garden by Christa Watson Raised Beds

Click here to get yardage of the Raised Beds print from Abstract Garden

I’ve basted my quilts many different ways over the last few years, and I try to share as much about the process as I can. So take a look at the different tutorials below from prior quilts I’ve made. I’m sure one of them will make your quilting life easier!!

Spray bastinG Video Tutorial

Click here (or the image below) for my spray basting video tutorial.

This is the first full-fledged basting tutorial I’ve created for my YouTube channel. I filmed and edited it while making my Infrastructure quilt. In reality it takes about an hour to do, but with the magic of edting, you can watch on super speed which only takes about 7 minutes. Too bad I can’t baste that quickly in real life, right??

Spray basting photo tutorial

Here’s the step by step process shared in my video above, but will still photos on my Modern Puzzle quilt made from Jelly Rolls.

Click here for my spray basting tutorial using a design wall.

Wall Basting Quilt Tutorial for Modern Puzzle Free Quilt Pattern

Table basting photo tutorial

If you don’t have a dedicated design wall, no problem! You can still do my spray basting method using a table. It’s the method I used when making my Improv Squares quilt:

Click here for my table basting tutorial.

Spray Baste

Safety Pin Basting Tutorial

Finally, here’s the way I USED to baste my quilts until about 5-6 years ago – using safety pins! It’s still a good method if basting spray isn’t your thing.

Click here for my safety pin basting tutorial.

Basted

If you have another method you prefer, feel free to share you tips or links in the comments for others to see. Until next week – happy piecing and basting!!

LINKS AT A GLANCE

Click the links below for supplies needed to make this quilt:

Next Week – Machine Quilting Ideas for Pieced Primrose

Swirls quilting

Dot ‘n Dash Quilt Along Week 5 – Backing and Basting

I love quilt alongs and the best part is seeing the variety you all are making! It makes my day. 🙂
This week we are getting down to the nitty gritty and getting the quilt ready for machine quilting next week. But don’t worry, if you aren’t to that point yet, that’s perfectly fine. These quilt along posts will stay up indefinitely and you can always refer back to the intro post for links to each specific QAL step.

Dot n Dash Quilt Along

Click here for the quilt along schedule and supply list.

Preparation is Key

Getting ready to machine quilt is a little like getting ready to paint a house. The actual painting isn’t hard – it’s all the prep work (ike moving furniture and taping down the windows) that takes time and gets in the way of the fun part. So take your time to prepare the quilt and baste it and don’t feel like you have to rush this part. In fact, I always set aside a separate day for backing and basting and then give myself a little reward when my least favorite part of the process is finished!

A tip on choosing batting: if you want to hide machine quilting “irregularities” and give your quilt that antique puckered look, choose a cotton batting. If you want to give your stitches more definition and a loftier look, choose wool. I usually stay away from polyester batting because it’s very slippery and usually causes me to get puckers on the back of my quilt. Cotton and wool cling to the quilt which gives you better control while quilting.


Sewing the Backing Fabric

You want to ensure that the backing fabric is at least 3-4″ bigger on all sides of the quilt top, more if you plan to long arm quilt. The easiest way to do this is to cut two large pieces of fabric and sew them together. For example, my quilt measures 60 x 72. So If I cut 4 yards into 2 two -yard pieces that will give me one big rectangle approximately 72″ x 80″ to work with once the chunks are sewn together parallel to the selvage.

Sewn Quilt Backing

I basted this quilt at a recent teaching retreat I participated in. All you need is one table for basting – work on the middle and then the sides as needed.

Spray Basting the Quilt

If you prefer to pin baste, click here for an alternate tutorial.

My basic method for spray basting is to spray the wrong side of the top and bottom layers of the quilt outside, then bring them inside for assembly. For a slight variation of this technique, click here for my wall basting tutorial.

My favorite basting spray is 505. Be sure to shake the can before you use it and spray a little on a scrap to make sure the nozzle isn’t clogged. If the spray doesn’t flow out evenly, some of the chemical can accumulate and leave a stain on your quilt, so always test it first.

Spray Basting the Quilt

At first I tried an off brand that a friend had but I didn’t like it because it wasn’t sticky enough. Fortunately one of the other retreaters had some 505 which they let me use for my quilt!

The basting spray does not cause any problems with machine quilting, and if you notice it starting to gum up the needle at all, just wipe it away and you’ll be all set!

Lay out all 3 layers of the quilt – backing, batting, and quilt top on a large table (or design wall). Spend time smoothing out each layer with a long acrylic ruler before adding the next layer. This can take awhile but is worth it so that the quilt is nice, flat and smooth.

Quilt Basting

Notice the leftover batting – most of it will get trimmed away after basting. I like enough extra batting and backing so that I don’t have to worry about getting my quilt top perfectly centered.

You can also use the acrylic ruler to scooch any quilt blocks back into place and straighten out any wonky seams as needed. Smooth out any bubbles as needed so that the quilt is nice and flat.

The last step is to iron the quilts on both sides – front and back. This helps set the glue and allows you to work out any wrinkles one last time before you quilt. I use a hot dry iron ,with no steam. You can iron the quilt on an ironing board, or on a table to give you more room. Because there’s batting inside, the quilt acts as it’s own pressing surface.

Iron the basted quilt to set the glue

My quilt is basted and ready to quilt!

Now it’s your turn! Get your quilt basted and we’ll start machine quilting next week. We’ll have extra time for quilting since it’s my favorite part!

Show Your Work

Don’t forget to share your progress in one of 3 ways (or all of them if you like):
(1) In my Christa Quilts Facebook group
(2) On Instagram, #dotndashqal
(3) Share a link to your blog, or leave a comment about your process on this post.

Dot n Dash Ready to quilt

Trim the batting so that there’s only 1-2 inches sticking out on all sides of the quilt. This will prevent the excess from flipping under the quilt and getting caught in the machine.

Spray Basting Tutorial – Using a Table

Recently I shared a tutorial on spray basting using a design wall. Today’s tutorial shows how to modify the spray basting process using a table instead. Note that my pictures are all taken outside but once the quilt layers have been sprayed outdoors,  you can assemble the quilt inside using any size table.

Improv Squares Quilt Using Modern Marks

Step 1 – Spray the back side of the backing and quilt top

Be sure to spray the layers outside, or in a well ventilated area. If you have sensitivity to chemicals, I recommend wearing a dust mask. I use 505 basting spray and a large sheet to protect the surface I’m spraying on.

I’m using a lightweight folding plastic table, so it’s easy to move. I just store it out of the way in the garage when I’m not using it.

Spray Basting

The table you are using doesn’t have to be bigger than the quilt. When I’m spraying, I cover the center section of the quilt first, and then the sides. For this step, you don’t even need a table; you can lay out a sheet or dropcloth on the ground or wherever you have room.

I used a small park near my home so that I’d have plenty of room, and also nice scenery for photography!

Hold the can an arm’s length away and spray evenly and generously. Make sure to get good coverage on the quilt. To ensure the can is spraying consistently and doesn’t get clogged, spray a few squirts on your dropcloth before applying it to the quilt.

Spray Baste

Although I pressed the top and backing separately before I began, you can see some fold lines on both layers. But not to worry – this gets pressed out at the end. If you spray the top and backing separately, it uses less spray than spraying the batting, and it’s easier to manage.

Once both layers have been sprayed, you can fold them up and bring them inside to finish the assembly process (or stay outside and set the layers aside like I’m showing here.) The layers will be sticky, but not stuck, and you don’t have to assemble them right away – the adhesive doesn’t dry out.

Remove the drop cloth or sheet from the table and then lay out the backing wrong side up.

Spray Baste

Step 2 – Add the batting

I like to fold the batting in half long ways so that I can put the fold line roughly in the center of the backing. You can see in the picture below that it’s not exactly even and that’s ok. As long as the batting and backing are bigger than the quilt top, you’ll have some wiggle room so that you don’t have to line things up perfectly.

In fact, my batting is actually a little longer than the backing so it’s easy enough to trim away the excess. Working on a table is great because it won’t hurt your back like the floor can.

Spray Baste

Open up the batting so you have coverage on all sides. Even if the sides hang down to the ground – that’s okay. The excess will get trimmed away.

Spend time smoothing out the backing. You can lift and reposition it if needed. Work out any wrinkles or bubbles, using your hands and a long acrylic ruler.

I’m using Hobbs cotton batting for this quilt. I like natural fiber battings because they cling to the fabric and they aren’t slippery. (Polyester has a tendency to slip while you are shoving the quilt through the machine which can cause puckers.)

Spray Baste

Once you smooth out the center section, adjust the layers so that you can smooth out the sides, too. Take your time here to really get it nice and flat. Smoothing out the layers also smashes them together so that they stick together better and don’t shift.

You can also iron your batting before you baste to get it nice and flat. I use a spray bottle and a dry iron. With cotton batting, you can put the iron directly on the batting. With more delicate battings like wool, you can cover the area you press with a piece of fabric. Be sure to use a dry iron so that it doesn’t shrink up the batting.

Spray Baste

Step 3 – Add the Quilt Top

Add the top in the same way that you added the batting – get it roughly in the center and make sure there’s coverage all the way around the edges. You can see it’s still a bit wrinkly from handling and moving it around. That’s okay – you’ll iron it again at the end.

Spray Baste

Trim away the excess batting and backing so you’ll have less bulk to deal with. If you have a super large quilt that touches the ground, you can always place two tables side by side to give you more room to work.

I use specialty batting scissors – they cut through the layers like butter, and trimming goes super fast! I only leave about an inch or two on all sides when I trim. That way it’s less likely that I’ll flip the quilt under itself and accidentally quilt through the extra layers!!

Spray Baste

Step 4 – Smooth Out the Layers

Smoothing out each layer as you add it is such a critical step. When your quilt sandwich is flat and smooth, it makes the machine quilting process so much easier! The reason I love using basting spray is that every inch of the quilt is stuck to every other inch. This prevents shifting of the quilt and greatly reduces the chances that you’ll get a tuck or pucker while quilting.

Spray Baste

Use the long ruler again to smooth out the center of the quilt. You can also use it to help line up the pieced seams and nudge things back into place if needed. It’s almost like pre-blocking the quilt before you quilt it.

Spray Baste

Once you’ve smoothed out the center, you can work on the edges. Roll up the excess so that it doesn’t drag on the ground as you shift the quilt around.

It usually takes me a good 20 minutes to smooth out each layer of the quilt, but it’s time well spent!

Spray Baste

Step 5 – Press the Basted Quilt on Both Sides

The secret to good spray basting is to press the quilt once it’s layered. The heat of the iron sets the glue and it smooshes the quilt together so it’s nice and flat. I press the back side first, working out any excess bubbles or wrinkles. Then I flip it over and press the front.

I use a big board which fits on top of my ironing board, giving me more room to work.

Spray Baste

I’ve developed this basting method over the last few years and I can honestly say it makes a huge difference in how my quilts turn out. Just remember, you are putting a lot of wear and tear on the quilt when you scrunch and smoosh it through the opening of your machine. But with this method, nothing shifts and it’s easy to just focus on one area of the quilt at a time.

Feel free to pin and share this tutorial with your friends. My goal is to get more people quilting their own quilts while enjoying the process from start to finish!

Wall Basting Tutorial Using Spray Adhesive

One of the secrets to successful machine quilting is basting your quilts properly. So today I will share with you my favorite way to baste a quilt using 505 basting spray and my design wall. You can definitely modify this technique and baste your quilts on a table, but I prefer the design wall because I can get up close to the quilt and make sure it’s nice and flat.

I’m demonstrating how to baste my Modern Puzzle quilt. Get the free quilt pattern here.
Click here to grab a strip roll of my fabric to make a similar quilt!

Wall Basting Quilt Tutorial for Modern Puzzle Free Quilt Pattern

Wall basting is my favorite way to baste! I can get up close to make it smooth and flat.

Wall Basting Tutorial

Ensure that all 3 layers of your quilt (top, batting, and backing) are nice and flat. The batting and backing should be a few inches larger than the quilt top on all sides.

Give the top and backing a final press and clip any stray threads. Relax the wrinkles in your batting by throwing it in a dryer with a wet towel for a few minutes, unrolling it from the package to “rest” for a few days, or pressing the batting with a hot dry iron. (For delicate batting, use a piece of fabric to cover it while you press.)

Step 1 – Apply Adhesive to Backing and Quilt Top separately

Lay a sheet on the ground to protect your quilt and catch any over-spray. Outdoors is best so that the fumes can dissipate, but you can do it inside in a well ventilated room while wearing a dust mask. Be sure to shake the can and spray a few squirts on the sheet to ensure the nozzle is clean and the spray comes out evenly before you start.

Lay out the quilt backing wrong side up and apply a thin coat of 505 spray adhesive evenly across the surface of the quilt. Walk around the quilt backing as needed to reach all areas.

Apply spray baste to the wrong side of the backing fabric

Spray the adhesive on one section of the backing at a time. Use seam lines in the piecing to help keep track of where you’ve sprayed since it’s hard to see the adhesive on the fabric.

Repeat the process for the quilt top, using the design of the quilt to help you keep track of which areas you’ve already covered. Don’t worry if the quilt top and backing have some give or are a bit wrinkly from movement. You will smooth it all out later.

Spray baste the quilt top

Be sure to lay out the quilt top wrong side up while applying basting spray.

Hint: it’s easier to keep track of where you’ve sprayed if you cover one-two rows at a time, moving methodically over the quilt top.

spray basting

Try to keep the can spraying out consistently so you don’t get any adhesive buildup.

Once the backing and quilt top are sprayed, fold them up and bring indoors to assemble the layers on a design wall. It doesn’t matter if you fold them right sides in or out. They will be sticky, but not stuck and you can easily unfold and the layers and peel them apart. You don’t need to baste right away, but I wouldn’t wait more than a few days to prevent the spray from drying out.

Quilt top and back with basting spray

It’s okay if the layers are a wadded-up mess. You’ll straighten them out next!

Step 2 – Assemble The Layers Indoors

Pin the quilt backing wrong side up to the top of the design wall (mine is made from foam insulation board covered with a white flannel sheet). Let gravity pull the weight of the fabric down. Gently un-stick any of the fabric sticking to itself and spend some time smoothing it all out with your hands or an acrylic ruler.

wall basting

For shorties like me, use a chair or step ladder to reach the top of the design wall.

Your hands will get a bit sticky, but the residue easily washes off with soap and water. Spend as much time as you need to straighten the backing so that it’s nice and smooth and flat on the design wall.

Smooth backing on the design wall

The backing is nice and smooth! Any small wrinkles will get ironed out later.

Fold the batting in half vertically and stick it on one side of the backing. Notice that I didn’t cut my batting perfectly straight on one edge and that’s okay. As long as the batting is larger than the quilt top, it’s easy to trim off any excess.

Wall basting - adding the batting

For this quilt I used Hobbs Tuscany Cotton/Wool blend batting. The cotton gives it a nice drape and the wool adds depth and dimension to the quilting without wrinkling up.

Unfold the batting and spend a good amount of time smoothing it out with your hands or a long acrylic ruler. My ruler can get a bit sticky so I have a separate one that I use just for basting. See the excess batting sticking out on the right side? I’ll trim that off with batting scissors before I add the quilt top.

Smoothing the layers

Spend 10-15 minutes smoothing out the batting. It’s okay to re-position it if needed. The ruler acts as an arm extension to help you cover more area while you smooth it all out.

Add the quilt top right side out in the same manner as the backing. Pin generously and let gravity pull on the weight of the quilt top to get it to hang straight. This is why it’s so important for the batting and backing to be larger than the quilt top. Then you don’t have to make sure it’s lined up perfectly in the middle – you’ll have a bit of “wiggle room” to maneuver.

The excess batting and backing will get trimmed away later.

Spend a lot of time smoothing out the top layer once it’s on the wall. Use the acrylic ruler to help you work out any bubbles and ensure that the seam lines are nice and straight. Once your basted quilt is flat, smooth and straight, machine quilting it will be a breeze!

Bastd Modern Puzzle Quilt

Taking time to smooth each layer will make it much easier to machine quilt!

Step 3 – Iron the Basted Quilt

Here’s where the magic happens! Once the quilt is basted, I take it to the ironing board and press both sides of the quilt. This does two things: (1) it’s a final chance to press out any wrinkles and work out any fullness in the quilt. (2) It sets the glue and ensures that all 3 layers will stay together without shifting, eliminating the need to add any pins. You can still pull apart the layers if needed, but this process will ensure that every inch of the quilt is sticking to every other inch of the quilt.

Press the spray basted quilt

I use a “big board” which sits on top of my regular ironing board and gives me more room!

No Design Wall? No Problem!

Click here for my spray basting tutorial using a table rather than a design wall to layer and baste the quilt. It’s basically the same process!

Spray Baste

You can use the exact same steps above except do everything on a table instead of a wall.
The quilt shown above is my Improv Squares quilt pattern.

Once I switched to spray basting, I virtually eliminated any pleats and puckers on my quilt. Because there’s a lot of “scrunching and smooshing” going on while quilting, your basted quilt needs to be able to handle a lot of wear and tear while pushing it under the machine. It takes the same amount of time to baste a quilt with spray or pins, but you’ll save a huge amount of time by not having to stop and remove pins. Give spray basting a try and let me know how you like it!

I quilted Modern Puzzle using walking foot wavy lines, a technique I teach in my book, Piece and Quilt with Precuts.

Modern Puzzle Quilting Detail

I hope you enjoyed this tutorial. If you end up making your own version of Modern Puzzle, please share pics in my Christa Quilts Facebook group. I’d love to see your progress!

Tutorial and Tips: How to Spray Baste a Quilt

2018 Spray Basting Update

I’ve updated this method to show I use my design wall to assemble the layers.
Click here for the updated tutorial.

Original Tutorial (From 2014):

I have been dabbling with using 505 basting spray to hold the three layers of my quilt together while quilting. I’ve learned a few things along the way and would like to share them with you. Thanks to Ann Petersen for introducing me to this method of basting.

spray_basting_0Yes, you get to see my ugly backyard during this tutorial. Yay, you!

Tips Before You Begin

First of all, when basting a quilt with spray, it is best to use pre-washed 100% cotton fabrics. The spray make not stick as well to other fibers. Also, if you like to starch the back of your quilt to make it slicker and aid in machine quilting, wait to do this until after you have spray-basted the quilt.

For best results, choose a natural fiber batting made of cotton, silk or wool (or a blend that is mostly cotton) because the adhesive tends to stick better. Finally, be sure to use the spray adhesive outside, or in an extremely well ventilated room with the doors and windows open.

Now on to the Tutorial

Begin by setting up one or two tables on which to work. Alternatively you can place a sheet on the ground, or even drape your fabrics over a wall if needed. Lay out the backing of your quilt first, wrong side up. You will be applying the spray to the wrong side of the fabric.

spray_basting_1Working outside is best so that fumes can dissipate.

Not shown in the photo: place a towel or two on each end of the table under the backing to protect it from over-spray.

Shake the can well before beginning. I have only used the 505 spray, so I cannot speak to the effectiveness of the other brands. Starting on one end of the quilt, spray the adhesive smoothly back and forth across the surface of your quilt. It should be very tacky to the touch. Set the backing aside and move on to the quilt top.

spray_basting_2Not a very flattering picture, but I’m keeping it real!

Lay out the quilt top and use the same method to apply spray evenly over the wrong side of the top and set it aside. I sprayed the center section of the quilt top and then went back and sprayed the sides. I didn’t move the top; I just sprayed the edges while they were hanging off the table.

spray_basting_3Lay out your quilt top wrong side up.

I usually hang my top and backing wrong side up over a railing while waiting to assemble them. You can also fold them up and open them later as needed. The quilt pieces will be tacky but can still be opened up if the sticky ends touch each other.

spray_basting_4I drape my quilt tops over a railing in my sewing room.

Using a large surface (like a couple of long plastic tables pushed together), spread the backing wrong side up and tape or clamp down the edges. Next, place your layer of batting on top.

spray_basting_5Tape the backing down with painter’s tape, wrong side up.

It is really helpful if you can grab an assistant to help you place the batting directly on top of the backing without having to move it around too much. Grab the quilt top, again with help, and place it on top of the other two layers, right side up.

Take some time to smooth out all 3 layers until it is nice and flat. Once you have worked out any wrinkles, take the whole sandwich over to your ironing board and press it together from the back of the quilt. This will help set the adhesive and works best with natural fiber battings. If needed, press the front side as well.bastingYou are now ready to quilt!

The quilt shown is Modern X, made as a free pattern for members of the Modern Quilt Guild. Pattern available for purchase here.

Favorite Tools – Kwik Klip for Basting

Since it’s almost time for my basting tutorial as part of my Modern Trees Quilt Along, I thought I would share one of my favorite tools that makes the job easier – a Kwik Klip.

These puppies have been around for awhile but I finally started using one after tearing up my fingers from previous basting attempts.

Pinning and Clipping

Pinning and Clipping

Kwik Klip is a simple wooden rod with a metal end with grooves in it. One of the grooves holds the end of the pin in place, so you can bring the head of the pin down to fasten it.

When I first tried it out, I did it wrong. I kept trying to use the tool to push up the pin to meet the head. But that is wrong – don’t do that! Instead, hold the Kwik Klip in one hand and push the pin down to close with the other hand. I’m right handed so I held the Kwik Klip in my left hand and pushed the safety pin with my right hand. Do what feels most comfortable.

Closing the Pin

Closing the Pin

Once I got the hang of it, basting went pretty quick. I put in a bunch of pins first and then closed them all at the end.

Just so you know, I used to use Pinmoors for basting with straight pins. Those are small silicon caps that go on the end of straight pins. They are nice because you can remove them quickly while sewing. However, I timed myself and realized it takes longer to put the pins in and add the caps than it does to push in a bunch of safety pins and close them.

Kwik KlipAfter basting several quilts, I prefer regular safety pins with a Kwik Klip.

And honestly, while quilting, it’s not a big deal to take a second or two to remove a pin. I’d rather save time on the basting end of it rather than during the pin removal process.

Christa’s Quilt Along 5.7 – Hugs ‘n Kisses Safety Pin Basting

For today’s Quilt Along lesson, we will tackle basting which is usually the least fun part of making a quilt. However, I’m giving you a whole week to do it and it only took me 2 hours including ironing and lots of pinning!

Step 1 – Give your top and backing a final pressing (30 Minutes)

This is the first time I have used starch on a quilt throughout the entire process and I loved it! Not only did I press all of my seams open, I starched the completed top and back.

Before Final Pressing

Before Final Pressing

This really made the top lie flat and made it easier to baste. When starching the top for the final pressing, I only starched the back side, waited a few minutes to let the starch soak in, and went over every seam with my iron. Just take a look at the before and after pics to see what a difference pressing with starch makes.

After Final Pressing

After Final Pressing

Step 2 – Lay Out The Quilt Sandwich (15 Minutes)

Use a large flat surface to lay out your quilt. I have 2 long banquet tables that I purchased from an office supply store. I leave them up in my sewing loft all the time and use them as my cutting area, too. Before I got these tables I used to baste on my wooden kitchen table.

Quilt Backing


I use binder clips to secure two edges of the table and painter’s tape to secure the other two edges. You want the backing to be secure but not overly tight. If you have just one table to work with, secure the middle of the quilt, baste it, and then move on to the rest of the quilt, pinning one section at a time.

Add the BattingAdd the Top

Next, add your layer of batting and smooth it out and look for any stray threads. Then add your quilt top. I don’t secure either of these two layers – just the backing.

Step 3 – Pin Basting (1 Hour, 15 Minutes)

I have learned that the key to good basting is using lots of pins! I start out by sprinkling a few safety pins on one side of the quilt. I leave them open after removing them from my previous quilt so they are already open, ready to be pinned.

Sprinkling of Pins

I divide the quilt into 4 areas and completely baste one section at a time. I put all of the pins into the quilt sandwich first, then go back and close them all. A band-aid really comes in handy on my index finger to protect it and help close the pins.

Baste the QuiltBand Aid for Protection


I used a variety of pins – some large, some small, some straight, some bent – whatever I had on hand. I pinned every other square.

Safety Pins

After pinning the entire quilt, I trimmed off the excess batting and backing fabric so there’s only an inch or two around all sides. The less fabric under the machine, the better!

Safety Pin Basting

Basted and Ready to Quilt!


Hugs ‘n Kisses Quilt Kits are available for purchase while supplies last. If you have any questions about this week’s homework, please be sure to join my flickr discussion, leave a comment, or email me directly at christa@christaquilts.com.

Quilt Along Schedule – Links will go to each active post when published.

Hugs 'N Kisses

Hugs ‘N Kisses 48″ x 64″


Grab my Quilt Along button!

<div align="center"><a href="http://christasquiltalong.com" title="Christa's Quilt Along" target="_blank"><img src="https://christaquilts.files.wordpress.com/2013/03/christas-quilt-along-175-2.png" alt="Christa's Quilt Along" style="border:none;" /></a></div>

Christa’s Quilt Along 4.9 – Sea of Squares Binding by Machine

Machine Binding

Today I am going to show you a quicker way to bind your quilt – by machine. Sometimes when I am in a hurry (like this week trying to finish all my quilting tasks before heading off to QuiltCon), a machine binding is just what I need!

It took me a total of 2 hours to bind this quilt using my home sewing machine. I love how it looked outside today with the quilt against the cloudy sky. A cool juxtaposition…

Sea of Squares Finished

Step 1 – Trim Your Quilt (10 Minutes)

Before binding, you want to start with a nicely trimmed edge, flush with your quilt. I don’t leave any batting peaking out. My method ends up with a fully stuffed, flat binding.

Using a large square ruler, I trim up all 4 corners first. If anything is out of alignment, I gently tug it back into place. Then I trim up all the sides with a long ruler.

Trim Corners FirstTrim the Sides


By starting with trimmed corners, I can match up the cutting lines so that things stay straight (as possible). You can throw your trimmings away or recycle them as pillow stuffing. 🙂

Step 2 – Calculate the Length of Binding Needed & Cut Strips (10 Minutes)

My favorite binding is called double fold straight grain binding, and it is super easy to make. You start off with strips of fabric, cut them on the straight of grain, then fold them in half twice to get the double fold. It holds up well especially on quilts that get a lot of use.

Measure the Perimeter

First, measure the perimeter of your quilt and add on 10 inches for corner folding, seams and “insurance.” In this case, my Sea of Squares quilt measures 50″ x 58″. It shrunk about 2 inches due to the intensity of the quilting on it.

I need a total length of 226 inches (50+50+58+58+10). If I divide this by 40 inches (the length of a fabric strip), I end up with 5.65 strips which I round up to 6 binding strips needed for this quilt. I cut all my strips 2.25 inches wide.

Binding Strips

Cut Six 2.25″ Wide Strips

For those of you sewing along using one of my Sea of Squares kits, binding fabric is included.

Step 3 – Sewing the Binding Strips Together (5 Minutes)

Join all of your binding strips into one long piece. Sew the ends on a mitered angle so that the bulk of the seam will be distributed more evenly. Be sure to cut one end of the binding on the same 45 degree angle. Fold the strips wrong sides together and press along the length with a dry iron.

Sew Continuous StripsFirst Fold

Before attaching to the quilt, I will pin part of the binding to one side, starting somewhere in the middle. Loosely walk the binding all the way around the quilt to ensure there will not be any mitered seams falling on the corners of your quilt.

Step 4 – Attaching the Binding to the Quilt (30 Minutes)

Sew from the front.Whether finishing the binding by hand or machine, this part is the same. Using coordinating or matching thread in top and bobbin, sew the binding to the front side of the quilt.

Starting with the binding on the angled end, leave a few inches of unsewn “tail” and use quarter-inch seams.

Be sure that you are sewing with the raw edges of the binding and the raw edges of the quilt in the seam. These will be covered with you flip your binding to the back.

You may wish to add a few pins to secure.

When you near a corner, be sure to mark a line 1/4″ away from the corner. Stop sewing at this line, then turn your quilt 90 degrees and sew off the edge.

Stop 1/4 inch from end.

Sew perpendicular to edge.


Flip the binding strip to create a 45 degree angle, pinch the excess, and then fold it back down. This creates the excess fabric allowing for a nice miter on both front and back of the quilt. Begin sewing the next side starting at the corner of your quilt. Repeat for all 4 corners.

Flip binding up.Flip binding down.


Leave about 6 inches of tail when you finish sewing. This will be joined next to create a continuous binding.

Step 6 – Joining the Ends Together (5 Minutes)

This is probably the trickiest part of the whole binding process. You want the ends to be joined with a nice miter seam that does not give any extra slack.

Leave a Tail

Open the Blunt End


Open both tail ends. Place the angled tail on top of the blunt tail and draw an erasable line along the edge of the angled tail where it meets the blunt end. You will need to account for both seam allowances, so cut 1/2 inch away from this line, keeping the 45 degree angle.

Trace the Angle

Now join the two ends together with 1/4″ seam. Use pins if needed and offset each of the triangle tips by about 1/4″. Finish attaching the binding to the front of the quilt.

Cut 1/2 inch wider.Pin ends and sew.


Step 7 – Binding by Machine (1 Hour)

I have a tendency to pull on my binding as I’m sewing, stretching  it and creating a wavy edge that needs to be blocked. By pinning first, this can eliminate most of the stretching.

Pin Binding

There are several different ways you can finish stitching the binding on by machine. For example, you can stitch in the ditch from the front side but only if you are absolutely sure you are catching the binding on the backside, too. You can stitch using straight lines or decorative stitches. Just sew slowly and be sure to catch the corners as you go around the quilt. A decorative stitch can hide a lot of mistakes!

For Sea of Squares I chose to use a reverse blanket stitch (similar to the regular blanket stitch I used for my machine applique table runner). The stitching won’t line up perfectly on the back but if you use a blending thread it won’t matter too much.

Sea of Squares Binding

Often times I have finished by quilting a decorative stitch from the backside, too.The picture below shows the binding I did on my first quilt-along, the Jolly Jelly Roll Quilt. I used one of my favorite stitches on my machine, a wavy serpentine stitch.

Jolly Jelly Roll QuiltI hope you have enjoyed following along as I made my Sea of Squares Quilt. I learned a lot from it and I encourage you to give this quilt a try. If you are currently working your way through your own version of Sea of Squares, I’d love to see it! You can share photos of your work in progress on my flickr group: Christa’s Quilt Along.

Here is a picture of the back of Sea of Squares, showing all that machine quilted texture.

Backside of Quilt


Complete Quilt-Along Schedule for Sea of Squares
Click any of the links below and follow along at your own pace.

Sharing is Caring

Please share your work in progress in my facebook group: Quilt With Christa . 🙂

Christa’s Quilt Along 4.8 – Sea of Squares Extra Quilting

Can you believe this quilt is almost done? Next week I will show you how to bind it by machine. The following week I will start all over with another brand new quilt-along. Here’s a hint for my next quilt: it requires 1 Jelly Roll and a 1 1/2 yards of background.

Extra Quilting

This week I added tons more quilting to my Sea of Squares quilt. I spent an extra 7 hours gleefully quilting along, adding loads of texture with straight slightly wonky lines using my walking foot. If I had planned ahead I would have quilted about an hour a day for 7 days. Instead, being the procrastinator I am, I did it all in one day, but it was still fun!

Step 1 – Quilting the Sash Rows (1 Hour 45 Minutes)

First I started with what was easy. I quilted parallel lines all going the same direction through all of the skinner sash rows. I worked my way across the quilt, one row at a time, flipping the quilt when there was too much bulk under the machine.

Quilt Parallel Lines

Step 2 – Quilting the Rest of the Rows (5 Hours, 15 Minutes)

Now it’s time to fill in the rest of the space. I quilted the rectangles with lines running perpendicular to the previous quilting lines. For the big squares I alternated directions. I quilted the print squares all one direction, and the solid squares the other way.

Quilt Perpendicular Lines

It was cold that day so I bundled up while quilting!

I wanted to try out the continuous reverse feature on my machine. I can push a button once and it will sew backwards until I push it again to stop (and I don’t have to keep my finger on the button). So I would quilt one line of quilting, then push the reverse button and quilt a line backwards without having to turn the quilt all the way around. It was great!

Reverse Quilting

It took about 1000 yards (2 spools) of thread just for the top. I used the same color in a thinner weight for the bottom so I wouldn’t run out of thread.

Quilting this quilt was very liberating for me. I did not mark the quilting lines because I wanted to add a touch of modernity to the quilt with more organic-looking texture. Once I let go of my perfectionist tendencies and got into the “waviness” of the lines, it set me free to enjoy the process. Jason is always telling me to go bold and let out my inner artist. So now I’m giving you the same permission!

Quitling Makes the Quilt

Be sure to take a look at my flickr group so that you can see the wonderful quilts being made by everyone else. And if you are working through any of my quilt-alongs, I’d love to see your progress!

In fact, Judith shared her version of Sea of Squares in beautiful brown and cream. Notice the wonderful quilting she did with wiggly lines across the surface and quilting motifs in the blocks. I love it when you can really make your quilt your own. Nice job, Judith!

Judith's Sea of Squares

Please share your pictures here:

http://www.flickr.com/groups/christasquiltalong/


Quilt-Along ScheduleLinks are Active at the Completion of Each Step:

Sharing is Caring

Please share your work in progress in my facebook group: Quilt With Christa . 🙂