Welcome to another installment of my Abacus Quilt Along! Today is when the magic happens. It’s time to machine quilt, which I think is the most fun part of the quilt making process. It took me only 1 3/4 hours to machine quilt – so fast and fun! 🙂
I’ve written several blog posts about getting started with machine quilting, including many of my favorite tips and tricks. Click here to read them all!
 Machine quilting wavy lines with your walking foot is super simple and fun!
Step 1 – Practice Quilting on a Scrap (1/4 hour)
I always, always, try out my quilting idea before I quilt the whole quilt. More often than not, I’m disappointed if I skip this step. What I see in my head may not translate well in fabric, so it always helps to make a small practice piece. It can be as simple as two scraps of fabric with a small piece of batting. Or sometimes I will make up a complete block using the same fabrics and thread as in the quilt.
 One of the biggest unknowns when machine quilting is how the quilting thread will look on a wide range of fabrics. I’d rather try it out on a smaller piece to make sure I’m happy. I think the grey Aurifil 50 weight cotton thread and uneven lines of quilting look great on both the light and dark fabrics. So now I’m ready to move onto the real quilt.
Step 2 – Quilt the Anchor Lines, AKA Stitch Near the Ditch! (1/2 hour)
Whenever I begin quilting a piece, no matter how large or small, I always start by quilting a series of anchor lines across the surface of the quilt. This helps stabilize the quilt for more quilting later. For Abacus, I stitched my wavy anchor lines right next to each of the vertical seams, moving the quilt slightly from side to side, letting the lines wobble a bit.
If the quilt is well basted, it doesn’t matter where you start. I usually start quilting in the middle, and move to the right across the quilt, stitching each line from top to bottom. Then I rotate the quilt ninety degrees and finish the other half in the same way.
 Right now it looks like a bit of a mess, but I know from my practice piece that once all the lines are filled in, it’s going to have some incredible texture.
Step 3 – Quilting the Wavy Lines (1 hour)
I quilted wavy lines using my built in even feed. That’s the same thing as using a walking foot. I increased the stitch length slightly and moved the quilt from side to side as the machine stitched, creating the waves.The feed dogs are up as normal and I’m wearing Machingers gloves to give me a better grip on the quilt.
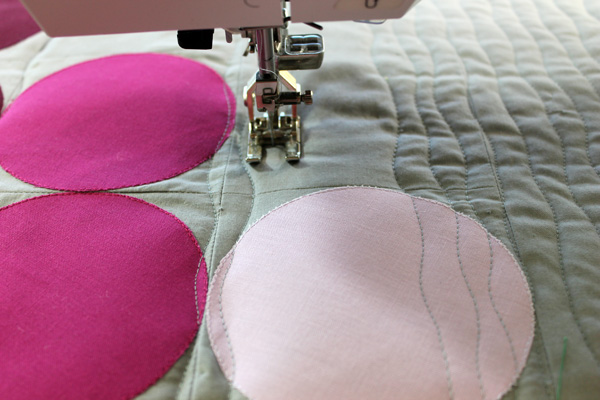 Once the anchor lines are quilted, I filled in the spaces between the rows with more wavy lines. I quilted a few lines on the left, then a few lines on the right, all the while aiming for a very organic (messy) looking texture. I let the number of quilted lines vary per row, and used the width of my foot as a rough guideline for spacing.
For those of you who can adjust your presser foot pressure, I set mine all the way down to zero. This really helps eliminate tucks and puckers.
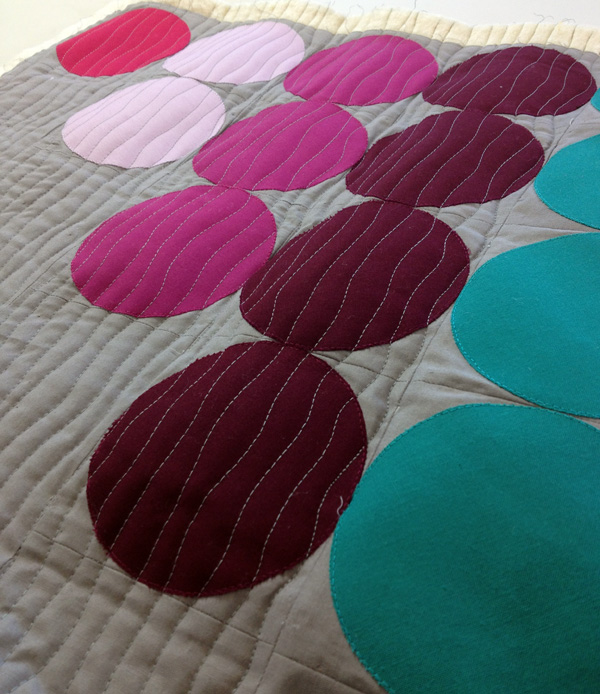
 In the picture above, I have quilted all the anchor lines and completely filled in the wavy lines on half of the quilt. I rotated the quilt, now I’m ready to finish quilting the other side!
Voila! Quilting finished! Next week I will show you how to square up the quilt and bind it.
 If you are enjoying this quilt along, please share your progress on my flicker group or on Instagram #abacusqal.
Remember, I encourage you to work at your own pace. However, if you finish your quilt (or even just the top) by November 10th, I’ll be happy to feature it on my blog in my parade of quilts! 🙂

I would love to go to Houston and be up and at it early and walk my legs off and see everything and everything as much as I could absorb. I love quilting and would just feel so complete by being able to be in Houston as an admirer and lover of everything and everyone involved in quilting!
Thanks for the quilting tips. I recently quilted a throw with the wavy lines, and had issues with the quilt top walking. Even though it was heavily pin basted, I ended up re-pinning both ends to keep everything straight. After reading your post, I can see that using anchor lines and setting my pressure foot to zero (I didn’t think I could do that!) would have prevented, or significantly reduced the issue. I’ll definitely follow your advice next time, since that’s a pattern I’d love to repeat.
I love this look! I really love it at this larger scale. I might just have to try it out in my next project!
This will be the exciting step! I have dual feed also, and love the way the wavy lines look! I am pinned in layers and ready to go, and today I even have new batteries in my little camera. I decided on somewhat heavier background fabric – in part because that is what I had in a neutral color – and stuck with the rainbow colors and layout. When I send this on to my son in Japan, I am going to describe it as a “play mat.” My piece for practice quilting will be a matching bib with one or more circles appliqued to it. Christa, this one is FUN!
Love how the quilting turned out.