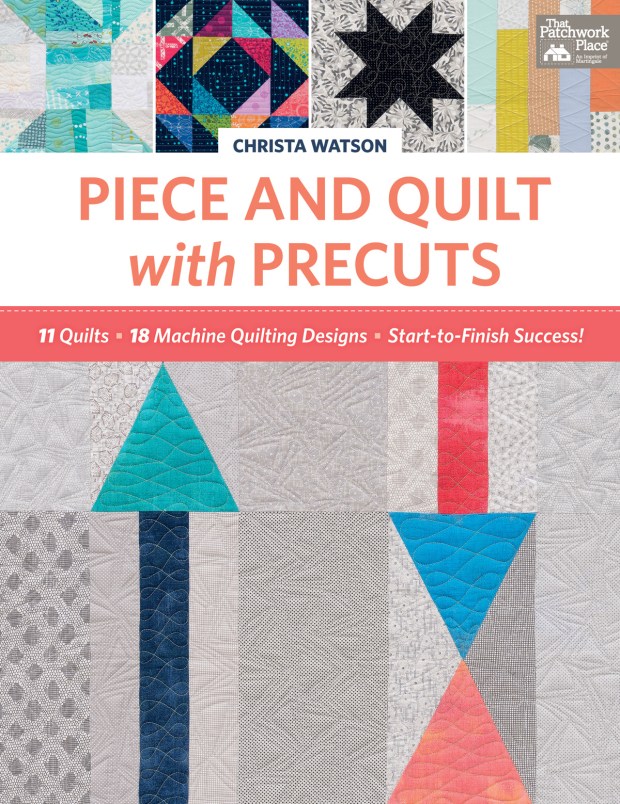
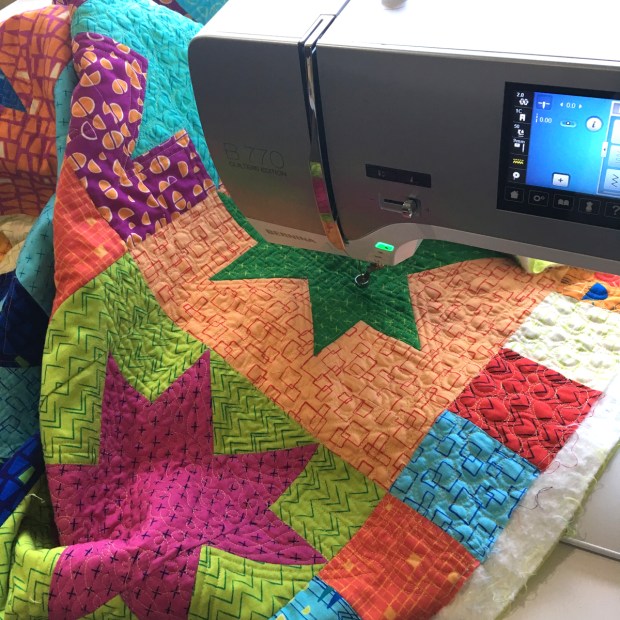
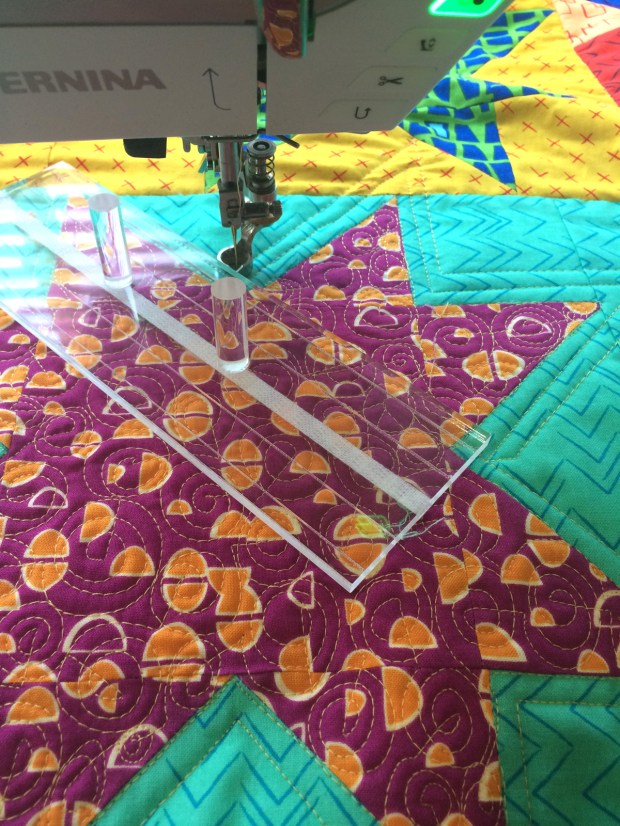
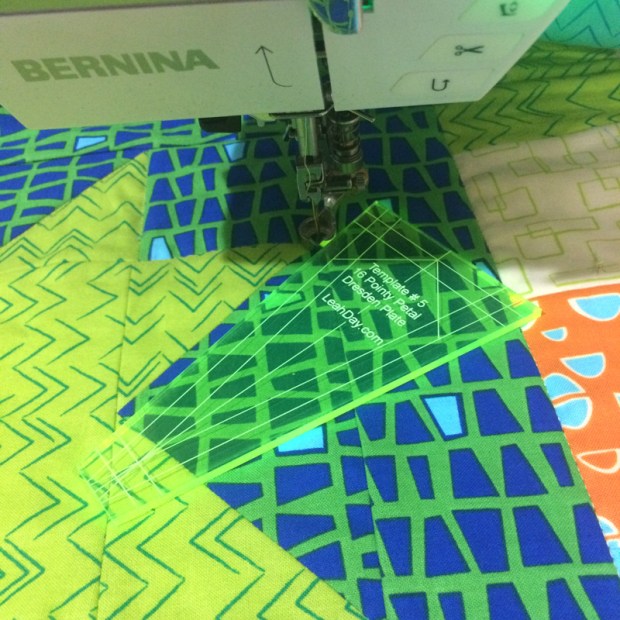
The Books Are Here! Piece and Quilt with Precuts Ships Ahead of Schedule

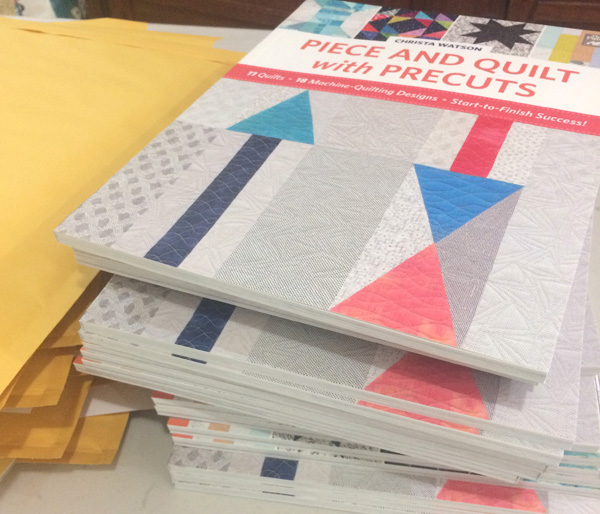
I have some exciting news to share today! My third book, Piece and Quilt with Precuts has arrived ahead of schedule! That means that all of you who have pre-ordered my book directly from me should be getting it in the mail over the next few days.

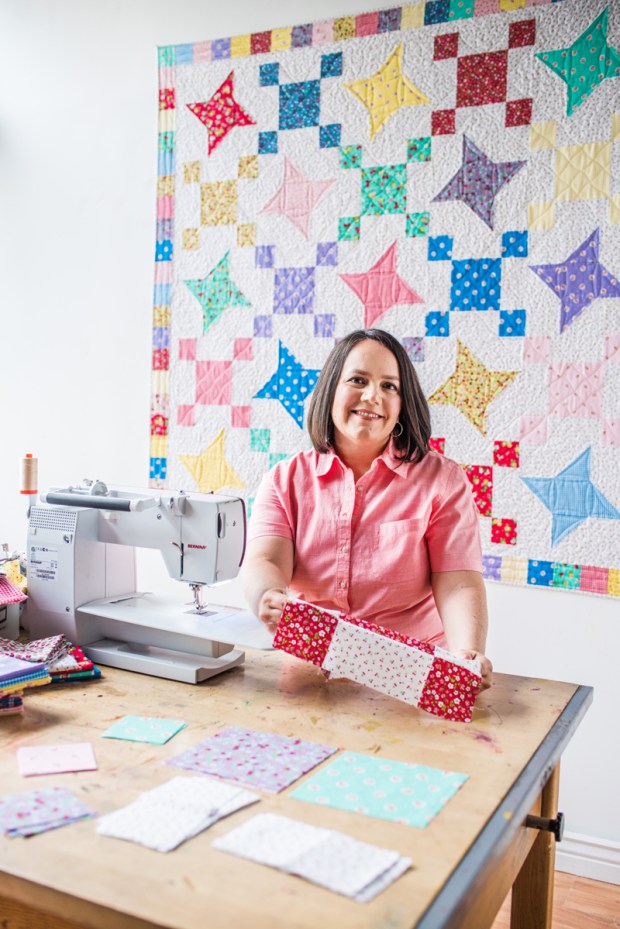
Piece and Quilt with Precuts by Christa Watson

Click here to order Piece and Quilt with Precuts – and get a free bonus pattern!

Needless to say, I plan to spend all day signing and shipping them off. This is always such an exciting day!! Huge thanks to those of you who pre-ordered directly from me. Not only will you get your book ahead of schedule, you are helping me to break a record for pre-sales compared to my other two books. Wowza and thanks!!

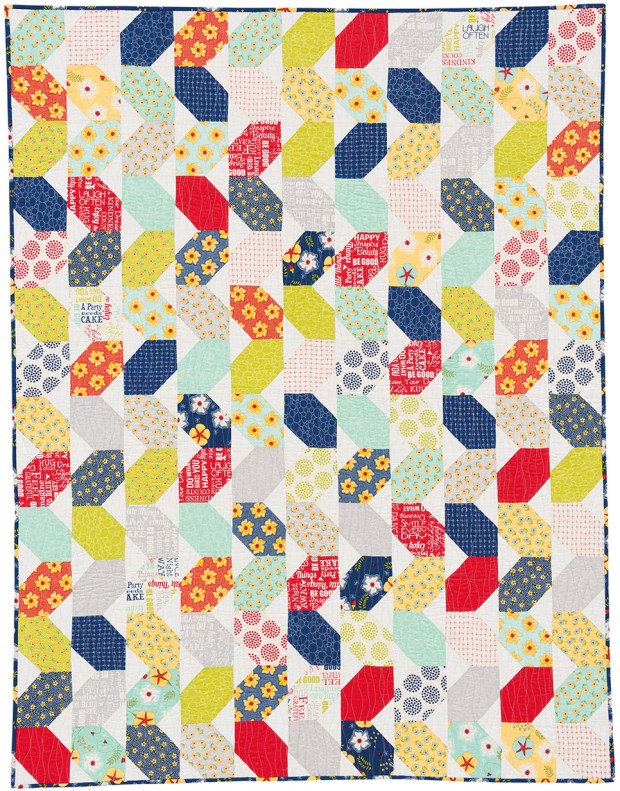
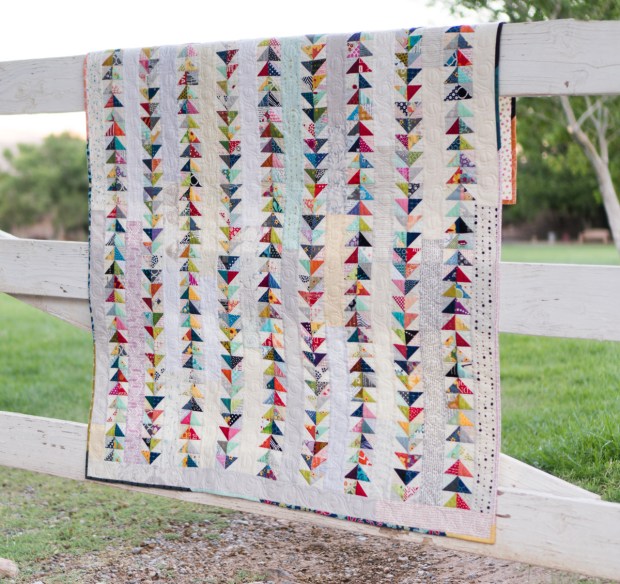
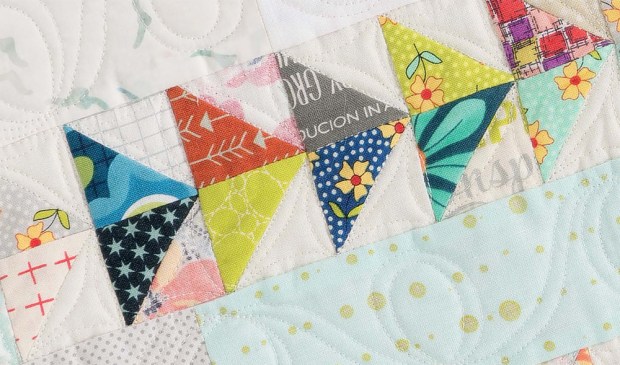
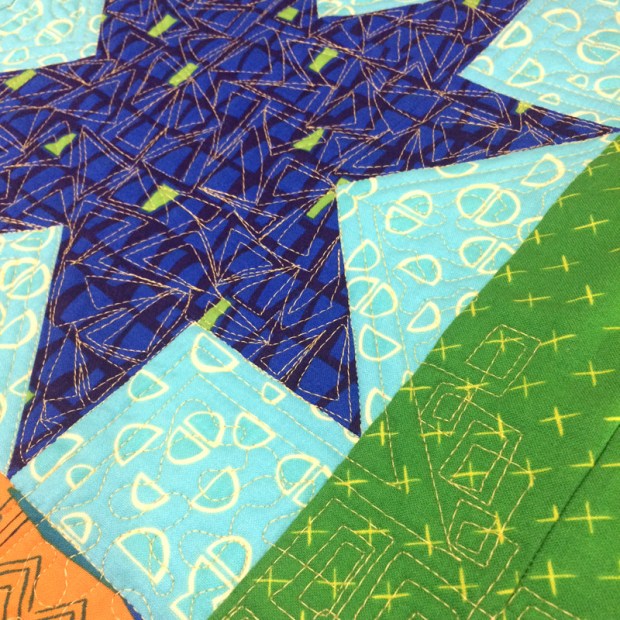
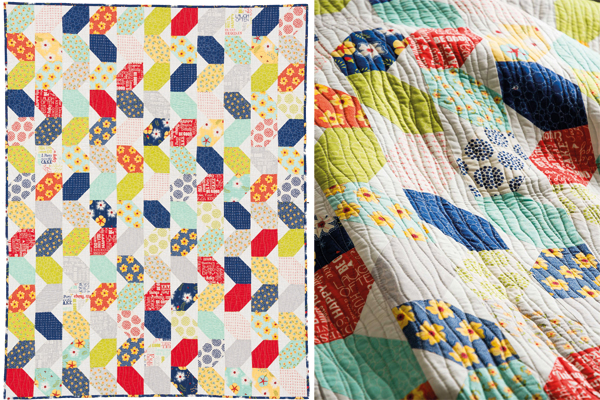
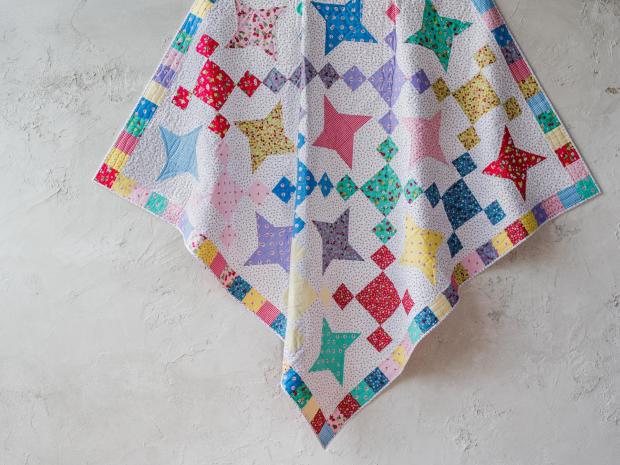
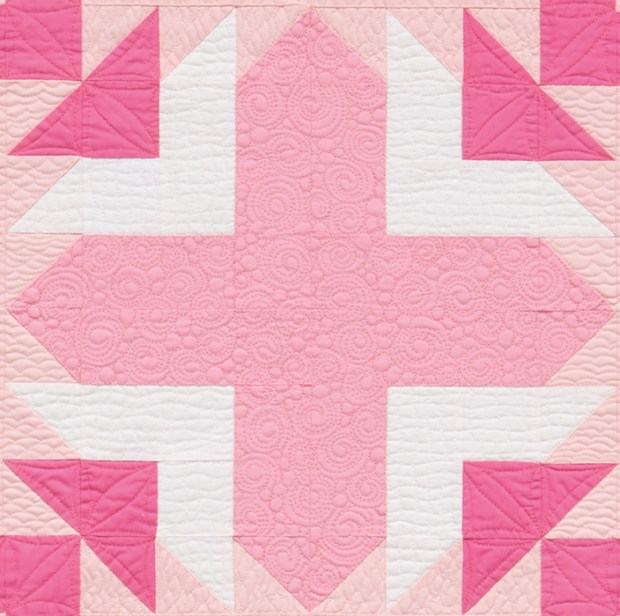
Squiggles Quilt from Piece and Quilt with Precuts by Christa Watson

Sneak peek of Squiggles, the first quilt shown in the book. I start off with super simple walking foot quilting like gentle wavy lines. They are such a fun and easy design to quilt!
Photo credit Brent Kane for Martingale/That Patchwork Place.

Now, if you ordered the book from somewhere else, that’s totally fine. I just can’t guarantee when it will arrive since that’s out of my control. But I’m grateful for your support wherever it comes from!

If you haven’t yet ordered Piece and Quilt with Precuts, now is your chance to get your hands on a signed copy ASAP, plus a special bonus. For each book you order directly from me, I’ll throw in one of my printed patterns for all orders placed through my birthday August, 17th! You all have given me the best gift by being my loyal friends and fans – now it’s my turn to give something back. 🙂

Now is a great time to announce that August 17th also kicks off my epic blog hop for the book. I can’t think of a better way to celebrate and party with you all!! The blog hop will run through the end of August, featuring 30 different talented bloggers I met through the Quilt Pattern Designers Facebook group.

You’ll be able to check out each of the quilts I made, plus you’ll be able to see how 30 other “real quilters” were able to easily follow my tips and techniques for piecing and quilting success!

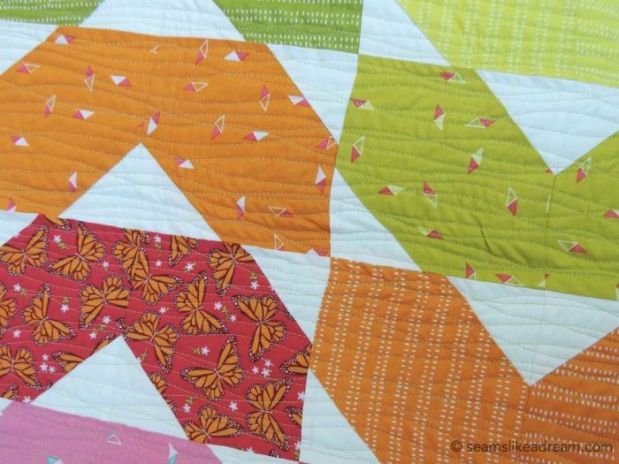
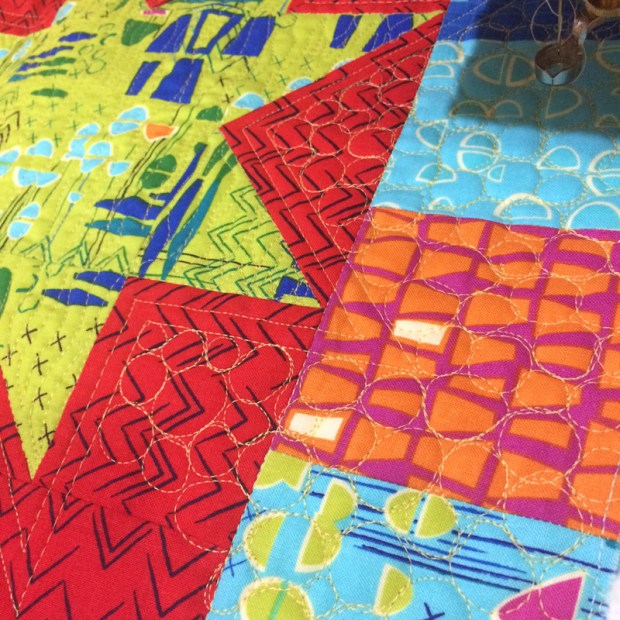
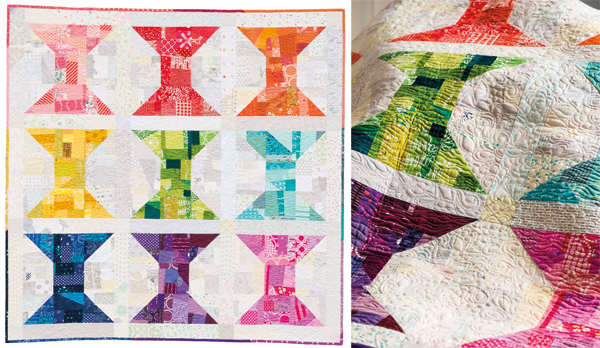
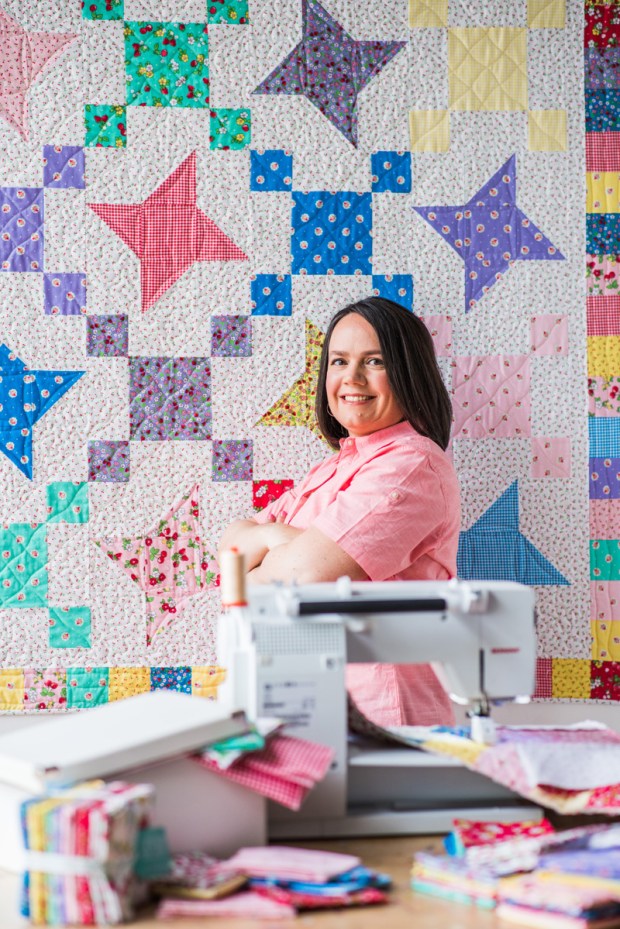
Spools from Piece and Quilt with Precuts by Christa Watson

Spools, is the final quilt shown in the book. It utilizes both improv piecing AND quilting – my favorite combo! Photo credit Brent Kane for Martingale/That Patchwork Place.

And you can’t have a party without presents, so I’ve rounded up some special giveaways throughout the event, plus an extra freebie for everyone who participates!! So save the date and plan to join the fun! It all starts here on August 17th!

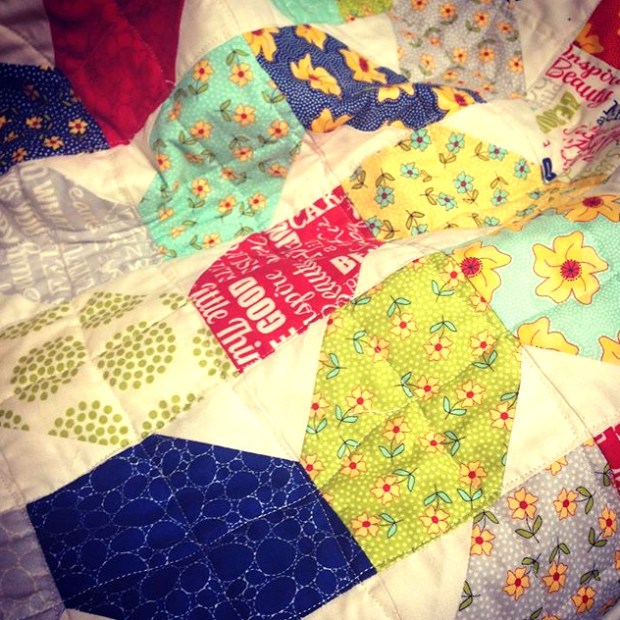
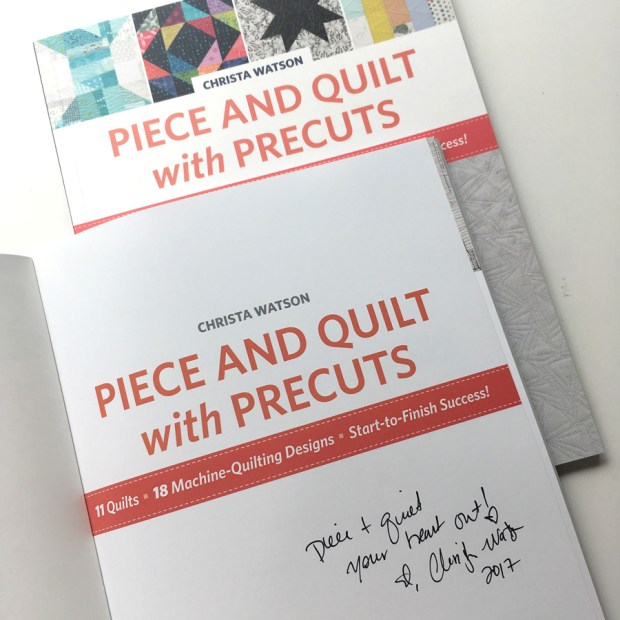
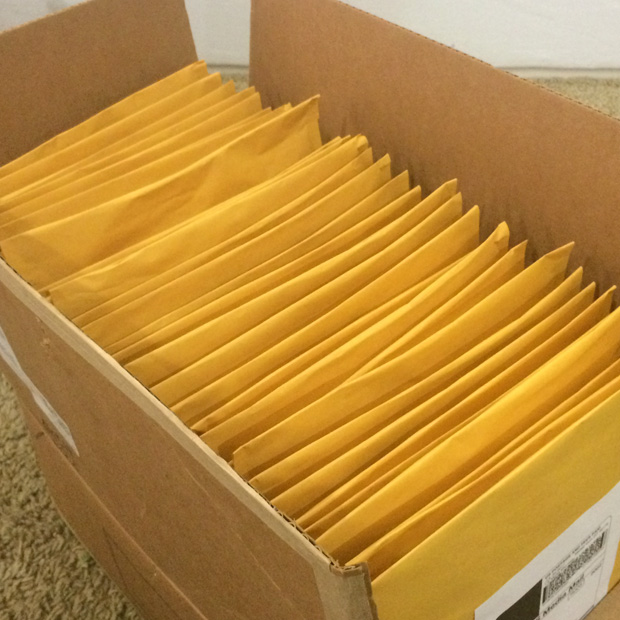
Box of Books - Piece and Quilt with Precuts by Christa Watson

It was so exciting to get back from vacation and find several boxes of my books waiting!!

Click here to get your copy of Piece and Quilt with Precuts, signed by yours truly.

Save

Save

Save

Save

Save

Save

Save

Save

Save

Save

Save

Save

Save

Save

Save

Save

Save

My Craftsy Class is Now Live and You can get 50% off the Regular Price!

Today’s the day!! It’s launch day for my brand new Craftsy class: Startup Library – Quilting. But first things first. Congratulations to Annie B. and Ursula (from Germany) who each won a copy of the class. I’ve emailed them their winning link!

I am so thrilled about this class. It’s very long and in-depth covering all the basics of how to make a quilt from start to finish. The total run time is 5 hours, 43 minutes which is nearly 3 times as long as one of their regular length classes. What can I say – I have a lot to teach!

Now before you get a bit of sticker shock for the price of the class (since it’s so much longer), I have a special 50% off instructor discount you can get by clicking this link below:

Click here to get 50% off Startup Library: Quilting (Through October 8, 2017.)

Christa Teaches on Craftsy

Fun Fact: I made this quilt twice!! A finished one to display and then the one I show step-by step in class. I was able to follow my own instructions while making it so everything is accurate.

You are welcome to share the discount link with your friends – the more the merrier!! It works a little differently than their normal discount, though. First you click the link and the coupon is automatically added to your cart, but the class sales page will still state the regular ammount. However, once you click “buy now” the price reflected in you shopping cart will be at the discounted rate. Clear as mud??

Friendship Stars Quilt

Fun fact: Craftsy photographed me “fluffing” the quilt top about 20 times to get some great “action” stills. It was a great exercise for my arms, LOL!!!

Just like any class, I’m here to help you every step of the way. You’ll have 24/7 access to the class platform and can post your progress. I usually answer any questions within 24 hours or less. In fact,  one of the first things I do each day is check in and see if anyone has questions. It’s become such a fun part of my morning routine!

Cuting Fabric for Friendship Stars Quilt

Fun fact: I cut out several duplicate fabric pieces just in case – it was a big job to keep them all organized and in order; but also tons of fun!!

I was so thrilled that I was able to include instruction on my methods for spray basting and binding in this class. It was fun to work out the logistics of how to film that and I’m pleased with how it turned out!

basting a quilt

Fun fact: during the basting lesson, my Craftsy content editor makes an appearance as my helper. I think I’ve now converted her to basting using my method!!

The class materials include the complete pattern and supplies to make the Friendship Stars quilt, a beginner’s glossary of common quilting terms (that was fun to write!), a startup checklist, and quilting diagrams for you to follow.

Christa Quilts on a BERNINA

Fun fact: I purposefully made the entire quilt on a smaller sewing machine so that students could see how I manage a quilt of this size under the machine.

For your convenience, Craftsy has put together a quilt kit using the exact same fabrics as shown in the sample. Of course, you can use any fabrics you like, but these were so fun to work with! The basic kit includes all the fabric needed for quilt top and binding. There’s also an option to get the kit with the backing included.

Friendship Stars Kit

Click here to get the Friendship Stars Strawberry Fizz kit on sale.

I sure hope you’ll join me in class. I can’t wait to see how you interpret the quilt and make it your own!! After all, the whole reason I wanted to present this class is so that you can walk away with a beautiful finished quilt and you can proudly say, “I made it myself!”

Start to finish quilting

Click here to enroll in Startup Library: Quilting.


Save

Save

Save

Save

Save

Road to California Registration Opens Saturday and I’m Teaching!

I’m heading to Road to California as a teacher next January and I couldn’t be more thrilled! But before I get into the classes I’m teaching, I have to tell you a story about how this amazing show has been part of my professional quilting journey.

Road to California 2018

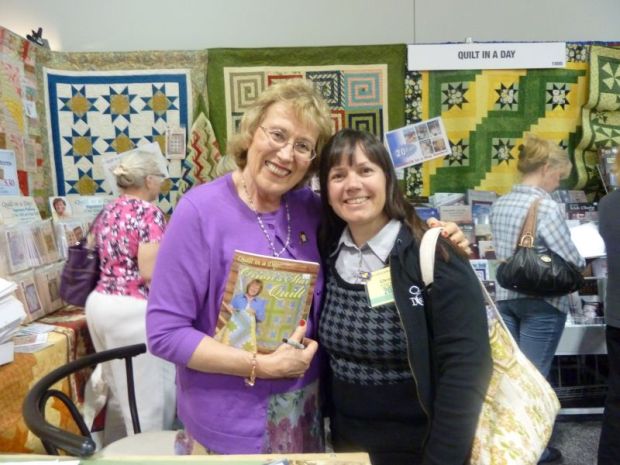
Road to California was the first national quilt show I attended in 2011 and was the catalyst that made me want to enter my work in national shows and become a national teacher. It was also really the first time I started getting to meet some of my favorite “sew-lebrities” like Eleanor Burns of Quilt in a Day. Like many others before me, I watched her quilting TV series on PBS when I first got into quilting, and was instantly hooked on her warm, inviting teaching style and funny television antics (such as tossing scraps over her shoulder onto the floor behind her).

Christa Quilts Meets Quilt in a Day

Meeting Eleanor Burns at Rd 2 CA in 2011 was awesome. My bangs back then? Not so much!!

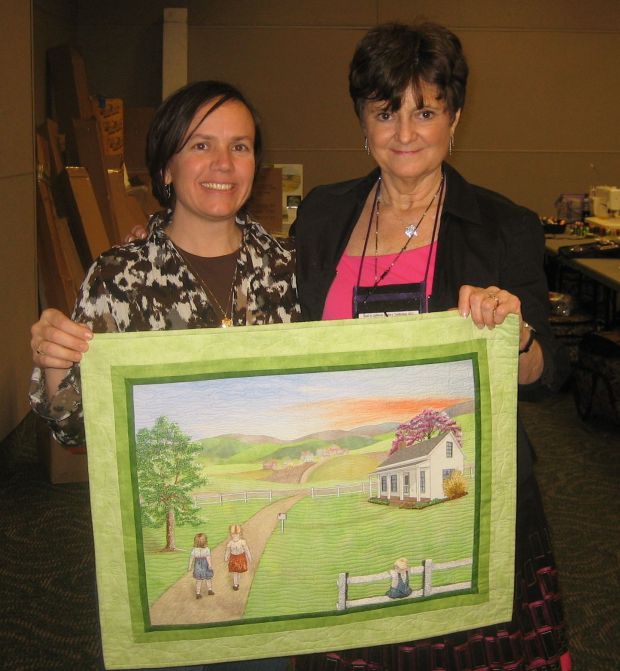
When I returned the following year in 2012, I took a class from award winning thread-painting artist Nancy Prince and we really connected. I ended up helping her out during a demo at the show and she was very encouraging when I mentioned that I wanted to become a national teacher and write books.

She turned to me and said, “I bet you’ll be back here as a teacher some day.” You can imagine how happy I was to run into her 5 years later at the Vermont Quilt Festival and tell her that her prediction had come true! (She even gave me a ride to the festival one day when we were teaching at the same location – what a peach!!) It’s amazing people like Nancy and Eleanor who’ve motivated me to always be kind and encouraging, especially to beginning quilters. And their willingness to pay it forward has been a great example for me to follow!

Christa and Nancy Prince

Meeting Nancy Prince in 2012 (and sporting a sleeker, shorter hairstyle).

My Road to California Teaching Schedule

And now before I get too sappy with all the warm fuzzies – onto the schedule! I’ll be teaching a total of 4 full-day free-motion quilting classes, Monday-Thursday, Jan 15-18, 2018. Click here to book mark the site. Registration opens on Saturday, July 8th at 7 AM Pacific Time, and classes can sell out quickly.

Click each of the links or images below for more info and a supply list for each class:

Monday, 8 AM -3 PM: Fun with Free-Motion Swirls

Christa Watson Road to California Teaching Schedule 2018This sample is from “Cornered,” showing how to combine swirls with other designs.

Tuesday, 8 AM -3 PM: Free Motion Designs with Lines

Christa Watson Rd 2 Ca 2018Plumb Lines” includes modern free-motion alternatives to straight line quilting.

Wednesday, 8 AM -3 PM: Free-Motion Improv

Free Motion Quilting Class with Christa Watson - Road to California 2018Free-motion improv” is a great way to show off all your favorite quilting motifs!

Thursday, 8 AM -3 PM: Modern Free-Motion Fillers

Modern Machine Quilting with Christa Watson at Rd to Ca 2018Modern machine quilting on “Candy Pop” means little to no marking, and tons of great texture!

All 4 classes will all be taught on sit-down longarm machines and the best part is that students will each get their own machine! I’ve taught at other shows in the past where students had to share and that’s kind of a bummer. But in these classes, you’ll have plenty of time to quilt and practice my motifs and methods. All l you need to bring are your sample swatches to practice on, and a “can-do” attitude!

Let me know if you plan to attend as I’d love to see you there!
Click here to see who else is teaching.

Save

Save

Save

Save

Save

Save

Save

Save

Save

Save

Save

Work In Progress – HST Remix

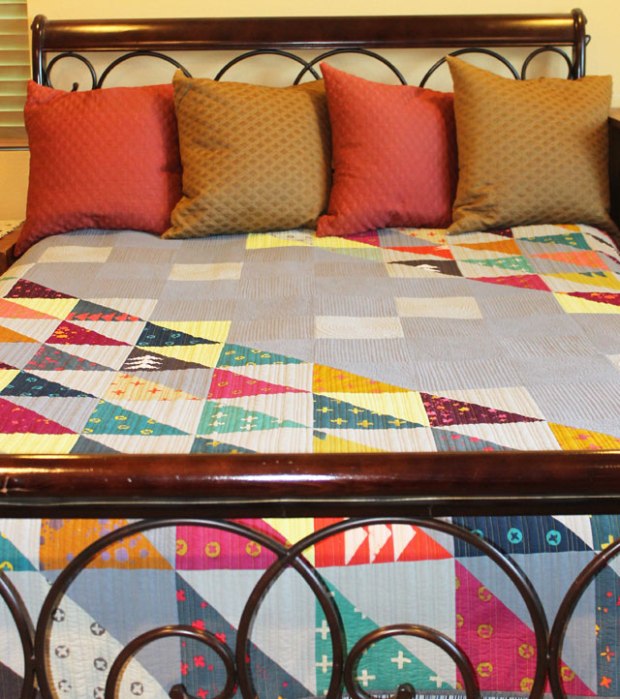
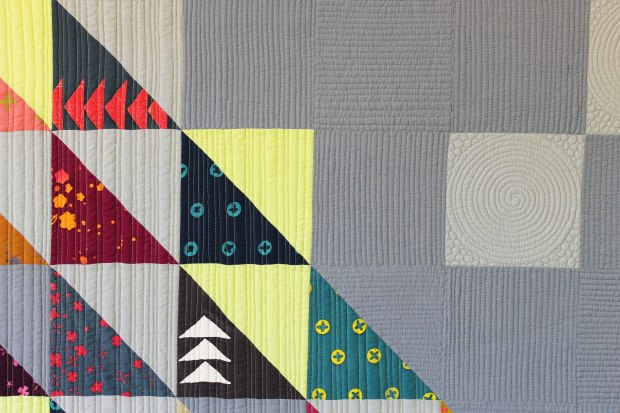
I am so excited that things have finally slowed down enough this summer that I can get back to working on some quilts that don’t have any set deadline! I originally made my HST quilt shown below a couple of years ago, then it got ruined in the wash when the “mild” wash powder I used bleached out some of the squares. (Note to self- stick with liquid detergent only!!)

HST Quilt

The original HST quilt – I still fits on my bed and is very warm and usable!!

The Remake – Improv Triangles

However, I loved the design so much that I had to remake it. I’m calling the new one HST Remix. I’m using the same Alison Glass batik fabrics as I had in the original, but the background fabrics are different and the fabric arrangement will be slightly different. One of the problems with the original is that I used a “textured” background fabric that had a lot of stretch. I never could get the quilt to hang straight. I do much better sticking with regular cotton fabrics, but it’s always fun to try something new, even if it doesn’t work out so well!

HST Remix in Progress

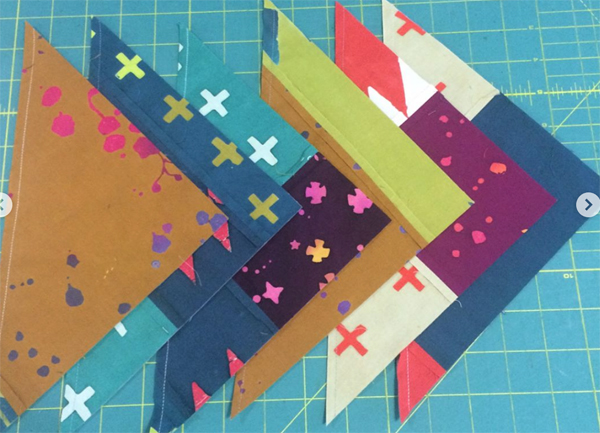
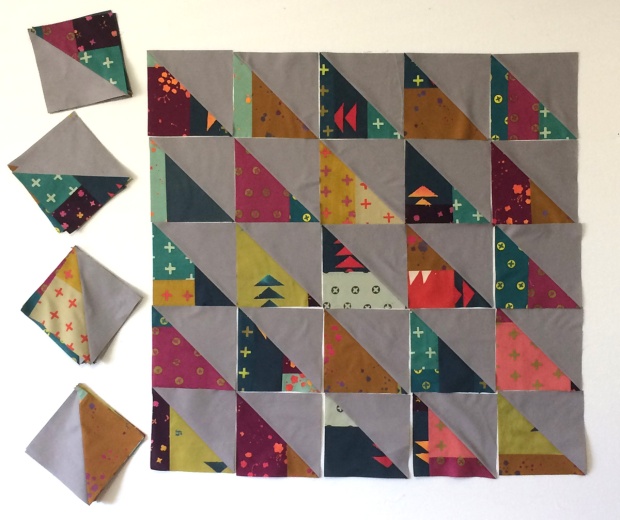
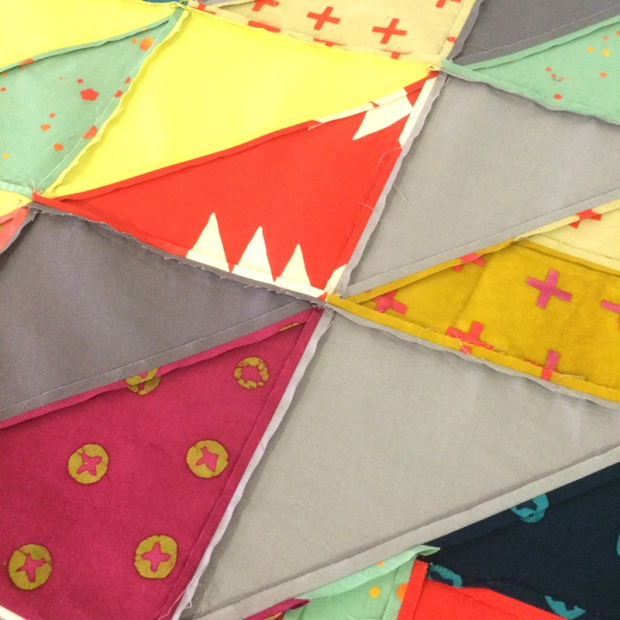
Because I’m working with leftovers from the first quilt, I didn’t have enough yardage to cut the squares large enough to make the half-square triangles so I improvised. And honestly I like the new blocks even better! I cut the yardage I had into straight strips with no wonky angles, then sewed them together randomly and cut them into the squares I needed. So many of them now have an improv look which I just love!

I also decided to make the blocks slightly larger the 2nd time around so that the overall quilt would be a few inches bigger.

Improv HST's

Some of my improv HST blocks in progress.

If this quilt turns out well, my plan is to enter it into a few upcoming quilt shows. That’s the one weird thing about me. It’s hard to make a quilt just for the sake of making a quilt. My quilts need a purpose, even if that purpose is just to delight a viewer at a quilt show!

Seams Pressed Open

Pressing Tips

Because the construction of this quilt includes a lot of bulky seams, I’ve pressed them open to help the quilt top lie flat. Contrary to popular myth, this will NOT weaken the seams. My tip for pressing seams open is to press with a hot dry iron so you don’t burn your fingers. First I open up the seams with my fingers or using a handy device called a wooden seam roller. (This is a device made for other applications but is one of my favorite tools for quilting!!)

I also use a shorter stitch length (2.0 rather than 2.5) when sewing the seams together to ensure they won’t split apart while handling.

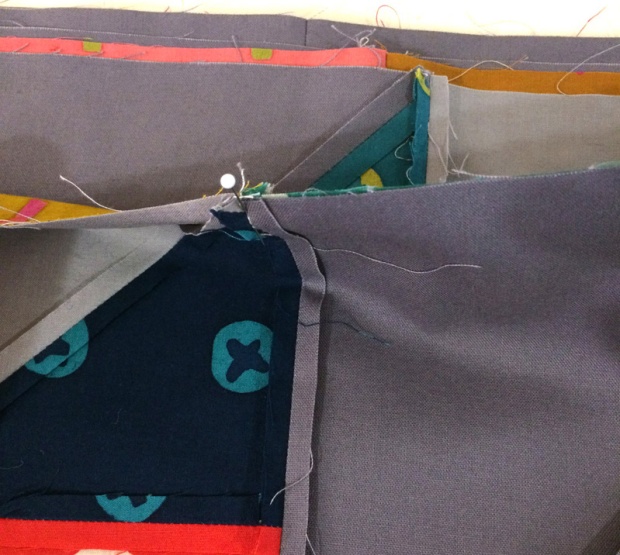
Seams pressed open and pinned

The biggest question I get asked is how do I get the seams to align when they are pressed open? I use lots of pins and pin right through the intersections where the points are supposed to match. The nice thing about pressing seams open is that I never have to worry about which way they need to go! I also like to press seams open to prevent shadowing – which is what happens when you can see a darker fabric underneath a light one.

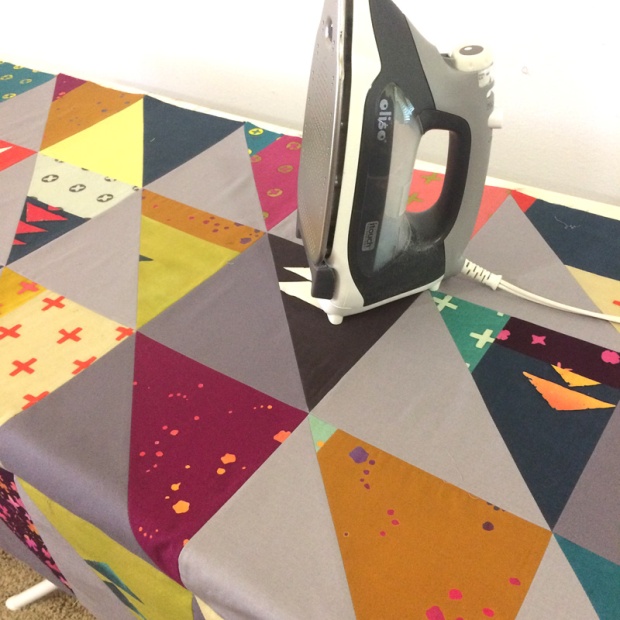
I’m also a pressing maniac. Pressing a lot (without steam) helps me keep the quilt top flat as I make it. I will usually sew 3-4 rows together and then press a section before sewing all the rows together. That way I’m dealing with less bulk under the iron at one time. When I press, I press from both sides – back and front. I want a nice, super flat quilt top!

Pressing Quilt Top

Pressing is very meditative for me – I listen to an audio book or podcast while I work.

Victory Lap!

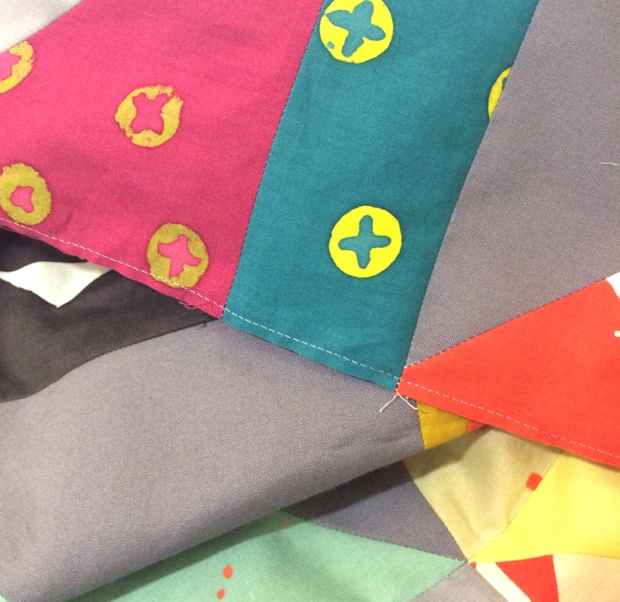
Whenever I’m working on a quilt without borders (which is most of my modern quilts), there’s lots of seams along the edges. To secure them from splitting open, I take a “victory lap” around the quilt by stitching about 1/8″ in from the edges of the quilt. I’ll use a longer stitch length here which then gets covered up by the binding.

Victory lap around the quilt to secure the edges

Victory Lap – aka “topstitching” around the edges to secure the seams.

Now that the quilt top is finished it’s time to make a pieced backing and start thinking about how I want to quilt it. In the original, I quilted lots of straight lines and some fun spirals and pebbles as shown below.

Machine Quilting HST

Original HST Quilting Motifs

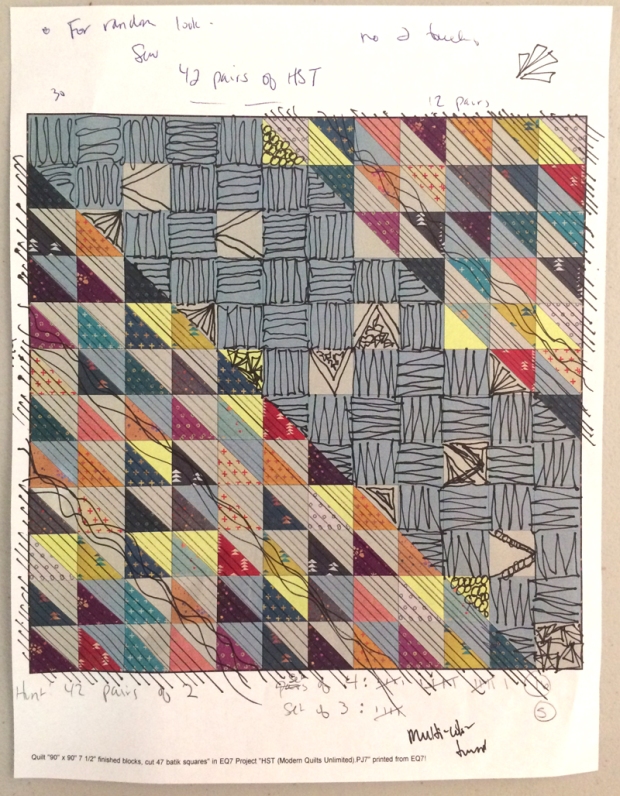
For HST remix, I still want to utilize straight lines and create a woven effect with the quilting, but I might change up the design a bit. In the original, I quilted straight lines vertically through the HST blocks and that was a lot of starting and stopping!! So this time around I’m thinking of quilting them diagonally instead so I can start and end off the quilt.

Whenever I’m trying to figure out how to quilt, I’ll print out a copy of my EQ7 design (or a photo of the finished quilt top) and I simply draw on top of it. I might come up with several different ideas, and it can look like a hot mess. So it may take a few tries until I come up with something I like. This is the method I teach in my Craftsy class, The Quilter’s Path – if I can create a pathway for myself to follow, the quilting doesn’t seem so overwhelming, even on a larger quilt!

Possible Quilting Plan for HST Remix

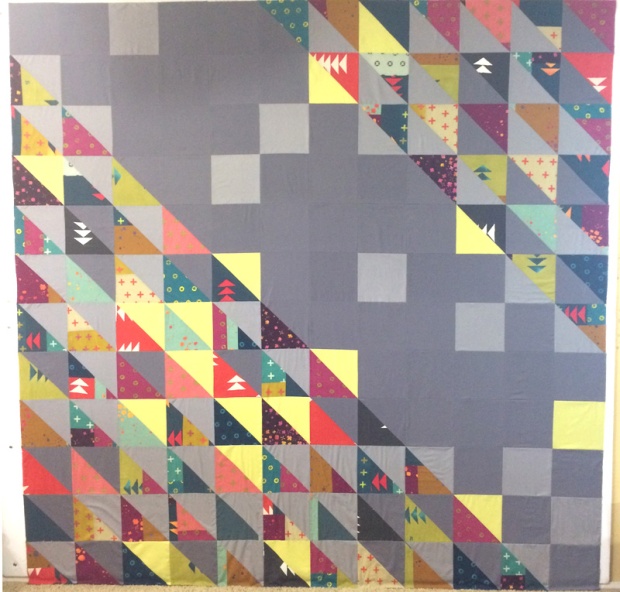
Here’s the finished quilt top. The picture isn’t so great because I just took it with my iphone and it’s actually larger than my design wall, so it’s wrinkling up a bit at the bottom. That’s my next note to self – make quilts that are smaller than my 8′ x 7′ design wall, LOL!! Jason will help me photograph it when the quilt is finished, so I’ll leave it to him to help me figure out how to take prettier pictures!!

HST Finished Quilt Top

I’ll post again when I’m ready to baste the quilt. Since I don’t have a deadline to complete this quilt, it may be a few more weeks (or months) before I can get back to it, but I sure do enjoy sharing my process. Hopefully you’ve been able to pick up a tip or two!

Save

Save

Save

Save

Save

Save

Save

Save

Latest Finish to Share – My Hometown from I Love House Blocks

I’m back with another fun finish to share, my contribution to the “Blockbuster Series” of quilt books – I Love House Blocks.

I Love House Blocks

My quilt is shown on the cover and I made it from a fun bundle of Pat Sloan’s fabric from Moda.

I made the house centers log cabin style and added a quick and easy paper pieced rooftop. I love adding lots of negative space (background) to my quilts so I can show off some fun quilting. Because I was on a deadline I quilted this one with simple swirls and wavy lines in a light gray Aurifil thread from my neutrals collection.

My Hometown by Christa Watson

My Hometown – such a fun quick and easy quilt to make!

The book includes a total of 14 fun house themed quilts which you can view here.

Giveaways GalorE!

Giveaway #1: If you’d like to win a ecopy this book from me, please leave a comment  letting me know if you’ve ever made a house themed quilt before. In my 20+ years of quilting, this was a first one for me!!! Everyone is eligble to enter and I’ll choose a random winner at the end of the day on Monday June, 26th.

Giveaway #2. Head over to Stitch This! the Martingale/That Patchwork Place blog for another chance to win! I love keeping copies of all books I own on my computer – then I have access to them anytime!


Save

Save

Save

Save

Save

Lanterns Quilt – My Contribution to Rock Solid

Have you seen the awesome new collaborative book from Martingale/That Patchwork Place and Robert Kaufman? It’s called Rock Solid, featuring 13 different quilt designs made from Kona Solids. My contribution, Lanterns, made the cover, so I thought it would be fun to tell you a little bit more about my quilt. But first, look at all that yummy solid goodness on the cover!

Rock Solid Cover

My quilt, Lanterns, was made from one roll-up (jelly roll) of my Christa Watson designer palette for Robert Kaufman, along with one roll-up of Kona coal. Aren’t they a smashing combination??

Lanterns by Christa Watson

I came up with the design while I was playing around in EQ7 (Electric Quilt software) on my Mac. I’m always designing and playing around with shapes and colors. I’ll usually start with a seed of an idea and then it branches off into a design on its own. The fun thing about my process is that I usually end up with at least 4-5 different variations in different stages of completion. Whenever I’m ready to finalize a new design, I start by looking through my “virtual sketchbook” first!

EQ7 design sketch for lanterns

As you can see, my virtual EQ7 sketch is very similar to the final quilt. Usually when I’m playing around, I’ll randomly color the quilt but I don’t worry about whether or not the colors end up in the exact same spot as designed. Just using the same swatches of color is good enough for me to get an idea of how the quilt will look.

Lanterns Quilt Path step 1

Step 1 – Stitch in the Ditch

When it’s time to plan out the quilting, I’ll print off the EQ7 sketch on paper and then start drawing possible quilting ideas. I know that you can actually draw quilting designs in the program, but it’s usually just faster and easier for me to draw it out by hand. 🙂

Lanterns Quilt Path step 2

Step 2 – Echo the Ditch

I usually make a quilting plan for each quilt I make because it’s much faster to draw out several ideas on paper, than try to dive into the quilt with no plan and then not like the results! I finally put a name to this process of  “finding your path” when my first Craftsy class came out earlier this year.

Lanterns Quilt Path step 3

Step 3 – quilt one design in the background between the blocks.

For the actual quilting I use another process I call “divide and conquer” where I break up the quilting into different segments and just attack one segment at a time. I teach this in my in-person workshops and I love seeing other students get it and start applying it to their own quilts!

Lanterns Quilt Path step 4

Step 4 – quilt a contrasting design in the blocks.

As you can see, my drawing lines are pretty wonky, but that’s okay – it’s the actual stitching that counts! Of course, I draw the designs on paper with contrasting ink so I can see them, but when I do the actual quilting, I use a blending 50 wt. Aurifil cotton thread. For this quilt I used just two thread colors – yellow for the blocks and gray for the background (both from my Piece and Quilt Collection).

Machine Quilting Detail from Lanterns by Christa Watson

Machine quilting detail – I can quilt better than I can draw!

I sure had a great time making my solid colored quilt.
Click here to see all of the quilts from the book and grab your copy!

Giveaway!! If you’d like to win an e-copy of this book, just leave me a comment letting me know if you’ve ever made a completely solid quilt before. If so – how did you like it? I’ll choose a random winner at 6 PM Pacific Time on Saturday, June 17th

Save

Save

Save

Save

Save

Save

Save

Save

Save

Save

Save

Save

My Week at Craftsy – May 2017

It’s been a little bit quieter around here the last few weeks, because I’ve been hard at work getting ready to bring you some new exciting things coming this year! The first sneak peek I can share is that I just wrapped up filming on my next Craftsy class that will debut later this summer.

Christa on Set at Craftsy

This was my last day of filming and I got to cuddle up with the quilt I made on set once we finished. I’ll tell you more about this quilt when the class  is ready – it was so fun and fast to make!!

My new class is part of Craftsy’s debut “Startup Library” which consists of longer, in-depth courses across all of their major craft topics. They are aimed at beginners or those who may be involved in one craft, but want to try their hand at something new. I was so pleased to represent quilting!

Startup Library: Quilting with Christa Watson

I was there filming for a total of 5 days, and prior to that I worked with their great editorial team for months, honing in on the content that I’ll be presenting. In a nutshell, I got to focus on my favorite topic: teaching new students how to make a complete quilt from start to finish!

Christa with the Craftsy Crew

Christa and the Craftsy crew – we made a great team! And yes, there were smoothies….

On Set at Craftsy

My fabulous  content editor, Linda Permann helped me baste on camera. I wanted to make sure I included this important step, and I love that she got to cameo as my “helper!”

Returning to Craftsy for a second time was much less stressful because I knew a little bit more about what to expect this time around, such as getting my hair and makeup professionally done each day, and knowing that we would put in long hours of work which would get edited down to just a few minutes. I love the magic of television!!

Christa Watson and Angela Walters at Craftsy

Angela Walters and I took turns in the hot seat getting professionally made up each day by the lovely and talented Danica. This is was my favorite way to start each day!

While I was there, I got to mingle with a couple of others on set who were also filming their next projects. Angela Walters happened to be there at the beginning of the week, filming the next season of The Midnight Quilt Show.

Joshusa John Russell: Man About Cake

And Joshua John Russell from Make About Cake was there at the end of the week, gearing up for the next series of episodes for his popular YouTube show. Behind the scenes fact: I asked him how much cake he ate in each episode and he told me he never touches the stuff. True story!!

Now that I’ve written three books and filmed two classes, I can really appreciate the similarities and differences between both types of delivery. A book is a longer, slower sort of project, while a video class has a much quicker turnaround, but is also more intense. I’ve realized that I love creating both types of products, and I’m so grateful work with people who have a knack for editing and polishing my content so that I can look my best!

Stay tuned for more, and in the meantime, if you haven’t purchased my first class yet, you can click here to get 50% off of The Quilter’s Path. (Be sure to add the class to your cart to see the discount.)

The Quilter's Path by Christa Watson

Save

Save

Save

Save

Save

Save

Save

Pre-Order Piece and Quilt with Precuts – My Next Book!

You guys! I wrote another book!! Piece and Quilt with Precuts will be published this August and I’m now taking pre-orders for signed copies through my site at shop.christaquilts.com.

Piece and Quilt with Precuts by Christa WatsonYou can see lots of sneak peeks here on the cover!! But wait, there’s more…

Now first things first. I’m totally happy for you to purchase the book where you like. However, when you purchase it directly from me, I earn more on each book since I’m the one selling them. Also, when you order from me, you’ll be guaranteed to get them as soon as they ship! The estimated shipping date is August 17, which just happens to be my birthday so that’s super exciting!! I’ll have a grand time, eating cake and signing your books! But don’t worry, I’ll be careful not to spill any, LOL!!

Sneak Peek of Piece and Quilt with PrecutsSneak Peek #1 from Piece and Quilt with Precuts – are you excited?

So FYI, another reason I’m pushing preorders this time around is based on the demand of my last two books. When people preordered them on Amazon, there was a delay in customers getting them because Amazon had to first get them from the publisher, and then fulfill the orders.

Although the publisher knows how many to ship to Amazon, it always takes Amazon several days to process and they get a little bogged down. So when you pre-order your signed copy from me, it’s a win-win for us both and you don’t have to wait!! (Ahem.. plus my preorder price is actually lower than the current price on Amazon as of this writing…)

Sneak Peek of Piece and Quilt with PrecutsSneak Peek #2  from Piece and Quilt with Precuts – one of my favorite motifs to quilt!!

And just to sweeten the deal, with every pre-order of Piece and Quilt with Precuts placed directly through me  before June 30th, I’m going to throw in a bonus pattern from my pattern shop for free!! When you check out, you can let me know which pattern you prefer in the comments. Or just leave it blank and I’ll surprise you. (For anyone who has already pre-ordered, you’ll get a free pattern too – but it will be a surprise!! I don’t want you to feel left out!!)

And did I mention the books will be personally signed by me??? (Wink wink!)

Sneak Peek #1 from Piece and Quilt with Precut

Sneak Peek #3 from Piece and Quilt with Precuts – Alison Glass fabric is so good, it’s in here twice!

Writing this book was such a joy but there’s a crazy story to go along with it. Just after I had turned in my manuscript for my first book, Machine Quilting with Style, I immediately came up with the idea for Piece and Quilt with Precuts – easy to piece patterns made from precuts along with step-by-step machine quilting instructions for each quilt.

So I set to work designing the patterns, fleshing out the details, and submitting a detailed proposal to the publisher. No sooner had I begun work on the book when the folks at Martingale contacted me and said “we love this book and want you to write it. However, can you wait just a bit? We have another idea we’d like you to do instead.” And then I proceeded to write my second book, The Ultimate Guide to Machine Quilting with Angela Walters.  So needless to say once that book was finished, it was time to get back to this one! So in essence, I wrote three books in 3 years, one right after another. Crazy huh??

Sneak Peek #1 from Piece and Quilt with Precuts

Sneak Peek #4 from Piece and Quilt with Precuts – Improv piecing AND quilting in the same quilt!!

Martingale was sooo awesome and supportive during this crazy time. They even offered to help me piece or bind the quilts if needed. But being the control freak that I am, I politely declined. I have this crazy obsession that when it comes to quilting, I must do all my own “stunts”, LOL!! For me, there’s something personally satisfying in taking ownership of every stitch. 🙂

So later on this summer once the book publishes, I’ll share details of all 11 quilts and 18 machine quilting motifs that are included in the book. I’ll also do a blog hop with some friends who will be trying out their own versions of some of the designs.

Sneak Peek #3 from Piece and Quilt with Precuts - Alison Glass fabric is so good, it's in here twice!

Sneak Peek #5 from Piece and Quilt with Precuts – Why quilt straight lines when you can go wavy?

One other thing I wanted to tell you that’s special about Piece and Quilt with Precuts is that the name is all mine. For those that don’t know, whenever you publish a book or magazine pattern, the editor reserves the right to re-name it, or work with you to come up with a name they think they will sell. The first 2 book names came straight from Martingale, and I think they did a fantastic job, since I was totally clueless as to what to choose LOL!! However, when writing this book, the name was all me, baby and I’m so proud that they chose to keep it!!

And now, I know what you are wondering…. have I already started on book #4?? No, not quite yet. I decided I needed a little breather before jumping into my next book idea or 3. And some other big opportunites have come my way that I’ll get to tell you about just after this book launches. So stay tuned, it’s never a dull moment around here!

Click here to preorder your copy of Piece and Quilt with Precuts.

As always, thanks for your support that allows me to do this crazy quilting thing full time!!

Save

Save

Save

Save

Save

Save

Save

Save

Save

Save

Save

Save

Save

Vermont Quilt Festival Class Registration Now Open – See My Schedule

This year I’m getting to travel to so many beautiful places I’ve never been before. That includes Essex, Vermont to teach at the Vermont Quilt Festival which has been going strong for 41 years! The show runs from Fri-Sunday, June 23-25 and classes start on Thursday, June 22. I’ll be teaching a total of 4 classes plus a trunk show. Read below for details:

Vermont Quilt Festival

The registration process for the show requires you to create an account and then purchase your $35 registration ticket which includes entry into the show the entire time. After registration, you  can then select the classes you wish to take.  It’s a little cumbersome, so to make it easier, here are some quick links:

Step 1Click here to create an account on their site. Then login.

Step 2Click here to add the $35 registration. Click “book ticket” to add it to your cart. The item “registration” is located in the “class categories” option.

Step 3Click here to view and add classes to your cart. You can search classes by category, instructor or date.

Step 4Click here to view and select any of my classes. Click each image individually to add it to your cart. Then check out and pay as you normally would.

The system will allow you to view the classes, but it won’t allow you to add classes to your cart until you’ve added the registration option. When you click on the detail of each class, it will list the number of seats still available.

Here’s what I’m teaching:

#118 – Modern Machine Quilting

Christa Watson Books

Thursday, June 22: 8-3
Take your modern quilts to the next level by adding depth and dimension to your designs. The secret is learning to let go of perfection by practicing over a dozen different asymmetrical textures that require little to no marking of the quilt. Students will utilize both free-motion and walking foot techniques by practicing on small practice samples or leftover quilt blocks. Students may bring in their tops for a discussion of possible quilting ideas.

Click here to purchase the recommended books, signed by me.

#203 – Ultimate Free Motion Fillers

Friday June 23: 8-12
Learn 12 fun fillers in just 4 hours! This class will walk you through a dozen of the free-motion motifs from The Ultimate Guide to Machine Quilting. This will be a fast paced class, so students should be comfortable working with their machines and have a little bit of experience with machine quilting. Book Required: The Ultimate Guide to Machine Quilting.

Click here to purchase the required book, signed by me and Angela.

#204 – Machine Quilting Trunk Show

Colorful chevrons

Friday, June 23: 1:30-3:30
I enjoy making complete quilts from start to finish, and am excited to share quilts from my books and patterns. I’ll share a few tips I’ve learned that make the machine quilting process easier, and will present a variety of designs that can be done on a home sewing machine. Exact quilts shown will vary and my lecture will include detailed images of machine quilting, as well as an opportunity to get up close and personal with my quilts.

#321 – Structured Improv Piecing (Facets)

Facets

Saturday, June 24: 8-3
Learn how to dive into improvisational piecing, but in an organized way. Students will create their own crazy pieced fabric, then give it some structure when they make their own Facets quilt top. Class includes instruction for quilt top only. Required book: Machine Quilting With Style.

Click here to purchase the required book, signed by me.

#413 – String of Pearls

String of pearls

Sunday, June 25: 8-12
Show off your favorite collection of fabrics with this bright, graphic quilt. It’s a great first pattern to get your feet wet with modern design. The blocks are easy to sew with plenty of background space for you to add interesting quilting texture. Class includes the instruction for quilt top only.

Click here to purchase the required pattern.

If you plan to attend the show, please let me know in the comments! It would be so great to meet you in person. 🙂

Save

Save

Save

Save

Save

Quilt Las Vegas 2017 – A Recap and a New Milestone

Quilt Las Vegas is the annual quilt show put on by my local traditional guild here in Las Vegas, Desert Quilters of Nevada. I’ve been a member of the guild for over 20 years, and I’ve been entering their show for nearly as long. It’s the show that gave me the confidence to start competing nationally. I’ve also learned a lot about what goes on in the judging room as a volunteer. As my quilting skills increased, it’s been reflected in the number of times I’ve gotten a ribbon. However, the show this weekend was a new milestone for me. It’s the first time that everything I entered received a ribbon.

Machine Quilting demo by Christa Watson

One of the show highlights for me was getting to share a machine quilting demo and book signing for one of the local quilt shops vending at the show, Sew Yeah Quilting.

Most of the quilts I make nowadays are usually for a book, magazine, or individual pattern, so I think it’s really helped me focus on doing the best quality work I can. Today, I thought I’d share pics of my quilts hanging in the show, include the judges’ comments, and let you know where the patterns can be found, if you are inspired to make on of your own. Plus there are a couple more that my friends made that I thought were super cool. Enjoy the mini-show!

My Quilts in the Show

Churn Dash Slide from I Love Churn Dashes

Churn Dash Slide, 1st Place, Pieced Large – Single Entrant Category

 I was actually surprised that this one got a ribbon, let alone first place because the quilting on it is really simple. It’s just an allover swirl design. But the the fabrics really make it and I had a fun time taking a traditional design and freshening it up a bit.

Machine Quilting Detail by Christa Watson

Machine Quilting Detail on Churn Dash Slide

Here’s what the judge had to say about Churn Dash Slide:

  • Excellent piecing technique
  • Well balanced tension in machine quilting
  • Appropriate overall quilting design
  • Binding is securely and neatly attached
  • A crisp, clean and fresh approach to a traditional quilt pattern

The pattern for Churn Dash Slide can be found in  I Love Churn Dashes, a compilation published by Martingale/That Patchwork Place (my awesome publisher). I enjoy submitting ideas for their books where they usually feature 14-16 different designers’ patterns all in one collection.

A block from my quilt made the cover of I Love Churn Dashes – so fun!!

Quatrefoil Applique by Christa Watson

Quatrefoil Applique, 1st Place Applique

I made Quatrefoil Applique as a machine quilting sampler to show what some of my favorite quilting motifs would look like stitched out. I’m actually teaching how to make this quilt for the guild’s workshop this May, so it was cool to get a ribbon on it so the students could see it in the show. 🙂

Here’s what the judge had to say about Quatrefoil Applique:

  • Piecing and applique are neatly and precisely executed
  • Excellent quilting technique and multiple patterns elevate simple piecing and applique to a higher level
  • Very good binding technique
  • Well balanced colors and values

The patterns and machine quilting instructions for Quatrefoil Applique, and Swirling Butterflies shown below, are both included in the book I wrote with Angela Walters, The Ultimate Guide to Machine Quilting. I’m extra proud of that book now that some of the quilts are getting a bit more bling! (Last year another quilt from the book, Plumb Lines, got a ribbon at HMQS.)

The Ultimate Guide to Machine Quilting by Christa Watson and Angela Walters

Signed copies of this book are available from me, with both of our signatures.

Swirling Butterflies by Christa Watson

Swirling Butterflies, 2nd Place Open Category (Wholecloth, misc., etc.)

Swirling Butterflies is the only wholecloth quilt I’ve ever made, and it was pretty risky using such a high contrasting thread for the butterflies. But it also pushed me technically, and was super fun and meditative to quilt! The lighting at the show wasn’t super great, so you can see a better detailed closeup of the quilting below. I explored one of my favorite techniques – free motion improv – in the background areas of this quilt.

Detail free-motion_quilting

Free motion improv quilting detail.

Here’s what the judge had to say about Swirling Butterflies:

  • Very good binding technique
  • Excellent machine quilting with precise backtracking
  • An elegant presentation

Fractured Puzzle by Christa Watson

Fractured Puzzle, 2nd Place Modern

This is the second time Fractured Puzzle has been shown in a show and the second 2nd place ribbon! (It got a 2nd place in modern last year at MQX). I love how the red ribbon matches the quilt!

Here’s what the judge had to say about Fractured Puzzle:

  • Very good piecing technique
  • Well balanced machine tension but strive for consistently even stitch length
  • Quilting motifs fill the spaces evenly
  • Binding is securely and neatly applied
  • Strong visual impact

Fractured puzzle is my ultra modern take on the free Puzzle Box quilt pattern I offer for newsletter subscribers. I really pushed myself and went way out of the box by cutting it up and sewing it back together again. But it was a really fun exercise in “what if…??”

Puzzle Box Pattern

Remember – you can always take a pattern and make it your own!

Other Favorite Quilts from the Show

I was bummed that I had very little time to spend at the show, due to other obligations at the same time, but I was thrilled to see ribbons on many of my friends’ quilts. These two quilts really resonated with me:

Vicki Ruebel Machine Quilting

Argyle Gone Wild by Vicki Ruebel of Orchid Owl Quilts. She won 1st Place Pieced Small, AND Best Machine Quilting. I was so excited and proud of her! Click here to see more details of the quilting and making of this quilt. She does amazing work!

Viva Las Vegas by Melissa Curley

My friend Melissa Curley won 1st place Show Theme for her quilt “Lucky.” She names all of her quilts with first names which I think is pretty cool. Lucky was the name of Elvis’ character in the movie Viva Las Vegas. I love how she showed the iconic neon of Vegas, mixed with the more subtle side of “Sin City”

Machine quilting students

In addition to catching up with local quilting friends, it was a thrill to run into some former local students while I was demoing. Kathy and Ofelia shown above were some of my first students way back in 1999. It was fun to connect with them again at the show, and know that they are still prolific quilters! I told them thanks for being great students that allowed me to learn how to become an effective teacher. 🙂

Now it’s time to go make (and enter) more quilts!

Save

Save

Save

Save

Save

Save

Save

Save

Save

Save

Save

Save

Save

Save