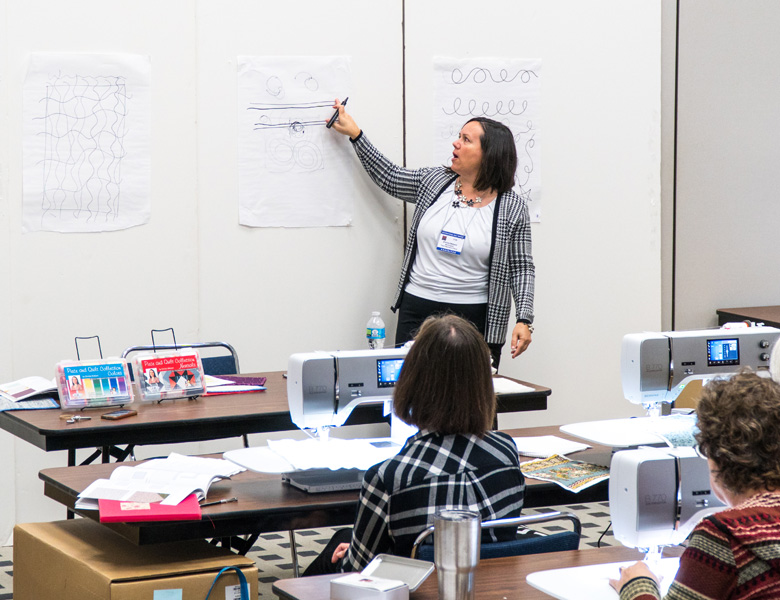
I’m thrilled to announce that I will be teaching at Quilt Festival this fall in Houston, Texas. This is especially exciting because it will be my first time teaching and attending this show. I was slated to teach last fall, but then we had to deal with an unexpected family emergency, and I had to cancel last minute. (All is good now – so no worries!)
I love to teach – especially in person!!
Class registration will open soon and this show has a good chance of selling out. So I’d like to share my schedule with you so you can plan your trip now and be all set to register when the time comes:
How to Make a Quilting Plan Workshop Thursday, Nov 3, 2-5 PM
I originally taught this class at QuiltCon back in February and it was a hit! It sold out right away because we focused on breaking down the planning process into manageable steps that anyone can master.
How Do I Quilt It? Lecture Friday, Nov 4, 10-11 AM
This is my most popular lecture that inspired my newest book that comes out later this year. (More on that soon, I promise!!)
Quilting Between the Lines with Your Walking Foot Friday Nov 4, 2-5 PM
Learn to use your seam lines as a guide for no mark quilting and lots of fun!
Modern Machine Quilting: Walking Foot Wonders Friday Nov 4, 6-9 PM
More walking foot fun and different motifs than the other walking foot class. Sign up for 1 or both!
Modern Machine Quilting: Free Motion Favorites Saturday Nov 5, 9 AM – 12 PM
Learn to quilt perfectly imperfect quilting textures that are fun and forgiving to stitch!
Quilting Between the Lines using Free-Motion Motifs Saturday Nov 5, 2-5 PM
More free motion fun! All of my quilting classes can be taken separately or together; you’ll learn fun techniques in each of them!
I’ll be teaching material found in all of my current books (plus the new one) and it’s a great way to practice your skills. If you haven’t yet taken a class from me, I teach in an easy going style that’s approachable for all levels. It’s absolutely my favorite thing to do!
Stay tuned for more info on registration. I’ll include more details about each class coming soon!!
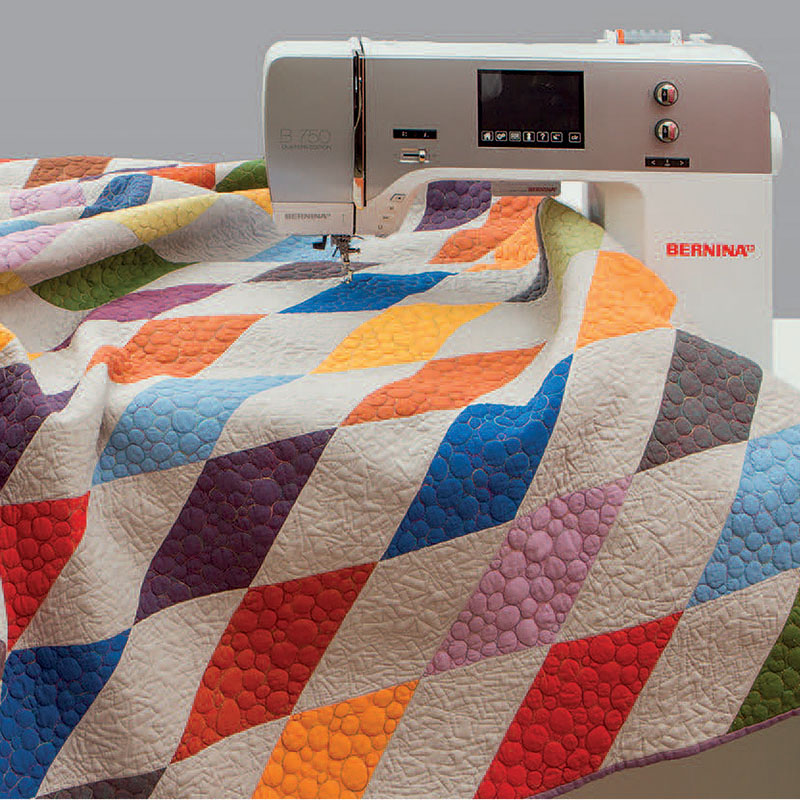
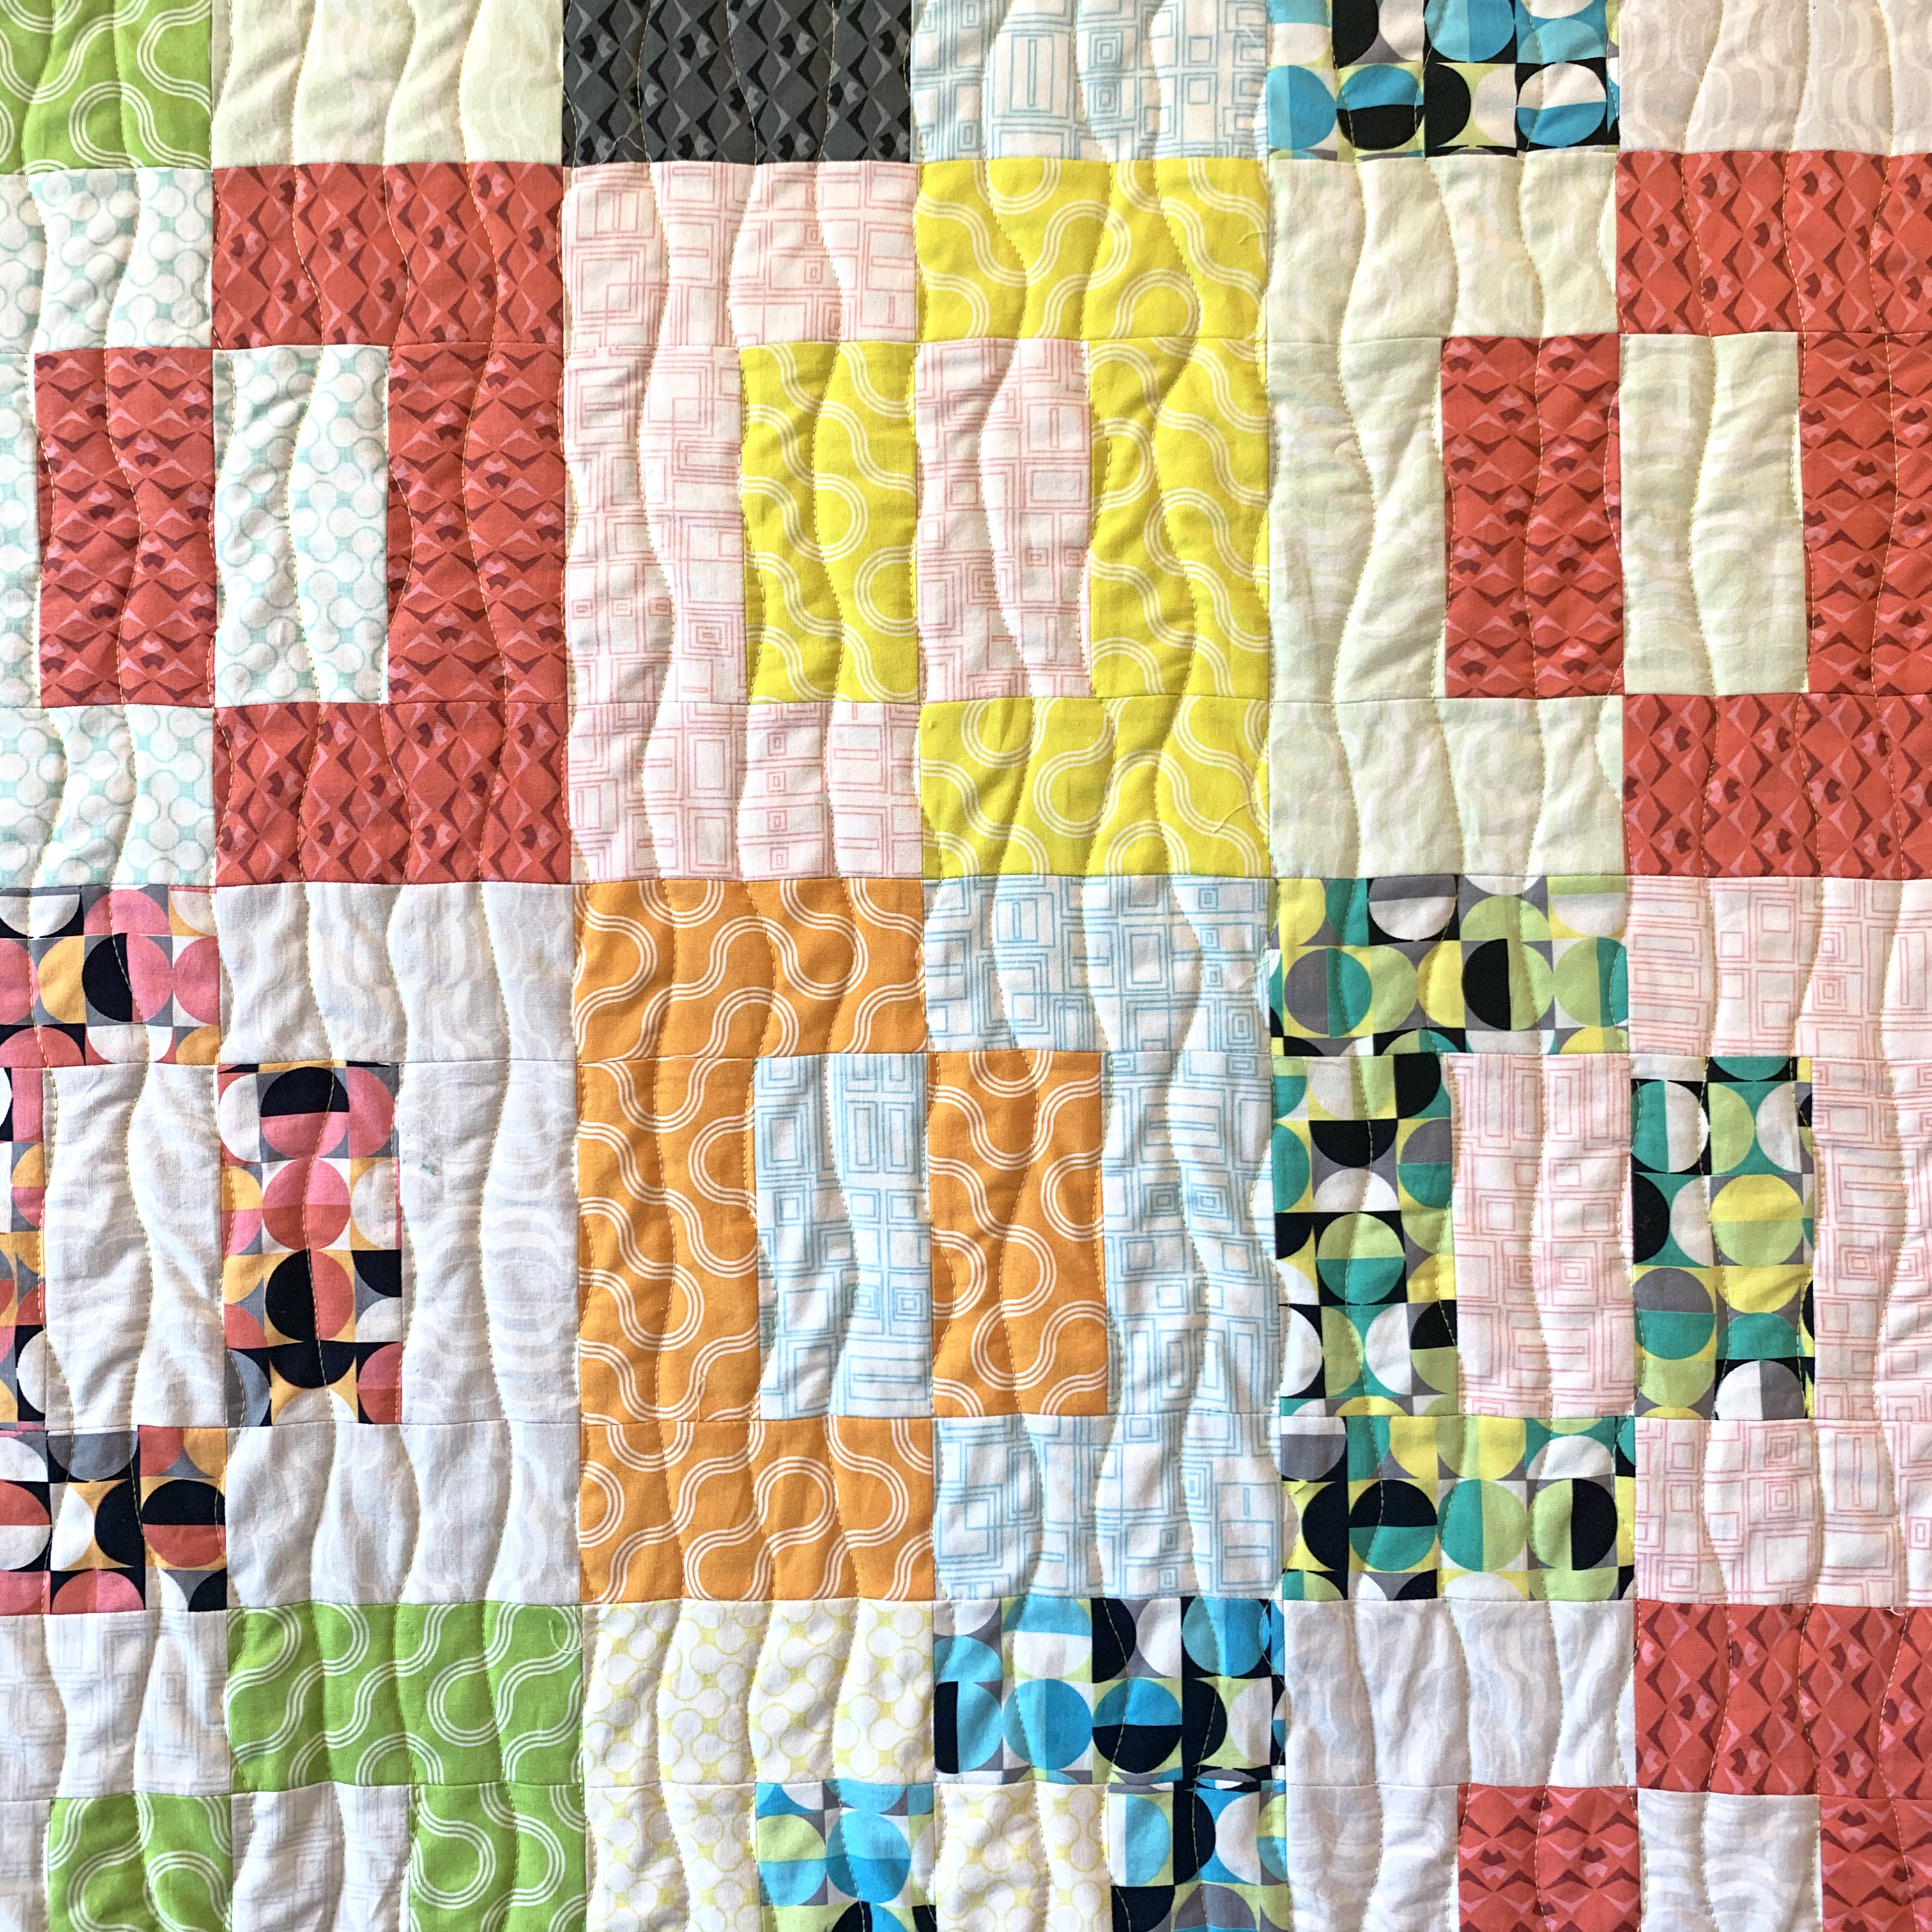
It’s my favorite time of the week again! It’s time to share my latest and greatest video tutorial with you, and you can subscribe to my YouTube channel so you don’t miss a thing. Click play below to learn how to make Color Weave, a fun modern quilt that’s much easier to make than it looks!
I love making these videos not only to help you successfully make the quilt I’m showcasing, but also to help you improve your machine quilting skills. Think of each of the quilting designs that I share as it’s own stand-alone pattern that you can apply to any quilt in your UFO (unfinished fabric object) pile!!
I’ll continue to keep the video content free, and then all I ask is for you to purchase a copy of my quilt patterns to follow along.
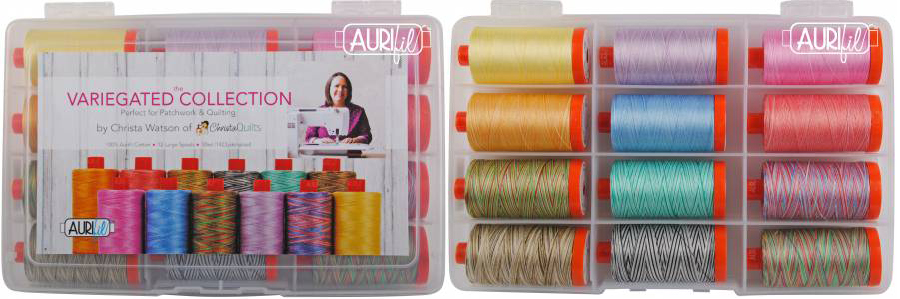
Where possible, I’ll also include links to the products I used to make these quilts, if the fabric is still available. When it’s not, I always suggest that you can get a similar look just by choosing similar (rainbow) colors from your stash, or my online shop.
My plan is to eventually create videos from all my current quilt patterns that I’ve already released. But of course I’m working behind the scenes on new fabrics and patterns, too.
For each weekly video I release, I’m hard at work editing and filming new tutorials as I make my way through my stash of secret sewing projects! This will keep me busy, but will also keep the content flowing on a consistent basis.
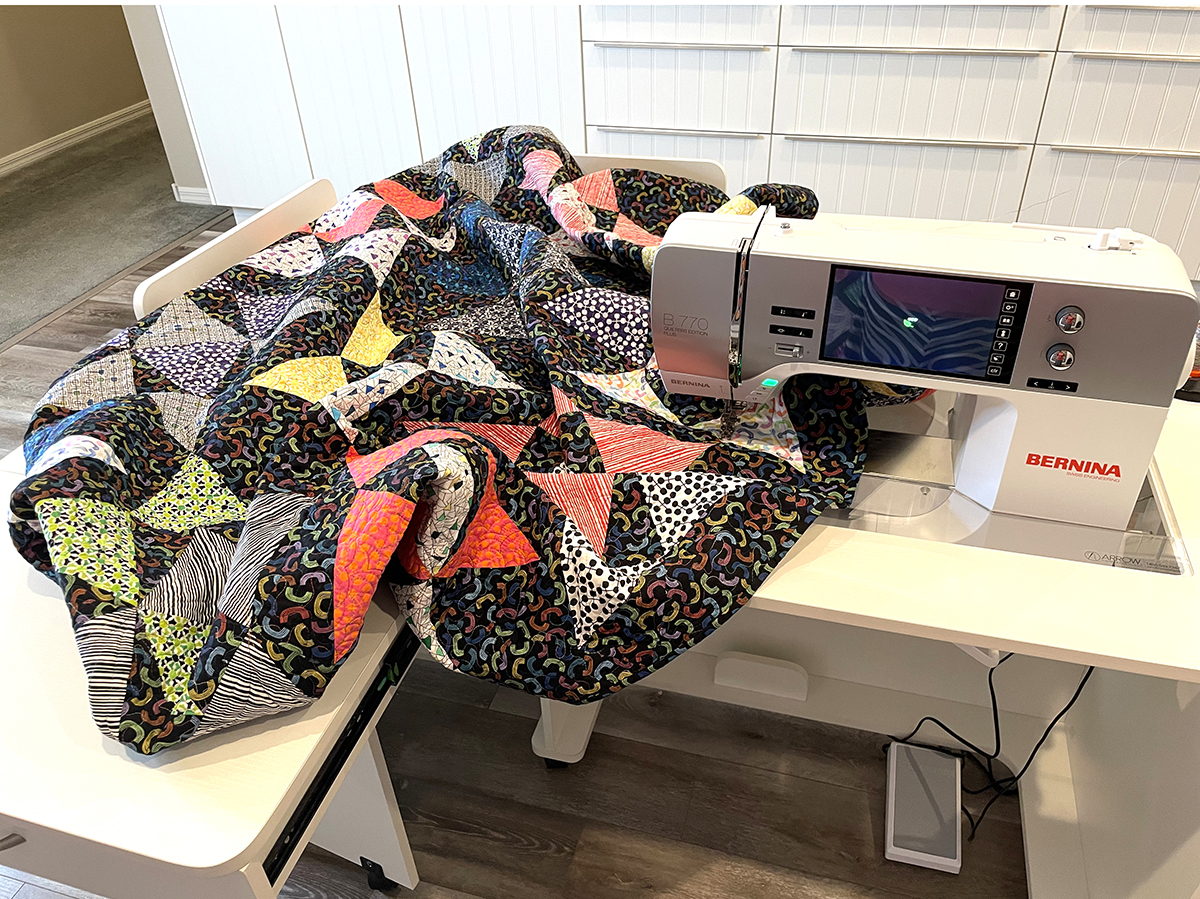
Here’s a little bit of what it looks like “behind the scenes” while I film. In the image below, I’ve hung the quilt I’m discussing on my design wall and started to set up the lighting. I’ll zoom in close so that all you see is me and a closeup of the quilt behind me. This is for the video segments where I’m talking directly to you, the audience.
I’m still working on getting the lighting right, but it’s all a fun work in progress!!
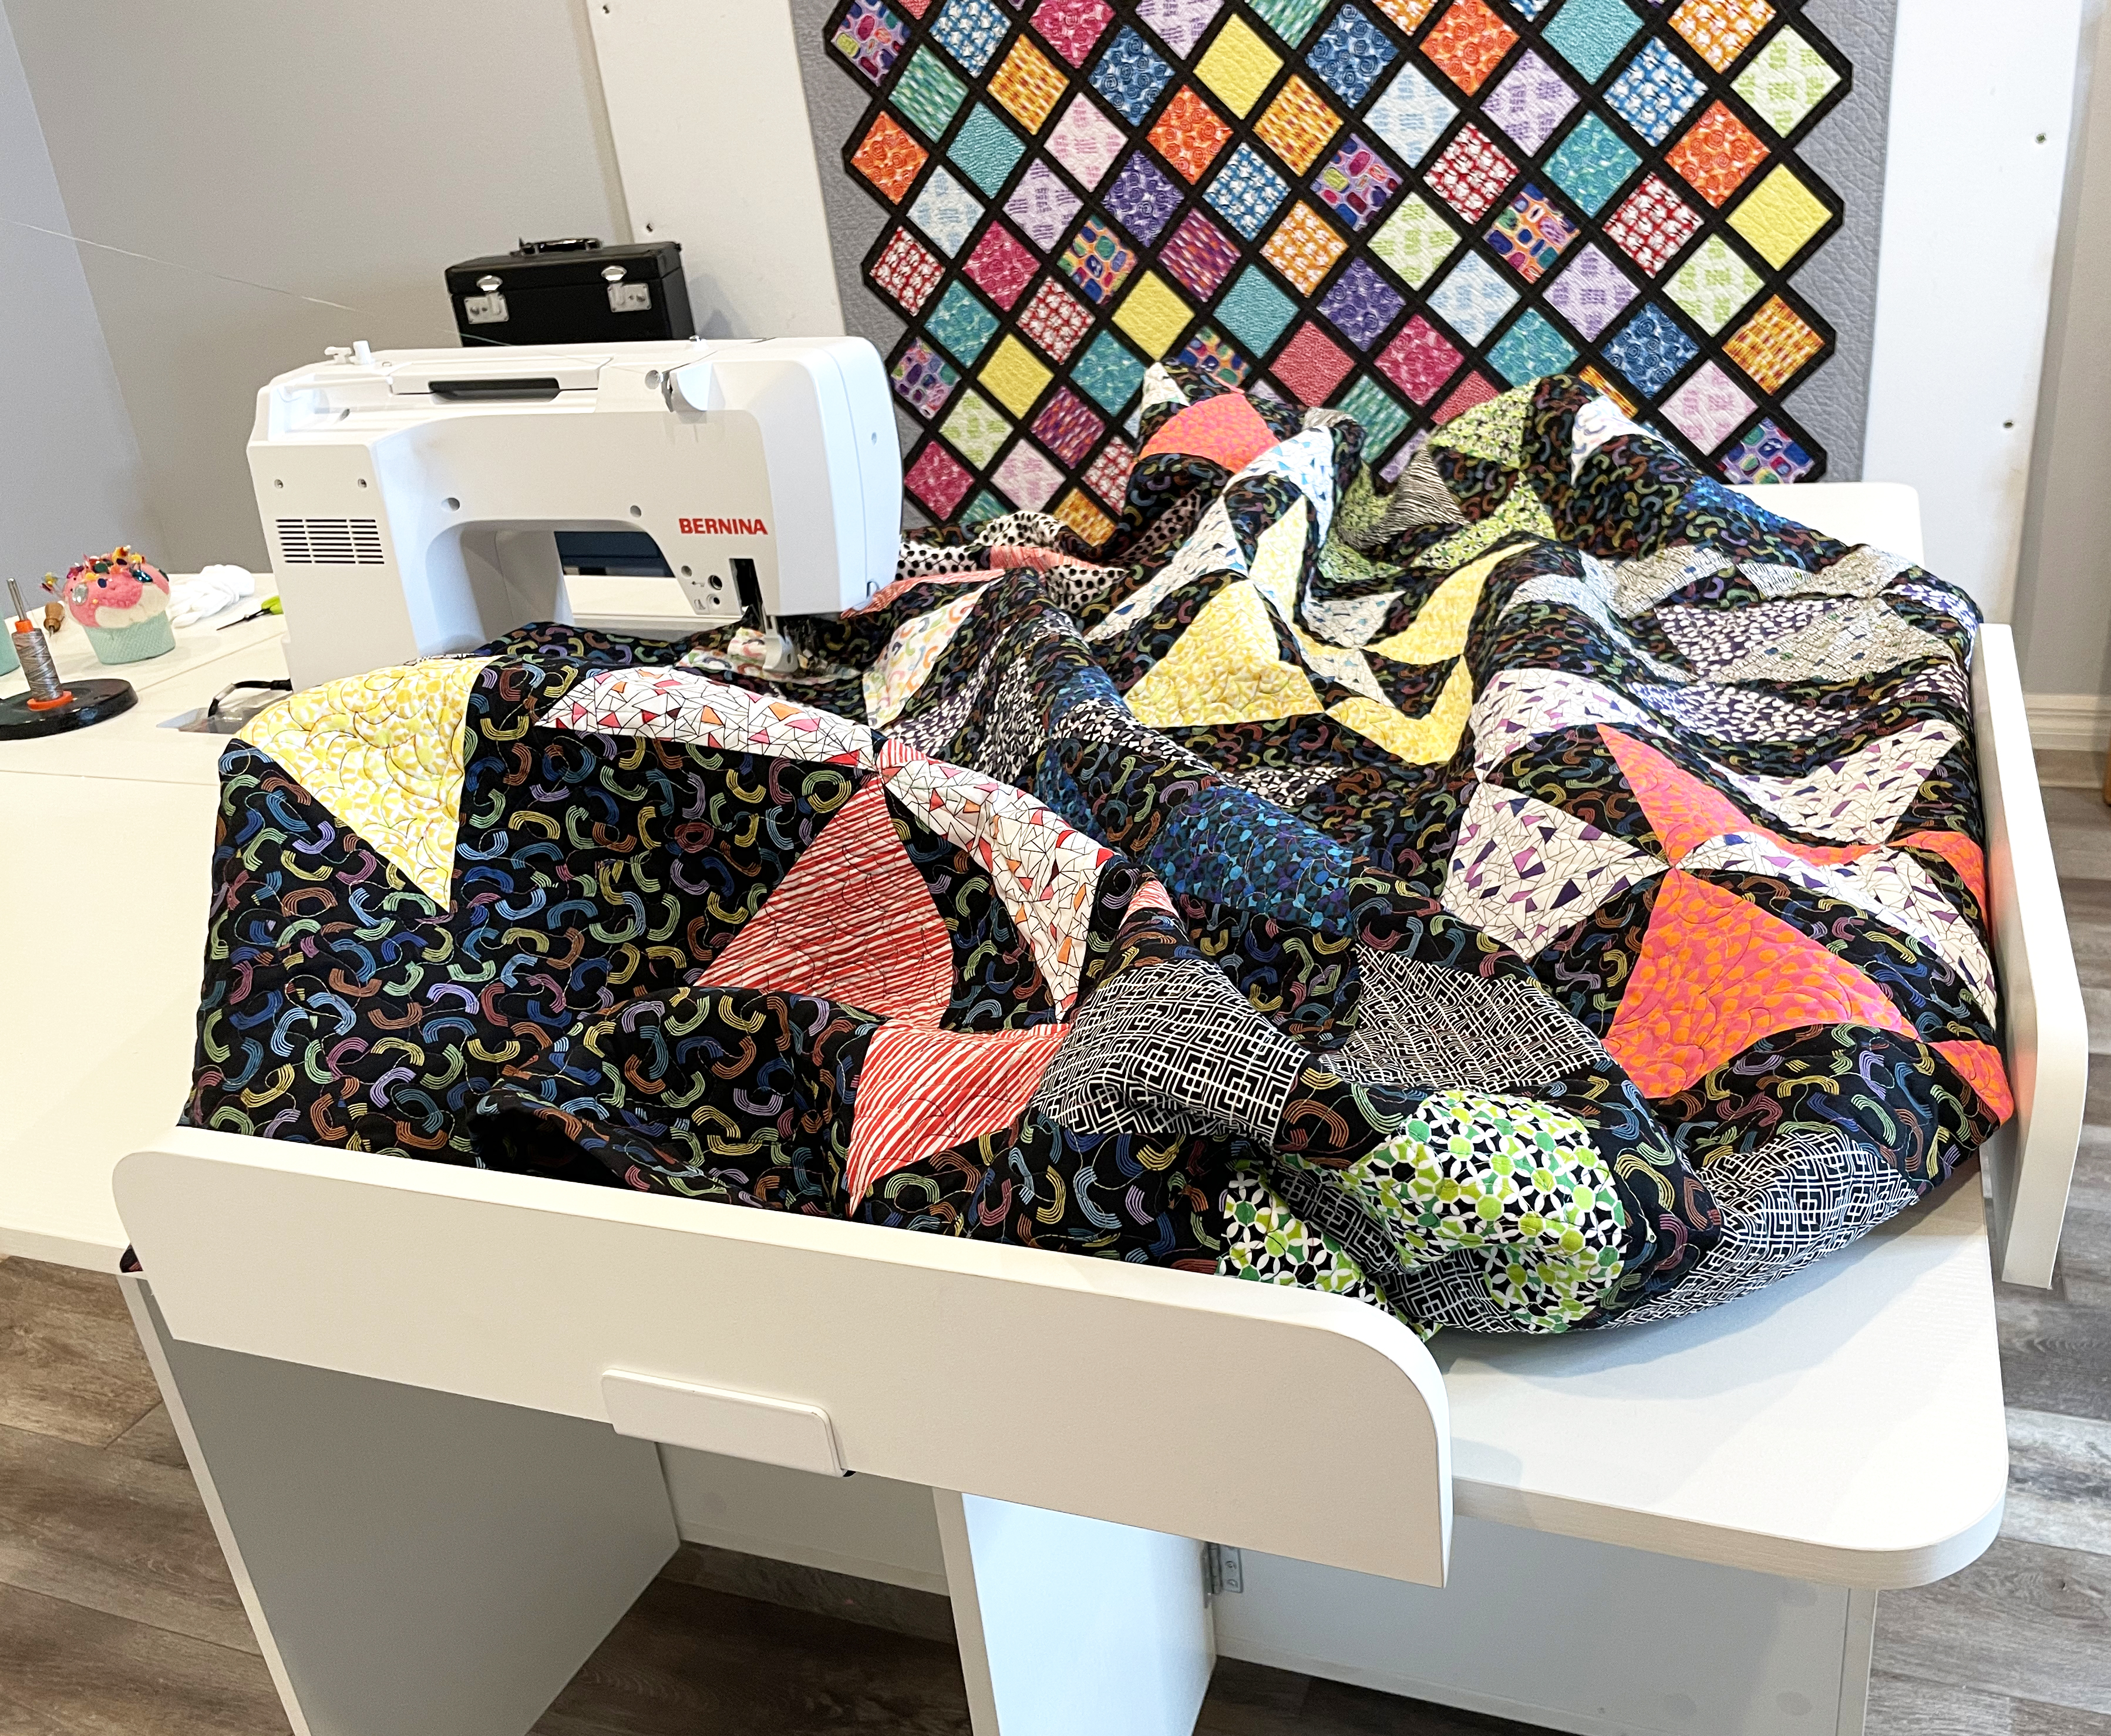
Below is the view from the other side of my sewing room. I’ve hung up some notes that I’ve printed in a large font and taped to my storage cabinets so I can see them from across the room. I go off script all the time of course, but at least this keep me on track of what important points I want to cover.
I also use a combination of different tripods to get overhead shots and closeup shots of the actual quilting process. I do all of my filming with my iphone and then edit everything in iMovie. Right now I just use one phone, but eventually I hope to use two so that I can film two angles at the same time. It’s all a work in progress and I’m learning so much with each new video I make!
My favorite tripod can adjust up or down, and has a bendable goose-neck so that I can get different angles when needed. It’s not perfect, but – just like quilting – that never stops me from trying!!
Now that I have a working format for my videos it’s pretty simple to film while I make the quilts. What works for me is to set up my camera phone on a simple tripod while I sew and not worry about any background noise. Then I take a bunch of those video snippets, edit out the sound and the record a voice over explaining what I’m doing while I’m doing it.
You’ll notice that for a lot of my earlier patterns, I don’t have much video of me actually cutting or sewing the quilt top, so I’ve been focusing more on the machine quilting and finishing techniques. But in my newer videos that I’m filming now, I’ll include more of the full quilt making process.
By alternating full quilting tutorial videos every other week with my informal “Quilt Chats” it keeps me busy, but not TOO busy!
Subscribe to Keep the Fun Content Coming!
So thanks for all the love and thanks for watching and subscribing to my YouTube channel. It’s growing my leaps and bounds and I couldn’t be more excited! To find my channel, you can search ChristaQuilts on YouTube OR you can type ChristaQuilts.TV into your web browser and it will redirect you.
Feel free to leave a comment letting me know what you’d love to see more of. I aim to please!!
Color Weave on display at quilt market while promoting my fabric collections with Benartex
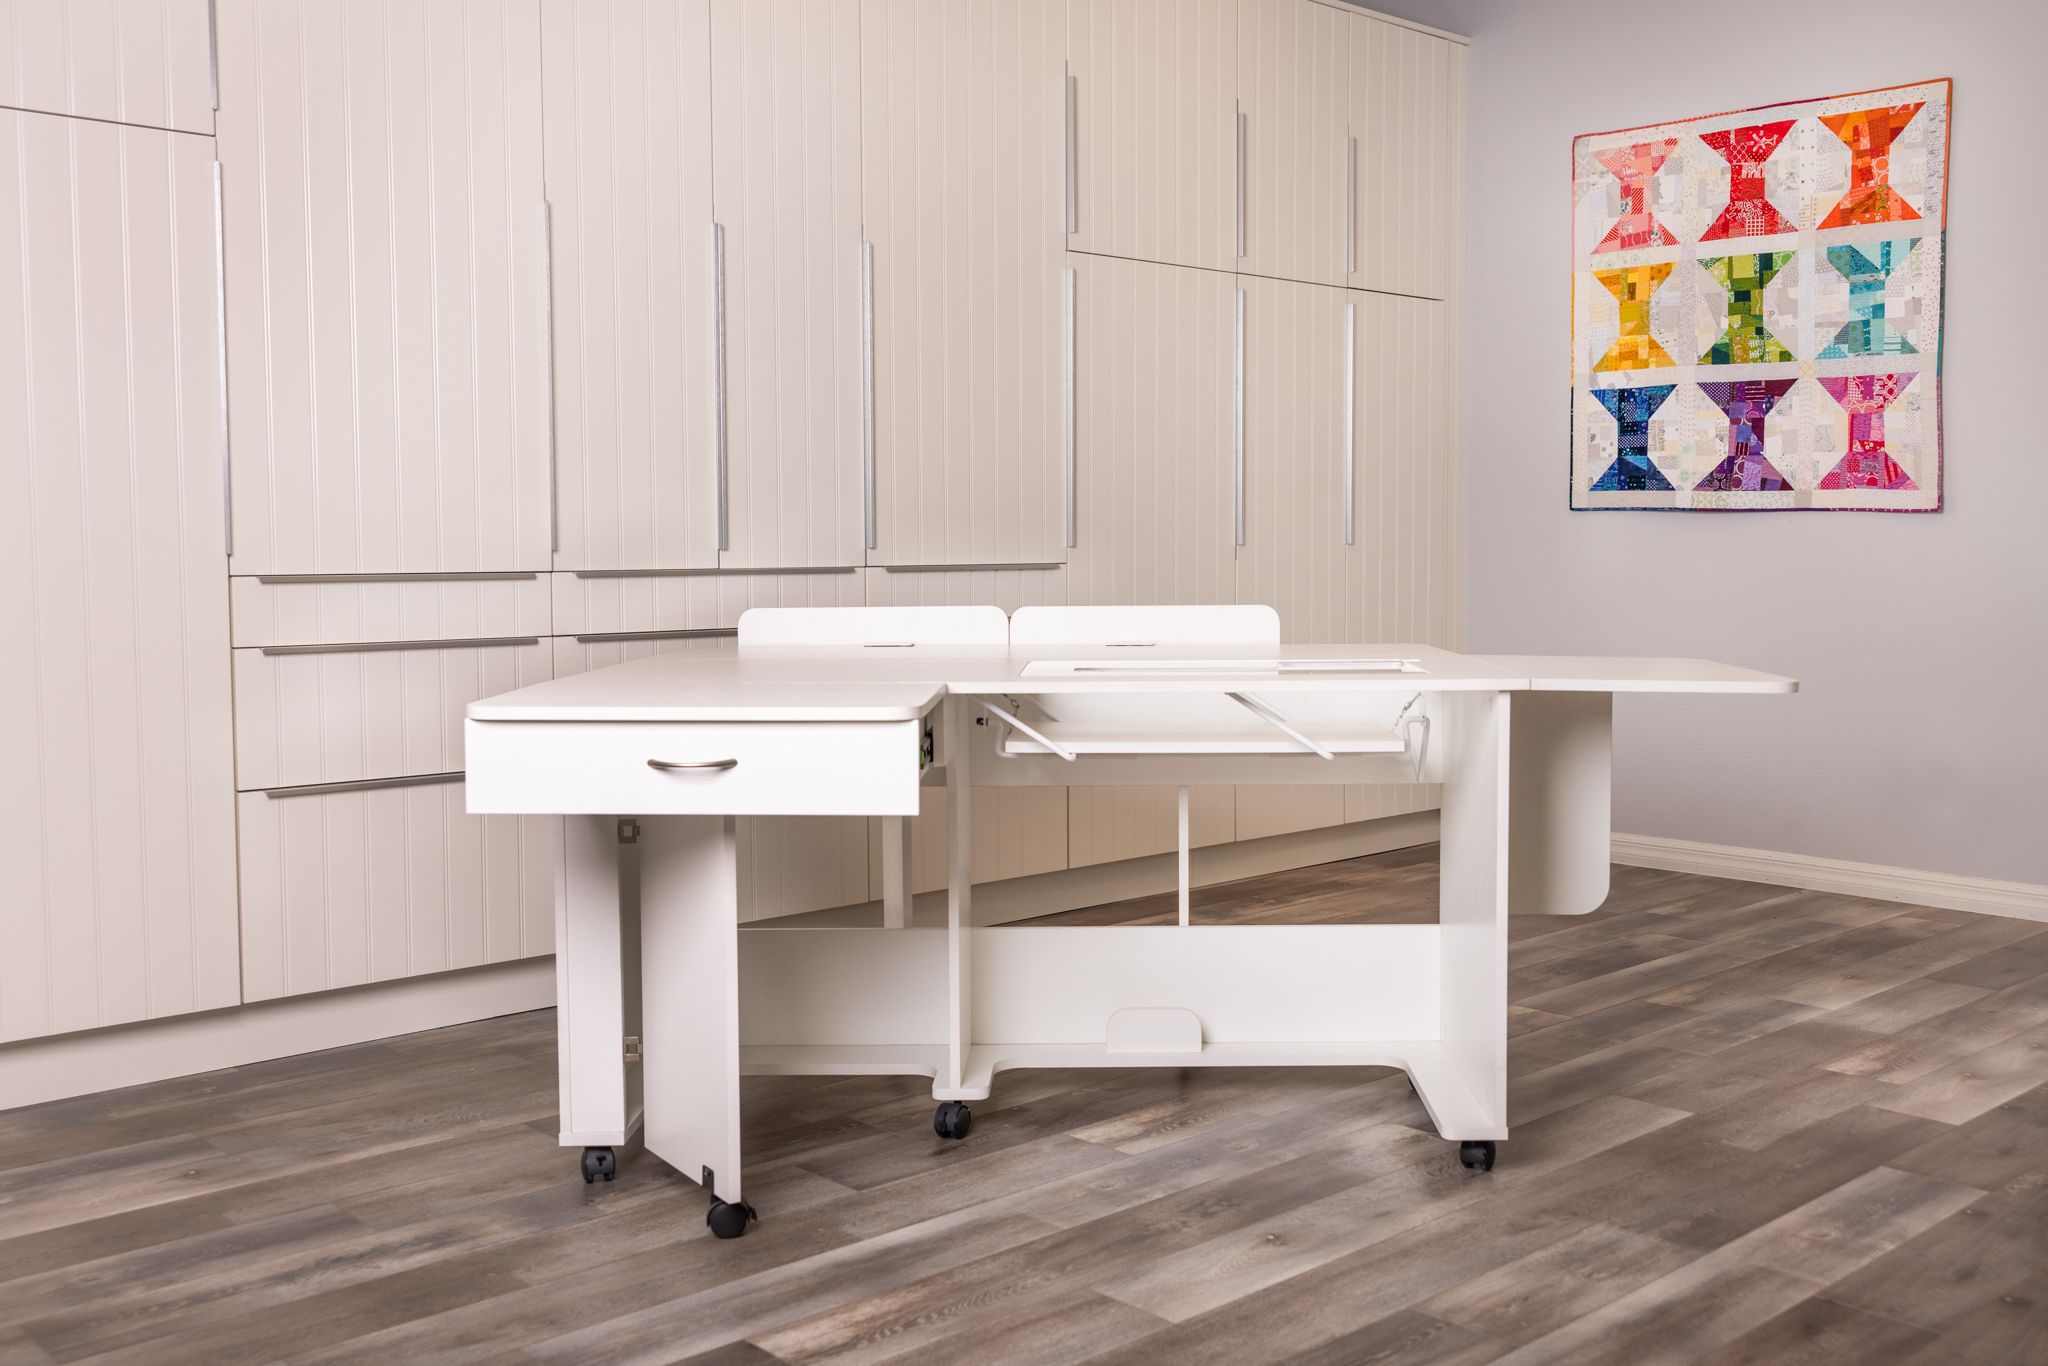
The moment we’ve all been waiting for has finally arrived. You can now place your order for my Christa Cabinet. This will totally change your quilting life!!
Due to MAP policies (minimum advertised pricing) it’s difficult to share the cost here in print on the internet that lasts forever. However, you can send me an email for current pricing and specials. Christa@christaquilts.com
Double Check The Measurements
The most important thing about my cabinet is double checking that your machine will fit the space allowed for the drop-down table. The official measurements are listed below, but the most important thing is to measure the width and depth of your machine. If it’s less than 23 1/2″ by 12 1/2″ you should be good to go.
Cabinet fully open, will all leaves extended: 71 5/8″ W x 40″ D x 29″ H
Cabinet closed with side leaf down: 56 1/2″ W x 22 5/8″ D x 29″ H
Quilt leaf (back extension): 55 3/4″ x W x 18 1/4″ D
Right side leaf for notions and stuff: 15 3/4″ W x 19 5/8″ D
Lift opening (table top cutout): 23 3/4″ x 12 1/2″ D
Drawer (open or closed on left): 18 3/4″ x 15″ D x 3 1/2″ H
Cover for drawer (extra table space): 22 3/4″ W x 14 3/8 D
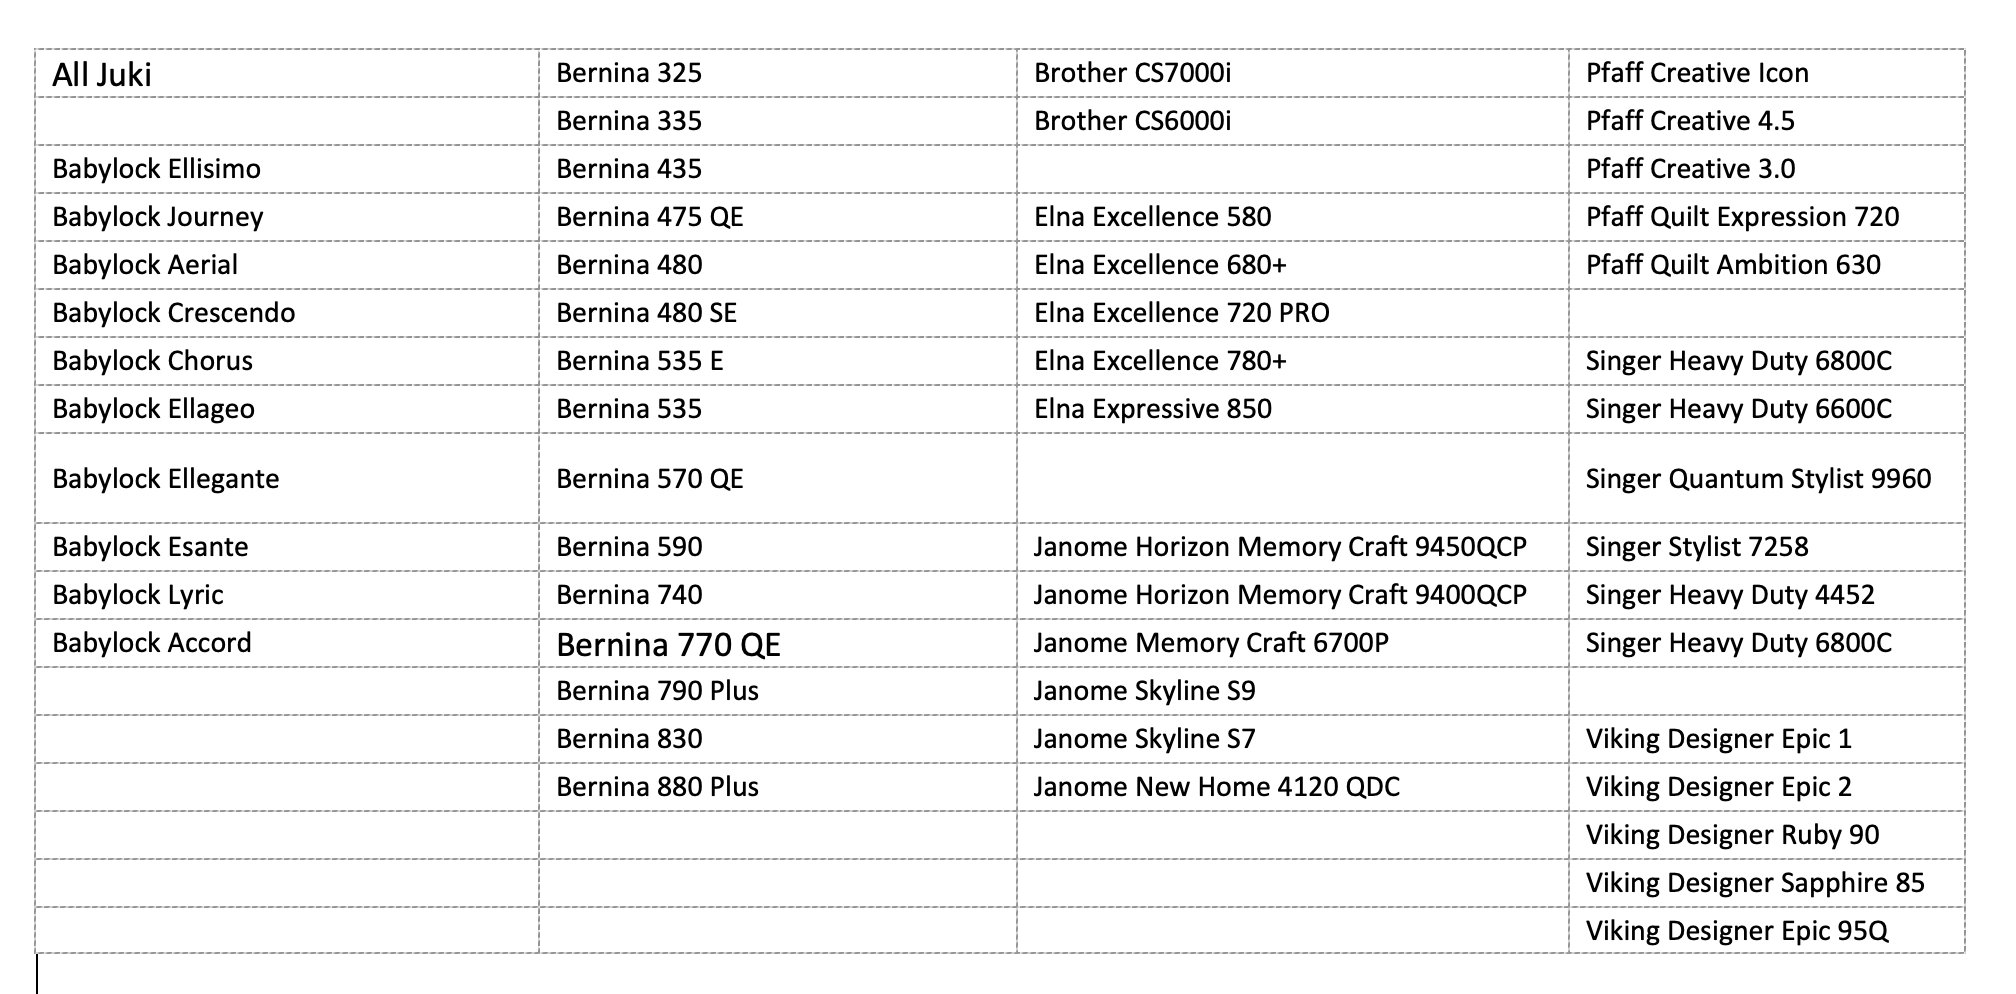
Partial List of Machines that Fit
I’ve been told that all BERNINAs and all Juki models will fit. However, double check your specific machine, just in case. You may have an older machine not on this list so it’s up to you to ensure proper measuring before placing your order. The cabinet will hold about 98% of the machines out there, except for the really huge ones.
Where Will it Ship?
The cabinet will be sent via FED EX “White Glove Delivery” which is available for 90-95 percent fo the continental US. This means it will arrive fully assembled, and they’ll deliver it to any room in your home, and even take away the packaging if you’d like. For anyone outside of this delivery area, we can discuss options on a case by case basis. Right now I can’t ship it out of the country, so my international friends will need to contact their nearest Arrow dealer.
Questions – Just Ask!
This is a big purchase so I want to help you through every step of the process. If you have a local Arrow dealer nearby, you are welcome to order it from them instead of me. I’m just here to provide a convenience for those who don’t have local access to one.
So please ask me any questions you have before purchase (and after, too)! You can reply in the comments, or shoot me an email: christa@christaquilts.com.
Other FAQS:
Christa Cabinet features manual lift and locking casters.
Standard height with casters is 29″
Assembled Cabinet takes 3-4 weeks for delivery
Both top loading and front loading bobbins can be accessed.
Knee will fit with the cabinet; specify with custom insert
Custom insert ships separately, allow 3-4 weeks for delivery
The first small batch of quilt blocks sold out right away during the local trade show, but more will be coming around mid July. I’ll open up orders for them around that time, to ensure there aren’t any production or shipping issues that may cause a delay.
I’ve been sewing on my cabinet since last October, when the first cabinet was sent to me to test and make sure I was happy with it. The answer has been a resounding yes!! I’ve made over a doze quilts on it since then (many in secret…) and I can’t emphasize enough what a joy it’s been to work on.
In Case You Missed It…
Check out the following information I’ve shared previously:
Click below to watch my “unboxing” when my Cabinet was delivered back in October:
I promise – you are going to love your cabinet as much as I do. In fact, I would say the cabinet is just as important as the machine you put in it! (But shhh…..don’t let me BERNINA dealer friends hear me say that, LOL!!)
It includes the Christa Cabinet, custom insert to fit your machine, assembly and delivery to most areas in the US.
Thanks so much for all the love for my videos! It’s a lot of work putting up a new video each week, but I am loving the format! It took me years to finally take the plunge and be consistently active on YouTube but I’m loving the feedback! In this week’s episode I’m sharing the story about how my first book came about, plus a virtual trunk show of all the quilts with lots of quilting detail. Watch below:
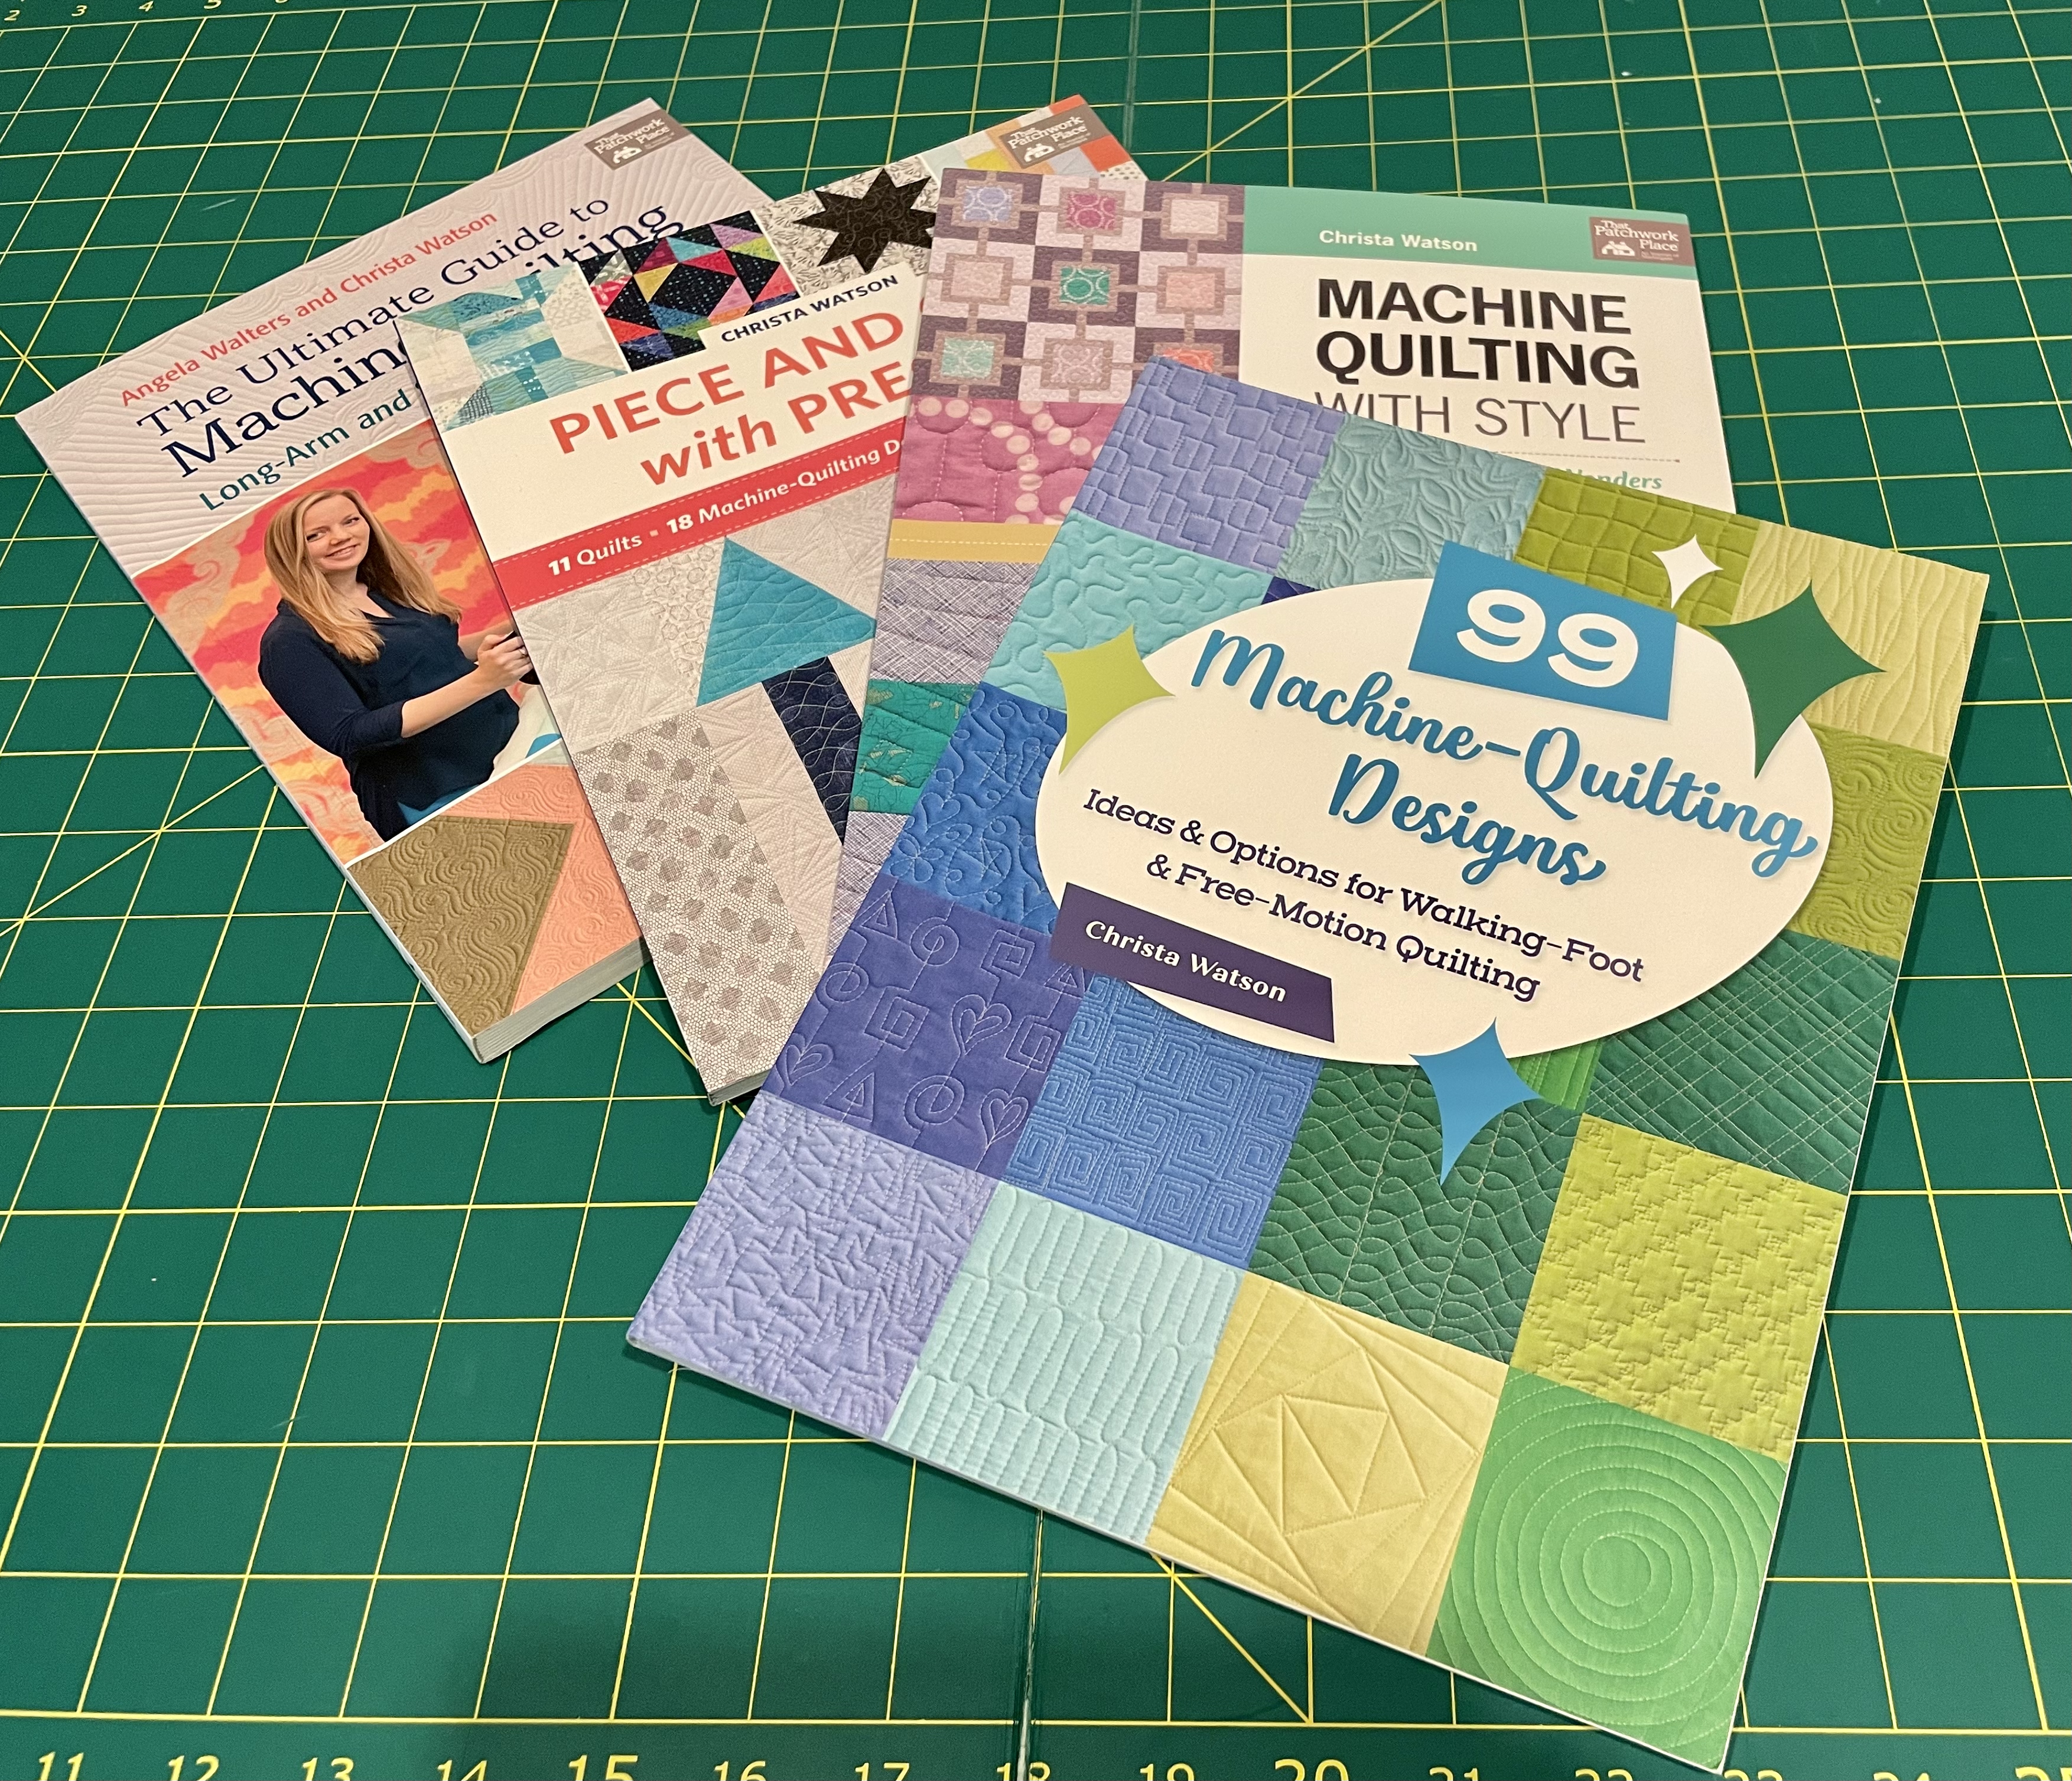
As I mentioned in my video, Machine Quilting with Style is now out of print, but you can grab one of the few remaining copies online at Shop.ChristaQuilts.com – and I’ll be happy to sign it for you! As of this writing there are less than 200 copies left and when they are gone, they are gone!!
Writing this book back in 2015 really changed my quilty life for the better. It was a dream come true and catapulted my quilting career. I learned so much while writing it and it’s helped me become a better teacher, too. If you already own this book, I’d love to know – what’s your favorite quilt from the book?
So here’s the story about how my quilting table came to be. It’s been a 2 year process, but over 20 years in the making. This is a long story, but I hope you enjoy the journey along with me! And if you want more details about pricing & delivery, shoot me an email: christa@christaquilts.com
I love my new cabinet! Stay tuned for the story of the quilt behind me – that’s coming soon!
So waaay back in the late 90s when I began quilting, my supportive mother picked up an inexpensive sewing table for me that fit my machine. I don’t remember the brand, and the store she purchased it from went out of business soon after. But it worked.
Once I upgraded my machine back in 2013, my original insert no longer fit. So to create as flat of an area as possible I covered the hole with the extension that came with my machine and propped a couple of books underneath so the machine was sitting at *mostly* the right height. That was hack job #1!
Old Table Setup:
Hack job #1 – Covering *most* of the hole with the extension bed of my machine.
Next, I realized the table I had didn’t have enough space to hold my scissors, thread, seam ripper and a drink right where I needed them, to the right of my machine. Stuff was always falling of the side, so I set up a little tray next to my table to catch anything that fell down. Hack job #2!!
Hack job #2 on the old table. There’s not much room to the right, but at least the stickers are fun!! Look closely to see the books holding up the machine underneath!!
But most frustrating of all, whenever I quilted a large quilt, most of it would end up in my lap because there was no where to hold the bulk of the quilt as I pushed it under my machine.
The quilt falling to the ground can be sooo frustrating!!
I discovered then, that an “L” shaped work surface with an area sticking out to my left was needed to hold the weight of the quilt. So I used various tables, ironing boards etc. to give me some extra room. Hello hack job #3!!
My table against the wall with a small table in front, forming an L shape to hold the quilt.
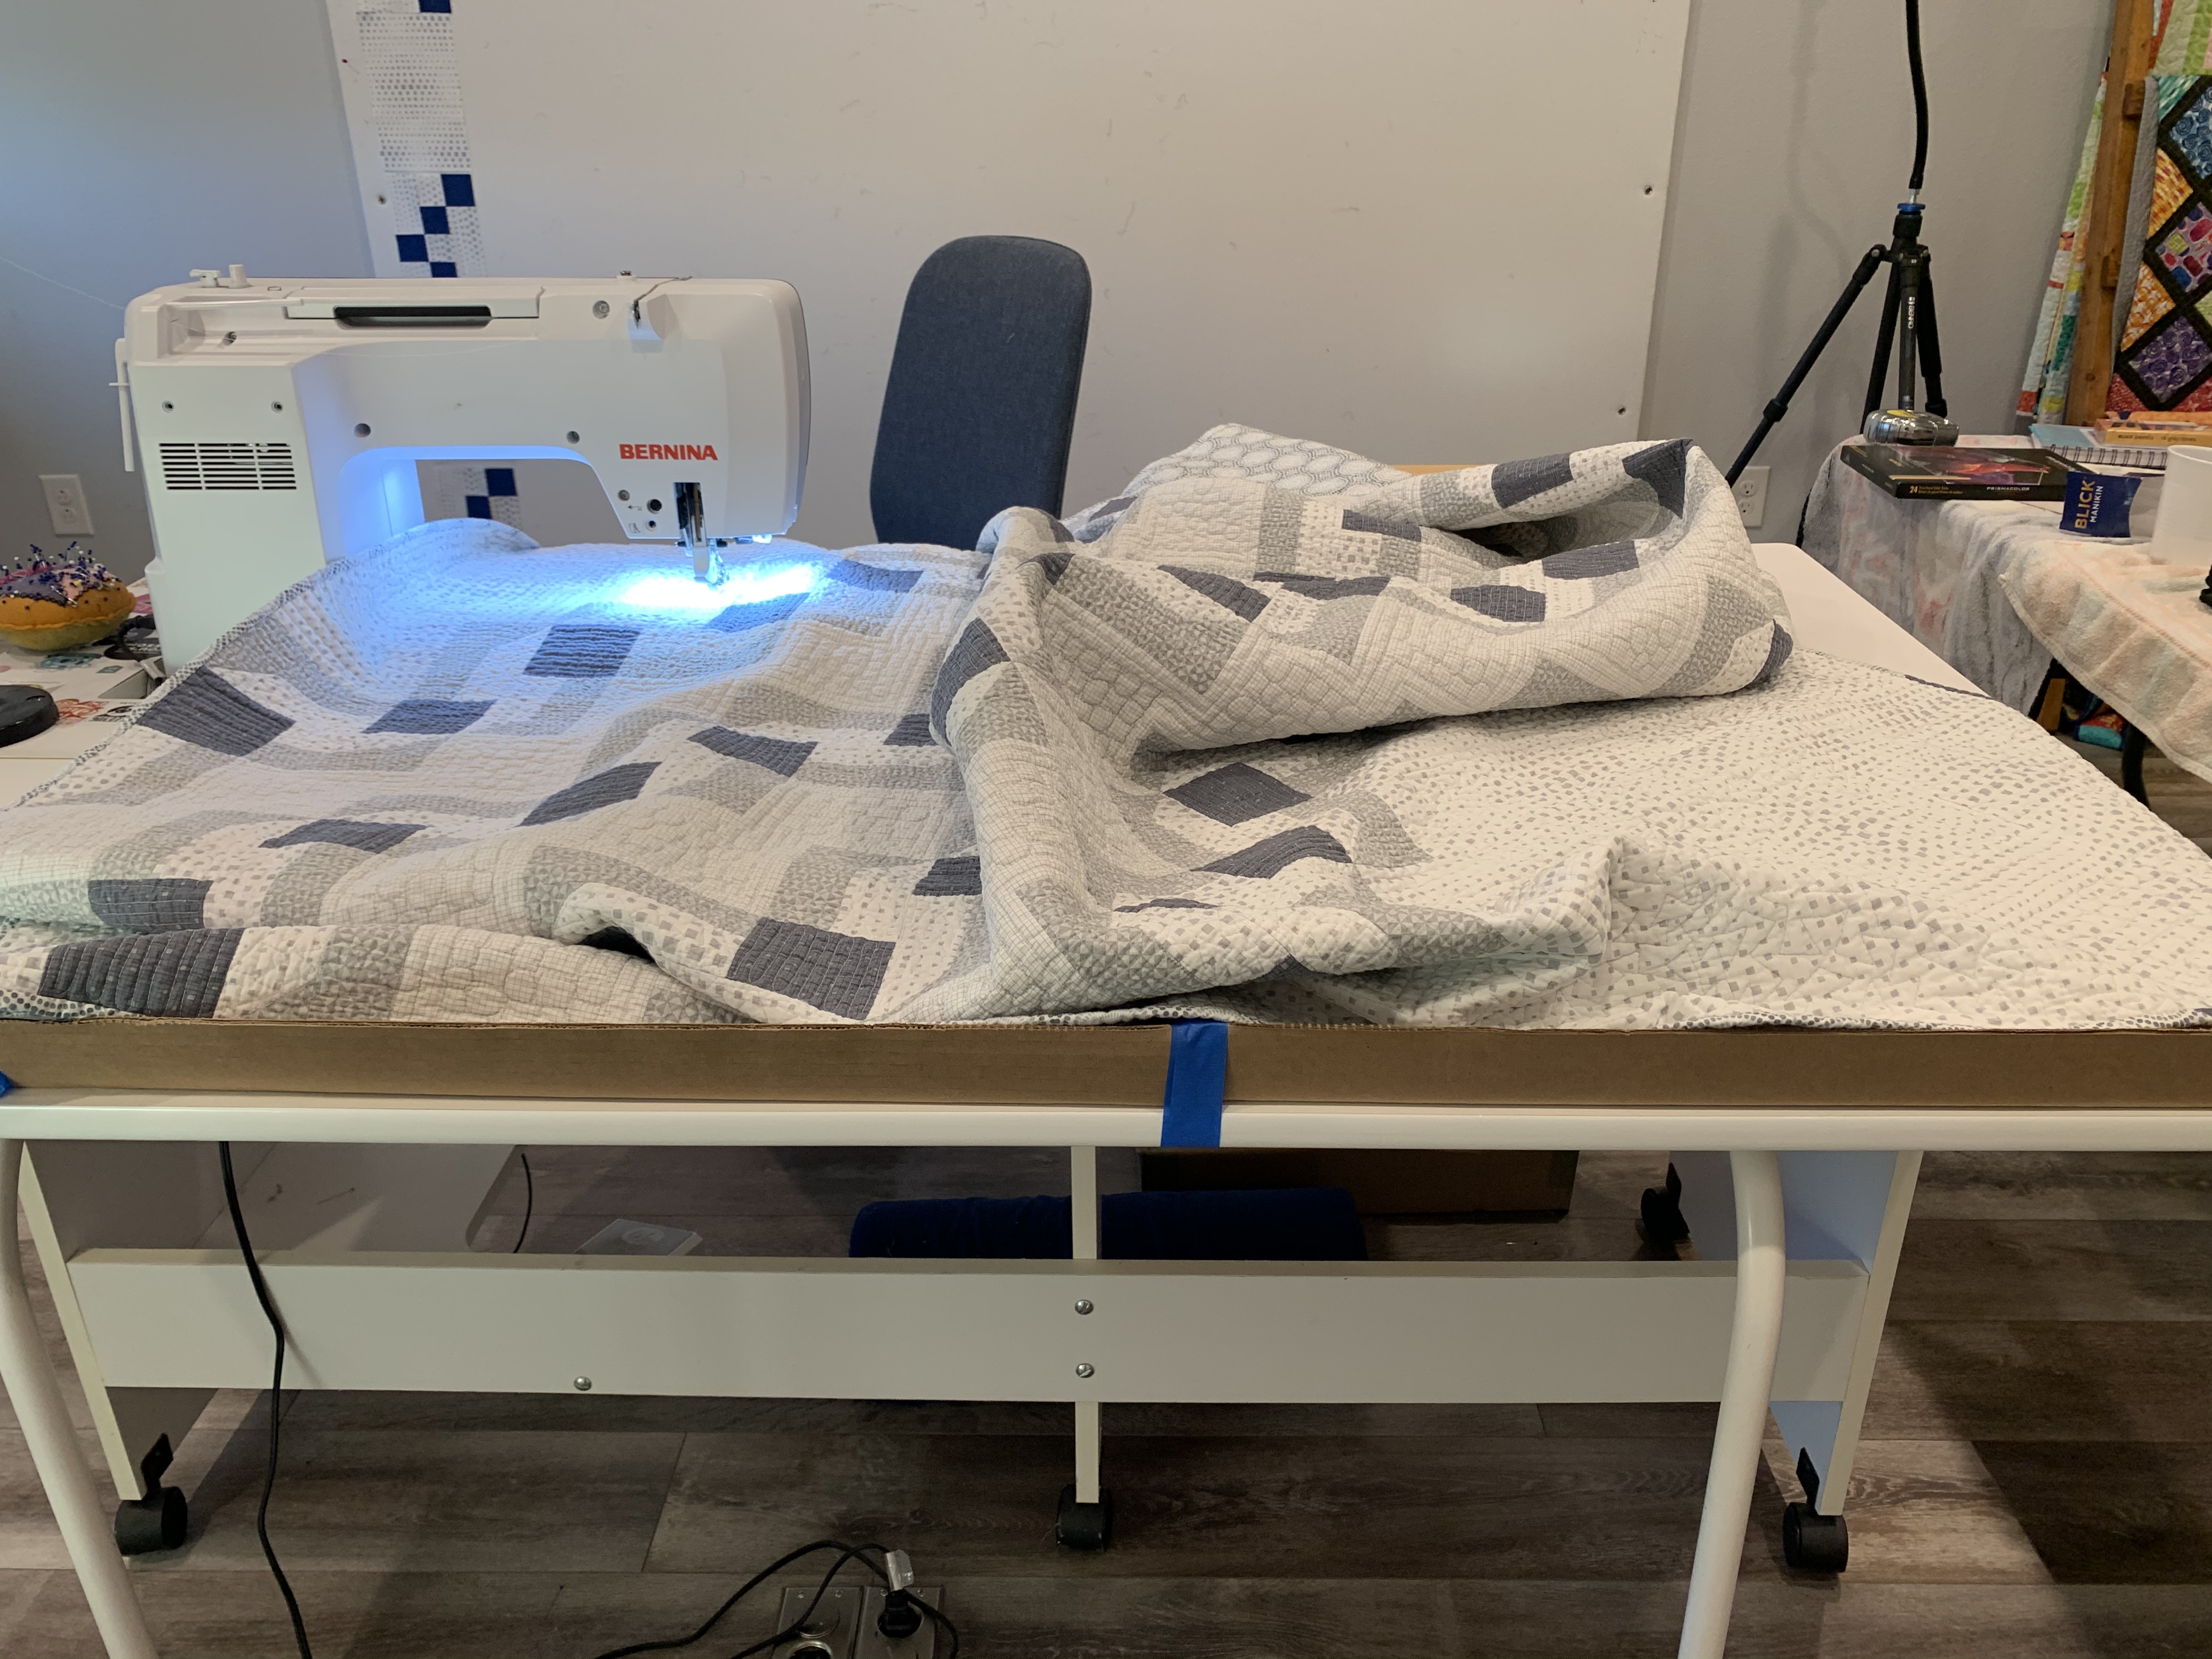
Once I moved into my new house with a larger studio space, I tried several different locations for my workspace. I finally decided to put my old table in the middle of the room instead of tucked into a corner. Now I discovered a whole new set of problems with my workspace!
Hello wobbly legs!!! And non-locking casters that would slip & slide on my laminate flooring!
My older table had very flimsy legs that would move out of position whenever I tried to move the table. That caused the back extension to slam down, sending anything on top of it flying through the room! And the casters didn’t lock so it never did stay firmly in place unless shoved against a wall. But you gotta work with what you have, right??
Also, whenever I quilted a large quilt, it would fall off the back and side of the table causing a ton of grief while quilting.
Due to gravity, a falling quilt creates friction and drag, wreaking havoc on your stitches!
This pulled on the quilt, causing friction and drag… and ugly stitches. I tried to mitigate this with hack job #4: taping up cardboard around the edges, but that didn’t really work!
My table needed a bumper around the edges, to prevent the quilt from falling off the sides.
About this same time I began to share more videos on social media, and folks began asking where to find a table just like mine. I creatively zoomed in so they couldn’t see the ugly hack jobs I had created. And it wasn’t just one or two people, it was dozens and dozens. Like crazy! In fact, I got so many questions about where to find one like mine, that I started shying away from sharing more videos because sadly, I had no answer for them!
So I decided, you know what?? I need to find a table that’s perfect for domestic machine quilting. And if I offered to make some videos about it, maybe a sewing furniture company would give me one in exchange for some promo, or perhaps let me buy one at a discount.
So I started searching and researching and contacting several of the furniture manufacturers out there. I did get a couple of nice offers of tables and cabinets currently on the market but as I examined them, I realized none of them suited my needs. I couldn’t believe NO ONE had a solution to the quilt falling off the sides of the table. And although there were a few tables that came pretty close to my needs, they were either way too big, or much too expensive for my budget.
The New Cabinet Situation
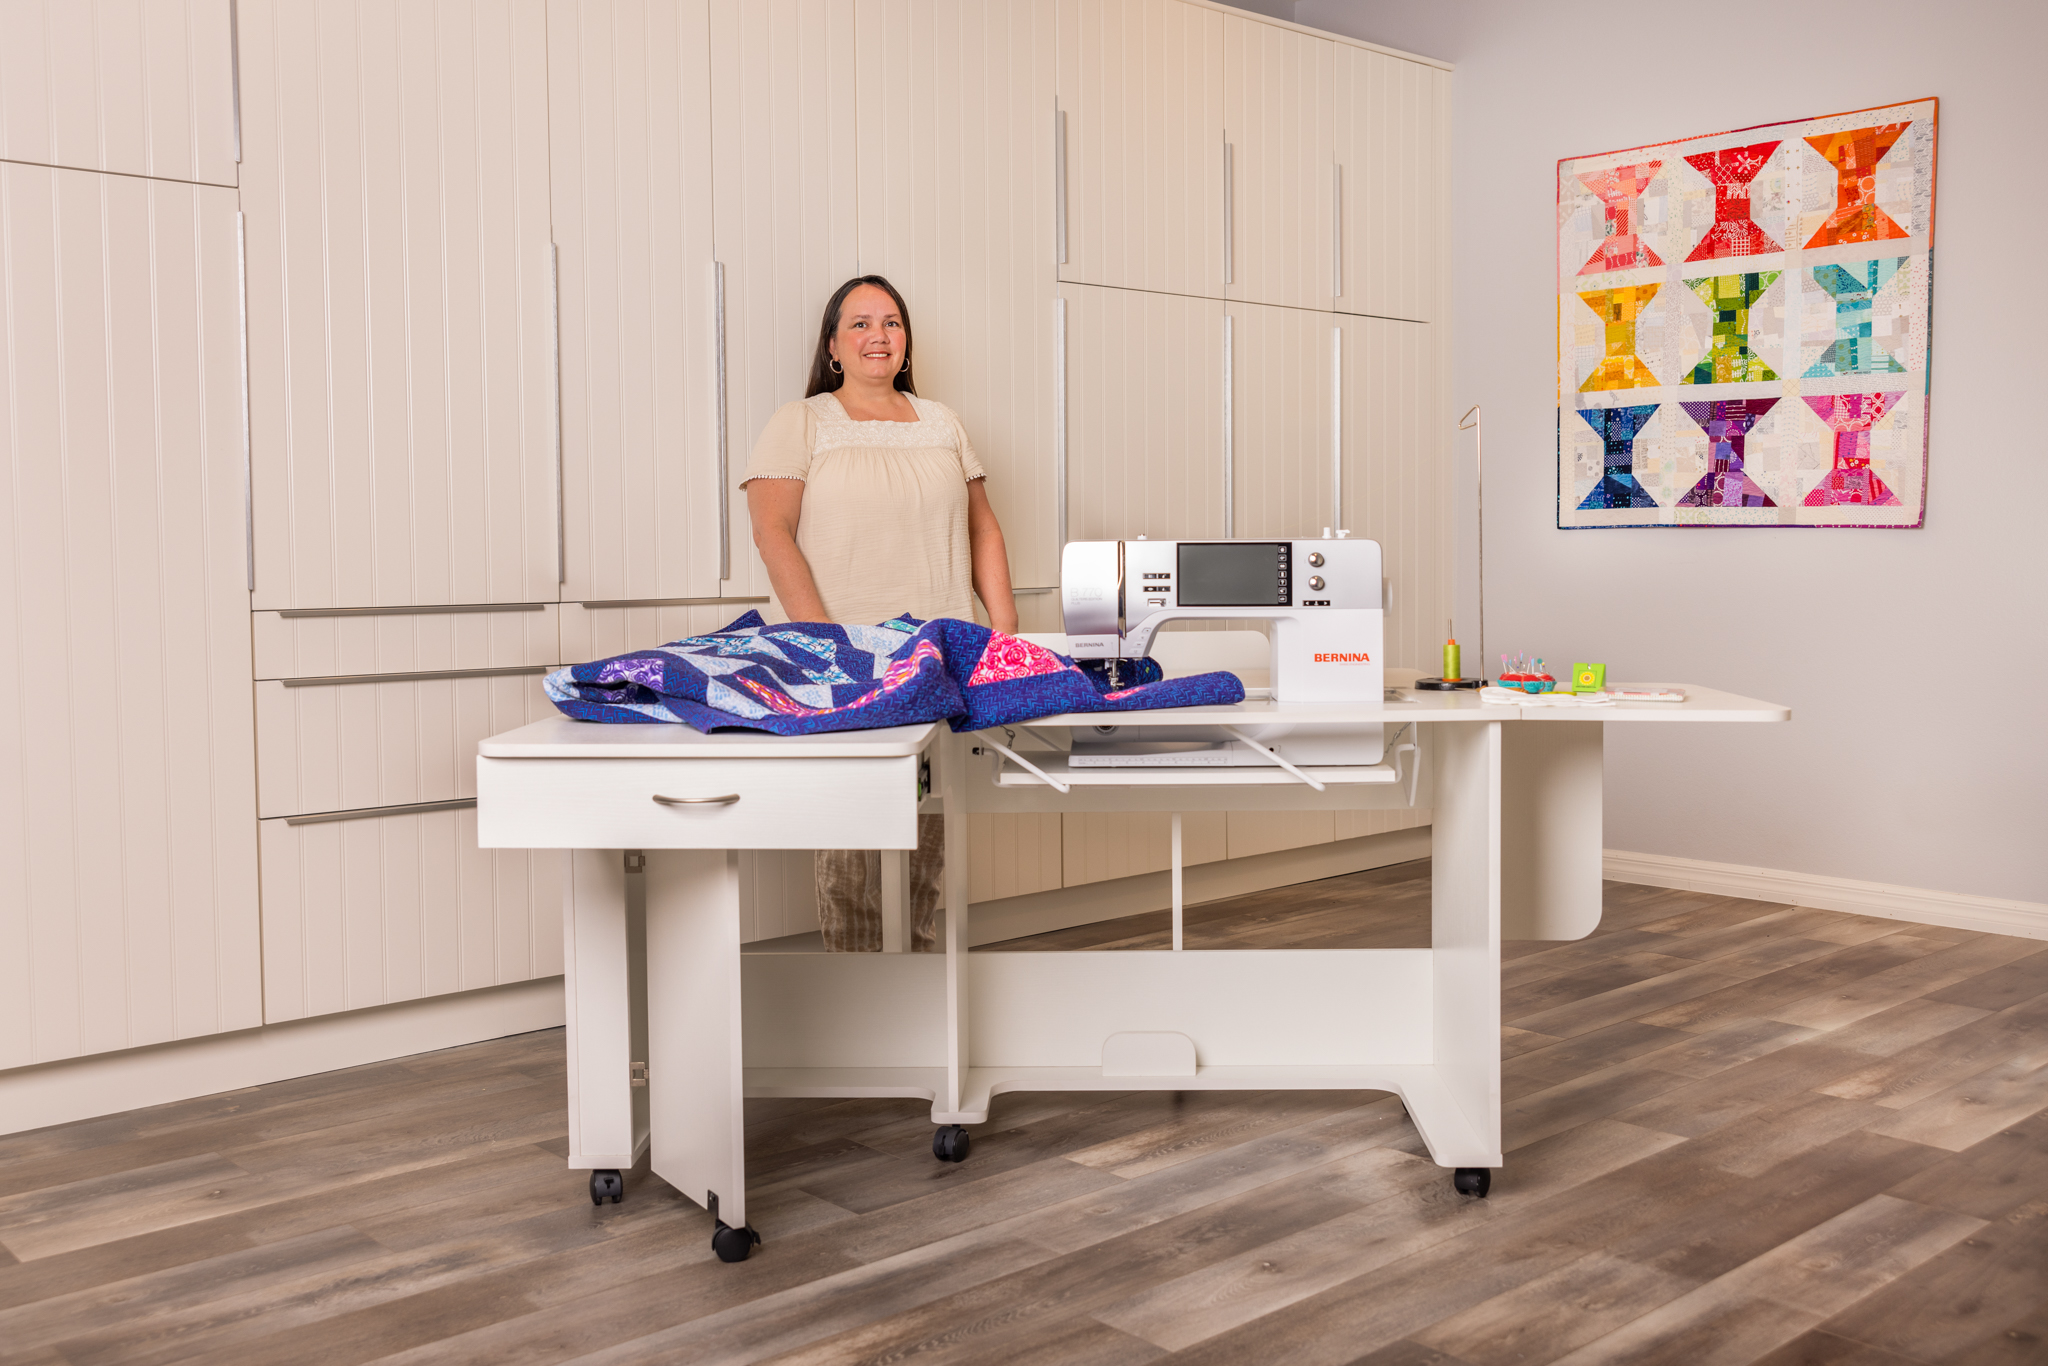
Look at the legs on her! My new cabinet is perfectly sized, sturdy and a joy to sew on! It’s “sew” stable!
So you know what they say, necessity is the mother of invention! I began making sketches and taking pics of my hack job in the hopes that I could present my idea for a NEW table to a company who would be willing to work with me. Several helpful folks recommended a few companies that could create a custom cabinet for me. But that’s not what I wanted.
Not only did I need a solution for myself, I needed a stock item that I could recommend to others as well, since I knew the question of “where did you get your table?” would be asked over and over and over and over and over and over and over again!!
Well, thankfully from some mutual industry connections, I was introduced to the amazing team over at Arrow Sewing, and we hit it off from the start! They worked with me on my design specifications and were realistic to let me know what was possible and what wasn’t.
Part of the fabulous Arrow team that made this happen: account managers Bobbi Jakic & Valerie Tribble, Me, president Jerry Voors, marketing director Harley Thomas, and VP Robert Hafner.
We recently launched the Christa Cabinet and Christa’s Quilt Blocks at a trade show right here in Las Vegas. This was for sewing dealers who come to these events to find the latests and greatest for their shops. I was a little nervous since I’d never done anything like this before.
We set up a cabinet display and I actually demoed for 3 days in a row, showing how the everything worked while quilting an actual quilt. Well, the cabinet and blocks where a hit! I was actually surprised with how well the quilt blocks sold, but when folks realized that they could fit on any table, including those they already had in stock, it was a no brainer.
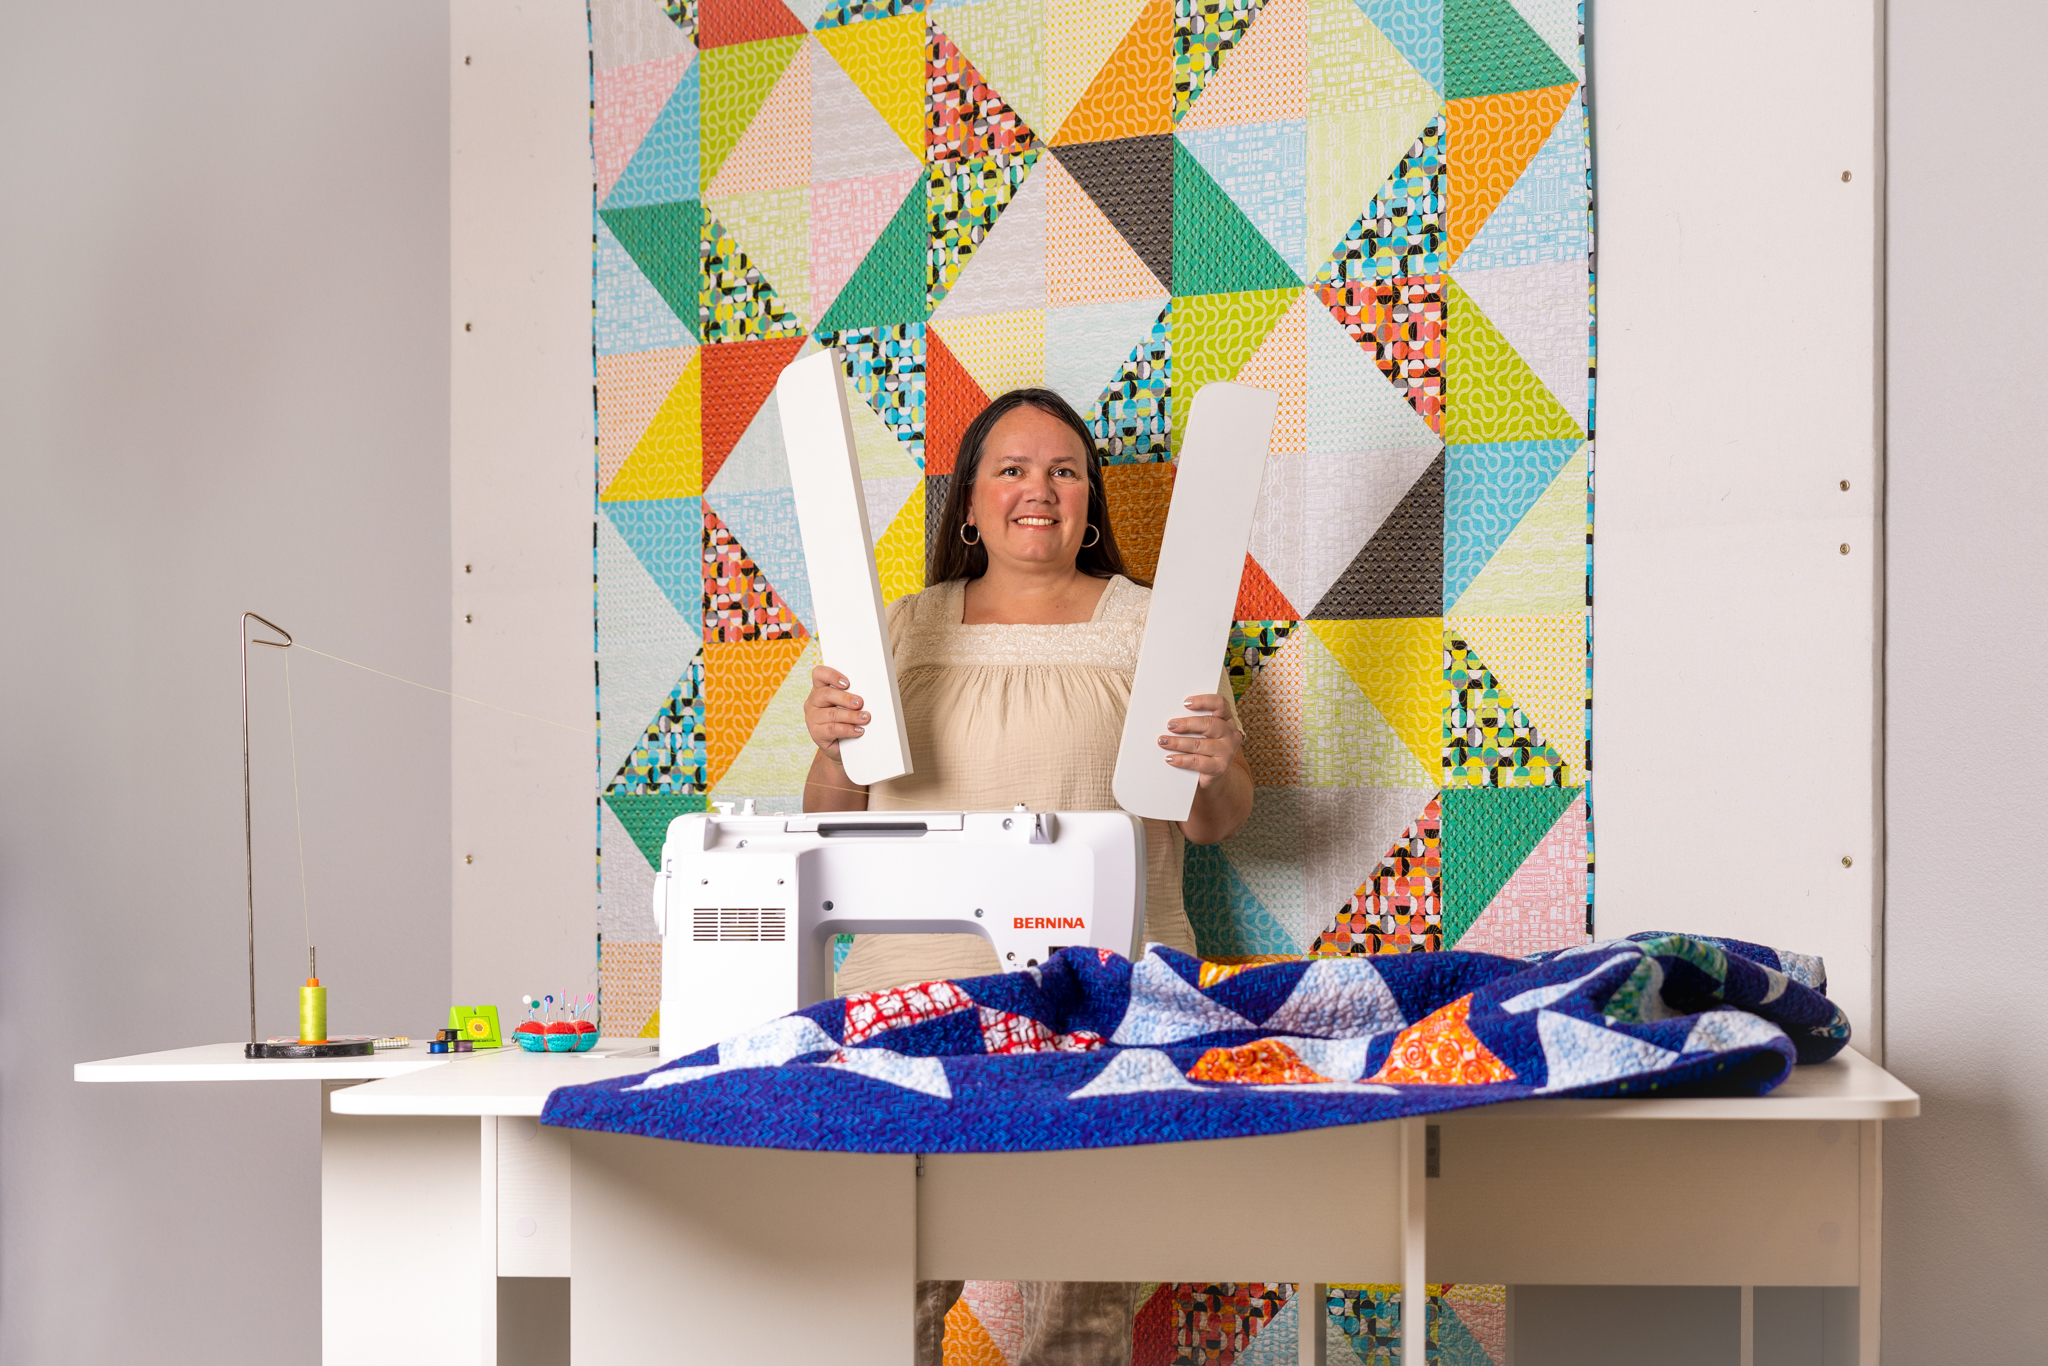
Christa’s Quilt Blocks are like guard rails for your quilt! They keep it from falling overboard!
Arrow talked me into becoming a drop-ship dealer which means that you can order it directly from me, and then they will ship the cabinet directly to you so that I don’t have to warehouse, since I don’t have an actual shop.
It’s a nice way to get the cabinet to people who don’t have a local dealer nearby. And so as not to compete too much with other dealers, I’m only offering MY table & accessories, rather than their full catalog of furniture.
I quilted on a smaller quilt throughout the trade show. Push play above to watch a short video clip.
I really have been pleased throughout the entire process and very happy with the reception so far. I’ll be opening up online orders on May 2nd, so be sure and sign up to get notified once it’s ready to launch. I’ll email you with special incentive that I can’t share publicly!!
I’m excited that my Christa Cabinet is finally being introduced into the world, and I can’t wait to see other folks sewing and quilting on it, too!
Well, this dream has been a long time coming. My Christa Cabinet that I designed in conjunction with Arrow Sewing is now in production, and will start shipping to dealers and consumers in May, 2022.
Christa’s Cabinet Specs
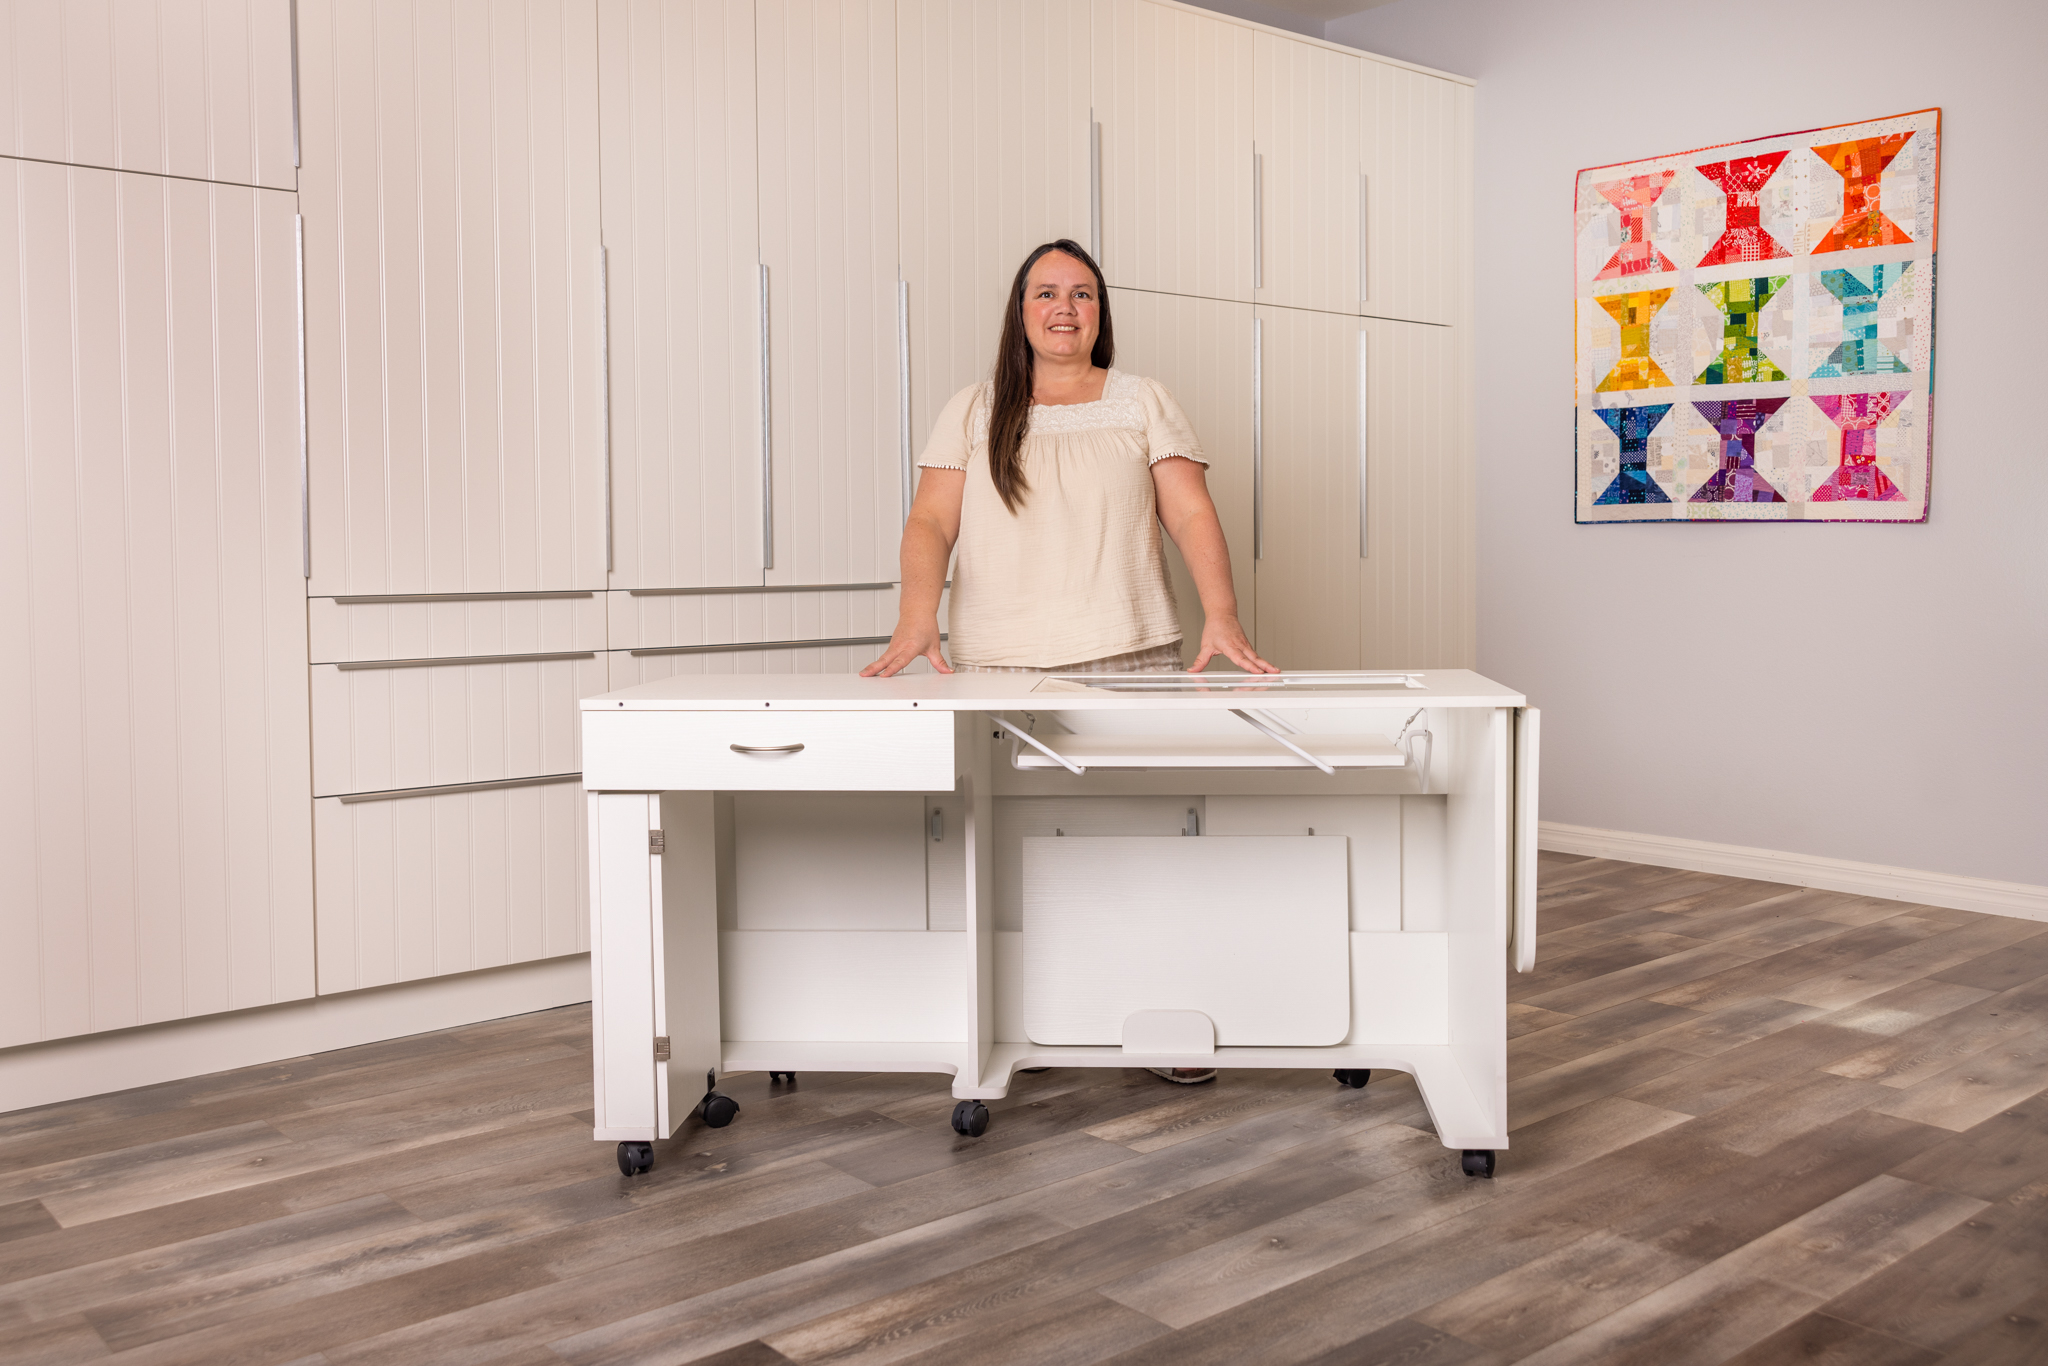
In this post I want to give you the basic details: beauty shots, pics etc. Then stay tuned for another email where I share more of the behind the scenes of how we developed it and launched it into the world. So here are the official measurements that I know many of you have been eagerly awaiting:
Cabinet fully open, will all leaves extended: 71 5/8″ W x 40″ D x 29 3/8″ H
Cabinet closed with side leaf down: 56 1/2″ W x 22 5/8″ D x 29 3/8″ H
Quilt leaf (back extension): 55 3/4″ x W x 18 1/4″ D
Right side leaf for notions and stuff: 15 3/4″ W x 19 5/8″ D
Lift opening (table top cutout): 23 3/4″ x 12 1/2″ D
Drawer (open or closed on left): 18 3/4″ x 15″ D x 3 1/2″ H
Cover for drawer (extra table space): 22 3/4″ x 14 3/8 D
When not in use, you can tuck the drawer cover into the bottom back of the cabinet and everything else folds down. So It doesn’t take up too much room if you are short on space. However, in my sewing room I leave it up and open the entire time.
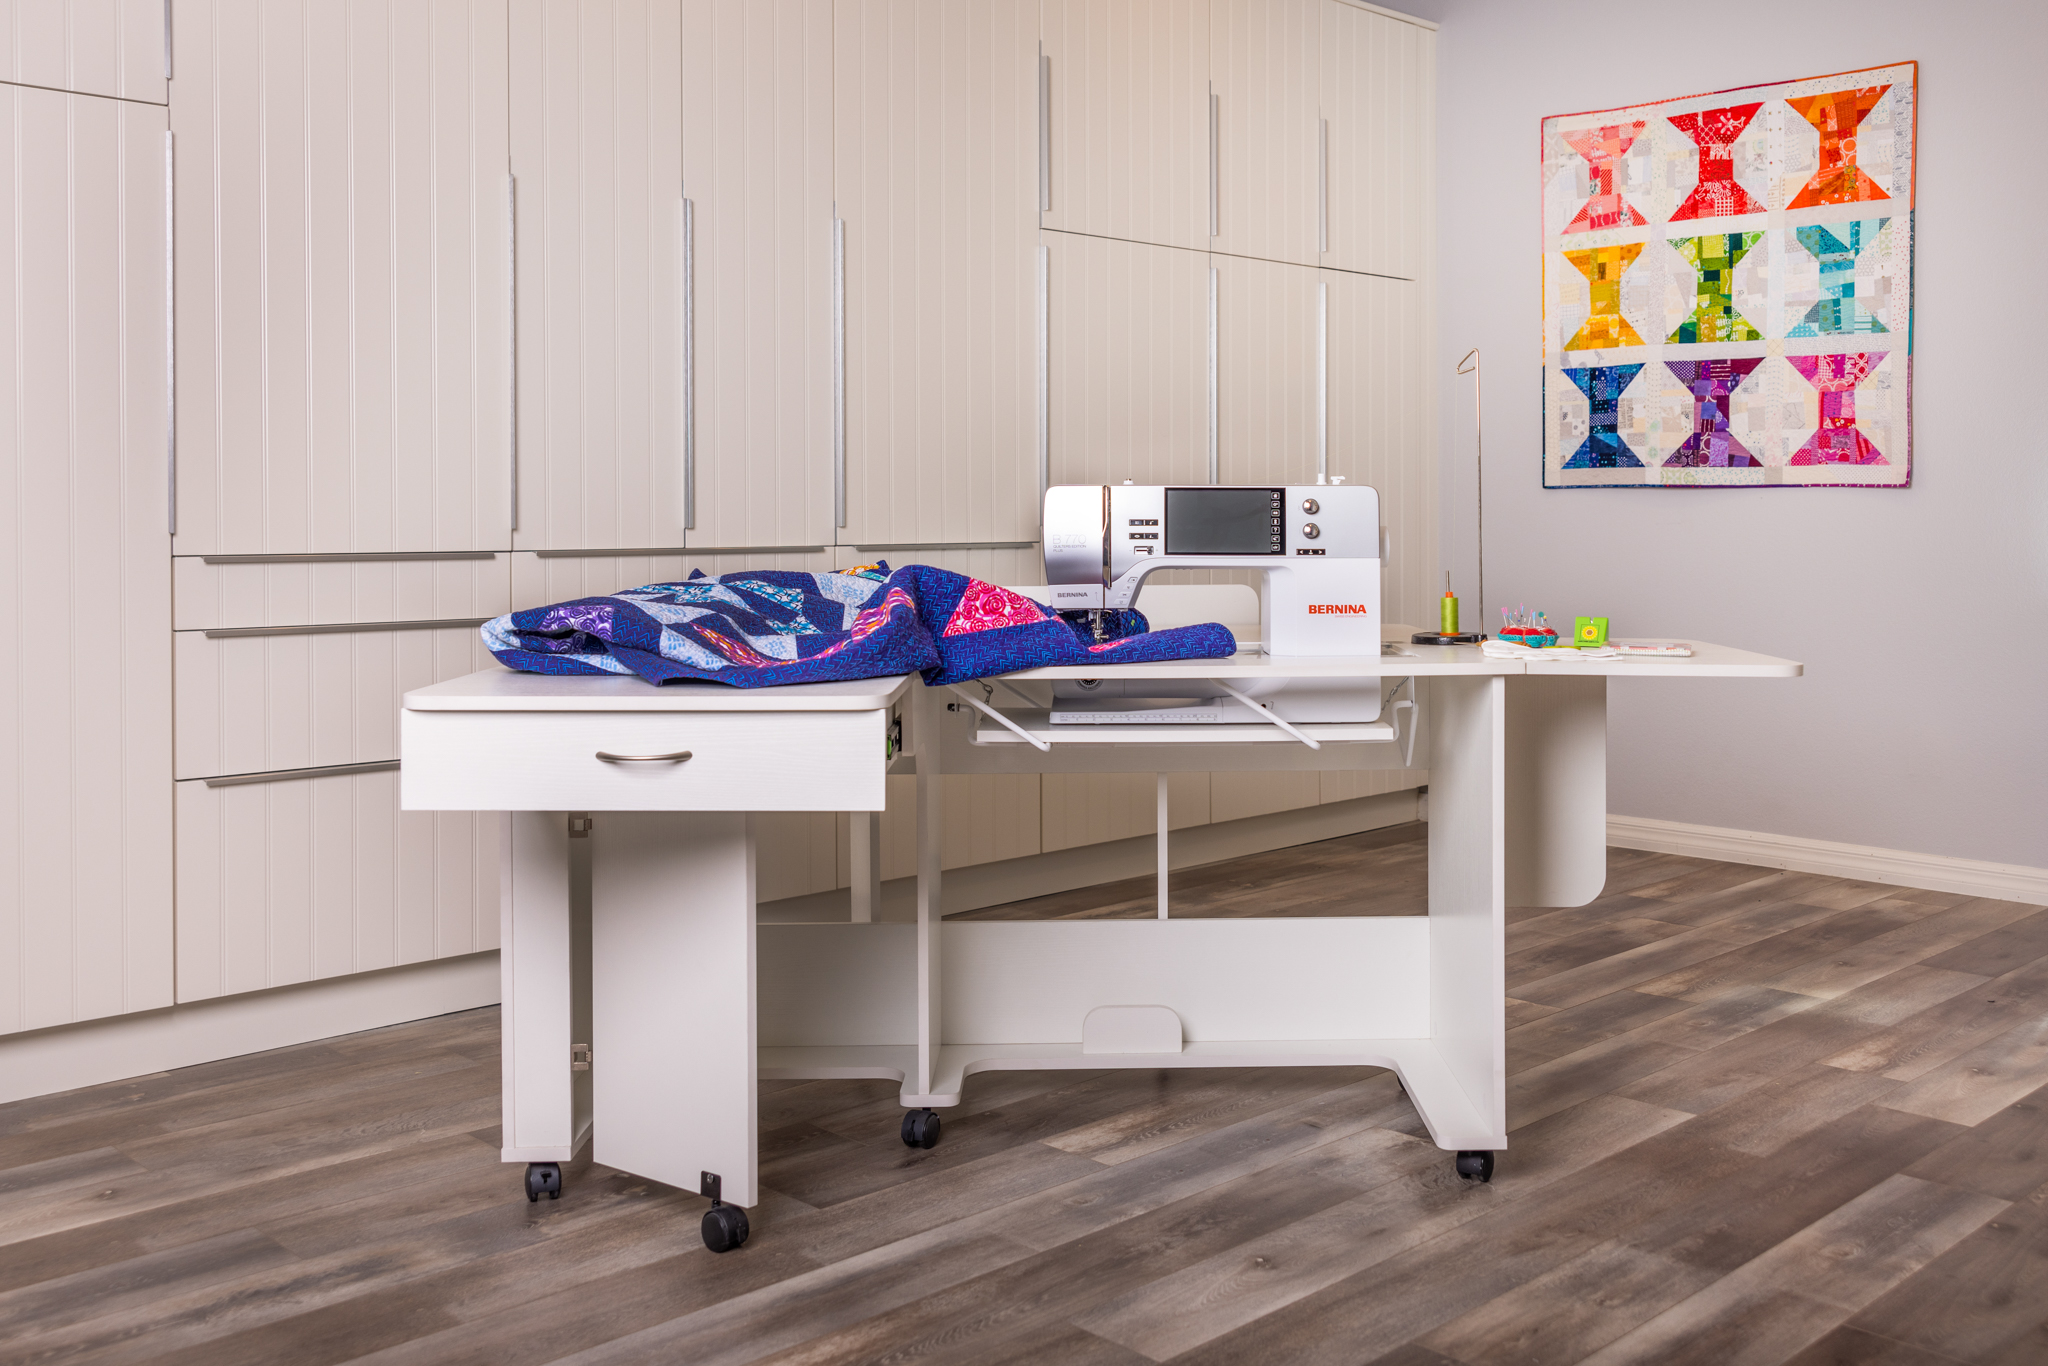
It fits my BERNINA 770QE perfectly and will accommodate about 98% of the machines on the market. That’s basically all but the biggest machines. So measure the width of your machine from end to end and then compare it with the cutout measurement above to see if it will fit.
I designed this table especially for domestic machine quilters like myself who need room to hold the quilt and supplies (scissors, thread, snacks etc) so that it’s very comfortable while you stitch. It has room to hold the weight and bulk of the quilt in all the right places.
Machines that will Fit
This is not an exhaustive list, but it includes most of the current machines on the market that will fit. But be sure to measure your machine to be sure. The opening is the M7 size.
Bonus – Christa’s Quilt Blocks
But really, the magic of this table, and any cabinet for that matter, is being able to keep the quilt from sliding off the ends of the table, especially if it’s not pushed up against a wall. My quilt blocks are like guardrails for your quilt and hold everything in place to prevent friction and drag on the quilt. The number one machine quilting tip I share in my classes is to make sure that the immediate area you are stitching is flat and moves freely. This makes machine quilting such a joy and it’s all about moving your quilt smoothly under the machine.
Sneak peek of another project I’m working on… coming soon!
When I first got my table to test drive several months ago, I used one set of quilt blocks (2 pieces total). However, I quickly found that it worked best to set up 4 of the blocks along the back AND side edges for complete coverage. In the picture above, I was showing it at a local trade show (more about that later) and I loved having all 4 blocks attached to the table at once!
So the best thing about Christa’s Quilt Blocks is that they will actually fit on any sewing table! Isn’t that great??
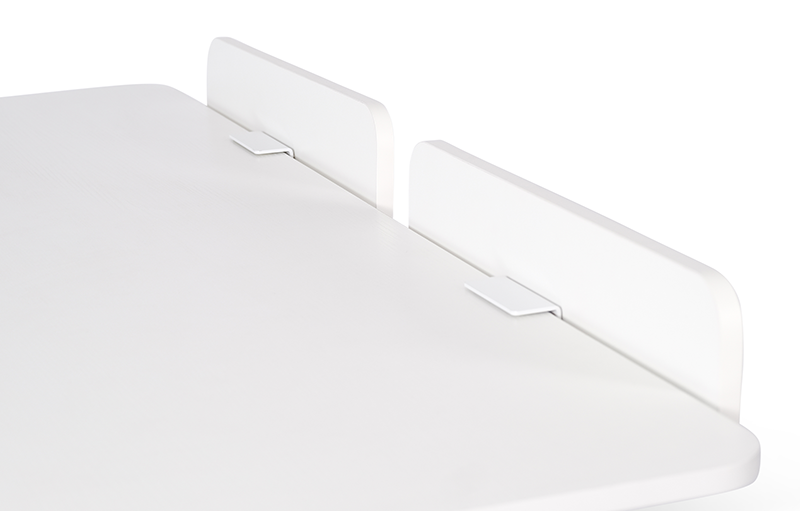
One set of quilt clocks includes 2 boards and 2 clamps that easily attach precisely where you want them. Here’s a better detail image of how they attach:
Once you screw the boards into the clamp, you attach the clamps to the table and they are very secure!
Where/How to Buy
So the Christa Cabinet is available to order starting in May. Christa’s Quilt Blocks are an add on purchase and are also available separately if you already have another table or cabinet. They are in production now and will be here roughly mid to late June.
You can also order a custom insert made to fit your sewing machine, and that will arrive separately as well. I’ll help you through the entire process if you choose to get it from me, but you can also head to your local Arrow dealer if you have one nearby.
You can add a custom acrylic insert to your order, made specifically to fit your machine.
I know you all are very interested in the price and I’m still working out final details. Because of something called MAP (minimum advertised pricing), I must sell it the at the publicly listed retail price. However, I can offer some incentives via email, so please shoot me an email for details: christa@christaquilts.com.
Because I do not have a physical brick and mortar shop, when you order from me, the cabinet will come fully assembled and the delivery guys will even bring it into your home and set it up. It’s an amazing service that is bundled into the price I’ll be offering. Press play below to see a quick video I made a few months ago, once my cabinet was delivered:
Isn’t that great? Ok, who else kept wanting to yell, “pivot!!” when they were climbing up the stairs??? LOL!!
I don’t do any embroidery but a friend of mine does. She came over to sew with me recently and check out my cabinet. She was thrilled with the fact that the table top is large enough to accommodate her embroidery system.
Like any part of your sewing setup, this is definitely an investment, but I wanted to keep it affordable. One of the ways to do that was by offering a manual lift (instead of hydraulic) and keeping the bells and whistles to a minimum. But I can tell you from experience, this is the perfect table for those who wish to quilt on a home sewing machine like I do. All of my recent videos I’ve been sharing, plus all of the quilts I’ve made over the last 6 months have been stitched on this cabinet and I couldn’t be more thrilled with the results!
Questions? Just Ask!
Please feel free to ask me ANY questions you have about my cabinet or quilt blocks. and I’ll do my best to answer.
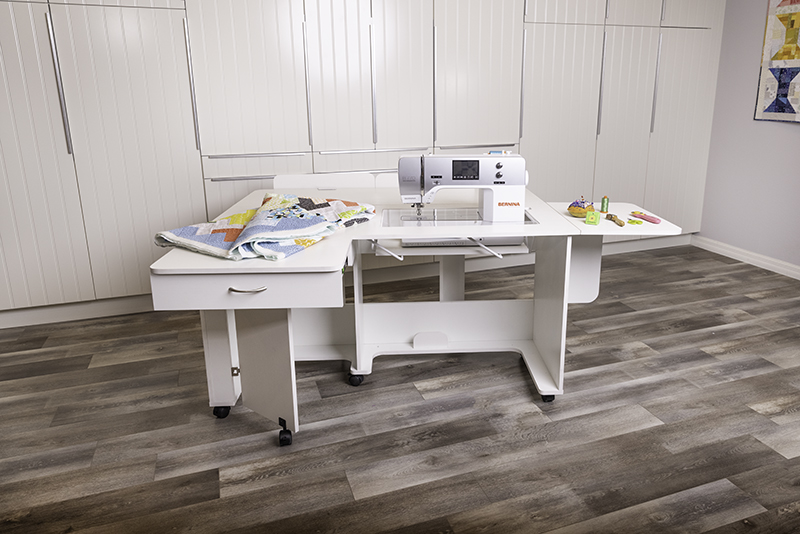
My table with 2 quilt blocks attached near the corners
Here are answers to a couple other questions I’ve gotten recently: yes, you can remove your bobbin while the table is lowered to flat-bed position. And YES, you can still use your knee lift if you have one. You just need to specify that when you purchase your custom insert.
I sure hope you enjoy this cabinet as much as I do. It’s been a game changer for sure!
I have another fun video for you this week! Learn to quilt simple wavy lines with your walking foot or intergrated dual feed. I’m demoing how do this on my free Puzzle Box quilt pattern. Click below to watch:
If you haven’t already done so visit my Free Patterns Page (click here) to download my Puzzle Box pattern, plus a few others. These are great quilts to make to practice your machine quilting skills!
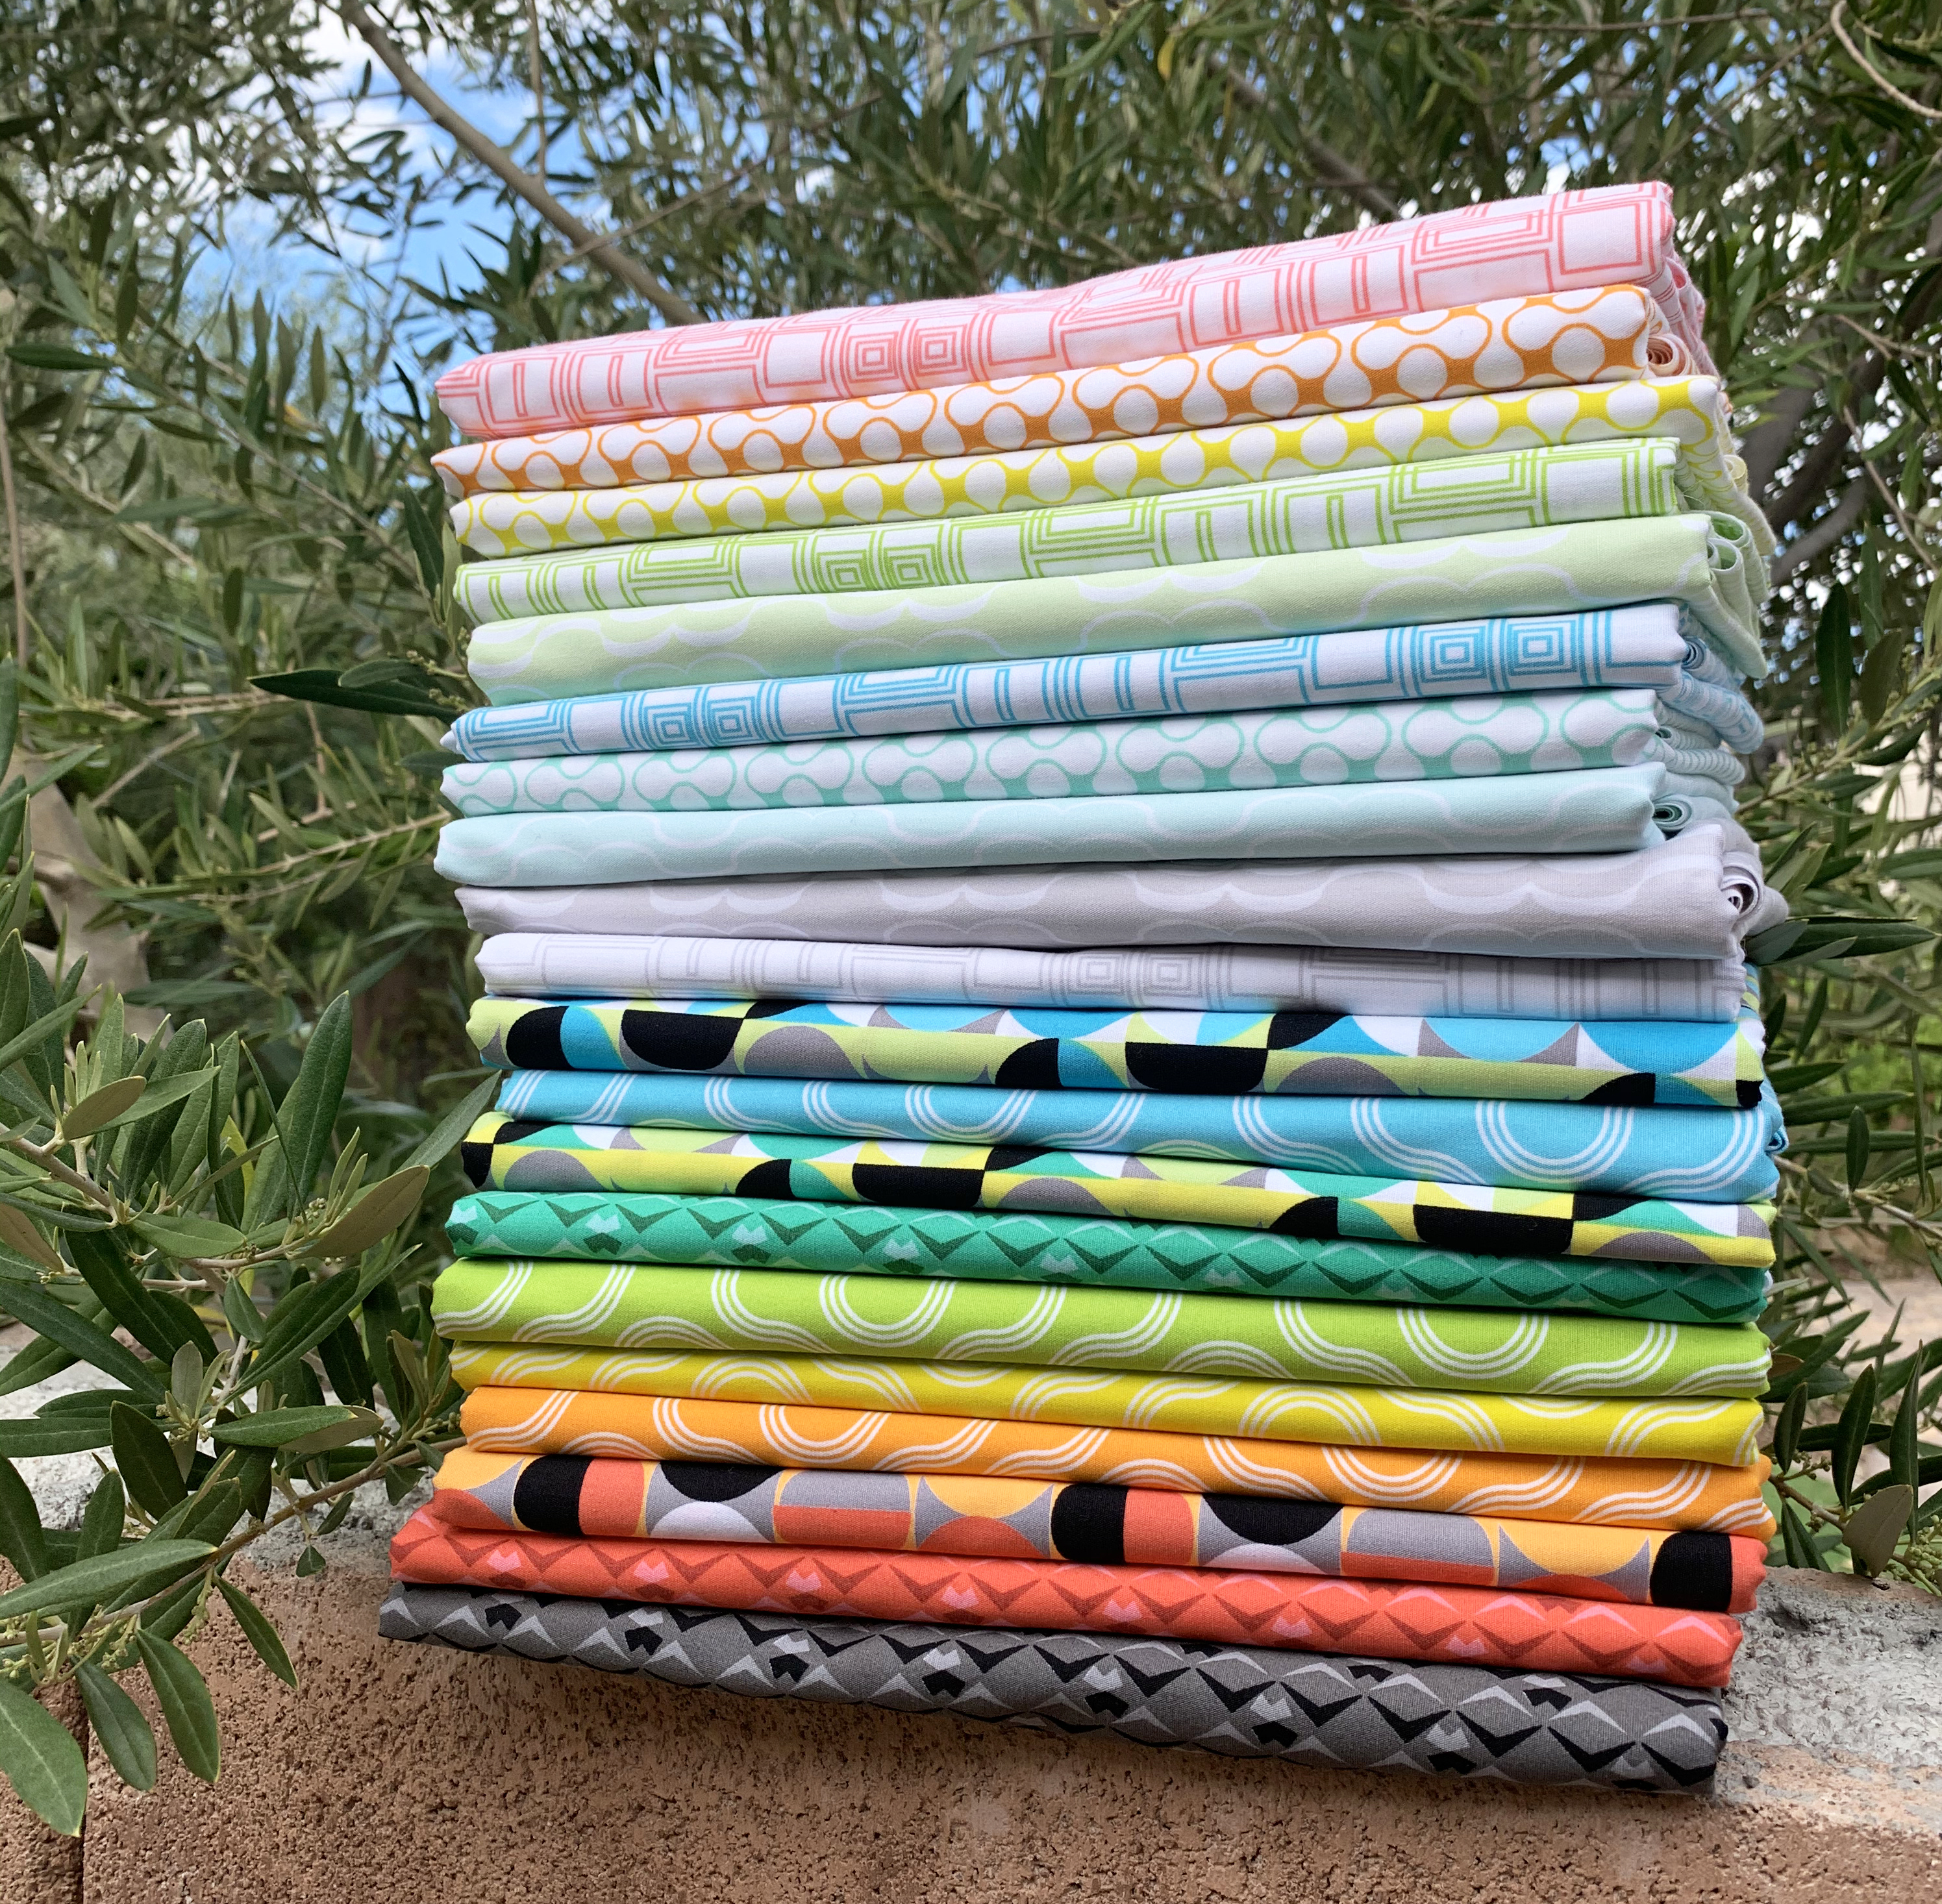
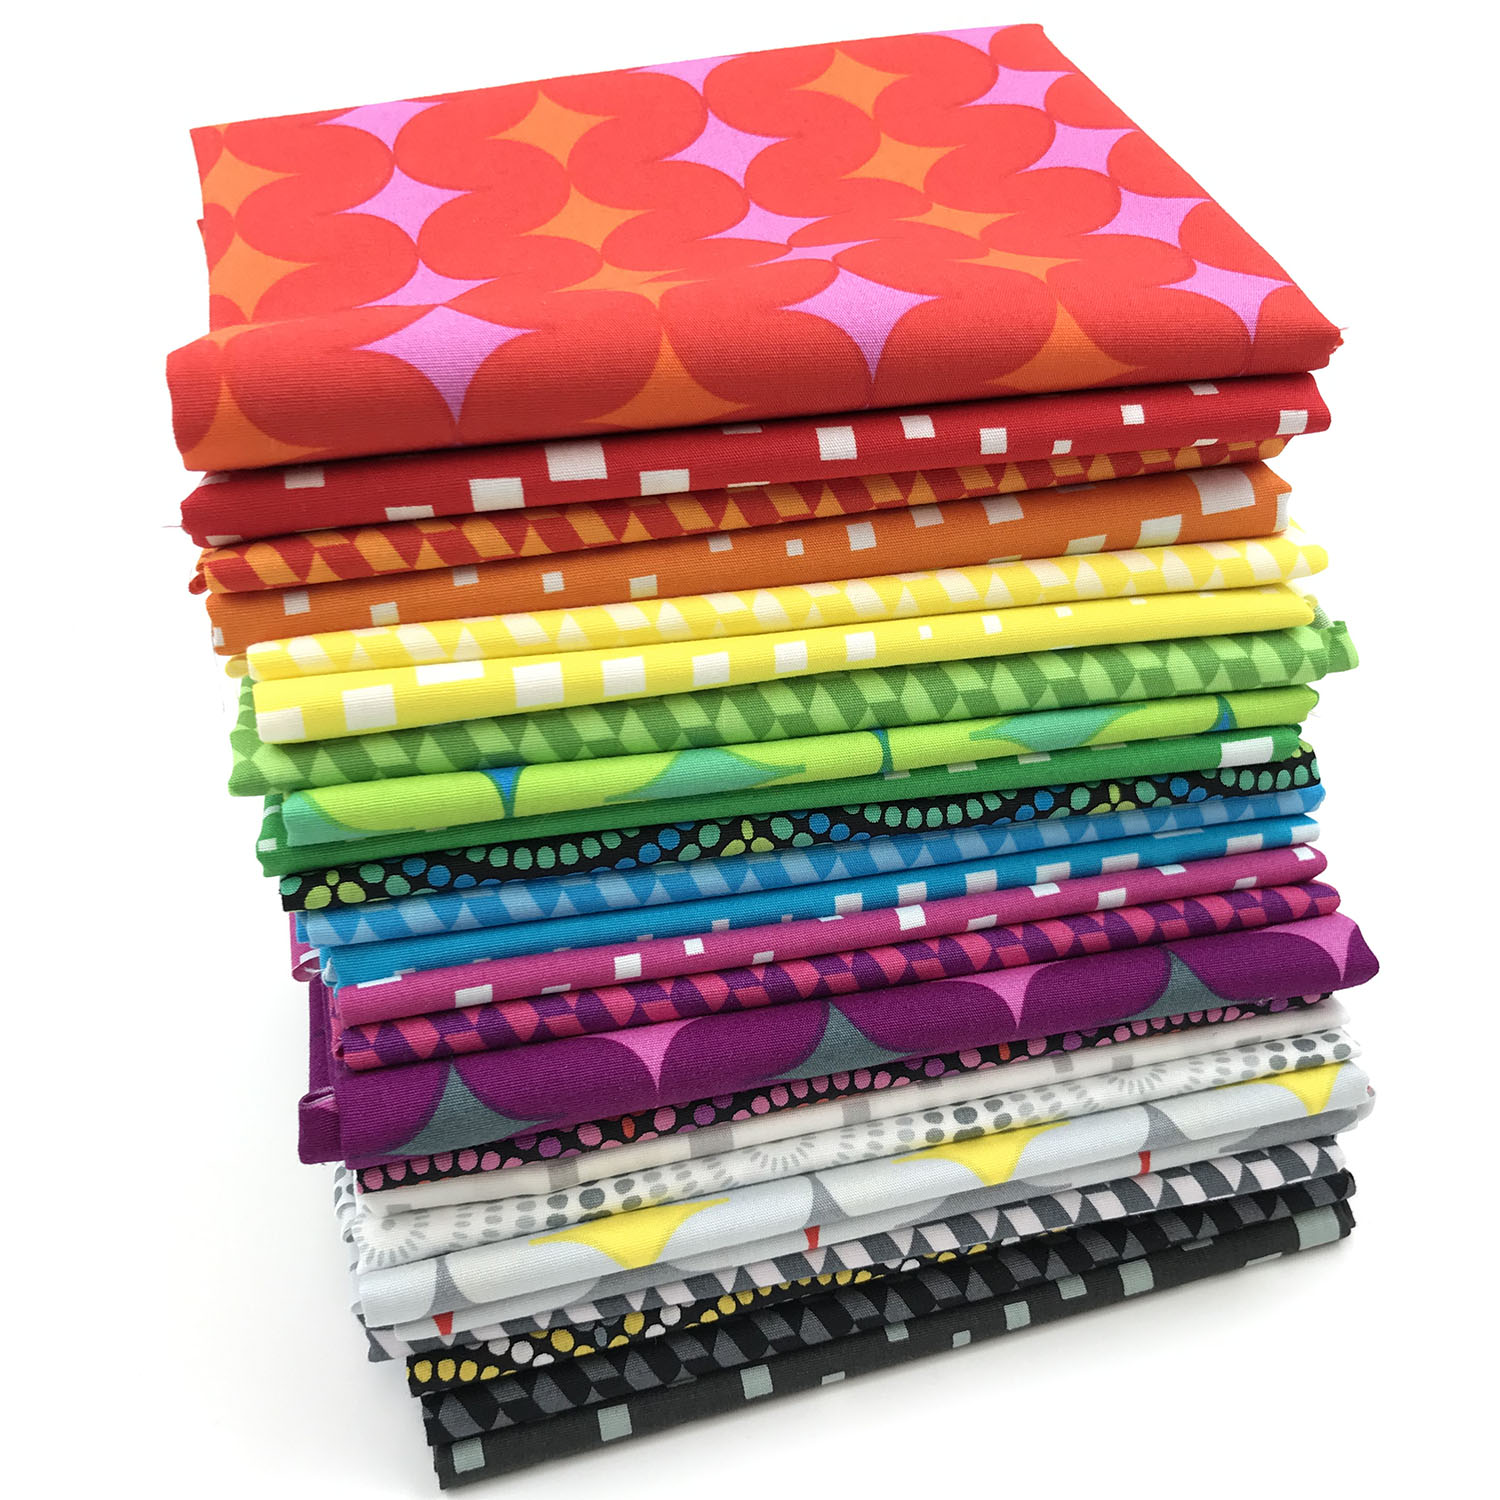
I made this quilt from 2 strip rolls of my Good Vibes fabric line. I specifically designed this collection so that it would include half lights and half darks. Contrast is the key to the success of this design!
Wavy lines are the simplest, fastest machine quilting design you can do. In fact, it’s the first design I teach my students in my machine quilting workshops. Once you feel comfortable with one design, it will give you the confidence to keep improving your skills!
Now I’m curious to know – what’s your favorite machine quilting motif to stitch? What’s a design you’d love to learn or get better at? I love making more quilts because it’s a great excuse to try new things!!
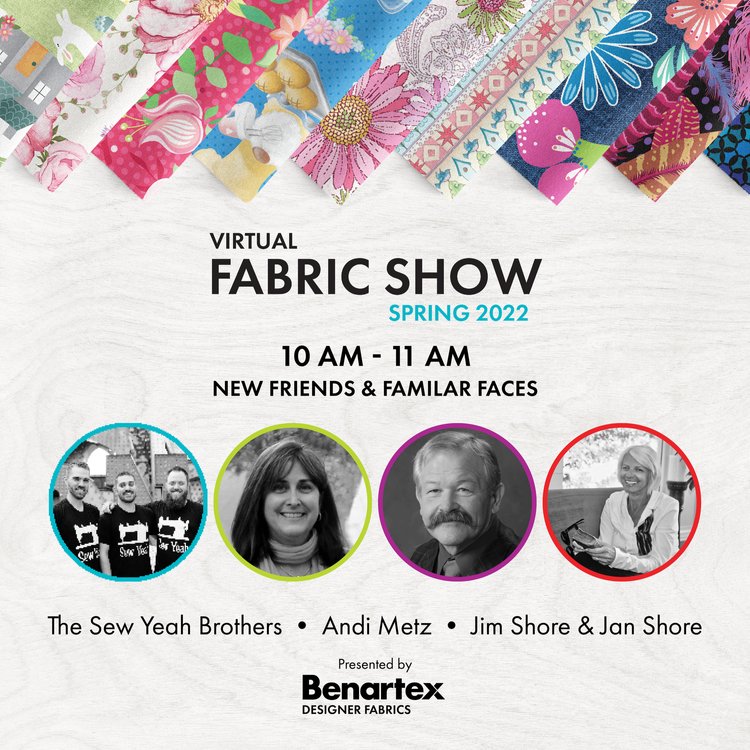
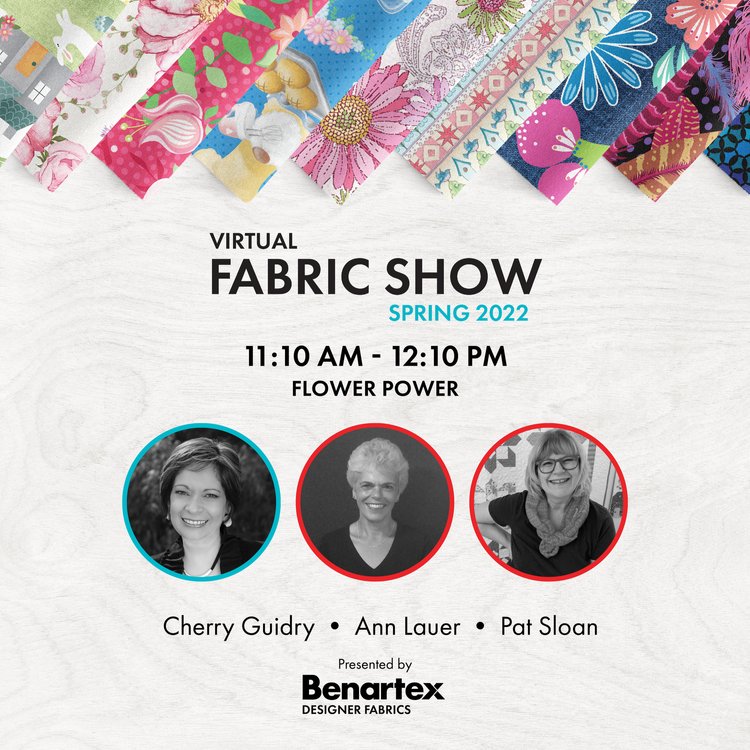
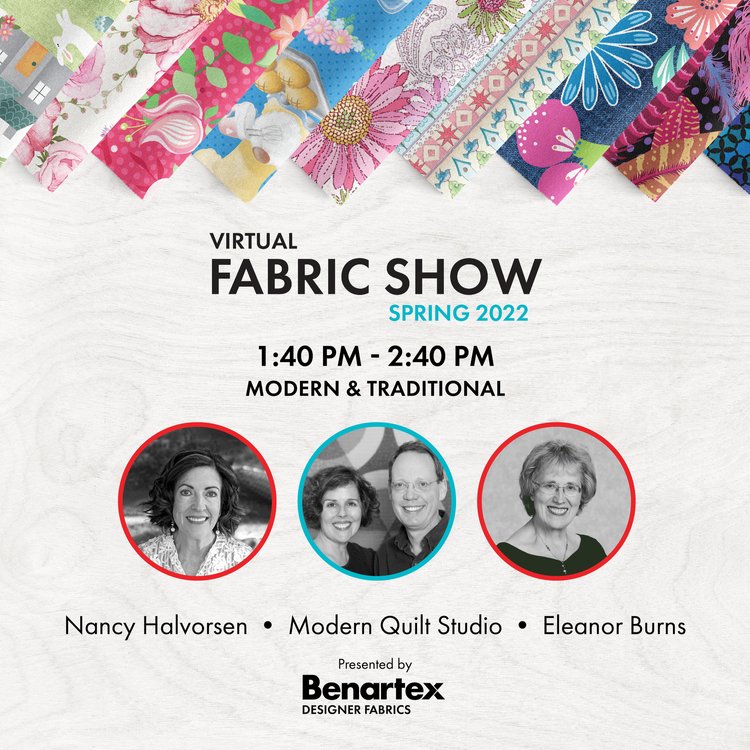
So the one good thing that came out of working from home was the focus on zoom presentations and the ability to meet with folks easily online. Benartex has been doing semi-annual virtual fabric shows now for a couple of years, and I’m excited to invite you to the next Virtual Fabric Show on Monday, April 25 from 10 AM – 3 PM Eastern Time (or 7 AM -12 PM for those of us on Pacific Time).
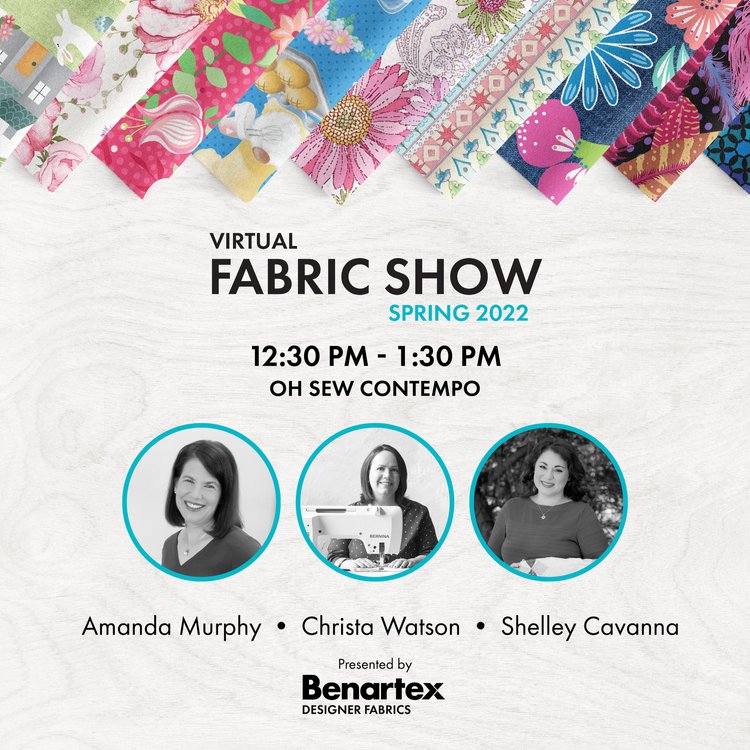
You’ll be able to view the latest & greatest, including more about my my Black, White & Bright collection, plus sneak peeks of fabrics coming out later this year. Take a look at the schedule of designers below:
Some are familiar faces, and there are some new designers that I can’t wait to see, such as my buddies from Sew Yeah Quilting right here in Las Vegas. I can’t wait to see their approach to fabric design!
My time slot will begin at 12:30 Eastern and there will be plenty of time for Q&A throughout the entire event. You can come and go as you please throughout the event, and it will also be recorded so you can watch all of it later if you have to duck out for a few minutes.
I love how most of the Benartex designers are quilters, so as we design, we really think about what the fabric will look like, cut up into smaller pieces. Many of us also release 1-2 lines per year which keeps us pretty busy, as you can imagine!
I hope you’ll join us for this fun event. Bring your enthusiasm, AND your questions!!
Hi all, I’m so excited to share episode 1 of Christa’s Quilt Chat with you. Just click play below to watch:
As I mentioned in the chat above, my goal is to bring you fun new video content, each and every Wednesday. This has been on my mind for quite awhile, but I finally got all my ducks in a row to do it!
In this week’s episode I share a little bit more about my Christa Cabinet that will be available from Arrow Sewing in May – I can’t wait!
I also share the tiniest hints about what’s coming next – new fabric and a new book – and I talk a little bit about my decision making process whenever it’s time to make a change.
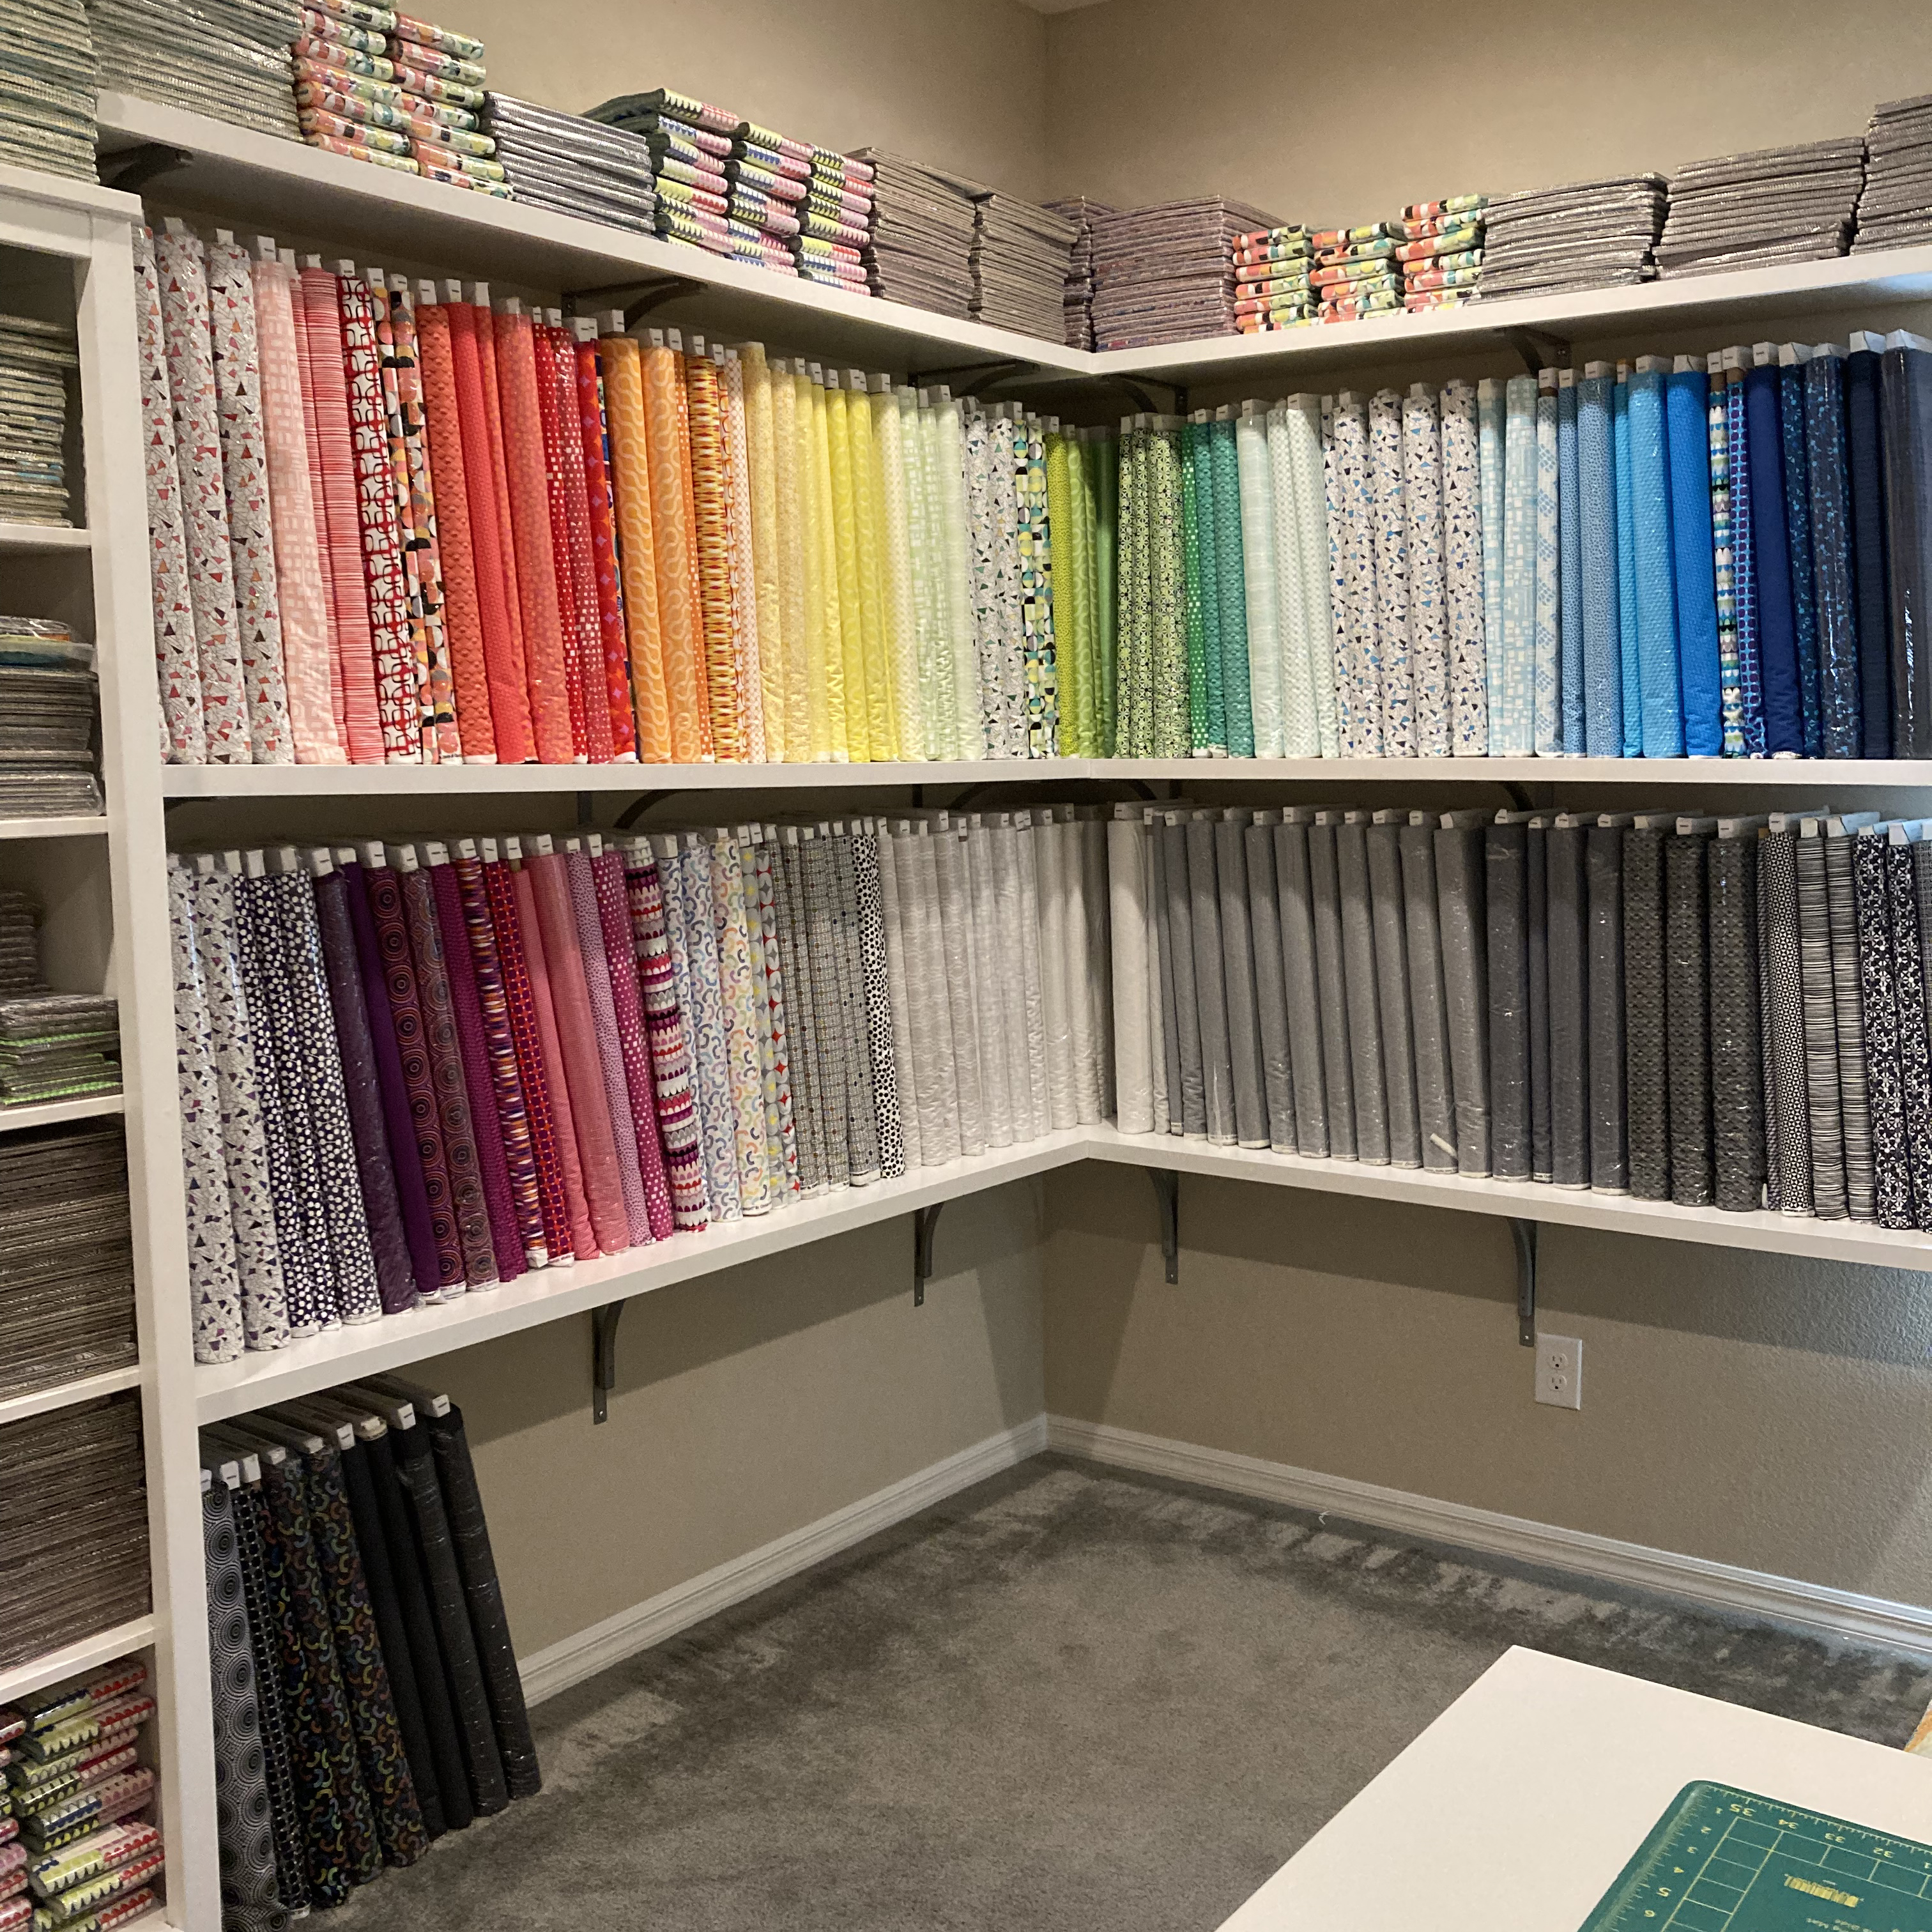
I also mentioned that I’ve recently updated my sale section on my website. From time to time I add things to the category when it’s time to clear out space to make way for new things. This is a constant sale that never ends, and you don’t even need a coupon!
See that empty bottom row? It will be full soon! In the meantime, help me clear out some of my older fabrics! Click here for my fabric clearance sale, while supplies last.
If you enjoy my free video content and tutorials, you can say, “thanks!” by stocking up on your favorite Christa Quilt patterns. As we speak, I’m planning out the next batch of patterns for later this year (with new fabric to make them) and I can’t wait to show you more.
I’m really having a ball making videos and sharing them over on my YouTube channel at ChristaQuilts.TV. I recently launched my DIY Quilting series, where I show you how to make a quilt from start to finish, and improve your machine quilting skills. I’ve updated my schedule for this series and it will now publish every other Wednesday at 10 AM Pacific Time.
On the alternate Wednesdays, I’ve decided to offer a new, informal series called “Christa’s Quilt Chat” where I’ll be chatting all things quilting, with different topics each week.
Keep in mind, this is NOT a live show. I actually tried that a few months back, but I couldn’t get the technology to work properly. The video was grainy, and I would lose signal event though we have a really strong internet connection. So I’ll be pre-recording these, but they’ll still be current and up to date with what’s happening in my quilty world.
My hope is to share more “behind the scenes” things that are going on, plus what I’m currently working on in real time. Think of it as a fun conversation with your BQF (best quilting friend), except that you don’t have to talk back, LOL!
When you share comments and questions on both videos series, I’ll reply to them in a timely manner, and it may open up more topics of conversation for the future.
Both of these shows will drop on Wednesdays at 10 AM Pacific Time on my YouTube channel, which is conveniently located at ChristaQuilts.TV. Be sure to subscribe so you don’t miss out on all the fun!!