Although machine quilting is my favorite part of making any quilt, I really enjoy the entire process from start to finish. Even though I’m on a tight deadline, it’s been fun to document my progress on Surplus Strips as I go. Be sure to check out my last post for tips on piecing the quilt top and basting it.
Choosing Thread Color

Audition thread to see which color blends in best. For multicolor quilts, go with a lighter thread on a darker fabric, rather than darker thread on lighter fabric.
I’ve been playing around lately with Aurifil variegated thread, so I chose a pink (#3660 Bubble Gum) for the warm colorway of Surplus Strips. I wasn’t sure how much thread I’d end up using, and since I only had one spool on hand, I chose a 50 weight thread in a similar color for the bobbin. I always try to use the same or similar color in top and bobbin so that I don’t get “pokies” – dots of thread on the top or bottom of the quilt.

The teal colored thread has a more pronounced color change than the pink.
For the cool colorway, I went with Creme De Menthe #4662. No matter which color thread you use, the more quilting you add, the less you’ll notice the thread and the more you’ll just see the overall texture.
Free-Motion Quilting Surplus Strips

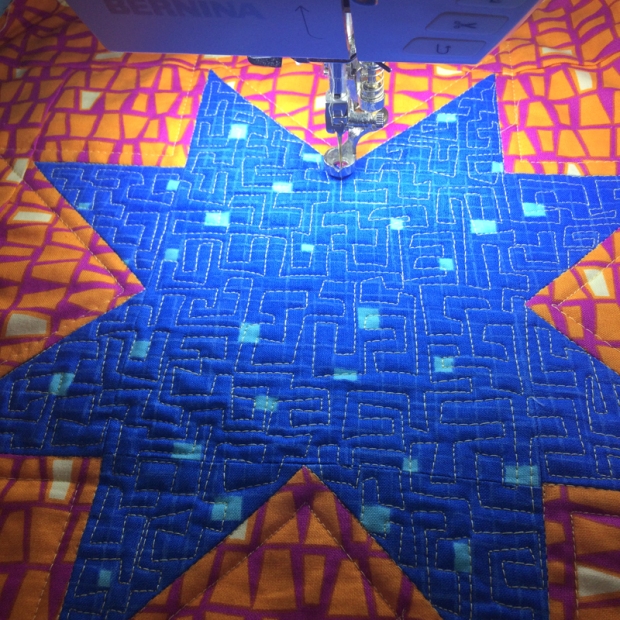
I scrunch and smoosh the quilt under the machine any way I can.
Whenever I quilt, I always start on the right side of the quilt and work my way towards the center. When I reach the middle, I rotate the quilt and keep on going. For an allover/meander type block, I just focus on one are of the quilt so that I don’t get overwhelmed.

I love the slight color change with the pink variegated thread!
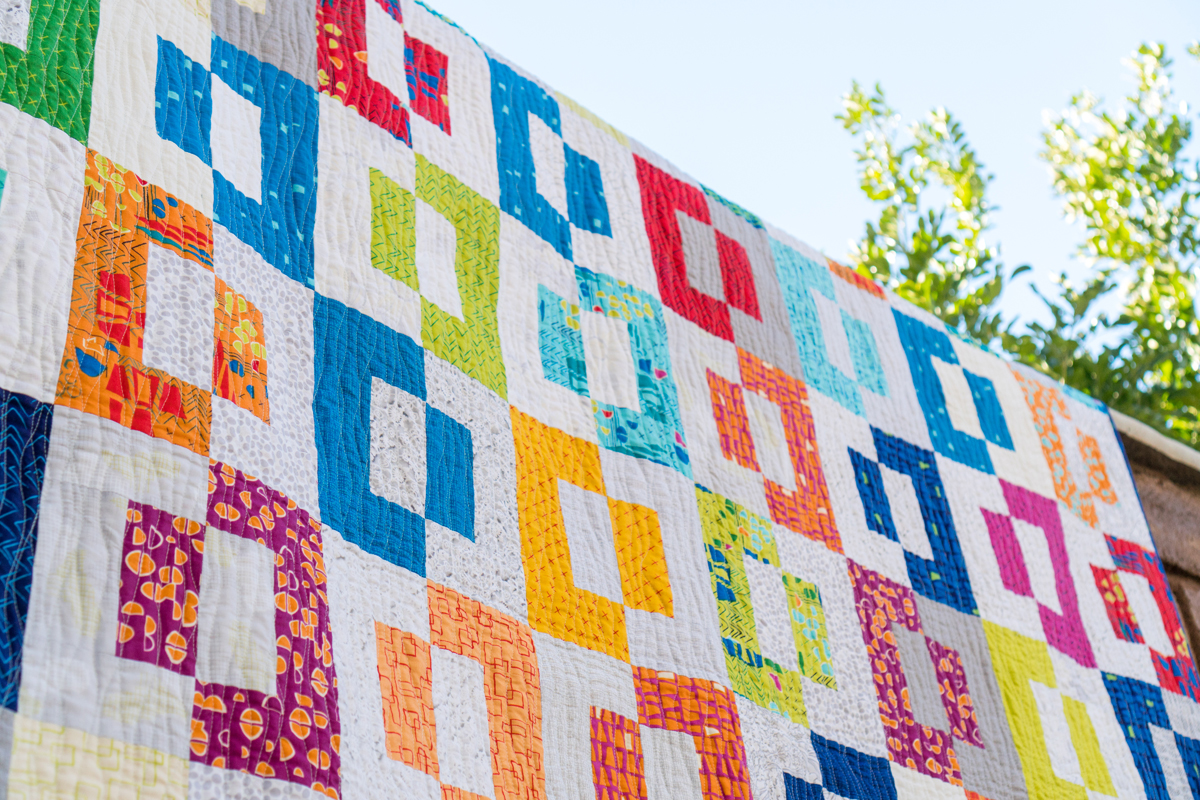
Because many of the fabric prints I design are based on some of my favorite machine quilting motifs, I really wanted to play that up with these quilts. For the warm colorway, I quilted “jagged stipple” which is one of the quilt designs I love to teach in my workshops. Can you see how it’s basically the same motif as the “Paper Cuts” print from Fandangle?

Jagged stipple is one of the motifs included in my book Piece and Quilt with Precuts.
When quilting an allover design, sometimes it will show up on some fabrics and blend into others. But that’s okay. I love the overall texture that it gives to the quilt!
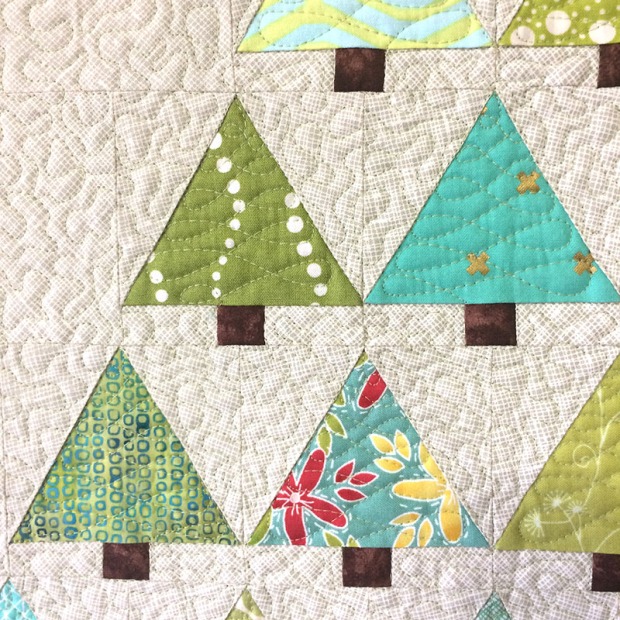
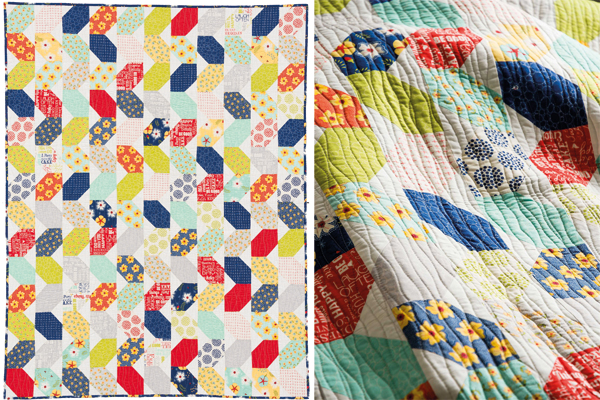
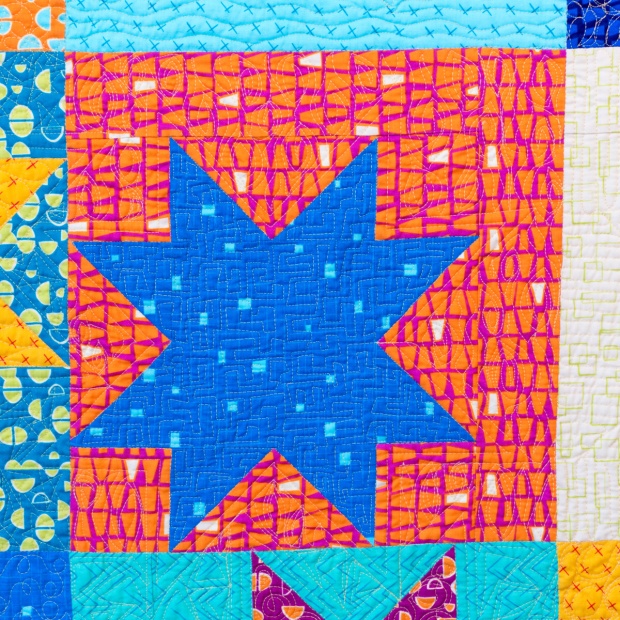
For the cool colorway, I quilted triangles that are similar to the “Triangle Trinkets” print from Fandangle. Any of the designs I quilt can be quilted on a smaller or larger scale. My rule of thumb is that if it’s an allover design, I’ll quilt it larger to fill more space quickly. For smaller, custom areas of the quilt, I’ll usually scale down the quilting motifs.

I love how the variegated thread gives depth and dimension to the quilt!
I also teach this quilting motif in my latest quilting book.
In my workshops, I always stress the point that I don’t worry too much about making my designs perfect. I like the irregular overall texture you can get from free-hand doodling with your machine. Besides, the best way to hide imperfect stitches is to surround them with more imperfect stitches!!

I chose Triangle Trinkets in turquoise for the backing.
Click here to see larger images of each fabric from Fandangle.
Binding the Quilt
Click here for my step by step binding tutorial from a previous quilt.

After I attach the binding to the quilt by machine, I press it away from the quilt. This makes it easier to wrap around the back of the quilt to ensure a nice flat binding.

The BERNINA Dual Feed acts just like a walking foot, but I can use any specialty “D” foot.
When I first started binding my quilts, I used 2 1/4″ strips, However, lately, I’ve cut them 2″ and I attach them using my BERNINA dual feed and 1/4 patchwork foot. This allows me to get an even quarter inch binding on both sides of the quilt.

It was fun to make some extra blocks and throw them on the back of the quilt!
Once I wrap the binding to the back, I secure in place with Clover Wonder Clips. I like to secure the entire edge so that it’s ready to hand-finish without interruption. It usually takes about 3 boxes of Wonder Clips to go around the entire edge, but you could definitely use fewer if you like.

I quilted triangles on the front to match the triangles on the back!
Even though I’m on a tight deadline to finish these quilts, I still enjoy binding by hand. I was able to finish the warm colorway on an airplane trip last week, and I finished the cool colorway while watching a movie with my family.

Click here to preorder Surplus Strips quilt pattern – ships on or before June 1.
Now all that’s left is to photograph these quilts, swap out the digital pattern cover above with the actual quilts and get them off to the printer! The PDF pattern will be coming soon, and you can pre-order the print version of Surplus Strips now.

I had a whole row to myself on a recent flight and was able to finish this quilt on the plane!
Click here to pre-order bundles of Fandangle Fabric.
Click here to see all Fandangle quilt patterns.
Now I have one more quilt to finish up, and then it’s time to pack for quilt market. More about that soon, I promise!!