Craftsy Sale – All Machine Quilting Classes Under $20

I love a great sale don’t you? From now through the end of the day on Monday, March 13 (11:59 PM MDT), you can get all Craftsy classes on sale for under 20 bucks. How cool is that? I know many of you have signed up for my Craftsy class, The Quilter’s Path which is fabulous!! Thank you!! xoxo. If you enjoyed that one, here are some other quilting classes I’d highly recommend by the very talented Christina Camelli::

Machine Quilting ClassClick here to get The Secrets of Free Motion Quilting for $19.99

And

Wild quiltingClick here to get Wild Quilting for just $19.99

Of course, if you haven’t had a chance to sign up for my class yet, I’d recommend that, too!

Click here to get The Quilter’s Path for just $19.99!

Then learn how to make a quilting plan and coming both walking foot quilting with free motion motifs. Happy quilting, friends!!

New Pattern Release – Stepping Stones

After the success of my most recent pattern launch for Positive Direction, I’m back again with my second new release of the year. I’d like to introduce you to Stepping Stones, available as an instant PDF download through my Craftsy pattern shop.

Click here to purchase the print version of Stepping Stones.

Stepping Stones quilt pattern by Christa Watson of Christa QuiltsClick here to get Stepping Stones via PDF

Stepping Stones was originally patterned as “Easy Going” in Quilts and More magazine and available in one size only. Now I have expanded the pattern to include 4 sizes from Crib to Queen. It’s super fast to make and is perfect to use up that favorite fat quarter bundle you’ve been hoarding. Or bust your stash by cutting each block from 2 different fabrics!

Stepping Stones Quilt Pattern in 4 Sizes

Make Stepping Stones in 4 sizes: Crib, Throw, Twin or Queen!

Stepping Stones fabric requiremenets

Stepping Stones Fabric Requirements – It’s Fat Quarter Friendly!

I used Me + You Hoffman batiks which gives it a bit of a modern vibe. I chose cool colors of teals, blues, and greens with a bit of yellow and tan to create some warm pops of color. I used leftovers to make a whimsical scrappy binding.

Machine Quilting Boxes on Stepping Stones

I also include quilting suggestions so that you can quilt it the same way I did, if you are so inclined. I quilted Stepping Stones using one of my favorite geometric motifs – boxes. This quilting motif looks great on both modern and traditional quilts.

Machine Quilting Plan for Boxes

I love including quilting plans and machine quilting suggestions in my patterns!

Machine Quilting Detail

I used Aurifil 50 wt. 100% cotton thread from my Piece and Quilt Collection to make the quilt from start to finish. I’ve curated a rainbow of color that allows me to piece, quilt and bind any quilt I wish to make!

Stepping Stones Quilt Pattern by Christa Watson of Christa Quilts

Jason and I had a great time taking pics out in the desert behind our home. I enjoy making the quits, and he enjoys photographing them so you can really see the details!

The key to making this quilt sparkle is by choosing several very light fabrics for the skinny strips between the blocks. Then, when it comes to choosing colors for this quilt, anything goes!

Stepping Stones by Christa Watson

Click here to view my PDF pattern shop and stock up on your favorites!
Click here to purchase print versions of my patterns.

Save

Save

Save

Save

Save

Save

Save

Answers to Your Machine Quilting Challenges – Part 6

Welcome to part 6, the final post where I’ve been offering suggestions to some of my readers’ most challenging machine quilting issues. Get more tips by reading part 1, part 2, part 3, part 4 and part 5.

Craftsy Filming Behind the Scenes

On set during the filming of my Crafty class: The Quilter’s Path where I show you how to quilt many of the quilting motifs I write about on my blog and in my books and patterns!

Problem: I have a hard time getting ideas from my head into reality.
My suggestion: I used to have this same problem until I started creating a machine quilting plan for each quilt I make. I take a picture or make a printout of my quilt top and then I figure out the quilting path I need to take to work my way around the quilt. Below is the plan I made for my Positive Direction quilt pattern.

Positive Direction Machine Quilting Plan

Problem: I’m not sure which batting to use.
My suggestion: Try out a different batting for the next several quilts and see how each performs. Take note of the shrinkage, softness and what the quilting stitches look like. Some battings like cotton, will make the quilting appear more flat because it doesn’t have a lot of loft. Others, like polyester or wool will give a better stitch definition because they are more lofty, or puffy. My favorites are cotton, wool and soy.

Problem: Too much time passes between quilt projects and I feel like I’m losing my skills.
My suggestion: machine quilting is like learning a musical instrument: the more you practice, the more you’ll be able to “play.” If you are in between projects, keep a stack of small scraps of fabric and batting to stitch on for a few minutes each day. Just quilting for 5 min each a couple times a week will keep your quilting muscles in shape!

Machine Quilting Practice

Problem: I get discouraged whenever I compare myself to other quilters’ skills.
My suggestion:
Anyone who has just started their quilting journey will definitely go through this. It’s one thing to be inspired and another to feel inadequate. Just remember that it takes a lot of time and practice to get good at anything. I always encourage newer quilters to embrace walking foot quilting first because it’s pretty much fool-proof. Then, move onto tackling free-motion when you are more comfortable.

Walking Foot Quilting

I always teach walking foot quilting before moving onto free-motion. It’s virtually goof-proof!

Problem: How do I get out of the “stipple” rut?
My suggestion: I recommend collecting as many books as you can about machine quilting, taking a lot of classes, and seeing quilts up close and personal. Start sketching quilting motifs that appeal to you and try them on your quilts. If you have a toolbox full of 4-5 designs you really like, you can mix them up and quilt them in different areas of your quilt!

Problem: I want to try ruler-work quilting but I’m not even sure where to start.
My suggestion:
enroll in my friend Amy Johnson’s Craftsy classes on ruler work. She has two of them and pretty much covers all the basics. It’s amazing what you can do with specialty rulers on your domestic machine.

Quilting with Rulers on Your Home Sewing Machine

Click here to learn more about ruler work and see a class preview.

Problem: I don’t want to practice, because I hate wasting fabric on “learning.”
My suggestion: I don’t think “learning” is ever a waste. 🙂 However if you want to make something practical out of your practice sandwiches, create a stitch journal. Try out different quilting designs on similar sized practice pieces. Write on each which thread you used and other details like stitch length, batting etc. Then get some grommets or a key chain and punch a hole in the corners of each sample to link them together. Whenever you are stumped on an idea, refer to your journal for inspiration!

Problem: I’m not coordinated when it comes to machine quilting. It feels awkward.
My suggestion: when I started quilting it felt weird too, and I still can’t get the hang of longarm quilting (which is why I stick to a sit-down machine). Try to position your quilt and yourself a few different ways to see if you can get in a comfortable position. Quilting is a skill that requires a different muscle movement than anything else so it can take awhile for it to feel more natural. Don’t give up! Also try different hand positions when quilting. Try keeping your hands flat, raised, or gripping the edge of the quilt to see which feels more comfortable.

All Craftsy Classes on SaleClick here to see which classes are on sale, including mine!

I hope you’ve enjoyed these tips! If you haven’t already done so, be sure and enroll in my Craftsy Class, The Quilter’s Path. All brand new Craftsy classes are on sale for $19.99 or less this weekend only! Sale runs from today through Sunday, so stock up on this massive sale!!

Machine Quilting Tips

Save

Save

Save

Save

Save

Save

Save

Save

Save

Save

Save

Save

Save

Save

Save

Save

Save

Save

Save

Save

Save

Come See Me at QuiltCon in The Electric Quilt Company’s Booth!

QuiltCon, the 4th annual modern quilt show put on by The Modern Quilt Guild is coming soon! It will be held in Savannah, Georgia from February 23-26, 2017 and I can’t wait! I’ll be teaching 5 classes and giving a lecture which are all sold out! However, if you are attending and didn’t make it into one of my classes, I’ll be doing a book signing and meet ‘n greet in The Electric Quilt Company‘s booth #337 on Friday, February 24, from 12-1 PM.

Amy Friend and Christa Watson at QuiltCon 2017

Following mine, you’ll get a chance to meet another EQ7 ambassador, Amy Friend who just released her second book! She’ll be in the booth on the same day from 1:30-2:30. If for some reason you won’t be there that day, you can still stop by the booth see some of our quilts “in the cloth.” They’ll be on display in booth #337 for the entire show.

During my book signing, I’ll have copies of both of my books available for purchase and I’ll be happy to sign anything else you would like as well (a quilt, my patterns, your arm…. the possibilities are endless!!) And you can even just stop by and chat for a few minutes if you want – it’s always fun to meet fellow quilt enthusiasts!!

Christa Quilts and EQ at QuiltCon 2017

Both Amy and I love to design in EQ7 because we can see what our finished projects will look like before we begin cutting! I designed 11 of the 12 quilts from Machine Quilting with Style in EQ7. (The 12th was actually designed by my husband on his iPad). When you stop by the booth at QuiltCon, you’ll get a chance to see my actual computerized renderings in the booth! I think it’s fun to see them side by side next to an image of the real quilt. In fact, my favorite feature of the software is being able to import swatches of any fabric I want so that I can see audition different possibilities ahead of time.

I have more “extra” events scheduled, so stay tuned for details and I hope to see you there!

Save

Save

Save

Save

Save

Save

Save

Save

Save

I’m Now on Pinterest!

Over the last couple of years, I’ve been slowly adding more social media channels to my network. Some I’ve enjoyed immensely, others not so much. I started off with my blog way back in 2010, tried Flickr for awhile before everyone abandoned it for Instagram. I got serious about my email newsletter in 2013, then joined the Instagram bandwagon in 2014. I added Facebook in 2015 and then did a short-lived stint on Periscope in 2016. Now in 2017 my goal is to tackle Pinterest.

Christa Quilts on Pinterest

Since I’m new to the game, I don’t have a ton of followers yet, but If you’d like to follow me on Pinterest, click here. I’d love to have you!

Although I enjoy social media, each time I add something new, it’s a huge learning curve for me. But, since LEARN is my word for 2017, I’m embracing the process! if you are a regular Pinterest user, please leave me a comment letting me know how you use it, or any tips you’d like to share.

Save

Save

Save

Answers to Your Machine Quilting Challenges – part 3

As we continue on with this series of trouble shooting your machine quilting challenges, be sure to read part 1 and part 2 for more helpful advice. And now, onto more suggestions:

Christa Watson of Christa Quilts

My goal is to help you love machine quilting as much as I do!

Problem: keeping size consistent on large scale designs
My suggestion: I have found that when it comes to domestic machine quilting, it’s much easier to quilt smaller scale designs because you have less room to work on the bed of the machine, compared to a long arm. If you want to quilt a larger scale design, I suggest marking it. Or if you are quilting a large scale textural filler, keep something nearby that is roughly the same size (such as a drawing of the motif, or a 3D item) so you can constantly refer to it for scale.

Problem: maintaining good speed control
My suggestion: free-motion quilting requires you to balance the speed of two things at the same time: the rate at which you push the quilt through the machine, and how fast your machine stitches. It’s like driving a car with a manual transmission for the first time – it takes some getting used to. Work on starting with a slower speed and aim for smooth stitches. Be sure and take a few “test drives” on practice scraps before you head out on the highway (quilting the real quilt)! Once you are comfortable with the process, then try to increase your speed.

Problem: I can’t get smooth curves
My suggestion: try a more modern, geometric design such as square boxes, triangle texture, or a more jagged stipple. Some people seem to have a natural inclination to quilt either curving or geometric shapes. If you struggle with either, practice quilting one design on a large section of the quilt with blending thread and don’t criticize yourself too harshly. It will get better with practice. Also, spend time sketching out your design on paper so that you can practice drawing the smooth, fluid shapes.

Triangle Texture and Pebble Quilting by Christa Watson

Try quilting both curves and angles to see which you like best. This is detailed quilting of “Broken V” from my book Machine Quilting with Style.

Problem: skipping stitches, nesting issues, thread breakage
My suggestion: these problems are usually caused by one or more of these factors – wrong needle size for the thread you are using; bent, nicked, or dull needle; incorrectly threaded upper thread; tension too tight; bobbin inserted incorrectly; machine not oiled or delinted often enough. Be sure to always thread with the presser foot up and then trouble shoot each of these issues one by one. A tiny silicone disc called a Magic Genie bobbin washer can also help on machines that don’t have built in bobbin sensors.  If all else fails, it may be time to take your machine in for service.

Problem: I don’t like free motion quilting
My suggestion: that’s perfectly fine, you can quilt tons of designs using just a walking foot! In my Craftsy class and in my books, I show how you can quilt several differnt quilts completely using walking foot techniques. Also, Jacquie Gering just wrote a fantastic new book called Walk that goes deeper into this subject.

Walk by Jacquie GeringClick here to preview Walk by Jacquie Gering.

Problem: I don’t know how to quilt a quilt that has a lot of blocks, like a sampler.
My suggestion: I’d go either super custom or super simple. An allover design either quilted with a walking foot or free motion is the easiest and would be quilted regardless of the piecing or block designs. This type of quilting adds a layer of tecture to the piece, and if done with a blending thread, becomes secondary to the overall design of the quilt. However, if you want to draw attention to the individual blocks, then custom quilting each one and treating it as a separate element is the way to go.

Free Motion Quilting a Sampler

I’d suggest taking a look at Leah Day’s Craftsy class, Free-motion Quilting a Sampler as a great place to start!

Problem: getting stuck in corner, missing areas in allover designs, getting boxed in 
My suggestion: Contrary to what the quilt police might think, it’s reall okay to stitch over previous lines of quilting, or cross over your lines if needed. I usually like to sketch out a quilting plan on top of a picture of my quilt top. That allows me to plan out the direction I’ll take to quilt each section of the quilt.

I hope you are enjoying these machine quilting tips. I love being a cheerleader for “do it yourself” quilting and I try to make the process as approachable as possible. I’ll be back again next week with more suggestions!

Save

Save

Save

Save

Save

Save

Save

Save

Save

Save

Save

Save

Save

A Gallery of Award Winning Quilts from 2013 to Present

I’ve been reorganizing my blog and decided to create a page showcasing my award-winning quilts since 2013. This was a turning point in my quilting career because it’s when I began entering modern quilts into national shows. Up until this time I had been making mostly traditional quilts and entering them into my local guild’s show. But after entering and attending QuiltCon back in 2013, I came home on fire, wanting to write books, travel to teach, and compete nationally. It’s been a fast-paced but fun 4 years!!

I created this page mostly as a means for me to keep track of which quilts have won awards since then. Please enjoy  this walk down memory lane with me:

Facets

From my book Machine Quilting with Style

Facets Quilt

  • 2nd Place, Modern – AQS Quiltweek, Paducak KY 2016
  • Teacher’s Choice ribbon, Lori East – MQX Quilt Festival Midwest 2016

Fractured Puzzle

A modern remake of my free Puzzle Box quilt pattern

fracture_puzzle_2nd_place_ribbon

Plumb Lines

From mine & Angela Walters’ book The Ultimate Guide to Machine Quilting

HMQS quilt show

Modern Logs

Individual Pattern Available

modernlogs

Colorful Chevrons

Individual Pattern Available

colorfulchevrons

  • 3rd place, Single Entrant Small – DQN Quilt Show, Las Vegas, NV 2015
  • Founder’s Award – MQX Quilt Festival Midwest, 2014
  • 3rd Place – Modern – AQS Quilt Show Paducah KY, 2014

String of Pearls

Individual Pattern Available

20140404_stringofpearls_dqn

Now I can’t wait to make and enter more of my work. I enter a lot of quilts, and most of them never receive any kind of recognition. So why do I do it? In all honesty, it gives me a deadline to shoot for, or I’d never get anything done. When one of them actually does win a ribbon, that’s like icing on the cake!

Answers to Your Machine Quilting Challenges – Part 1

While promoting the launch of my new Craftsy Class, I asked folks on Instagram what their #1 challenge was when it comes to machine quilting on a home sewing machine. It generated a lot of great comments, so I thought I’d try and tackle them here. There were so many great questions that I decided to break them up into multiple blog posts.

christaquilts

Click here to get 50% off my class, once it’s in your cart. Coupon expires 4/4/17.

Problem: Tension
My suggestion: Try and adjust the top tension first. If the bobbin stitches poke through to the top, the top tension is too tight, so lower it. If the top stitches show up on the back, the top tension is too loose, so tighten it. Always thread the needle with the foot up to engage the tension properly.

Problem: Choosing Quilting Designs
My suggestion:
Pick one or two designs you like and then go for it. You can pick one design to quilt allover, or break up the design into blocks and background and quilt a different design in each area. Once you are comfortable with a few designs, it will get easier to combine them together. My books are a great resource containing dozens of different designs for you to try.

Problem: Not Knowing Where to Start
My suggestion:
Divide and conquer! Quilt what you know you can easily do first such as stitching in the ditch along the major seam lines. I call this “anchor quilting” which helps stabilize the quilt for more intricate quilting later. I prefer to start on the right side of the quilt and work my way across the quilt, then fill in smaller and smaller sections. My Craftsy Class, The Quilter’s Path, covers this subject in great detail.

free-motion-quilting

Practice won’t necessarily lead to perfection; but it will help you make progress!

Problem: Movement and Stitch Length Consistency
My suggestion:
Practice makes progress. It’s easier to get consistent stitches with a walking foot because the machine is doing most of the work for you. However, when it comes to free-motion, it’s a whole different movement. You need to smoothly guide the quilt under the machine, yet with enough force to push it through at an even speed. In essence, you do the work of the feed dogs since they are covered or disengaged while free-motion quilting. For consistency, a stitch regulator can help, especially for beginners. Also, slowing down can help. Aim for a smooth, fluid movement that begins to feel more natural over time, the more you practice.

Problem: Quilting a Large Quilt on a Small Machine
My suggestion:
Take it one step at a time and remember that only a small area of the quilt is being quilted at any time, so there is a lot of constant scrunching and smooshing to get it out of the way. Aim for designs that don’t need you to turn the quilt very much (such as gentle wavy lines). Also, quilt on the largest table surface you can find. When it’s time to upgrade your machine, get the widest throat/harp space (the area between the needle and arm of the machine) that you can afford.

pastel_quilting

Imperfect wavy lines look great every time and are quick, fun, and easy to do!

Problem: I am afraid I’ll ruin my quilt top.
My suggestion:
Practice on small “cheater” panels first. Turn them into baby quilts and give them away so you don’t have to be reminded of your beginner progress. (Or keep a few to see how far you’ve come!) Take time to make a couple of extra pieced blocks and practice quilting those first so you can see what your design actually looks like before you spend time on a whole quilt. Finally, if you are just starting out, choose an easy design to quilt with your walking foot such as a wavy grid, or a forgiving free-motion design such as random loops. This will give you confidence to keep going, knowing that you can quilt one or two designs that actually looks good!

I hope these suggestions help! If you have a quilting problem you don’t know how to tackle, please leave a comment. I’ll try to include suggestions for as many of them as possible in next week’s blog post! You can also post photos of your trouble spots in my facebook community,  and fellow group members can help make suggestions.

My Craftsy Class is Now Live – Save 50% on The Quilter’s Path: Plan It, Stitch It, Quilt It

My class, The Quilter’s Path: Plan It, Stitch It, Quilt It is now available online. I’m so excited for you to join my classroom where you’ll have direct access to me – 24/7!! And the best part is, for a limited time, you can save 50% using my exclusive instructor discount! But here’s the catch: it’s available only from me using this link and you won’t see the discount until you actually put the class in your cart. So be sure it shows up before you check out. 🙂

the-quilters-pathClick here to add The Quilter’s Path to your cart and save 50% off the regular price!

As you view the videos, you can take notes, ask questions, and upload images of what you are working on. It’s a great place to get quilting advice from me, or to trouble shoot any issues you are having. My Craftsy class is a dedicated space where I can help you one on one, and I’m really looking forward to it! I like to think of it as 2+ hours of engaging video, along with unlimited coaching. 🙂

navy-pinwheels

Learn how to quilt an easy but effective wavy grid using your walking foot! This is just one of the many quilting motifs I’ll show you how to do with your walking foot, free motion, or both!

In The Quilter’s Path, it was very important for me to show you how to quilt on real quilts and blocks during class, so the class materials include a free pattern for the Pinwheels quilt. I’ve made it in three different colorways (navy, pink and teal) so that you can see how changing the fabrics and the quilting can totally change the look of the quilt!

pink-pinwheels-quilting

You can easily quilt your own quilts when you find your quilting path!

Here’s an actual screenshot from class so that you can see what the platform looks like. There’s a detailed menu bar where you can find the lessons and class materials, as well as take notes and post projects. On the right hand side of your screen, you can ask questions and read the Q&A of other class members. You can also hide this part of the screen if you don’t want to view it.

video-screenshot

The best thing about asking a question and interacting on the platform is that all of the other students can see your projects and discussions, too. I honestly think you learn as much from the Q&A as you do in the class itself! And remember, my philosophy is that the only dumb question is the one that is never asked!

During class,  I show how to quilt effective designs using a walking foot (or dual feed), free-motion techniques, and combined designs to create a truly custom look.

Click here to enroll in The Quilter’s Path and let me help you become a better quilter!

the-quilters-path

Christa’s Soap Box – Why I Enter Quilt Shows and a Few More Thoughts

It’s been awhile since I’ve written a series of “soap box” articles. These aren’t meant to be controversial, but rather a chance for me to gather my thoughts on certain topics and share them with you. It’s great to have a conversation about quilting that goes a little deeper than the usual quilt tutorial or eye candy inspiration. I’ve been so crazy busy over last year that I’ve barely had time to think big thoughts, let alone share them with you, LOL!!

Participation Ribbon

My first national quilt entry was QuiltCon 2013. At the time they gave hand made ribbons to ALL entrants. It’s the only QuiltCon ribbon I’ve ever received and I love it to death!!

Quilt show season is upon us so I thought I’d write a little about why I like to enter my work into shows. I do it for three basic reasons:

  1. To give myself a deadline to shoot for. I’ve realized that if I don’t give myself a deadline to do something, then it just doesn’t happen!!
  2. To share my work with a wider audience. Because quilting is my job (and IMHO the best one in the world!), it behooves me to come up with creative ways to get my name out there.
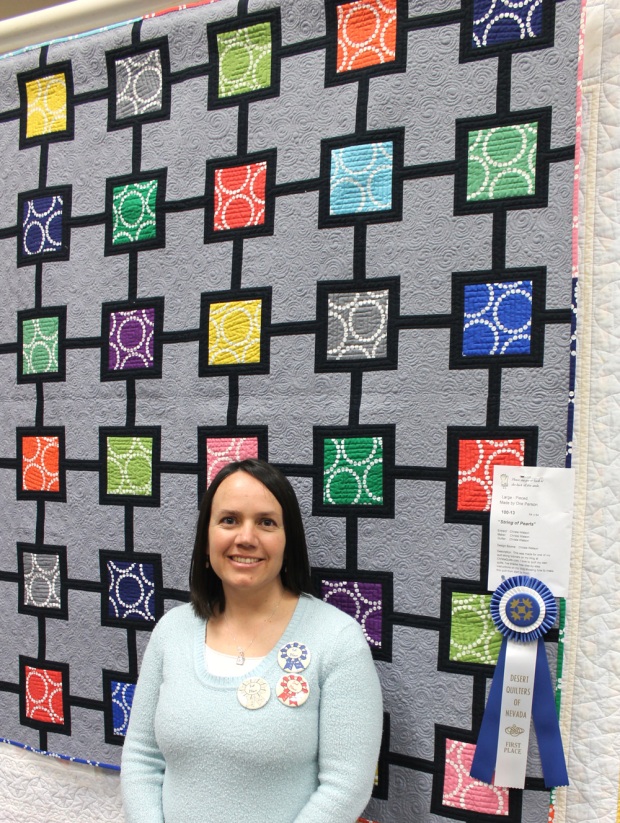
  3. Because it’s fun to see my quilt hanging in a big show and sometimes, on a lucky day, I just may snag a ribbon.Fractured Puzzle RibbonSome shows give monetary awards while others don’t. It depends on the show.

Now, I have to say, entering a show isn’t for the faint of heart. Most large shows are juried, which means that if there are more entries than spots in the show, a small panel of jurors will look through all of the entries and select what they feel will be the best representation for a show. Getting into a juried show can be thrilling; getting rejected can feel like a punch to the gut, especially if you made a quilt specifically for that show.

Facets Quilt

Facets got a ribbon at AQS Paducah, but was a “quiltconreject” for 2017, along with 4 other entries. That’s ok because I know it’s a very subjective process – you win some, you lose some!!

Plus, it’s expensive to enter shows. The average price of entering a quilt in a large show can range anywhere from $10 to $25 per quilt, or more, and there’s no refund if you quilt doesn’t get accepted. Then you have to pay for the shipping, depending on the show it can either be one way, or both!! I look at these costs as business expenses (again, because it’s part of my job), but they can definitely add up!

quiltcon-rejects

For the record, here are the other 4 quilts I entered that didn’t make it into QuiltCon: Candy Pop, Feathered Chevrons, Lightning, Square in a Square. I had my 5 second pity party and then I moved on. Each of them has already been in another show, or will be shown in one soon.

With many of us sharing our work online and in social media, getting likes and positive comments all the time, it can feel a bit jarring when the quilt show circuit isn’t all unicorns and rainbows. But in the end, whether a quilt gets into a show or not, or whether it wins recognition or not, I think it’s still tons of fun to try.

Many people enter larger shows forgetting that there are a ton of local opportunities, too. I entered my local guild’s show for many years (and still do), until I finally got up the guts to enter my first national show (QuiltCon in 2013). I knew the competition would be fierce even the first time around, so I did a lot of research into what makes a “show quality” quilt and did my best to adhere to those standards (a clean and appropriately quilted quilt with square corners, flat edges and evenly applied binding). Luckily, one of them got in back then, and each year I’ve submitted, I’ve gotten both rejections and acceptances.

diamonds_quilting

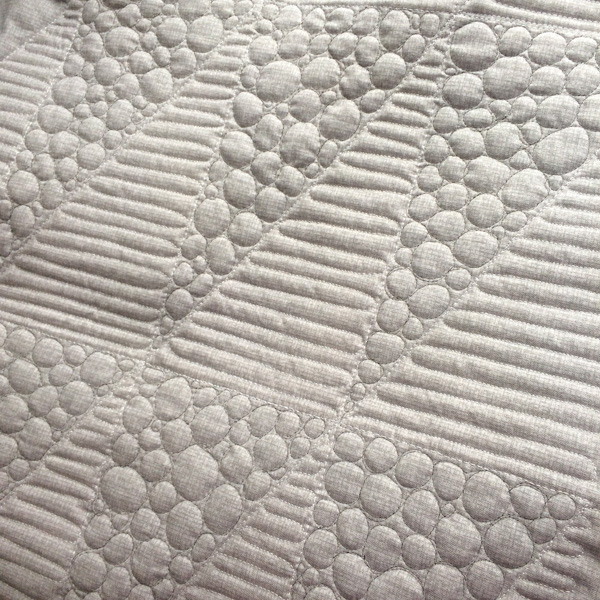
The back of my QuiltCon 2017 accepted entry. It’s all I can show for now since it’s for publication. It’s quilted as heavily as those that were rejected, so it’s all just a big crap-shoot anyhoo!! 🙂

I also enter lots of other shows on a regular basis, too, so I know the drill. However, with each entry, it’s still nerve-wracking, knowing I could be kissing my hard earned money goodbye. Quilting is definitely an emotional outlet and there’s always raw feelings –  elation when one gets accepted and dejection when one doesn’t. But I can say the more shows I enter, the easier it gets. They are all run with similar rules and deadlines so once you know the system, it’s easier to get into a routine.  Plus, the rejections get easier to handle, too. And here’s the biggest tip I’ve learned with quilt shows – enter ALL of them! What gets rejected from one show has many times gotten a ribbon at another show. So you never really know until you try.

fractured-puzzle_resizeMy entry into the MQG challenge that didn’t make in into QuiltCon 2016 but went on to win an award at MQX later in the year. If at first you don’t succeed, try, try again – until you are tired of trying and then it’s totally fine to move onto something else!!

So if you are thinking about entering a show, or nursing your wounds from not getting into one that you really liked, just remember your work is amazing because you did it. I bet you had a great time, making it, too. And if quilt show entering is not your thing, that’s totally okay! It definitely takes a thick skin to get over feeling rejected and it’s hard not to take it personally. But here’s one thing I can guarantee: if you share your quilts with me and my facebook friends, we would absolutely love to see them and will give you a virtual high-five!!

Related Reading

Here’s a roundup of posts I’ve written on similar topics – there’s a lot of info here:

List of shows to enter with modern categories:

**Disclaimer*** I welcome your considerate and thoughtful comments on this post. This article came about as my response to all of the chatter about QuiltCon on instagram over the last few days, both positive and negative. If you want to see an amazing virtual quilt show, check out the hashtags #quiltcon2017 and #quiltconreject. There’s some amazing work that just blows me away!!