Lil Rascals Charm Pack Quilt Part 2 – Machine Quilting

Last Thursday I posted instructions on how Lil Rascals Charm Pack Quiltto make this cute Li’l Rascals quilt top from just one charm pack and a yard of coordinating fabric.

If you are following along, feel free to post comments or ask questions about the project and I’ll do my best to answer!

This week I am working on machine quilting the 9 patch blocks with a free-motion wavy plaid design. Next Thursday, I’ll blog about marking and quilting the borders and sashing with a stencil.

I was really excited about doing something different with this quilt. I have stippled myself silly over the last 4-5 years and I’m ready to move on to new textures and designs.

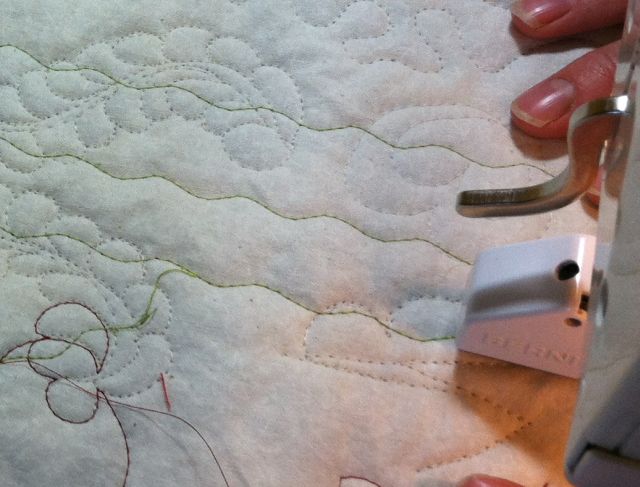
Wavy Plaid PracticeI was inspired by Leah Day’s Loose Weave quilting from her  Daisy to Paisley book of free motion fillers. I stitched out a practice sample on scrap fabric, then set to work on my quilt.

The long wiggly lines were easy to quilt without marking. My design is called “Wavy Plaid.”

First, I quilted long slightly wavy lines down the length of each 9-patch block. I used a thin polyester thread that seemed to blend in with most of the fabrics. I wanted the texture to show, not the thread! I quilted 4 sets of double rows per block and kept them sort of even.

Vertical Lines Quilting

Next, I quilted the same type of wavy lines going across the width of the blocks. I did have to rotate my quilt so that I was quilting either up or down the quilt the entire time. When I tried to quilt from side to side, my thread kept breaking.

Wavy Plaid Quilting I love the freedom this design gave me. Nothing had to be perfect and the quilting added lots of gorgeous texture!

Echo LinesTo create the double lines, I quilted an echo outline with my free-motion foot, using the edge as my guide.

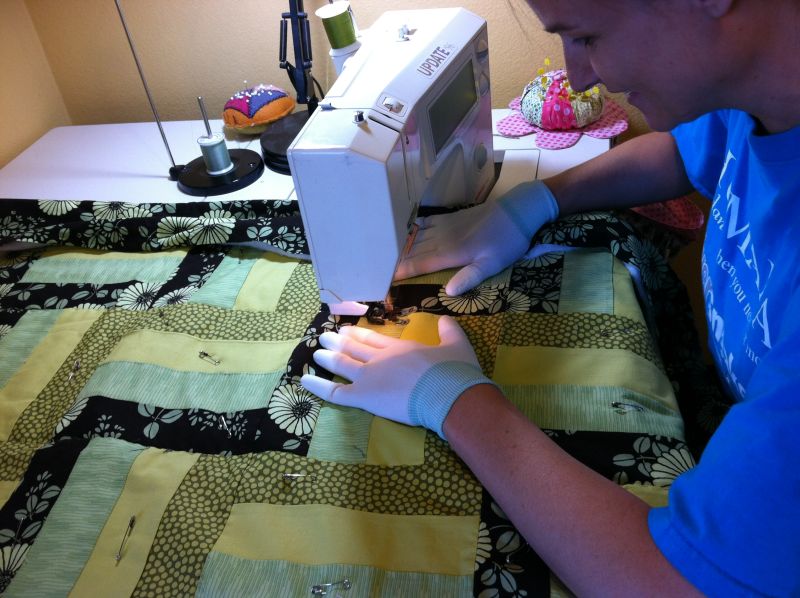
I dropped the feed dogs on my machine, used a Supreme Slider underneath the quilt to help it slide around smoothly, and stitched while wearing Machingers Quilting Gloves. The right tools make all the difference!

By the way, in case in case you need it, here are links to my mini-tutorials on pin basting, and sewing a pieced backing.
Loopy Quilting

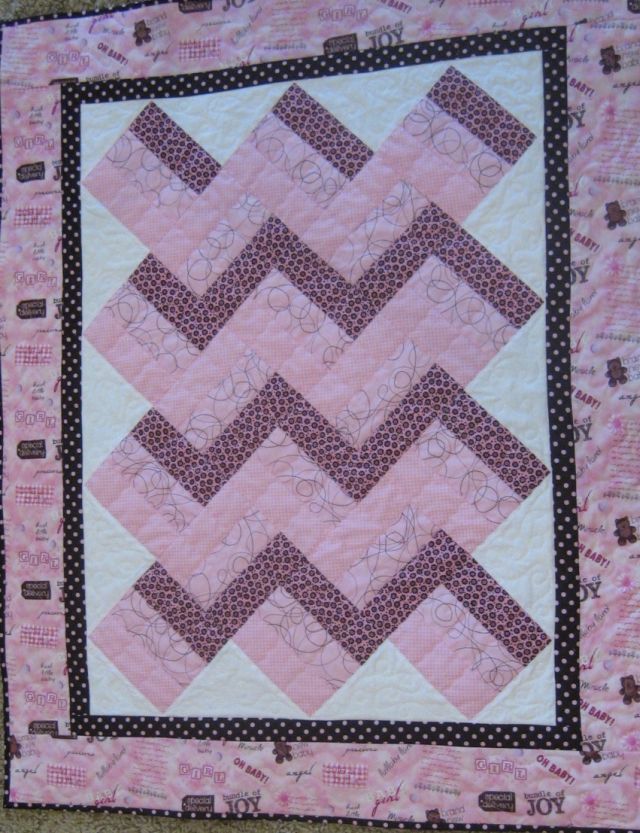
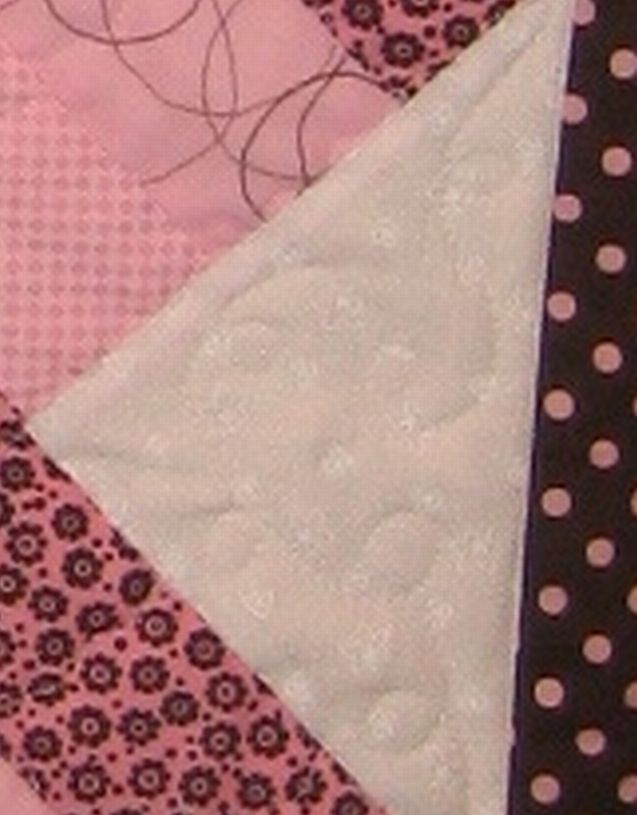
I made this cute pink and brown baby quilt a few years ago and wanted to share the loopy quilting I did in the border triangles surrounding the blocks. My inspiration was taken from the loopy pink and brown fabric in the blocks.

Pink & Brown Baby QuiltThis quilt was super fast to make. It’s a simple rail fence set on point.

The blocks are made from 2 1/2 inch strips. I  sewed 9 coordinating pink and brown strips Loopy Quiltingtogether (3 strips each of 3 different colors) and cut them into 6 inch finished sized blocks (6 1/2″ unfinished).

I made a total of 18 blocks with cream colored setting triangles. I added a 2 inch inner border and 5 inch outer border.  It finished around 41″ x 50″ – a great crib sized quilt.

Here’s a closeup of the loopy quilting – a great way to finish a quilt in a hurry!

I made the top before the Jelly Roll craze but it would be fun to make a scrappy version using pre-cut strips, too.

Weight Loss Week 9 – Drink Lots of Water

ItDrink Lots of Water can’t be stressed enough during the hot summer weather how important it is to drink plenty of water!

My weight loss plateaued this week, with nothing lost. That means I didn’t gain weight either so I’m still happy about that. What with all the summer parties and barbecues, eating opportunities abound. My total weight loss is 14.8 pounds gone. It’s staying off and it’s not coming back! Click here to read last week’s report.

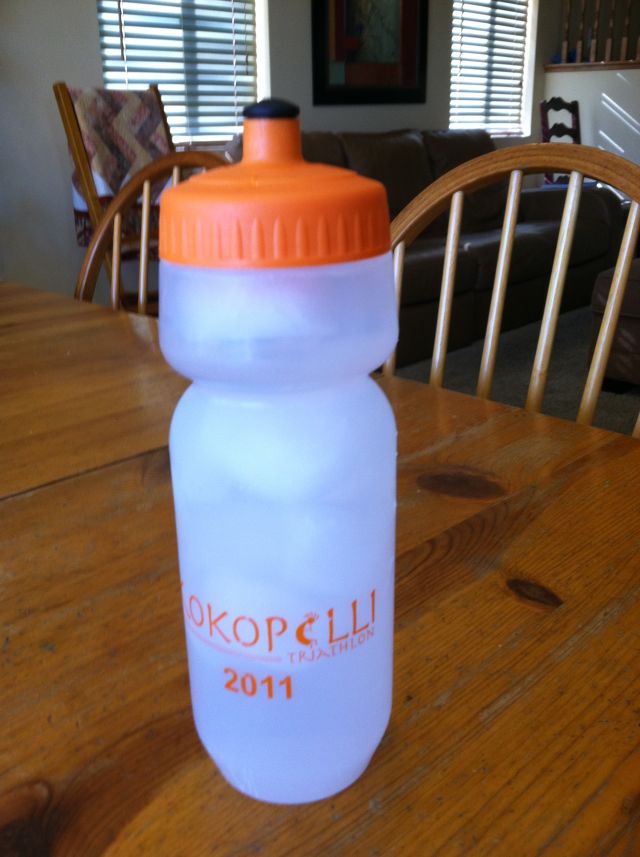
One of the easiest ways to stay the course is to keep drinking lots of water and that will magically “flush” the pounds away! I shoot for 8-10 glasses each day. My favorite water bottle  holds about 3 cups so I only have to drink about 3 of these a day to stay hydrated.

Here are this week’s tips on how to chug enough water every day!

1. Fill up a large water bottle and keep it by my side at all times. It’s amazing how much water I can drink with just a sip or two here and there. I also fill it up with lots of ice when I head out to run errands. On a hot day, I can drain the container very quickly!

2. Drink a full glass of water before each meal. Not only does that knock out at least  3 cups of water out of my daily total, it helps my tummy feel fuller quicker so I’m less tempted to over eat!

3. Remind myself of the added benefits of drinking enough water. When I drink enough water I’m less likely to get dehydration headaches. Plus,  I heard recently that drinking plenty of water also helps speed up your metabolism so that’s an added bonus.

4. Water down the drinks. If I am at a party where they are serving soda or lemonade and I want just a little, I’ll water it down. That decreases the calories and increases my water intake, too.

Here’s to a thirst-quenching week!

Soapbox – Quilt Your Own Quilts

I’m starting off on my soap box this week with a plea – try machine quilting your own quilts.

Now, before I have any long-armers getting upset with me, I do understand that there is a time and a place for beautiful long-arm quilting and quilting for hire. However, when I used to teach beginning quiltmaking classes years ago, I always encouraged my students to make at least one quilt from start to finish, so that they would know what the process entailed.

And you know what? Just about all of them went on to make many more beautiful quilts with the confidence that they could indeed, quilt their own quilts.

Quilt Your Own QuiltDo you need to have a fancy machine to be able to quilt your own quilts? No! You can even do decorative machine quilting with a walking foot. My friend Tamara came over so I could teach her how to machine quilt her lovely green rail fence that she pieced. We basted it together several months ago – you can read about that here.

This is Tamara’s first quilt so I started her off with an easy wavy stitch using the machine’s walking foot. It’s called a serpentine stitch and rather than quilting in the ditch, the stitch wiggles back and forth creating a really cool texture without the need for perfection. You can see her practice piece below and then how it looks on her actual quilt.

Serpentine Stitch PracticeQuilting CloseupShe’s going to fill in all the seam lines with this wavy serpentine quilting and it’s going to create a wonderful texture on the front and the back.

Click the pictures for larger images.

So I implore you – try to machine quilt at least one complete quilt before you give up and begin to “quilt by check”. Take as many machine quilting classes as you can to learn this fun technique.  Read as many books, watch as many demo videos, and scan as many blogs about free-motion quilting as you can.  I promise, once you get the hang of it, you’ll be hooked!

Sew and Tell – Call for Entries

Many of my customers and friends regularly email me pictures of completed projects that they’ve made with fabric purchased from me. I love to see all the talent and creativity out there and to I get excited when fabrics are used in new and different ways.

This got me to thinking… I would love to see  more of these finished fabric objects (FFO’s), not only to share with my blog readers, but also to inspire me to spend more time sewing!

So, with that in mind, I want to announce a call for entries that I can showcase on my blog.

To participate, simply email me at christa@christaquilts.com with nice clear pictures of your finished quilts or sewing projects that you’ve made using at least one fabric purchased from me. Include as much detail as you like, such as the reason you made it, your inspiration, and anything else interesting about your creation.

If I feature your project on my blog, I’ll send you a $5 gift certificate to use on any purchase in my shop, as my way of saying thank you for sharing!

If I get enough responses, I will be happy to feature “Sew and Tell” every Friday.

Lil Rascals Charm Quilt Part 1 – Free Pattern

Here’s a quick and easy charm pack quilt I came up with. It requires 1 Lil Rascals charm pack and 1 yard of brown Sock Monkey Texture fabric (with enough left over for binding). You can substitute any charm pack and any coordinating fabric for the sashing.

Lil Rascals Quilt TopI’ll blog about marking and machine quilting it next week. Now I will explain how to make the quilt top.

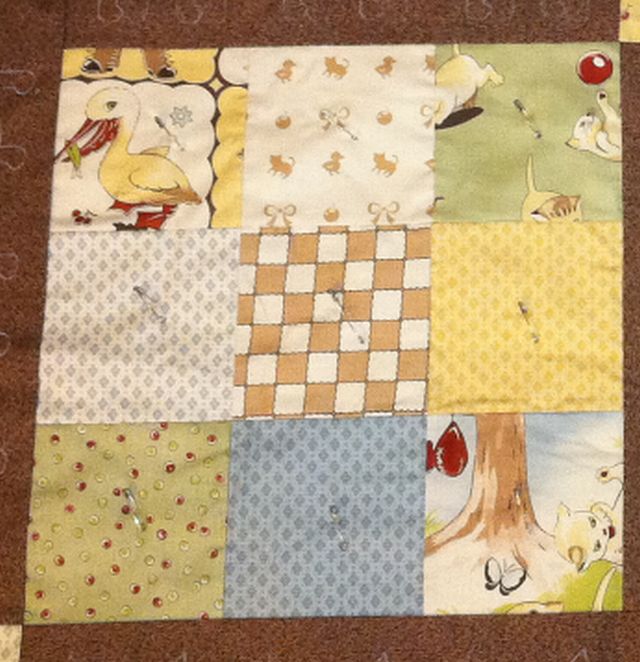
9 Patch BlockFirst, select 41 of the 42 charm squares that comes in the charm pack (you can save the 42nd square to use as a label on the back).

Arrange 9 of the squares to make one 9 patch block. Repeat for a total of 4 blocks. The charms are precut 5 inch squares, so your 9 patch block should measure approximately 14″ unfinished.

Measure your block and cut 4 sashing pieces 5″ wide by your block measurement.

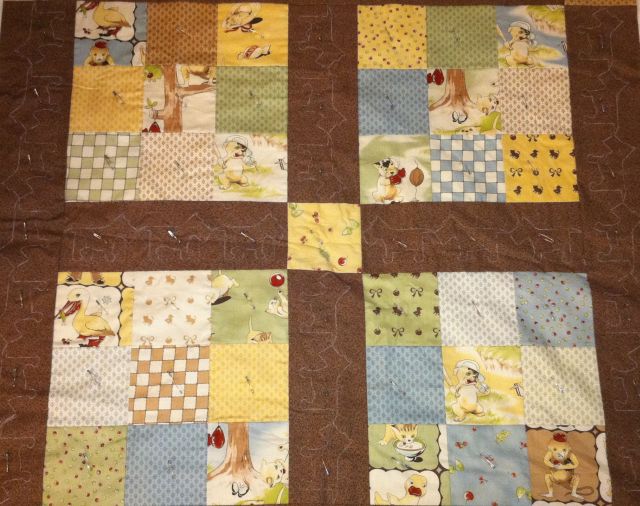
Top & Bottom RowsMake 2 rows like the picture at left. Sew a 9 patch block, sashing piece and another 9 patch block to make the top and bottom rows. Measure the width of this row (should be 32″). Cut 4 brown border strips 5″ by this measurement.

Middle RowFor the middle row, take 2 sashing pieces and sew on both sides of a charm square. Sew all 3 rows together to create the inner quilt. Press towards the brown sashing strips.

Add Side BordersSew two long border strips to either side of the quilt top, like the picture at right.

Finally, sew the 4 remaining charm squares to each side of the two remaining long border strips (picture lower right).

Add each border  to the top and bottom to complete the quilt top.

Add Top & Bottom BordersThe quilt top measures approximately 41 inches square. It’s a little too wide to use just one length of fabric for the backing.  I pieced my backing so that I had an extra 4-5 inches around on all sides.

It requires about 3 yards if you want to use the same fabric for the entire backing, with some left over. With care, you could get away with using just one 1 1/2 yard piece for the backing, if it’s at least 42 to 44 inches wide, but that’s cutting it a little too close for my taste!

To learn about piecing a backing using two different fabrics, read my post about that here. You could also sew a few chunks of fabrics for the back, or piece together a layer cake for the backing and you’d have a double sided quilt!

Feel free to share this tutorial with your friends, and let them know to come visit my blog for more quilting tips, free patterns, and fun inspiration!

Click here for step 2 – basic machine quilting

Click here for step 3 – stencil quilting

Click here for step 4 – blocking and binding

Spaceship Circuit Board Quilting

I’ve been following along on Leah Day’s Blog – The Free Motion Quilting Project. She posted a design called “Circuit Board” and I was excited to see it because it was very similar to a free motion design I had stitched on a quilt I made for my oldest son last year.

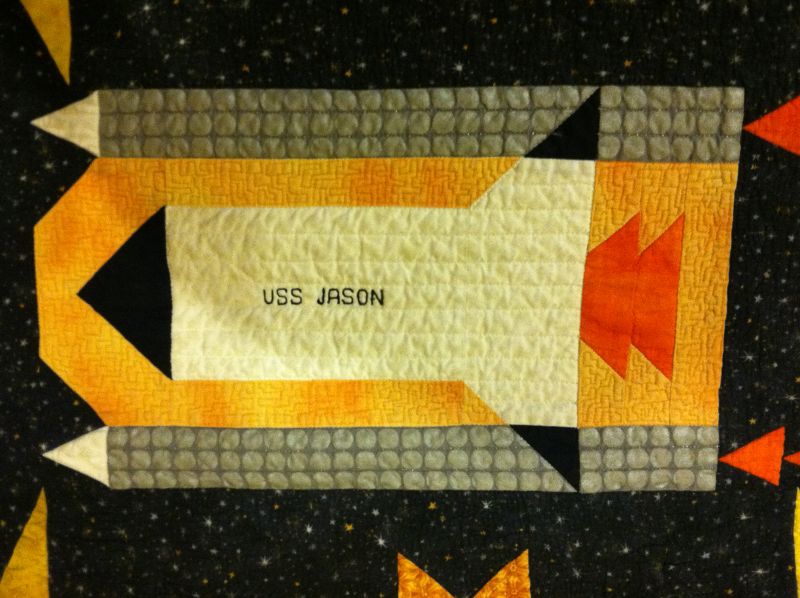
I wanted to add some texture to the Spaceship block I made for him (which he designed several years ago. ) I didn’t have a name for this free-motion design, but now I do!

Spaceship BlockI really do love quilts with lots of texture and I’ve been having fun trying out different designs and breaking away from stippling. The circuit board quilting is very easy to do – it’s like stippling but with straight lines and 90 degree angles instead of curves.  I also added some straight lines to the rocket for more texture.

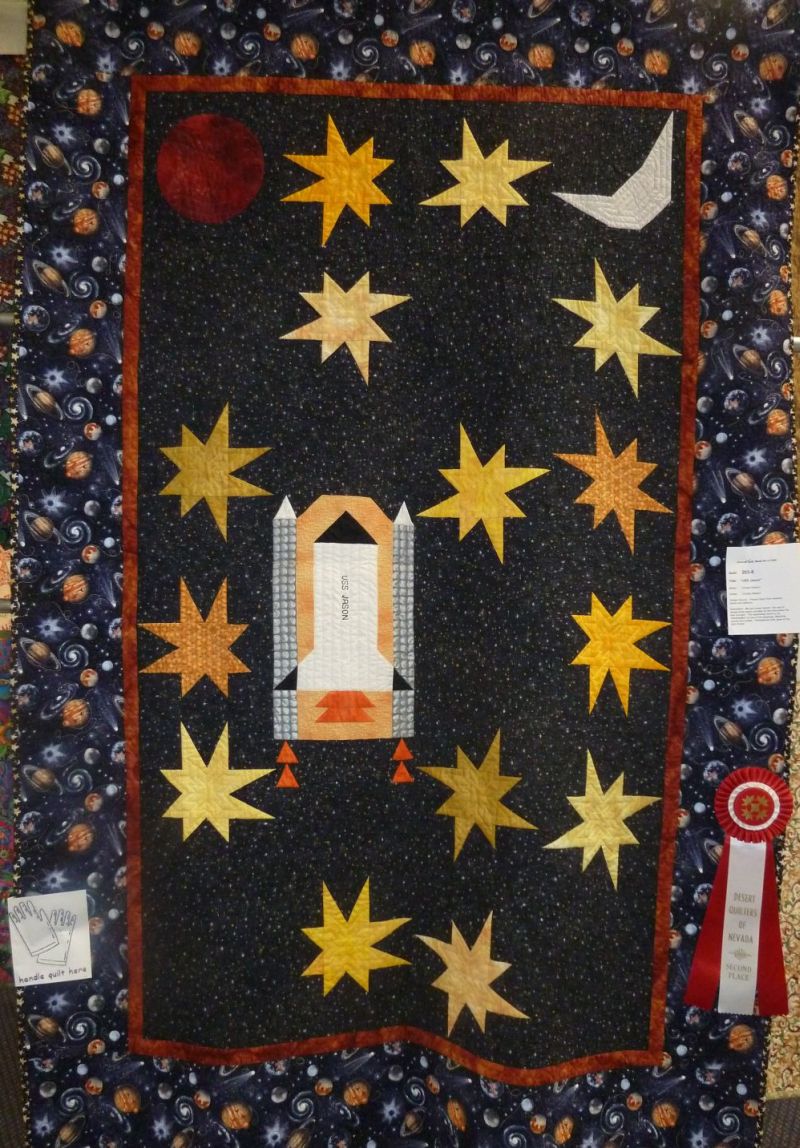
I was very excited with how this quilt turned out. I entered it into my guild’s quilt show in 2011 and it took a second place ribbon. Yay for me (and my son)!

Award Winning Space Quilt

Weight Loss Week 8 – Be Committed!

As I continue on my weight loss journey, I am happy to report another 1.6 pound weight loss this week, for a total of 14.8 pounds lost so far. I’m so close to the 15 pound mark I can’t wait! You can read about last week’s progress here.

It helps that I’ve been running again. I ran a scenic 10-mile run early last Saturday morning. The other thing that helps is that I am committed to this goal. I realized that if I’m not committed to a healthy lifestyle, I just may have to be committed…. to an unhappy life!

I really mean that. Studies have shown that people who exercise have a better outlook on life, and they have less depression and anxiety. I recently read somewhere that it may help prevent Alzheimer’s, too (or was that quilting that helped keep your mind focused? I think it may be both!) So not only is weight-loss good for one’s physical health, it can help prevent mental health issues, too!

Here are this week’s tips on how to stay committed:

1. Realize that like quilting, exercise is cheaper than therapy. Even with the cost of new running shoes every 4-6 months, or a gym membership, the cost of good health is way cheaper than the results of not being healthy! Plus, eating fewer groceries, and skipping fast foods and processed junk is a boon for my wallet.

2. See how far I’ve come. When I first started, it seemed like my goals were a long way off; but each week that I lose weight and gain fitness, the end goal seems much more realistic!

Christa’s Soapbox

I’ve come up with a new idea for my blog – I want to try and blog nearly every day and would like to start rotating through different topics on a weekly basis, with each day dedicated to a specific topic.  One idea that’s been stewing for awhile is they idea of a soapbox- my fabric soapbox where I can discuss ideas that I’m interested in, and generate some conversation about whatever the topic of discussion is.

Sometimes the topics may be a little controversial, but they’ll be mostly quilt-related (quilting controversy-what’s that??). We quilters and sewing enthusiasts can be quite opinionated when it comes to our craft so I welcome discussion, debate and ideas.

I think I’ll start posting my soapbox once a week on Saturdays.  I’m mostly done with my work for the week by then so that gives me a little time more time to write. I’ve already got lots of great ideas for discussion that I’ll start with next week; for example, my opinions on quilting your own quilts, whether or not to pre-wash fabrics, what makes the best quilting thread, why “premium” quilting fabric is so expensive compared to Wal-Mart, etc., etc!

If you have an idea you’d like to chat about, please post a comment. I’d be glad to discuss it!

A Productive Week

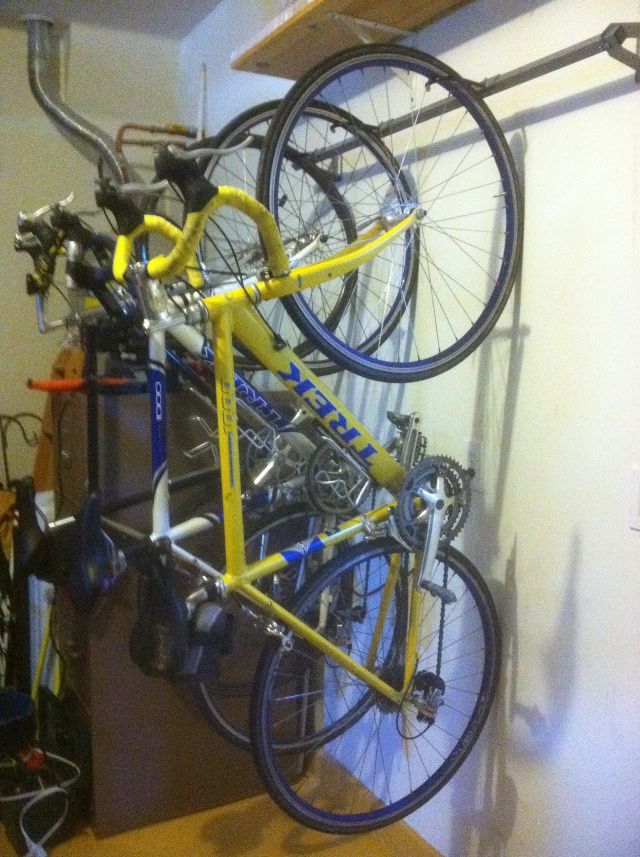
MyBike Rack children were gone on vacation for over a week, but they are now back home safe and sound! Jason and I were able to get quite a few projects done around the house while they were gone…..

We cleaned and scrubbed the stove, scoured the bathrooms and mopped the entire house. (We have lots of tile so that’s a big job).

Plus, Jason was quite the handy-man. I love Honey-Do projects!

He helped me clean our work area &  install a bike rack in the garage. What a space saver!

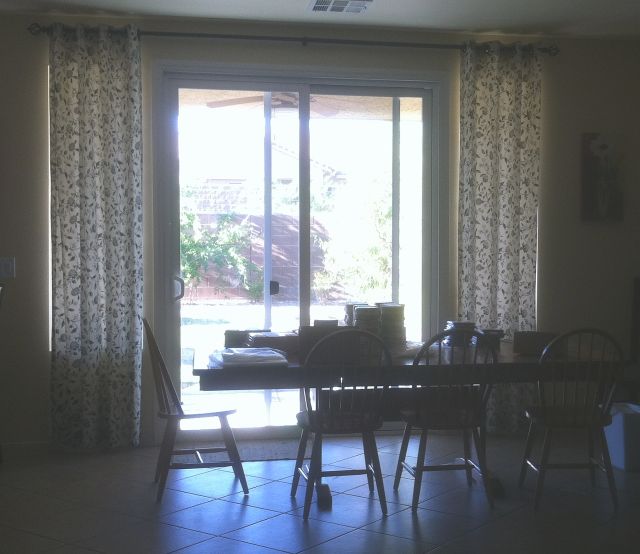
New CurtainsWe also hung some curtains over our large sliding glass windows. (Yes, those are stacks of Jelly Rolls and Charm Packs on the kitchen table – waiting to be bagged and labeled.)

I love these new curtains and the picture just doesn’t do them justice – there’s too much light coming in from the back window. My friend Jessica made these curtains for her house, but she and her family recently relocated out of state so she gave them to me when she moved rather than throw them out. I love these kinds of hand-me-downs!!

We made lots of plans for how we are going to accomplish our seemingly unending task list: we’ll just do a little bit each week. After all, Rome wasn’t built in a day and it will certainly take longer than that to get our home clean and organized. But the joy is in the journey, especially when we are doing it together.