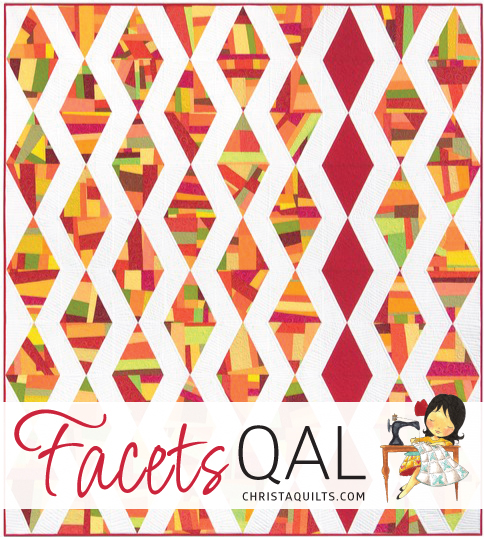
I can’t tell you how much fun it is to watch your Facets progress. So many people are sharing their progress on Instagram and in my Facebook group. It makes me giddy!! If you are just joining us, you can catch up and get started on the Facets Quilt Along here. Be sure to grab a copy of Machine Quilting With Style, if you don’t already have it. We will be following the instructions found on pages 92-94 from the book.

This week’s assignment is to cut your “made fabric” into triangle shapes using the Triangle Squared Ruler and Perfect Rectangle Ruler from Creative Grids. If you don’t have these rulers, you can cut your shapes from the full-sized templates given on pages 96-97 of the book. You can either make templates from plastic or draw them onto paper and tape the paper to a ruler that’s wide enough to accommodate them.

You need both Creative Grids rulers for this method to work.
How to use the Creative Grids rulers:

First, make sure there is fabric completely underneath the triangle shape you are cutting. Next, align the Triangle Squared Ruler so that the blunted triangle corner is on the top of the strip, and the measurement you need lines up evenly with the bottom of the strip. Trim on both sides of the triangle. There will be a little bit of waste, but you can just throw that in the scrap pile for more improv piecing!

Once you have cut the triangle with the blunted tip at the top, rotate the ruler to cut a triangle with the blunted tip at the bottom.

Don’t forget to cut triangles from you accent fabric, too! Hint: if you are using directional prints, you may need additional fabric to accommodate cutting your triangles in one direction only.

You will need to cut the background triangles using the Perfect Rectangle Ruler. Remember to keep your strip folded so that you get a half rectangle for each side of the triangle in a square.

Don’t forget to cut angled tips indicated by the blunted end of the ruler. These will help line up your units correctly for sewing.
Using the picture below as a guide, line up the background rectangles so that the blunted ends align with the center triangle. The pointed tips will stick out. Trim the tips once the units are sewn.

I borrowed this image from a previous project using the same method with a smaller sized unit.
Sew the triangle blocks into diamonds where indicated in the book on page 94.
Eye Candy Inspiration
The best part of any quilt along is seeing how others make it their own. Here’s a roundup of blocks being made by followers in my Facebook group: Quilt With Christa and on instagram: #facetsqal. Remember – you can jump in at any time and work at your own pace. Some people have just started and others are nearly finished (which gives me plenty of pics to share for future posts)!

I love the pop of orange that Gina from Gina’s Custom Creations chose to include!

Sherri (@snugbear2 on IG) is laying out her pretty purple blocks and sewing them together!

I love Paula’s pretty piles!

I know I’m not supposed to have favorites but I really love Jocelyn’s triangles!!
Next week we will sew the blocks together to complete the quilt top.
Click here for the start of Facets Quilt Along

I bought my background fabric today! Now to get cracking on cutting those triangles!