How is your Infrastructure quilt coming along? Just remember, you can work at your own pace and if you are new, you can start this quilt any time! This week is quilt top assembly plus a complete basting video on YouTube. Keep reading for more….

Tips for Quilt Top Assembly
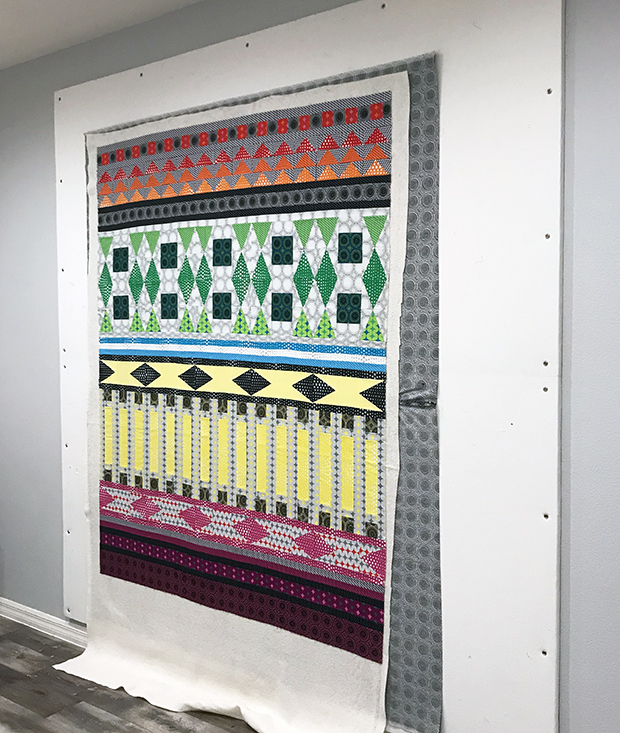
Once all 9 rows of Infrastructure have been sewn, it’s time to sew them together. They may look a little wavy, but if you sew each section in opposite directions, that will help eliminate some of the waviness.
If your rows are not all the same size, you can add coping strips, trim off some of the excess, or use lots of pins to ease in any fullness. Always sew with a “baggy bottom” which means sew with the longer strip on bottom and the feed dogs will help compensate. If needed, you can always go back and increase or decrease the seam allowance of some of the rows to get them all the same size.
Once the quilt top is sewn together, you want to take a “victory lap!” Sew about 1/8″ from the perimeter on both sides of the quilt to secure the edge seams from splitting open. This isn’t necessary for the top and bottom of the quilt since those are long strips of fabric without seams. When your top is finished, give it a final pressing and you are ready to baste!
Basting the Quilt – Quick Overview
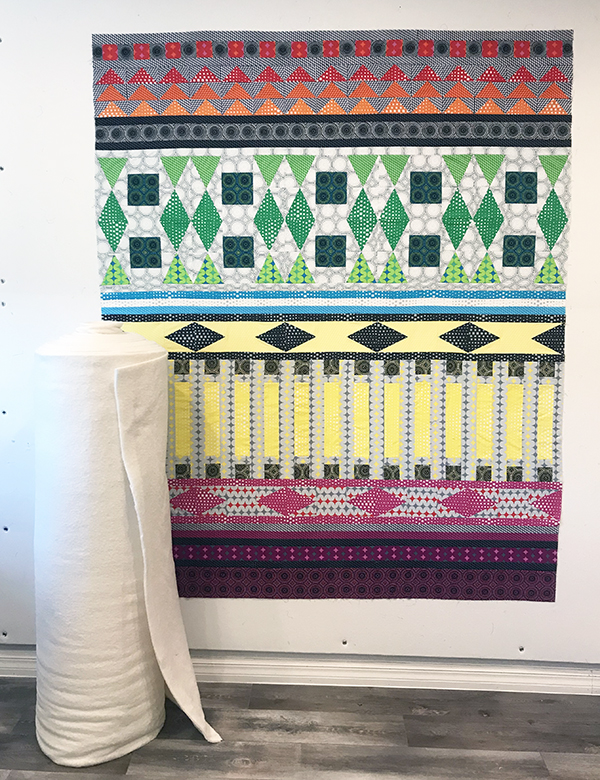
I baste using my design wall and 505 basting spray. I make sure my batting and batting are bigger than my quilt top and I trim away some of excess after it’s been basted. I spray the top and backing outside separately, then assemble all the layers on my design wall, taking care to smooth each layer as I go.
Once everything looks nice and flat, I’ll roughly trim the edges so that only and inch or two remain around all 4 sides. I cut off as much extra as I can to prevent it from tucking under the back and quilting the quilt to itself!!
The final basting step is to iron the quilt on both sides to set the glue and smooth everything out one final time.

Full length Basting Tutorial on YouTube
Here’s the complete step-by-step basting process. The total video is just under 7 minutes because I’ve sped it up in several parts so that you don’t have to watch it in real time. In reality it still didn’t take very long – only about 45 minutes from start to finish to baste my quilt.
GIVEAWAY & HEATHER’S SOLIDS VERSION
Pop over to Heather Black’s blog at Quiltachusetts to see her week 10 post, made from Benartex Superior Solids. While you are there, be sure to enter the giveaway. One lucky winner will receive some Hobbs batting – which is the same batting I used to make my quilt. My favorites are the cotton/wool blend or the 80/20 cotton poly. It’s easy to work with and makes the quilt soft and cuddly!!
Helpful Links
- Click here for my design wall tutorial
- Click here for the Infrastructure QAL page with all the tutorial links
- Click here to get the Infrastructure Quilt Pattern – PDF version
- Click here to get the Infrastructure Quilt Pattern – Paper version
- Click here to get the Infrastructure Quilt Kit
Sharing is Caring
Both Heather and I would love to see how you are progressing, even if you make this quilt long after the quilt along is over! Here are all the ways you can share with us:
- Leave a comment here on the blog, and add a link to anyplace you want to post pics
- Share your progress and ask questions in my Facebook group
- Share on instagram #infrastructurequilt and tag us @christaquilts and @quiltachusetts.


I love spray basting my quilts! I didn’t make this one, but you mentioned “long after”. So, I thought I’d tell you that this weekend I’m quilting Modern Trees! I can’t even find it on your blog any more – I was going to link it to your QAL or pattern, but I can’t find that on your Etsy, either. It’s from 2013 and I see it in your sidebar! Mine’s been spray basted and ready to quilt since 2015, right in plain sight, where I ignored it blithely until today on my UFO weekend sewing. The trees are all outlined and next week, I’ll do the rest.