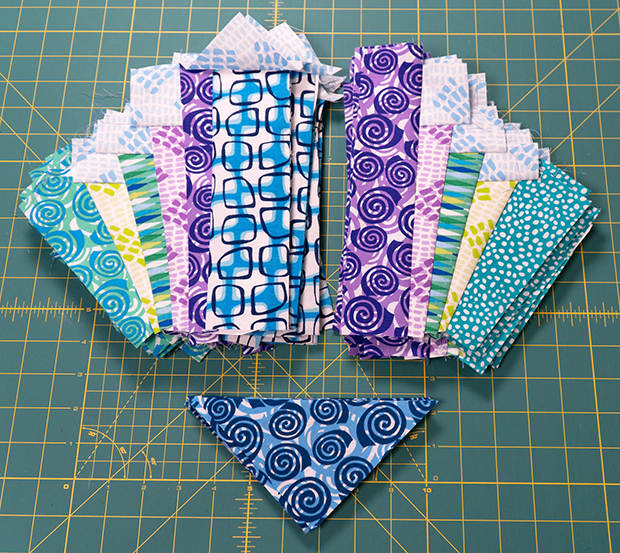
Please note, this tutorial shows an earlier version of my updated Party Time Quilt Pattern. However the techniques are exactly the same. Notice how there are 3 separate sections you’ll need to create for each block. Just follow my step-by-step tutorial below and you can adapt this process to any foundation paper pieced (FPP) design you can think of!
- Click here for my tips on getting started with FPP.
- Click here to get the Foundation Paper Pieced PDF Pattern
Preparing the Paper Foundations
One of our quilt along participants, Michelle Hanus recommends folding all of the sewing lines (the dark lines on the pattern) before piecing. That will make it easier to rip off the papers later on. Thanks for that great tip, Michelle!
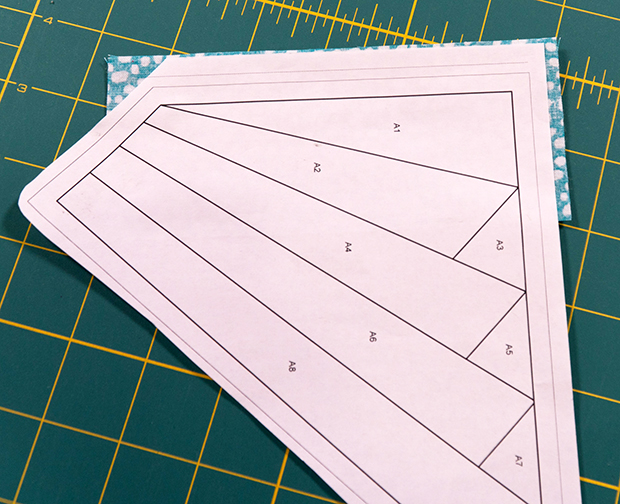
After photocopying the master template (one for each block you are making), roughly cut apart the two FPP sections (A and B), leaving a little bit of space around the dashed lines – those are your seam allowances for the outside edges of the blocks.
Above is what the master template looks like. In the examples below, mine look slightly different because I was working from a draft before I finalized the pattern for printing.
I highly recommend making one test block out of scrap fabrics following the steps below. Then, once you understand the process, you can sew multiple blocks at the same time with your chosen fabrics. You can even chain piece the same sections if desired – just know that you’ll use a little bit more thread in the process, but that’s ok.
Fold, Trim, Sew and Press (FTSp)
This process might seem very awkward because it’s different then what you are used to with regular piecing. I’ve heard it described as dancing like Ginger Rogers – backwards and with high heels! But if you just follow the same “dance” steps each time, you’ll have no problems getting precise results every time!
Position the First Piece Into Place – A Units
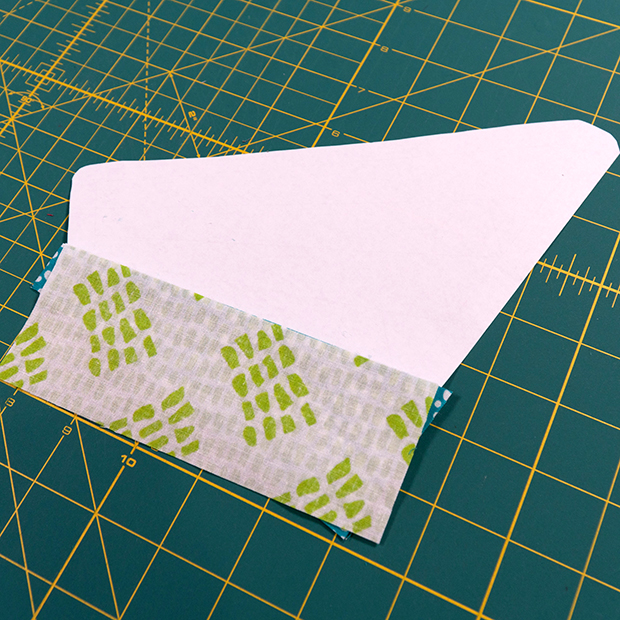
To begin, line up the wrong side of your A1 fabric piece underneath the A1 section so that there is fabric sticking out on all sides of the A1 unit. To keep it from shifting, you can pin it or add a dab of glue from a glue stick to keep it in place.
A rectangle works much better than a long skinny triangle so that you can ensure coverage of the entire piece. You will be sewing on the paper side with the printed lines facing up, just like the image below:
Step 1 – Fold
Position a piece of cardstock (such as the pattern cover, or an index card) on the first line that you will sew (the line between A1 and A2 above). A piece of thin, rigid plastic works, too!
Fold the paper template over the piece of cardstock, exposing the extra fabric underneath. Remember that the wrong side of the fabric will be touching the blank side of the paper each time.
Step 2 – Trim
Keeping the fabric, cardstock, and paper template in position, place the Add a Quarter ruler on top with the lip securing everything in place. This will add 1/4″ seam allowance beyond the fold line.
Trim the excess fabric with a rotary cutter.
Doing it this way ensures that the long skinny triangle is positioned at the correct angle for sewing.
Step 3 – Sew
On the non printed paper side, line up the freshly trimmed edge of piece A1 with the edge of piece A2, with the fabric right sides together. Align the raw edges ensuring that the A2 piece is long enough to cover the entire A1/A2 line plus 1/4″ seam allowances on both ends.
Lower your stitch length so that it will perforate the paper, making it easier to tear off later. My default is 2.5 so I turn it down to 2.0 or even 1.8. Use a brand new needle for best results.
Sew from 1/4″ before the A1/A2 line to 1/4″ after the printed solid line to ensure you have seam allowances on both sides of the marked line.
Here’s what my piece looks like after sewing the first seam. It’s ok to go slightly beyond 1/4″ if needed. I do this especially when chain piecing multiple blocks at the same time.
Step 4 – Press
Open up the A2 piece so that both fabrics are right side up. With a wooden seam roller, press the the seam from the front of the fabric. This is easier to do for each step than using an iron.

repeat The Dance over and over until the unit is complete
A3: Fold and Trim
Reposition the cardstock again along the next line. For this example, it’s the very short line between A2 and A3. Click the image below to enlarge if needed.
Fold the paper template over again. Use the Add a Quarter ruler to add the 1/4″ seam allowances and trim the excess with a rotary cutter.
Tip: if the paper is stuck to the fabric, you can lift it away (gently) from the seam as needed.

A3: Sew
Sew the next piece in the same manner as before. Align the A3 edge to be sewn with the freshly cut edge. In the example below, the small blue square does not need to take up the entire space of the trimmed A1- A2 edges.
Position the fabric square in the middle of the area to be sewn as shown below. Flip the whole unit over if needed and hold it up to the light to ensure that the fabric square will cover the full line between A2/A3 plus seam allowances.
Below is what my unit looks like after sewing the line between A2/A3. It’s ok if the sewn line is slightly longer than 1/4″ on both sides. If you are worried about the seam coming apart at the ends, you can backstitch at either end.
A3: Press
A4: Fold
Repeat the prior steps: open up the A3 piece and press from the front with the wooden seam roller. Then fold over the next line (A2/A4) using the cardstock or other thin, hard edge for stability.

A4: Trim
Repeat the same step as before: use the Add a Quarter ruler to add 1/4″ seam and trim the excess.
Fold the paper template back into position and flip the paper over again so that you can see the proper angle to align the next piece (the green A4 rectangle).
A4: Sew
Line up the A4 rectangle right sides together. Flip the paper over and sew on the line between A2/A4 with 1/4″ extra on either end of the drawn line. Below is what this next step looks like:
A4: Press
A5: Fold and Trim
Repeat the same steps over and over again: press the green A4 rectangle (below left), fold the paper back (not shown), trim the excess (below right).
A5: Sew and Press
Align the A5 square (light blue), sew the seam and press from the top.
A6 and A7: Fold, Trim, Sew and Press!
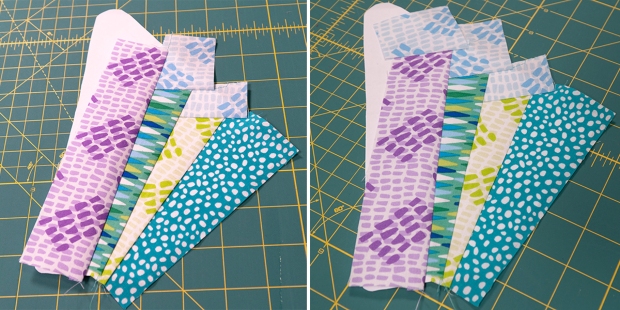
Fold the paper, trim the excess, Sew A6 (light purple), press A6 (below left).
Fold, trim, sew, and press the A7 unit (light blue square, below right).
A8: Fold, Trim, Sew and Press
This will complete all of the sewing for the A side of the block!
Sewing the B Units
Now repeat the process for the B half of the block. It has a total of 10 units to piece. Remember to fold, trim, sew and press each and every unit, just like before!
Notice that I used a triangle instead of a square for the B10 unit. This made more efficient use of the fabric when cutting, but it’s still the same process as before.
Once you’ve sewn all of the Section A and Section B blocks, trim them along the outer dashed lines using a rotary cutter and ruler. Be sure you don’t trim off your triangle points! At this point, your paper should still be intact to keep the blocks stable.
Sew the A and B unit together. Then sew the oversized corner triangle to the bottom of the block. It’s oversized so that you don’t have to line it up perfectly. (See below, left).
Trim the excess fabric from the triangle to match the rest of the block. (see below right).
After making one test block, continue in the same manner to sew the number of blocks you need for the size you are making. I’m creating this quilt in both the warm and cool colorways of my Abstract Garden fabric line, but the process is exactly the same!
 Above is the same block in warm and cool colorways of Abstract Garden.


Thanks for the recognition. I gadget that is useful when tearing paper off is sharp pointed tweezers. They get those stubborn small pieces that get stuck, especially in the seams.