How are your Pieced Primrose blocks coming along? Did you check out some of the optional layouts from last week’s post? This week will be pretty straightforward as we sew the blocks and add borders to complete the quilt top.

- Click here to get the Paper Pieced Primrose quilt pattern – PDF version
- Click here to get the Paper Pieced Primrose quilt pattern – Paper version
Quilt Top Assembly
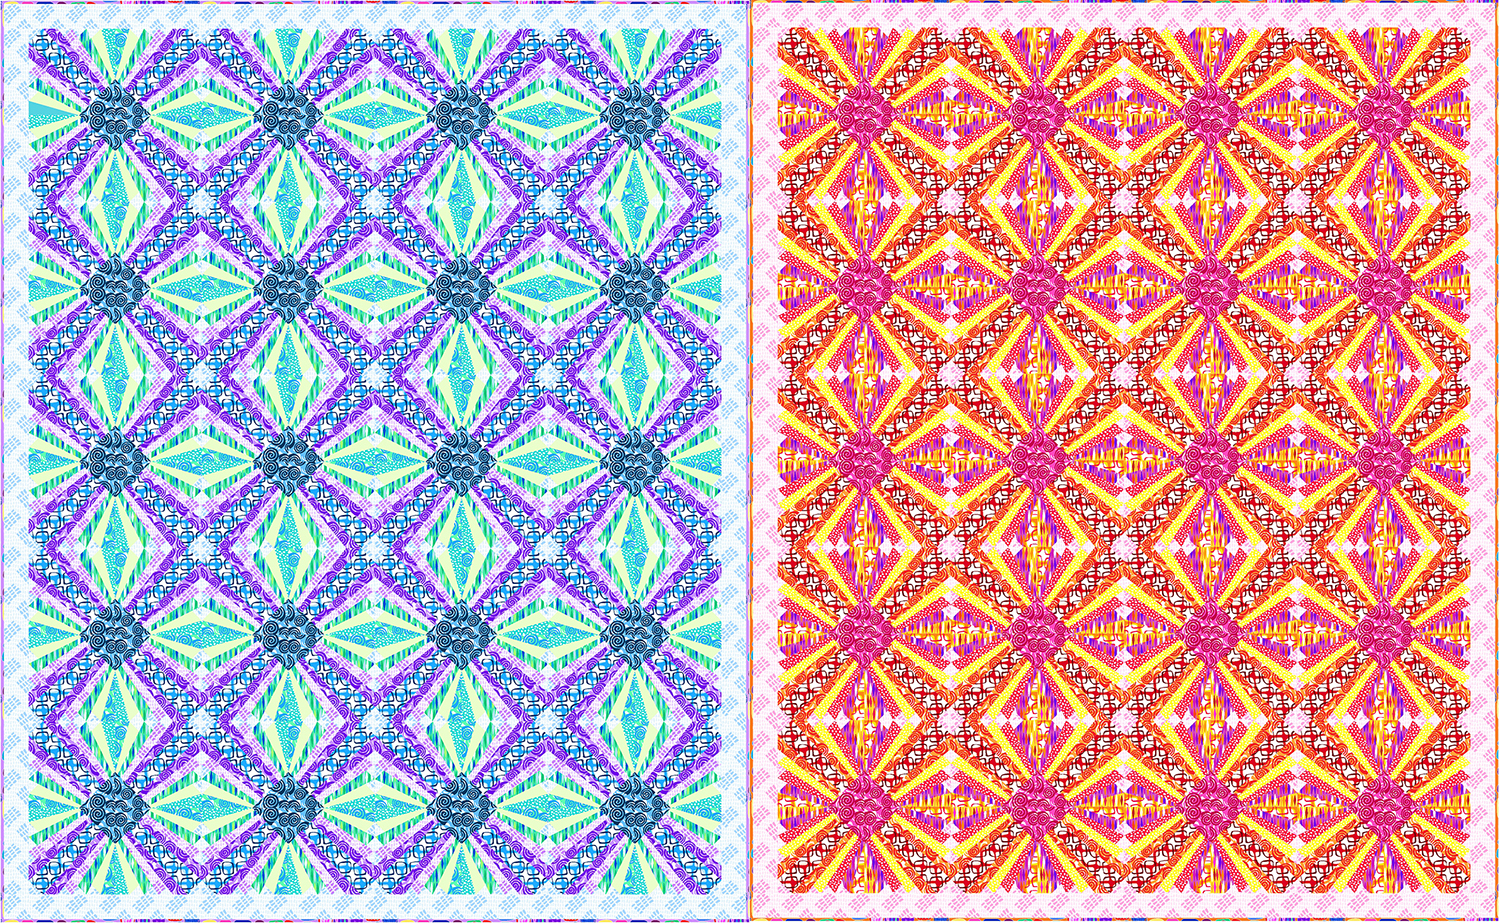
For my cool and warm versions of the quilt, I’m doing the standard layout as shown on the cover of the Pieced Primrose Quilt pattern above. It’s the same basic layout whether you are making the smaller wall size, or the larger throw size.
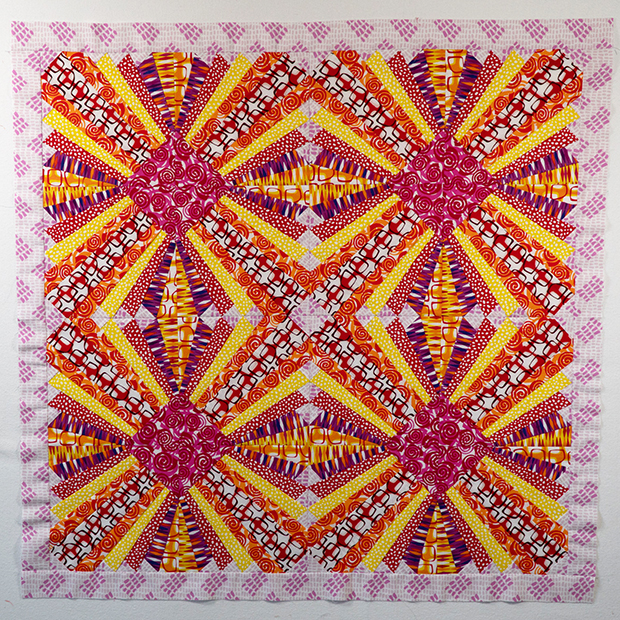
First I sewed all of the foundation pieced blocks into larger 4 block units. The trick is to rotate the blocks so they look like the image below and sew 2 rows of 2 blocks each . Because of the bias edges on the blocks, you want to hand them carefully and use pins to ensure the edges match correctly.
Although the block seams are pressed to the side during block assembly (due to the foundation paper piecing process), I press the larger block seams open so they will lie flat.
Large Primrose Block – Warm Colorway

Large Primrose Block – Cool Colorway

For the wall size quilt you will be making 4 of these larger blocks. For the throw size, you will be making 20 of them. Just remember that you can always change up the size of your quilt by adjusting the number of blocks that you sew.
Click here to get the Pieced Primrose kit in warm or cool, wall or throw size.
Pieced Primrose Throw Size Layout
Adding the Borders
Although the pattern gives you the correct measurements to cut for the borders, I always recommend measuring your quilt top first. It can shrink or grow depending on how accurate your seam allowances are.
The best advice is to measure both sides and through the middle, then cut your side border strips to this length. After the side borders are sewn, measure again with the borders attached and cut the top and bottom borders to match.
Wall Size Finished Top – Warm

Wall Size Finished Top – Cool

Next week we will baste our quilts and get them ready for machine quilting. So if you are still sewing your blocks together, don’t worry – you still have plenty of time! Remember to share your progress on instagram #piecedprimrose quilt or in my ChristaQuilts Facebook group.
LINKS AT A GLANCE
Click the links below for supplies needed to make this quilt:
- Click here to get the Paper Pieced Primrose quilt pattern – PDF version
- Click here to get the Paper Pieced Primrose quilt pattern – Paper version
- Click here to get the optional Primrose kit in warm or cool
- Click here to get my favorite notions
- Click here for my Aurifil Thread kits
- Click here for the complete QAL supply list and schedule

I completed 4 quadrants, one block. Hope to post on FB today block and final fabrics.
You’re doing a great job!! Christa Watson Instagram @christaquilts website/blog: ChristaQuilts.com