Blooming Wallflowers Week 1: Cutting

Are you ready to dive in and make this dynamic looking quilt? All you need is a copy of the Blooming Wallflowers quilt pattern and you can jump in anytime! See the end of this post for all relevant links.

Blooming Wallflowers quilt

Blooming Wallflowers can be made in three sizes: Crib, Throw, or Queen

Cutting the Center Triangles

The triangles used in this pattern are a specific shape and require either the use of the full-size templates included in the pattern, or a specialty ruler. Tri recs is recommended for the smaller sizes or Creative Grids Triangle Squared AND Perfect Rectangle for the larger size. Of course you can use the larger rulers for the smaller blocks, too.

Cut Pieces for Blooming Wallflowers Quilt

These are all of the cut pieces used to make Blooming Wallflowers.
I used my Abstract Garden fabric line for the “flowers.”

Stack and layer the fabric strips for faster cutting. Follow the chart on page 6 of the pattern to cut the center triangles from the colorful prints. Here’s a quick 1 minute video demo showing how I used the specialty ruler. Notice the position of the blunt end on the ruler.

Corresponding diagrams can be found on page 2 of the quilt pattern.

Cutting The Triangle Pairs

The background triangle pairs s are cut in the same way except you will want to make sure to cut one left and right triangle at the same time. The easiest way to do that is to make sure the background fabric strips are folded in half. Then you’ll get one pair per cut. See the step by step cutting diagrams on page 3 of the pattern.

Here’s another short video showing how I cut the triangle pairs. Don’t forget to trim off the little triangle tip at the top to ensure proper matching when sewing them together next week. I used the ruler to trim off the left edge of the fabric strip first, and didn’t worry about the direction of the print while cutting.

The background fabric is Navy Herringbone from my Modern Marks fabric line.

Cutting the rest of the background

The rest of the background is pretty straightforward. Follow the chart in the pattern on page 6 to cut extra background squares that allow the design to float, plus the side and corner triangles and the binding strips. See the diagram on page 3 to cut the corner and side triangles.

Blooming Wallflowers cut pieces

I love a pretty stack of cut pieces, don’t you?

Once everything is cut, you’ll be ready to sew the blocks together next week! Don’t forget to share pics of your progress in my Facebook group, or on Instagram using the hashtag #bloomingwallflowersquilt.

Important Links

Blooming Wallflowers Quilt Along Supply List and Schedule

All you need to get started is a copy of the quilt pattern and a few supplies listed below:

Scroll to the end for links to all of the quilt along posts.

Blooming Wallflowers quilt

Supply List

(1) Blooming Wallflowers Quilt Pattern

(2) Fabric Needs – see materials list in the image below. I will be making the throw size.

Blooming Wallflowers Supply List

(3) A set of Tri Recs rulers for the Crib or Throw Size.

Please get these exact tools. Anything else won’t be the correct angle for cutting. Tri Recs makes blocks up to 6″ finished. For the Queen size quilt, you will need the Creative Grids Triangle Squared AND Perfect Rectangle rulers that make up to 9″ finished size blocks.

If you don’t have access to these rulers, you can use the full-size templates included in the quilt pattern.

Tri Recs Tools

(4) Batting for your quilt size
(5) Basic rotary cutting equipment – mat and rulers, and cutter with new sharp blade.
(6) Basting supplies – either safety pins or 505 basting spray. (I will spray baste)
(7) A “can-do” attitude and willingness to share – this is going to be fun!!

Quilt Along Schedule

The quilt along will run for a total for a total of 10 weeks which includes 3 scheduled breaks to catch up. If you follow along each week, you’ll have a completely finished quilt at the end!!
Once each post has been published, the links below will become clickable so you can navigate to any post you need as you follow along.

Sharing is Caring

As you are gathering your supplies and getting ready to start, please share pics of the fabrics you’ll use – I’d love to see! Also, anytime during the quilt along, I encourage you to share your progress in any of these ways:

  1. On Your own blog – share links in the comments section of any of the QAL posts
  2. On Instagram – use hashtag #bloomingwallflowersquilt so others can see your progress
  3. In my Christa Quilts Facebook group – this is also a great place to ask questions and interact with other quilt along participants.

Blooming Wallflowers Quilt Along

I’m so excited to get started!! Who’s with me?? As always, it’s totally OK to follow along virtually, or save the blog posts for later and make this quilt any time, on YOUR schedule.

Sign up for My Next Quilt Along in January: Blooming Wallflowers

Can I say how much I enjoy doing quilt alongs with you all? It keeps me motivated to design and make new things, and nothing thrills me more than seeing all the variety of quilts that are being made, even when we all start with the same basic pattern. So I’m excited to announce the next quilt along which will start mid January!

Blooming Wallflowers quilt

We will be making my Blooming Wallflowers quilt from start to finish over 12 weeks. Each Friday starting in Janaury, I’ll share a new blog post with inspiration pictures, bonus tips and plenty of cheerleading to keep you motivated. I’ve built in a couple of breaks to the quilt along, so it should be a nice and relaxing pace, and easy to follow along!

Blooming Wallflowers quilt

Get the Pattern

The quilt along itself is free, all you need to purchase is a copy of the pattern:
Click here to purchase the PDF version of Blooming Wallflowers
Click here to purchase the print version of Blooming Wallflowers

Optional Kit

Of course, you can use whichever fabrics you like, but I’ve put together an optional fabric kit which includes all the fabric to make the quilt top and binding as shown above: Fat Eights of 12 different Blooming Roses prints, 1 1/4 yards of light blue Tracks for the accent, and 4 yards of Modern Marks Herringbone Navy for background and binding.

Click here to purchase the Blooming Wallflowers kit – Throw Size

Blooming Wallflowers made with Abstract Garden and Modern Marks

Sign up to Follow Along (Free)

It’s completely free to follow along and you will gain tips and tricks for better quilt making, even if you don’t want to actually make the quilt!

Click here to sign up and be notified each time a new quilt along step has been released.

Blooming Wallflowers Quilt Along

I’ll post the complete supply list and schedule on January 4th and will then give everyone a couple of weeks to gather their materials and supplies before we dive into cutting on January 18th. We will wrap up by the end of March and I’ll encourage everyone to post their progress in my ChristaQuilts Facebook group. After all, doing things with friends is a large part of the fun!

So who wants to join me?? Leave a comment if you plan to follow along, either making the quilt – or virtually in your head!!

New Quilt Pattern – Blooming Wallflowers

Are you enjoying seeing all of the new quilts I made from my Abstract Garden collection? I sure had fun making them! Today I’m excited to introduce you to Blooming Wallflowers, an optical illusion type quilt that looks much more complicated than it actually is.

Blooming Wallflowers quilt

Blooming Wallflowers – Throw Size

I paired up the colorful prints from Abstract Garden along with the Navy Herringbone print from Modern Marks, which is still available! I love brightly colored quilts with a rainbow of fabrics and it’s been fun to experiment and use “neutrals” other than black white or gray for this quilt.

Blooming Wallflowers detail

I love the movement in the Navy Herringbone print. I’ve designed all of my fabrics to work with each other so that you can mix and match between the collections.

The Blooming Wallflowers quilt pattern comes with instructions in 3 sizes and the cool thing about this design is that it stays the same for each size. The individual triangles are cut larger or smaller depending on which size you make.

Blooming Wallflowers Pattern CoverClick image above to enlarge.

I recommend using specialty rulers to cut the triangles, but I’ve also included full size templates so that you can get started making this quilt with the tools and supplies you have on hand!

I also include machine quilting suggestions in all of my patterns so that you can actually have success finishing them! Nothing disappoints me more than to see “quilt as desired” at the end of a quilt pattern.

Blooming Wallflowers quilt detail

Quilting detail – all of my patterns include machine quilting suggestions.

Blooming Wallflowers Quilt Along

It’s important for me to make all of my own quilts not only to pattern test my designs, but to also go through the entire process so I can better understand any trouble spots that you may run into as you make the quilts. After all, my main goal in designing patterns and fabric and teaching my machine quilting methods is to help you make beautiful quilts and have a fun, stress-free time doing it!

So I’m excited to share quilt along to make this quilt. Be sure to grab a copy of the pattern and click here for quilt along details!

Blooming Wallflowers made with Abstract Garden and Modern Marks

Blooming Wallflowers Quilt Stats

  • Size: 59″ x 76″ (Throw)
  • Completed: October, 2018
  • Machine used: BERNINA 770QE
  • Fabric used: Abstract Garden and Modern Marks
    by Christa Watson for Benartex Contempo Studio
  • Batting used: Hobbs Tuscany Cotton/Wool
  • Thread used: Aurifil 50 weight cotton from Pieced and Quilt Collections:
    Colors and Neutrals by Christa Watson
  • Quilting Motifs: straight-line chevrons in the colorful blocks, pebbles in the accent blocks, free-motion chevrons in the background

Quick Links

Dot ‘n Dash Quilt Along Wrap Up and Inspiration Photos

Although my Dot ‘n Dash quilt along wrapped up about a month ago, I wanted to revisit it one final time to share all the links to all the posts for anyone just wanting to get started. I also want to share some gorgeous photos from several in my Facebook Group that made their versions.

Dot n Dash quilt by Christa Watson

Click here to purchase the Dot ‘n Dash quilt kit, while supplies last.

As a reminder, the pattern for Dot’n’Dash can be found in my book, Piece and Quilt with Precuts and it’s easy enough to gather your supplies: just one Jelly Roll of prints and 3 yards of background fabric are all you need to make this fun quilt.

Dot ‘n’ Dash Inspiration

Here are some beautiful finishes and works in progress from others who are making their own versions. Some of them have finished while others are still working at their own pace, so it’s never too late to jump in and start!

Dot n Dash by Lucy Given

Don’t you love this one above in teal by Lucy Given? She did a fabulous job making it super scrappy by mixing up beautiful blue hues for both the blocks and the background. She’s finished the quilt top so far and I can’t wait to see how she quilts it!

Patti Baymiller's Dot n Dash

Here’s another beauty above, pieced and quilted by Patti Baymiller. Didn’t she do a fantastic job on the quilting? The texture is so fantastic! I love it when others show how easy and fun domestic machine quilting can be.

Heather Lofstrom Halloween Dot n Dash

How about this one done in Halloween novelty prints by Heather Lofstrom? She quilted it with a diagonal grid and she shares more of her inspiring quilty life over on her instagram account @aquiltingcowgirl so be sure to check out her feed for more fun!

Lucy's Dot n Dash quilt top in Modern Marks

Of course I might be biased, but I really think Lucy Blum’s quilt top done in Modern Marks looks just as fabulous!! She used up leftovers from other projects, and although the Modern Marks precut strips are sold out, you can still grab a fat quarter bundle and cut your own strips if you are so inclined.

Lisa's Dot n Dash in Yellow

Lisa Tucker created her stunning quilt with a yellow background which really pops! Who says you have to use a neutral background, right??

Abbie Bill Machine Quilting

Here’s another quilt in process, being quilted by Abbie Bill. She’s opting for the original quilting plan as given in the book and she’s making fabulous progress!!

And these are just the tip of the iceberg of the fabulous work being created and shared over in my Christa Quilts Facebook group. Be sure to add pics of your progress there and you can do a quick search of “Dot ‘n Dash” in the group for even more amazing inspiration. 🙂

Quilt Along Posts

Here’s a roundup of links to all of the Dot ‘n’ Dash Quilt Along Posts that were shared. Keep in touch and let me know if you have any questions as you make YOUR version – I’d love to cheer you on!

Week 1 – Quilt Along Complete Supply List
Week 2 – Cutting the Fabric
Week 3 – Sewing the Blocks
Week 4 – Completing the Quilt Top
Week 5 – Backing and Basting
Week 6 – Quilting Part 1 – Stitching in the Ditch
Week 7 – Quilting Part 2 – Quilting Double Zig-Zags
Week 8 – Quilting Part 3 – Free Motion Quilting Double L’s
Week 9 – Binding to finish

Free Motion quilting on Dot n Dash by Christa WatsonQuilting Detail from Dot’n’Dash made from my Fandangle Strip-pie.

Beaded Lanterns QAL Week 7 – Binding

I can’t believe we’ve finally come to the end of the Beaded Lanterns Quilt Along! If you’ve missed any part of it or want to make one later on, be sure and check out the rest of the links at the end of this post.

Beaded Lanterns Finished Quilt

Over on the BERNINA blog at We All Sew, I’m sharing my method for binding my quilts. If you’ve followed any of my quilt alongs before it will look familiar because it’s the same technique I use for all my quilts large or small. One thing I will say is that the more you do it, the faster and better you’ll get!

Click here for the Beaded Lanterns Binding Tutorial

Beaded Lanterns Quilt Along - Trim and Bind

Beaded Lanterns QAL Links

Click here to purchase the Beaded Lanterns Quilt Kit
Click here to get the free Beaded Lanterns Quilt Pattern

Week 1: Supply List
Week 2: Making the Blocks
Week 3: Sewing the Quilt Top
Week 4: Spray Basting Tutorial
Week 5: Walking Foot Quilting & Quilting Plan
Week 6: Free-Motion Quilting
Week 7: Binding to Finish

Dot ‘n’ Dash Quilt Along Week 9 – Binding

Have you enjoyed quilting along with me? Or are you just now finding this quilt along? Either way, I want to remind you that Dot ‘n’ Dash quilt along will stay up on my blog indefinitely so you can make this quilt any time you wish, on your own time, and at your own schedule. Dot ‘n’ Dash Kits are still available and you can pick up a signed copy of my book to get the pattern.

Dot n Dash Quilt Along

Click here for the supply list and links to all of the previous posts for Dot’n’Dash QAL.

This week it’s time to bind the quilt! Follow the steps below for my favorite method, or adapt it to your own process as desired. This method uses straight of grain strips that are double folded and attached with smooth seams ensuring no lumps and bumps. I use it for all of my quilts!

Step 1 – Trim the Quilt

I like to trim off the excess batting and backing flush with the edge of the quilt so that I can sew the binding on nice, straight, and even. I use a large square acrylic ruler to trim off all four corners first. This ensures that the corners of the quilt will stay nice and square. I use the lines on the ruler to nudge the quilt into shape if needed.

Quilt Trimming - Corners

Once the corners are trimmed, I use a long acrylic ruler to trim up the sides the same way. I line up the already cut corner with the edge of the straight ruler so that I can continue to get a straight, clean cut around all four sides of the quilt.

Quilt Trimming - Sides

Step 2 – Sew the Binding Strips

To figure out how much binding I need, I take the perimeter of the quilt, add 10″ to the total, and divide by 40″ (the width of fabric) to figure out how many binding strips I need. See pages 52-55 of the book for this particular pattern.

Binding from leftover jelly roll strips

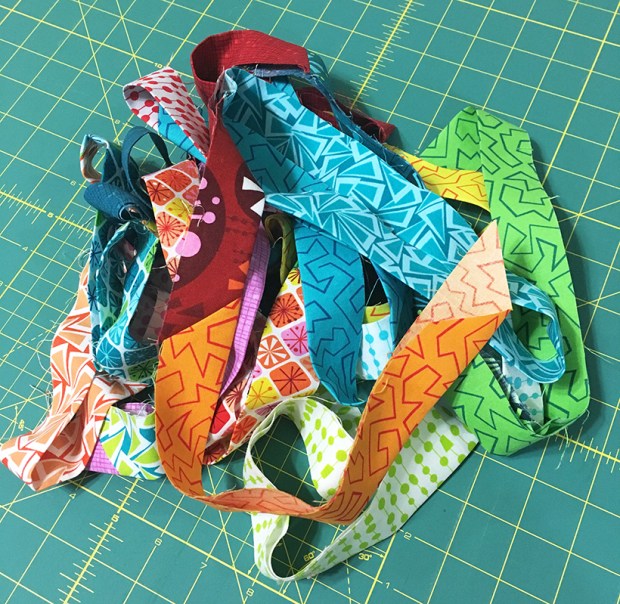
Because I wanted to use the fabric efficiently, I used leftover precut strips from the Strip-pie bundle (aka jellyroll) to make a scrappy binding. Because you don’t use the entire strip when you cut and sew the blocks, there’s enough leftover for the binding. You can trim them narrower if desired, but I went ahead and left them at 2 1/2″ since I was in a hurry to finish!

Sewing the binding

Join the binding strips with a mitered seam by placing them wrong sides together at a 90 degree angle. Sew from one corner to the other to join the seams. I can usually eyeball it (see image above), but feel free to mark the sewing line if you need to stay straight.

Sewing binding strips

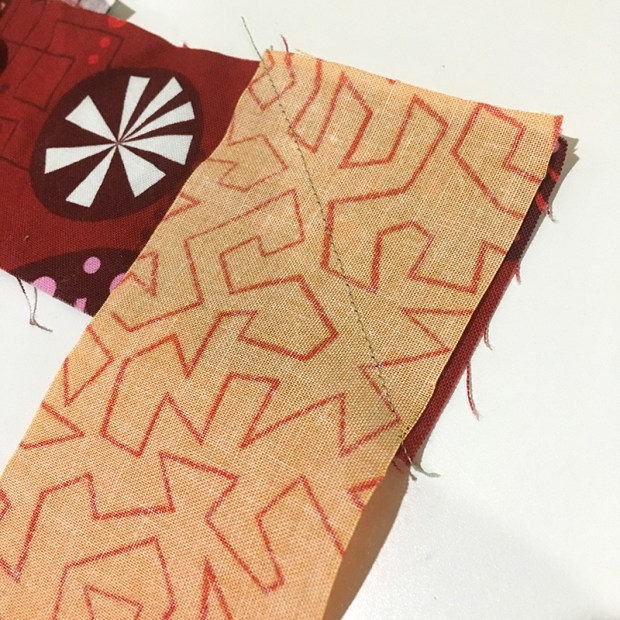
To chain piece (assembly line sew), I add each next strip as I go, flipping over the top strip so that I join them right sides together each time.

Because the strips are very colorful, I joined them with a neutral colored Aurifil 50 weight thread and sewed with a shorter stitch length (2.0 instead of 2.5). This prevents the thread from poking through the seam and makes a nice tight stitch that won’t split when I press the seams open.

Trim binding corners

Once all of the seams are sewn, I trim off the excess with 1/4″ seam and press all seams open.
I’ll designate one of the binding ends as the starting “tail” and trim it off at a 45 degree angle. That will come in handy later when it’s time to join the ends together seamlessly.

Continuous Binding

Finally, I’ll press the entire binding in half wrong sides together lengthwise, and it’s ready to sew to the quilt!

Step 3 – Attach Binding to Quilt

I line up the open ends of the binding to the raw edge of the quilt. I leave about 10″-12″ of a starting “tail” so that I have room to join it up later. I’ll put a pin in place to indicate where I’ll start sewing. Sew with 1/4″ seam for skinnier binding strips, or slightly wider if using wider strips.

Attach binding to quilt

If you want the pieced seams to avoid ending up in the corners, quickly measure the binding around the perimeter of the quilt before you start sewing. If any of the seams ends up in the corners, adjust your starting tail by an inch or two in either direction.

When you get to the end of one side, stop sewing about 1/4″ away from the edge (or the width of your seam allowance), and sew off the corner at a diagonal. this will enable to you create a pretty miter on the front of the quilt.

Sew the binding to the quilt

Next, remove the quilt from the machine, rotate it and fold up the next unsewn binding side.
Make sure the edge of the binding matches up to the edge of the quilt as shown in the photo below. This will ensure that everything lines up perfectly.

Notice that a nice diagonal crease will form across the corner.

quilt binding

Fold the binding back down upon itself at the corner. (See photo below.) You want the top of the fold to line up exactly with the top of the sewn quilt. This will ensure a nice crisp corner.

Binding in progress

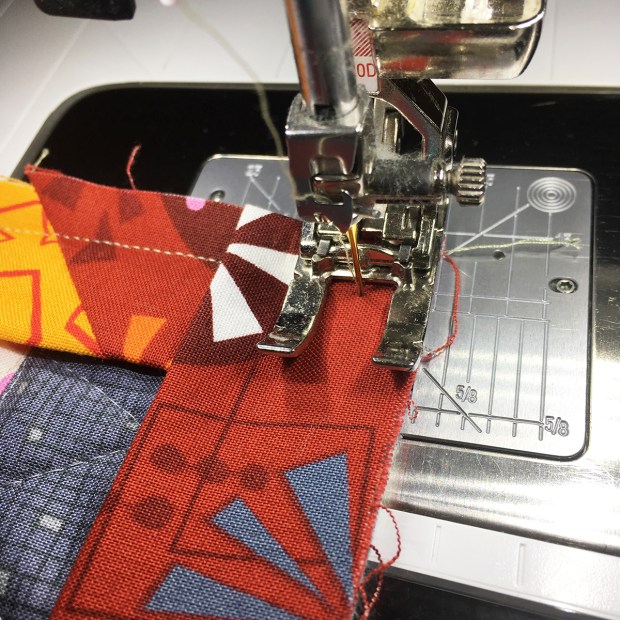
Continue sewing at the corner. You might need to grasp the starting threads because this will be a thick seam to start. In my image below, I’m using the BERNINA integrated dual feed with the open toe embroidery foot (20D) so that I can see what I’m doing. I recommend using a walking foot if you don’t have the dual feed, so your fabric doesn’t slip or pucker.

Sewing the binding

Continue sewing all four sides and corners the same way. Leave an ending tail of about 5″-6″ that will join up with the starting tail. Trim off the excess binding if needed.

Step 4 – Secure the Binding Ends

To join up the ends, I’ll use some photos from another quilt because I was in such a hurry to finish this one, that I forgot to snap photos, LOL!!

Place the cut angled end (the beginning tail) inside of the ending tail and mark the 45 degree angle where they meet exactly.

Binding Ends

Add 1/2″ to this line for seam allowances and trim off the ending tail at a 45 degree angle, using a small square acrylic ruler with a 45 degree line.

Add the binding

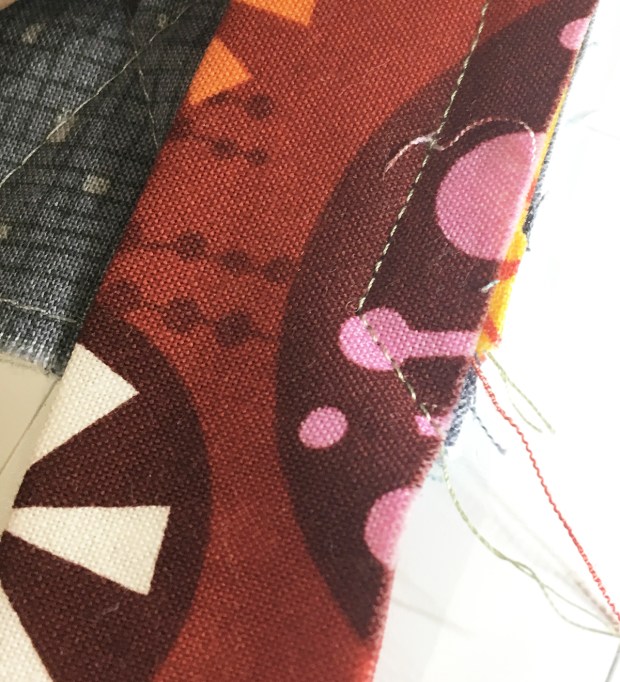
Match up the beginning and ending tails and sew them together with a 1/4″ seam. You’ll notice the triangle tips sticking off at each end. Press the seam open and trim off those tips, also known as “dog ears.”

Join binding edges.

Finish sewing the binding to the back of the quilt. If desired, flip the binding to the front and press away from the quilt to make it easier to fold over to the back.

I secure the entire binding with Clover Wonder Clips so that nothing shifts while I hand sew the binding down on the back.

Secure the binding

Step 5 – Hand Sewing to Finish

I prefer to finish my binding by hand because it gives a nice, clean finish to the quilt. However if you prefer to finish by machine, I suggest using a decorative stitch on your machine so that the binding becomes a decorative element of your quilt.

I like to use a blending thread color to secure my binding. I normally use whatever is leftover in the bobbin after I’ve attached the binding to the quilt. Thread a hand sewing needle with about 16″ of thread and knot one end.

Hand Binding

Notice that I hold the quilt away from me and stitch from right to left. I make each stitch by catching a little bit of the backing and the folded edge of the binding each time. Some people call this a “ladder stitch.”

Hand Stitch the binding

Whenever I run out of thread, I knot the end and hide it underneath the binding, then start with a new length of thread. When I get to the corners, I fold them over in the opposite order of how they are folded on the front to reduce bulk.

Hand stitched binding

I also sew the corner miters closed for a nice finish. It usually takes me about one hour per side when hand stitching a throw sized quilt. That’s a couple of evenings of movies with the family which is a fun way to finish!

Machine Quilting on Dot n Dash

I enjoyed finishing this quilt just before we took a beach vacation earlier this summer, so I have fond memories of working on this quilt!

Share your Finishes!

Be sure to share your progress on instagram #dotndashqal and also in my Christa Quilts Facebook group. Even if you are just starting, I’d love to cheer you on!

Click here for the supply list and start of the quilt along.
Click here to purchase the Dot ‘n’ Dash Quilt Kit or my fabric bundles.

Beaded Lanterns Quilt Along Week 4 – Spray Basting Tutorial

Have you always wondered how I spray baste my quilts? Over on the BERNINA blog at WE All Sew, I’m sharing my spray basting method using my design wall. It’s part of the Beaded Lanterns Quilt Along I’m hosting over there on the blog, so be sure to check it out!

Whether or not you are making the Beaded Lanterns quilt, you can apply this technique to any quilt.

Beaded Lanterns Quilt Along Links

Week 1 – Supply List and Schedule
Week 2 – Sewing the Blocks
Week 3 – Quilt Top Assembly
Week 4 – Backing and Basting

Click here to purchase Fandangle fabric, kits and bundles.

Beaded Lanterns Quilt Along Week 3 – Quilt Top Assembly

Great news for those of you following the BERNINA quilt along to make Beaded Lanterns. More of the kits are back in stock at shop.christaquilts.com.

beaded lanterns

Last Thursday, the lastest installment was shared over at We All Sew. The next step in the process  is to sew the blocks to make the quilt top. Click the links below to catch up on the Quilt Along and feel free to jump in at any time!

Beaded Lanterns

BERNINA Beaded Lanterns Quilt Along Links

Week 1 – Supply List and Schedule
Week 2 – Sewing the Blocks
Week 3 – Quilt Top Assembly

Click here to get the optional Beaded Lanterns quilt kit, while supplies last.

Dot ‘n’ Dash Quilt Along Week 7 – Machine Quilting Part 2: Double Zig-Zags

It’s time to embellish our quilts with some fun machine quilting this week! In my book Piece and Quilt with Precuts, I’ve shared 18 different quilting ideas that you can mix and match along with the 11 projects in the book. We are going to do a little bit of mixing and matching of motifs this week!

(By the way, If you are a little unsure of your free-motion quilting skills, be sure to check out my machine quilting class on Craftsy for my best machine quilting tips and tricks!)

Dot n Dash Quilt Along

Original Dot N Dash Quilting

Here’s how I quilted the original Dot ‘n’ Dash quilt. I quilted “crazy 8’s” in the background areas, and wavy lines in the print strips. I followed a similar quilting plan to what we are doing today, but with different designs. If you’d like to follow this quilting plan, see pages 50-55 of the book.

Free-Motion Quilting Dot n Dash

Original quilting plan for Dot ‘n’ Dash – from the book.

For this week’s quilting “assignment,” we are going to play with one of the walking foot designs from another project in the book to  come up with a really fun variation. Take a look at the “Frequency” quilt on page 28 of Piece and Quilt with Precuts. You can create amazing texture by quilting “sort of” straight lines, zigging and zagging from side to side across each strip.

Quilting Modern Zig-Zags

Notice the random irregularities. Not only do they add interest to the quilt, they are fast and easy to do because there’s no marking involved and you don’t have to measure any spacing. This is MY kind of perfectly imperfect quilting!!

Frequency Quilting

See page 28 of Piece and Quilt with Precuts to practice this design.

quilting with your walking foot/dual feed

Rotate the quilt so that you are quilting each strip row from the top to bottom. Quilt a short line by eye and stop with the needle down when you get to the side of your strip. Lift the foot up and slightly rotate the quilt so that you can angle the line in the opposite direction. Keep going, quilting the irregular lines from side to side. If you have a knee-lift or hover feature on your machine, use it so that you can leave your hands on the quilt the entire time.

To prevent whiskering (wrinkles) or puckers on your quilt, quilt each row starting at the top of the quilt and working your way to the bottom each time. Just like when I stitched in the ditch last week, I’ll start on the right side of the quilt and work my way towards the center, then rotate the quilt and keep going from the center out.

Alternate Method: Free-Motion Quilting the Zig-Zags

To get started free-motion quilting, I recommend using a Supreme Slider – a slick sheet that clings to the bed of your sewing machine, and a pair of Machingers gloves that will give you a better grip on your quilt. Just remember to only use the Supreme Slider while FMQ, not walking foot quilting, so that you don’t accidentally stitch through it! (Ask me how I know….)

Tools for free motion quilting: open toe foot, gloves, supreme slider

The gloves and slider will help me control the quilt with less strain on my hands.

I’ve lowered my feed dogs and I’m quilting with an open toe free motion foot so I can better see what I’m doing. Although my machine does come with a stitch regulator, I actually prefer quilting without it. I learned without a regulator so that’s the movement I’m most comfortable with.

However, if you have a stitch regularot, give it a try and see which feels more comfortable to you – with or without. Here’s another tip I picked up from my good buddy Leah Day: try quilting both with your feed dogs up and down to see which gives you a better stitch. The nice thing about using a Supreme Slider is that it covers the feed dogs, keeping them out of the way if you decide to keep them up!

Free Motion Quilting Zig-Zags

Free-motion quilting is faster, but requires more control and lots of practice.

Did you know you can free-motion quilt short straight lines without a ruler? If they are done in short bursts, you can eyeball a straight line if you look ahead and pick a point you are trying to get to.

The reason I’m quilting this design free-motion instead of with a walking foot is that it’s faster, since I don’t have to stop and turn the quilt for each zig and zag. However, it requires more muscle control, so practice both ways first on a scrap of batting and fabric and then decide which technique is easier for you to master.

Free Motion Modern Zig-Zag Design

First pass across the quilt – zig-zags in all the gray areas.

Notice that I’m quilting modern, random zig-zags in the gray strips between each print strip (not including the small gray squares). To quilt one long continuous line without breaking thread, zig or zag over to the next gray section to quilt. If needed, it’s okay to backtrack (or quilt over a precious quilting line) in the seam to get to where you need to go.

After quilting one pass of zig-zags, I decided that I wanted to quilt another set of lines, intersecting what I had already done. I’m using the same method to quilt the random short lines, but crossing over each previous line as shown below:

Double Zig-Zags fmq

Notice how I’m quilting each row from the top of the quilt to the bottom.
I will rotate the quilt as needed to find a comfortable quilting position.

Machine Quilting Homework

Quilt all of the gray areas with a blending thread. I used the same Aurifil 50 weight gray that I used for stitching in the ditch last week. Quilt one pass across the quilt like the pictures I showed above. Then quilt a second pass across the quilt to give it more random texture.

We will tackle the print strips next week, using another free-motion motif from a different quilt in the book. It’s been fun to mix and match the designs to show how versatile they can be!

Free Motion Quilting Double Zig-zags

Divide and Conquer – quilt all of one design first before moving on to the next.

It’s Not to Late to Start!

Remember – you can jump in and make this quilt any time. Just grab a copy of the book and your favorite fabrics (strips, scraps, or stash).

Click here for the supply list and links to all of the previous posts.
Then share your progress on instagram #dotndashqal or in my Christa Quilts facebook group.

Free motion quilting double zig zags

I love yummy machine quilting texture!! Next week I’ll show you how to quilt the rest.