Welcome to the Block Chain quilt along! This week we will be cutting all the fabric needed to make this quilt. It will be super easy because the center of each block features precut squares which are already cut for you (one of the reasons I love working with precuts)!
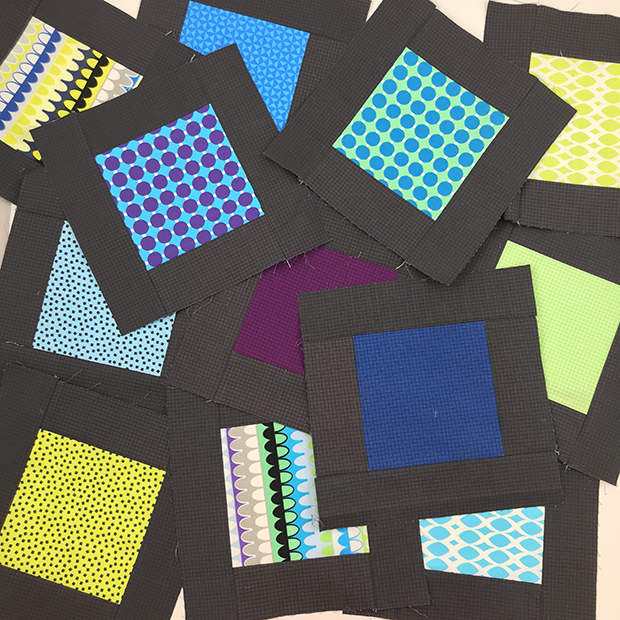
You will need one charm square for each block in your quilt. Because the throw size consists of 36 blocks and my Gridwork charm pack includes 42 squares, I pulled out 6 squares of the black and gray prints. I like the random coloring below with just two of the black/white squares included for interest. Refer to the Block Chain pattern for the number of squares you’ll need for the smaller or larger sizes.
The important thing to remember is that as long as there is contrast between the squares and the surrounding frames (black in my quilt), it will still look good. Here’s another tip: if one of your squares is the same color as your background, it will look like there’s a hole in your block, so avoid that if possible.
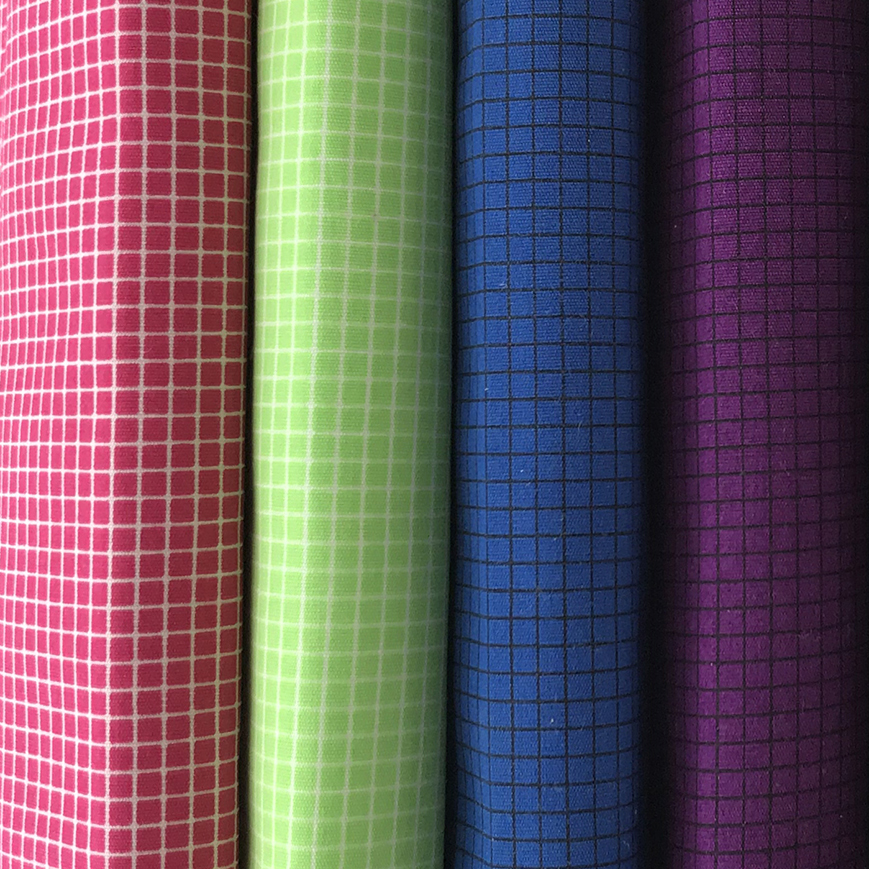
Refer to the Gridwork quilt pattern on page 3 to cut out your accent, background, and binding strips. Here are closeup images of the fabrics that I used:
The black is called Square Grid. I included this one in the Gridwork line specifically for this quilt!!
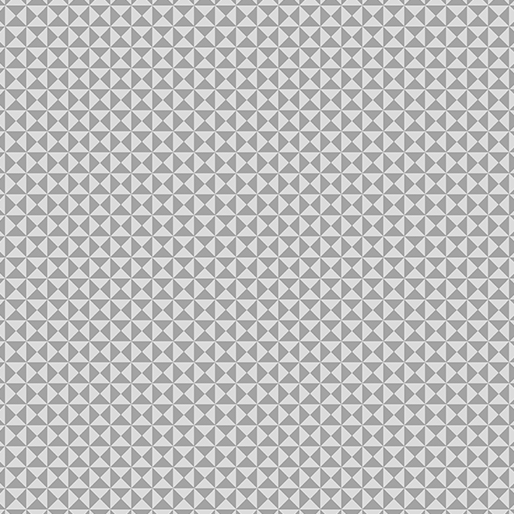
There are several great grays in Gridwork but I really like the look of the gray Hourglass print for the background. It gives the quilt just the right amount of interest and texture!
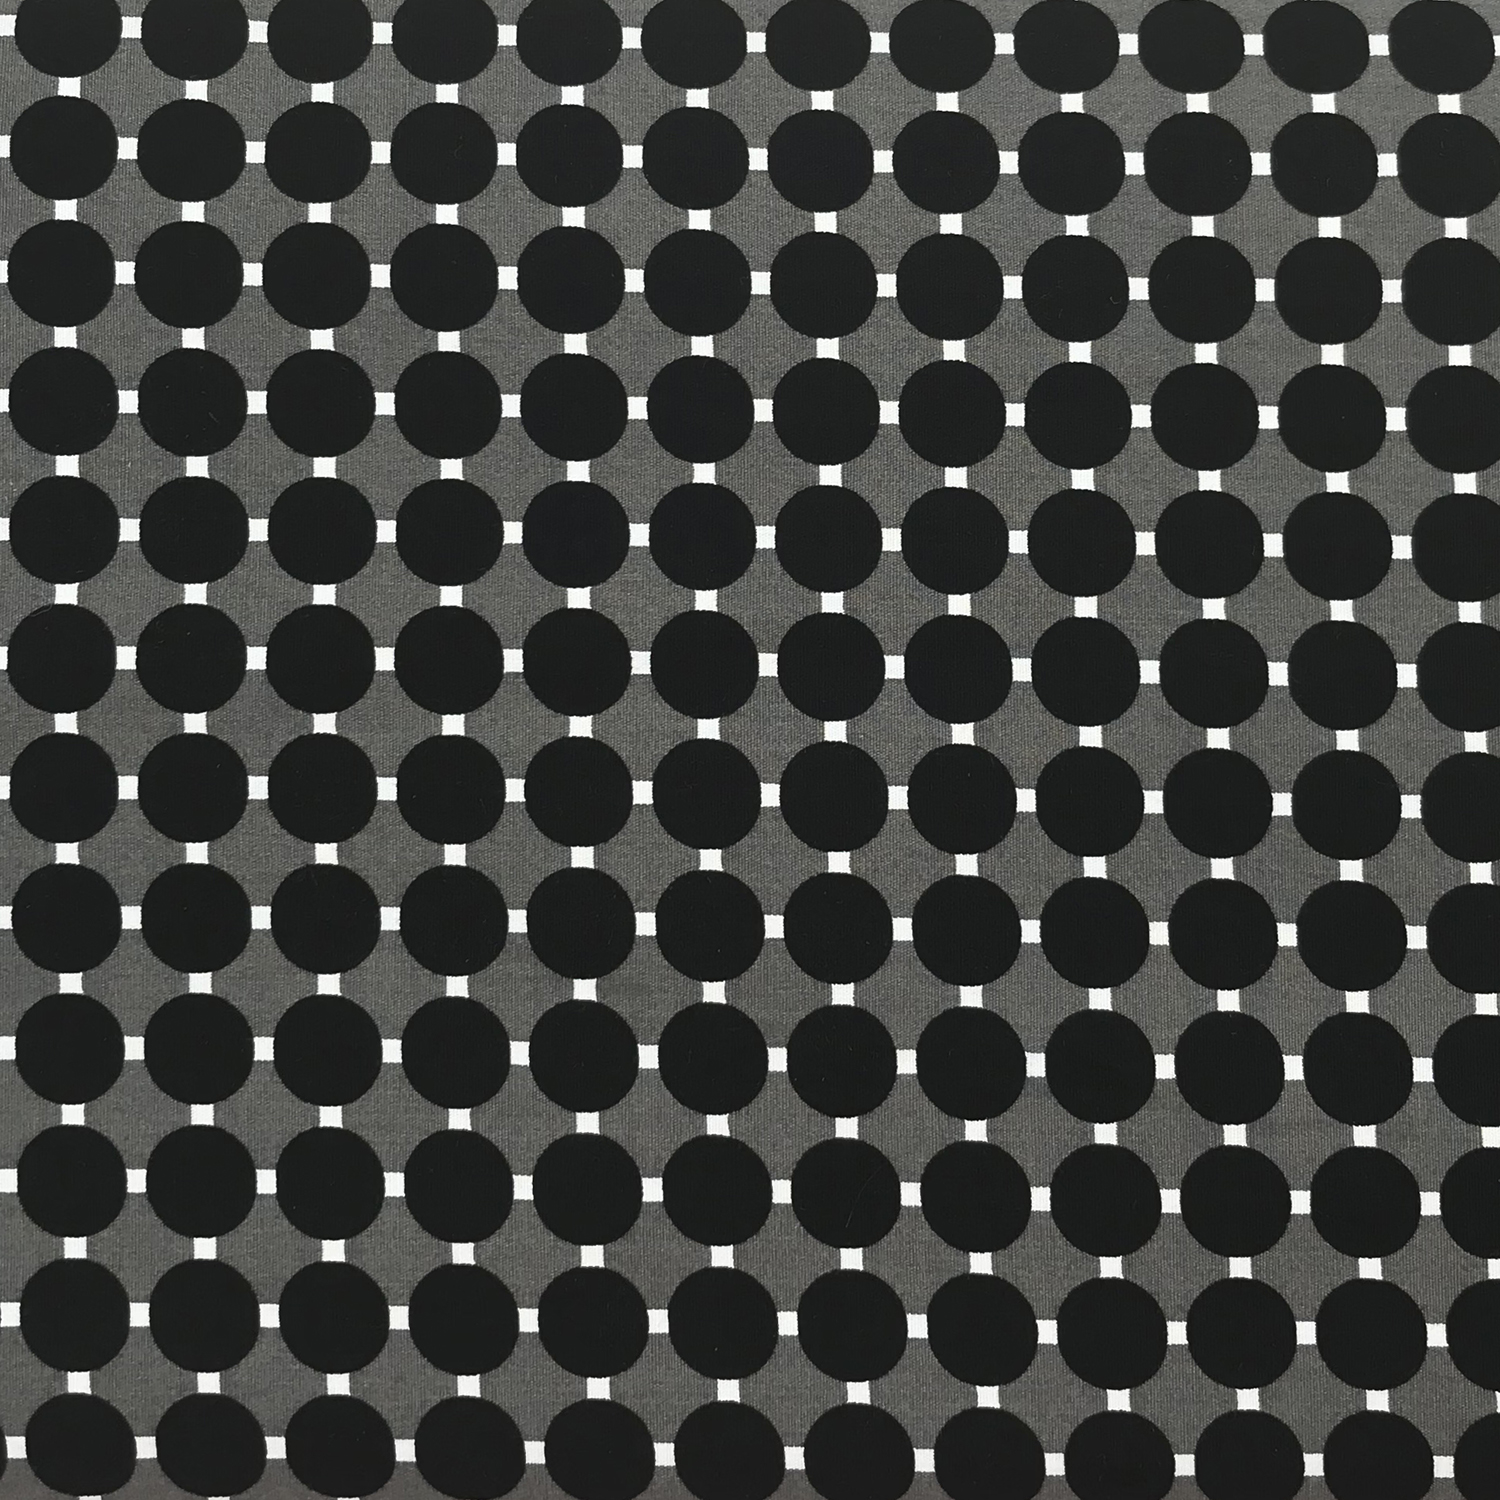
I especially love using fun geometric bindings for my quilts, so I picked the black Circle Grid print to finish off the edges of the quilt.
Here’s a tip to save for the end: if you want a super narrow binding thats finishes exactly 1/4″ evenly on front and back, cut your strips 2″ and sew the binding on with 1/4″ seam allowance.
Next week we will start sewing all of our cut units into blocks. Just remember, you can work at your own pace, faster or slower as you wish. I’m here to cheer you on each step of the way!
How are your Pieced Primrose blocks coming along? Did you check out some of the optional layouts from last week’s post? This week will be pretty straightforward as we sew the blocks and add borders to complete the quilt top.
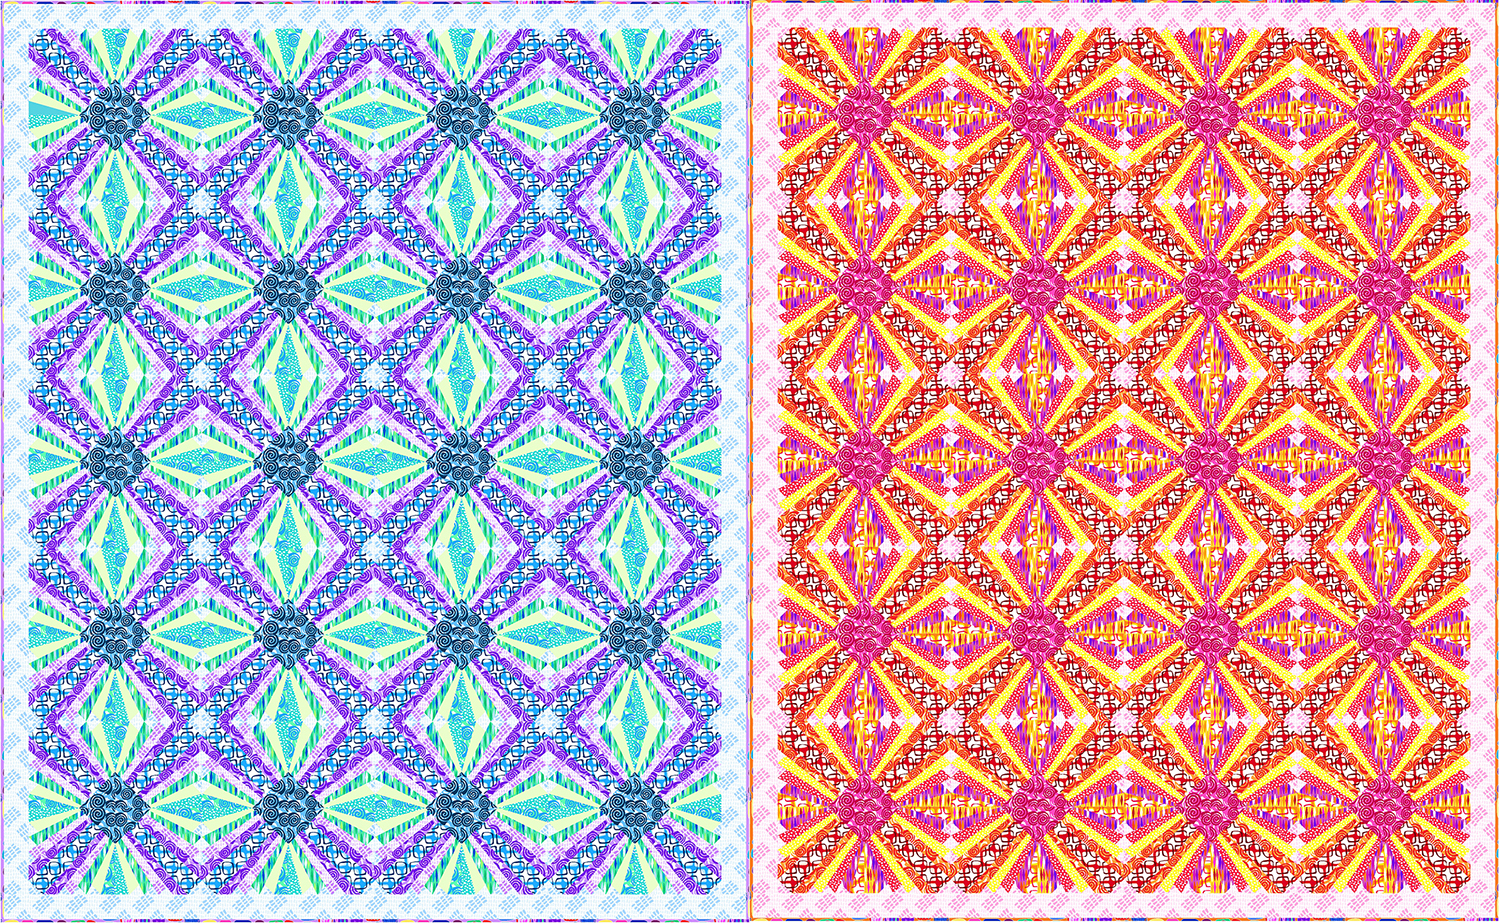
For my cool and warm versions of the quilt, I’m doing the standard layout as shown on the cover of the Pieced Primrose Quilt pattern above. It’s the same basic layout whether you are making the smaller wall size, or the larger throw size.
First I sewed all of the foundation pieced blocks into larger 4 block units. The trick is to rotate the blocks so they look like the image below and sew 2 rows of 2 blocks each . Because of the bias edges on the blocks, you want to hand them carefully and use pins to ensure the edges match correctly.
Although the block seams are pressed to the side during block assembly (due to the foundation paper piecing process), I press the larger block seams open so they will lie flat.
Large Primrose Block – Warm Colorway
Large Primrose Block – Cool Colorway
For the wall size quilt you will be making 4 of these larger blocks. For the throw size, you will be making 20 of them. Just remember that you can always change up the size of your quilt by adjusting the number of blocks that you sew.
Although the pattern gives you the correct measurements to cut for the borders, I always recommend measuring your quilt top first. It can shrink or grow depending on how accurate your seam allowances are.
The best advice is to measure both sides and through the middle, then cut your side border strips to this length. After the side borders are sewn, measure again with the borders attached and cut the top and bottom borders to match.
Wall Size Finished Top – Warm
Wall Size Finished Top – Cool
Next week we will baste our quilts and get them ready for machine quilting. So if you are still sewing your blocks together, don’t worry – you still have plenty of time! Remember to share your progress on instagram #piecedprimrose quilt or in my ChristaQuilts Facebook group.
LINKS AT A GLANCE
Click the links below for supplies needed to make this quilt:
First of all – huge thanks and hugs to those of you who commented on my last post about my blogging goals for the new year. I’m so grateful to all of you who read this blog. Your kind thoughts really made my week!!
Today I’m excited to announce that my new Gridwork fabric is finally here – whoo hoo!!
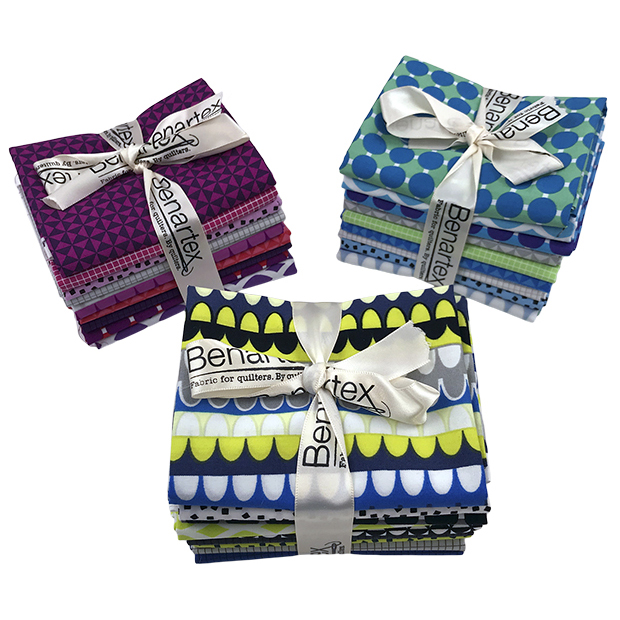
Gridwork includes 27 prints divided into three colorways: Amethyst, Breeze, and Citron. Each colorway includes a total of 9 pieces and they are available in fat quarters, half yards, or full yard bundles.
Use code SHIP at checkout on orders of $50 or more for a bonus free shipping discount!
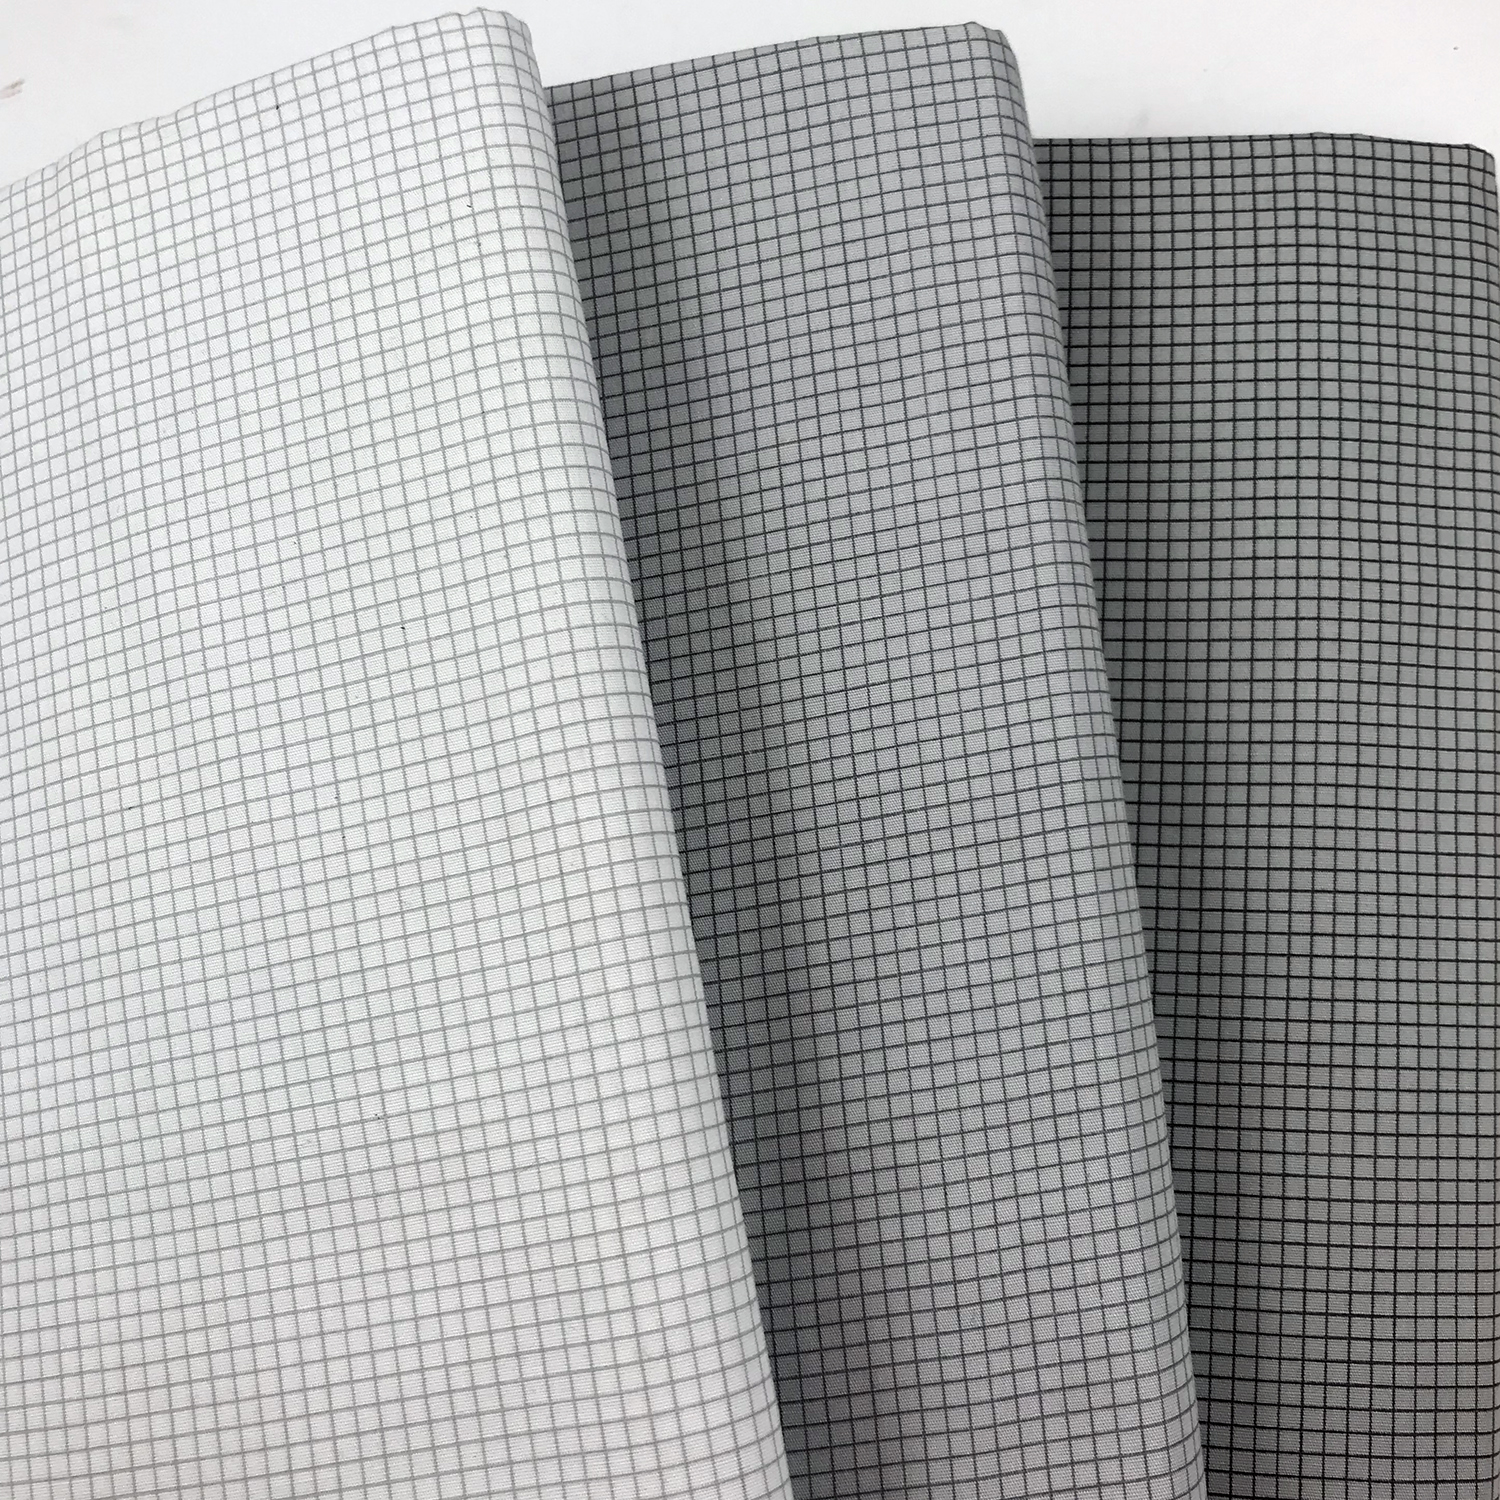
By request, I also put together a Gridwork neutrals bundle – 8 pieces of the black, white and gray prints from among all three colorways:
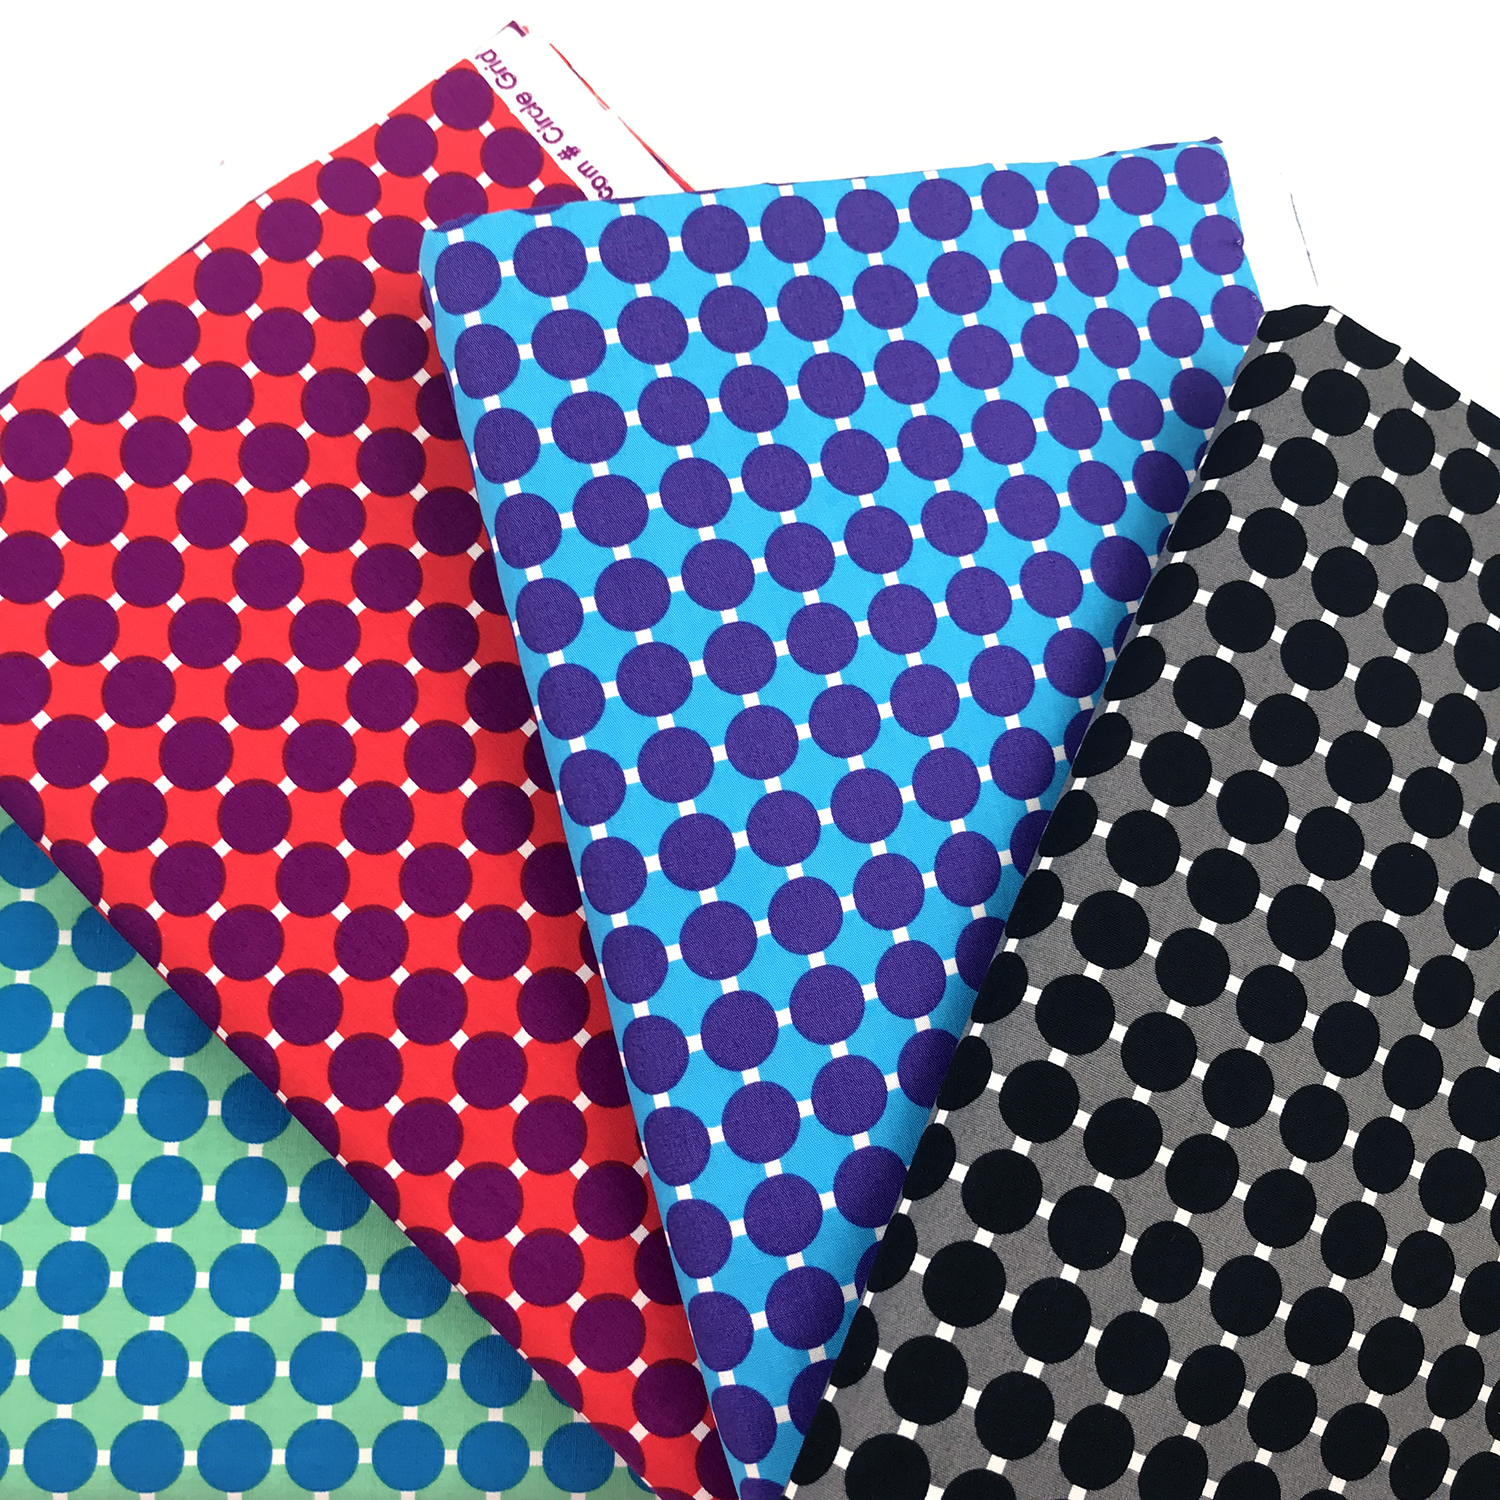
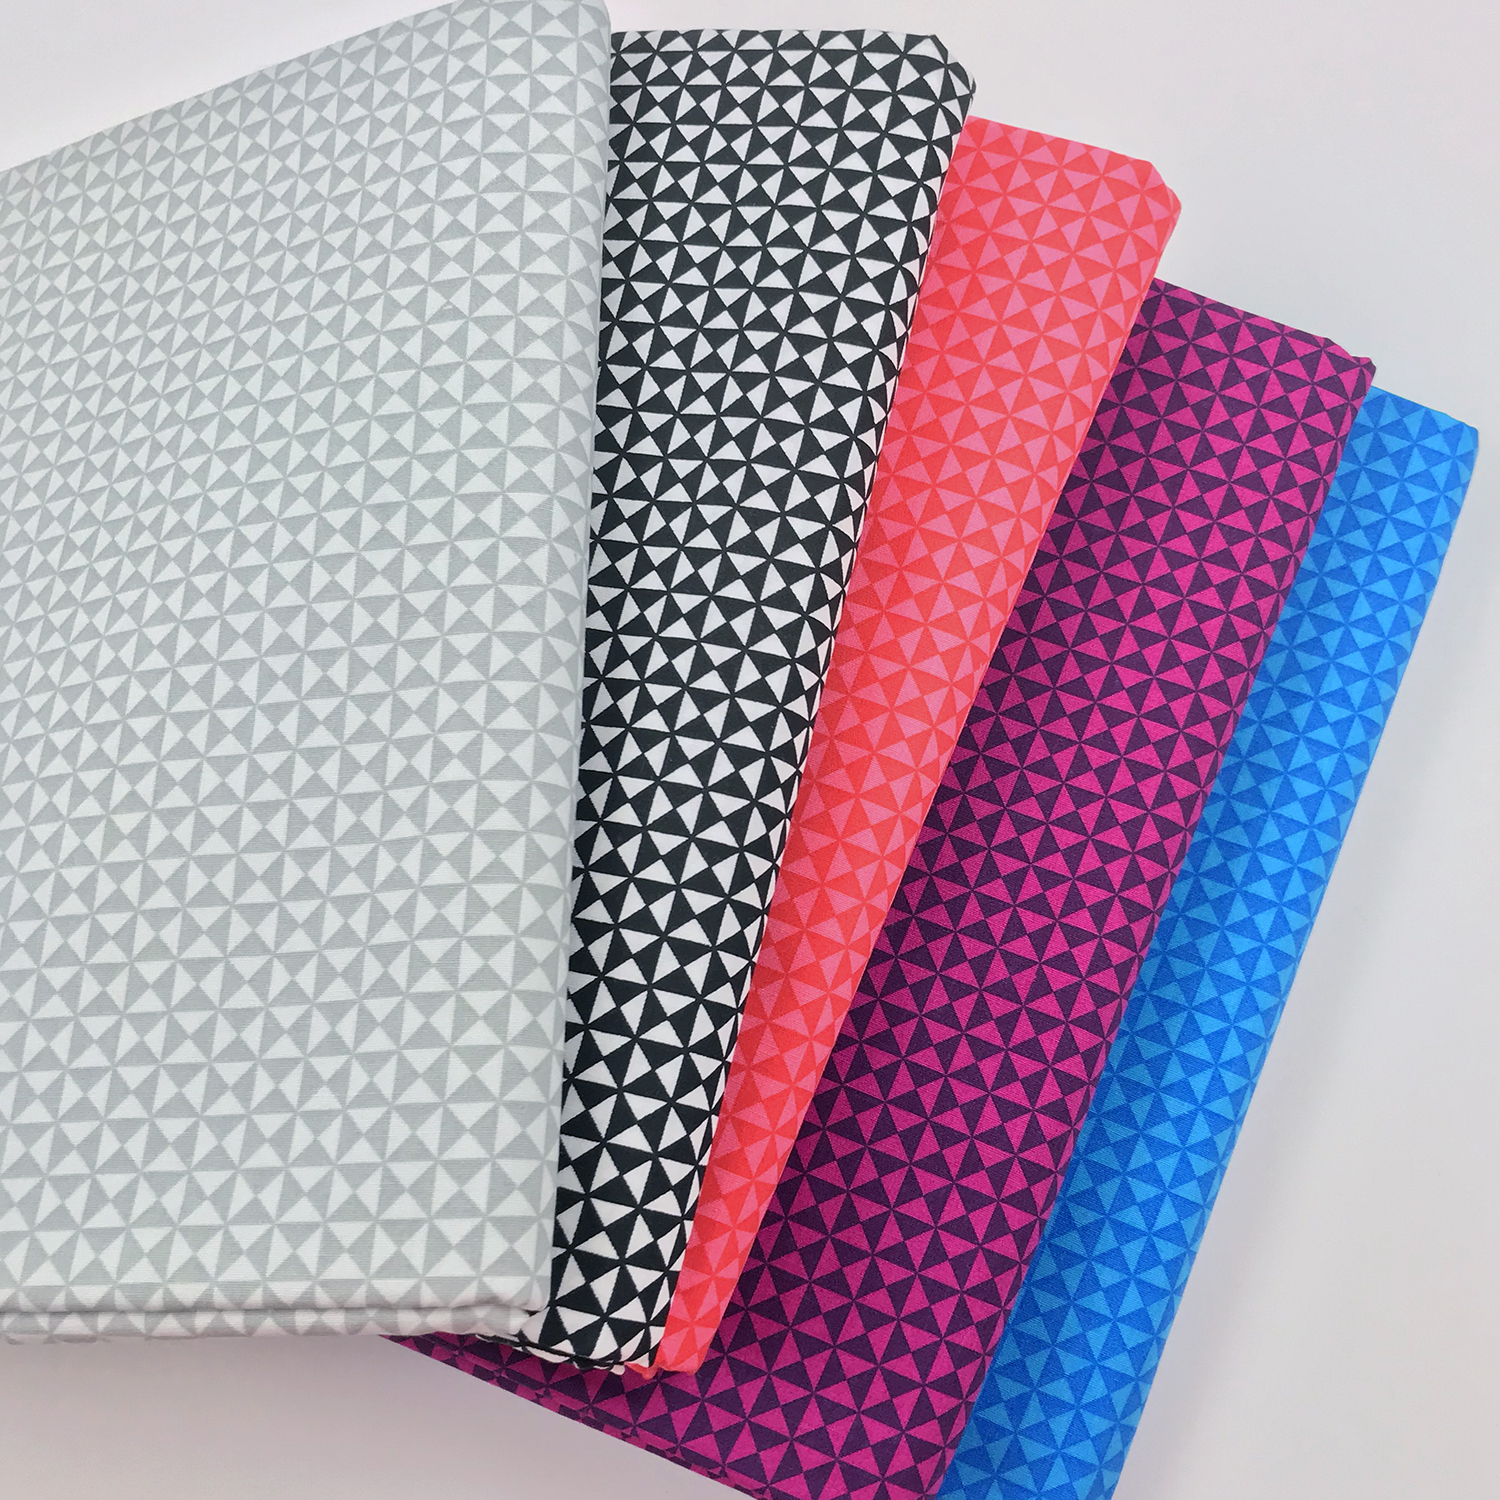
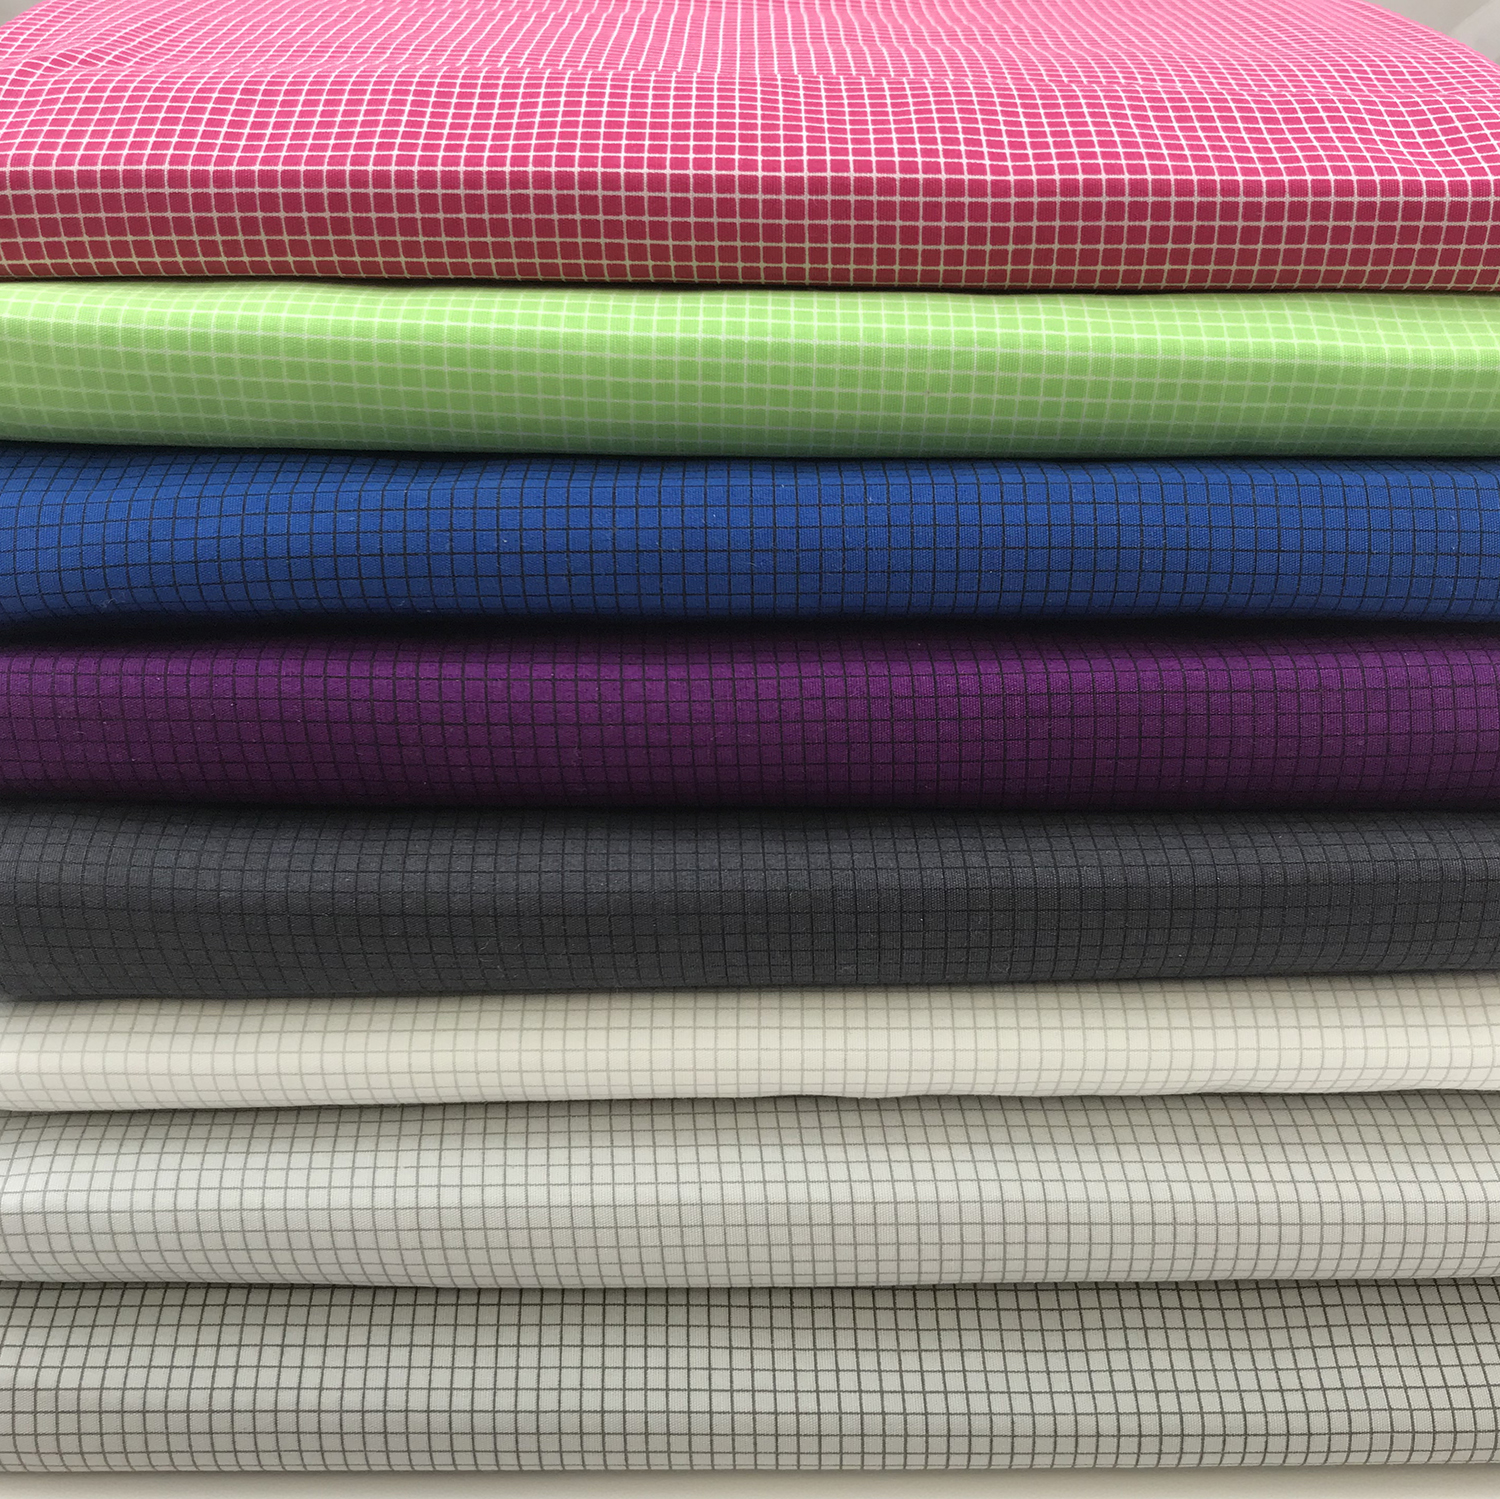
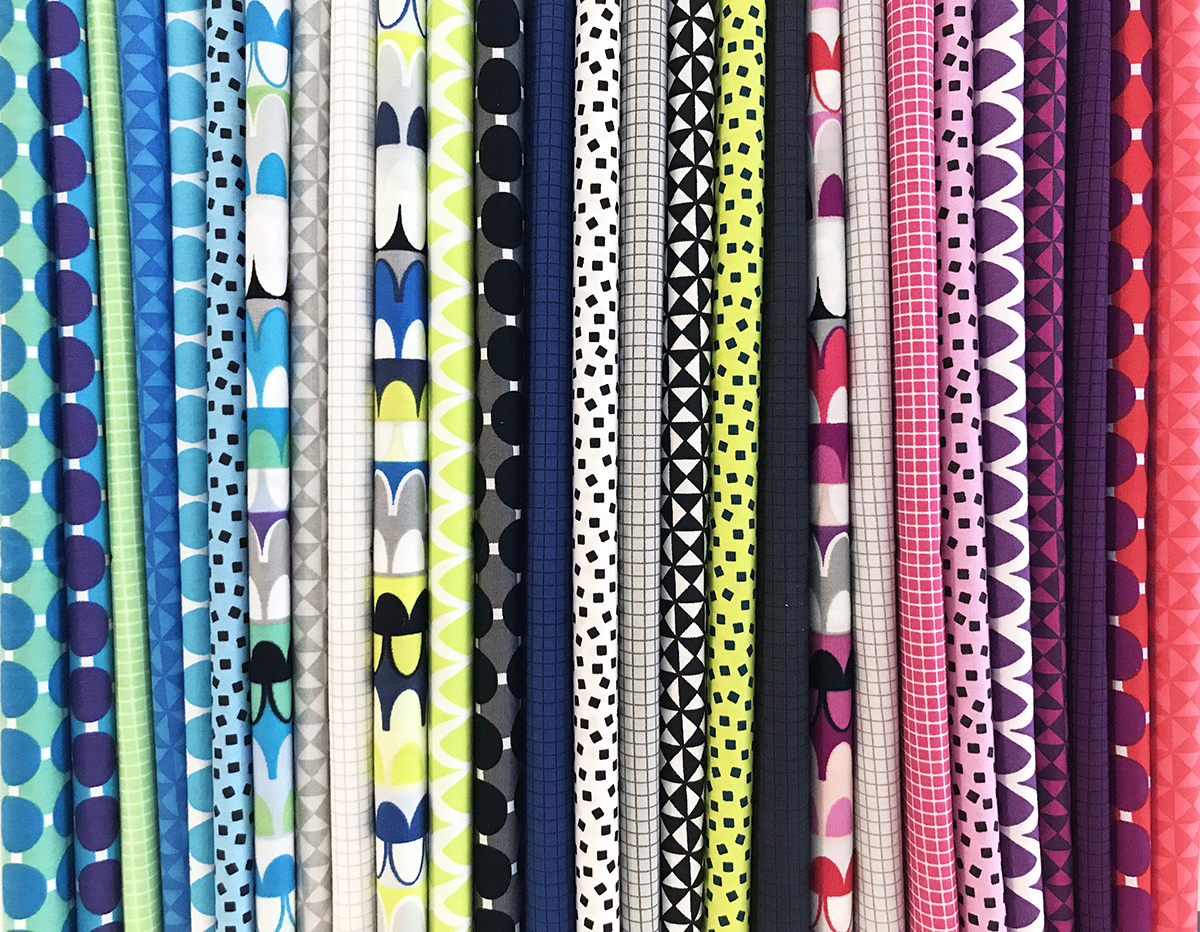
Of course, you can pick and choose your favorite prints by the yard, too! There are a total of 6 different geometric designs with several colors of each. Here they are grouped together by print:
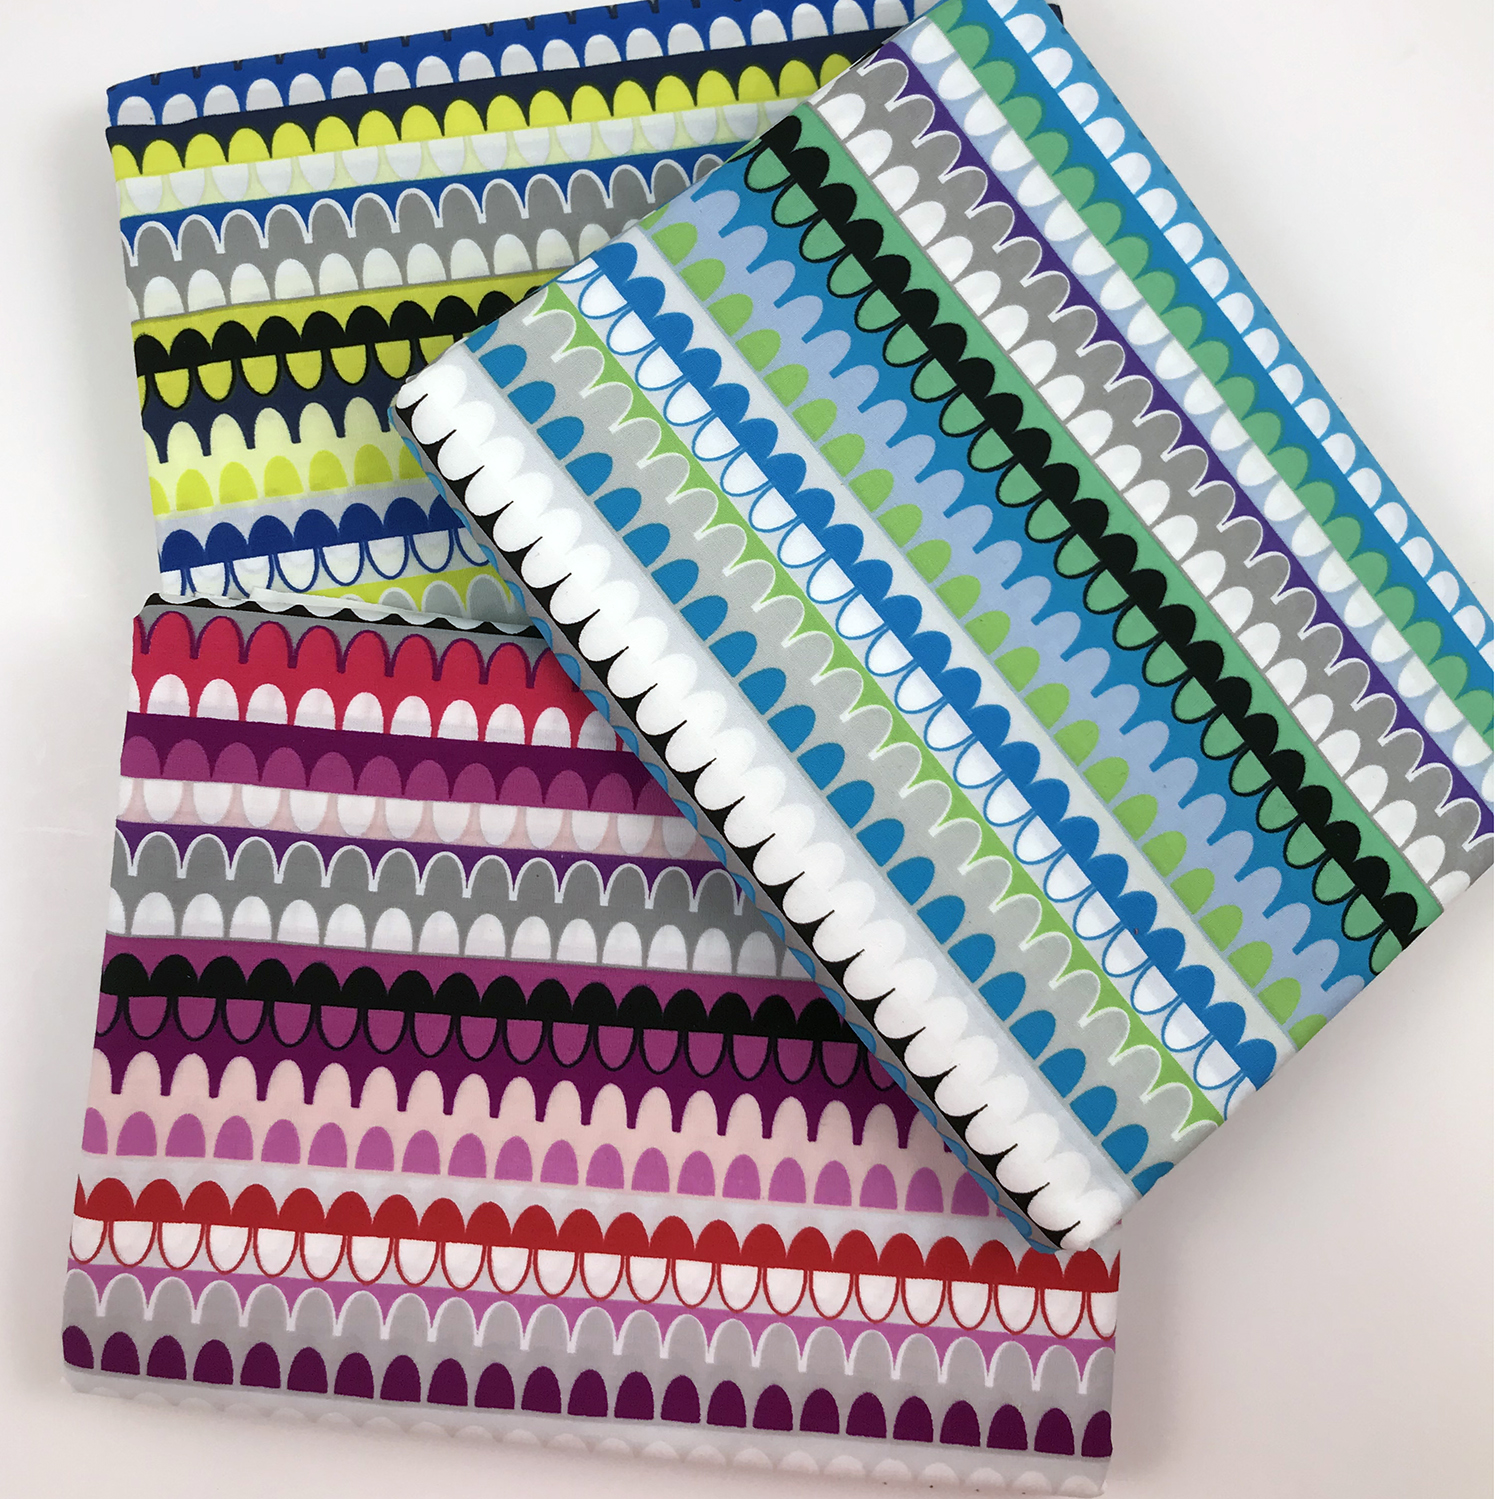
Arches Stripe in Blue, Turquoise, and Fuchsia
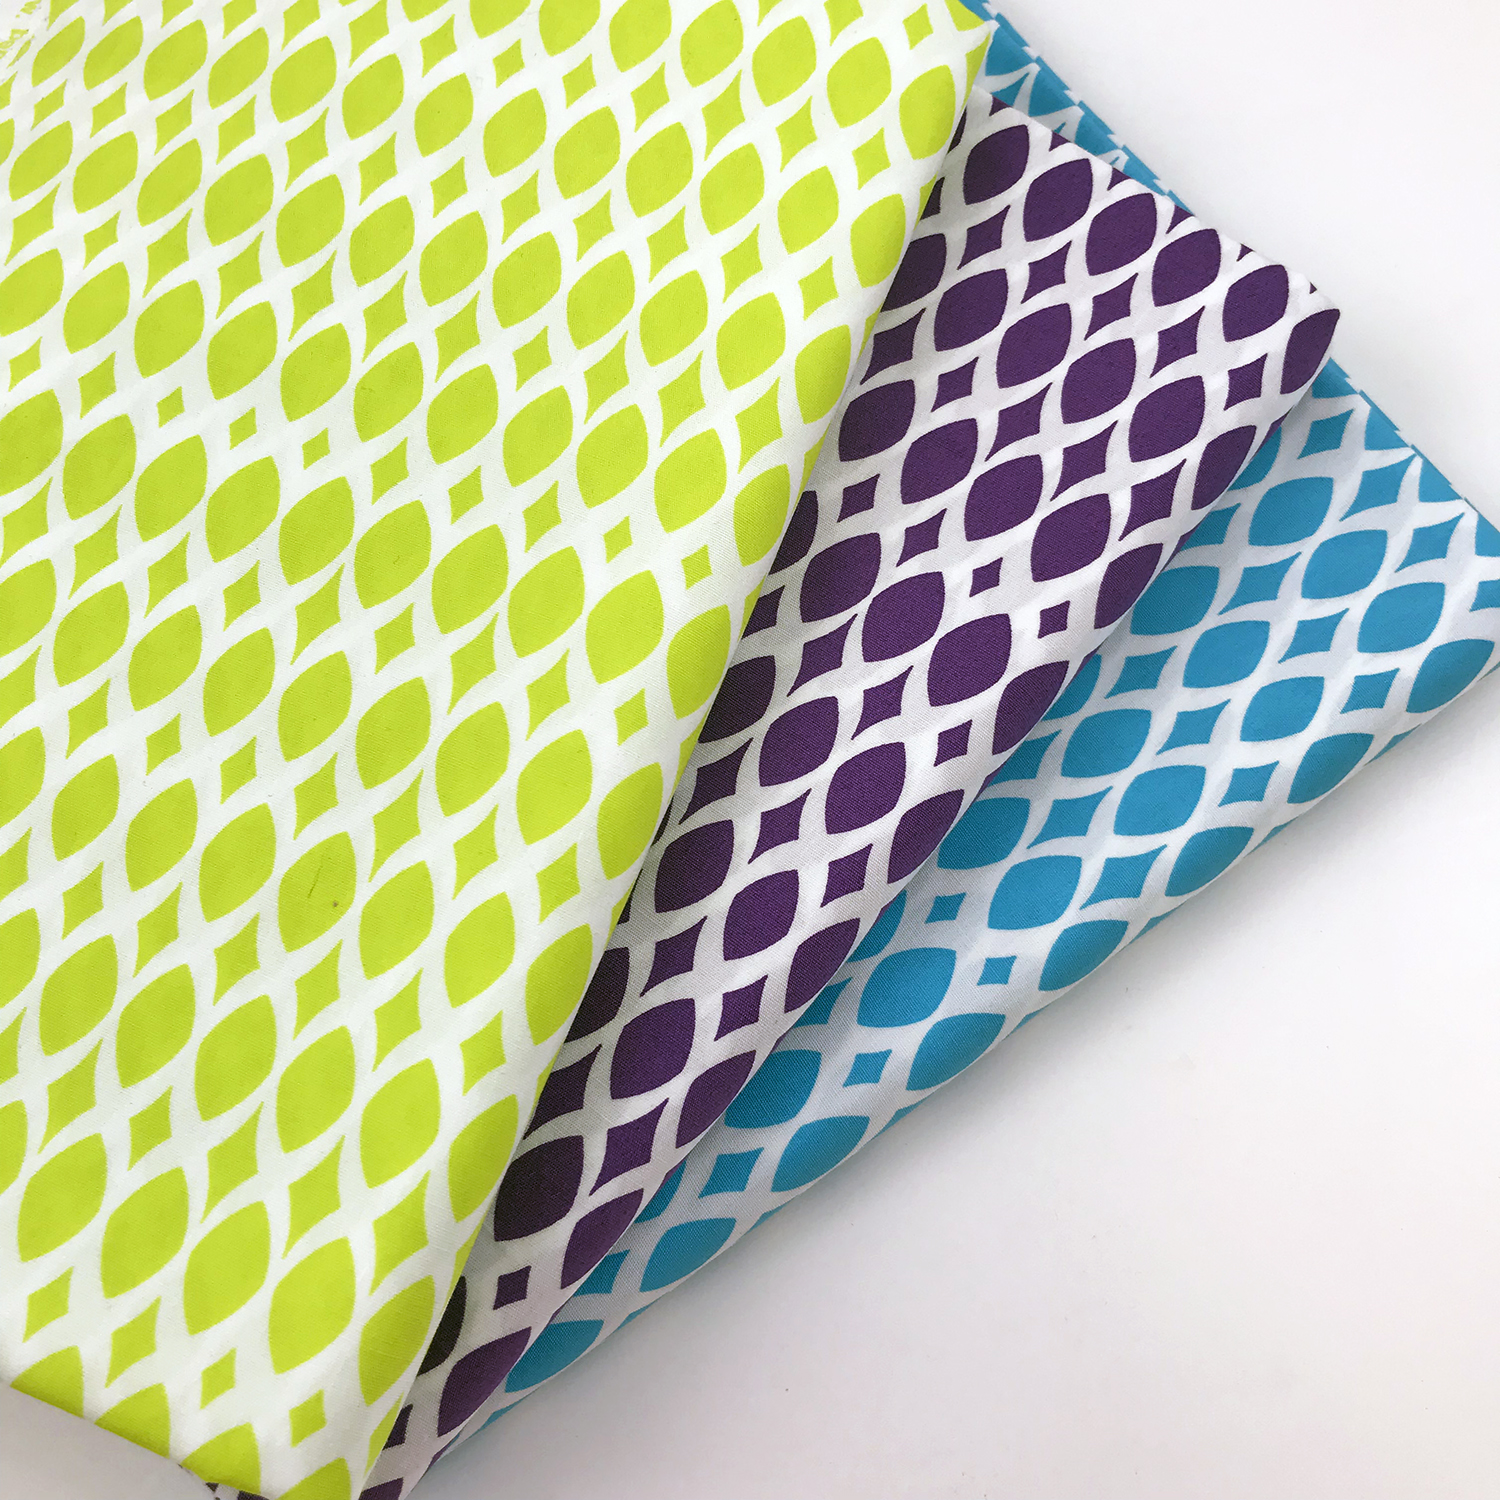
Diamond Ovals in Citron, Purple and Turquoise
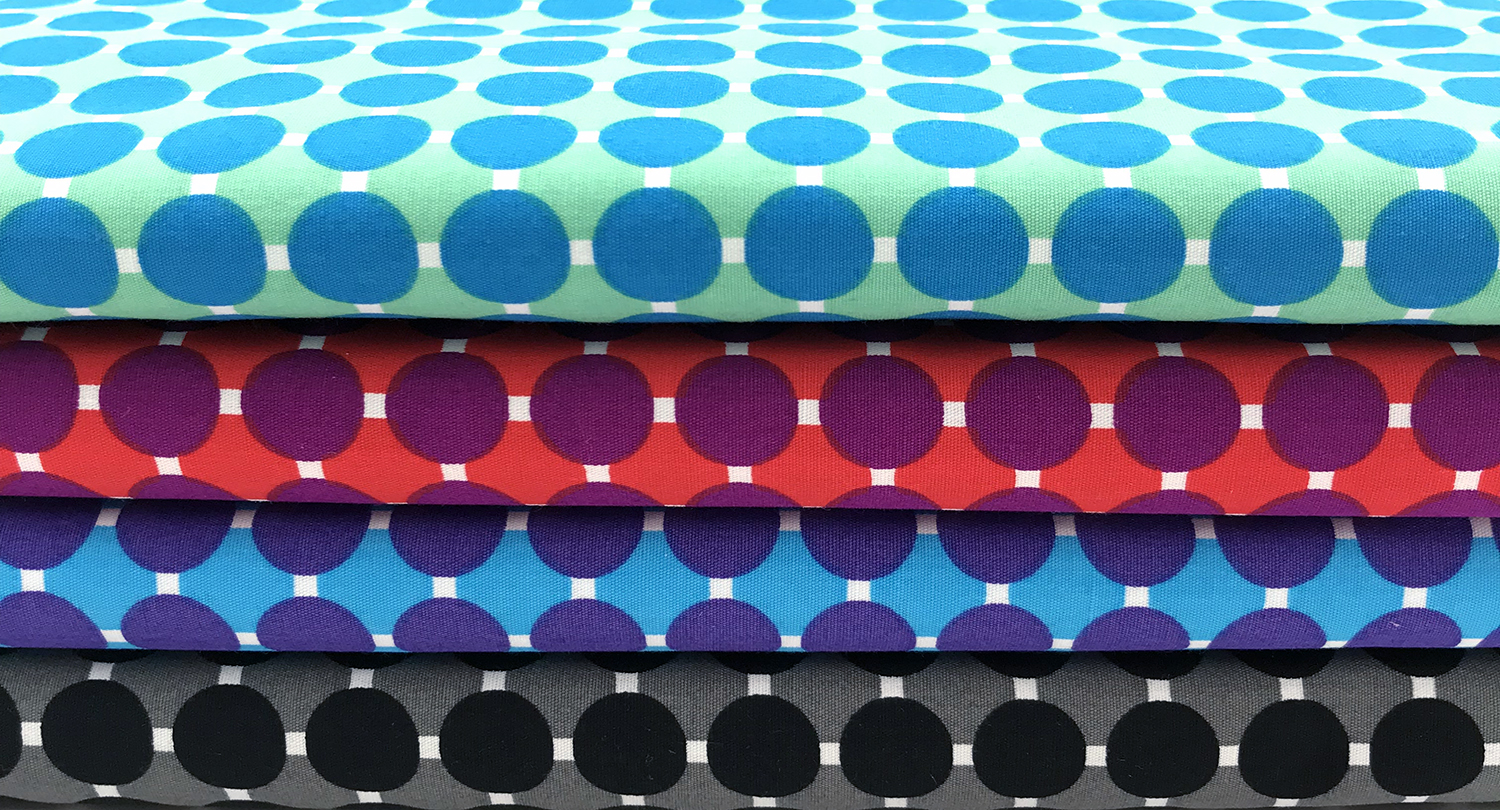
Circle Grid in Caribbean, Purple/Red, Grape/Blue, and Black
Hourglass in Gray, Black/white, Red/pink, Purple and Blue
When Gridwork first arrived, I created an unboxing video on Youtube. It always feels like Christmas when I get new fabric, but these actually DID arrive right before Christmas and I couldn’t wait to dive into them!
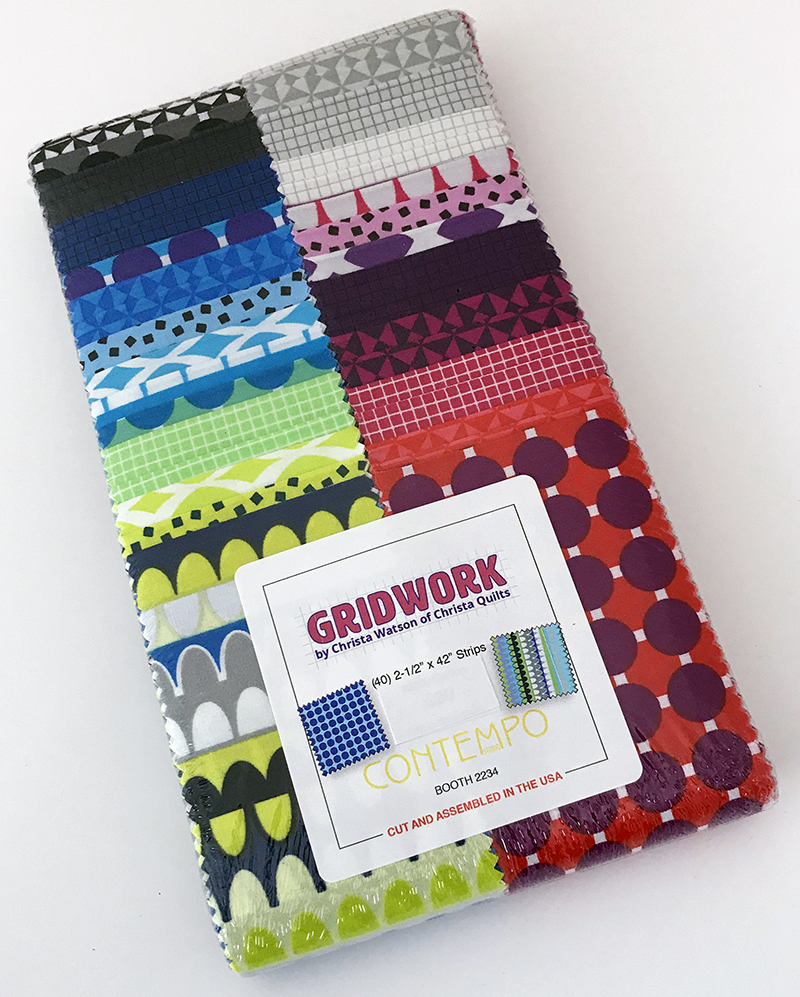
Gridwork Precuts
Gridwork comes in all of the standard precuts, too: 5″x5″ charm packs, 10″x10″ squares, and everyone’s favorite: 2 1/2″ strip rolls which Benartex calls “Strip-pies.”
The Strip-pie includes 40 strips with 1-2 of each print as shown below:
To thank you for being a loyal blog reader, I’d like to offer you free shipping on your Gridwork fabric purchase. Use code SHIP at checkout to get free US shipping on orders of $50 or more. International customers will get $5 off the shipping cost order and I’ll refund any excess international shipping charges.
I sure hope you enjoy Gridwork as much as I do! When you share your makes on social media, please use the hashtag #gridworkfabric so I can see what you are creating. I love to re-share and inspire others, too!
Are you planning on learning to foundation paper piece in the new year? With my Pieced Primrose pattern, learning this skill is much easier than you’d think!! Be sure to let me know in the comments if you’ve done paper piecing before, or if this will be your first experience with it.
The fun begins on Monday, January 6th with weekly posts to keep you on track for finishing by the end February. But you can still work at your own pace, and I’m here to cheer you on, no matter how long it takes!
Next week’s introductory post will talk a little bit more about the tools and supplies and general foundation paper piecing tips. Then we’ll dive into cutting the following week, so you still have plenty of time to gather your fabrics and supplies.
We’ll take extra time to piece the blocks and will finish up with basting, machine quilting and binding. After all, if you’ve done a quilt along with me before, you know how much I detest these three little words, “quilt as desired!”
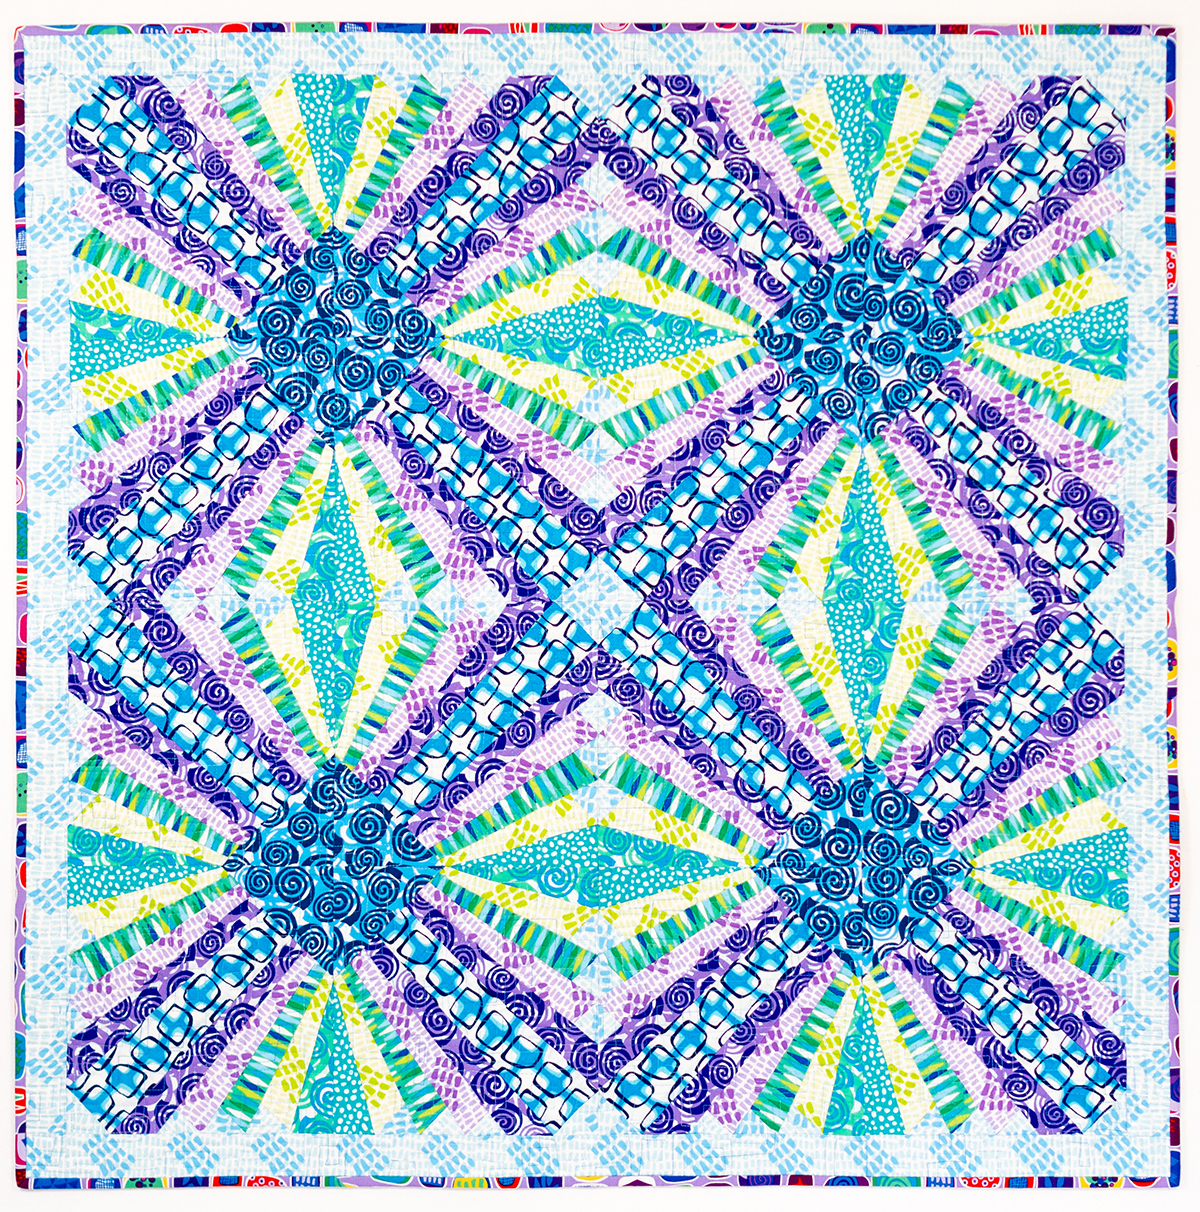
Pieced Primrose shown in the Cool colorway of Abstract Garden above.
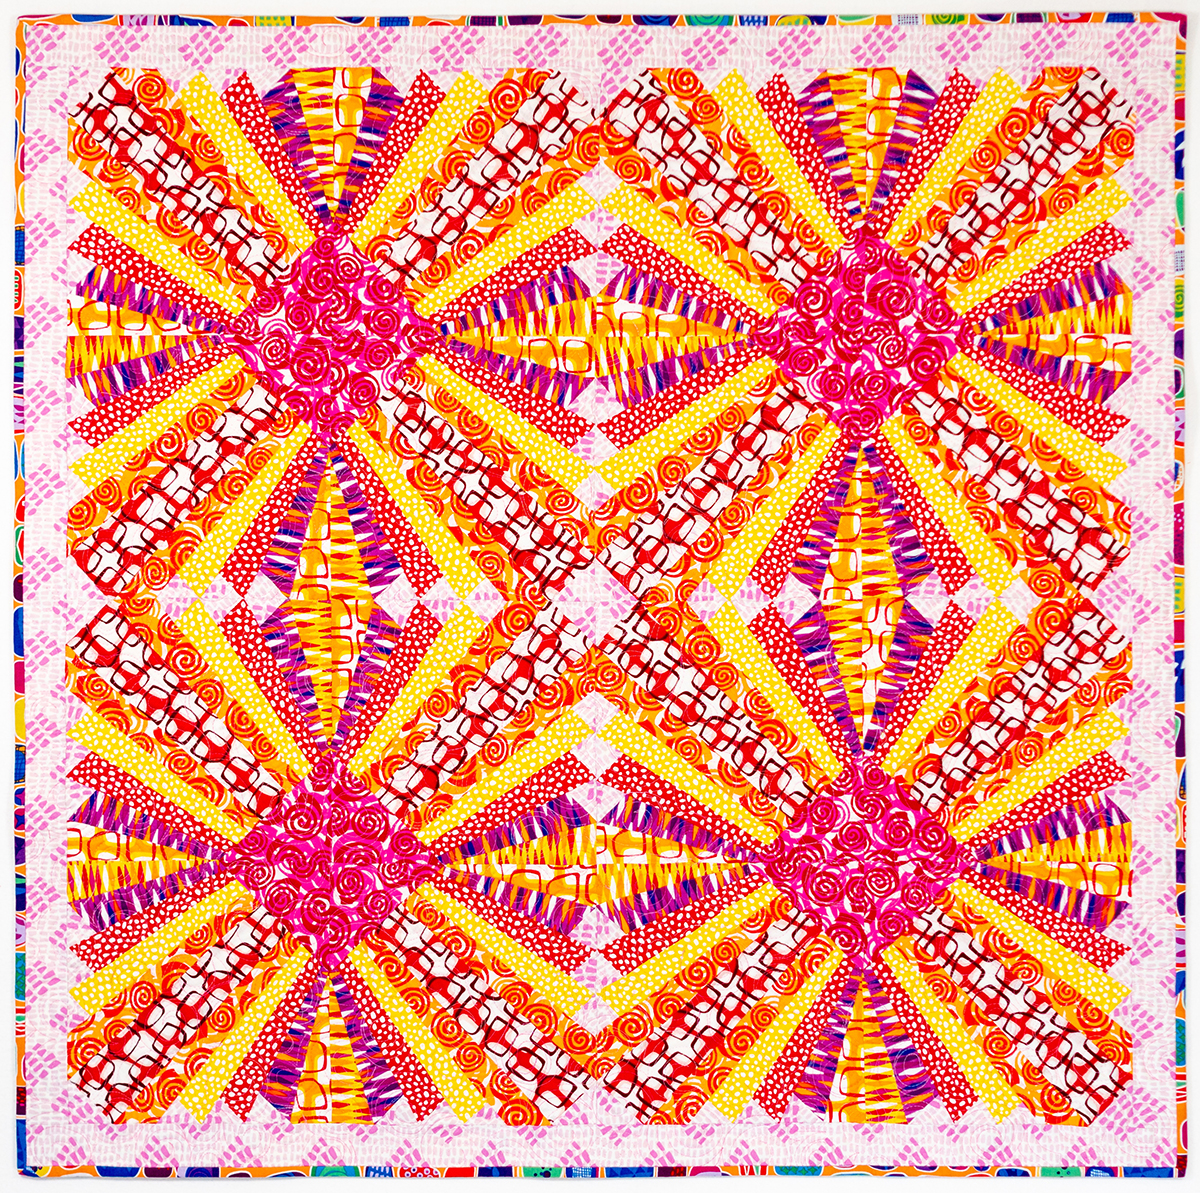
Pieed Primrose shown in the warm colorway of Abstract Garden below.
My Pieced Primrose quilt pattern is super versatile and you can sew up as many blocks as you like with several different layouts. And it looks fabulous in ANY fabrics you choose to use. So I hope you’ll join the fun and consider me your cheerleader for “Start to Finish” quilting!!
Before the issue went to print, APQ magazine contacted me and asked if I’d be willing to offer kits for this quilt since it’s so eye catching. I immediately said yes and they were kind enough to mention my fabric and include a link to my shop in the magazine pattern.
Here’s a photo of the magazine cover, so you know which issue has the pattern:
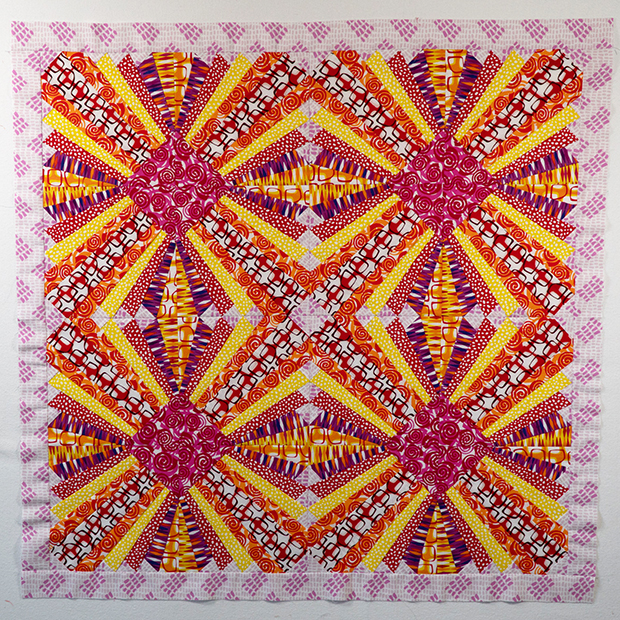
It’s no secret that I simply adore all of Heather Black’s quilt designs. She really makes my fabric look good, don’t you think??
Of course I’m biased because it’s using my fabric, but I just love the bold design and energy in this quilt! I think Heather did a fabulous job with color placement, and I love how she fussy cut the Mosaic Dots print to create a frame in the borders. Heather is an expert with modern pieced curved designs, and I can’t wait to see what she comes up with next!
Have you enjoyed following along with Infrastructure? Remember, even if you haven’t even started your quilt, you can make it anytime and I’m here to help cheer you on! We’ve come to the very last step of making the quilt and I’m “sew” excited to share my tutorial for binding by machine.
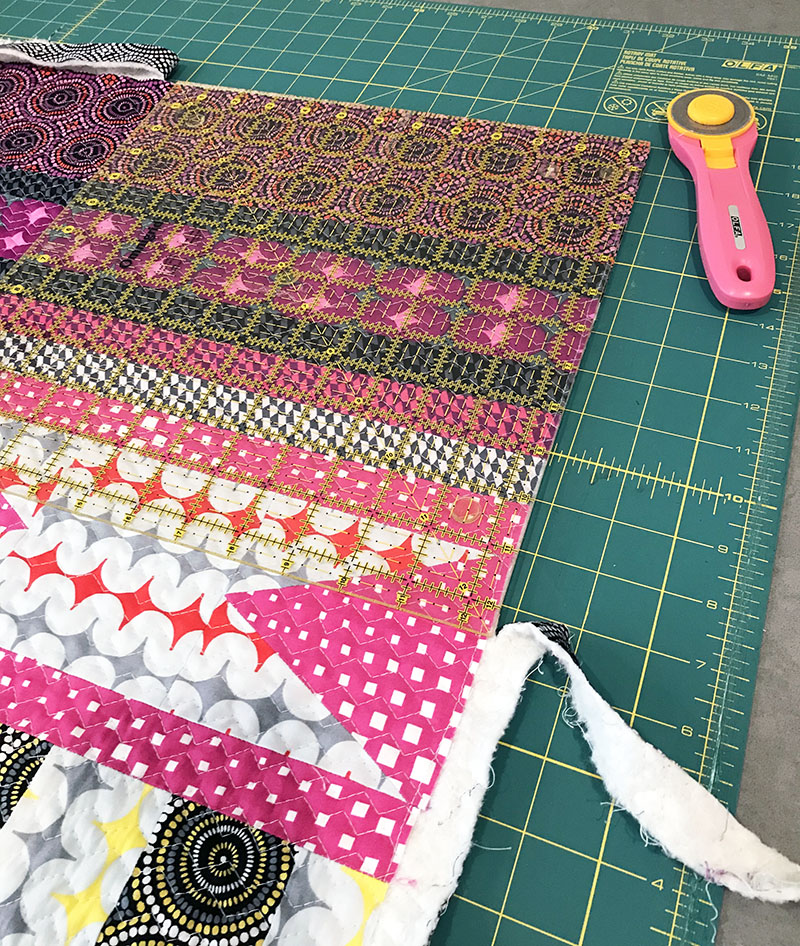
I like to use a large square ruler at the corners and along straight ruler for the sides. I trim the extra batting and backing flush with the edges of the quilt so that I can get a nice, tight binding. I’ll sew with an accurate 1/4″ seam and try not to cut off any points along the edges.
Step 2 – Cut the Strips and Sew Continuously
The length to cut your strips is a personal preference. For this quilt I experimented and cut them out at 2 1/2″ wide so it would give me enough room to finish by machine. But I usually like to cut them narrower at 2″ so I get a nice tight binding that’s even on both sides. Here’s an easy way to calculate the # of strips you’ll need. Take the perimeter of the quilt and add 10″. Then divide that number by 40″ and that will tell you how many strips to cut.
Sew the strips together end to end, mitering each of the corners so you get a long continuous strip. Cut one end at a 45 degree angle so the end and beginning are hidden. Then press the entire binding in half, wrong sides together.
Step 3 – Bind by Machine
Sew the binding to the BACK of the quilt and then secure it to the FRONT of the quilt with a decorative stitch so that it becomes part of the design!
Watch me sew the Binding & Follow Me on YouTube!
I’ve put together a short 6 minute video showing how I sew the strips and attach the binding by machine.
The difference between hand binding and machine binding is which side of the quilt I sew it on. I sew it to the back and finish by front by machine. Or I sew it to the front and finish on the back by hand. But whichever technique you choose is completely up to you!
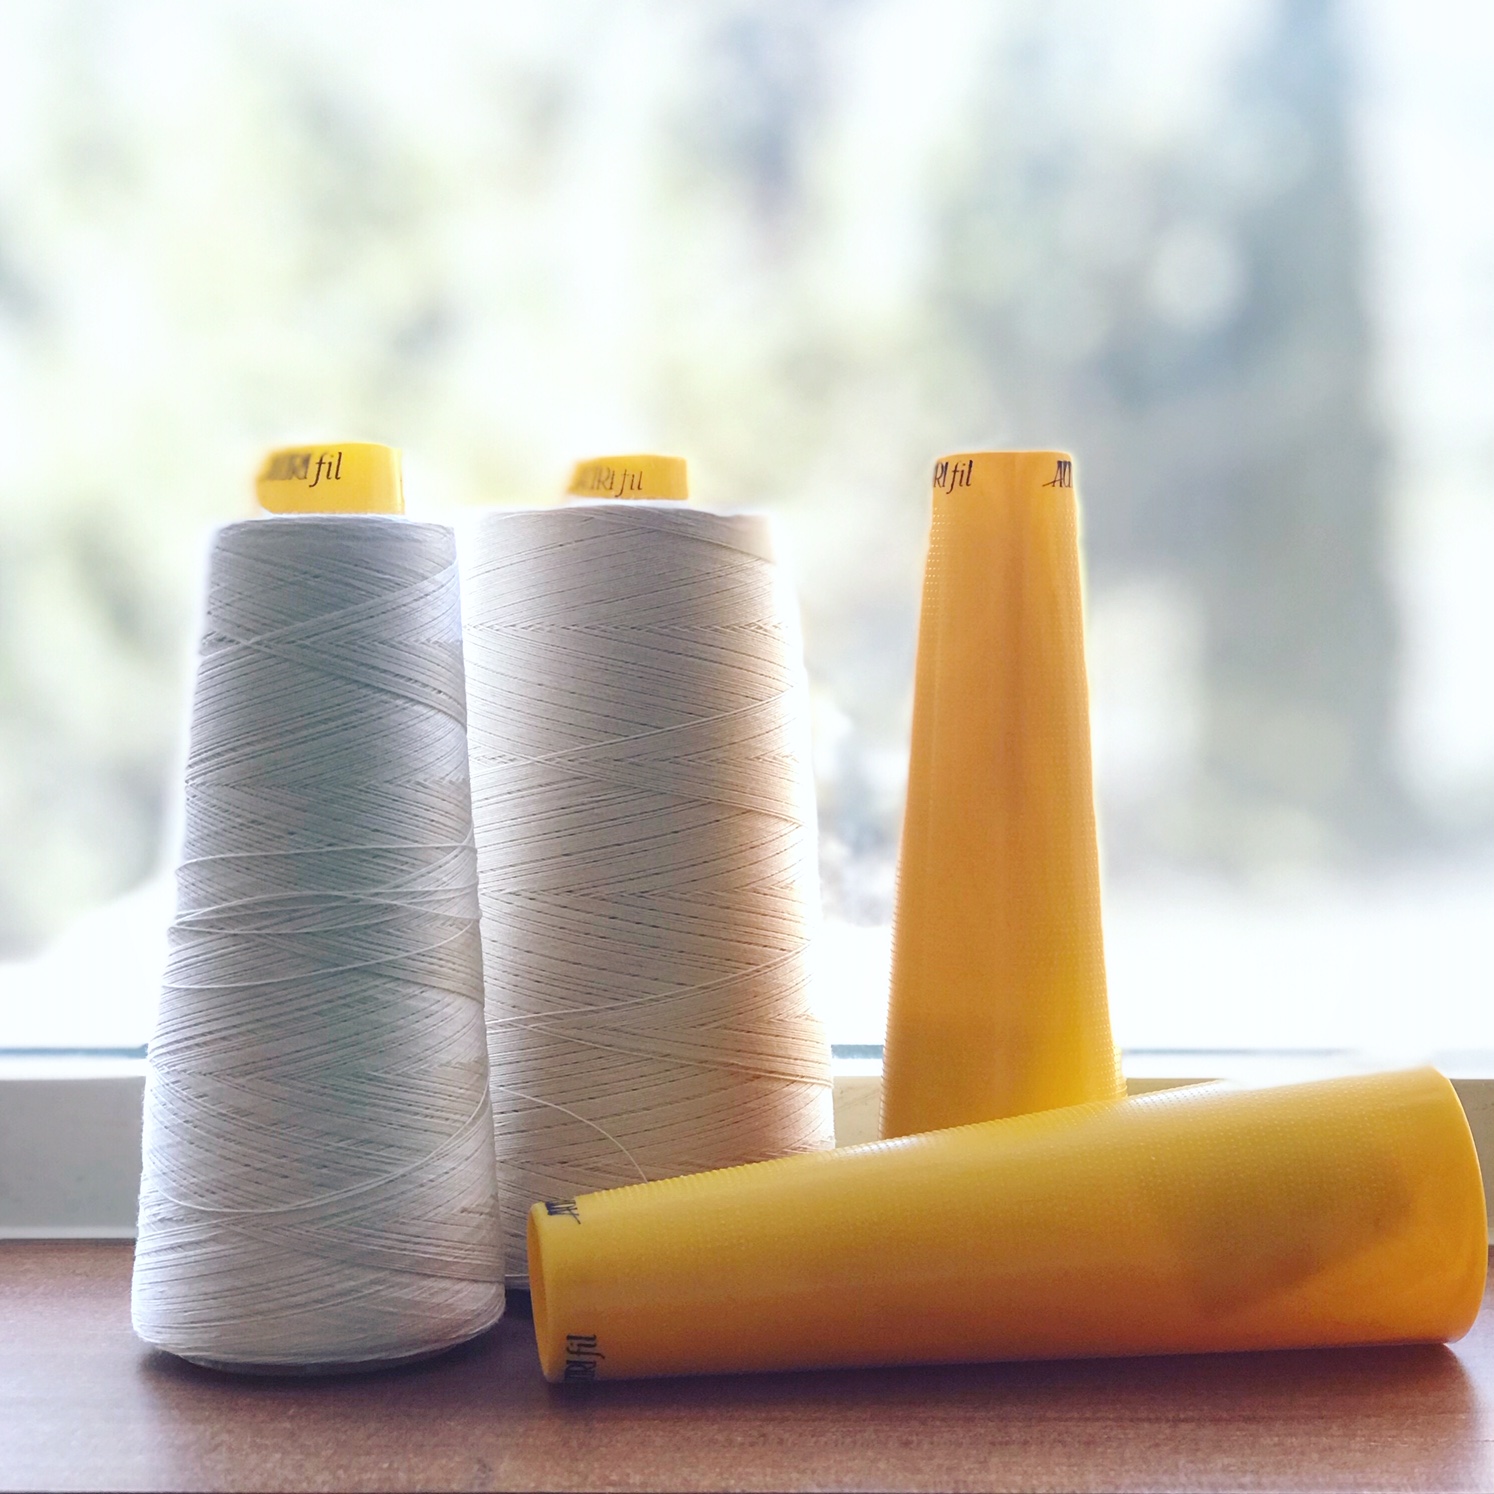
While you are there be sure to enter the giveaway on Heather’s blog. Aurifil is giving away two large cones of their 40 weight, 3 ply thread in fave colors of dove and light beige.
I sure love seeing everyone’s progress pics. You can also share on instagram by tagging us @christaquilts and @quiltachusetts and use the search hashtag #infrastructurequilt in your post so others can see, too!
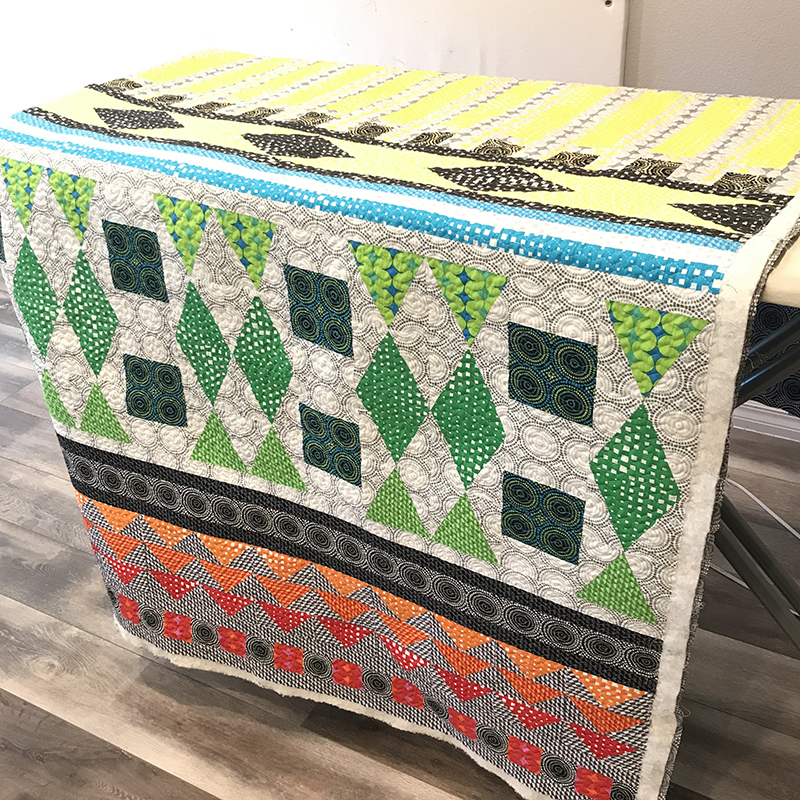
And now we get to my favorite part of making a quilt – machine quilting!!! There are so many different ways to quilt this quilt. Heather Black did an amazing job custom quilting hers, and I took the opposite approach with one of the simplest designs you can do – decorative machine stitching.
Infrastructure Machine Quilting Detail Using a Decorative Stitch
So the first thing to do is choose the thread you’d like to quilt with. I piece AND quilt all of my quilts using Aurifil, 50 weight, 100% cotton thread from my 3 thread collections. It’s thin, yet strong and blends into my quilts so all you see is the yummy texture. I use leftover bobbins for piecing my next quilt and I never have to worry about which bobbin matches which spool since they are all the same weight!
I like to use the same color thread in top and bobbin so that I don’t get “pokies” on my quilt – those little dots of thread that appear when your tension is the tiniest bit off and you are using highly contrasting thread.
I used Aurifil #5007 light gray/blue from my Neutrals thread box. It’s one of my favorite go-to neutrals because it blends with nearly every color. When I’m doing an allover edge-to-edge quilting design, I don’t want to have to stop and switch thread colors while I’m quilting.
Because the spools hold so much thread on them, it took me less than one spool to quilt the entire quilt, including the front and back.
Make a Quilting Plan
I love figuring out HOW I’m going to quilt ahead of time, so I don’t have to think too much. I will usually print out a copy of the quilt top from the pattern (you can photocopy the pattern cover for personal use, OR you can take a picture of your finished quilt top). Then I draw all over it until I come up with something I like. I include quilting suggestions in ALL of my quilt patterns to help you out with each quilt you make.
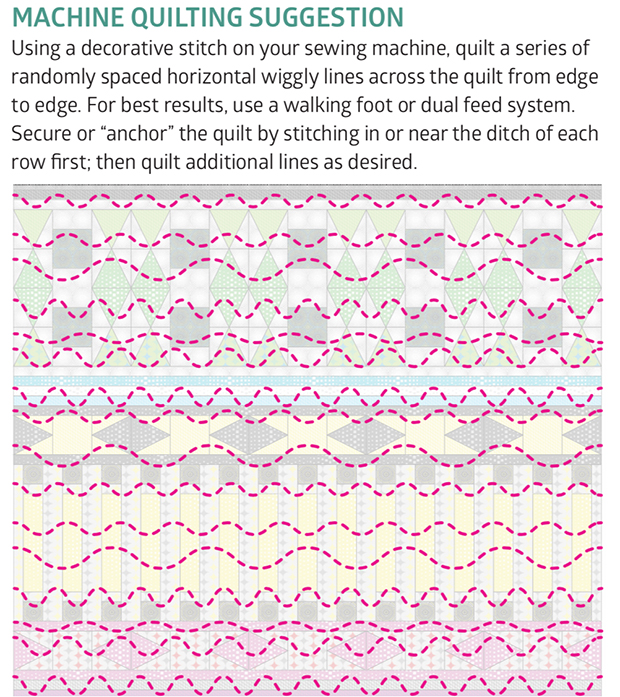
Above is the illustration that’s included in my Infrastructure Quilt Pattern. Here’s the basic idea: choose a decorative stitch on your sewing machine and quilt a series of lines across the quilt from one side to the other.
Make them as light or dense as you like and use my “divide and conquer” method: quilt one set of lines “near” the ditch instead of IN the ditch for each row. Then go back and quilt additional passes across the quilt, shrinking up the open spaces until the entire area is filled.
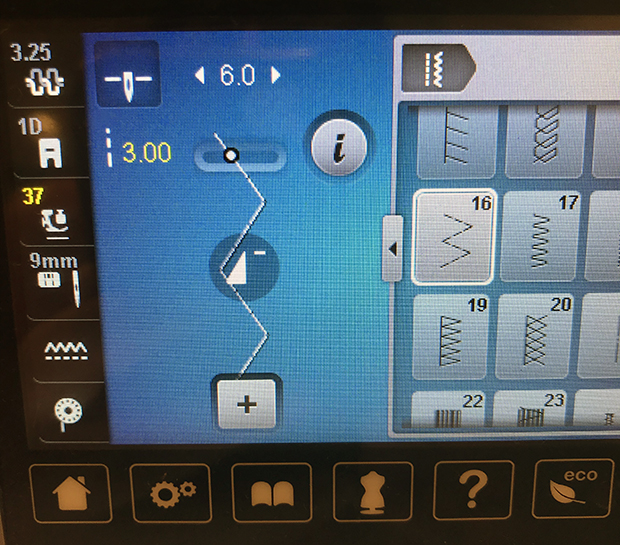
You can use ANY decorative stitch on you sewing machine. Play around with length and width settings until you find something you like, and stitch on a practice sample before you quilt on the real thing. Here’s a picture of the settings I chose on my machine, a BERINA 770 QE:
I’m using decorative stitch #16 which is known as a running stitch or a broken zig-zag. It creates several stitches each time it zigs and zags, so you can make it bigger than the default settings and it still looks great! I adjusted my width to 6.0 and my length to 3.0 because I like the way it looks. Don’t forget to use a zig-zag needle plate so you don’t break a needle when it moves back and forth!!
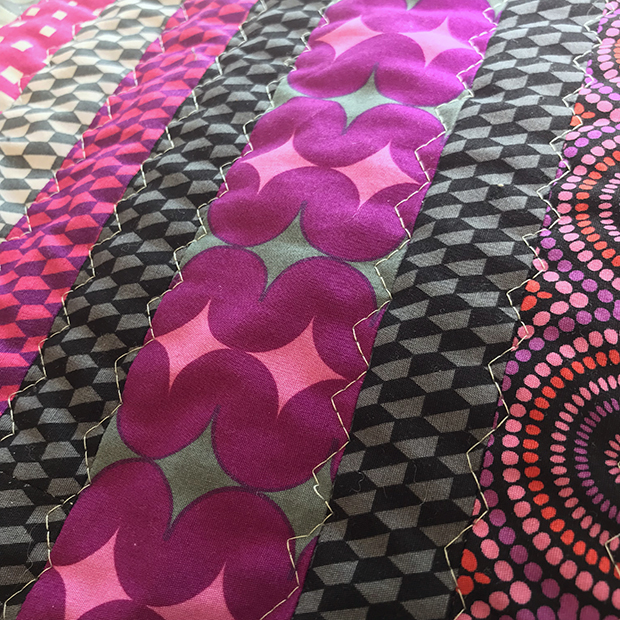
The Quilting
Here are some beauty shots of the decorative stitch quilting in process. I made sure to NOT try to line up the quilting lines perfectly because I love a more organic look. The more quilting I did, the more beautiful texture it added to the quilt and the more the thread blended in. After all, the best way to hide imperfect stitches is to surround them with MORE imperfect stitches!!
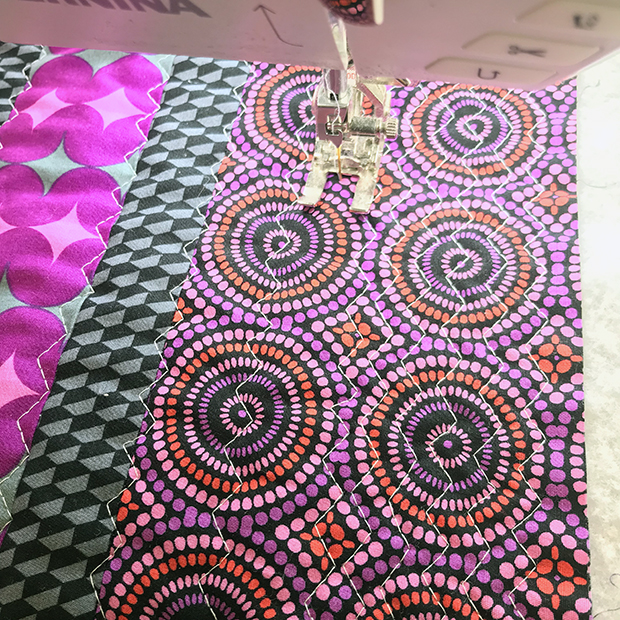
Here’s what it looks like when I’m stitching “near” the ditch in each row. You can see all the imperfections up close, but fortunately they get hidden when more quilting is added.
I’m filling in the spaces between the first pass with randomly spaced lines. I’m using the 20D foot on my BERNINA with the integrated dual feed. It works just like a walking foot and I don’t have to mark anything. I’m using the edge of the foot as a guide for some of the lines.
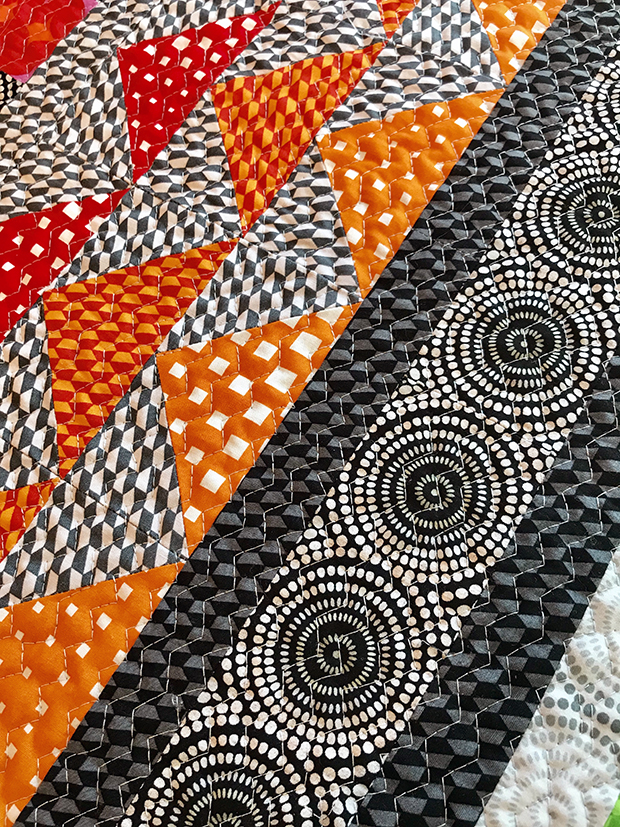
What this section looks like when it’s completely filled in.
None of the lines match up and some are a bit irregular – I love this look!!
Another section complete. Look how well the stitching blends in to the quilt!
This is one of my favorite designs because it adds great texture to ANY quilt!
See it In Action
Here’s my latest YouTube video, showing me quilting this decorative stitch on my quilt. It did take a few hours to accomplish, but I just worked on it a few minutes at a time over several days. It’s my joy and my zen when I get to do mindless quilting like this, and once you let go of perfection, it’s really quite fun!
Next week we’ll finish up with machine binding, including another video tutorial – so stay tuned!!
This Week’s Giveaway & Heather’s Version
Heather did some amazing custom quilting on her computerized long arm machine. Pop over to her blog at Quiltachussetts for more about how she chose her designs.
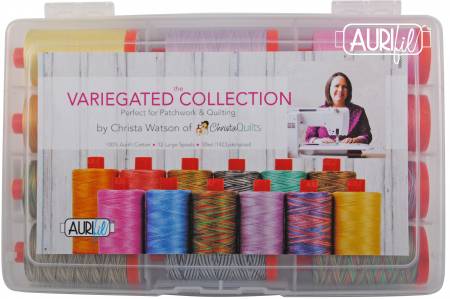
While you are there be sure to enter the giveaway on Heather’s blog. One lucky winner will receive one box of my Variegated thread collection, courtesy of Aurifl!! How cool is that???
I had an amazing time at fall quilt market last month. This is the semi-annual trade show where I get to debut my new fabric and patterns. I was able to share my newest fabric line, Gridwork which is shipping to shops in January of next year.
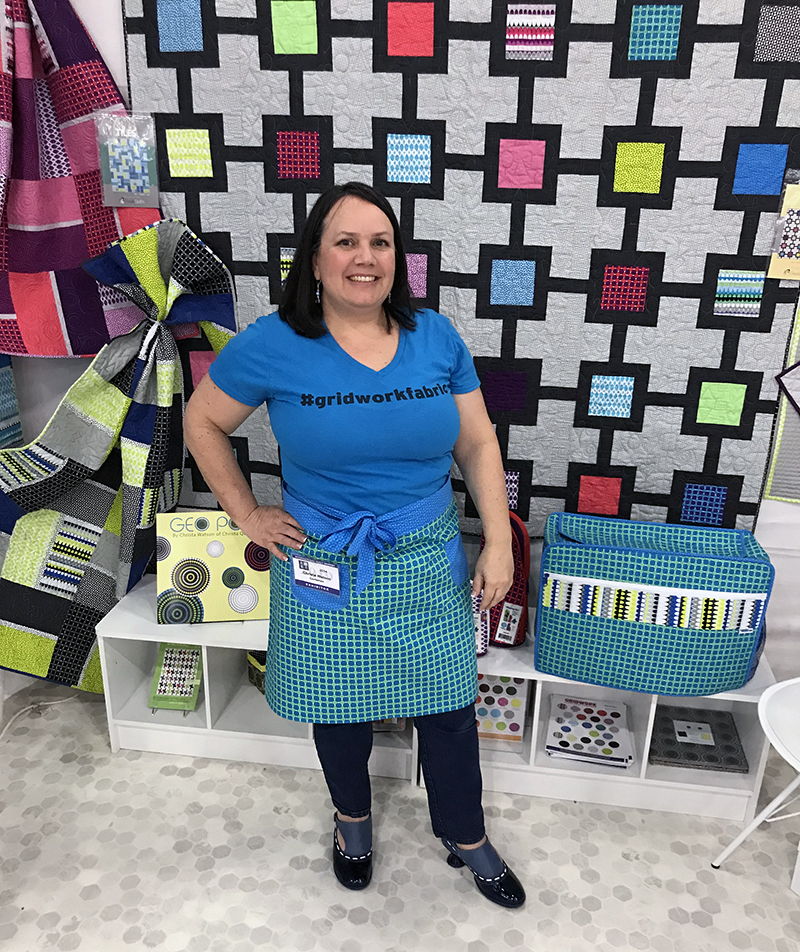
Here’s a closeup of the Gridwork fabrics displayed in my booth.
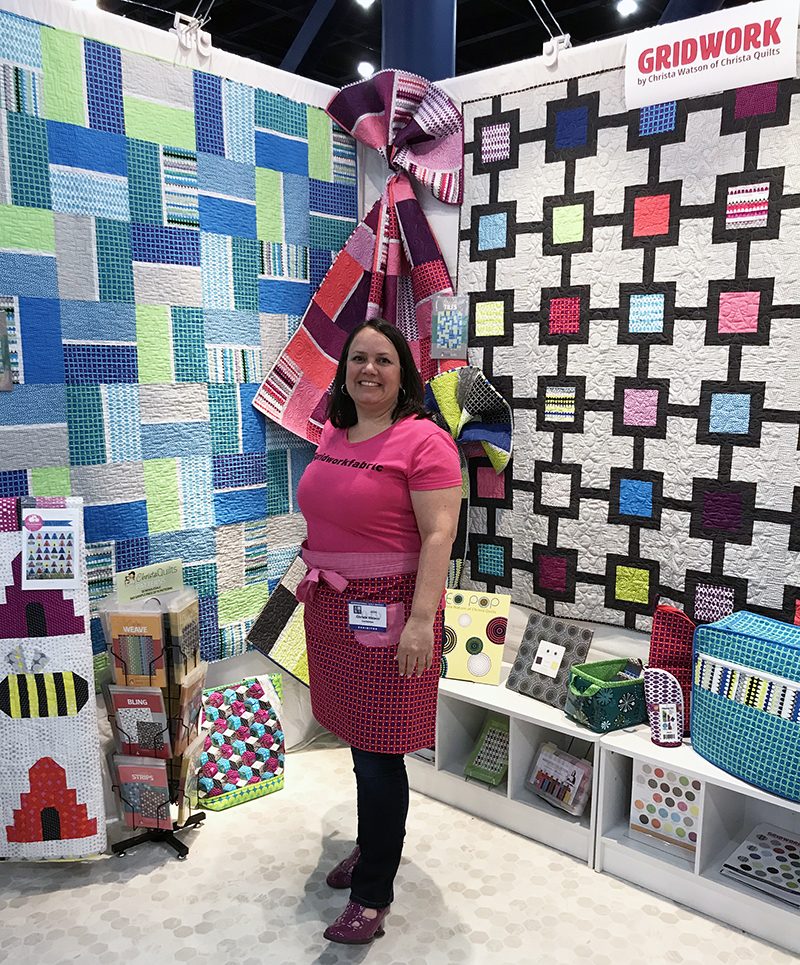
The Shoes!!! And Matching Outfits!!!
Each time I have a booth, I love creating something fun to wear from my fabrics. This year, I made 4 aprons and paired them up with fun pairs of Fluevog shoes. Each market I purchase a new pair that matches my fabric which is always a great excuse for shopping, right?
Day 1: I designed the Citron colorway of Gridwork to match my fave pair of shoes!!
Day 2: It’s so fun to match my outfit to my quilts!!
Day 3: I bought the blue pair this season and they are sooo comfy!!
Day 4: here’s a closer look at the purple patent leather shoes I got to wear twice.
I paired up the aprons and shoes with a matching Tshirts that I had custom printed with #gridworkfabric on the front and #benartex on the back. I figured I was the best walking advertisement for my fabrics, right??
The People!
It’s always fun to meet up with new friends at quilt market and make new connections with quilt shops who carry my fabric, and designers who want to work with my fabric. But the highlight of working with Benartex has been getting to know the other fabric designers. All of our looks are so different, yet they complement each other very well!
We roped our fearless leader, Benartex president David Lochner into posing with us and he was such a good sport! A you can tell, we like to have a good time!!
Over the 3 years since I’ve been with Benartex, I’m especially grateful to learn from superstars like Eleanor Burns and Paula Nadlestern. These ladies have been my heroes since I began quilting over 20 years ago and I pinch myself that I get to call them my colleagues and friends!!
Paula Nadelstern and I shared some fun moments on the show floor when I gave her some Instagram posting tips. She repaid the favor by recommending me for some upcoming teaching events, so stay tuned for more!
Another highlight of the show was the Benartex company dinner in which I got to sit next to Eleanor Burns. She made my night when she complimented me on my energy level. This is high praise from the energetic queen of quilting!!
The Projects!!
It was fun to spot my fabrics in other booths. I love it when designers want to showcase my fabrics in their new patterns because that exposes my fabrics to their customers who may not have seen it yet. And in turn, I get to share some talented designers with you all!!
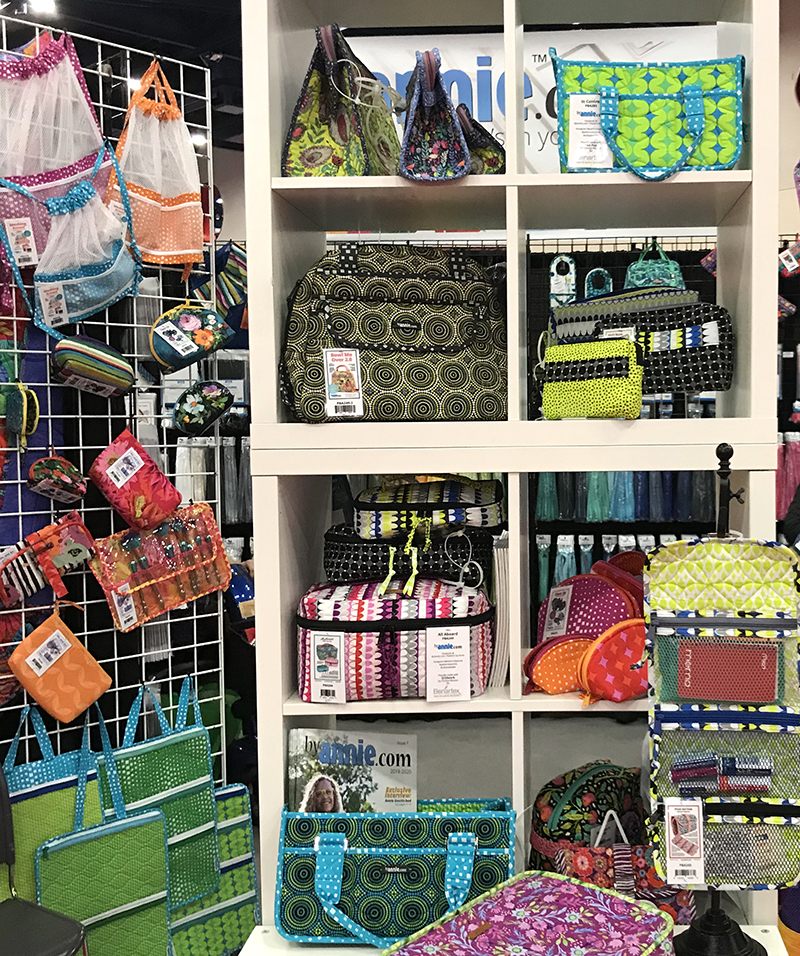
By Annie had a wonderful display of bags, containers and other projects made from both Gridwork and Geo Pop. It was fun to see how great they looked next to colorful fabrics from Tula Pink!
Brewer is one of the distributors that also carries my fabric and patterns for shops to purchase all in one spot. I was thrilled that they wanted to hang two of my quilts in their booth to promote my current patterns: Infrastructure and Color Weave. This is a great example showing how well my fabrics from different collections mix and match with each other.
My friends Lynn and Pam from The Stitch TV Show created a fun new pattern called Dapper, featuring colorful bowtie blocks made from Gridwork + solids. They are always a hoot to listen to online and in person!!
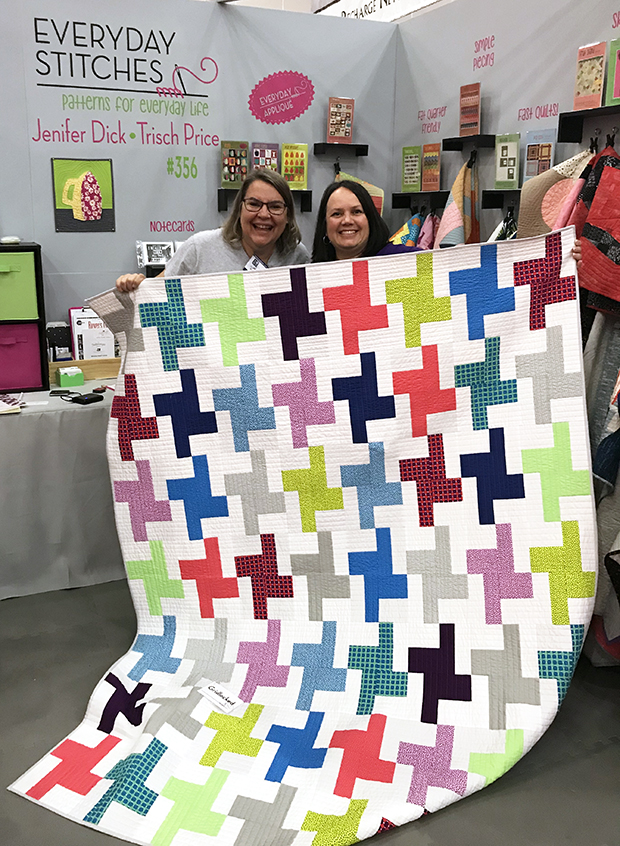
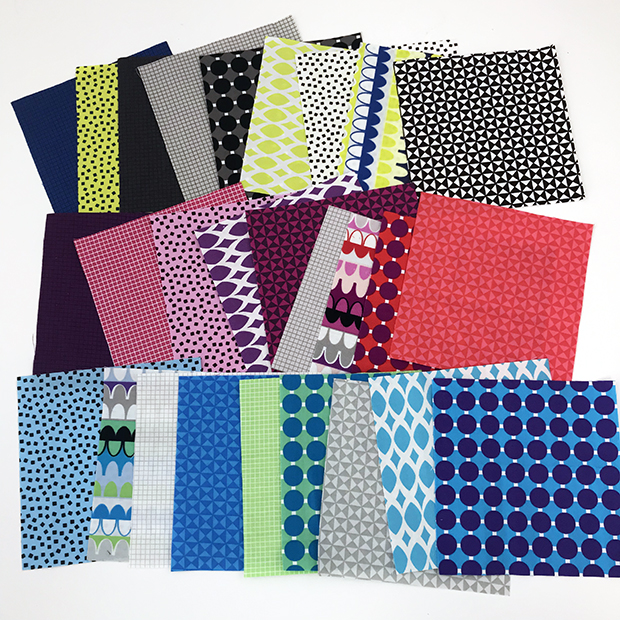
Jenifer Dick from Everyday Stitches also debuted a new fun pattern in her booth at quilt market using Gridwork fat quarters + background fabric. I love seeing how others use my prints!
I had a fabulous, though exhausting time and I’m thrilled with how many more shops are getting interested in my fabric. If you want to share the fabric love, be sure to ask your local quilt shop to order Gridwork (and any of my other fabrics) from their Benartex sales rep. Now it’s time to make more quilts!!
I enjoy sharing my process of quilt making so that you can have more success when you make your own quilts. Over the next 4 blog posts, I’ll share my process for making Bling – one of my newest patterns featuring my 4th fabric collection – Geo Pop for Benartex/Contempo. Of course it would look great in any fabrics, which is what today’s topic is all about.
I love this design for Bling, and especially enjoy making fat quarter friendly quilts. When choosing fabrics, the easiest way to choose colors for a successful quilt is to pick a whole bunch of fabrics that you like with the same theme or color scheme, then pair them up with a highly contrasting background fabric.
For example, I knew I wanted to use as many fabrics as I could in the line and most are all very bright. So bright, bold, and geometric was my fabric “theme” for this quilt.
Because there’s a lot going on with the fabrics themselves, I paired them up with the lightest fabric in the line and the darkest fabric in the line to ensure there was contrast between the main fabrics and the background. I honestly couldn’t decide which I liked better, so I decided to make both quilts!
For me, fabric selection really is that easy. I don’t get hung up too much on color theory; rather I just go with my gut feeling. After all, most of us are pretty successful choosing what to wear each day, so choosing the colors our quilts will wear isn’t that much different, right?
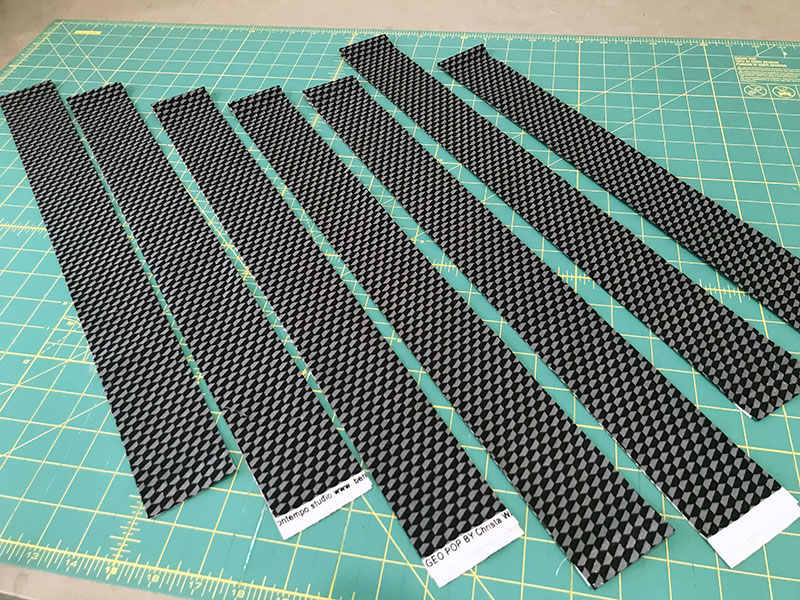
My Bling quilt pattern calls for 20 fat quarters + 4 yards of background fabric for the Twin size that I’m making. Geo Pop has 25 prints in the line including several light and dark grays. To ensure I had the most contrast possible, I pulled out the 5 light and dark grays and just use the more colorful prints. I’ll plan to use the leftovers in another project, or add them to my stash.
I pulled these grays out of the bundle and will use them in another project.
You could also piece them into the back of the quilt.
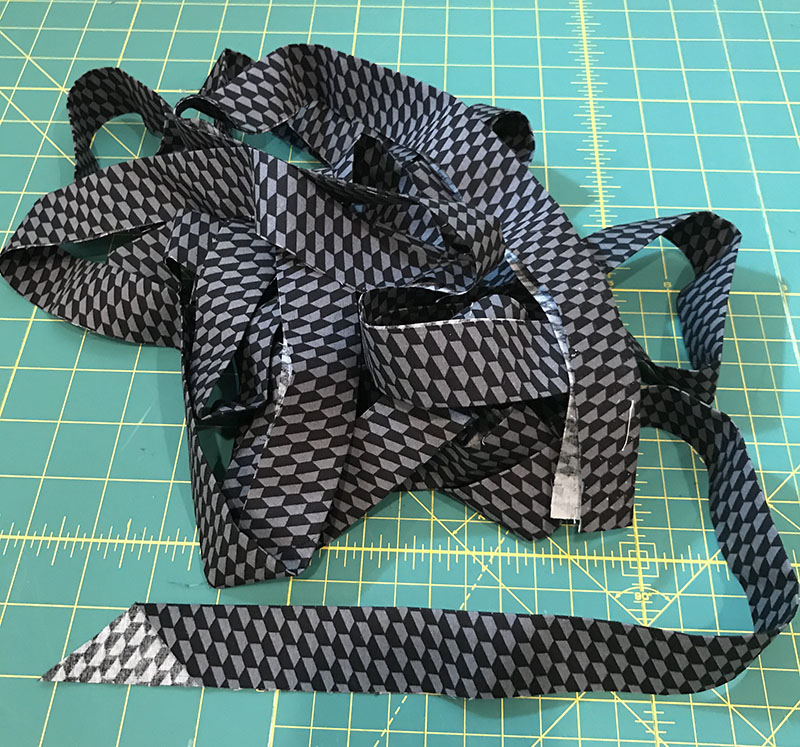
For the white version, I’m using some of the leftovers to make a scrappy binding that frames the quilt. For binding on the black version, I’ll use the same fabric as the background so that the the negative space goes all the way to the edges – two slightly different looks for two great quilts!
The first step after choosing fabrics is to prewash and starch. I always prewash any fabric that’s a fat quarter or larger. My favorite starch is inexpensive Faultless premium starch from the grocery store. To prevent flaking, I spray starch on one side of the fabric, and then iron it from the opposite side, then repeat for both sides of the fabric.
In the next post, I’ll show you these lovelies all cut and ready to piece, so stay tuned!
Today I’ll be sharing how I quilted my LattticeWork quilt using a super simple, fast and fun walking foot quilting design. It’s called “wavy grid” and it’s one of my fave designs when I’m on a deadline, so you’ll probably see it in lots of my quilts!
Here’s a close detail shot of what it looks like quilted with my Aurifil Variegated Thread collection. I love the funky modern texture it adds to the quilt, especially where the thread contrasts the most:
The most fun part about machine quilting is choosing which thread color I’m going to use to quilt it. Because this quilt was so colorful, I could have used nearly any hue and it would look great. Below are the colors in my Variegated Collection.
I chose to go with the cheddar/orange color because the variegation is really subtle and it reads as one shade of orange. But I love the slight sparkle that the it adds to the quilt!
How to Quilt a Wavy Grid
Because I’m quilting continuous lines all the way across the quilt from edge to edge, it’s easiest done with a walking foot (or a built in dual-feed system like I’m using on my BERNINA 770 QE). The idea is to quilt a “line” from one end of the quilt to the other and slightly rotate the quilt from side to side to form the wavy lines.
First I do what I call “anchor” quilting: stitching in or near the ditch along the major seam lines to secure the quilt. Then I made additional passes across the quilt in both directions, creating a wavy grid. With each pass across the quilt, the gap in between the lines shrink. You can quilt a 2″ grid, 1″ grid, 1/2 grid, etc. depending on the look you want. Notice that nothing is marked – I just eyeball the spacing and it ends up looking great!!
Here’s a 4 minute silent video of me quilting the wavy grid on my LatticeWork quilt. I’m still getting the hang of editing videos but this is a good start!! Notice how I make one path across the quilt in both directions, then keep subdividing the area until the grid gets to the size I want. I hope you enjoy it!!
In the video above, notice how I stop and shift a lot. I’m quilting the area near my hands which is only a few inches at a time. When I feel like I’m starting to reach, that’s when it’s time to stop and shift the quilt. But you’ll get the hang of quickly so it’s not too disruptive.
I’m also quilting from edge to edge into the batting so I don’t have to worry about tying off my threads. I’ll just trim the excess and cover it all with binding when finished.
If you’d like to make this quilt , click either of the links below to purchase the pattern in your favorite format. I appreciate your support of my small mom and pop shop!
If you have any questions about this quilt in particular, or the machine quilting process in general, please ask them in the comment box. I’d love you to enjoy making this quilt as much as I did!
 Click here to get the Block Chain quilt kit wile supplies last.