And now we get to my favorite part of making a quilt – machine quilting!!! There are so many different ways to quilt this quilt. Heather Black did an amazing job custom quilting hers, and I took the opposite approach with one of the simplest designs you can do – decorative machine stitching.

Infrastructure Machine Quilting Detail Using a Decorative Stitch
Thoughts on Thread

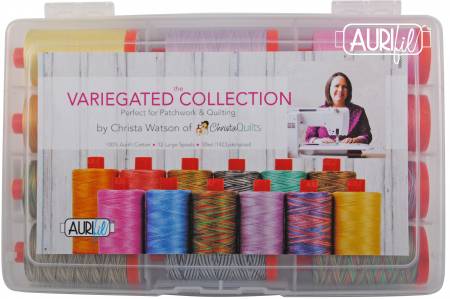
Click here to get my Aurifil Thread Kits in Colors, Neutrals, or my newest Variegated box.
So the first thing to do is choose the thread you’d like to quilt with. I piece AND quilt all of my quilts using Aurifil, 50 weight, 100% cotton thread from my 3 thread collections. It’s thin, yet strong and blends into my quilts so all you see is the yummy texture. I use leftover bobbins for piecing my next quilt and I never have to worry about which bobbin matches which spool since they are all the same weight!
I like to use the same color thread in top and bobbin so that I don’t get “pokies” on my quilt – those little dots of thread that appear when your tension is the tiniest bit off and you are using highly contrasting thread.

The light gray/blue #5007 can be found in my Piece and Quilt Neutrals collection.
I used Aurifil #5007 light gray/blue from my Neutrals thread box. It’s one of my favorite go-to neutrals because it blends with nearly every color. When I’m doing an allover edge-to-edge quilting design, I don’t want to have to stop and switch thread colors while I’m quilting.
Because the spools hold so much thread on them, it took me less than one spool to quilt the entire quilt, including the front and back.
Make a Quilting Plan
I love figuring out HOW I’m going to quilt ahead of time, so I don’t have to think too much. I will usually print out a copy of the quilt top from the pattern (you can photocopy the pattern cover for personal use, OR you can take a picture of your finished quilt top). Then I draw all over it until I come up with something I like. I include quilting suggestions in ALL of my quilt patterns to help you out with each quilt you make.
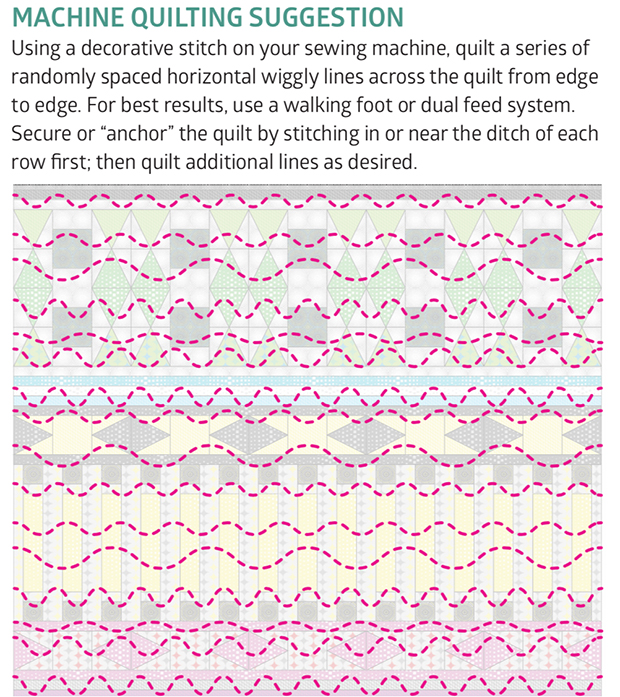
Above is the illustration that’s included in my Infrastructure Quilt Pattern. Here’s the basic idea: choose a decorative stitch on your sewing machine and quilt a series of lines across the quilt from one side to the other.
Make them as light or dense as you like and use my “divide and conquer” method: quilt one set of lines “near” the ditch instead of IN the ditch for each row. Then go back and quilt additional passes across the quilt, shrinking up the open spaces until the entire area is filled.
You can use ANY decorative stitch on you sewing machine. Play around with length and width settings until you find something you like, and stitch on a practice sample before you quilt on the real thing. Here’s a picture of the settings I chose on my machine, a BERINA 770 QE:
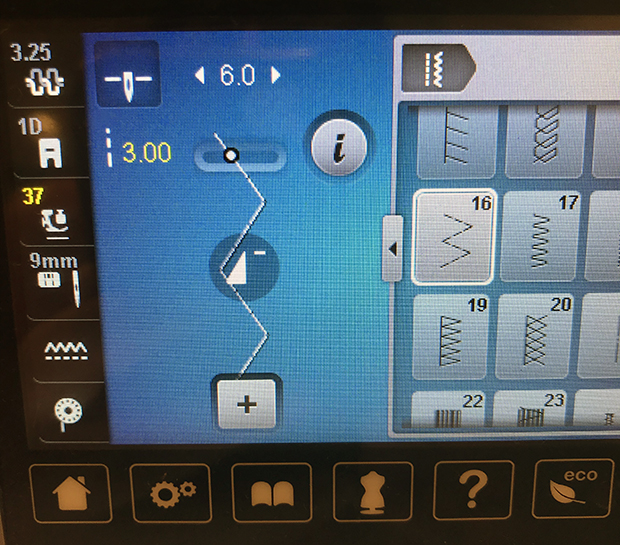
I’m using decorative stitch #16 which is known as a running stitch or a broken zig-zag. It creates several stitches each time it zigs and zags, so you can make it bigger than the default settings and it still looks great! I adjusted my width to 6.0 and my length to 3.0 because I like the way it looks. Don’t forget to use a zig-zag needle plate so you don’t break a needle when it moves back and forth!!
The Quilting
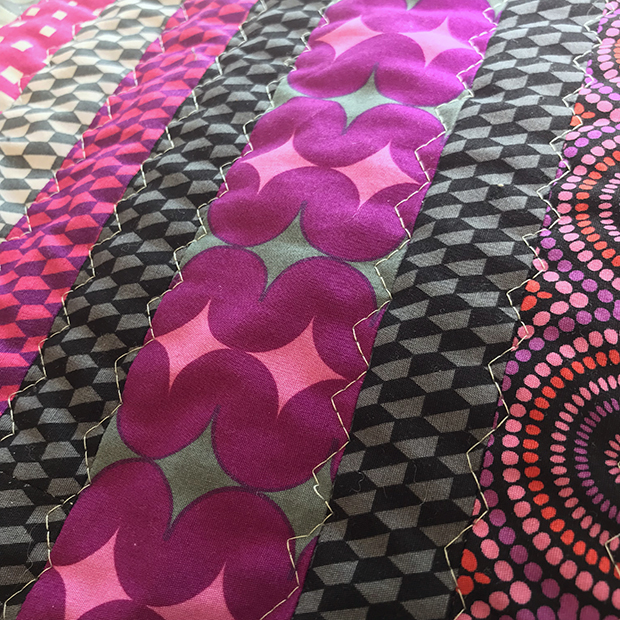
Here are some beauty shots of the decorative stitch quilting in process. I made sure to NOT try to line up the quilting lines perfectly because I love a more organic look. The more quilting I did, the more beautiful texture it added to the quilt and the more the thread blended in. After all, the best way to hide imperfect stitches is to surround them with MORE imperfect stitches!!
Here’s what it looks like when I’m stitching “near” the ditch in each row. You can see all the imperfections up close, but fortunately they get hidden when more quilting is added.
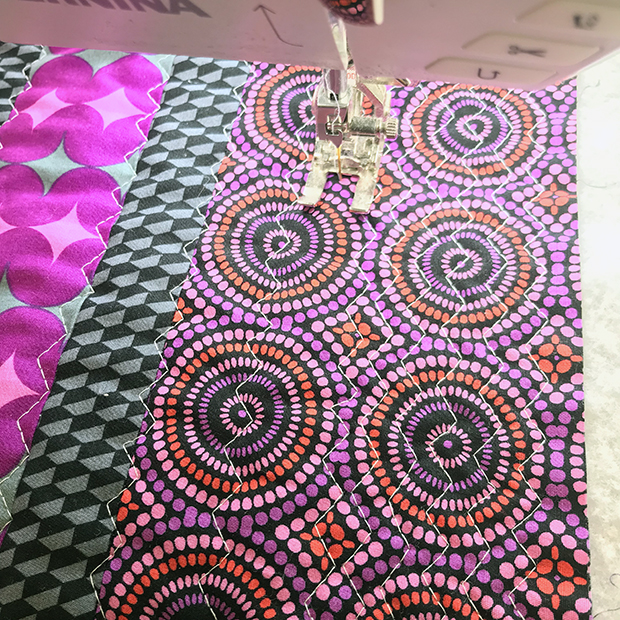
I’m filling in the spaces between the first pass with randomly spaced lines. I’m using the 20D foot on my BERNINA with the integrated dual feed. It works just like a walking foot and I don’t have to mark anything. I’m using the edge of the foot as a guide for some of the lines.

What this section looks like when it’s completely filled in.
None of the lines match up and some are a bit irregular – I love this look!!

Another section complete. Look how well the stitching blends in to the quilt!
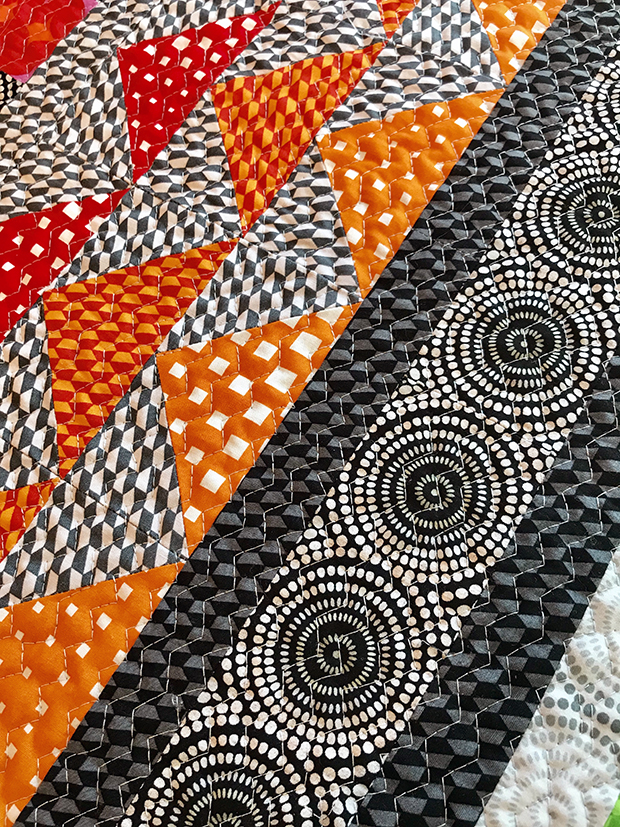
This is one of my favorite designs because it adds great texture to ANY quilt!
See it In Action
Here’s my latest YouTube video, showing me quilting this decorative stitch on my quilt. It did take a few hours to accomplish, but I just worked on it a few minutes at a time over several days. It’s my joy and my zen when I get to do mindless quilting like this, and once you let go of perfection, it’s really quite fun!
Next week we’ll finish up with machine binding, including another video tutorial – so stay tuned!!
This Week’s Giveaway & Heather’s Version
Heather did some amazing custom quilting on her computerized long arm machine. Pop over to her blog at Quiltachussetts for more about how she chose her designs.
While you are there be sure to enter the giveaway on Heather’s blog. One lucky winner will receive one box of my Variegated thread collection, courtesy of Aurifl!! How cool is that???
Quick Links
- Click here for the Infrastructure QAL page with all the tutorial links
- Click here to get the Infrastructure Quilt Pattern – PDF version
- Click here to get the Infrastructure Quilt Pattern – Paper version
- Click here to get the Infrastructure Quilt Kit
- Click here to share your progress and ask questions in my Facebook group.
- Click here for Heather’s Week 11 Blog Post – Solids Version

Finished Infrastructure quilt on my design wall!! You’re almost there!!!

I went on retreat and finished a quilt top. I was going to post a picture but am not sure how or where.
You can share your work in my Christa Quilts Facebook group. Here’s a link to join: https://www.facebook.com/groups/christaquilts/ Christa Watson Instagram @christaquilts website/blog: ChristaQuilts.com