Spray Basting Tutorial – Using a Table

Recently I shared a tutorial on spray basting using a design wall. Today’s tutorial shows how to modify the spray basting process using a table instead. Note that my pictures are all taken outside but once the quilt layers have been sprayed outdoors,  you can assemble the quilt inside using any size table.

Improv Squares Quilt Using Modern Marks

Step 1 – Spray the back side of the backing and quilt top

Be sure to spray the layers outside, or in a well ventilated area. If you have sensitivity to chemicals, I recommend wearing a dust mask. I use 505 basting spray and a large sheet to protect the surface I’m spraying on.

I’m using a lightweight folding plastic table, so it’s easy to move. I just store it out of the way in the garage when I’m not using it.

Spray Basting

The table you are using doesn’t have to be bigger than the quilt. When I’m spraying, I cover the center section of the quilt first, and then the sides. For this step, you don’t even need a table; you can lay out a sheet or dropcloth on the ground or wherever you have room.

I used a small park near my home so that I’d have plenty of room, and also nice scenery for photography!

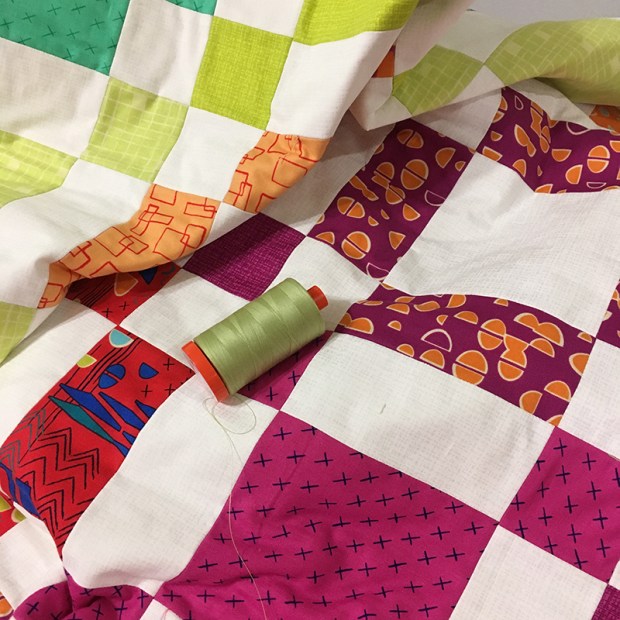
Hold the can an arm’s length away and spray evenly and generously. Make sure to get good coverage on the quilt. To ensure the can is spraying consistently and doesn’t get clogged, spray a few squirts on your dropcloth before applying it to the quilt.

Spray Baste

Although I pressed the top and backing separately before I began, you can see some fold lines on both layers. But not to worry – this gets pressed out at the end. If you spray the top and backing separately, it uses less spray than spraying the batting, and it’s easier to manage.

Once both layers have been sprayed, you can fold them up and bring them inside to finish the assembly process (or stay outside and set the layers aside like I’m showing here.) The layers will be sticky, but not stuck, and you don’t have to assemble them right away – the adhesive doesn’t dry out.

Remove the drop cloth or sheet from the table and then lay out the backing wrong side up.

Spray Baste

Step 2 – Add the batting

I like to fold the batting in half long ways so that I can put the fold line roughly in the center of the backing. You can see in the picture below that it’s not exactly even and that’s ok. As long as the batting and backing are bigger than the quilt top, you’ll have some wiggle room so that you don’t have to line things up perfectly.

In fact, my batting is actually a little longer than the backing so it’s easy enough to trim away the excess. Working on a table is great because it won’t hurt your back like the floor can.

Spray Baste

Open up the batting so you have coverage on all sides. Even if the sides hang down to the ground – that’s okay. The excess will get trimmed away.

Spend time smoothing out the backing. You can lift and reposition it if needed. Work out any wrinkles or bubbles, using your hands and a long acrylic ruler.

I’m using Hobbs cotton batting for this quilt. I like natural fiber battings because they cling to the fabric and they aren’t slippery. (Polyester has a tendency to slip while you are shoving the quilt through the machine which can cause puckers.)

Spray Baste

Once you smooth out the center section, adjust the layers so that you can smooth out the sides, too. Take your time here to really get it nice and flat. Smoothing out the layers also smashes them together so that they stick together better and don’t shift.

You can also iron your batting before you baste to get it nice and flat. I use a spray bottle and a dry iron. With cotton batting, you can put the iron directly on the batting. With more delicate battings like wool, you can cover the area you press with a piece of fabric. Be sure to use a dry iron so that it doesn’t shrink up the batting.

Spray Baste

Step 3 – Add the Quilt Top

Add the top in the same way that you added the batting – get it roughly in the center and make sure there’s coverage all the way around the edges. You can see it’s still a bit wrinkly from handling and moving it around. That’s okay – you’ll iron it again at the end.

Spray Baste

Trim away the excess batting and backing so you’ll have less bulk to deal with. If you have a super large quilt that touches the ground, you can always place two tables side by side to give you more room to work.

I use specialty batting scissors – they cut through the layers like butter, and trimming goes super fast! I only leave about an inch or two on all sides when I trim. That way it’s less likely that I’ll flip the quilt under itself and accidentally quilt through the extra layers!!

Spray Baste

Step 4 – Smooth Out the Layers

Smoothing out each layer as you add it is such a critical step. When your quilt sandwich is flat and smooth, it makes the machine quilting process so much easier! The reason I love using basting spray is that every inch of the quilt is stuck to every other inch. This prevents shifting of the quilt and greatly reduces the chances that you’ll get a tuck or pucker while quilting.

Spray Baste

Use the long ruler again to smooth out the center of the quilt. You can also use it to help line up the pieced seams and nudge things back into place if needed. It’s almost like pre-blocking the quilt before you quilt it.

Spray Baste

Once you’ve smoothed out the center, you can work on the edges. Roll up the excess so that it doesn’t drag on the ground as you shift the quilt around.

It usually takes me a good 20 minutes to smooth out each layer of the quilt, but it’s time well spent!

Spray Baste

Step 5 – Press the Basted Quilt on Both Sides

The secret to good spray basting is to press the quilt once it’s layered. The heat of the iron sets the glue and it smooshes the quilt together so it’s nice and flat. I press the back side first, working out any excess bubbles or wrinkles. Then I flip it over and press the front.

I use a big board which fits on top of my ironing board, giving me more room to work.

Spray Baste

I’ve developed this basting method over the last few years and I can honestly say it makes a huge difference in how my quilts turn out. Just remember, you are putting a lot of wear and tear on the quilt when you scrunch and smoosh it through the opening of your machine. But with this method, nothing shifts and it’s easy to just focus on one area of the quilt at a time.

Feel free to pin and share this tutorial with your friends. My goal is to get more people quilting their own quilts while enjoying the process from start to finish!

Your Chance to win a Rainbow Taffy Quilt Kit + Machine Quilting Tips

April Update!! My Quilt Won the Championship!!
Thanks for all your Votes!!

I know it’s a little silly to get all excited about a fun promotional contest, but it really means a lot to me that so many of you have picked Rainbow Taffy as your favorite free pattern from Benartex so far. Today is the last round of voting to determine the final fan favorite, and one lucky voter will take home a kit of the winning quilt! Will it be Rainbow Taffy?? See below for details:

Benartex March Madness Voting

Final matchup: Rainbow Taffy from Modern Marks versus Violette from Gloaming

Click here to cast your vote for Rainbow Taffy on Benartex’ blog: Sew In Love with Fabric.
Click here to vote a second time in their Sew Interesting Facebook group.

You can also vote over on their Instagram account @benartex_fabrics.

Well, it all comes down to today and the final matchup between my pattern and my friend Shelley Cavanna’s. I met Shelley last fall when her booth was near mine in the Contempo section of Benartex at Quilt Market. She, too was debuting her first line of fabric and we got to know each other as we chatted on the floor for 3 days. So I will be happy no matter which of us wins!

Shelley Cavanna and Christa Watson at Benartex

Half the fun of attending quilt market is getting to meet new designer friends!!

Rainbow Taffy Quilting Tips

Here’s a tip for choosing thread: if you want your quilting to blend in, choose a thin, 50 weight thread in a color that is slightly lighter than the prints in the quilt. I chose a lime green Aurifil which actually acted as a neutral. It didn’t stand out too much on the white fabric and it added bit of sparkle to this colorful quilt!

Lime Green Aurifil Thread

Here’s another tip: the more quilting you add, the more the quilting design recedes into the background and becomes a textural element, rather than a focal point point motif. And rather than thinking you are quilting your quilt to death, you are really quilting the life into it by adding an extra layer of design!

Boxes quilting Detail

I quilted Rainbow Taffy using one of my favorite modern free motion motifs, “Boxes.”

In fact, I love this design so much, I included it as one of the prints in the line, seen in orange below. I thought it would be so “meta” to quilt boxes on boxes, LOL!!

Boxes print from Modern Marks

Here’s my tip for quilting an allover, or edge-to-edge design: start on one side of the quilt, and meander your way around the quilt, block by block. Allover designs are perfect for quilting a quilt in a hurry, since you don’t really have to worry about quilting different designs in different areas of the quilt.

Scrunch and Smoosh

I work my way from right to left across the quilt, rotating in the middle when it gets bulky.
To deal with the bulk – scrunch and smoosh it out of the way as you go.

Allover designs are also fantastic to hide any less than perfect seams. If they don’t match up perfectly, you can obscure this fact by adding a layer of texture right on top of the quilt.

Also, if there’s any fullness in your quilt, or it doesn’t lay quite flat, dense allover quilting can draw up some of that excess, and you can use your fingers to smooth out and problem areas while you quilt – just be careful that they don’t get in the way of the needle!

Machine Quilting Texture

See how that lime green thread blends in?? I love it!!

If you happen to run out of thread while you are quilting, you can just back up about 1/2 an inch and quilt a little bit on top of your previous quilting. Stitching on top will help secure the threads, and on a buys quilt, it’s hardly noticeable.

Rainbow Taffy by Christa Watson

One other tip – try not to play “bobbin chicken!” If you have a low bobbin indicator on your machine, try to stitch off the end of the quilt and put in a fresh bobbin. If you are quilting with cotton thread, you can always use that bit of leftover thread when piecing your next scrappy quilt!

Vote For Your Chance to Win a Rainbow Taffy Quilt Kit

Rainbow Taffy Quilt by Christa Watson. Made from Modern Marks.

To wrap up March Madness, Benartex is generously offering one lucky voter a chance to win a kit of the winning quilt! Voting closes Monday, April 2 at Noon EDT.

So head over to the Benartex blog now to cast your vote. The winner will be selected at random. You can also submit a bonus vote in their Facebook Group and Instagram @benartex_fabrics.

I sure loved making this quilt and I know you will, too. Click here to get the free pattern.
Good luck and thanks for playing!!

Finished Quilt – Squiggles Made from Modern Marks Fabric

At long last, I’m excited to show you the finished version of Squiggles, made from my first fabric line with Benartex, Modern Marks that released late last year.

Squiggles by Christa Watson

Squiggles version made from Modern Marks with black background

You may remember that the original version, shown below was made from precut squares with a cream background and overlapping wavy line quilting using a walking foot. The step-by-step instructions for both piecing and machine quilting this version are included in my third book, Piece and Quilt with Precuts.

Squiggles Quilt from Piece and Quilt with Precuts

Squiggles, original version from Piece and Quilt with Precuts

When I got my fabric samples last year, this was the first (of many) quilts that I wanted to remake using my fabric. It just goes to show how different a quilt can look using the same pattern, but different fabrics.

Squiggles Quilt Top

I love the bold bright colors against the black!

With the updated version I really wanted the modern fabrics to pop, which is why I paired them with the deep black. I think it gives the quilt a more contemporary/modern vibe which I really like.

Aurifil Thread Squiggles

Choosing thread color was the hardest part of this quilt! I knew that any colorful thread would work, but I opted to go with the bolder Turquoise Aurifil to really give it some punch.

Quilting Random Crosshatch

Although I love to piece, machine quilting is still my favorite part of the process. I absolutely loved adding an extra layer of texture to this quilt using random crosshatch quilting, which is really just quilting parallel straight lines in random intervals across the quilt in both directions.

Machine Quilting Squiggles

Here are some pretty “scenic” shots, taken in the desert behind our house. My husband Jason really enjoys doing photography and capturing photos in interesting spots.

Squiggles Quilting Detail

I love how the bright colors contrast with the softer, muted desert background.

Squiggles in the Desert

This is my favorite picture: showing the Las Vegas skyline behind the quilt:

Squiggles by Christa Watson

Squiggles Finished Quilt Stats

Click here for a list of shops that carry Modern Marks fabric.

Squiggles Quilt Along Week 6 – Machine Quilting Tips

This week we get to my favorite part of any quilt – the machine quilting!! For Squiggles, I quilted it with my walking foot. I always recommend starting off with walking foot quilting for beginners because it really is no-fail quilting. In the book, I show you how to quilt organic, squiggly lines with the walking foot, for the original version made from Pat Sloan’s The Sweet Life charm packs:

Machine Quilting Ideas

Squiggles Quilt from Piece and Quilt with Precuts

The original version of Squiggles: pattern & quilting instructions available in my latest book.
Click here to get your signed copy of Piece and Quilt with Precuts.
Click here to purchase The Sweet Life charm packs seen above, while they last.

If you’d like to quilt fun, fast and easy squiggle lines, follow along in the book on page 19 to see the instructions and quilting plan for Squiggles

Another quick and easy way to finish this would be to quilt a wavy grid, following the directions for “Gridwork” on pages 26-27. Check out a closeup of the wavy grid quilting below:

Gridwork quilting with a walking foot

For my Squiggles remake from Modern Marks fabric, I wanted to try out a different design that I mention briefly in the book on page 21 as a “make it your own” idea.  Rather than quilting wavy lines, try quilting irregularly spaced “straight-ish” parallel lines to create a random crosshatch grid.

Random crosshatch quilting

I chose a highly contrasting Aurifil thread in Jade so that it would show up on the busy prints.
The thread is from my Piece and Quilt Collection – Colors.

Random Crosshatch Quilting Tips

Here are a few tips on how I approached quilting the second version of Squiggles:

Machine Quilting Squiggles

I always start quilting on the right hand side of the quilt and “scrunch and smoosh” the bulk of the quilt as I go. First I make one pass across the quilt in both directions to anchor the quilt for more quilting later. This breaks up the quilting, secures it in place, and allows me flexibility on how densely I want to quilt it.

Start and end off the quilt

I try to choose designs that allow me to start and end each line of stitching off of the quilt in the batting. Then I don’t have to tie off all those pesky threads!! For best results when using walking foot/dual feed quilting, try to stitch in one direction rather than stitching the lines up and down or back and forth across the quilt.

It will help prevent puckers or “whiskering” that looks like little creases caused by the shifting of the fabric. I make one pass across the quilt from right to left, quilting “anchor” lines depending on how wide the blocks are. Then I rotate the quilt when I reach the middle, and keep on going to the other side.

Use gloves to move the quilt

I wear Machingers gloves to help grip the quilt and give me a little more power when I push the quilt through the machine. I also use my hands as a hoop and only focus on the area I’m quilting between my hands. It’s not a very larger area, so I re-position my hands and the quilt A LOT while quilting, and that’s ok!

For the random crosshatch, some of the “anchor” lines will be in the ditch, while some of them may be randomly to the side of the ditch. Below are three different ways that I mark or randomly quilt straight lines across the quilt:

Marking With a Washable Pen

Marking Straight Lines

Use an acrylic ruler and washable marking pen to mark guidelines if needed. I used a combination of marking and eyeballing when quilting my straight-ish lines. Mostly I changed it up so I could dry out several different methods. Hey, what I can I say? I’m always experimenting!

Painter’s Tape

Use Painter's Tape as a Guide

Painter’s tape is one of my favorite marking tools! I can place it at random intervals, using my long acrylic ruler to keep the lines straight. The best part about quilting random lines is that I can stitch along both sides of the tape to quilt 2 lines at a time!

Bonus tip: rather than putting the needle next to the tape, put the edge of your quilting foot next to the tape. It will space the lines out a little wider, and you won’t accidentally stitch through the tape!!

Walking Foot Guide Bar

Using a guide bar for quilting

You can also use a guide bar to follow along a seam line, or previously quilted line. Just decide how far apart you want your lines, and adjust the width of the guide bar appropriately.

Notice that I’m using the BERNINA dual feed rather than a walking foot. My machine has a built in mechanism that attaches to the back of a specialty “D” foot, giving me more options of which foot I can use. It acts just like a walking foot and performs the same function. I also like using an open toe so I can see exactly where the needle is stitching.

Machine Quilting Random Crosshatch

Here’s what Squiggles is looking like after a few random passes across the quilt in both directions.

Keep on Quilting!

Walking Foot Quilting

Continue quilting randomly spaced liens both horizontally and vertically across the quilt until you are happy with the spacing. The hardest part is knowing when to stop!!

Machine Quilting Random crosshatch

Click here to purchase a Squiggles Quilt Kit made from Modern Marks fabric.

And just remember, if you aren’t happy with the way it looks, just keep quilting. When I had only quilted a few lines on the quilt, I honestly wasn’t sure if I would like the end result, and the thread really stood out like a sore thumb. However, once I added more lines, all of the sudden, I couldn’t see any of the imperfections, and I love the amazing texture that was created!

Remember to share your progress!

Part of the fun of any quilt-along is seeing all of the variety everyone is making. Check out my ChristaQuilts group on Facebook to cheer on your fellow quilt-alongers and post pics of your WIP’s (works in progress). You can also tag me on instagram @christaquilts and #squigglesqal.

The next post will go up in 2 weeks, giving everyone a chance to catch up on their progress!
Click here for the previous Squiggles Quilt Along tutorials.

Meet Me at QuiltCon 2018: My Schedule of Events

I’m super excited for QuiltCon 2018 which takes place next week, February 22-25 in Pasadena California. Although I taught there the last 2 years, this year I’m excited to take it a little bit easier by being a student and attendee, and I can’t wait. However, I’ll still be super busy with a full lineup! If you plan to attend, I’d love to see you at one of my events listed below:

Christa’s QuiltCon Schedule

Christa at QuiltCon with Hobbs

On Thurs. Feb 22, from 12:15-1:15 I’ll be in the Hobbs Batting Booth #122 for a meet ‘n greet. I’ll have some small samples on display and will be happy to answer your questions about batting, machine quilting, and anything else! Rumor has it, there might even be a giveaway!!
Later that day, I’ll be helping out as a general volunteer from 4-6 PM. I’m sure I’ll be wandering the show, pitching in wherever help is needed. Volunteering is truly one of the best ways to get the most out of any show!
Christa at QuiltCon with Hobbs
On Fri. Feb 23, from 12:30-1:30 I’ll be having a book signing with InTown Quilters at booth #624. They’ll have copies of Piece and Quilt with Precuts for sale and some Modern Marks precuts. If you know you’ll be at the show and want to reserve a copy of the book ahead of time, be sure and contact them right away before they sell out.
star Shadow by Christa Watson
Star Shadow, designed and made by Christa Watson, featuring Modern Marks
On Saturday, Feb 24 from 10-11:30 I’ll be hanging out tin the Modern Quilts Unlimited Booth #105. They will have my quilt Star Shadow on display, and you can get the pattern in their latest magazine issue! For those of you enjoying Quiltcon from home, click here to purchase the latest issue #22.
Christa at QuiltCon with BERNINA
Later that day, starting on Saturday at 1:15 PM, I’ll be performing a live machine quilting demo on stage, followed by a Meet ‘n Greet & book signing in the BERNINA booth #502. I’m pretty sure BERNINA will have a machine or two in their booth that you can try out and see why it’s my favorite sewing machine!
The MQG book
Finally, I’ll end my day on Saturday from 5:30-7:30 hanging out at The MQG Book Signing Party, to celebrate the launch of the new book Modern Quilts: Designs of the New Century. I was thrilled to have 2 of my quilts featured in the book, which you can read about here.
QuiltCon 2018
I have to say, QuiltCon is my absolute favorite event – it features over 300 modern quilts and tons of great vendors. So far I’ve gone to every single show (since the first one in 2013). QuiltCon changed the course of my quilting career for the better and I’ve been pleased to have at least one of my quilts included in the show each time. For those not able to attend be sure to follow #quiltcon on social media, and check out a fun event that will be happing at the same time: #quiltconfromhome.

check out My Other posts from Prior QuiltCons:

Squiggles Quilt Along Week 2 – Making the Blocks

I sure have enjoyed seeing pictures of the fabrics everyone is using so far to make their Squiggles quilts. (Check out my facebook group and #squigglesqal on Instragram.) One of my favorite parts of any Quilt Along is seeing how different fabric choices affect the look of a quilt made from the same pattern. Even those who purchased Squiggles quilt kits will end up looking different because of the fabric placement.

Squiggles from Piece and Quilt with Precuts

I’m remaking Squiggles from my book using my Modern Marks Fabric.
Click here to purchase a kit with black or white background.

Making the Quilt Blocks

This week it’s time to make the Squiggles blocks! Turn to page 16-17 of Piece and Quilt with Precuts for instructions on making the individual units and sewing them into quilt blocks.

Squiggles Unit – See the book for how many to make and what size squares to  use.

Once the units are complete, randomly sew them together to make pairs of “C” blocks:

Squiggles Block from Piece and Quilt with Precuts

C is for Christa, right?? Just kidding!!

Bonus Piecing Tips

In order to get my quilt top really flat for easier domestic machine quilting, I prefer to press all of my seams open while sewing the blocks. Contrary to popular myth this will not weaken the seams.

Because I’m using bold prints with a black background, I pieced them together using a darker thread – Aurifl 50 weight cotton #4241 Very Dark Gray. This makes it less likely that thread will show through the seams when they are pressed open.


I’m using very dark gray from my Aurifil Piece and Quilt Collection – Neutrals

I also used a shorter stitch length to help secure the seams. For example, the default stitch length on my BERNINA is set to 2.5. I turn it all the way down to 2.0 while piecing so that the seams ends don’t come apart. Smaller stitches also helps ensure that you don’t see the thread peaking through the seams. If you don’t want to use a shorter stitch length, you can instead back stitch each set of units at the start and end of each unit while chain piecing.

Sharing is Caring

Next week it will be time to sew the blocks into the quilt top! In the meantime be sure and post pictures of your progress in my facebook group, and share them on instagram using the hashtag #squigglesqal. (You can also tag me on instagram @christaquilts). I love it when we all cheer each other on!

In fact, check out this fun mini quilt that Leslie Frost made from the corners that are leftover when you make the blocks. Isn’t it cute??

Squiggles Leftovers

Use up the leftover corners in a mini quilt or throw them in your scrap pile.

For a limited time I have Modern Marks Squiggles Kits available with a black or white background. But once they’re gone – they’re gone!!

Suiggles with Modern Marks

If you are just joining the quilt along, click here for the complete schedule.


Christa’s Soap Box – A Look Back at 2017

I debated on whether or not to do a “year end” blog post like so many do. But then I realized, it’s been a very busy year! Can I distill it down to just a few snippets? So I decided to focus on one memorable event for each month of 2017. Here’s a snapshot of what happened this year:

January – An Injury & A Visit

Angela Walters and Christa Watson

My buddy and co-author Angela Walters came to visit my local guild in January, so she got to see me sporting my fashionable elbow sling! Thank goodness I love to wear black and white, LOL!!
Click here to see the book we wrote together in 2016.

The year didn’t start off so great. After trying to get healthy and fit, I dislocated my left elbow when I fell from a climbing wall at the gym. This is an activity where you free-climb indoors without ropes and there’s padding on the floors to catch your fall. I was great at climbing, but not so great at falling. I’ve now learned that when you fall, it’s best to tuck and roll and NOT reach your arm out to break the fall!!

It’s taken the majority of the year for me recover and heal completely, but I’ve been working on a safer workout routine, and next year is shaping up to be the year I finally recover my fitness. Here’s to a healthy 2018!

February – Lots of Teaching!

Machine Quilting Student Work at QuiltCon 2017
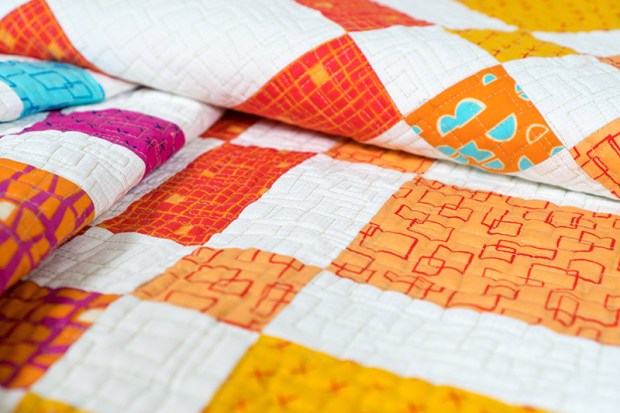
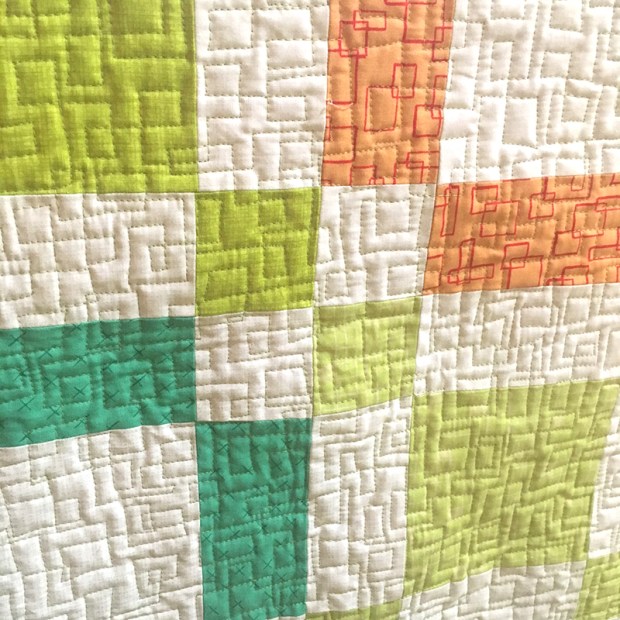
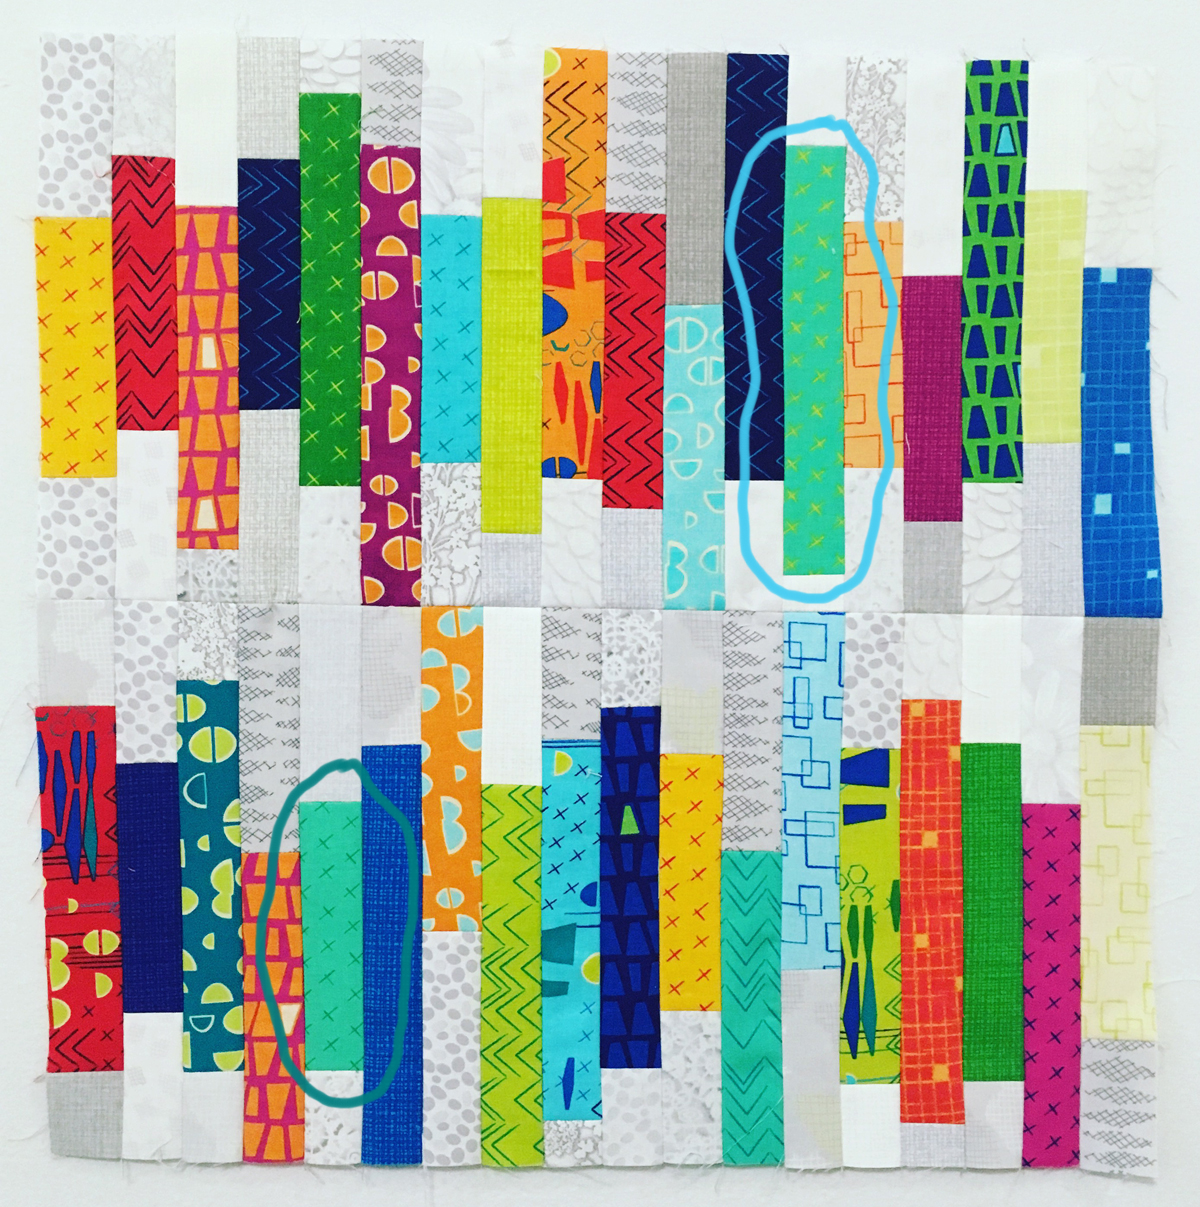
Student work from one of my classes at QuiltCon.
Click here to read my blog post about QuiltCon 2017.

I taught at QuiltCon for the second time in a row and loved it! The only downside is that I was so busy teaching, I barely had time to enjoy the show! I look forward to attending QuiltCon 2018 and NOT having to teach so I’ll have plenty of time to view each and every quilt! (They prefer to not book the same instructors more than a couple of years in a row, to give others a chance to teach.)

March – Lots of Ribbons!

Churn Dash Slide

Churn Dash Slide – 1st place single entrant category at DQN Quilt Las Vegas 2017.
Click here to read more about my local guild’s quilt show in 2017 and a new milestone.

I attended my local guild’s show and entered quilts as I do every year. It’s a fabulous show for a local event and I usually pull a ribbon each time I enter. This year was a new milestone for me as every quilt I entered (there’s a limit of 4) earned a ribbon. I consider this a win for domestic machine quilting since many of the quilts are judged against professional long arm quilting. It just goes to show that the machine you use doesn’t matter as much as your willingness to do good work, no matter the tools. 🙂

April – Lots of Patterns!

Christa Quilts Patterns

Click here to see my full collection of printed quilt patterns.
Click here to see my full collection of PDF quilt patterns.

After a few fits and starts, I released several new quilt patterns. Originally the goal was to release them on a regular schedule, but other, more exciting projects kept getting in the way. This was also the point at which I realized I do much better working with other companies to create new and exciting content rather than trying to do things entirely on my own. (Look for more patterns next year as I plan the releases to coincide with new fabric lines.)

May – An Anniversary Celebration

Christa & Jason at the Beach

Here’s to another 24 years of love and marriage!
This was us at the beach a couple of anniversaries ago and it’s still my favorite place to hang out!!

I celebrated 24 years of marriage with the love of my life, Jason. We’ve had our share of ups and downs over the last two decades and we feel like we are finally figuring out this marriage and work-at-home thing!! (Yes, we got married young – I hadn’t even turned 20 yet and he was almost 23. Now that we have children approaching that age, I realize how young that truly is!!)

June – Judging Beautiful Quilts

Best Modern Quilt Vermont Quilt Festival 2017

Best Modern Quilt at Vermont Quilt Festival by Anya Byam of Burlington, VT
Click here to read more about my judging experience at the show.

I judged my very first quilt show! I was brought into the Vermont Quilt Festival to add my modern voice to the talented pool of judges they solicit each year. It was amazing to get up close and personal with each and every quilt and see the detail and love stitched into each one. I was on my feet for 6 days straight – 2 days of judging and then another 4 days teaching, so I don’t know that I would be keen to combine both types of work in the future, but It was a fabulous experience nonetheless.

July – 2nd Craftsy Class Release

Startup Library Craftsy Class by Christa Watson

Click here to get 50% off my 2nd Craftsy class Startup Library: Quilting
Click here to get 50% off my 1st Craftsy class: The Quilter’s Path

I launched my second online Craftsy class, Startup Library – Quilting. This workshop is 3 times longer than my first class and was created as a basic introductory course for brand new quilters, or those who’d like to freshen up their quilting education. Working with the folks at Craftsy is such a treat, and they are so professional! They produce top notch videos and I plan to continue to work with them to launch additional classes in the future.

August – 3rd Book Release

Piece and Quilt with Precuts by Christa Watson

Click here to get your signed copy of Piece and Quilt with Precuts.

I released my third book, Piece and Quilt with Precuts. Just like my previous two books, it includes start to finish instruction for making the quilt top, plus strategies and step by step diagrams on how to quilt them. After writing 3 books in a row non-stop, I’m taking a little breather to catch my breath before starting on the next one!

September – More Teaching!

Teaching at MQX quilt show

Setting up for my class at the fall MQX quilt show.
Click here for info about next year’s shows – spring and fall.

I taught at MQX quilt show for the first time (and will be returning again in the spring of 2019). This show is special to me because it’s the first national quilt show where I received a ribbon. Back in 2013 I entered my String of Pearls quilt in their newly created “Quilting the Modern Way” category. I received an honorable mention but to me it felt like best in show!

October – First Fabric Release

Modern Marks by Christa Watson for Benartex

Click here to get a fat quarter bundle of Modern Marks, while supplies last.

I launched my first line of fabric, Modern Marks at international quilt market in Houston Texas. Fabric design has long been a dream of mine and it was so gratifying to achieve this goal. So far it has been well received and my hope is to continue designing 1-2 fabric collections a year for as long as it is sustainable.

November – Family Fun!

Watson Family Dia De Los Muertos

We get silly with the extended family at holiday time each year. My MIL creates an elaborate scavenger hunt and we all dress up based on a movie theme for the year. This year’s theme was “Day of the Dead” from the Disney movie Coco. We’re celebrating the fact that we’ll be headed to a fun family reunion in the Mexican Riviera next year and we can’t wait!

I spent a lot of time enjoying time with my family. 2018 will be a big transition year for us – the oldest heads off to college and the next oldest graduates from high school. The youngest who has been home-schooled the past 6 years wants to go to regular high school (for her sophomore year) to see what that is all about. We may actually have some time in 2018 where it’s just the two of us at home during the day – I can’t even imagine what that will look like, or how quiet it will be, LOL!!

December – More In-Person Quality, Less Online Quantity

Teaching at Quilt Addicts Anonymous

I love connecting with others face to face in class and at fun events.
Click here to read my post on simplifying social media.

I traveled to my last teaching event of the year at my friend Stephanie’s shop, Quilt Addicts Anonymous. It was a crazy busy, but fun year of teaching! I did a total of 17 multi-day teaching events in 2017 and realized that as much as I love it, that’s a bit too much. I’ve decided to slightly scale back and limit my travels to no more than 1 event per month, and I’m still booked solid for the next two years.

I also decided to simplify my social media to focus on more quality and less quantity. Although it’s only been a few weeks since I made the switch, I’m already enjoying more time and head space for me to truly do what I love – create!

I hope you had a fabulous 2017 and are looking forward to more quilty fun in 2018!!

Finished Quilt: Color Weave, QuiltCon Entry + Quilting Tips

Today I have another quilt finish to share! Now that I’m not inundated with too many projects and too little time (yay for balance!), I can actually blog more about quilts I’ve recently finished, and I love sharing my virtual show and tell with you!

Color Weave by Christa Watson

Color Weave was published in issue 21 of Modern Quilts Unlimited. Photo Credit MQU.

Modern Quilts Unlimited is one of my all-time favorite magazines and it’s such a thrill when my work appears in their pages. Fun fact: the editor, Laurie Baker and I met backin 2014 when she helped edit my first book, Machine Quilting with Style, and we’ve been friends ever since!

Color Weave Backstory

I originally made Color Weave to be included in my most recent book, Piece and Quilt with Precuts, since it’s completely sewn from 2 1/2″ strips. While the book was in the layout and editing stage, the editors realized it was going to be too long (what? Me wordy???) and we had to make the agonizing decision to cut this project.

Quilting Detail on Color Weave

I love quilts with simple color schemes. Pick any 3 colors to make this quilt!

This happens with craft books more often than you realize, because book publishers would rather have too much content to choose from than not enough. For budgeting purposes, they have to stick to a strict page limit that’s agreed ahead of time in the book contract, and there’s only so many ways you can lay things out with a limited number of pages.

Precut Pieces for Color Weave

I love it when all of the pieces of a quilt are cut and ready to sew!

So after I held my 5 minute pity party, I contacted MQU and asked if they’d be interested in publishing this pattern in their magazine and they said yes! FYI – if you are interested in getting into magazines, editors are always on the lookout for great content and the fact that my quilt was ready to go meant they could schedule it for any issue where they needed to fill pages.

Machine Quilting Details

Needless to say I was thrilled that Modern Quilts Unlimited was excited to publish the pattern for Color Weave, and I was even more pleased that they included the instructions on how to quilt it as a free “web extra” on their blog. (See below image for link.)

Color Weave Web ExtraPhoto Credit – Modern Quilts Unlimited Magazine

Click here to get my machine quilting instructions for Color Weave, courtesy of MQU magazine.

Random crosshatch is actually one of my favorite ways to quilt a quilt with your walking foot (or dual feed) and it is so easy to do! Rather than painstakingly trying to mark and create a perfectly symmetrical grid, I use the piecing seams as a guideline for my lines.

Machine Quilting Random Crosshatch

I started off by quilting in the ditch between all the seams to stabilize and anchor the quilt. Then I filled in between the grid with straight lines at random intervals. I used the edge of my walking foot as a guideline for spacing, moving the needle position to create narrower or wider lines.

QuiltCon Acceptance

I knew right away when I received this quilt back from the magazine that I wanted to enter it into QuiltCon for their 2018 show. I haven’t really seen a design like this before, so I thought it had a good shot of getting into the innovative “Piecing” category.  I’m pleased that others will be able to see it at next years’ show because one of the reasons I enter shows is to share my work with a wider audience who might not have discovered me yet.

Quilting Detail on Color Weave

Quilting detail from Color Weave. Just remember: the best way to hide an imperfectly straight line is to surround it with more imperfectly straight lines!!

It took me awhile to figure out how to create the woven effect in the piecing. It’s like an optical illusion, and I’m sure the quilt would look totally different using scrappy prints, but I was pleased with how it turned out.

When trying to quilt parallel lines, just remember that “straight-ish” lines are perfectly ok! When you are two inches away from the quilt, you’ll notice all the imperfections. But once you back away from the quilt, all of a sudden your eye sees the overall texture rather than the individual stitches.

Random Crosshatch Grid by Christa Watson

Quilting Tip:  If you want your quilting to show, use a solid back. If you want to hide your quilting, using a busy back. I always use the same color thread in top and bobbin because I’d rather see the quilting show up on the back, than little dots of bobbin color on the top!

color Weave Stats:

Color Weave by Christa Watson

Photo Credit: Jason Watson

Modern quilts are my favorite. Now I just need to make more of them!!

Mini Frequency – A Collaboration with Leah Day

Today I’m excited to tell you about Mini Frequency – a fun collaboration I did with Leah Day, of The Free Motion Quilting Project fame. First, a picture of the finished mini:

Mini Frequency by Christa Watson

A Mini Version of Frequency, Using 1 1/2″ Strips

Leah Day – Your Machine Quilting Friend

Next, a quick background about mine and Leah’s friendship: we met online somewhere around 2012-2013 when I discovered her blog and realized that you didn’t have to wait until you were at retirement age to make quilting a successful full-time job!

We first met in person at Spring Quilt Market back in 2015 and then collaborated on a presentation at Fall Market 2016. When we met up to for lunch at QuiltCon earlier this year, it was inspiring non-stop talk about the business of quilting which I just love! She’s got that “entrepreneur-on-fire” spirit that really motivates me, especially when I see it from women business owners.

Leah Day is as passionate about empowering others to quilt as I am!

Leah just published a brand new quilting book and she launched a new podcast just over a year ago which I will be a guest on soon, so stay tuned for more details about both!

Our Quilty Collaboration

When Leah approached me about working on a small project together, I immediately knew that I wanted to make a “mini” version of Frequency, one of the quilts from my book Piece and Quilt with Precuts. Here’s what the original pattern in the book looks like, made from 2 1/2″ strips.

Frequency by Christa Watson for Piece and Quilt with Precuts

I thought it would be fun to scale down the design, using 1 1/2″ strips instead. I had just received strikeoffs (sample swatches) of my Modern Marks fabric line earlier this year when I started on the mini, so I was able to cut small bits of fabric to make the mini.

Here are some in-progress pics of the piecing:

Mini Frequency Block Piecing

It’s amazing how much the blocks shrink up when you piece them together! I had a fun time deciding which fabrics I wanted to place next to each other.

Frequency Blocks

Rather than making a full-scale version of the original, I chose to make 4 blocks from 1 1/2″ strips. That way I could incorporate every fabric without it being too big.

Behind the Scenes: Fabric Printing

I was able to use strikeoffs for my mini: samples that are printed before the entire line goes into full-scale production. This allows you to check for fabric quality and to determine if everything will print correctly. Check out that piece that’s circled in the top row below. On paper it printed out fine, but when the mill printed it on fabric, the lime x’s on turquoise created an effect called “trapping” which makes it look blurry. So we decided not to print that one.

Instead we changed it to be dark turquoise x’s instead of lime which worked much better. See the fabric circled in the bottom row below. I still thought it would be fun to use both pieces  in my mini to preserve the history of this fabric collection, and a bit of a story to go with it!

Mini Frequency Quil Top

The fabric circled on top was replaced with the one on the bottom row for better printing.

Leah Works Her Magic

Once I had completed the top, I shipped it off to Leah to let her work her quilting magic. For anyone who knows me, they’ll understand what a big deal it is for anyone else to quilt for me. I’ve never had someone quilt a quilt for me so this was a fun stretch for me to give up a little bit of control over that process, LOL!! Needless to say, she did an amazing job!

Leah created a YouTube video sharing her thoughts on how and why she quilted it the way she did. It’s very informative and full of fabulous tips. Plus it’s always so fun and mesmerizing to watch someone quilt and see the way they move the quilt under the machine. Take a look below:

Click here to read Leah’s blog post about our collaboration.

I love how Leah decided to highlight the fabrics with her batting and quilting choices. This is a perfect example of what you can do when working with busy prints. My favorite part of the video is when she holds it up at the end and you can really see how the light hits her beautiful background quilting.

Of course, me being the crazy dense quilter that I am, I decided to add a little extra touch and went ahead and quilted right on top of the prints when I got it back, LOL!! So it just goes to show how different choices can affect the look of a quilt. 🙂

Binding Tips

Press the binding for a nice, flat and tight finish.

I learned a great tip about binding from Leah a few years ago: after you attach your binding, give it a bit of a press with a hot dry iron. This will make a nicer crease and allow you to stitch it down nice and tight.

Quilting Detail on the back of Mini Frequency

Click on the image above to enlarge it and see all the yummy quilting detail on the back.

Here’s the finished mini – I’m really happy with how it turned out, and it means even more that I was able to collaborate with a friend!


Squiggles Quilt Along Schedule – Grab Your Fabric and Get Ready!

Let’s kick off the next year in quilty style, with a Quilt Along!! If you remember the launch of my newest book last summer, I teased the idea of remaking one of the quilts from the book in my new fabric. Readers were able to vote on their favorite quilt, and when to start the Quilt Along.

Well guess what? We’re going to start the Quilt Along on Monday, January 15 and it will run for 6 weeks, going through every step you need to make the Squiggles quilt below, from start to finish!

Suiggles with Modern Marks

Squiggles Quilt Kits are available for a limited time, with black or white background.

I’ll be remaking my version of Squiggles using my Modern Marks fabric + black background, but of course, you can choose any fabrics you like!

Here’s the Quilt Along Schedule and Supply List. Each week as I write create each step, I’ll update the links below so that this post can serve as a landing page for the quilt along.

2018 Quilt Along Schedule

Click the hotlinks below to get to each blog post.

Modern Marks Fabric

Supply List

  • Copy of my book, Piece and Quilt with Precuts
  • Two – 5″ charm packs of background solid or tonal fabric (or a total of 77 squares)
  • Four – 5″ charm packs of print fabric (or a total of 154 squares)
    • (Note – you can also substitute one 10″ square pack if needed, and cut to size)Piece and Quilt with Precuts
  • 1/2 yard of fabric for binding
  • 3 1/4 yards of fabric for backing
  • 56″ x 70″ piece of batting (I recommend Hobbs batting)
  • Approx. 1200 yards (or one large spool) of thread for quilting (I recommend Aurifil)
  • Sewing Machine with new needle and basic sewing supplies
  • Rotary cutting equipment (6″ acrylic ruler, mat, standard cutter with new blade)

So gather your fabrics, your copy of Piece and Quilt with Precuts, and start sharing on social media (#squigglesquilt and Christa Quilts on Facebook).

The original version of Squiggles, as shown in the book:

Squiggles from Piece and Quilt with Precuts

We’re just a month away from a quiltin’ good time!!

Save

Save

Save

Save

Save

Save

Save

Save

Save

Save

Save

Save