I love it when we get to the machine quilting part of a Quilt Along! I’ve just finished my fourth book on machine quilting so I feel like that is one of my specialties. I’m excited for you to try free motion stipple quilting like I did on my Modern Logs, or another quilting design of your choice.
I made a video with all my best tips and tricks for quilting Modern Logs. Just nine minutes but it’s packed full of help and guidance! Click play below to watch.
If you’ve never tried free motion quilting or a stipple (also called a meander), layer up a couple of fat quarters with batting and practice there before you start on your real quilt. You can quilt on this practice sandwich many times over, using it as a warm-up if you like.
I can’t wait to see how you decide to quilt your Modern Logs!
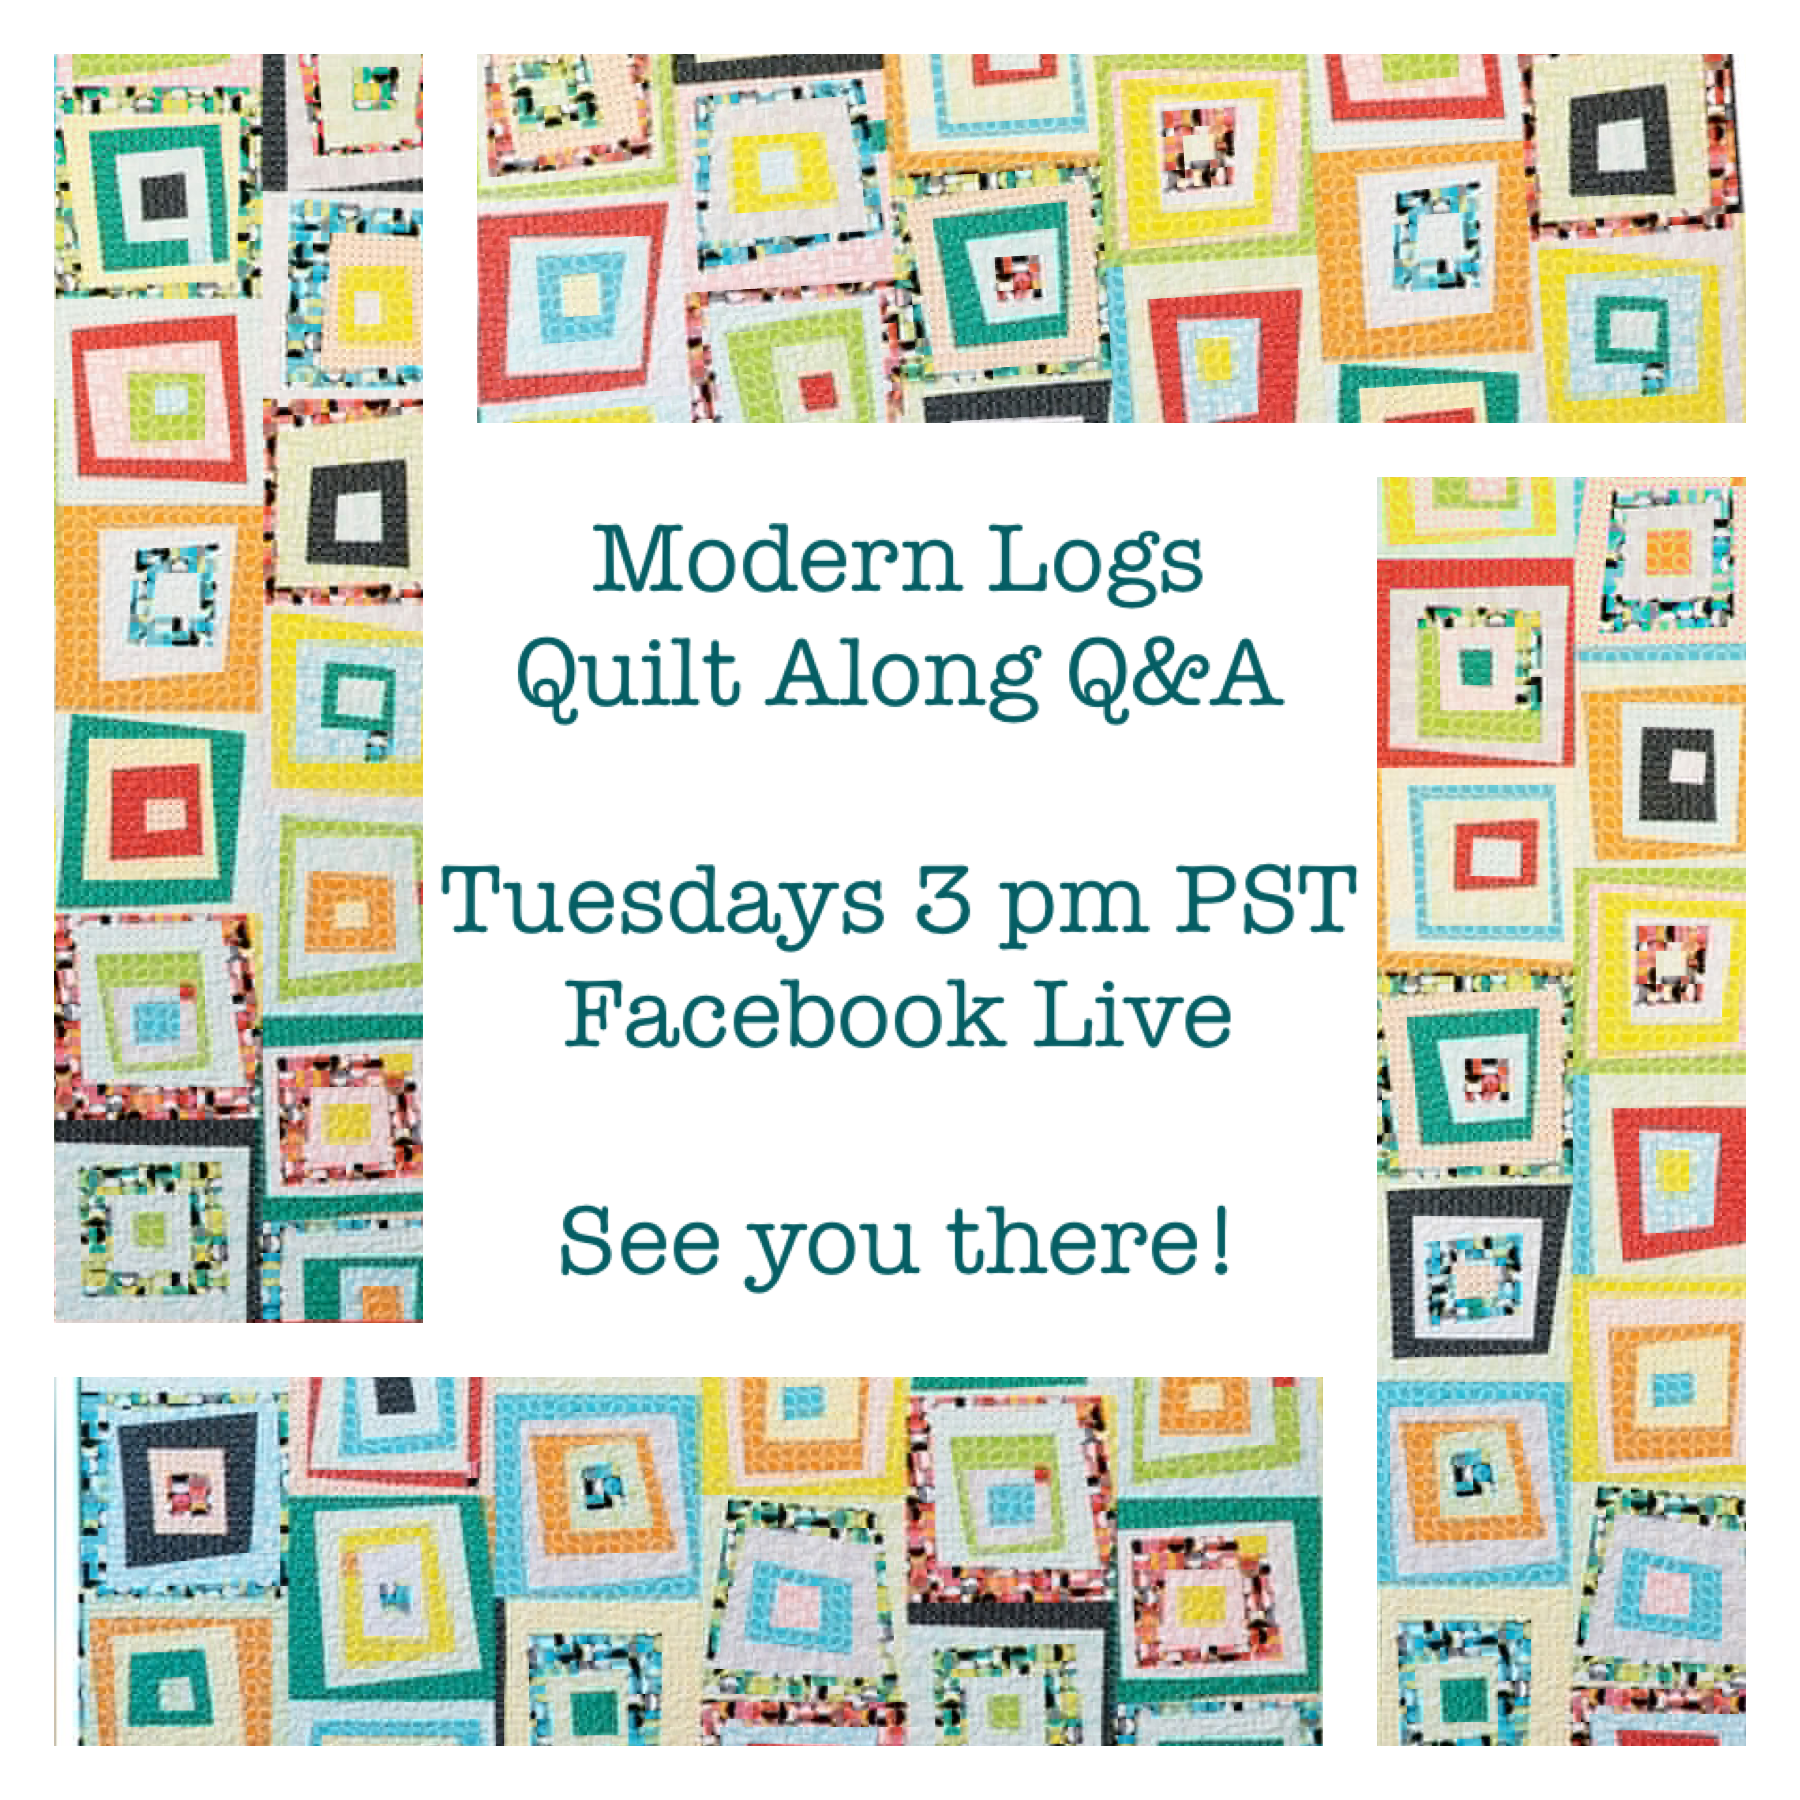
To go along with the Modern Logs Quilt Along that just recently started, I’m hosting a weekly Facebook Live chat for the duration of the Quilt Along. This will allow me to share some bonus tips and tricks along with a chance for you to ask any questions you have while making this quilt!
In case you missed it, I posted the first Modern Logs Q&A over on my YouTube channel. You can enjoy last week’s chat by clicking the play button below. Then join me live in my Facebook group for the next chat!
I’ve found that many people have questions around improvisational piecing and of course the whole quilting process. I’m excited to answer your questions about this quilt during the entire process, and I think you’ll feel confident about your skills by the end of the QAL!
Although the quilt along has just begun, it’s not too late to follow along. Feel free to work at your own pace and access all steps of the quilt along indefinitely.
One of the things people like best about my FREE quilt alongs is the help I offer on machine quilting so that you can finish the quilt yourself.
It is the best feeling to make a quilt from the first stitch to the last! I really enjoy sharing the things I’ve learned about quilting on a home sewing machine so that you can be successful at it, too.
If you already have questions for me, please leave them here in the comments and I’ll answer them live on the air tomorrow, September 8 at 3 pm Pacific/6 Eastern in the Christa Quilts Group on FB. I can hardly wait!
When the quilting is finished on your Optical Illusion quilt, or whatever quilt you happen to be making, just the final step of binding is left. I’d like to show you in words, pictures and videos how to bind a quilt. Let’s dive right in.
Finished Optical Illusion Quilt, 67″ x 88″
If you’re still working on your Optical Illusion quilt, no worries! This will be here when you’re ready for it. You can scroll to the bottom for links to all of the steps.
The first thing to decide is whether you want to make the binding from just one fabric or you want to make it scrappy.
Which way you go is just a matter of personal preference, as there is not a right or wrong decision.
Step 1 – Calculate and cut your binding strips
A well-written quilt pattern will tell you how many binding strips to cut, but it’s handy to know how to figure it yourself. To determine the length of binding you’ll need, add up the length of the four sides (known as the perimeter) and then add 10″. The extra 10″ is for the seams and gives you a little insurance.
For example, Optical Illusion finishes at 67″ x 88″. This would be the math:
67+67+88+88+10 = 320″
You’ll need 320″ of binding. We use 40″ as the standard width of useable fabric from selvage to selvage, so from each cut across the fabric, we will get 40″ of binding. So we divide 320″ by 40″ to see how many strips to cut.
320″/40″= 8 strips
Just as a side note, if you ever divide by 40 and get something like 6.49, round up to get the number of strips. If you got 6.49, you’d round up to 7 because you’d need 7 strips.
How wide should your binding strips be cut? It’s a matter of personal preference. Most of my patterns, including Optical Illusion, give 2-1/4″ as the cut width for binding strips. But over the past few years, I often cut my strips 2″ wide and sew them to the quilt with a scant 1/4″ seam allowance. If you’re a beginner, it may be a little easier to cut binding strips at 2-1/4″ wide.
Step 2 – Sew the binding into a continuous length
To join the strips with mitered seams, place two strips right sides together at a 90 degree angle. Sew them together across the diagonal as shown. Join all of the binding strips into one long piece.
Trim the seam allowances to 1/4″ and press the seams open.
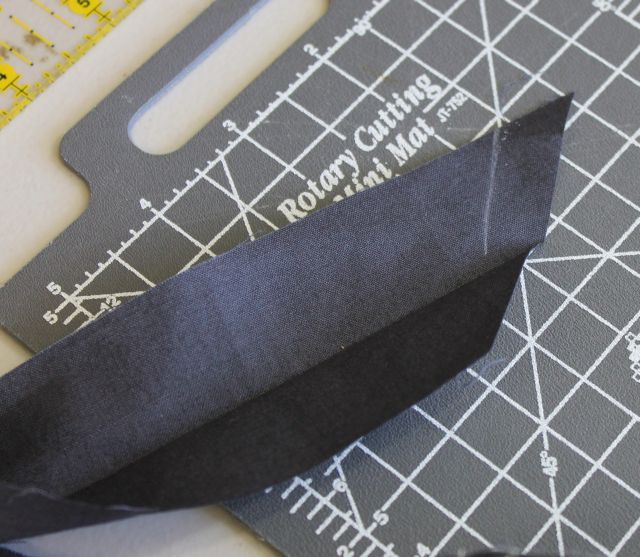
Trim one end of your binding at a 45 degree angle as shown above. This will be the starting end.
Step 3 – Press the binding
Press the binding wrong sides together along the entire length.
Step 4 – Trim the quilt and walk-around
Trim off the excess backing and batting before you attach your binding. I use a large square ruler for the corners, and a long straight ruler for the sides.
Quickly do a “walk-around” by running your binding along the perimeter of your quilt to ensure you won’t have any seams falling in the corners. If you do – move the binding up or down a few inches to avoid seams at the corners.
Step 5 – Attach the binding to the quilt
Please note: These instructions are for sewing binding to the front of the quilt and then sewing it by hand on the back to finish. If you prefer to bind completely by machine, see this video. Or:
Now back to Step 5: Attach the binding to the quilt
Starting at least 6″ – 8″ away from any corner, place your binding on the front side of the quilt and leave a tail of about 6″ – 8″. Line up the raw edges of binding with the raw edges of your quilt. The fold should be toward the quilt.
Attach a walking foot or even-feed foot or use a dual-feed setting on your machine. Starting at the pin as shown, stitch the binding onto the front of the quilt with a 1/4″ seam allowance.
As you come to a corner, stop stitching 1/4″ before you reach the corner and sew off the corner at a 45º angle.
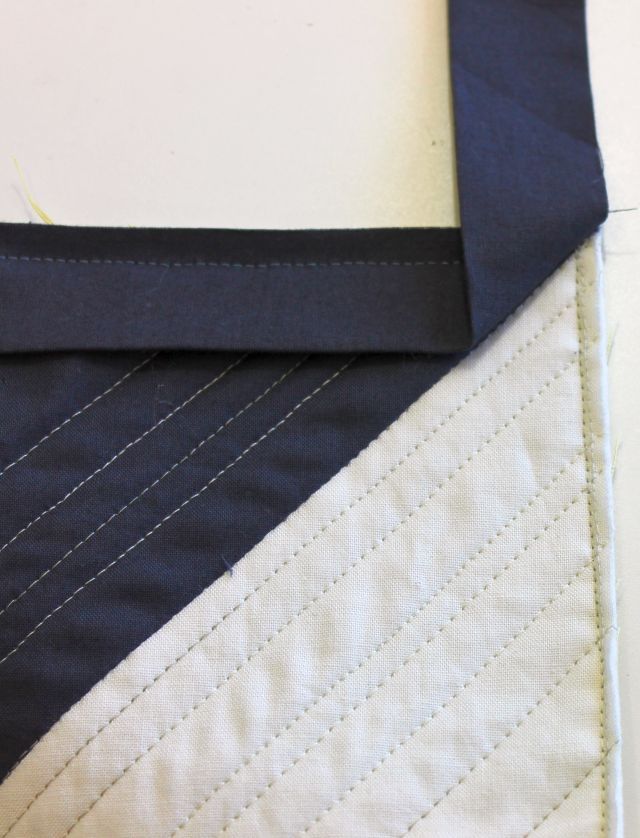
It will look like this. In order to miter the corner, fold the binding up and away from yourself. Keep the raw edges of the binding in line with the raw edges of the quilt as shown.
Next, fold the binding back down toward yourself, creating a tuck of fabric underneath.
The fold will form a little triangle that stands up off the quilt.
The fold will form a little triangle that stands up off the quilt; later it will form the miter on the quilt front. Now the quilt goes back under the machine.
Starting from the edge of the quilt, stitch the next side of binding down until you reach the next corner. Repeat this process for all four corners until you approach your starting point. STOP when you’re about 8″ away from where you began.
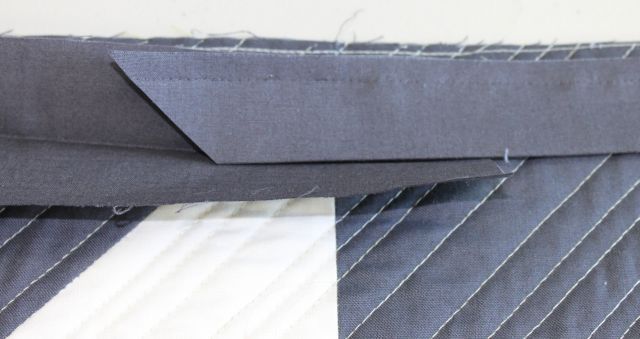
Trim off the excess, leaving a few inches of overlap to work with. Open up the end of binding and place the beginning tail inside it.
Using the cut angled end as a guide, lightly mark a line right up next to it. Then cut 1/2″ away from this measurement to account for seam allowances on both ends.
Put the two tail ends right sides together, and sew with 1/4″ seam to complete the continuous loop of binding. Finger press the seam open.
Sew that last part of the binding to the quilt. Now the binding is attached all the way around the quilt.
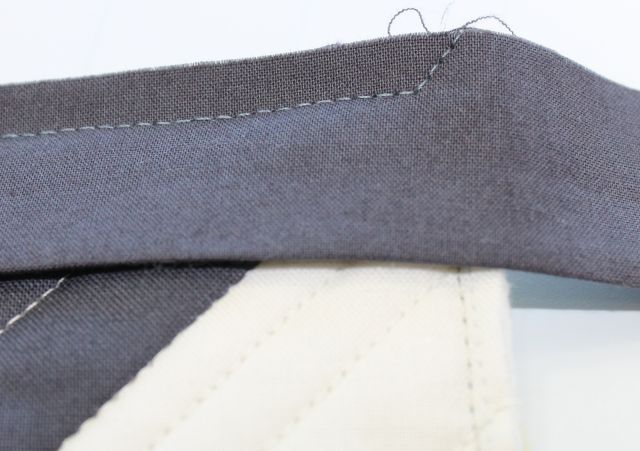
Step 6: Sew the binding down
The next step is to fold the binding to the back of the quilt and sew it down by hand. I love using binding clips all round the edges to hold it down. Here’s the only picture I got of my binding Optical Illusion:
Welcome to Part 4 of the Optical Illusion Quilt Along! You’ve made it through the piecing, so congratulations! Now we come to what may not be your favorite part of the process: prepping the backing and batting, and basting the layers together in preparation for quilting.
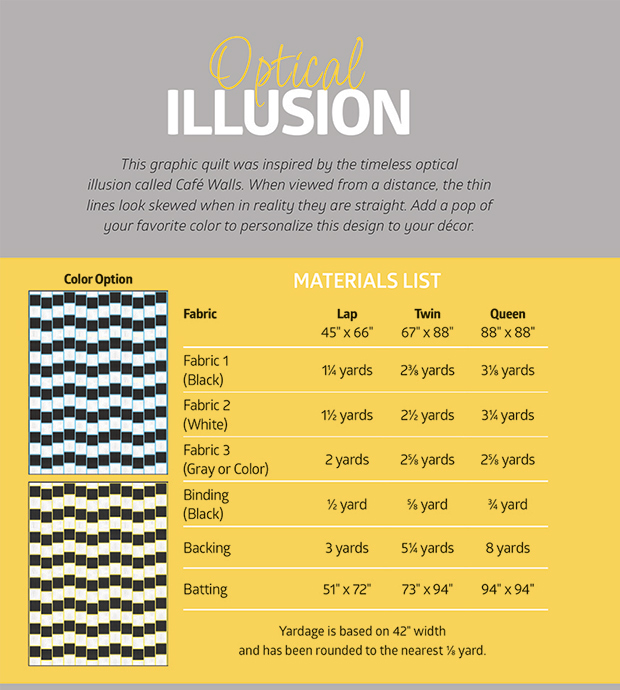
Above is one of the alternate colorways for Optical Illusion. You can make something similar with red, light blue, and white fabric from my online shop.
But if you’ll let me guide you through the next steps, I’ll share some tips to make it less painful and move you along to the quilting that much sooner.
Prep the Batting
The most important step in basting a quilt is to ensure that the batting and backing are several inches larger than the quilt top all the way around.
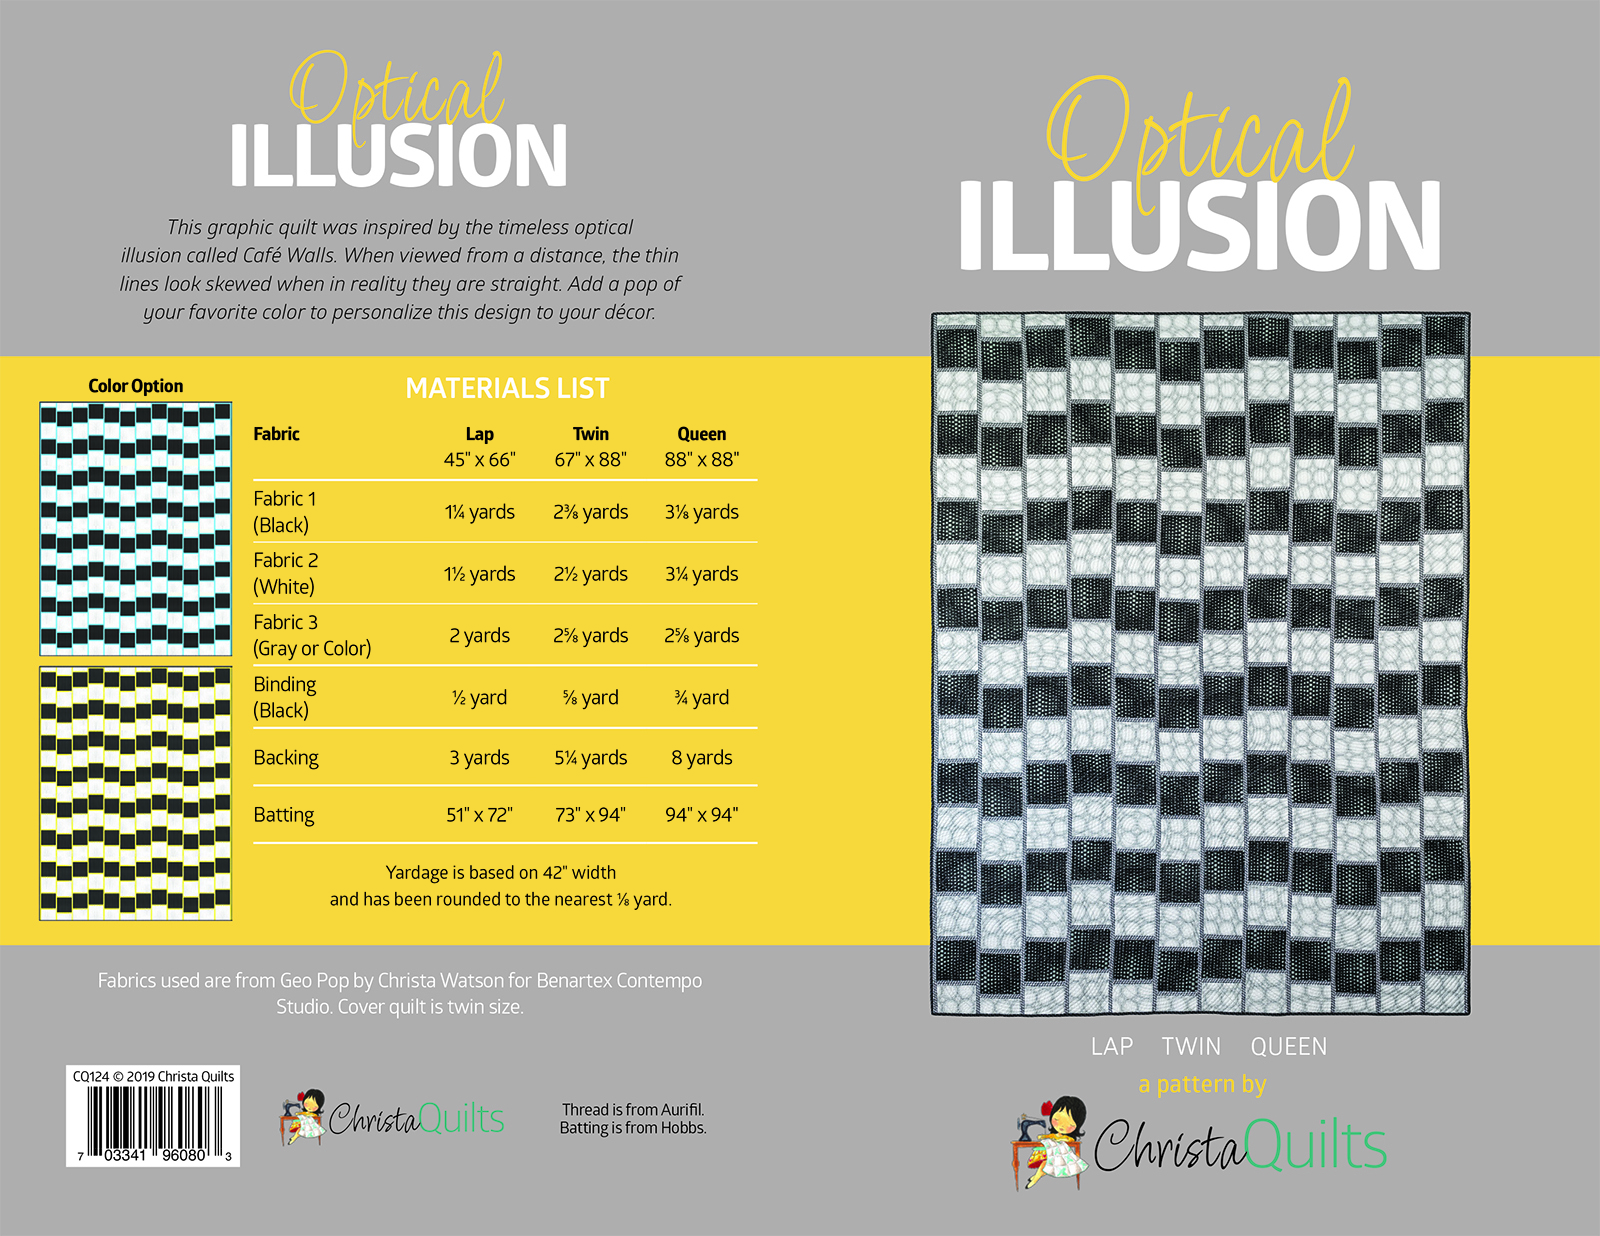
If you look at the back of the pattern, you’ll see that for the batting size, I have added 6″ to the length and width of the quilt top. For example, the lap-size top is 45″ x 66″. The batting needed is 51″ (45″ + 6″) x 72″ (66″ + 6″).
Example of measuring batting from a previous Quilt Along:
The batting should be several inches larger than the quilt top all the way around.
For me, the easiest way to measure the batting is to buy a roll of it, then unroll it across the width of the quilt top and roughly trim off the amount I will need. In the photo above, I’m using Hobbs Tuscany cotton/wool batting which is one of my favorites.
It’s 90″ wide and folded double on the bolt. So after I trim off a chunk from the bolt, I’ll lay the quilt top out and trim off several inches from the top of the batting. I save those chunks to make practice quilt sandwiches later.
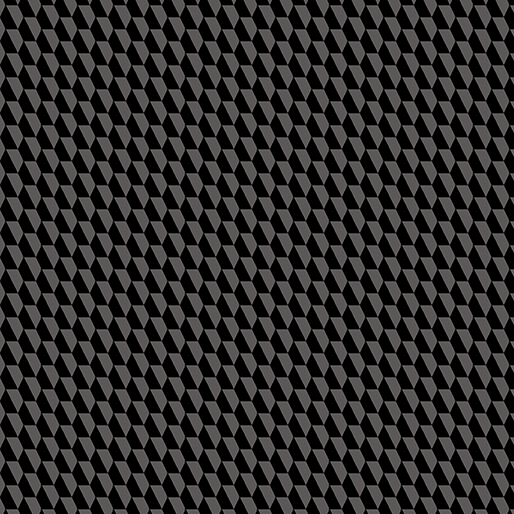
Geo Pop Tiny Hex in black by Christa Quilts for Benartex/Contempo
Piece your backing so that it is a few inches larger than the batting size given on the back of the pattern.
For example, for the lap size, I would cut my three yard piece of backing fabric in half crosswise. This gives me two pieces about 40″ x 54″. I need backing a bit larger than 51″ x 72″.
Backing, pieced horizontally.
I’ll sew the two pieces together for a backing that’s roughly 54″ x 80″. The seam will be horizontal across the quilt.
Now you are ready to baste!
Basting the Layers: Quick Overview
I baste using my design wall and 505 basting spray. I make sure my batting and batting are bigger than my quilt top and I trim away some of excess after it’s been basted. I spray the top and backing outside separately, then assemble all the layers on my design wall, taking care to smooth each layer as I go.
Once everything looks nice and flat, I’ll roughly trim the edges so that only and inch or two remain around all 4 sides. I cut off as much extra as I can to prevent it from tucking under the back and quilting the quilt to itself!!
The final basting step is to iron the quilt on both sides to set the glue and smooth everything out one final time.
I didn’t have a chance to take pictures of this process while making Optical Illusion, but here are links and tips from previous quilt alongs.
And if you have any more specific questions, you can alway post pics and ask questions in my Christa Quilts Facebook Group!
Next week I’ll include a video showing spiral walking foot quilting practice to get you ready for the most fun part of making this quilt!! I can’t wait!!
Spiral Quilting on Optical Illusion can be done with a Walking Foot or Dual Feed system.
Welcome to Part 3 of the Optical Illusion Quilt Along! I hope you are enjoying your fabric choices and feel confident in your cutting and sewing skills. Now I’m excited for you to start sewing the quilt top. It’s easy and fun!
If you haven’t already, please go through your pattern and highlight or circle the number of units to make for your size on pages 3 and 4. You’ll be so glad you did.
Begin with Step 1 on page 3 of your Optical Illusion pattern. Remember to sew with the gray on top for each sashed square. If you do, you’ll automatically alternate the direction in which you’re sewing, which helps prevent your strips from warping.
I press all of the seams open on this quilt. Whether you press seams open, to the side or toward a specific fabric is up to you. The seams don’t have to match up with anything, which is one of my favorite things about this design.
Continue with each Step as given in the pattern, referring carefully to the diagrams in the pattern for each unit. I use sticky notes to label each little pile of units as I finish them.
When you’ve completed all the Steps, move on to Sewing the Rows on page 5.
Sewing the Rows
As I am making the rows, I keep them oriented horizontally so they match the diagrams. Be sure and notice that there are different diagrams for the Lap Size than for the Twin and Queen size. It will help to circle the diagram for your size!
Label the rows with their letters to help you stay organized.
When your rows are finished, give yourself a high five!! Great job!
Quilt Top Assembly
Moving on to Quilt Top Assembly: In last week’s post, I mentioned alternating your sewing direction by keeping the long skinny strips on top. This will be helpful as you assemble the top.
The layout diagram below is included in the pattern. Refer to pages 6 and 7 of the pattern for more info as you assemble, including a method for trimming. Use your design wall to stay organized, or snap a quick picture on your phone for a helpful reference point as you progress.
I pin generously during this process. I match and pin at each end, at the middle and at several points between. Remember to sew with the skinny strip on top each time so that your sewing direction will automatically alternate.
TIP: If you have a row or a sashing strip that is longer than its neighbors, sew with the longer strip on the bottom, next to the feed dogs. This helps to ease in the fullness.
Press the quilt top gently to wrap up the piecing.
SEW A VICTORY LAP!
When the quilt top is complete, you’ll want to “stay-stitch” the edges by sewing across the top and bottom of the quilt. Do this about 1/8″ away from the edge on the top and the bottom so it will be hidden when you add the binding. Just a note: When you make a quilt with borders, you can skip this step since the borders will stabilize the edges instead.
Congratulations! Your Piecing is complete.
Next week we’ll cover how to prepare your backing and batting, and how I baste a quilt. Here is the back of the pattern with info that you’ll need. Click the image for an enlarged view.
You know how much I enjoy machine quilting. Just a few more weeks and we will quilt walking foot spirals—I can’t wait!! Being able to finish your quilt on your own sewing machine because you’ve built the skills to do it is a great feeling. You’re going to love it!
I’m excited to tell you about the PaintBox quilt along being hosted by my talented friend Linda Sullivan from Colourwerx, starting on January 28th. The version below is made from my new Gridwork fabric collection and I’ve even put together some quilt kits to make it.
Linda is such a talented designer and her patterns are top notch! I love that she makes each of her patterns in several different fabric lines so you can see how they look in various colors.
You can sign up for Linda’s newsletter to get QAL updates (they are free), or you can join her facebook group where she’ll be sharing and encouraging you to make this amazing quilt! Here’s the complete schedule below:
Don’t you just want to make this gorgeous quilt? All it takes is one jelly roll plus two 1 yard cuts of background fabric. That’s enough the make the 48″ x 48″ size quilt top plus binding.
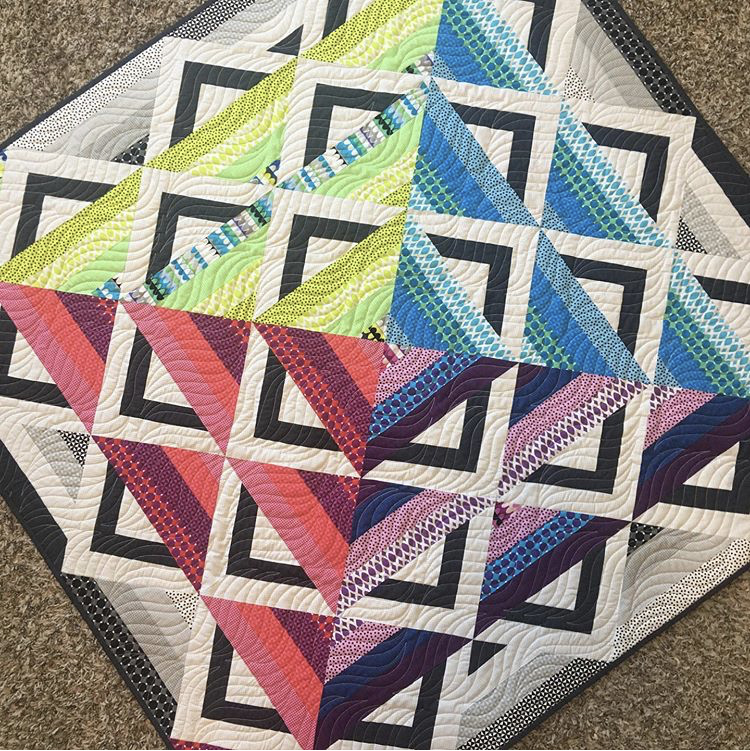
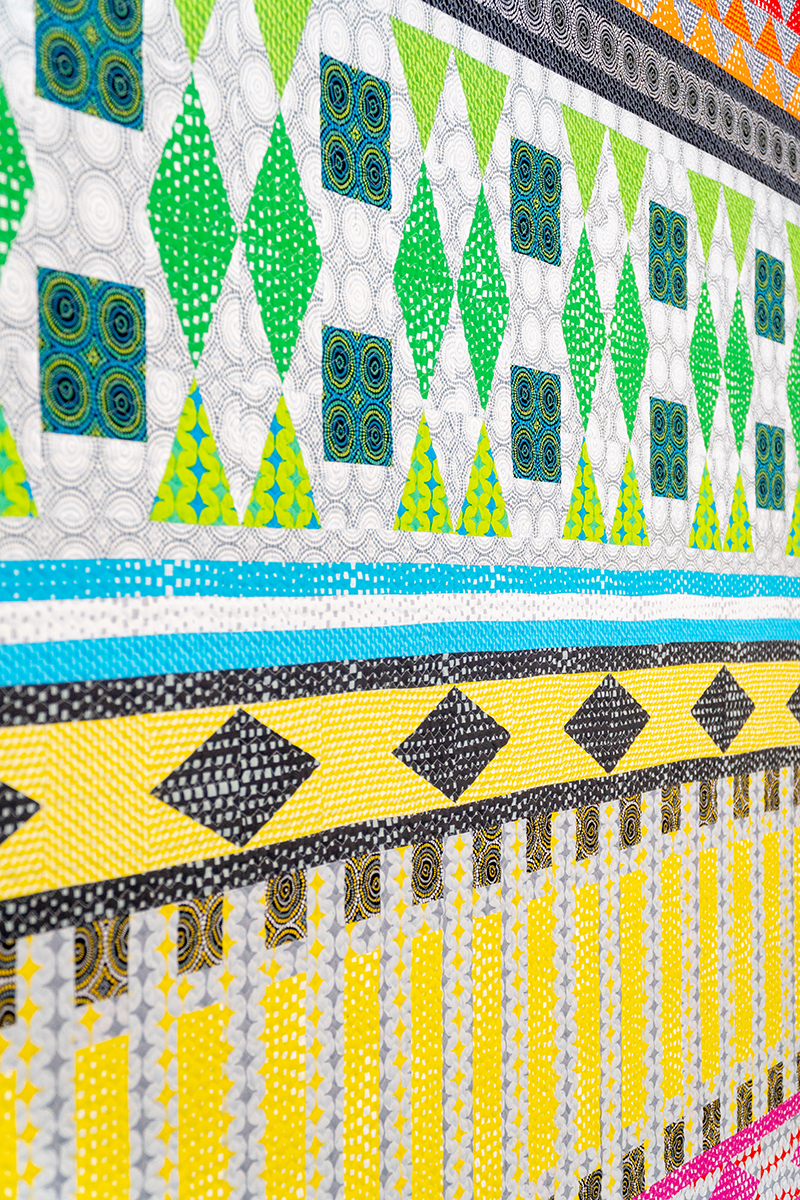
Earlier this week, I shared my Infrastructure quilt finish, along with links to all of the quilt along tutorials. Today I’m back with more inspiring versions of this quilt made by others. I love to see the same design made up in different fabric, don’t you??
My version of Infrastructure quilt made with Geo Pop fabric.
Heather Black’s Version Made from Solids
Heather Black originally designed this quilt for me to show off my Geo Pop fabric line. But then she made her own version using Benartex Superior Solids. The color placement is basically the same, but the solids really allow her amazing machine quilting to shine!
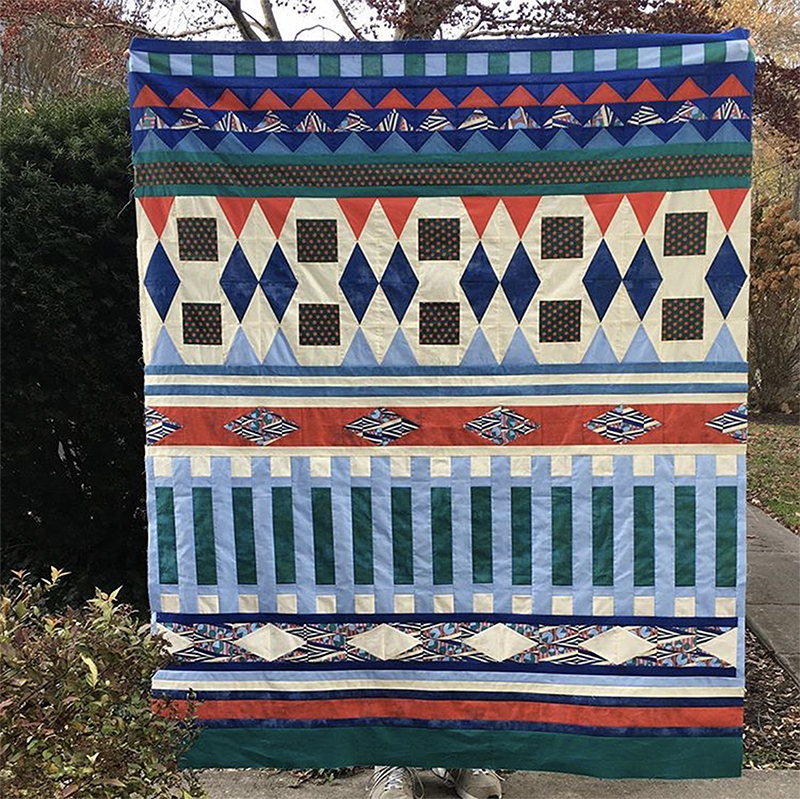
Whenever I do a quilt along, I always emphasize that I want everyone to work at their own pace. But it was really fun to follow two of the participants on Instagram as they kept up each and every week. Check out their beautiful versions of Infrastructure below:
This lovely quilt top was made and shared by Margaret Fleisher on Instagram. I love her color choices and clever use of fabric. Now I’m excited to see how she quilts it!
If these have inspired you to make more quilts in the new year, be sure to check out my quilt along web page. It’s a roundup of all of the quilt alongs I’ve done so far. You may just find the perfect quilt you’ve been looking for!
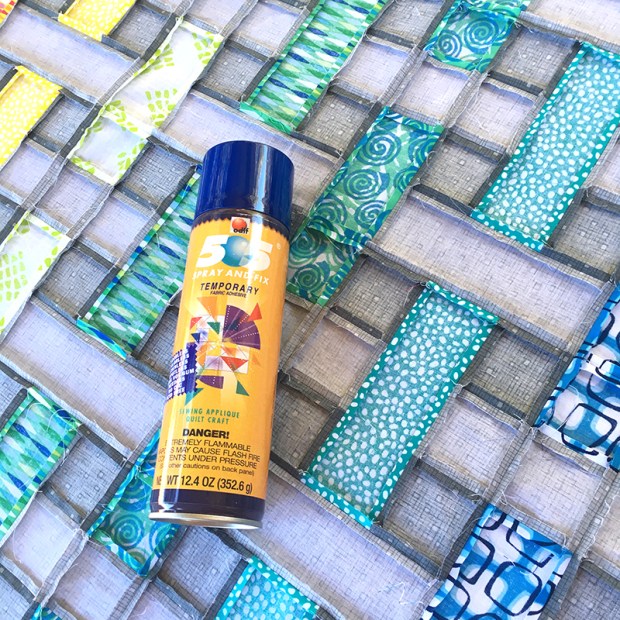
One of the secrets to successful machine quilting is basting your quilts properly. So today I will share with you my favorite way to baste a quilt using 505 basting spray and my design wall. You can definitely modify this technique and baste your quilts on a table, but I prefer the design wall because I can get up close to the quilt and make sure it’s nice and flat.
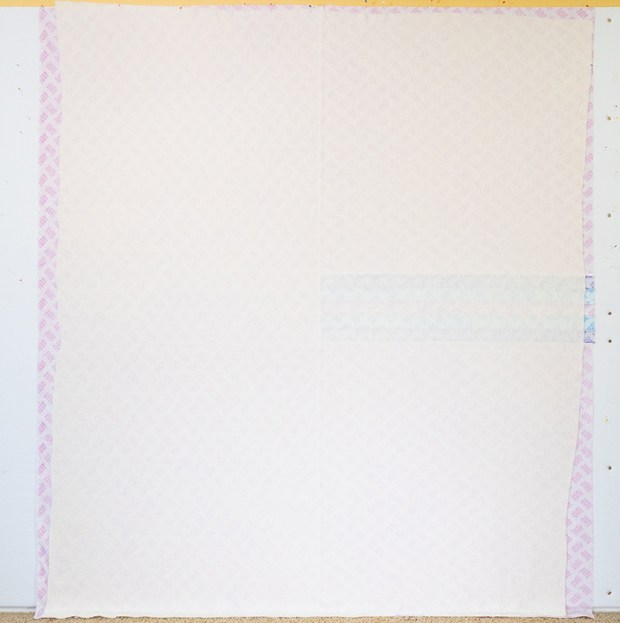
First I put up the finished quilt top on the design wall so I can see how much area to cover. I cut my 5 yards into 2 pieces that are NOT equal because I knew the strips would take up some of the room. One piece was about 94″ and the other piece was about 80″. Then I cut the shorter piece in half to create to rectangles, roughly 40″ x 40″ each. I placed the strips in the center gap between the two pink squares and sewed them together to create a strip set, then joined the two pink pieces on either side.
Once the left half of the backing was sewn, I attached it to the long piece, parallel to the selvage to create the finished backing. The important thing is to ensure that the backing is a few inches larger on all four sides for basting.
Because my name was on the selvage, I allowed the selvage to show instead of cutting it off first. And I wrote more info on the white part of the selvage to create a built-in label for the quilt.
WALL BASTING TUTORIAL
Ensure that all 3 layers of your quilt (top, batting, and backing) are nice and flat. The batting and backing should be a few inches larger than the quilt top on all sides.
Give the top and backing a final press and clip any stray threads. Relax the wrinkles in your batting by throwing it in a dryer with a wet towel for a few minutes, unrolling it from the package to “rest” for a few days, or pressing the batting with a hot dry iron. (For delicate batting, use a piece of fabric to cover it while you press.)
I’m using Hobbs Cotton/Wool batting and I have a roll of it, so to measure how much I need, I keep the quilt top on the design wall and unroll enough of it so there’s extra around all 4 sides. I cut it with specialty batting shears.
STEP 1 – APPLY ADHESIVE TO BACKING AND QUILT TOP SEPARATELY
Lay a sheet on the ground or a table to protect your quilt and catch any over-spray. Outdoors is best so that the fumes can dissipate, but you can do it inside in a well ventilated room while wearing a dust mask. Be sure to shake the can and spray a few squirts on the sheet to ensure the nozzle is clean and the spray comes out evenly before you start.
Lay out the quilt backing wrong side up and apply a thin coat of 505 spray adhesive evenly across the surface of the quilt. Walk around the quilt backing as needed to reach all areas.
Repeat the process for the quilt top, using the design of the quilt to help you keep track of which areas you’ve already covered. Don’t worry if the quilt top and backing have some give or are a bit wrinkly from movement. You will smooth it all out later.
Once the backing and quilt top are sprayed, fold them up and bring indoors to assemble the layers on a design wall. It doesn’t matter if you fold them right sides in or out. They will be sticky, but not stuck and you can easily unfold and the layers and peel them apart. You don’t need to baste right away, but I wouldn’t wait more than a few days to prevent the spray from drying out.
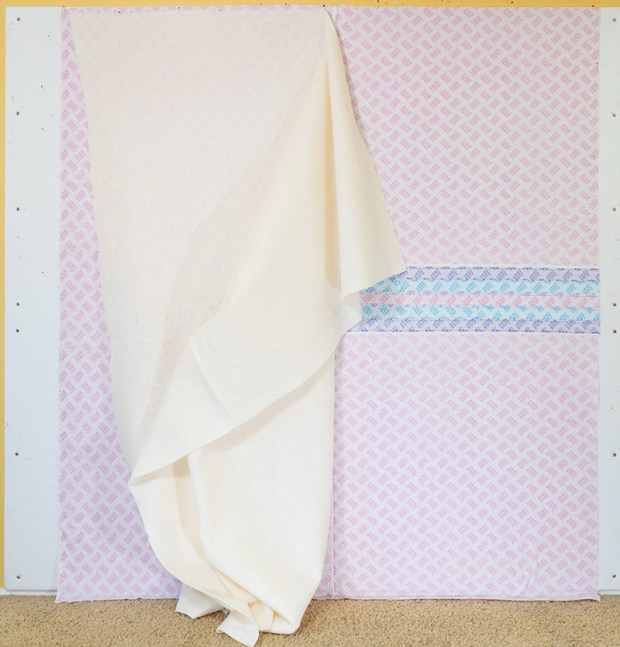
STEP 2 – ASSEMBLE THE LAYERS INDOORS
Pin the quilt backing wrong side up to the top of the design wall (mine is made from foam insulation board covered with a white flannel sheet). Let gravity pull the weight of the fabric down.
Gently un-stick any of the fabric sticking to itself and spend some time smoothing it all out with your hands or a long acrylic ruler. Your hands will get a bit sticky, but the residue easily washes off with soap and water. Spend as much time as you need to straighten the backing so that it’s nice and smooth and flat on the design wall.
Repeat the process above with the batting. It can take awhile to smooth out all of the lumps and bumps so give yourself time and don’t rush the process.
Notice that I didn’t cut my batting perfectly straight on one edge and that’s okay. As long as the batting is larger than the quilt top, it’s easy to trim off any excess.
Add the quilt top right side up in the same manner as the backing and batting. Pin generously and let gravity pull on the weight of the quilt top to get it to hang straight. This is why it’s so important for the batting and backing to be larger than the quilt top. Then you don’t have to make sure it’s lined up perfectly in the middle – you’ll have a bit of “wiggle room” to maneuver.
Spend a lot of time smoothing out the top layer once it’s on the wall. Use the acrylic ruler to help you work out any bubbles and ensure that the seam lines are nice and straight. Once your basted quilt is flat, smooth and straight, machine quilting it will be a breeze!
After the layers are nice and smooth, I trim off much of the excess batting and batting, leaving only about an inch all the way around. I don’t want a ton of excess around the edges that could flip and get caught under the machine as I quilt. I use the leftover fabric/batting pieces when I’m practicing my machine quilting.
STEP 3 – IRON THE BASTED QUILT
Here’s where the magic happens! Once the quilt is basted, I take it to the ironing board and press both sides of the quilt. This does two things: (1) it’s a final chance to press out any wrinkles and work out any fullness in the quilt. (2) It sets the glue and ensures that all 3 layers will stay together without shifting, eliminating the need to add any pins. You can still pull apart the layers if needed, but this process will ensure that every inch of the quilt is sticking to every other inch of the quilt.
I use a “big board” which sits on top of my regular ironing board and gives me more room!
Can you believe that we are almost at the end of the Blooming Wallflowers quilt along? But not to worry, I have more inspiration coming your way! Next week we will bind our quilts to finish. But in the meantime, check out the fabulous quilts being made and shared in my Facebook group. Everyone featured today wins a free PDF pattern of their choice for sharing!
I love how Gina S. Chose soft watery batiks for her version and paired it with a black background. She finished it off with a textural allover quilting design and that binding is to die for!!
Abbie B. recently finished her quilt top and I love her yellow background, don’t you? Remember, you can work on any of my quilt alongs at your own pace, and on your own schedule. 🙂
Lynn L. gets bonus points for practicing her free motion quilting on a test piece before diving into her quilt. This is one of the recommendations I make in all of my classes.
I’m adding in another “catch-up” break so that those of you following along will have plenty of time to work on your quilts. But just remember, you can work on Blooming Wallflowers on your own schedule, too! Scroll to the end for links to all of the previous QAL posts.
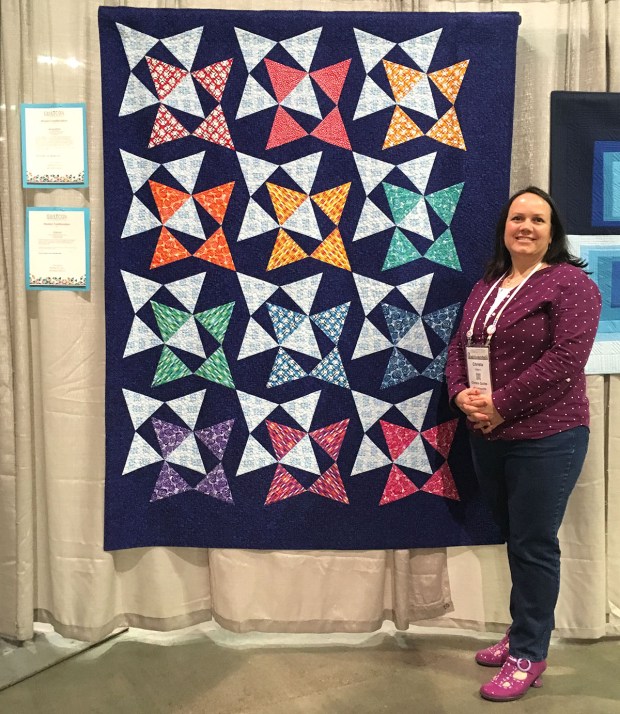
It was exciting for me to see Blooming Wallflowers hanging in the show at QuiltCon last week! The biggest comment I got was how much nicer it looked in person (probably due to my inadequate photography skills, LOL!) and how much everyone loves the Navy Herringbone background from Modern Marks.
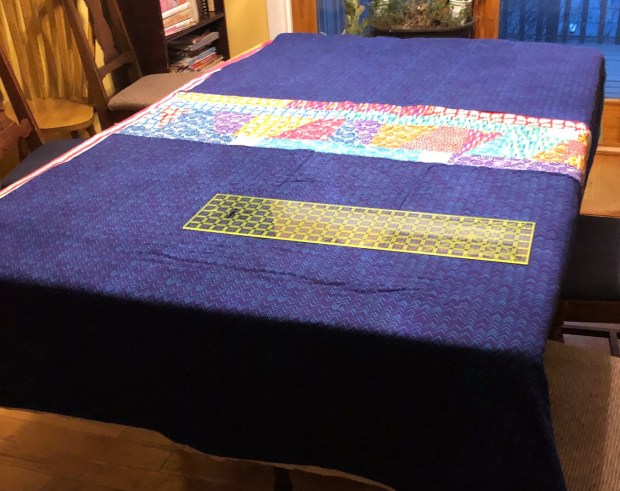
Sandra C aka @thebiasedge on Instragram shared her gorgeous quilt top that she’s getting ready to load on her long-arm. I can’t wait to see her quilting in progress!
I love how Michelle H made hers bigger by adding more blocks. Her print fabrics are fantastic!
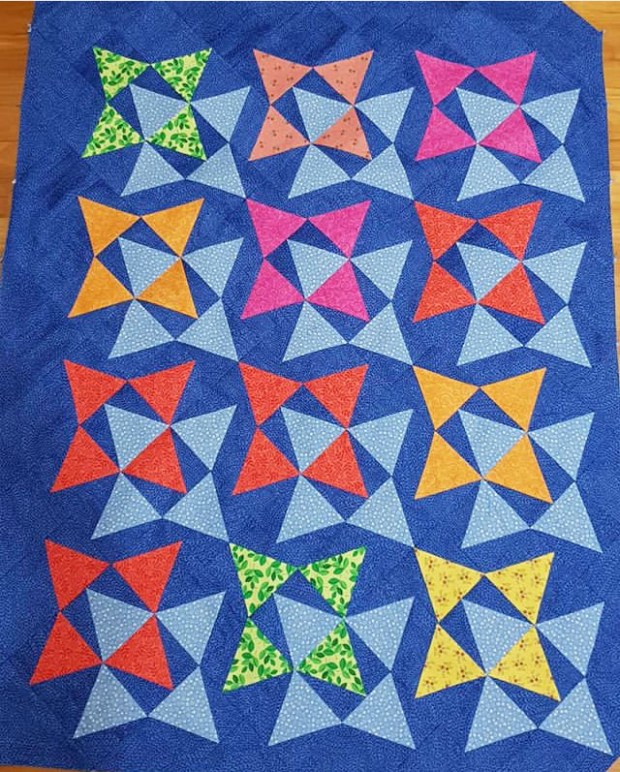
Robin P (aka Palm Beach Quilter) chose a light green background for her version. She made the baby size which is the exact same layout, except the blocks are smaller! I’ve included 3 different sizes in the quilt pattern so you can customize it to fit your needs.
Who says you have to use a dark background? Gayle S is creating a stunning version with white background and a fun polka dot accent fabric. Isn’t it so fun??
Next week I’ll start sharing tips for fun and interesting machine quilting – I can’t wait!