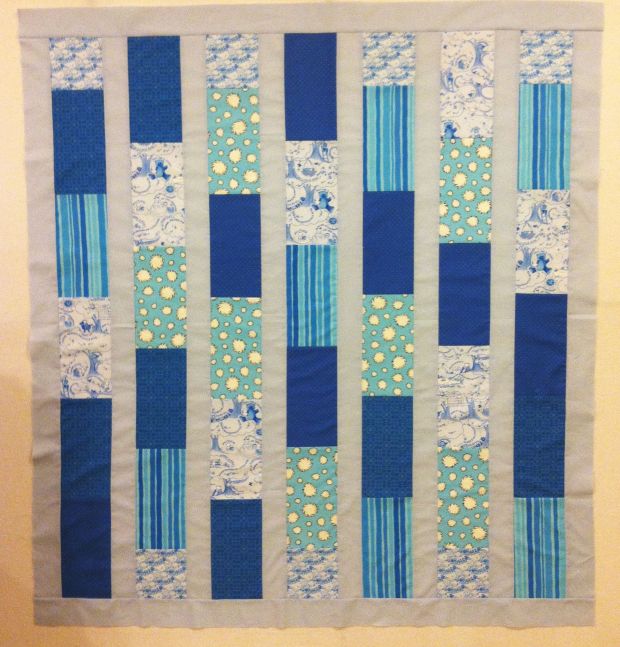
This week we will sew together the complete Baby Bricks quilt top. Kits are available if you would like to quilt-along, or scroll down to the end for a link to the supply list.
I am making two quilts at the same time so it’s double the fun! I finished the boy version just before we left on our vacation and it literally took me 2 hours to sew the whole top. We were just in time to catch our flight! (I’ll finish the girl version when I get back!)
Step 1 – Sewing the Rows
The quilt consists of 7 rows of bricks with alternating 1/2 bricks at either end. There are solid strips in between each of the rows. Watch your fabric placement if you are using directional fabrics. I used cotton thread, size 50 and a new needle, size 80/12 for piecing.
It’s easiest to sew together 14 pairs of two bricks first. I grabbed them at random.
 Next, double up your pairs so that you have 7 rows of 4 bricks each.
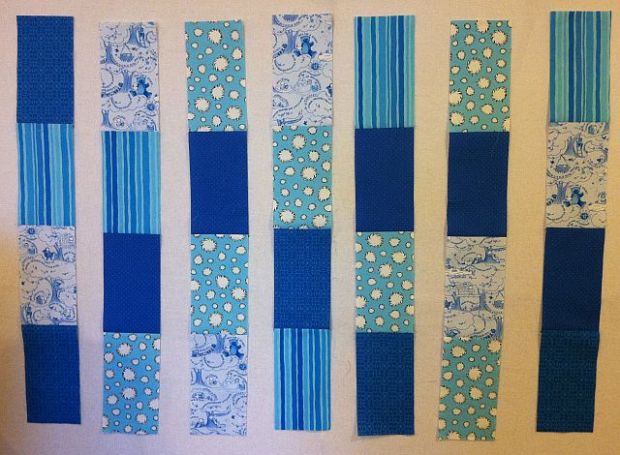 Add 1 full brick and 1/2 brick to the top and bottom of each row, alternating placement. (The half bricks are slightly longer than 1/2 of a brick to account for seam allowances.)
 Each row has a total of 6 pieces.
Step 2 – Adding the Background Strips
Measure the length of your rows. Mathematically they should measure 44 1/2″ at this point.
Fold a row in half to make it easier to measure. The half-measurement is 22 1/4.”
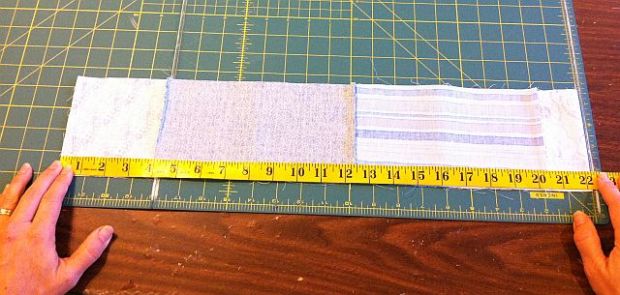 Trim up 8 of your background strips to this measurement. Pin one strip to the right side of each row and sew. The first row will have a strip on the left side, too. Because the strips were cut parallel to the selvedge, they will have less give and there is less chance for distortion.
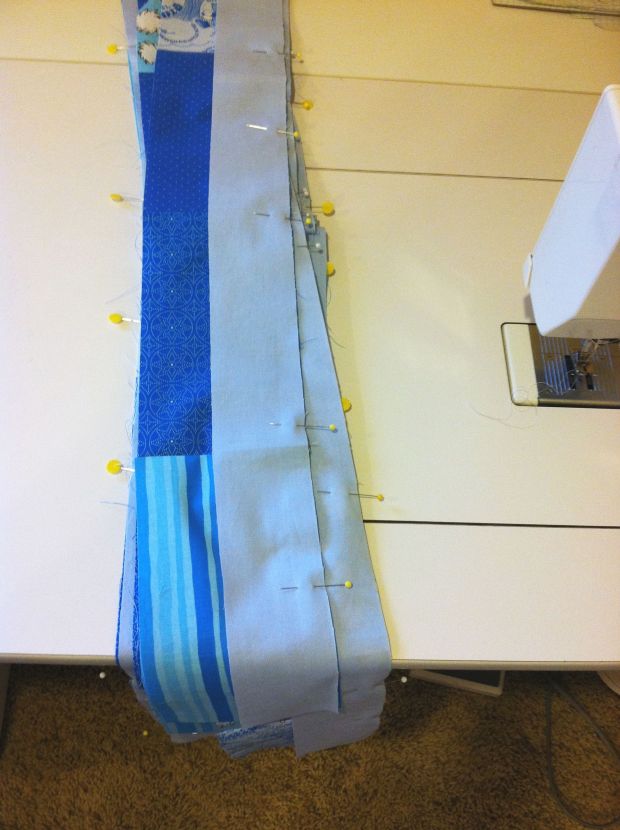 After the background strips are sewn on, sew the top into wider rows, joining 2 at a time. This time, sew with the bricks on the top side and the background strips underneath. This will help ease any distortion that occurs when sewing long strips together. Again, pin well.
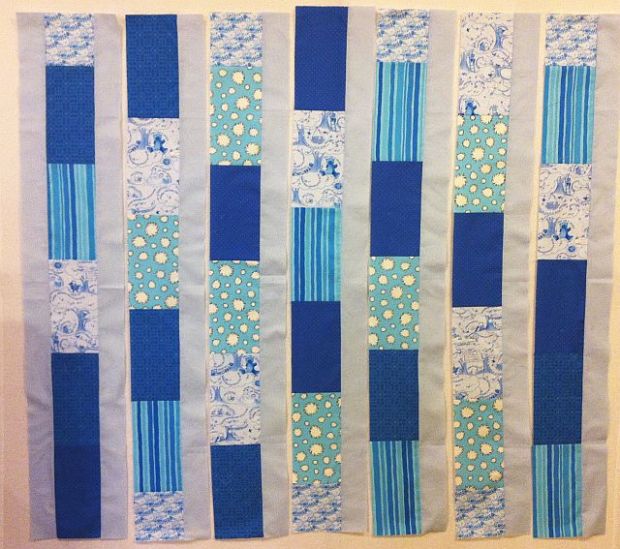 Once all the rows are joined, measure across the width of your quilt.
Mathematically it should be around 44 1/2″ wide (the same as the length of each row).
Trim your last two background strips this length and join to the top and bottom.
Give it a nice press and your top is done! This quilt will be a nice canvas for some fun geometric machine quilting. I can’t wait to get to that step in 2 weeks.
Be sure to email me pictures of your progress and any questions you have!
The full tutorial schedule is shown below, with links to each completed step as I finish:
- Week 1 – Supply List & Intro
- Week 2 – Cutting Your Fabric
- Week 3 – Sewing the Quilt Top (today’s blog post above)
- Week 4 – Marking and Basting
- Week 5 – Machine Quilting Option 1 – Straight Stitching
- Week 6 – Machine Quilting Option 2 – Free Motion Quilting
- Week 7 – Binding by Hand
- Week 8 Bonus – Blocking and Labeling
This is pretty I love the blues! I am stopping by from the WIP blog hop. I have my WIPs up today if you want to stop by!
It’s those colors! I could jump in and swim in them, as they are just what I needed on this hot day in Southern California. I made a bar quilt for my son long long ago, and used the aquas as well. He’s had it now for many years and it’s still a favorite of his. I’m sure whoever gets this lovely quilt will treasure it. Lovely, simply wonderfully lovely.
That is cute! I love simple quilts that you can whip together quickly.
The timing on this is working out perfectly. I need mine for a baby shower on 10/13. I cut it all out last Saturday and now here is the sewing instructions! This is going to be so cute and a perfect gift!!
Excellent Karen, I am glad to hear that! I will probably add in an extra week for the machine quilting to give 2 weeks for that instead of 1. I’m going to show two different designs since I am making two of them myself. Keep following along and you will have it done in plenty of time for the baby shower! Be sure to email pictures of your progress if you want!