Today I’m excited to share some machine quilting tips and videos for all 3 versions of my Terrace Tiles quilts. My thought is why make one quilt when you can make 3 in almost the same amount of time, right?? LOL!!
Choosing Thread colors

The variegated thread color above is actually a combo of red, white and blue but it looks pink and purple when quilted on the Amethyst quilt!
Because these quilts are so bright and colorful, I decided to quilt them using 3 different colors from my Aurifil Variegated Thread Collection. I’ve really been enjoying quilting with them because they add a bit of whimsy and sparkle to my busy quilts! Whenever I pick colors, I audition the thread by placing the spool on top of the fabrics to see how it will blend in.

Variegated thread on the Breeze colorway in progress!
It’s often surprising how well a thread will blend in even if the colors aren’t an exact match to the fabric. I normally use the same color it top and bobbin and don’t worry about whether or not the same colors will line up perfectly – that’s an impossible task. But with the variegated colors, any imperfections are hard to see and that makes for stress free quilting!
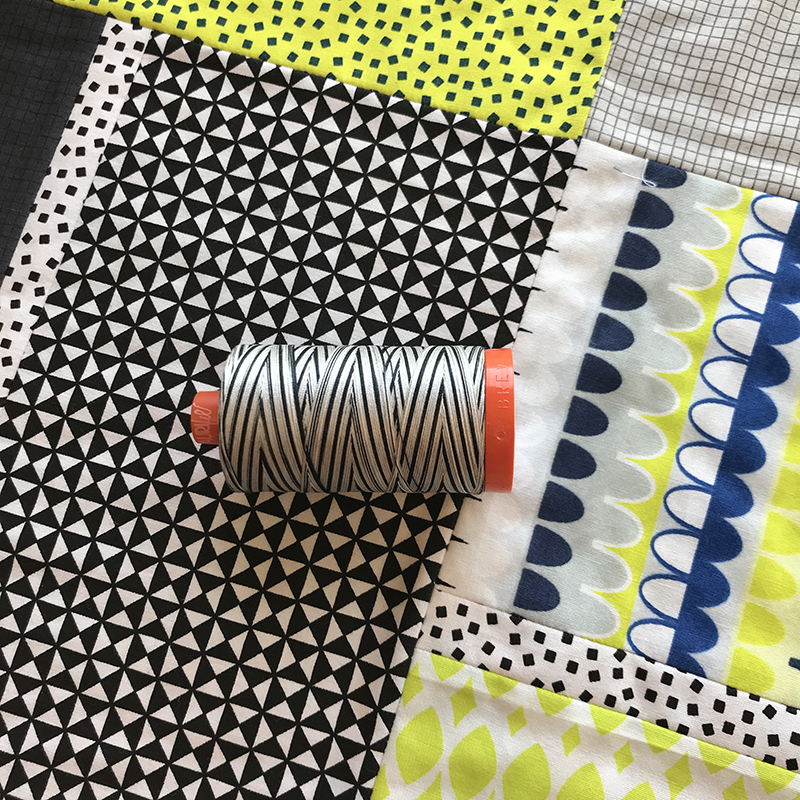
The black and white will add an extra dimension to this modern color palette!
Choosing the Quilting Designs
Because I was in a hurry to make these quilts for quilt market last fall, I didn’t have a whole lot of time to finish them. I pride myself on quilting my own quilts because (1) that’s my favorite part and (2) I’m a little bit of a control freak. So I knew I had to choose designs that would look great and wouldn’t take too much time.
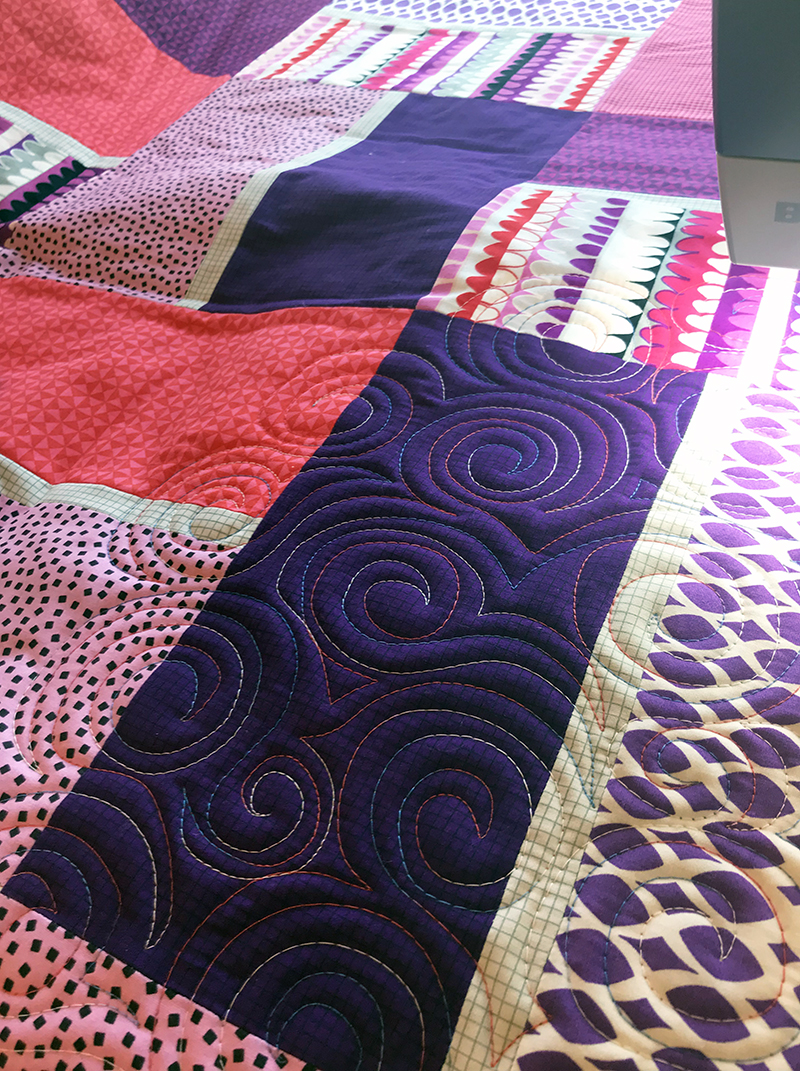
Swirls in progress on the Amethyst colorway. Don’t stress about the imperfections!
Also, I wanted these quilts to do double duty. Not only do they showcase my Gridwork fabric and Terrace Tiles quilt pattern, they also are examples of 3 different motifs I teach in my machine quilting workshops: Swirls on the Amethsyt colorway, Boxes on the Breeze colorway, and Jagged Stipple on the Citron colorway.

Boxes on the Breeze colorway is one of my favorite modern machine quilting designs.
The fastest and easiest way to finish a quilt with free motion is to choose one design and quilt it from edge to edge across the quilt regardless of the pieced quilt design. It’s also a forgiving way to hide wonky or irregular seams. Just focus on one block at a time, and before you know it, the whole thing is finished! Another way to speed up the process is to quilt the motifs on a larger scale, because that takes up more space in less time.

Jagged stipple is my modern, angular version of it’s traditional cousin, smooth curving stipple.
Just to give you an idea of how fast these designs are to stitch out, it took me about 3 hours to quit swirls on the baby size Amethyst version, 5 hours to quilt boxes on the throw-sized Breeze version, and 2 hours to quilt jagged stipple on the baby sized Citron version. Although the Citron quilt is the same size as the Amethyst, jagged stipple is a much looser design than swirls, so it was a bit faster.
Scrunching and Smooshing the Quilt
Because I do everything on a sit down machine, it’s important to control the weight and bulk of the quilt. I still have yet to find the perfect quilting table, so this is what my hacked together set up looks like below:

I got this table for a song 20+ years ago and sadly I don’t even remember the brand!
My sewing machine is flush with the bed of the table so it can hold most of the weight. It’s pushed against the wall so the quilt won’t fall off the back of the table. Most of the bulk is to my left, and I’ve placed a TV tray forming an L shape to hold more of the quilt as I scrunch and smoosh it through the machine. I also have a comfortable ergonomic chair that I can roll around easily.
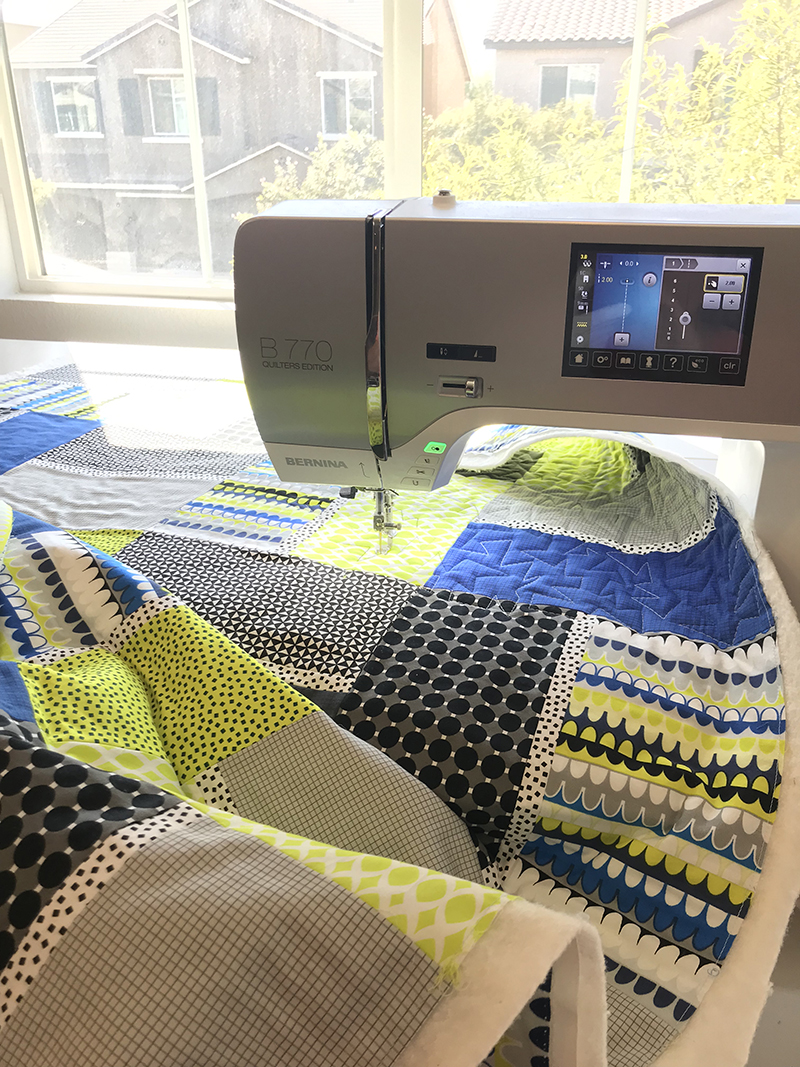
A larger throat space on my machine makes a huge difference when managing the bulk!
On a bright sunny day I like to look out the window which gives me lots of natural light while I’m sewing and quilting! When the quilt falls into my lap, I just scrunch and smoosh it out of the way as needed while I quilt.
I hope this helps you overcome your fear of free motion when choosing and allover textural design like this. The key is to fill in all the spaces, so your eye doesn’t notice any of the imperfections.
See it on Video!
Here’s a YouTube video I made showing me actually fee motion quilting each quilt. The video is just under 8 minutes and it’s packed with tips as I quilt each of the 3 quilts shown above. I’m stitching in real time with the volume on my machine so you can see and hear what it looks like “in real life.” Notice how much I stop and reposition my hands:
Scrappy Binding

Sew the leftovers together randomly for a fun, scrappy binding!
I love a scrappy binding, especially when making quilts from fat quarters. For Terrace Tiles, you just use up the leftovers and piece them together randomly to carry the colorful chaos all the way to the edges of the quilt.

You can join the ends on an angle or edge to edge!
I prefer to cut my binding strips 2″ wide so they finish nice and narrow and are even on both sides. I press each of the seams open to reduce bulk and make sure the binding is long enough to go around the entire quilt with a few inches extra.

Another great thing about scrappy binding is you can always add more strips!
Although I prefer the look of hand binding, machine binding is a great way to finish fast! Here are my two favorite ways to bind, either by hand or machine:
- Click here for my hand binding tutorial from Dot ‘n Dash Quilt
- Click here for my machine binding tutorial from Color Weave
Remember, if you make your own version of this quilt, please share. You can use #terracetilesquilt on instagram, or you can share your progress in my ChristaQuilts Facebook group. I’d love to see it!!

LINKS AT A GLANCE:
Click here for the making of Terrace Tiles, Part 3
Click here to get the Terrace Tiles quilt pattern – paper version
Click here to get the Terrace Tiles quilt pattern – PDF version
Click here to get the Terrace Tiles quilt kits + Gridwork by the yard
Click here to get my Aurifil thread collections: colors, neutrals, or variegated
Click here for my binding tutorial (on a previous quilt)

See you at QuiltCon!
Catherine P