Christa’s Quilt Along – Abacus Week 6: Binding

Free Quilt Pattern

New to my blog? Be sure to sign up for my email newsletter to get a free pattern!

Binding

I have really come to love hand binding my quilts. There’s nothing better than curling up on the sofa with some mindless TV and hand stitching for awhile. However, for those of you who prefer a quicker finish, be sure to check out my machine binding tutorial.

And now, it’s onto binding! It took me a total of 3 hours to bind Abacus.

TrimmingStep 1 – Trim the Quilt and Prepare the Binding (1/4 hr)

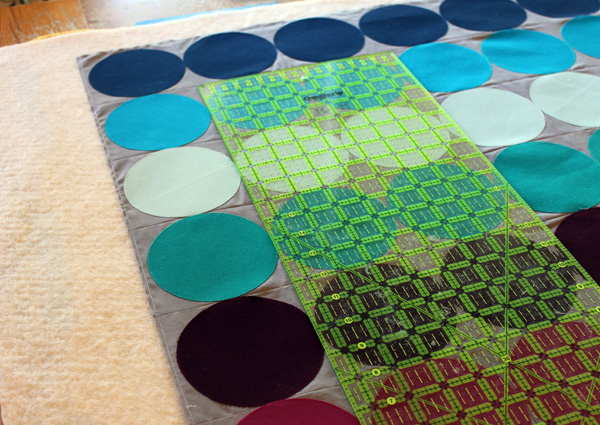
I use a large square ruler to square up the corners flush with the edge of the quilt. I use a longer ruler to trim up the sides. Be sure you have 1/4″ of background left around the edges of your beads so they don’t get covered up by the binding.

I love the look of a freshly trimmed quilt, ready to bind!

quilt-trimmedTo calculate the length of binding needed, take the perimeter and add 10 inches:

32+32+32+32+10 = 138

Divide this number by 40 to get the total number of binding strips needed. 138/40 = 3.45 which I will round up to 4 strips. Cut them 2 1/4″ wide.

Join your strips together by sewing mitered seams. Place them right sides together, perpendicular to each other with a little bit sticking off on both sides. You will be sewing a diagonal seam indicated by the black line below:
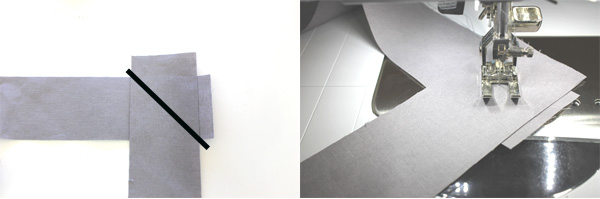
binding_1Note: if you are working with solids, take care to know which side you are working with! You can put a pin to indicate which is the front or back side of the strip.

Trim off one end at a 45 degree angle and press the binding, wrong sides together along the length. This is what it the binding strips should look like when trimmed and pressed:

binding_2

Step 2 – Sew the Binding to the Front of the Quilt (1/2 hour)

Start with the trimmed end and stitch with a 1/4″ seam, leaving a tail of about 6″ dangling off the quilt. When you near a corner, make a crease indicating the edge of the quilt underneath. Stop sewing exactly 1/4″ away from the crease and sew off the end at an angle.

binding_3To fold the miter on each corner, lift the strip up and away, parallel to the quilt. Bring it back down upon itself, even with the edge of the quilt, creating some bulk. I call this the “funky fold.”
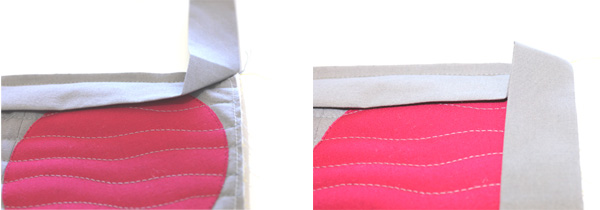
binding_4Continue sewing from the corner you just folded, all the way around the quilt, mitering each corner as you go.

When you get close to the end of the quilt, leave another tail of about 5″ – 6″.

Join the ends together by opening the beginning tail with the angled edge and placing it on top of the ending tail with the untrimmed edge. Draw a 45 degree line on the untrimmed end. I’ve drawn a black line on the photos below so you can see that more clearly. Cut 1/2″ away from the drawn line. Use a small ruler with a 45 degree angle for an accurate cut.

binding_5

Pin the beginning and ending tails together and sew with a 1/4″ seam, offsetting the edges by 1/4″ (see that little triangle peeking out below). You may have to scrunch the quilt out of the way to make room. Finger press the seam open, fold the binding in half again, and finish sewing the binding to the front of the quilt.

binding_6Step 3 – Pin or Clip the Binding in Place to Sew (1/4 hour)

With an iron, press the binding away from the quilt on the front. This creates a crease making it easier to fold over the binding and sew in place by hand or machine.

binding_7Fold over the edges and hold in place with pins or clips. My favorite are the Clover Wonder Clips in packs of 100. I prefer to clip the whole thing in place so it’s ready to sew, and I place them pretty close together so I can quickly use up a whole bag of clips!
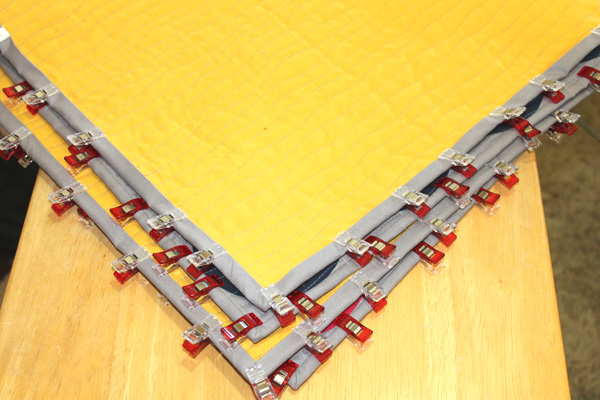
binding_8

Don’t forget to fold the corners in place and secure with a clip. They will automatically create a nice pretty miter on the back – aim to line up the two corner edges so the miter is right in the middle of the corner.

Step 4 – Finish by Hand (2 Hours)

I forgot to take pictures while sewing the binding down by hand. I guess I was enjoying myself too much. Click here for another hand binding tutorial which basically outlines the steps above with hand stitching closeups.

Congratulations on a great finish!

Abacus-Finished-for-Blog

Click here for all of the Abacus Quilt Along Tutorials.

Sharing is Caring

Please share your work in progress in my facebook group: Quilt With Christa . 🙂


Christa’s Quilt Along – Abacus Week 5: Machine Quilting

Welcome to another installment of my Abacus Quilt Along! Today is when the magic happens. It’s time to machine quilt, which I think is the most fun part of the quilt making process. It took me only 1 3/4 hours to machine quilt – so fast and fun! 🙂

I’ve written several blog posts about getting started with machine quilting, including many of my favorite tips and tricks. Click here to read them all!

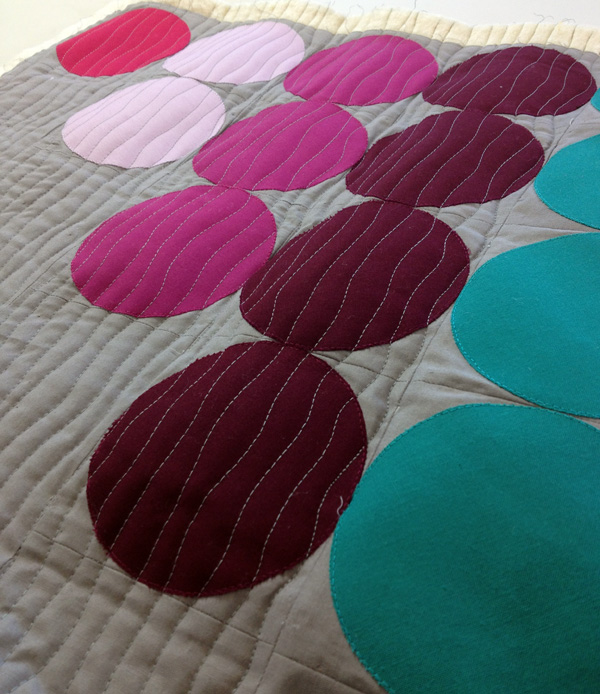
machine-quiltingMachine quilting wavy lines with your walking foot is super simple and fun!

Step 1 – Practice Quilting on a Scrap (1/4 hour)

I always, always, try out my quilting idea before I quilt the whole quilt. More often than not, I’m disappointed if I skip this step. What I see in my head may not translate well in fabric, so it always helps to make a small practice piece. It can be as simple as two scraps of fabric with a small piece of batting. Or sometimes I will make up a complete block using the same fabrics and thread as in the quilt.

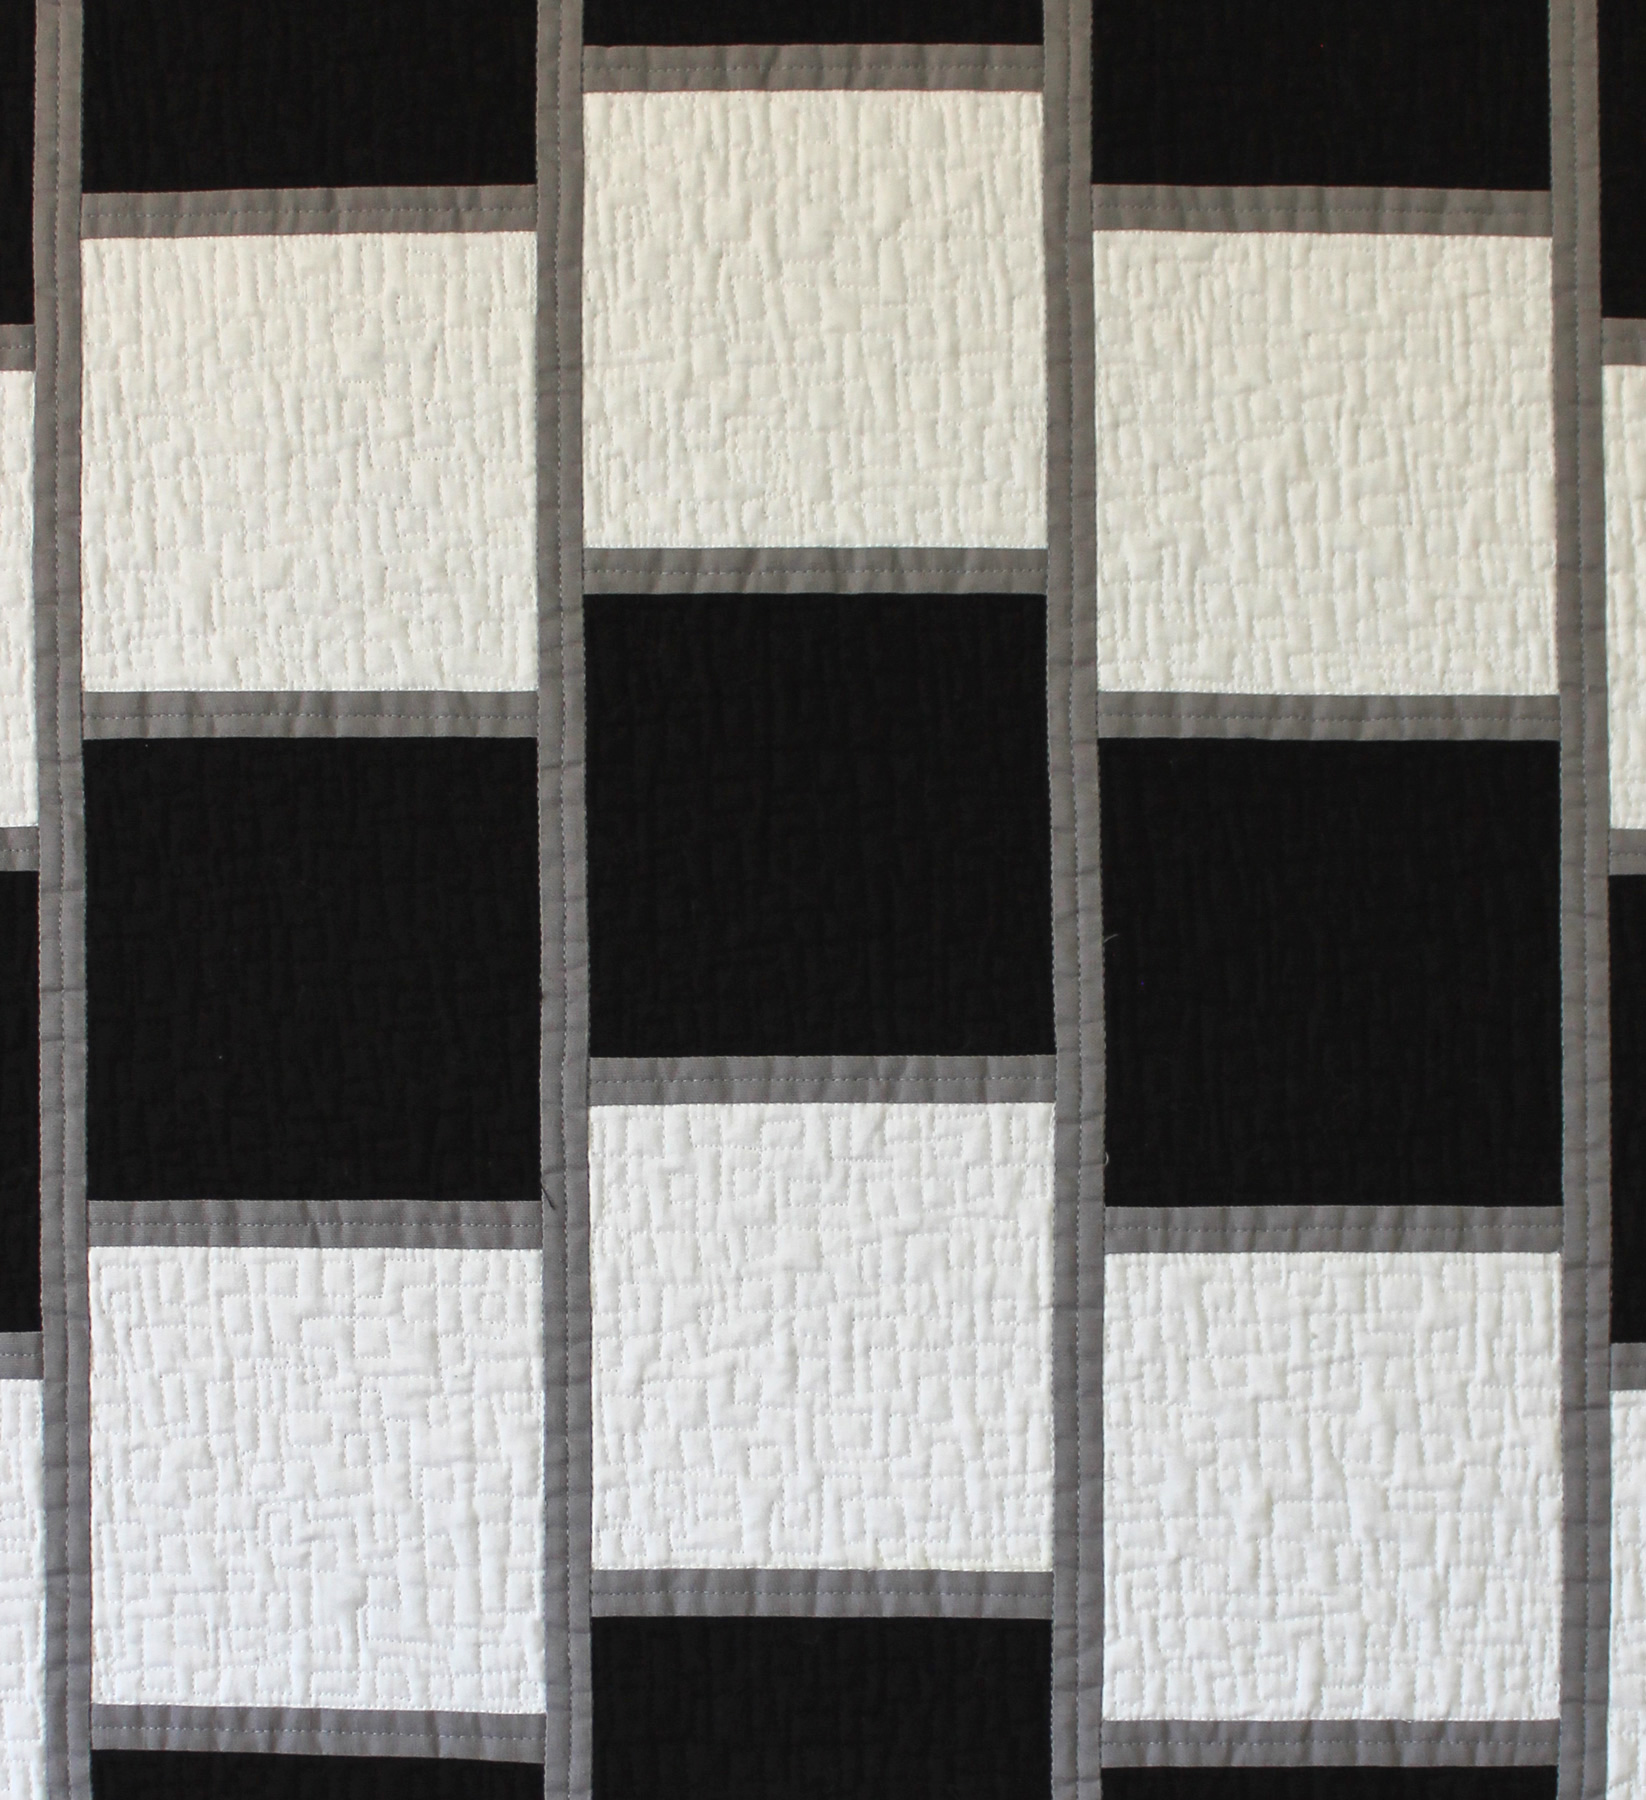
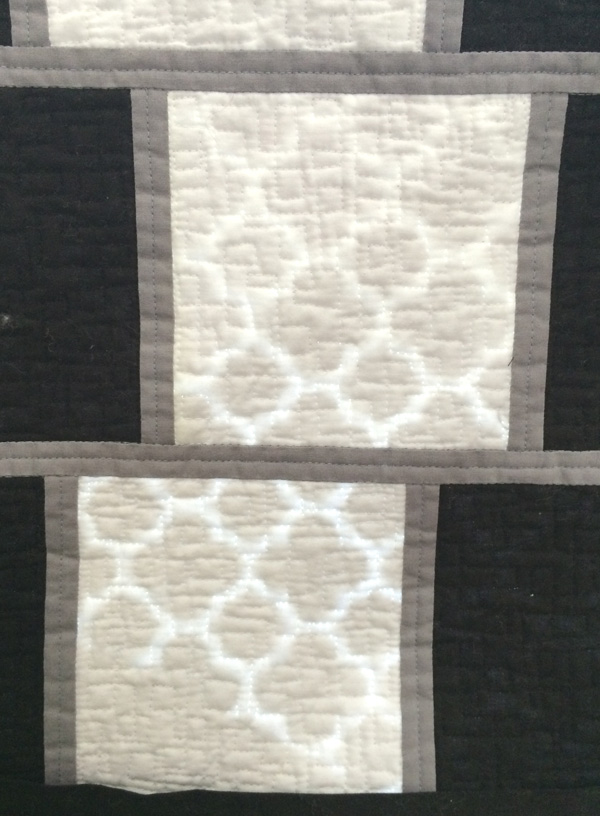
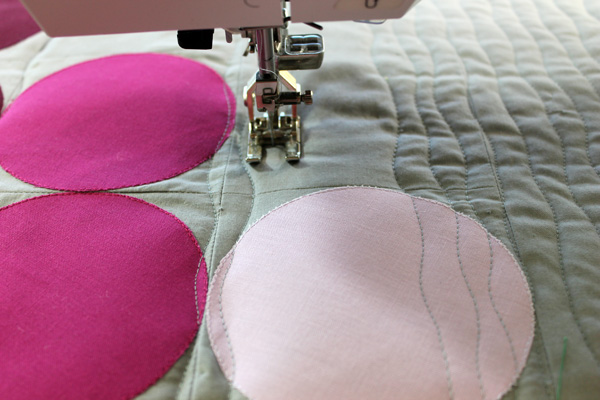
illustration_3_abacus_quiltingOne of the biggest unknowns when machine quilting is how the quilting thread will look on a wide range of fabrics. I’d rather try it out on a smaller piece to make sure I’m happy. I think the grey Aurifil 50 weight cotton thread and uneven lines of quilting look great on both the light and dark fabrics. So now I’m ready to move onto the real quilt.

Step 2 – Quilt the Anchor Lines, AKA Stitch Near the Ditch! (1/2 hour)

Whenever I begin quilting a piece, no matter how large or small, I always start by quilting a series of anchor lines across the surface of the quilt. This helps stabilize the quilt for more quilting later. For Abacus, I stitched my wavy anchor lines right next to each of the vertical seams, moving the quilt slightly from side to side, letting the lines wobble a bit.

If the quilt is well basted, it doesn’t matter where you start. I usually start quilting in the middle, and move to the right across the quilt, stitching each line from top to bottom. Then I rotate the quilt ninety degrees and finish the other half in the same way.

Anchor-QuiltingRight now it looks like a bit of a mess, but I know from my practice piece that once all the lines are filled in, it’s going to have some incredible texture.

Step 3 – Quilting the Wavy Lines (1 hour)

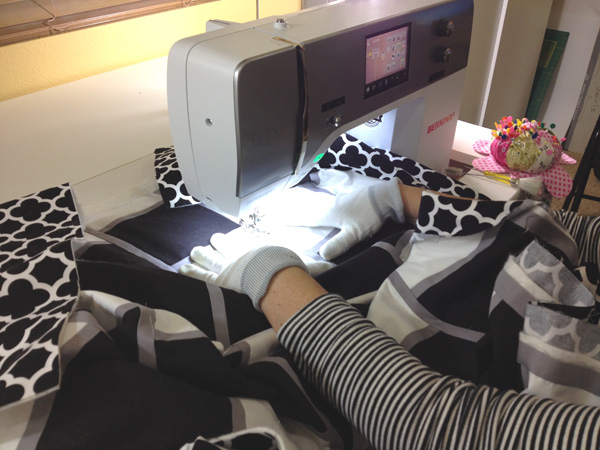
I quilted wavy lines using my built in even feed. That’s the same thing as using a walking foot. I increased the stitch length slightly and moved the quilt from side to side as the machine stitched, creating the waves.The feed dogs are up as normal and I’m wearing Machingers gloves to give me a better grip on the quilt.

machine_quilt_1Once the anchor lines are quilted, I filled in the spaces between the rows with more wavy lines. I quilted a few lines on the left, then a few lines on the right, all the while aiming for a very organic (messy) looking texture. I let the number of quilted lines vary per row, and used the width of my foot as a rough guideline for spacing.

For those of you who can adjust your presser foot pressure, I set mine all the way down to zero. This really helps eliminate tucks and puckers.

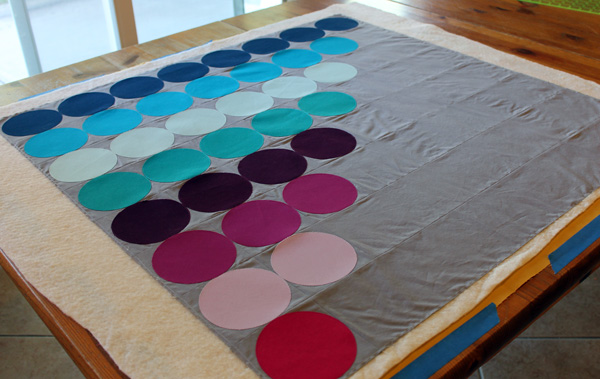
machine_quilting_abacusIn the picture above, I have quilted all the anchor lines and completely filled in the wavy lines on half of the quilt. I rotated the quilt, now I’m ready to finish quilting the other side!

Voila! Quilting finished! Next week I will show you how to square up the quilt and bind it.

abacus_quilting_finishedIf you are enjoying this quilt along, please share your progress on my flicker group or on Instagram #abacusqal.

Remember, I encourage you to work at your own pace. However, if you finish your quilt (or even just the top) by November 10th, I’ll be happy to feature it on my blog in my parade of quilts! 🙂

Click here for all of the Abacus Quilt Along Tutorials.

Christa’s Quilt Along – Abacus Week 4: Basting

Good news: Abacus is now available as a stand alone pattern for just $4.95! Click here to purchase. (You don’t need the pattern for the quilt along, but I know many of you would prefer to print it off and keep by your sewing machine.)

abacus_quilting_finished

Basting is probably everyone’s least favorite part of the quilt-making process, and I think I know why. Recently I helped my friend make a small baby quilt and we basted it on her kitchen floor because she didn’t want to scratch up her table. What an awful process! I would never do that again, LOL!!

spray_basting_5Tables are the best for basting – use one, two, or your kitchen table – just not the floor!

Yes, it takes up a lot of room to baste on a table, and in my friend’s case, you may not want to scratch up your table. I suggest getting some plastic folding tables like those above that can be stashed in a garage or closet. Or keep some large pieces of cardboard to protect your kitchen table if needed. You don’t need a huge table – you can move the quilt around as needed, but please, get up off the floor! 🙂

For today’s basting tutorial, it took me a total of 1 1/4 hours to safety pin baste the three layers. Click here for my tutorial on spray basting (outside or in a well ventilated room – on a table!)

Step 1 – Prepare your batting and Backing Fabric (1/2 hour)

You want to make sure there are about 2-3 extra inches of backing and batting around all 4 sides. My quilt top is 32″ x 32″. Therefore my batting should about least 34″ x 34″ and my backing should be about 36″ x 36″.

table_baste_1Dining Room Table Basting – Checking to see that my backing is bigger than my top.

If using cotton batting, give it a quick press to work out any wrinkles. You want the quilt sandwich to be as flat as possible. Also, starch your backing fabric before you baste to make it extra slippery. This will come in handy when machine quilting.

Step 2 – Pinning the Quilt (3/4 hour)

Lay your backing right side down on a table. Tape down the edges of the quilt with masking tape or painter’s tape. You can also use binder clips if your table isn’t too thick. You want the backing to be secure but not taut. Only tape down the backing, not the other layers.

table_baste_2All 3 layers ready to go for basting! I will smooth out the wrinkles next.

Lay your batting on top of your backing. Get someone to help you if possible, so you can lay it down smoothly. Add your top, right side up. Before pinning, take a few minutes to smooth out the layers with your hands or a long ruler.

table_baste_3Using a ruler to smooth out the wrinkles and align the rows into place.

Starting anywhere on your quilt, drop a bunch of safety pins on the top to work with. I recommend using size 1 nickel plated safety pins. I left them open from the last quilt so they are ready to go. The usual recommendation is to pin about 5″ apart. However, I find that I get fewer tucks and wrinkles when I pin closer, about 2″-3″ apart. For this quilt I only pinned in the background sections, not in the circles.

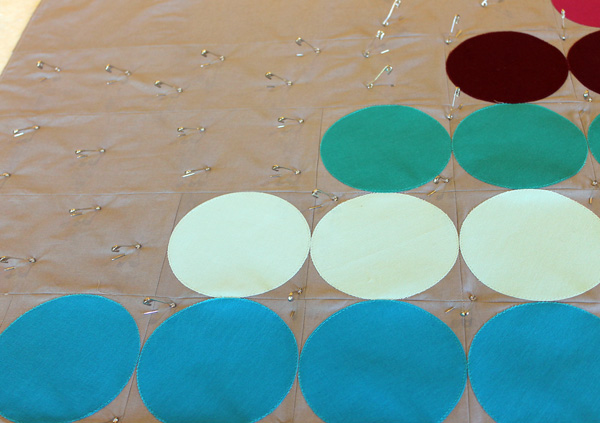
table_baste_4Pin an entire section, then go back and close the pins. This quilt was small enough that I pinned the entire top before closing the pins. A Kwik Klip comes in really handy for this. Click here to see how to use one.

Work you way across the quilt, pinning one section at time. When the quilt is fully pinned, remove the tape and check the backing to make sure you haven’t pinned in any tucks. Then trim off some of the extra batting and backing so there’s less bulk under the machine.

table_baste_5Now you are ready to quilt! There, now,  that wasn’t too bad, was it? Remember, I encourage you to work at your own pace. However, if you finish your quilt (or even just the top) by November 10th, I’ll be happy to feature it on my blog in my parade of quilts! 🙂

Click here for all of the Abacus Quilt Along Tutorials.


Christa’s Quilt Along – Abacus Week 3: Sewing the Top

For today’s Abacus Quilt Along, we will be sewing together our quilt tops! Be sure to click here for links to the rest of the tutorials and supply list. It took me a total of 2 hours to complete this week’s lesson. Feel free to jump in at any time!

 finished-topAbacus quilt top – you can tell it’s real from all the wrinkles! 🙂

Step 1 – Sewing the Rows (3/4 hour)

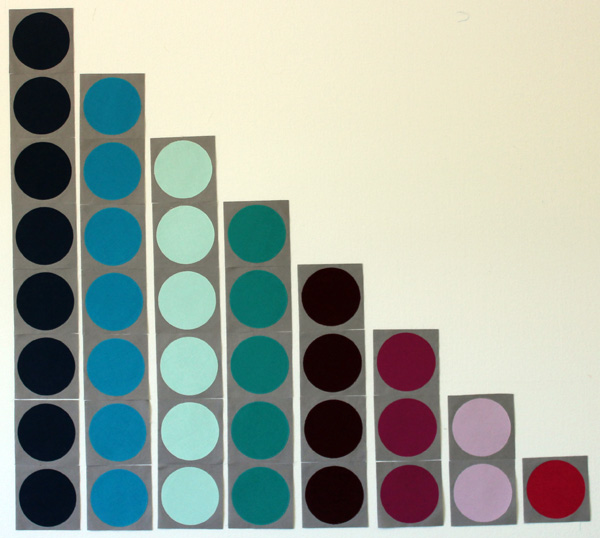
For ease in construction, lay out all of your machine appliqued and trimmed blocks in order on a design wall or other large flat surface.

Block-layoutLay out your blocks in order on a design wall or take a picture with your phone!

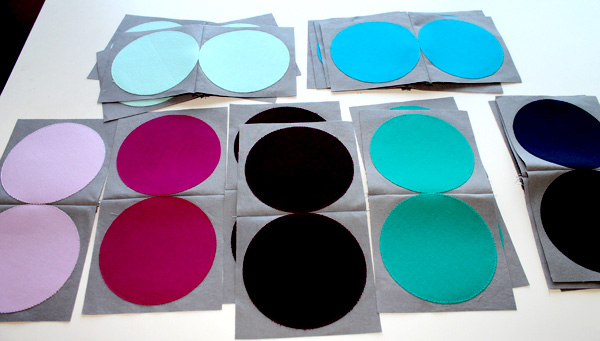
Sew matching bead blocks together in pairs, chain piecing for faster assembly. Sew all blocks from one color into a row for a total of 8 rows of beads.

Block-pairsBe very accurate when you sew your 1/4″ seams so that you don’t cut off any of the circle. Press your seams open to reduce bulk. This will also help the circles align better.

When placing your blocks right sides together, try to match up the circle positions as closely as you can. You may need to sew more slowly and use pins to ensure accuracy.

Block-pairs-sewnYou want the edges of the circles to just barely touch without catching any of the circle fabric in the seam allowance.

Sew all of the beads together first, then add the background strips to complete each column. The diagram below shows the position and cut length of each background strip.

Background-Strip-NumbersStep 2 – Quilt Top Assembly (1 1/4 Hours)

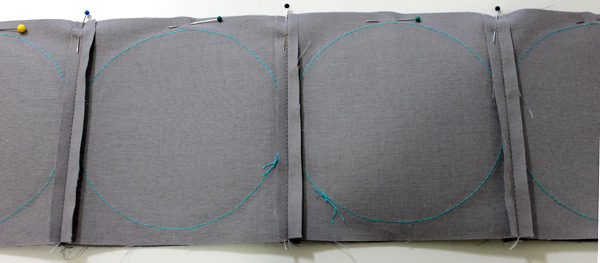
 Sew together pairs of columns to complete the quilt top. When joining rows, be sure to pin at block intersections. I also pinned in the middle of each block, matching up the two circles in the same position.

Optional: If you want to ensure perfect alignment, you can use a larger machine basting stitch to sew a few stitches only where each of the horizontal pins is below. Once you are happy with the alignment, you can go back and restitch the entire row.

Abacus-Bead-rowsJoin the columns together into pairs, and then into halves to complete the quilt top. Stay stitch 1/8″ around all the edges to secure the seams while quilting. Quilt-Top-AssemblyAbacus Quilt Top Assembly

Just for fun, I designed an alternate solid colorway for Abacus, which I call Parfait.  I think it would look great in prints, too.

Abacus - New Kona ColorsPlay around with different fabric combinations and see what else you can come up with!

I encourage you to share you progress on your own blogs and leave a link in the comments below. If you don’t have a blog, you can always share your pictures on my flickr group, or on instagram (#abacusqal), or via good old-fashioned email! 🙂

Next week we will baste the quilt together. It’s easy peasy and will give everyone a chance to catch up, although you are never behind because the goal is to work at your own pace!

Christa’s Quilt Along – Abacus Week 1: Fusing and Cutting

Free Quilt Pattern

New to my blog? Be sure to sign up for my email newsletter to get a free pattern!

Abacus

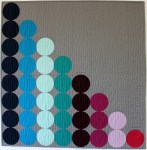
Welcome to my Fall 2014 Quilt Along – Abacus! Join me as we make a modern applique quilt perfect for the wall, floor, or any place you’d like to add some color! My version of Abacus finishes at 32″ x 32″. Please feel free to tweak the size, colors, and fabrics to make it yourself and make it your own!

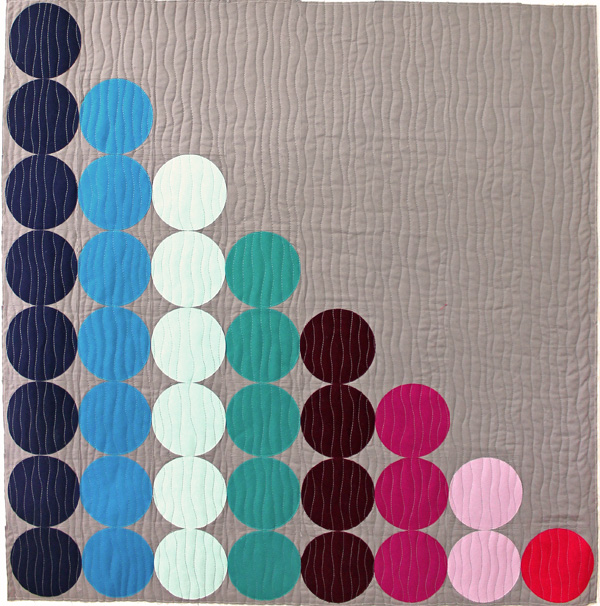
Abacus-Finished-for-BlogAbacus by Christa Watson, 32″ x 32″, made from Kona Solids.

At any time, you can click on the Abacus main page which will has the supply list, the quilt along schedule, and links for all the tutorials as they go live. It took me a total of 3 hours to complete this week’s lesson. This is not a race, so please, work at your own pace. 🙂

Now, let’s get started! All fabrics are based on 40″ of useable fabric width. I recommend washing and starching all fabrics prior to beginning. Wash lights and darks separately with dye magnet sheets such as Shout Color Catchers.

Step 1 – Cutting the Colored Bead Strips (1/2 hour)

  • 1 – 5″ x 40″ strip of 4 different fabrics (solids 1-4 below)
  • 1 – 5″ x 20″ strip of 4 different fabrics (solids 5-8 below)

Step 2 – Cutting the Background Fabric (1 hour)

From the background (grey) fabric, cut: 5 strips, 5” x 42”. Crosscut them into a total of 36 squares, 5” x 5” each. You should be able to get 8 squares per strip. These are cut oversized for now and will be trimmed down later.

cut squaresCut a total of 36 squares, 5″ x 5″ each.

Also, from the background fabric, cut 4 strips: 4 1/2” x 42.” Cut these into 7 different rectangles that will form the negative space above the abacus strips.

The measurements are 4 1/2” wide by:

4 1/2”; 8 1/2”; 12 1/2”; 16 1/2”; 20 1/2”; 24 1/2”; 28 1/2”

Background-Strip-NumbersCut background strips according to the diagram above.

Step 3 – Fusing and Cutting the Bead Fabrics (1 hour)

Cut 12 strips of paper backed fusible web, 4 3/4” x 15”. (You will get 3 circles per strip.)

Following the manufacturer’s instructions, adhere full and partial fusible web strips to the wrong side (back side) of your bead fabric strips.

fusible webAdhere fusible web to the back side of your “bead” fabrics.

Cover strips of fabric with fusible web:

  • 40” of fabric strip 1;
  • 35” of strip 2;
  • 30” of strip 3;
  • 25” of strip 4;
  • 20” of strip 5;
  • 15” of strip 6;
  • 10” of strip 7; and
  • 5” of strip 8.

Cut additional strips of fusible web if needed.

fusible squaresCut your fusible backed fabric strips into squares approximately, 5” x 5”:

  • 8 squares of fabric 1;
  • 7 squares of fabric 2;
  • 6 squares of fabric 3;
  • 5 squares of fabric 4;
  • 4 squares of fabric 5,
  • 3 squares of fabric 6,
  • 2 squares of fabric 7,
  • and 1 square of fabric 8.

For Die Cutting the Circles (1/2 hour):

Note, using a die cutter is super fast. If cutting the traditional way by hand, allow additional time. Run the fusible backed squares through your die cutting machine, using a 4” diameter circle die. Repeat to cut all 36 circles.

die cutterUse a 4″ diameter circle die if using a die cutter. I used the Sizzix.

20140908_sizzix6Repeat to cut a total of 36 circles.

For Traditional Cutting of the Circles (Time May Vary):

Click the picture below to print off the circle template onto a piece of stiff cardstock. Or print in onto plain paper and trace it onto template plastic, cutting carefully on the line. Use a lightbox or window if needed for tracing. Be sure to print at 100% scaling and measure the diameter to ensure it is 4”.

White CircleCircle Template – be sure to click the picture, save it, and print at 100% scaling.

Trace around your circle template on the back of each fused square and cut the circles out on the line slowly and carefully, for a total of 36 fused circles.

20140908_sizzix7Congratulations! You are now ready to assemble an awesome quilt from just circles and squares! Come back next week for block assembly and easy, yes easy machine applique!

Here’s a hint: choose thin blending cotton threads such as Aurifil 50 weight in colors to match your fabrics for quick and beautiful machine applique!

Something new I am adding this year is a parade of quilts! If you finish your quilts by November 10th, you can email me a picture of your quilt (along with a blog link if you have one) and I’ll feature them on my blog on November 12th.

Sharing is Caring

Please share your work in progress in my facebook group: Quilt With Christa . 🙂
I also invite you to share your progress on Instagram with the hashtag #abacusqal, or on my flickr group: Christa’s Quilt Along

Let’s share the love! Please grab a quilt along button and add it to your blog.

<div align="center"><a href="http://christasquiltalong.com" title="Christa's Quilt Along" target="_blank"><img src="https://christaquilts.com/wp-content/uploads/2013/03/christas-quilt-along-175-2.png" alt="Christa's Quilt Along" style="border:none;" /></a></div>

Giveaway Featuring Kona Solids and Abacus Quilt Along Schedule

Thanks to my fabulous friends at Robert Kaufman for donating this lovely bundle of Kona Solids for one of you to win!

20140918_kona_giveaway

This is to get you guys jazzed about my upcoming Quilt Along which starts next week!

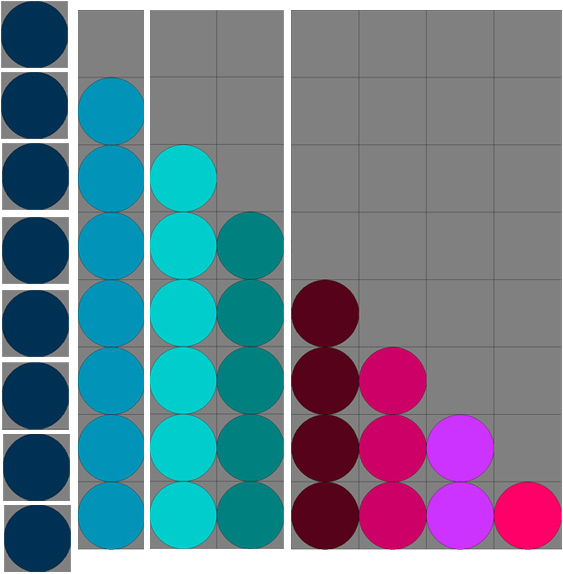
Included in the bundle are 8 fat quarters of the exact same colors I am using in my version of Abacus. They are: Navy, Turquoise, Baby Blue, Jade Green, Berry, Cerise, Petunia and Pomegranate. Also included is a nice sized chunk of Medium Grey which is what I picked for my background and binding.

Abacus Full Res

Now, you don’t have to quilt along to enter and win, and what you make from these fabrics is entirely up to you! The contest is open to everyone through next Tuesday at noon.

To enter, just leave a comment below telling me which is your favorite quilt along that I’ve offered (or one you’d love for me to do in the future).

Click here to see all of my quilt alongs.

I know we don’t all have time to do every quilt along, but isn’t it fun to dream, or follow along virtually?

Abacus Quilt Along Schedule, Posted Each Wednesday:

  • Week 1 – Fusing & Cutting (September 24)
  • Week 2 – Machine Applique (October 1)
  • Week 3 – Sewing the Top (October 8)
  • Week 4 – Backing and Basting (October 15)
  • Week 5 – Machine Quilting (October 22)
  • Week 6 – Binding to Finish (October 29)
  • Parade of Quilts – November 12

New this year – a parade of quilts! If you finish your quilt by November 10th, email me a picture and I’ll feature it on my blog on November 12th!

Click here for the Abacus Quilt Along supply list.

Start gathering (or winning) your fabrics and I’ll see you next week!

EQP.S. I’ve also made Abacus available as a free EQ7 download. Click here to import it into your Electric Quilt software.

P.P.S. For a bonus entry, please share my Quilt Along logo on your blog, instagram, flickr, facebook, or social media of choice. #abacusqal

<div align="center"><a href="http://christasquiltalong.com" title="Christa's Quilt Along" target="_blank"><img src="https://christaquilts.com/wp-content/uploads/2013/03/christas-quilt-along-175-2.png" alt="Christa's Quilt Along" style="border:none;" /></a></div>

Announcing My Fall 2014 Quilt Along: Abacus

Ok guys, I’m super excited to bring you another fun quilt along! With my new quilting schedule, I’ve decided I can still fit in a couple of quilt alongs twice a year – one in the fall and another in the spring. As with all of my Quilt Alongs, I will post tutorials for each step of the quilt-making process from start to finish. Abacus features simple machine applique and fun machine quilting that anyone can do!

Abacus_EQ7Abacus, designed in EQ7 by Christa Watson – 32″ x 32″

Below I have listed the supply list, and I’ll post the full quilt along schedule next week.

I’ve also lined up a few sponsors who are going to give away some fabulous prizes. But don’t worry – you don’t have to quilt along to enter the giveaways – they will be open to all followers of my blog. 🙂 Check back tomorrow for the first one!

I will officially launch the quilt along on Wednesday, September 24th, so that should give you plenty of time to start planning your colors and fabrics. If you’d like to help spread the word, please grab the quilt along button below and share it on your blog!

<div align="center"><a href="http://christasquiltalong.com" title="Christa's Quilt Along" target="_blank"><img src="https://christaquilts.com/wp-content/uploads/2013/03/christas-quilt-along-175-2.png" alt="Christa's Quilt Along" style="border:none;" /></a></div>

Abacus Supply List

  •  1 – 5″ x 40″ strip of 4 different fabrics (solids 1-4 above, blue through teal)
  • 1 – 5″ x 20″ strip of 4 different fabrics (solids 5-8 above, burgundy to pink)
  • 1 3/8 yard background fabric (grey above)
  • 3/8 yard fabric for binding (I will probably use the same grey)
  • 1 1/8 yard of fabric for backing
  • 36″ x 36″ square of batting
  • Thread for machine quilting (I recommend Aurifil 50 weight cotton)
  • 2 yards of 17″ wide light paper backed fusible web. Note: you can use (9) –  9″ x 11″ sheets instead, but there will be a lot of waste.
  • Sharp Scissors for cutting through paper and fabric
  • Optional: 4″ circle die cutter (only if you have one – otherwise you will trace and cut out the circles by hand)

Fabrics and Threads Used

Because I know some of you are going to ask, these are the Kona Solids fabrics and Aurifil 50 weight cotton threads I will be working with (going left to right from blue to pink):

  • Kona Solid 1243 Navy; Aurifil #2785
  • Kona Solid 1376 Turquoise; Aurifil #2810
  • Kona Solid 1010 Baby Blue; Aurifil #5007
  • Kona Solid 1183 Jade Green, Aurifil #4093
  • Kona Solid 1016 Berry, Aurifil #4030
  • Kona Solid 1066 Cerise, Aurifil #2535
  • Kona Solid 24 Petunia, Aurifil #2560
  • Kona solid 1295 Pomegranate #Aurifil #1100
  • And the grey background is Kona Solid 1223 Medium grey, with Aurifil #2610

 Who’s ready to have some fun?


A Stack of Finishes – What I did on my summer vacation.

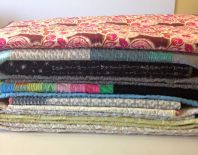
I have been busy all summer finishing this stack of quilts. It’s been such a pleasure to work on them! Although it will be quite a while before I am ready to reveal them in public, I can truly say I’ve grown as a quilter while creating them. It’s been a little tricky blogging and sharing on Instagram (@christaquilts) when there’s nothing to show, but I’ve been enjoying posting a few little sneaky peeks now and then.

20140827_quilt_stackWhat I did over summer vacation. Now it’s time to get busy on the design wall again!


Spiraling out of Control Update – My Quilt Gets Around!

In my “former” life as a traditional quilter years and years ago, I hardly ever kept any of my quilts. I would finish them off just in time to send them to a show, use them as a teaching sample, or give them as gifts. My show and teaching quilts were mostly earmarked to give away even before they were made, and usually after only one showing. So I never really understood the value of keeping and sharing the same quilts in several venues. Until now.

Modern QuiltSpiraling out of Control by Christa Watson 70″ x 70″

I love how my friend Leanne from She Can Quilt says she is a “quilt-show enterer” rather than a “show quilter.” I think I will adopt that moniker, too. Somehow it seems less intimidating. I’ve been enjoying entering my Spiraling Out of Control quilt in several competitions this year while helping to spread the modern quilt aesthetic.

Spiraling Out of Control started off as my entry into the Riley Blake/MQG challenge, made it’s appearance at my local show, traveled to AQS Charlotte for a brief appearance, and most recently was accepted as part of the Modern Quilt Guild Showcase for the upcoming International Quilt Festival in Houston, TX.

spiraling_backBacking detail of Spiraling out of Control by Christa Watson

As an added bonus, it will be showcased in Quilt Scene Magazine which is a special issue that focuses on Quilt Market and Festival each year. What fun! Right now my quilts get to travel more than I do; but hopefully in the future, I will get to go with them more often! 🙂
WIP Wednesday – Free Motion Quilting Frenzy

I’ve been quilting like crazy, trying to finish up quite a few projects on a deadline. The sad thing is that I won’t be able to share them for awhile, but the good news is that I can share little work-in-progress snippets here and there. (The pictures are all from my instagram feed so they are not the highest quality – but you get the idea!)

20140809_fmq_4I can get lost in pebbles! They are fun to stitch but very time consuming! I usually put on a good audio book and keep stitching until I can’t stand it or until my shoulders ache – then I take a break and do something else!

I’ve been having a blast playing around with different weights and colors of Aurifil threads as I quilt my myriad of projects. My go-to thread is the standard 50 weight cotton which blends wonderfully with any fabrics.

20140809_fmq_3I’m also experimenting with quilting spirals – in a slightly heavier thread – I love it!

However, I have been getting a little more daring. I usually try to match my thread colors to my fabrics but have been playing with variegated thread colors and heavier weights, too. I’m really liking the 40 weight Aurifil cotton which is just a tad heavier than the 50 weight (the smaller the number – the heavier the thread).

20140809_fmq_1Who doesn’t love a good stipple? Technically, the larger scale is called “meandering.”

I even tried some of the heavier 28 weight which adds a nice definition to the quilting. I love the Aurifil cottons because they go through my machine with ease and they don’t break! I usually use a size 80 needle with the size 50 thread and then switch to a heaver size 90 needle when dealing with the thicker threads. So far, so good.

20140809_fmq_2Loops are a great go-to design anytime. They always look good on any pattern!

I usually stick with the regular 50 weight thread in the bobbin in a similar color so that I can pack a lot of thread onto one bobbin for more non-stop quilting.

20140809_fmq_5Swirls always take my breath away. They don’t have to be perfect, either, to look good!

How about you? What are you working on this week?

20140809_fmq_threadNearly empty spools of thread make me happy!