Can you believe we are almost to the end of our Paper Pieced Primrose Quilt Along? If you are just now hearing about it, scroll to the end for links to all of the other QAL posts. I’ll leave them up indefinitely so that you can make this quilt on your own time and schedule.
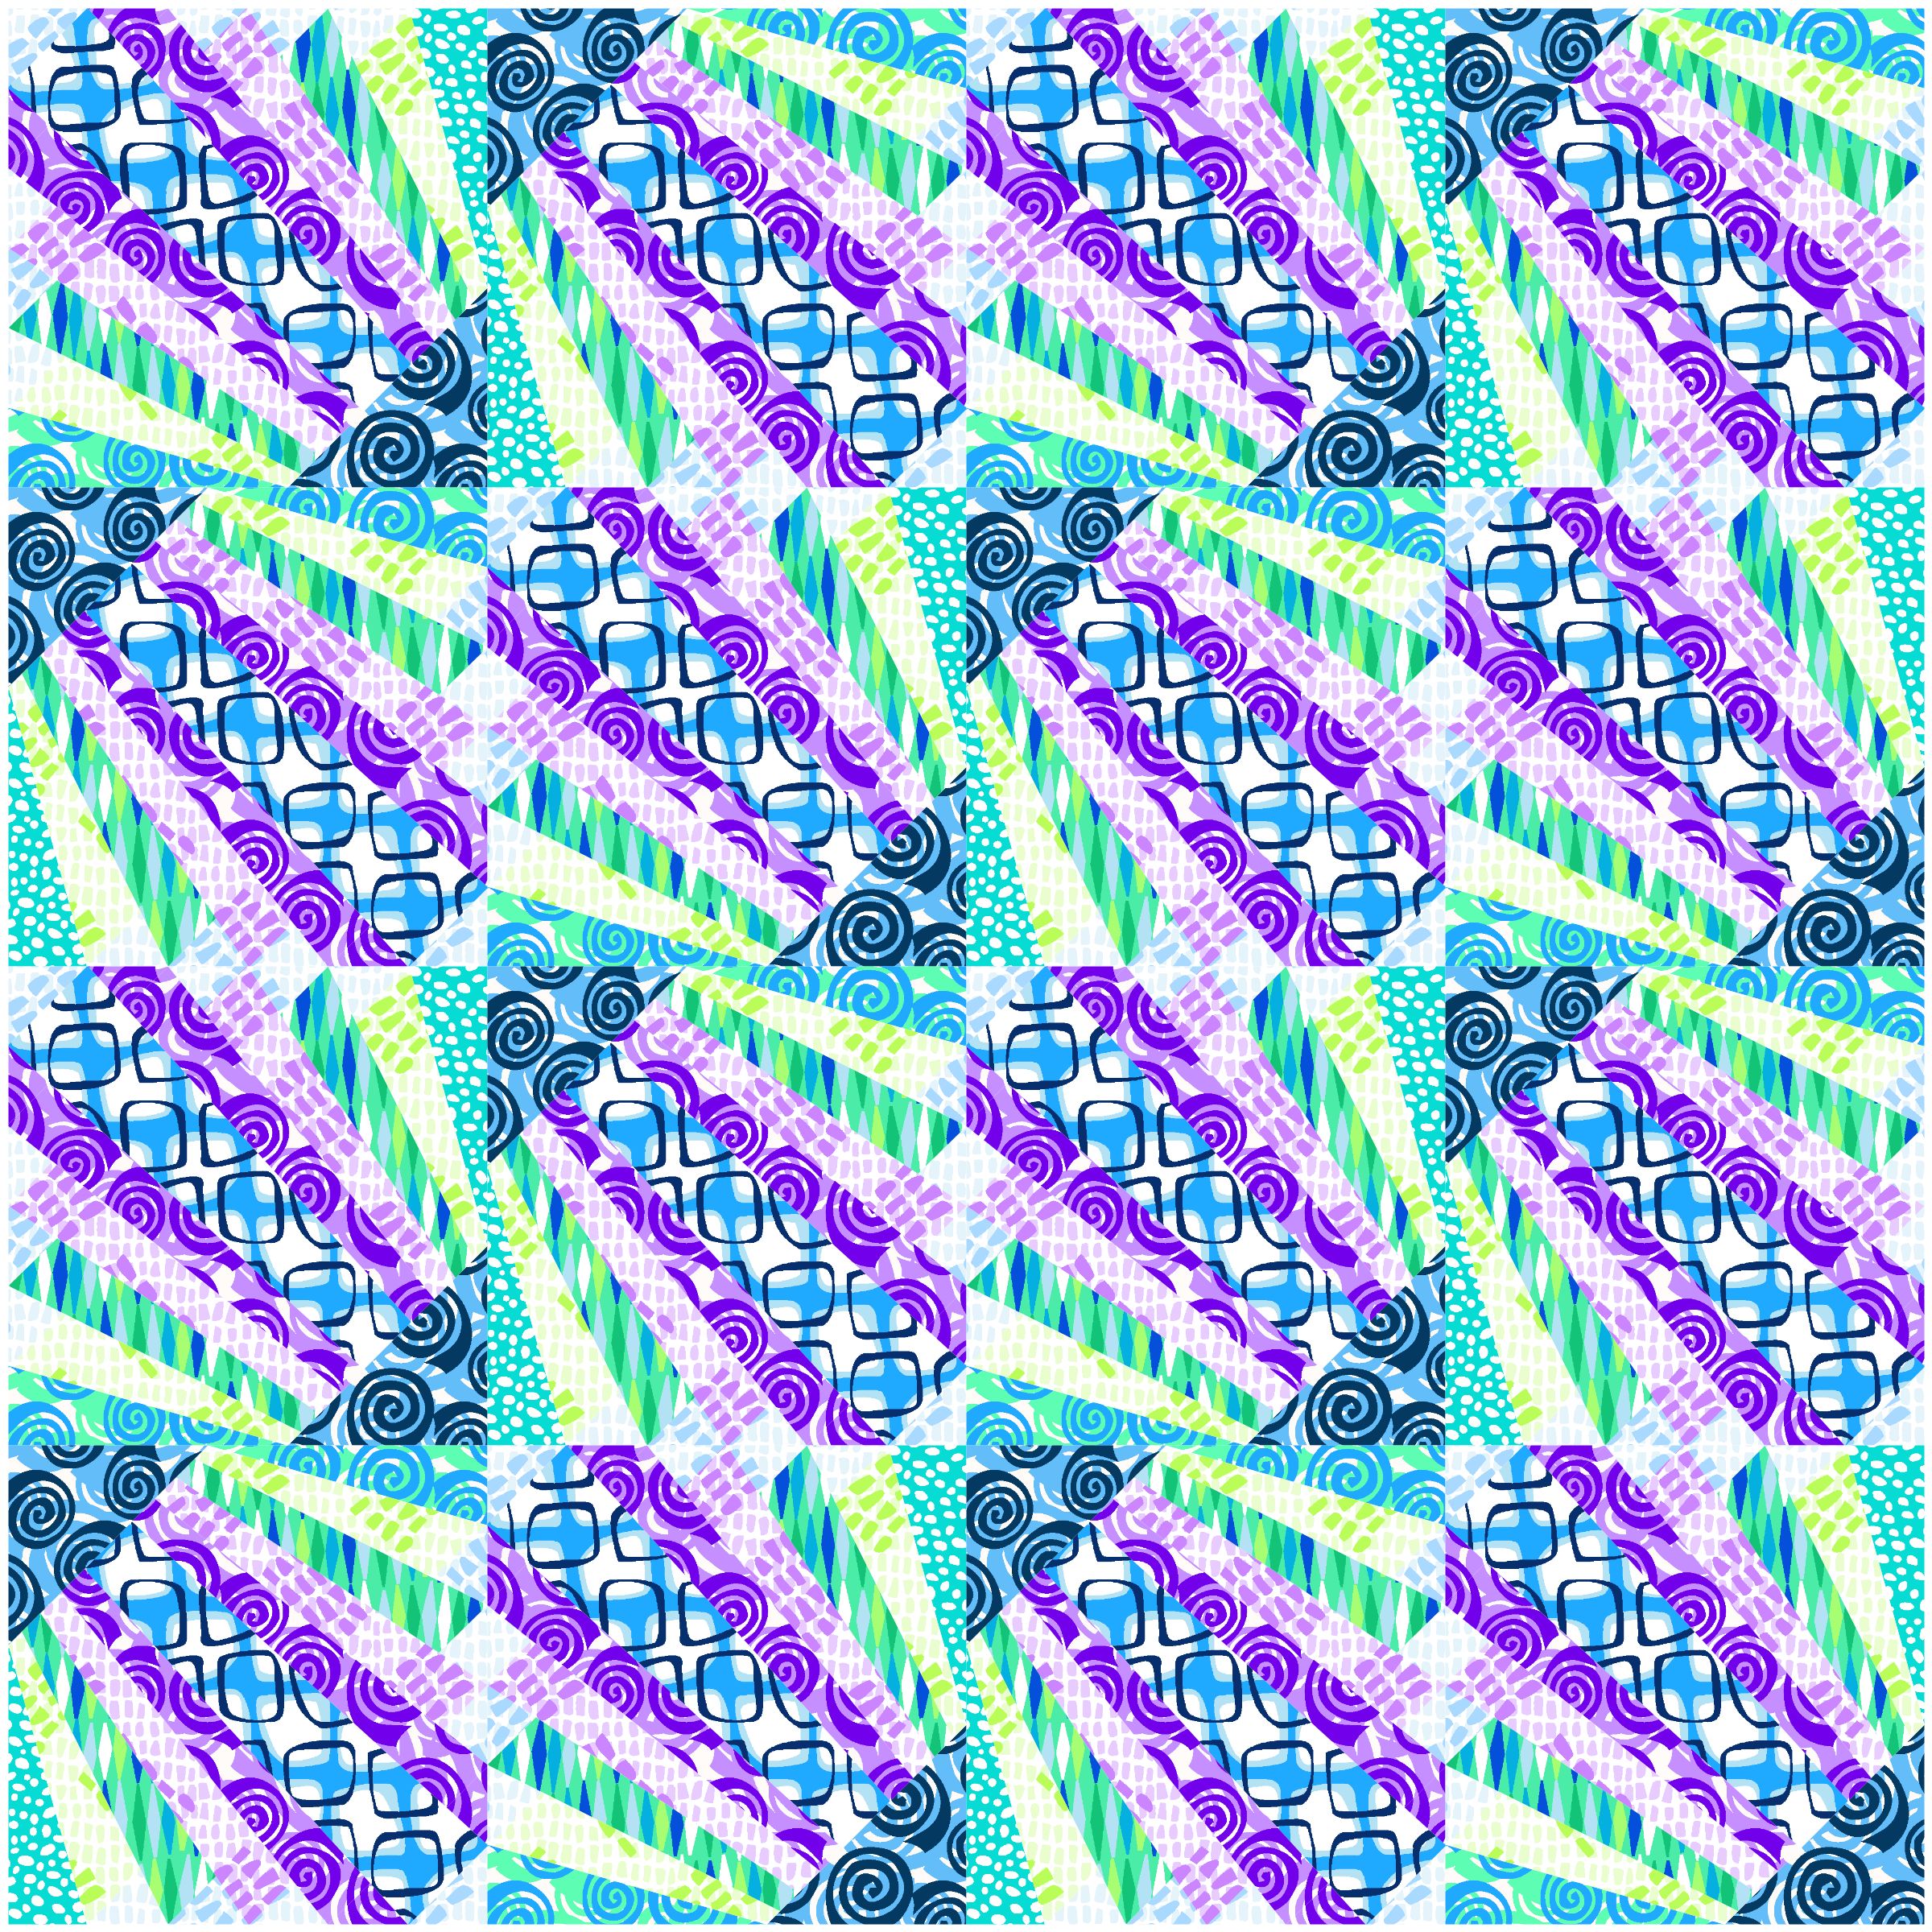
The first thing to think about when quilting a busy quilt such as my versions shown above, is that the quilting won’t be a focal part of the quilt. It’s more about the interplay of the fabric colors and the geometry of the pieced design. So a busy quilt is a great place to practice a new quilting design, or one that you want to get better quilting.
In the Pieced Primrose quilt pattern, I give machine quilting suggestions (just like I do in ALL of my quilt patterns). Because I made two versions of the same quilt, I quilted them with two different allover edge to edge free-motion designs: round spirals and square spirals.
When quilting an edge to edge design – I start on one side of the quilt and work my way across the quilt in a methodical fashion, block by block.
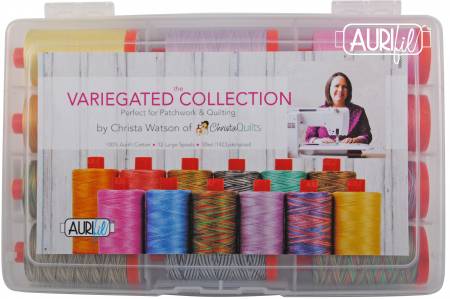
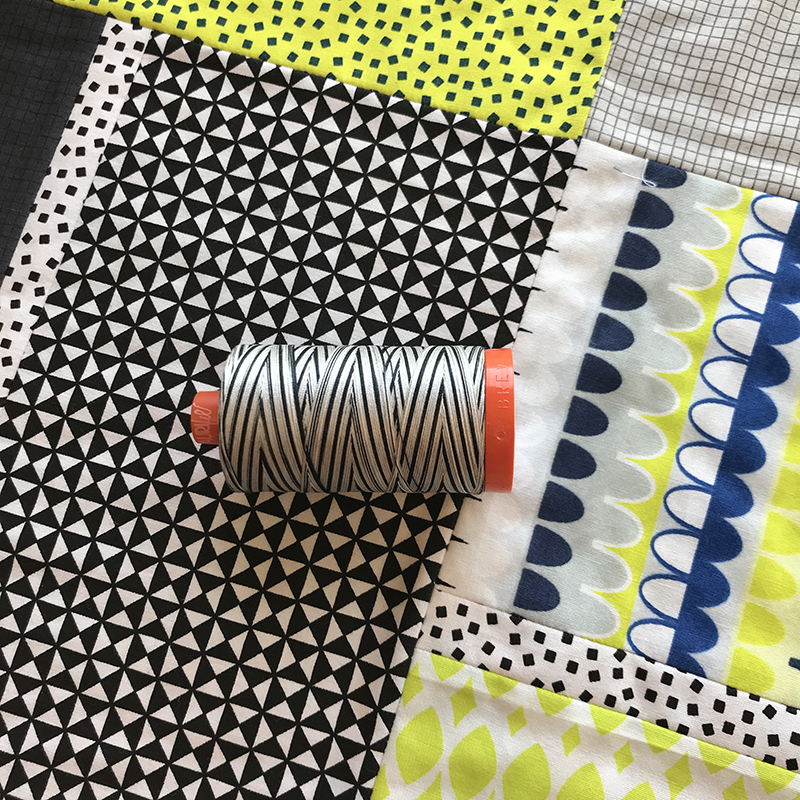
I used my Aurifil Variegated Thread Collection in blue and pink for each of the respective colorways. They blend into all of the fabrics and added a little bit of sparkle to the quilts. Here are a few detail shots below:
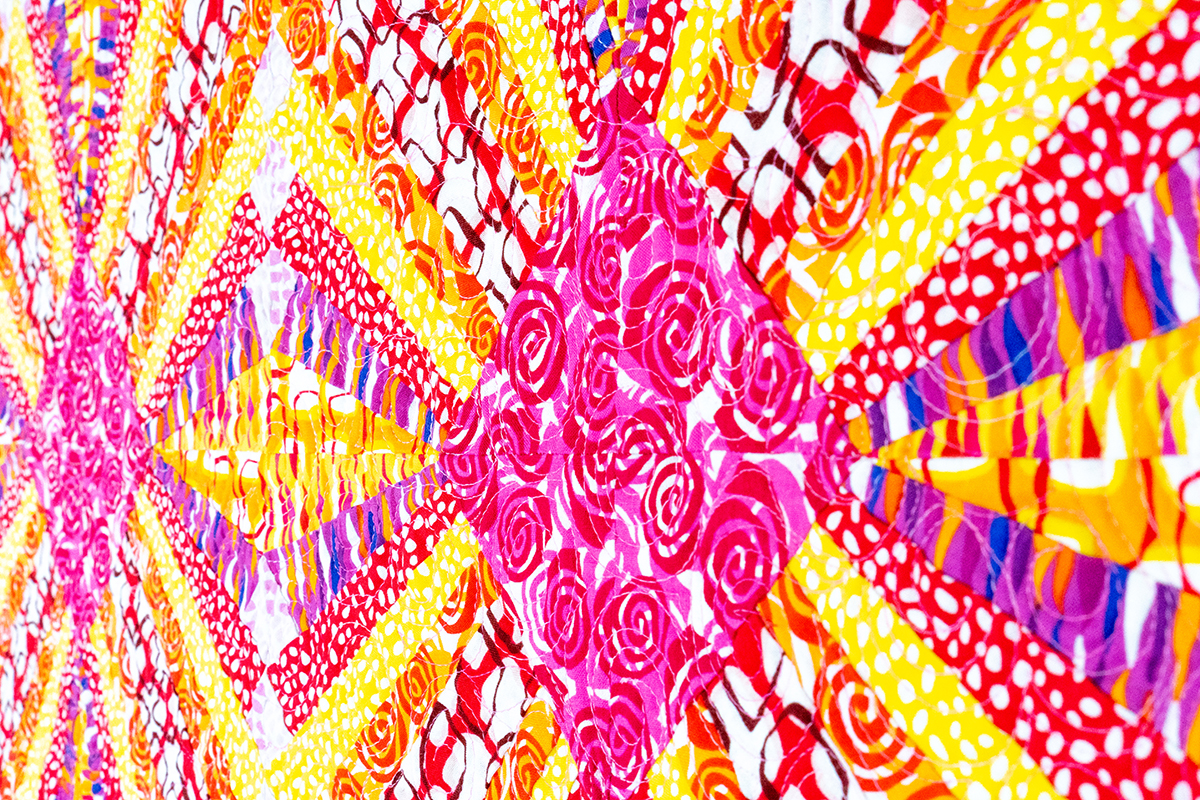
Abstract Garden Warm – click images to enlarge
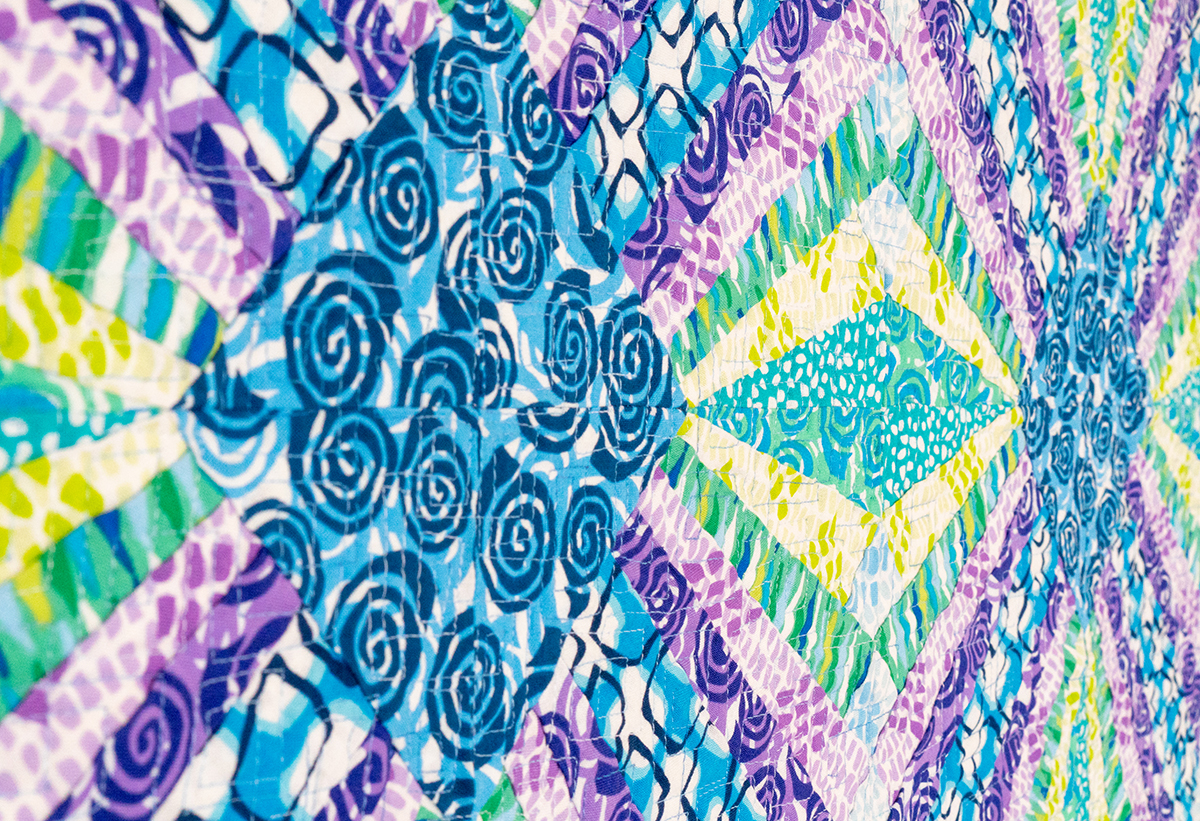
Abstract Garden Cool – click images to enlarge
My favorite thing about quilting an allover edge to edge design is that it adds yummy texture to the quilt and is sooo forgiving! Your motifs don’t have to be perfect because you won’t see the individual stitches. And the best way to hide imperfect quilting is to surround it with MORE imperfect quilting!!
See Me qulting on Video!
I recently quilted 3 different versions of another quilt – Terrace Tiles using 3 different free-motion designs in the same way. I stitched Swirls and Boxes (similar to Square Spirals) on two of them and other fun design – Jagged Stipple – on the third.
This is the final part of my “making of” series for Terrace Tiles. I hope you’ve enjoyed the journey and are inspired to make your own version! See below for info about these quilts and the previous progress posts.
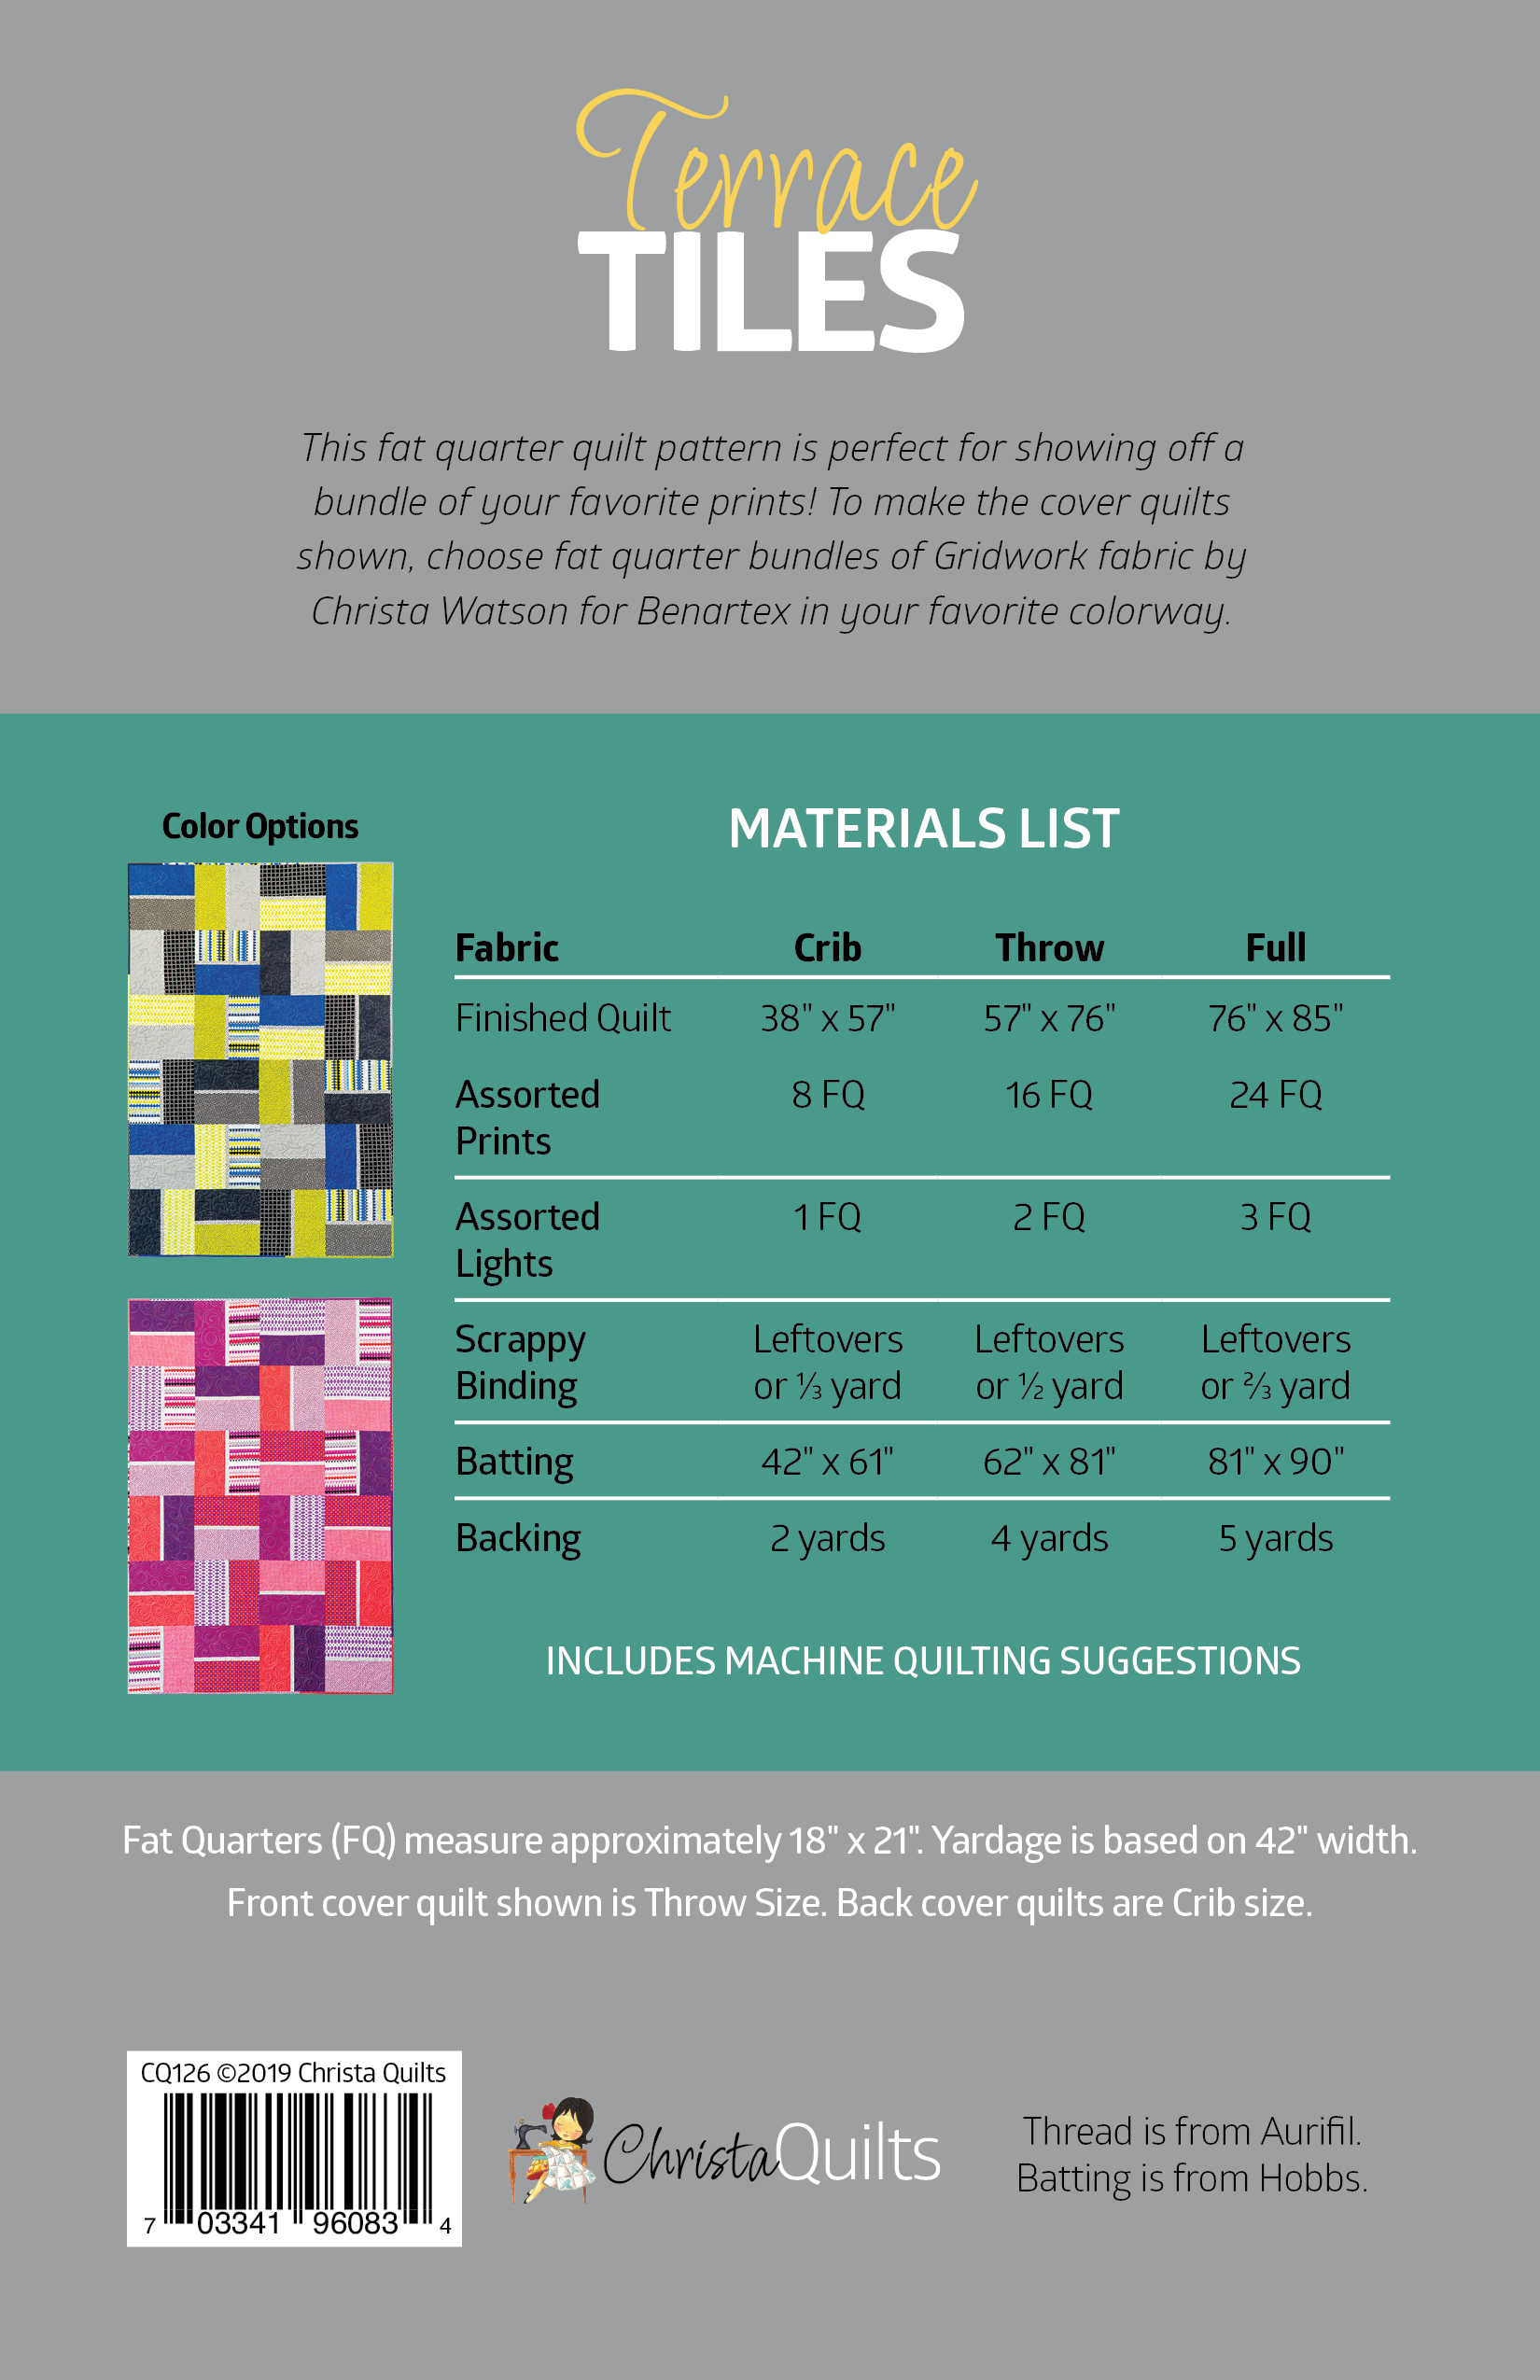
Terrace Tiles Finished Quilt Stats
Finished sizes: Amethyst and Citron 38″ x 57″; Breeze 57″ x 76″
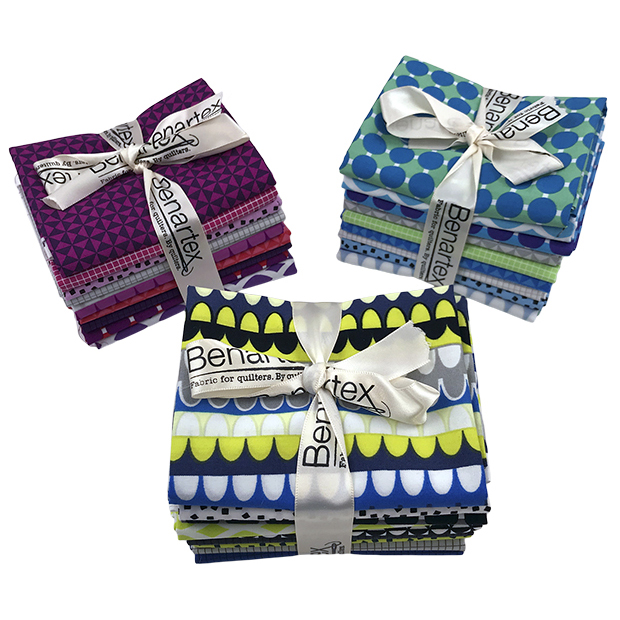
This week, Benartex is promoting my new Gridwork fabric on their social media channels. Along with that, they run a weekly Win-it Wednesday promotion. Today is your chance to win a fat quarter bundle of Gridwork + 2 of my quilt patterns made from it.
To enter, head over to @benartex_fabrics on instagram and leave a comment there. You must follow both Benartex and me @christaquilts on instagram to win. Contest is open until Tuesday, February 18th at 11:59 pm EST. Three winners will be announced on Wednesday, February 19th on the Benartex social media account.
And now we come to everyone’s least favorite part of making a quilt – basting!! But really, if you just set aside the time to do it’s not that bad! Here’s what both versions of Pieced Primose look like up on my design wall that also doubles as my basting area. Read on for helfpul ways to tackle this part of the quilt-making process. It’s easier than you think!
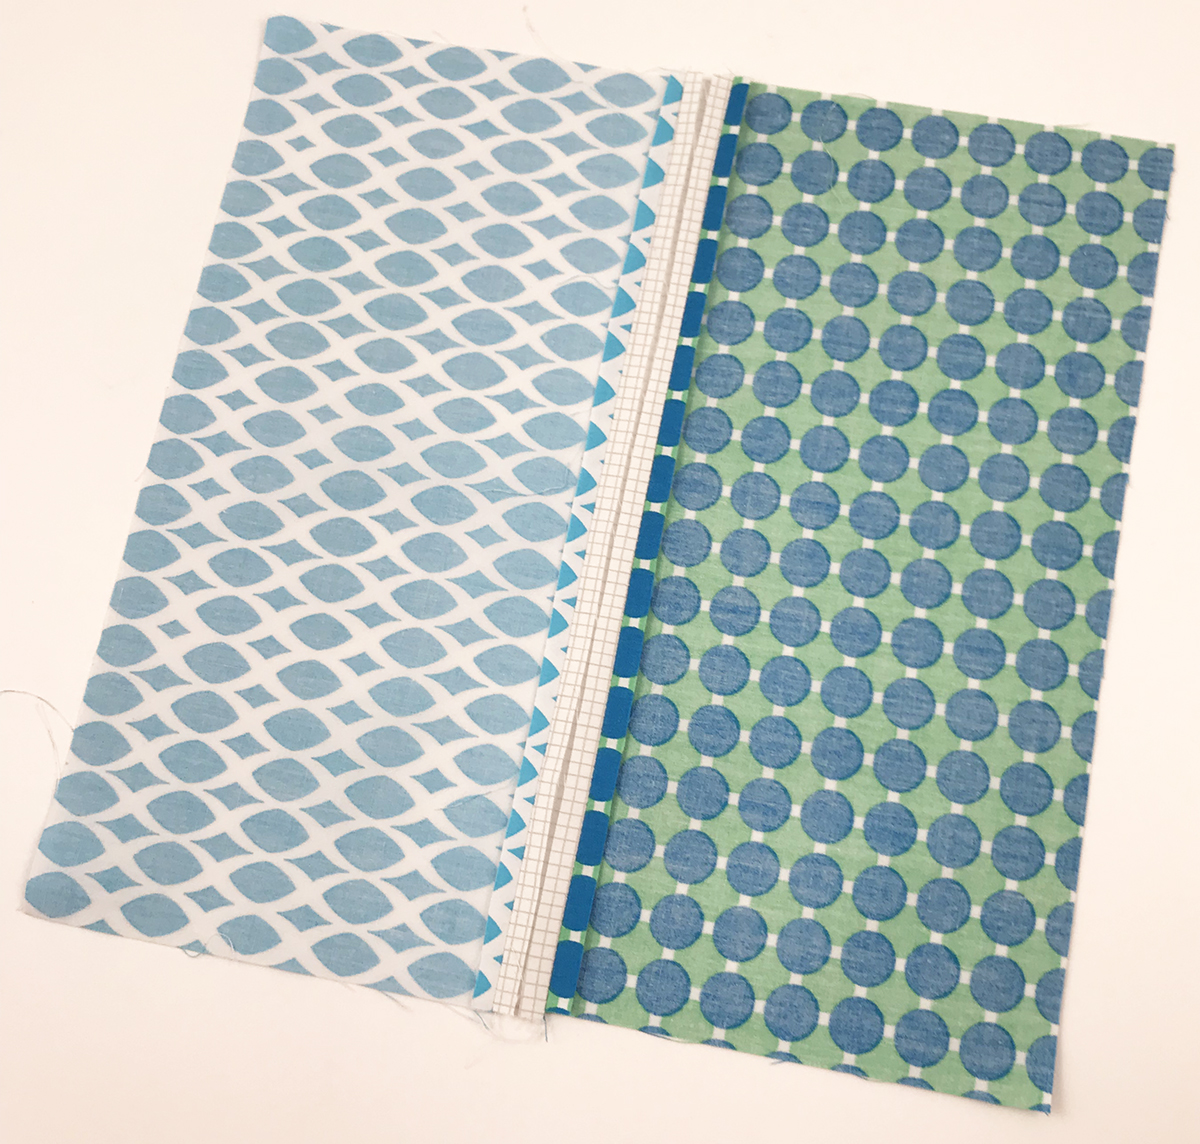
Because I wanted to include all 10 warm or cool fabrics from Abstract Garden in both colorways of Pieced Primrose, I used 9 fabrics for the blocks, and then the multicolor print “Raised Beds” for the backing and binding. The wall size kit includes the backing; for the larger size you’d need 6 yards of either color.
I’ve basted my quilts many different ways over the last few years, and I try to share as much about the process as I can. So take a look at the different tutorials below from prior quilts I’ve made. I’m sure one of them will make your quilting life easier!!
This is the first full-fledged basting tutorial I’ve created for my YouTube channel. I filmed and edited it while making my Infrastructure quilt. In reality it takes about an hour to do, but with the magic of edting, you can watch on super speed which only takes about 7 minutes. Too bad I can’t baste that quickly in real life, right??
If you don’t have a dedicated design wall, no problem! You can still do my spray basting method using a table. It’s the method I used when making my Improv Squares quilt:
Finally, here’s the way I USED to baste my quilts until about 5-6 years ago – using safety pins! It’s still a good method if basting spray isn’t your thing.
If you have another method you prefer, feel free to share you tips or links in the comments for others to see. Until next week – happy piecing and basting!!
LINKS AT A GLANCE
Click the links below for supplies needed to make this quilt:
Today I’m excited to share some machine quilting tips and videos for all 3 versions of my Terrace Tiles quilts. My thought is why make one quilt when you can make 3 in almost the same amount of time, right?? LOL!!
Choosing Thread colors
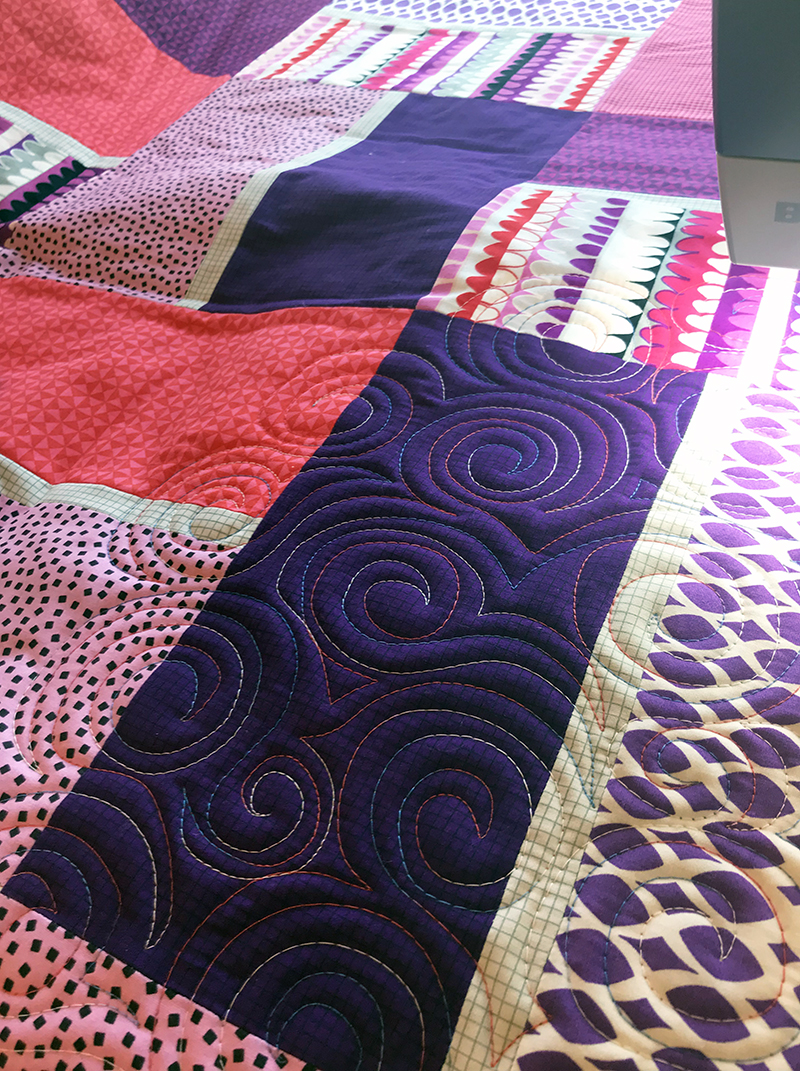
The variegated thread color above is actually a combo of red, white and blue but it looks pink and purple when quilted on the Amethyst quilt!
Because these quilts are so bright and colorful, I decided to quilt them using 3 different colors from my Aurifil Variegated Thread Collection. I’ve really been enjoying quilting with them because they add a bit of whimsy and sparkle to my busy quilts! Whenever I pick colors, I audition the thread by placing the spool on top of the fabrics to see how it will blend in.
Variegated thread on the Breeze colorway in progress!
It’s often surprising how well a thread will blend in even if the colors aren’t an exact match to the fabric. I normally use the same color it top and bobbin and don’t worry about whether or not the same colors will line up perfectly – that’s an impossible task. But with the variegated colors, any imperfections are hard to see and that makes for stress free quilting!
The black and white will add an extra dimension to this modern color palette!
Choosing the Quilting Designs
Because I was in a hurry to make these quilts for quilt market last fall, I didn’t have a whole lot of time to finish them. I pride myself on quilting my own quilts because (1) that’s my favorite part and (2) I’m a little bit of a control freak. So I knew I had to choose designs that would look great and wouldn’t take too much time.
Swirls in progress on the Amethyst colorway. Don’t stress about the imperfections!
Also, I wanted these quilts to do double duty. Not only do they showcase my Gridwork fabric and Terrace Tiles quilt pattern, they also are examples of 3 different motifs I teach in my machine quilting workshops: Swirls on the Amethsyt colorway, Boxes on the Breeze colorway, and Jagged Stipple on the Citron colorway.
Boxes on the Breeze colorway is one of my favorite modern machine quilting designs.
The fastest and easiest way to finish a quilt with free motion is to choose one design and quilt it from edge to edge across the quilt regardless of the pieced quilt design. It’s also a forgiving way to hide wonky or irregular seams. Just focus on one block at a time, and before you know it, the whole thing is finished! Another way to speed up the process is to quilt the motifs on a larger scale, because that takes up more space in less time.
Jagged stipple is my modern, angular version of it’s traditional cousin, smooth curving stipple.
Just to give you an idea of how fast these designs are to stitch out, it took me about 3 hours to quit swirls on the baby size Amethyst version, 5 hours to quilt boxes on the throw-sized Breeze version, and 2 hours to quilt jagged stipple on the baby sized Citron version. Although the Citron quilt is the same size as the Amethyst, jagged stipple is a much looser design than swirls, so it was a bit faster.
Scrunching and Smooshing the Quilt
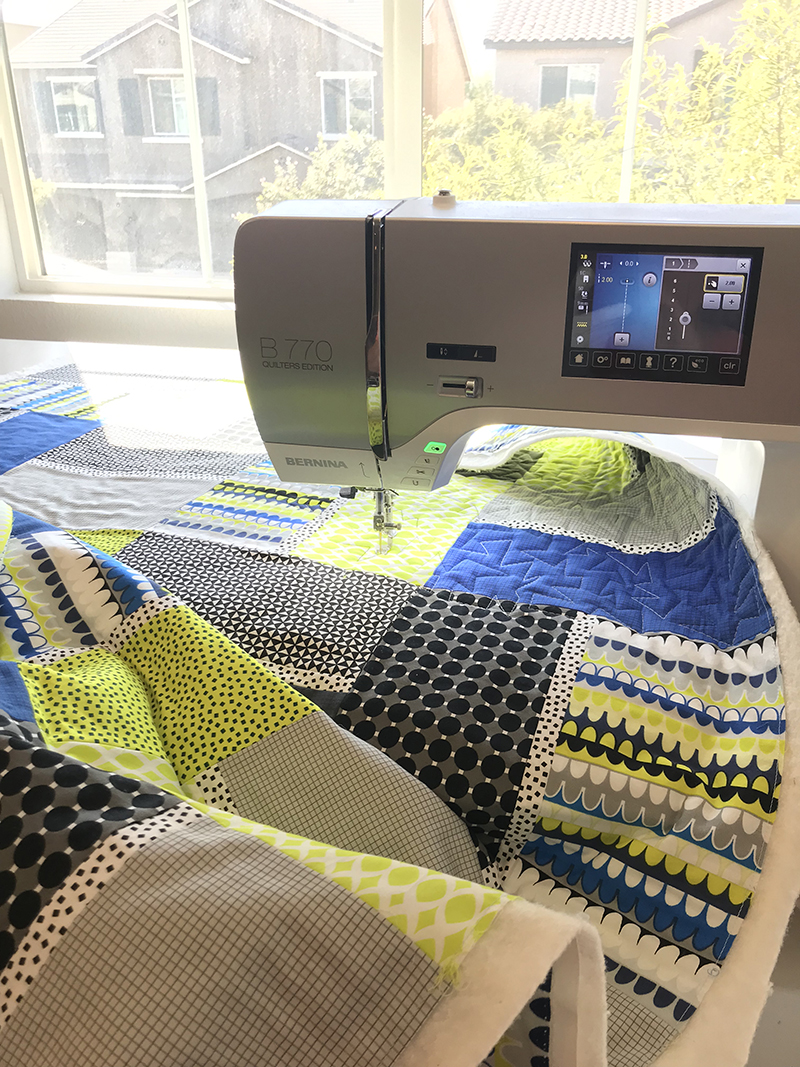
Because I do everything on a sit down machine, it’s important to control the weight and bulk of the quilt. I still have yet to find the perfect quilting table, so this is what my hacked together set up looks like below:
I got this table for a song 20+ years ago and sadly I don’t even remember the brand!
My sewing machine is flush with the bed of the table so it can hold most of the weight. It’s pushed against the wall so the quilt won’t fall off the back of the table. Most of the bulk is to my left, and I’ve placed a TV tray forming an L shape to hold more of the quilt as I scrunch and smoosh it through the machine. I also have a comfortable ergonomic chair that I can roll around easily.
A larger throat space on my machine makes a huge difference when managing the bulk!
On a bright sunny day I like to look out the window which gives me lots of natural light while I’m sewing and quilting! When the quilt falls into my lap, I just scrunch and smoosh it out of the way as needed while I quilt.
I hope this helps you overcome your fear of free motion when choosing and allover textural design like this. The key is to fill in all the spaces, so your eye doesn’t notice any of the imperfections.
See it on Video!
Here’s a YouTube video I made showing me actually fee motion quilting each quilt. The video is just under 8 minutes and it’s packed with tips as I quilt each of the 3 quilts shown above. I’m stitching in real time with the volume on my machine so you can see and hear what it looks like “in real life.” Notice how much I stop and reposition my hands:
Scrappy Binding
Sew the leftovers together randomly for a fun, scrappy binding!
I love a scrappy binding, especially when making quilts from fat quarters. For Terrace Tiles, you just use up the leftovers and piece them together randomly to carry the colorful chaos all the way to the edges of the quilt.
You can join the ends on an angle or edge to edge!
I prefer to cut my binding strips 2″ wide so they finish nice and narrow and are even on both sides. I press each of the seams open to reduce bulk and make sure the binding is long enough to go around the entire quilt with a few inches extra.
Another great thing about scrappy binding is you can always add more strips!
Although I prefer the look of hand binding, machine binding is a great way to finish fast! Here are my two favorite ways to bind, either by hand or machine:
Remember, if you make your own version of this quilt, please share. You can use #terracetilesquilt on instagram, or you can share your progress in my ChristaQuilts Facebook group. I’d love to see it!!
QuiltCon, put on by The Modern Quilt Guild is absolutely my favorite quilting event to attend! It’s taking place this year in Austin, Texas February 20-23 and I can’t wait!!
The first modern quilt show and conference took place back in 2013 and I’ve attended each and everyone one since. It’s a can’t miss event for me and this year I’m especially thrilled to taking classes, doing some meet’n greet events, and sharing my quilts on the show floor and in several vendor’s booths.
Meet ‘n Greets on Friday and Saturday
I’m thrilled to be invited for a couple of meet ‘n greets with quilt shops who will be selling my fabrics, books and patterns at the show. So please stop by and say hi, show me what you are working on, and get some tips and tips on machine quilting or modern design:
Loving Stitches Booth #545 on Friday Feb 21, 1-2 PM
I’m excited to be taking a whole slew of design classes from a couple of my talented friends, Heather Black of Quiltachusetts and Daisy Aschehoug of Warm Folk. I love gettin to be a student at the show this year because my quilting education is always a work in progress!
I’ll also squeeze in several lectures and I’m excited to check out the awards ceremony and other social events throughout the show. Let me know if you’ll be in attending any of these events:
Several of my other quilts will be on display in the Homestead Hearth booth, Loving Stitches booth and also the Hobbs batting booth. I love loaning them out so they can help decorate the vendor booths and also so they can be seen by a wider audience.
Some of my quilts that will be on display in vendor booths throughout the show.
Be on the lookout for Bling, Block Chain, Optical Illusion, Infrastructure and several more! If you’ve ever been to a national quilt show before, I’m sure you’ll agree that the quilts hanging up in the booths are just as fun an inspiring as those in the show!
So if you are planning to attend let me know – I’d love to see you! And if you’ll be watching all the action at home, check out the Instagram hashtag #quiltcon for some amazing inspiration from the show. Now it’s time to start dreaming about the quilts I’ll make for next year’s show……
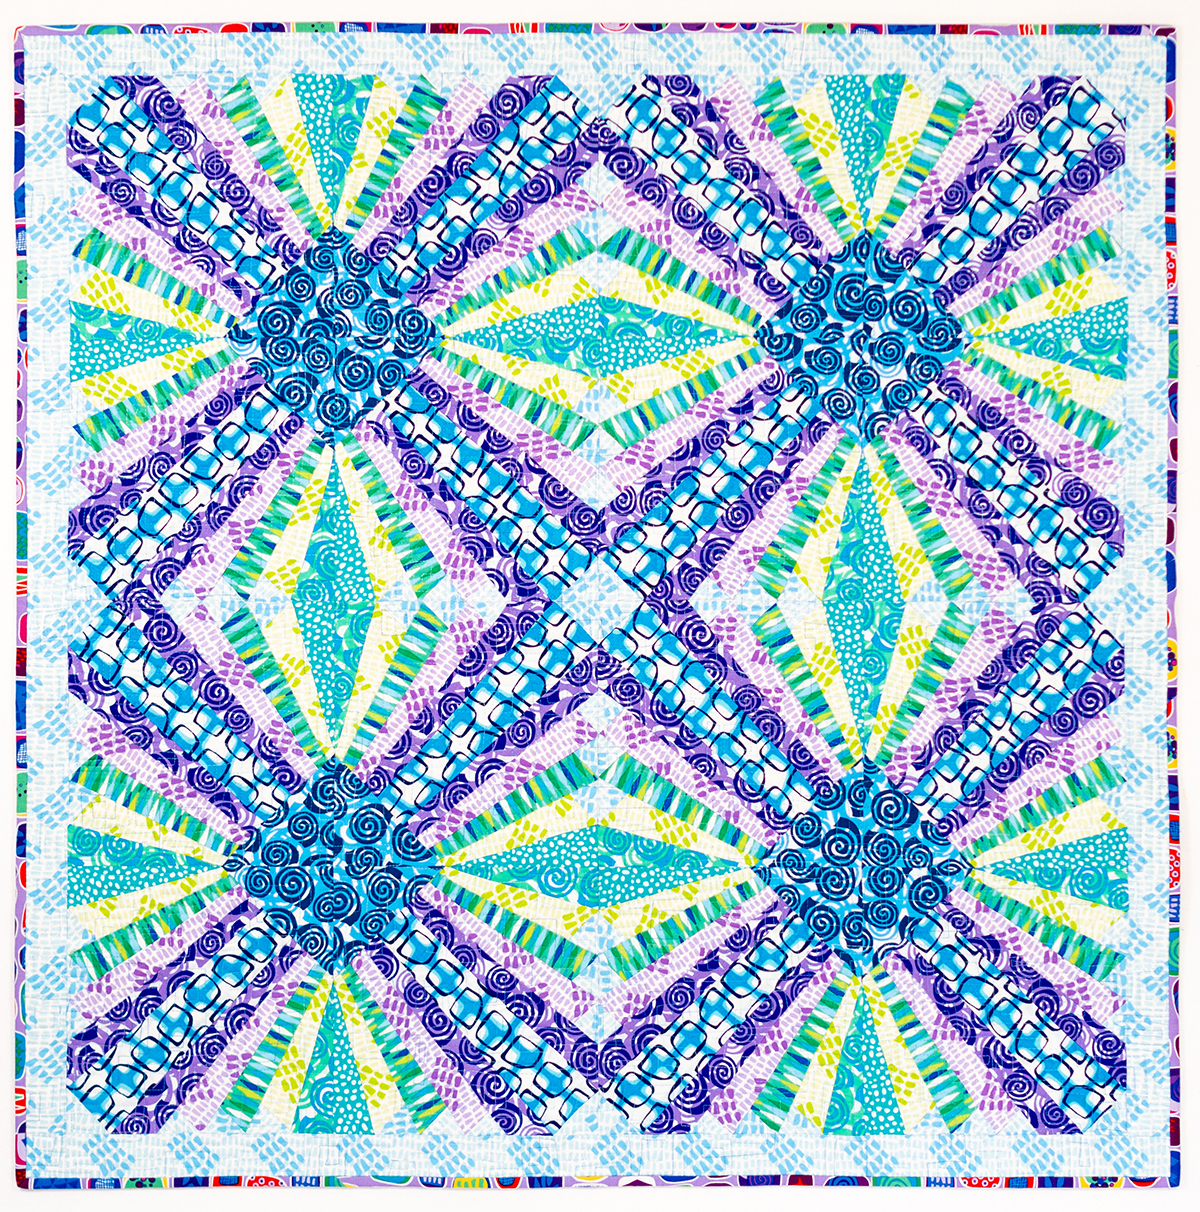
How are your Pieced Primrose blocks coming along? Did you check out some of the optional layouts from last week’s post? This week will be pretty straightforward as we sew the blocks and add borders to complete the quilt top.
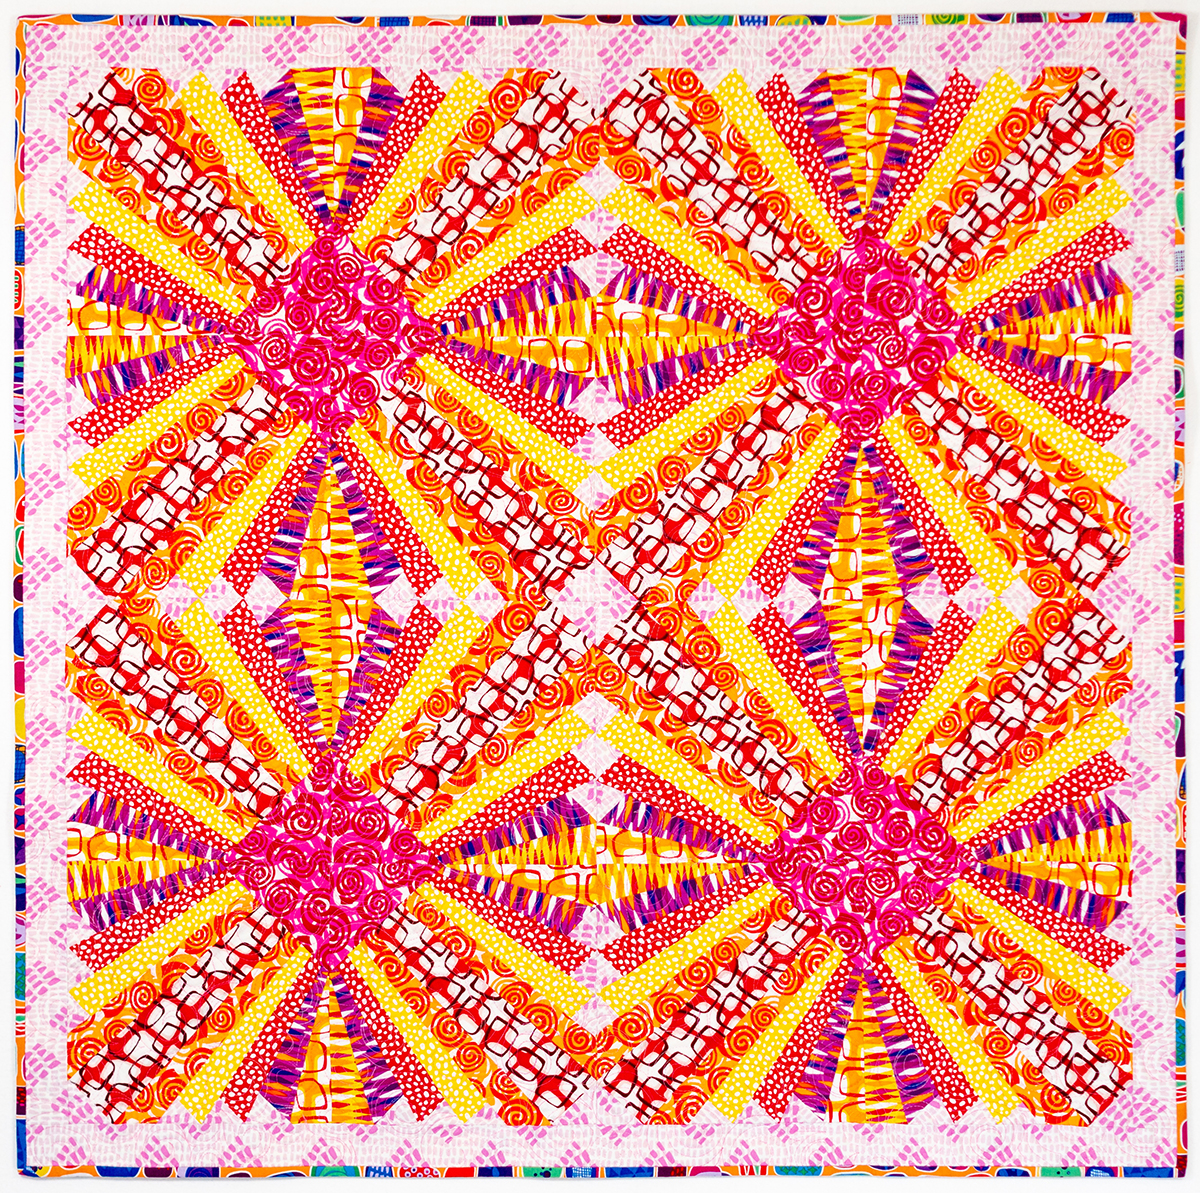
For my cool and warm versions of the quilt, I’m doing the standard layout as shown on the cover of the Pieced Primrose Quilt pattern above. It’s the same basic layout whether you are making the smaller wall size, or the larger throw size.
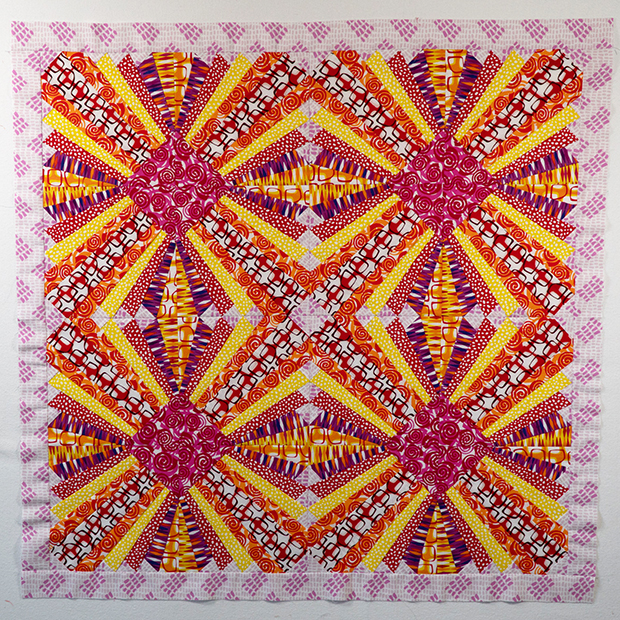
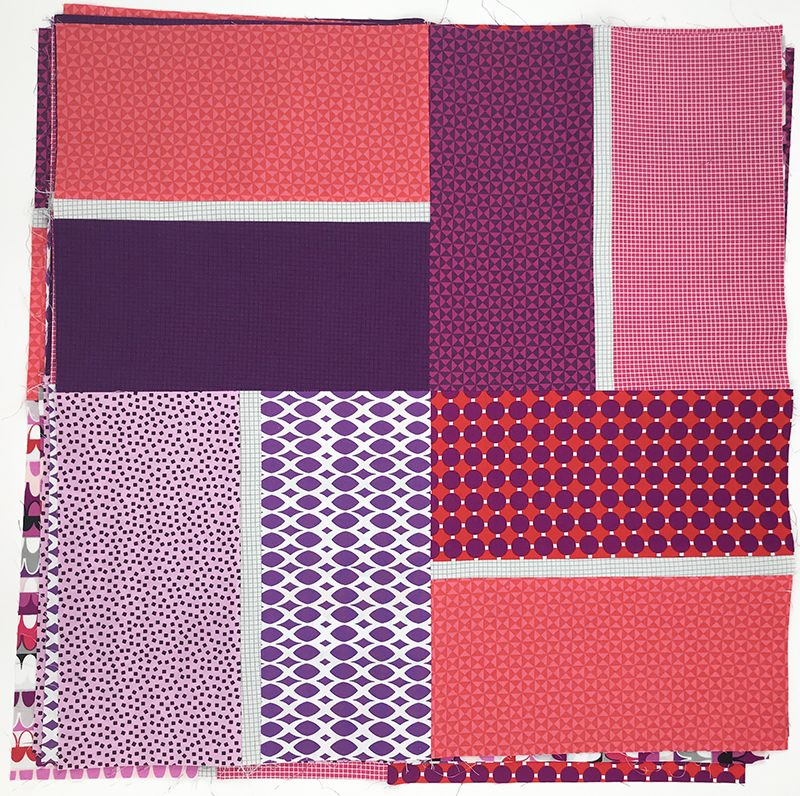
First I sewed all of the foundation pieced blocks into larger 4 block units. The trick is to rotate the blocks so they look like the image below and sew 2 rows of 2 blocks each . Because of the bias edges on the blocks, you want to hand them carefully and use pins to ensure the edges match correctly.
Although the block seams are pressed to the side during block assembly (due to the foundation paper piecing process), I press the larger block seams open so they will lie flat.
Large Primrose Block – Warm Colorway
Large Primrose Block – Cool Colorway
For the wall size quilt you will be making 4 of these larger blocks. For the throw size, you will be making 20 of them. Just remember that you can always change up the size of your quilt by adjusting the number of blocks that you sew.
Although the pattern gives you the correct measurements to cut for the borders, I always recommend measuring your quilt top first. It can shrink or grow depending on how accurate your seam allowances are.
The best advice is to measure both sides and through the middle, then cut your side border strips to this length. After the side borders are sewn, measure again with the borders attached and cut the top and bottom borders to match.
Wall Size Finished Top – Warm
Wall Size Finished Top – Cool
Next week we will baste our quilts and get them ready for machine quilting. So if you are still sewing your blocks together, don’t worry – you still have plenty of time! Remember to share your progress on instagram #piecedprimrose quilt or in my ChristaQuilts Facebook group.
LINKS AT A GLANCE
Click the links below for supplies needed to make this quilt:
My Terrace Tiles quilt pattern is quickly becoming a favorite because it is so fast and fun to make!! Last week I shared some tips on piecing the quilt blocks. Now it’s time to finish the quilt tops and get them ready for quilting.
Terrace Tiles in Gridwork Citron Colorway
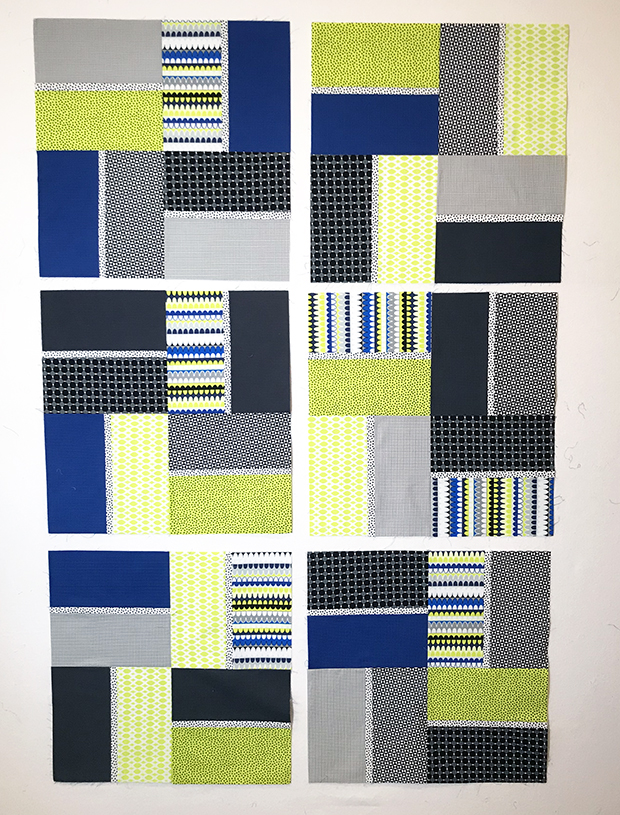
You can either arrange all the blocks on a design wall or other flat space; or you can sew them together into larger sets of 4 blocks like I did to speed up the process. I’m not worrying about block placement at this point. The more random the better!
I’ll take a little bit of time to arrange them in a pleasing order, but I won’t overthink it.
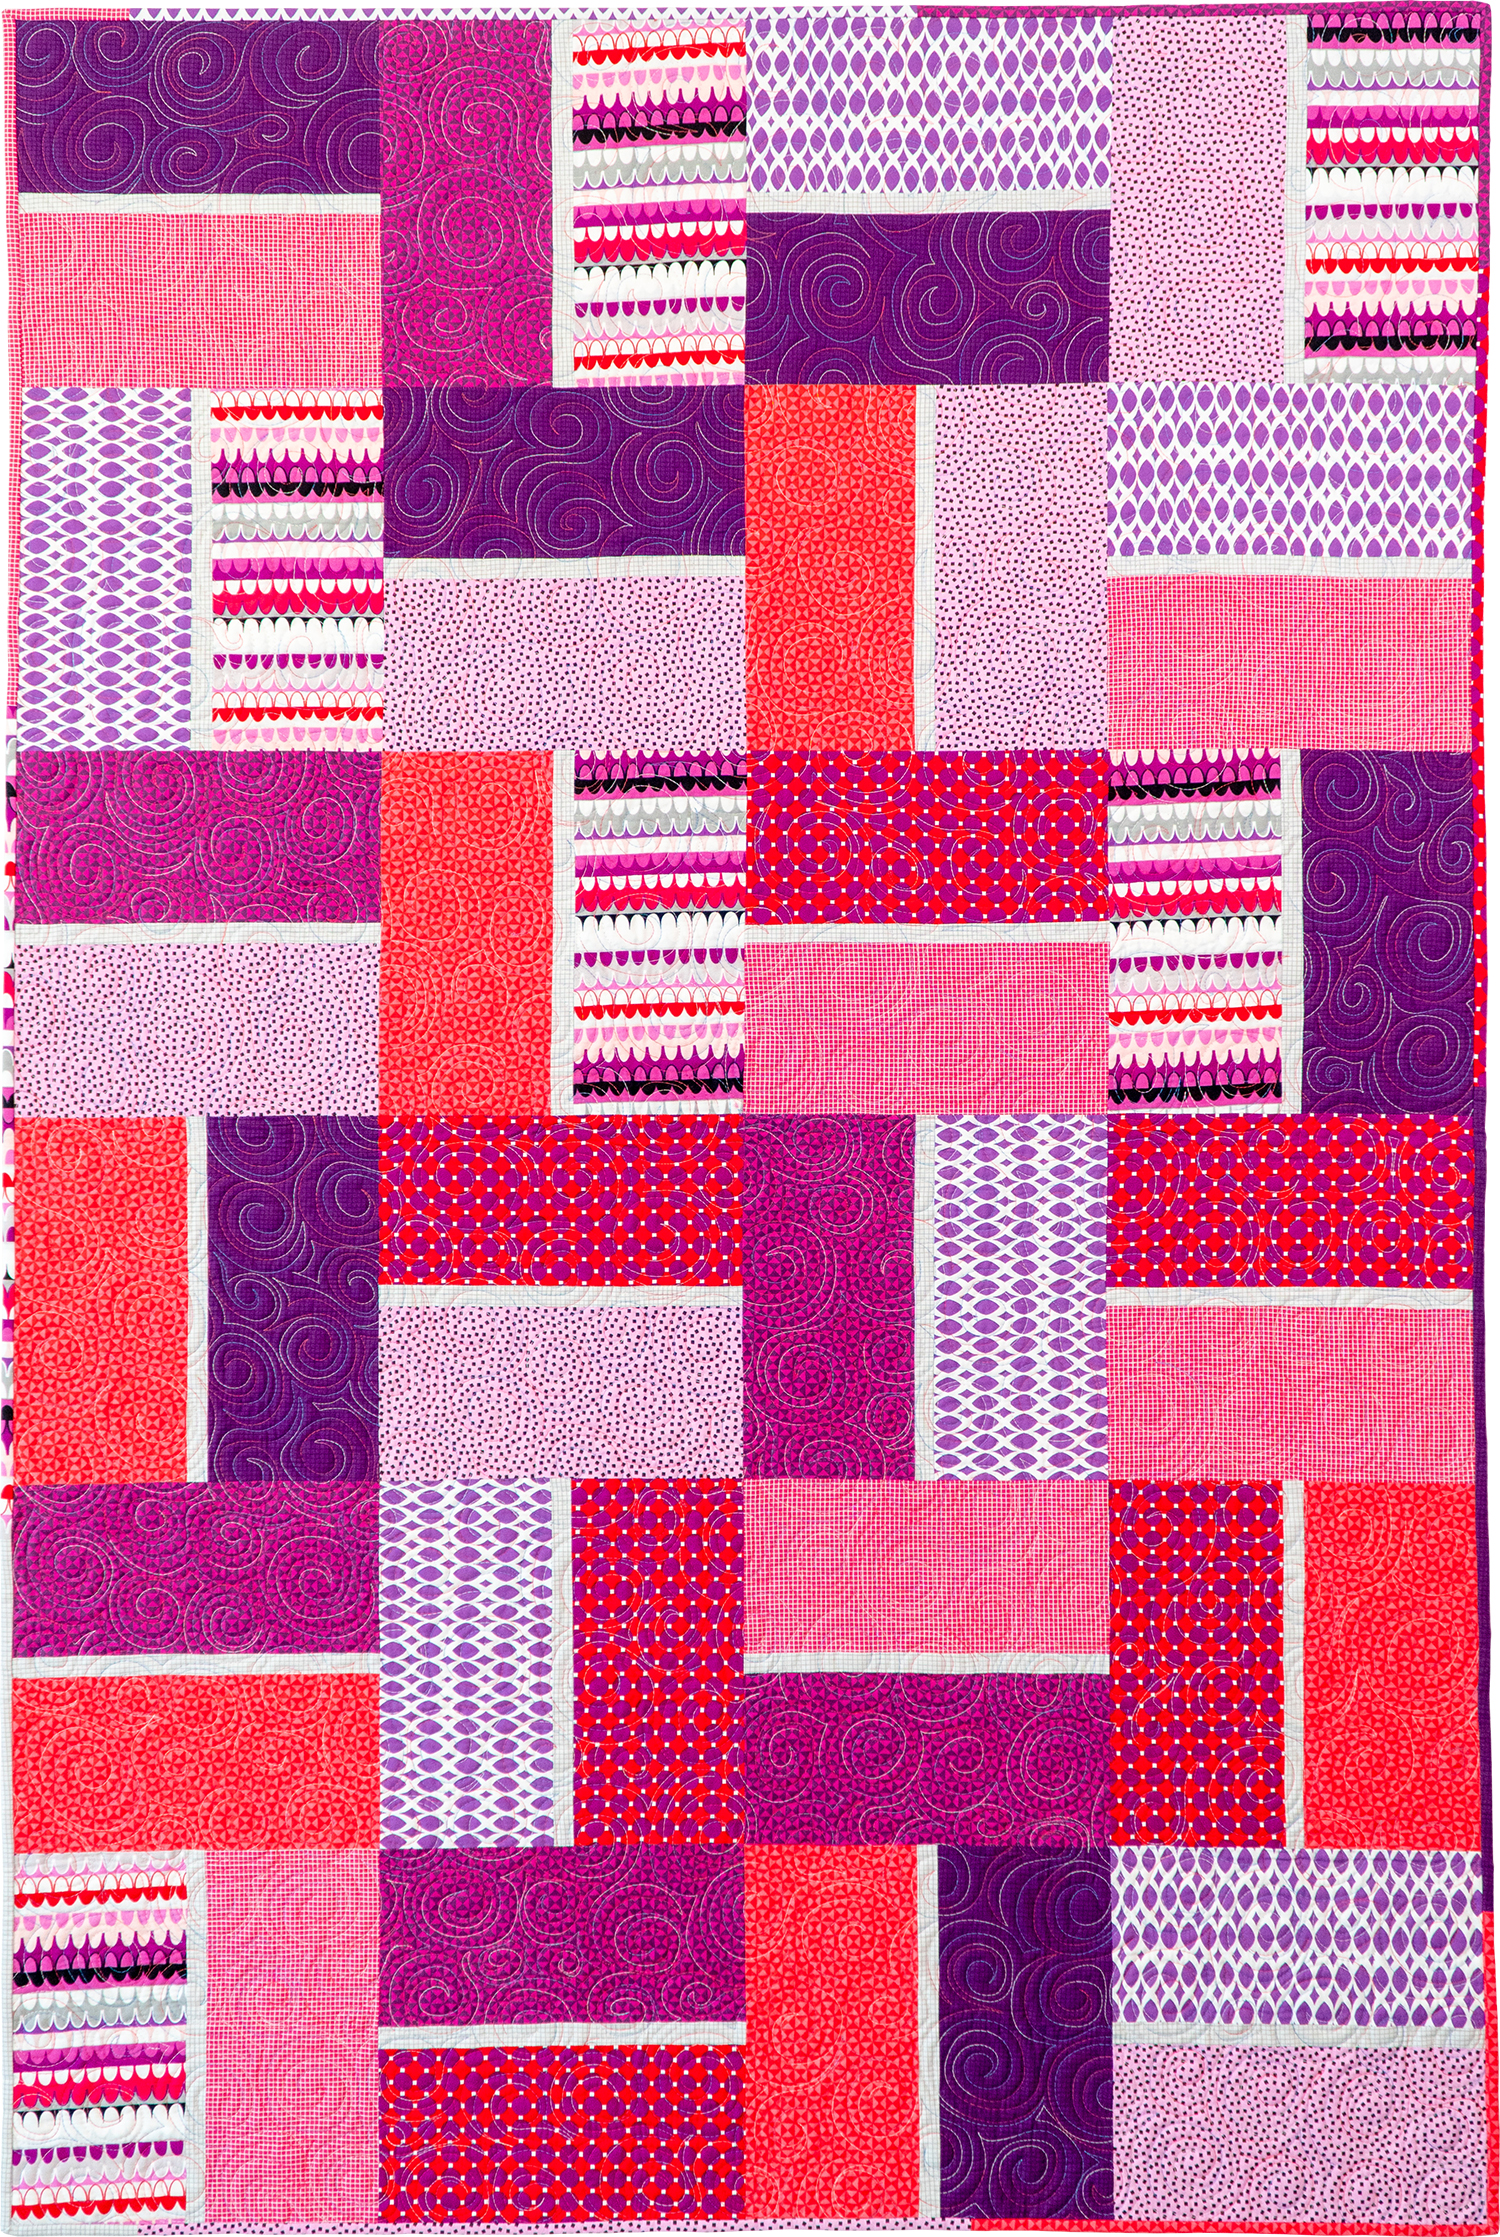
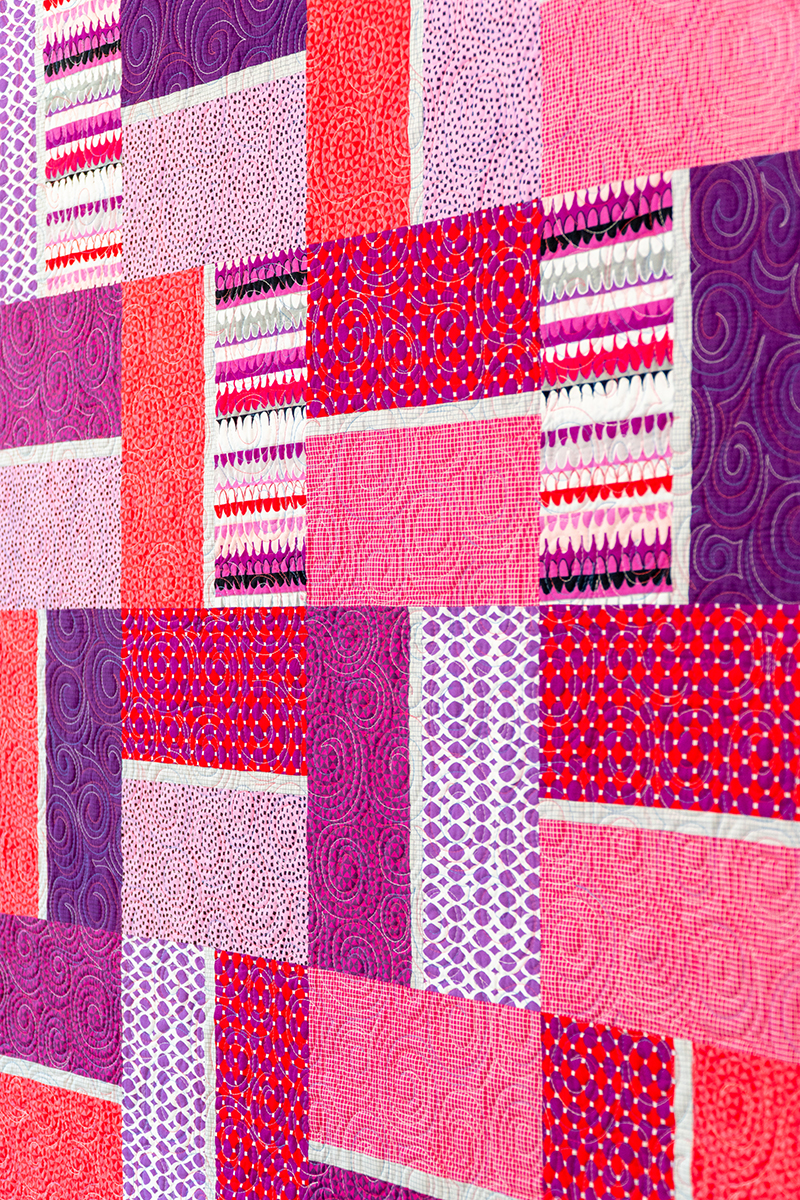
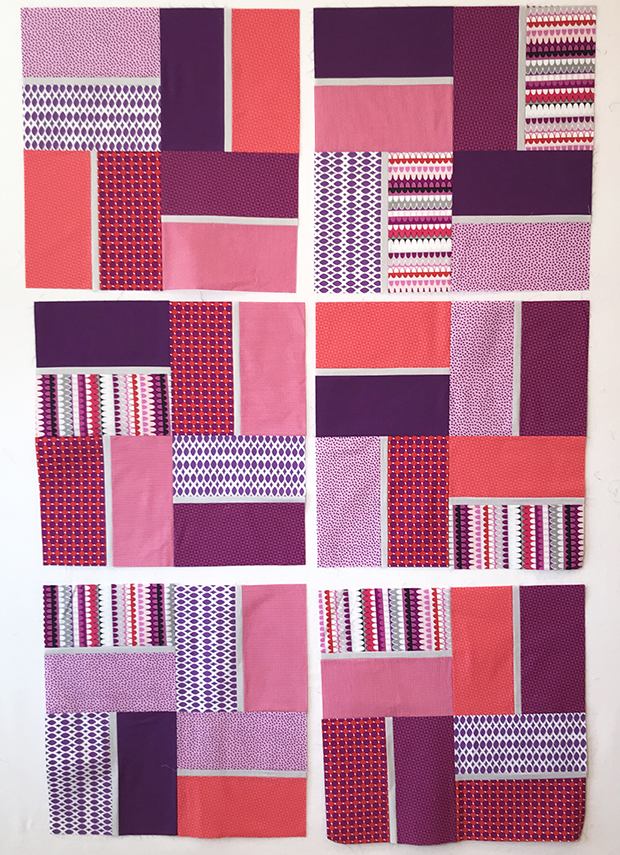
Terrace Tiles in Gridwork Amethyst Colorway
I don’t worry too much if the blocks get a little wrinkly at this point. I’ve used spray starch on the fabric before I cut it which gives the blocks a tendency to wrinkle when handled. But that’s ok – once the top is sewn up and basted they won’t be as flimsy or prone to wrinkling. I also press each seam as I go to keep my blocks as flat as possible.
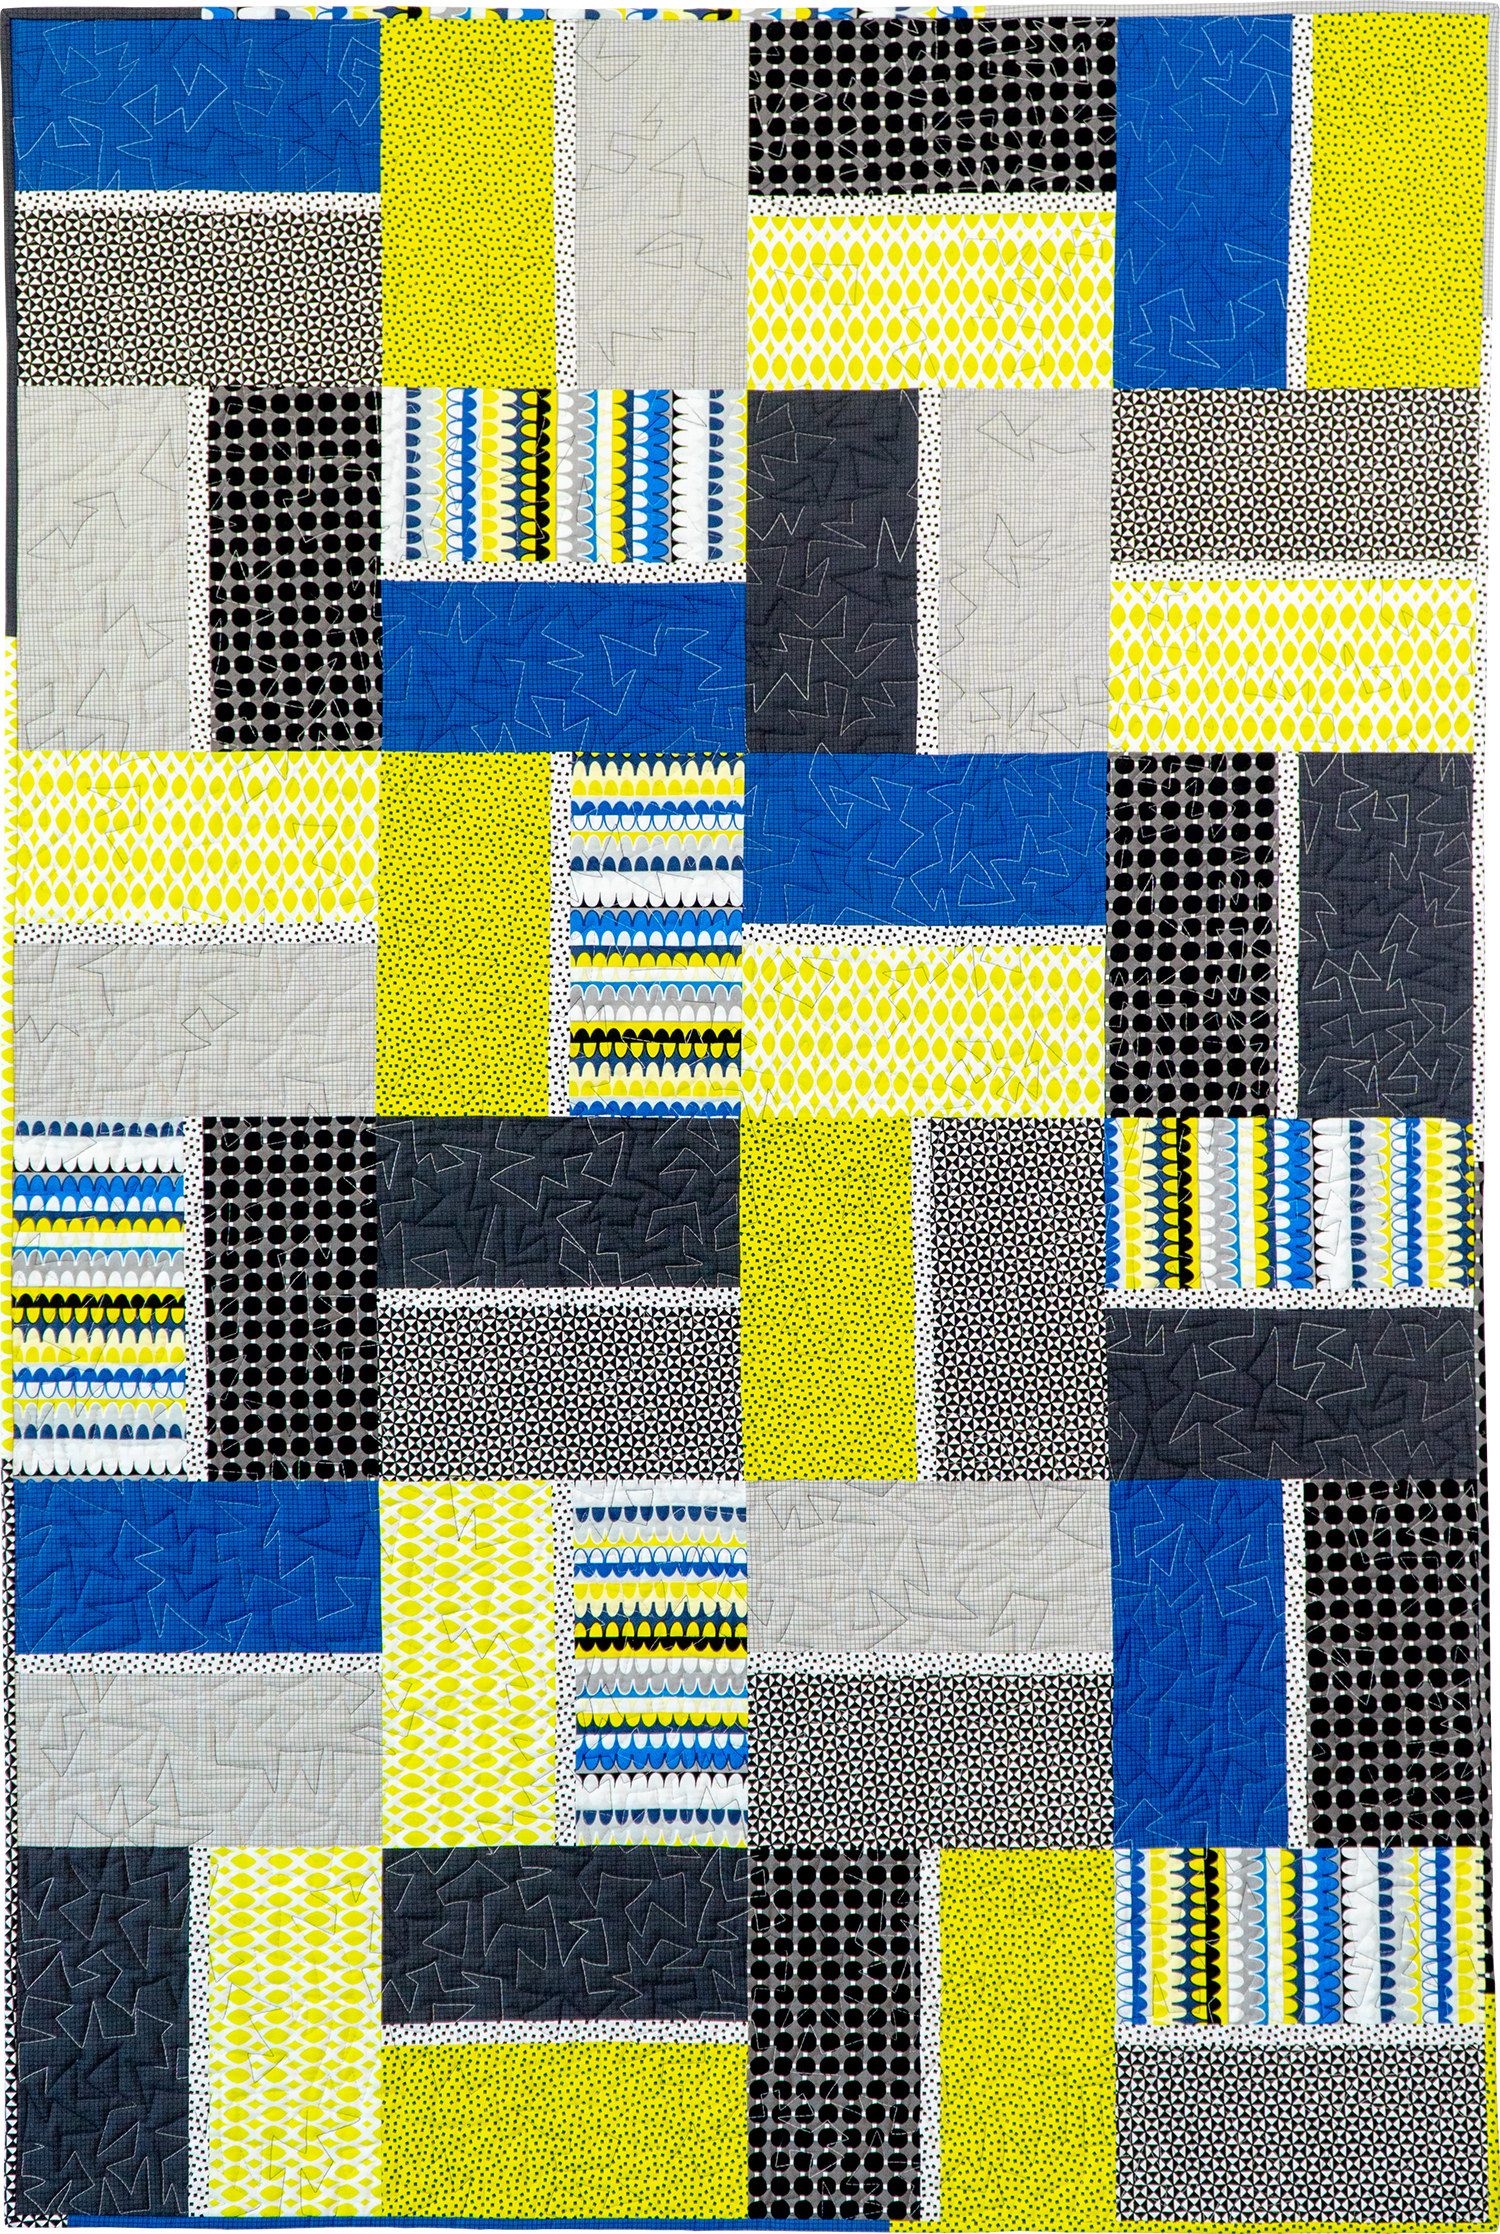
Terrace Tiles in Gridwork Breeze Colorway
I made the Amethyst and Citron quilts in the smaller crib size. For the Breeze colorway, I wanted to make it in the bigger throw size with more blocks.
Once the blocks are assembled into the quilt top, I take what’s called a “Victory lap:” I sew about 1/8″ around the edges with a longer stitch length to secure the edge seams from splitting open. If the quilt has borders, then you don’t need to worry about that step.
Prepping the Backing
The crib size calls for 2 yards of backing so that you can piece part of it if needed. However, you can get away with less fabric if you measure and baste carefully. As long as the backing is a couple of inches bigger than the quilt top on all sides, you’ll be ok. Below the backing just barely covers the finished quilt top on the left and right, but it’s still enough, thank goodness!
I’ll make sure to pull up the backing from the floor so that it covers the entire quilt top; then I’ll trim off the extra fabric, and press it with starch before I baste.
I also like to take a picture of the batting with the quilt I so I can remember which one I used.
Basting the Quilt
I like to set up a table in my back yard and apply 505 basting spray to the wrong side of the top and backing. It’s much easier to spray the top and backing separately and it uses less spray than spraying the batting instead. Below I’m basting the throw sized quilt so it requires a larger backing.
After spraying outside, I bring the top and backing inside and assemble them on my design wall, one layer at a time.
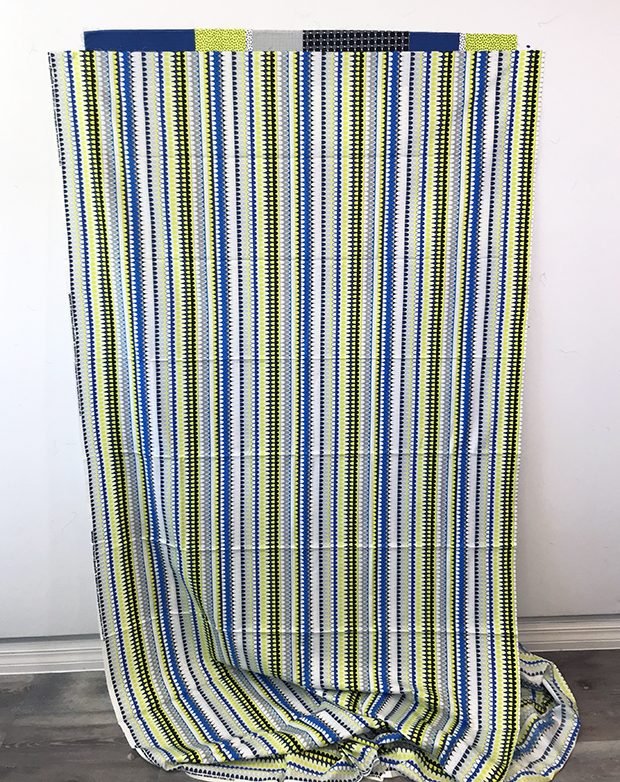
Below, you can see how I pieced the backing for the throw size in the Breeze Colorway: two 2-yard pieces of the blue Hourglass fabric with a horizontal seam in the middle. Don’t worry too much about the small wrinkles – those will get ironed out at the end once the layers are assembled.
I prefer to work with Hobbs batting on a roll so I’ll roll out just enough batting to cover the top plus a few inches, then cut if off the roll and trim off the extra after it’s all basted. I smooth out one layer at a time on my design wall: backing, then batting, then quilt top.
A long acrylic ruler is handy to smooth out each layer. I use a separate one just for basting, since it tends to get sticky from the basting spray.
Above is the Amethyst quilt after basting. I’ll trim off the extra batting and backing fabric so that there’s only about 1″ sticking out on all sides for quilting. That way the excess won’t accidentally get tucked under itself while quilting!!
The final step (not shown) is to iron the front and back of the basted quilt with a hot dry iron. This presses out any wrinkles and helps set the glue so things don’t shift while quilting.
Next week I’ll share some pics and videos the machine quilting I did for each quilt, so stay tuned!
I know that last week’s foundation paper pieced tutorial was quite intense, so this week I wanted to give you some extra time to finish sewing your blocks. Last week I shared the steps using the cool colorway of my Abstract Garden fabric. Now here are more pics of the warm colorway:
Remember to piece as many blocks as you need for the size you are making. The primrose block is constructed from 3 units per block: the A & B foundation sections (full sized paper template to photocopy is included in the quilt pattern), and the corner triangle unit:
Once all 3 pieces are sewn, then you can trim up the block to the proper size, including the seam allowances. When you tear off the paper is up to you. Some people like to tear off the paper once each block is sewn; others like to wait until the entire quilt top is sewn before removing the paper. But if you use a shorter stitch length while sewing, that will perforate the paper, making it easier to remove.
Design Layout
Due to space constraints, the Pieced Primrose quilt pattern includes one basic layout, made by sewing 4 blocks together into one larger Primrose block. If you choose to make this layout, be sure to rotate 4 blocks so that they look like this, then make the number of larger blocks listed in the pattern:
Here’s the same layout for the cool colorway blocks:
Alternate Layouts
I had fun rotating the blocks in EQ8 software and coming up with these different layouts. They are all based on the smaller throw size, but can be adapted to the larger size, too:
To make any of the layouts above, simple rotate each individual block to create the new design. This is just a small sampling of what you can do, and some designs read busier than others. But once you blocks are finished, spend time playin around with different rotations of the blocks and take pictures with your phone when you find one or two that you like!
This Week’s Homework:
Finish sewing all of your blocks and then assemble them into larger 4 block units if you get that far. Next week will sew all the blocks together and add borders to complete the quilt top. Just remember, work at your own pace and come back to any of the blog posts you need for a refresher as you make your quilt.
Welcome back to part 2 of Terrace Tiles quilts from my Gridwork fabric line. I’m excited to let you know that I’m now offering kits to make all 3 colorways of this quilt in two different sizes each!
Click here to catch up on part 1 and think of this as a shortened version of my quilt alongs. You can bookmark this post and come back to it when you are ready to make YOUR version of Terrace Tiles.
The quilt blocks for Terrace Tiles sew up really fast! This is by far one of the quickest quilts you can make, which was good for me since I sewed all 3 of them in a hurry for quilt market last fall. I could have just made one version of the quilt, but I really wanted to showcase all 3 colorways of my Gridwork fabric line. So 3 quilts it is!!
For the making of this quilt I wanted to share piecing tips just as much as quilting tips. Because I make all of my own quits from start to finish, the piecing can really impact the quilting and I like to make things as easy as possible so I can enjoy the entire process from start to finish.
When you use a smaller stitch length it does two things: (1) It secures the seams so that there’s less of a chance that the edges will split apart while handling. (2) It also helps hide the thread so that you don’t see it poking through the seams. The default stitch length on my BERNINA is 2.5 so I turn the stitch length down to 2.0 whenever I’m piecing blocks for a quilt.
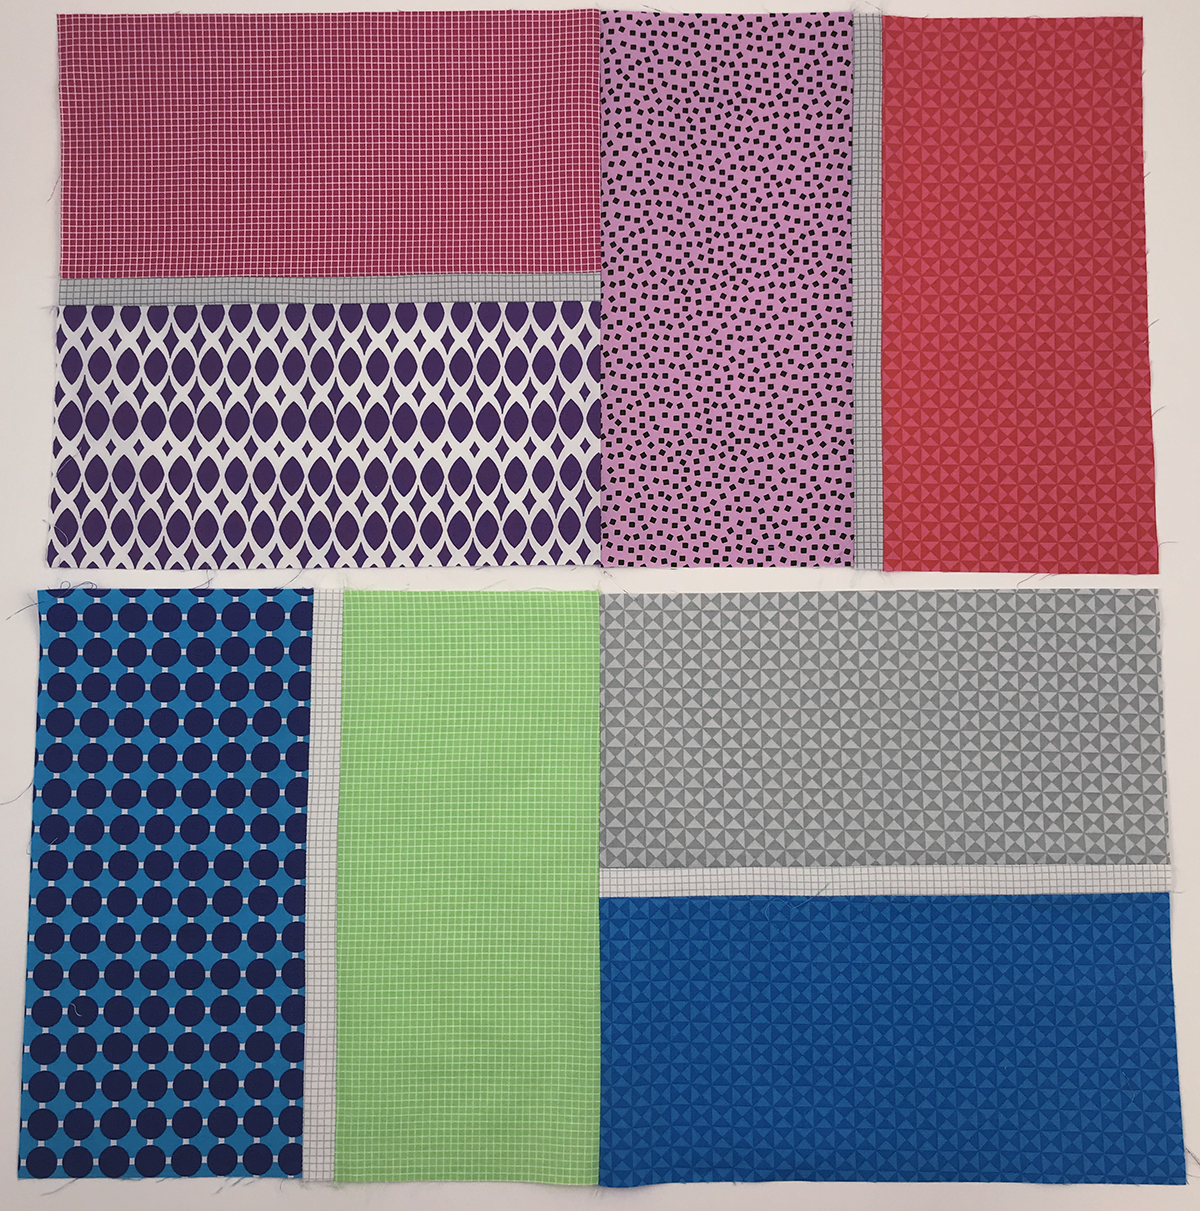
Pairing up fabrics in each block is half the fun!!
Tip #2 Sew with the Long Skinny Strip on Top
Any time you are working with pieces that are longer than a few inches, they have a chance to bow or warp out of shape as you stitch because of the action of your sewing machine and the feed dogs. So if you can sew each set of units in opposite directions, this will help compensate and ensure that your blocks stay nice and square.
An easy way to automatically switch sewing directions is to sew with the skinny center rectangle on top when you are making the Terrace Tiles blocks. It’s also easier to handle the cut pieces this way, too.
Seams pressed open = flatter blocks!!
Tip #3 Press Seams Open
I press the seams open so that the blocks will lie as flat as possible. This is super important especially when quilting on a home sewing machine because it will help eliminate friction and drag on the quilt while shoving it through the machine.
The less bulky you make your seam joins, the easier time you’ll have when your machine easily glides over the block intersections. And contrary to popular myth, you CAN still stitch in the ditch. In fact, it’s much easier to actually stay in the ditch and see what you are doing when your seams are pressed open.
The more fun prints, the better!!
Tip #4 Sew Blocks into Larger Chunks
To keep things random, I like to sew all of the blocks together into pairs and chain piece as I go. The only rule is I try to make sure each pair has 4 different fabrics. I like to press my seams as I sew each pair, so there’s less to press later and everything stays nice, flat and square.
Pairs of blocks from the Amethyst and Breeze colorways.
Once all the pairs are sewn, you can choose to sew them into rows, or sew together into sets of 4 and then into larger rows. Because this is supposed to be a scrappy looking quilt, I don’t overthink it. I try to not have the same fabrics touch each other, but there will usually be a repeat of the print in the larger 4 patch design and that’s ok with me.
Citron Terrace Tiles Blocks
Tip #5 Pin and press for success!
I press every seam as I go, and pin generously whenever I’m sewing together two pieces of fabric. It helps prevent the pieces from stretching and I especially pin where the seams come together. I get better joins this way, and of course I remove the pins as I sew.
Below is how I pin: with the pins perpendicular to the fabric. I pin next to each intersection on both sides rather than right where it’s sewn (so it doesn’t split apart). This is also the orientation in which I feed the blocks under the machine:
In the next post, I’ll show how I assembled these finished blocks into the quilt tops and prepped the quilts for machine quilting, so stay tuned! And honestly, it’s not much more work to make 3 quilts than it is to make 1 and I enjoy every step of it!