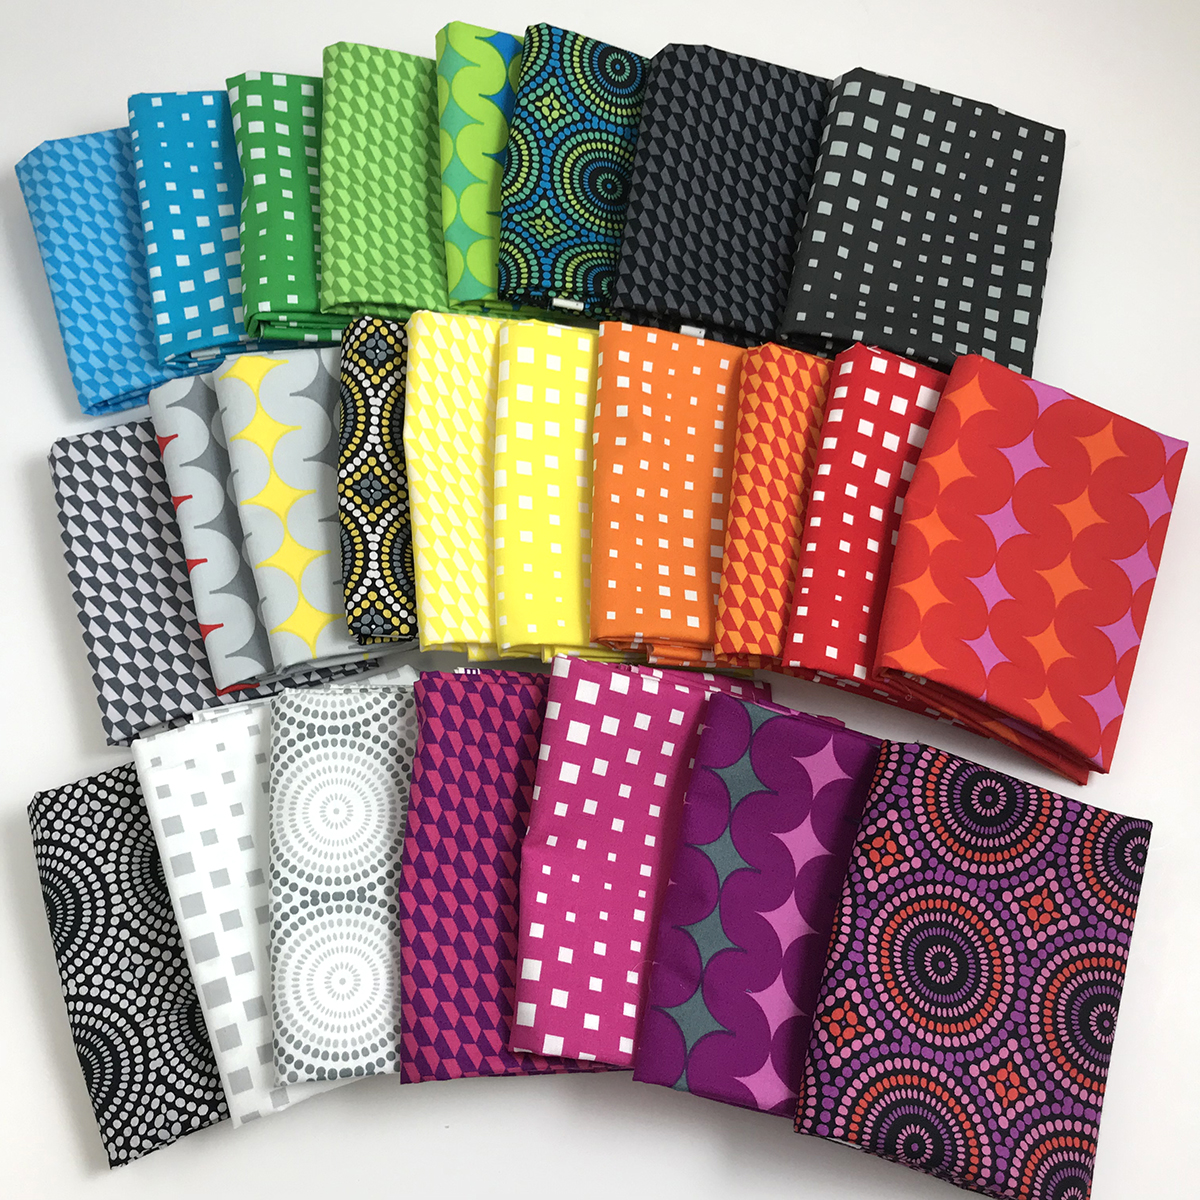
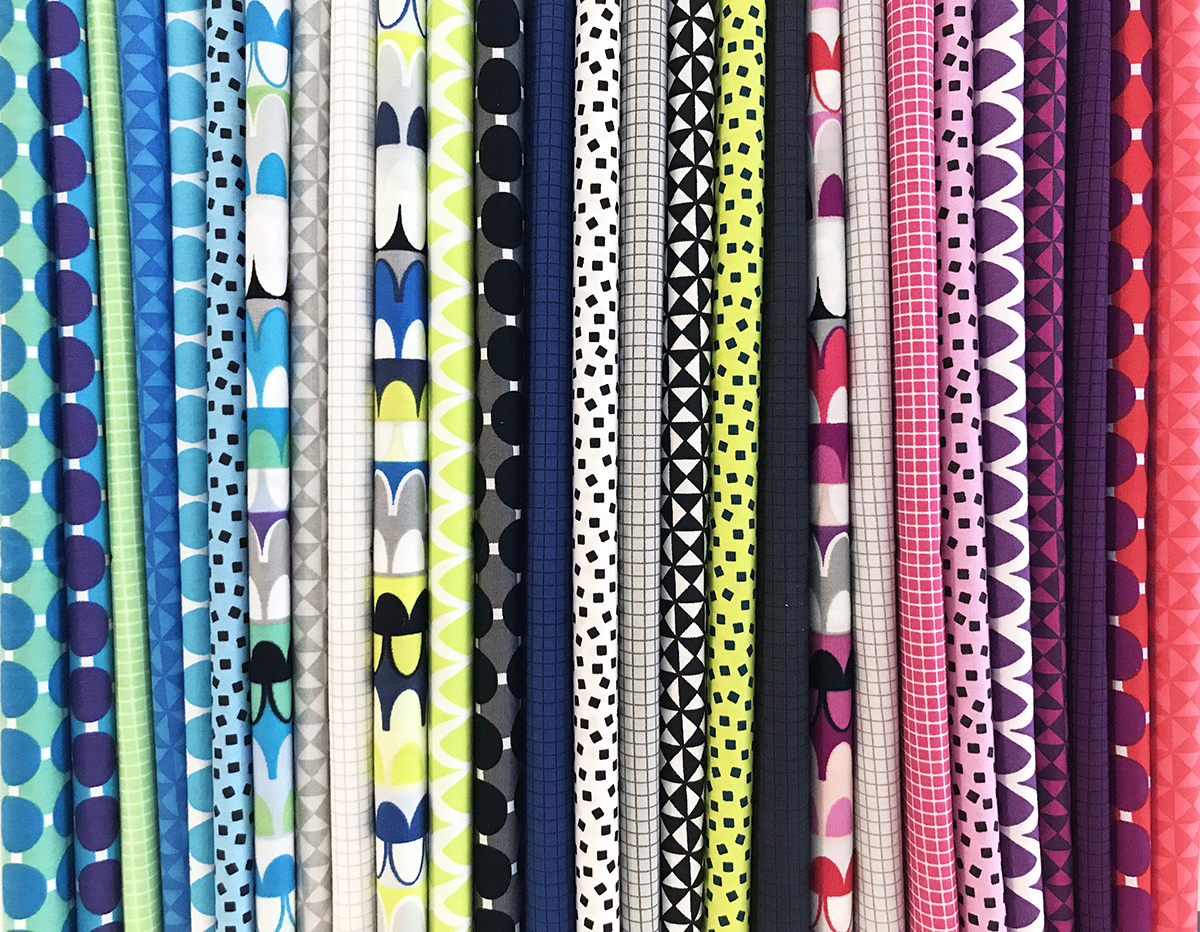
With all of the holiday preparations at this time of year, I’m also getting excited for my best gift of the year – my new fabric line Gridwork from Benartex, which should be arriving at shops starting in January of next year. For your viewing pleasure I’ve included pretty pics of all 3 fabrics by colorway below:
The Amethyst colorway includes 9 coordinated fabrics in gray, lilac, pink and plum.
The Breeze colorway includes 9 coordinated fabrics in lime, cloud, aqua and teal.
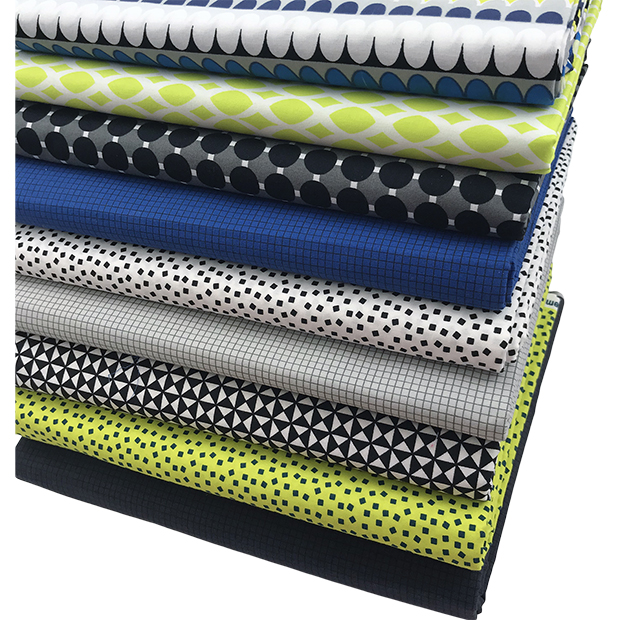
The Citron colorway includes 9 coordinated fabrics in Black, White, Navy, & Citron
Of course, I always encourage you to ask for my fabrics from your favorite local quilt shop first. And if you ARE a quilt shop who’s reading this, feel free to use these images in your marketing efforts.
However, if you don’t have a shop nearby, you can also preorder Gridwork directly from me while supplies last. I like to keep a healthy stock of all my fabric lines one hand, not only for my own use, but also to share with others so it gets into as many hands as possible.
You can preorder your favorite colorway from me in your choice of 9 fat quarters, half yards, or full yard increments.
Nothing beats seeing a project “in the wild” made from one of my fabric lines. And I escpecially love seeing how well it plays with other fabrics, too. Be sure to share your makes on social media using #gridworkfabric. Whenever I see your projects made from my fabric or patterns, it totally makes my day!!
Before the issue went to print, APQ magazine contacted me and asked if I’d be willing to offer kits for this quilt since it’s so eye catching. I immediately said yes and they were kind enough to mention my fabric and include a link to my shop in the magazine pattern.
Here’s a photo of the magazine cover, so you know which issue has the pattern:
It’s no secret that I simply adore all of Heather Black’s quilt designs. She really makes my fabric look good, don’t you think??
Of course I’m biased because it’s using my fabric, but I just love the bold design and energy in this quilt! I think Heather did a fabulous job with color placement, and I love how she fussy cut the Mosaic Dots print to create a frame in the borders. Heather is an expert with modern pieced curved designs, and I can’t wait to see what she comes up with next!
I just love hosting quilt alongs, and better yet, I love it when you all quilt along with me! Here’s all the info you need to get started on my Paper Pieced Primrose Quilt Along:
Paper Pieced Primrose Kits Available
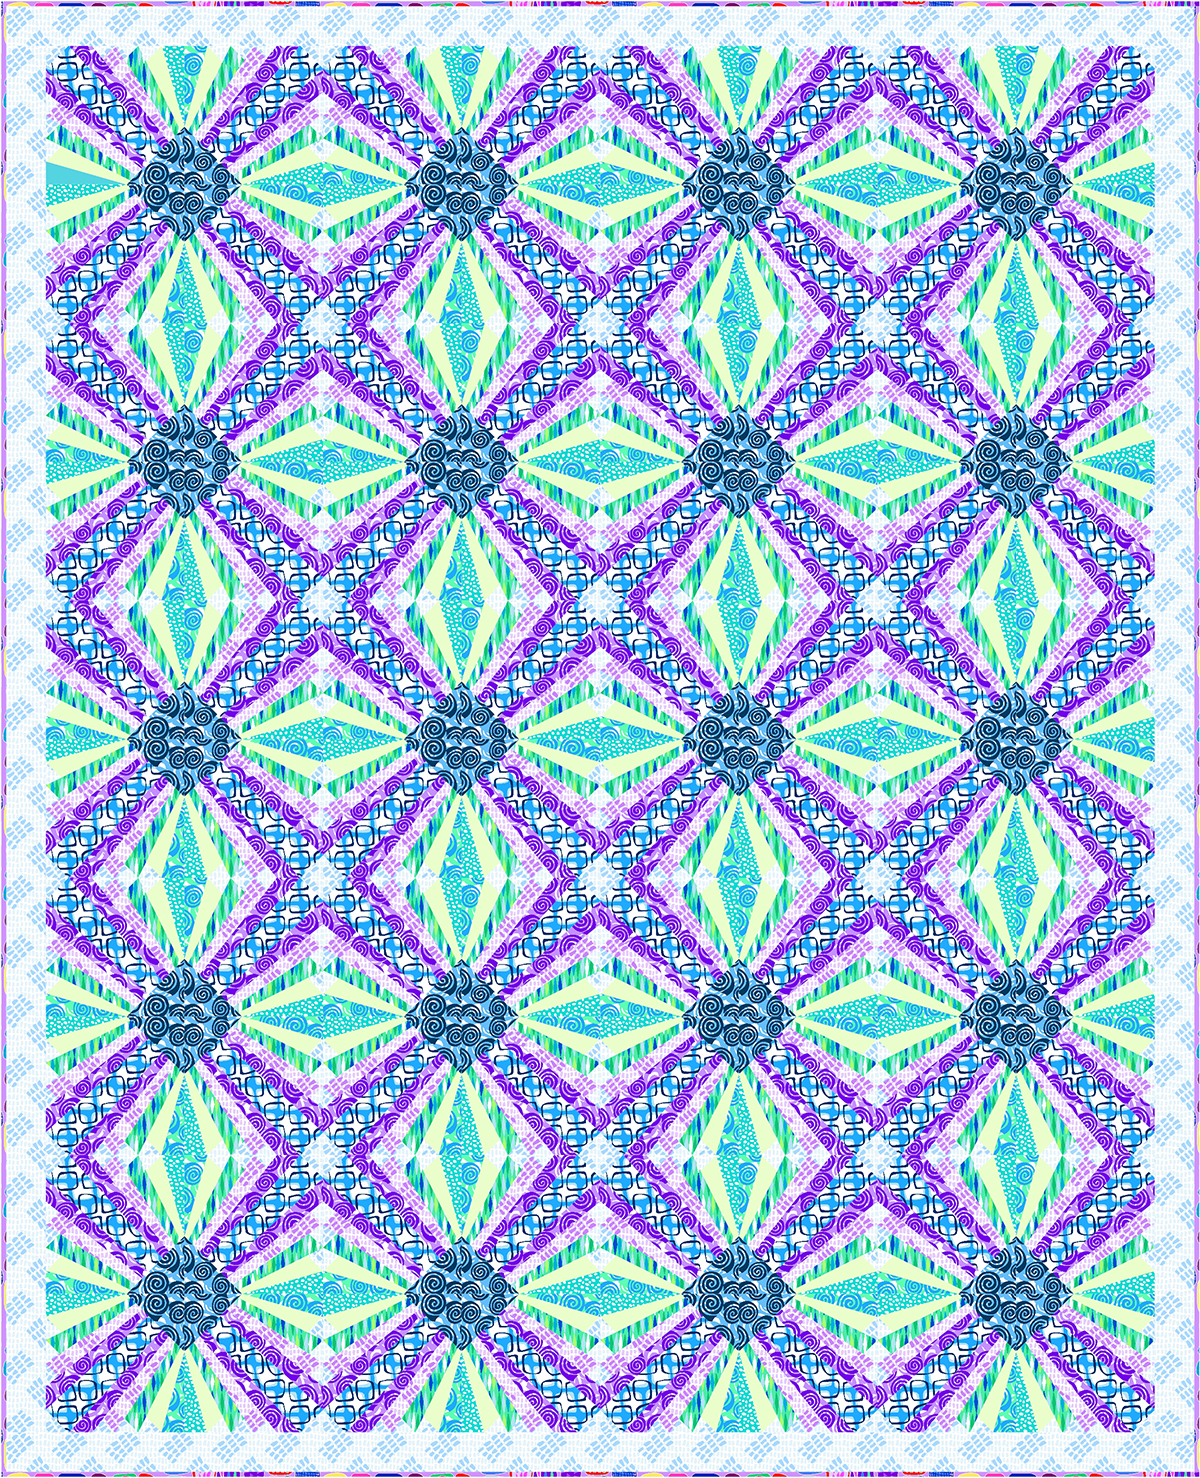
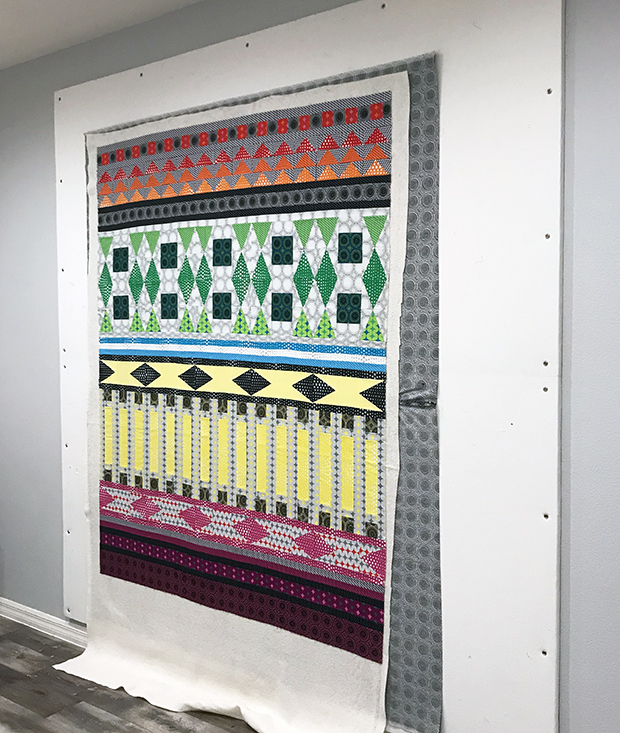
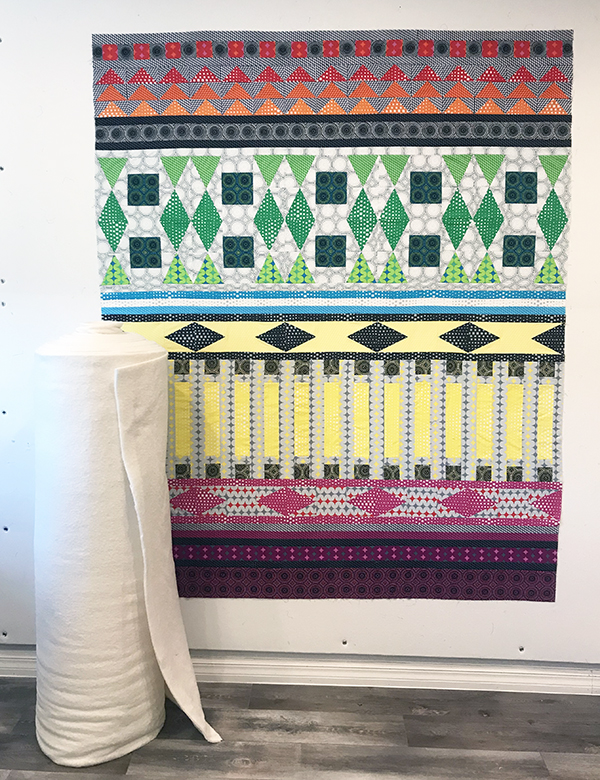
The image above shows the 35″ x 35″ wall size in two colorways, made from 16 paper pieced blocks. The images below show the 68″ x 84″ throw size in both colors, made from 80 paper pieced blocks.
For your convenience, I’m offering kits in both colorways, and both sizes – so you can pick and choose what works best for you! All four versions are made from my Abstract Garden fabric for Benartex. And for one week only, you can save 10% off the kit when you enter code KIT at checkout!
Of course you can make this quilt using any fabrics you like! Part of the fun will be seeing all of the different variations! Click the quilt pattern image below to enlarge the materials list:
If you want to follow along, we’ll make this entire quilt from start to finish in just 8 weeks!!
Click the links below for each step of the quilt along:
So don’t worry if you’ve never tried foundation paper piecing before. I’m going to walk you through every step of the process with detailed photos and explanations. The pattern includes the master foundation paper pieced template that you can photo copy as many times as you’d like. It will be a fun new adventure for a new year!
If you can cut the shapes above, you’ll have no problem foundation paper piecing – I promise!! Abstract Garden fabric shown is for BOTH colorways of Pieced Primrose.
So who’s with me? All you have to do is follow my blog each week! You can subscribe to my blog by entering your email in the box in the sidebar (either on the right if you are viewing on a laptop, or scroll all the way down to the bottom on your phone). You can also use the hashtag #piecedprimrosequilt on instagram so I can see what you are making!
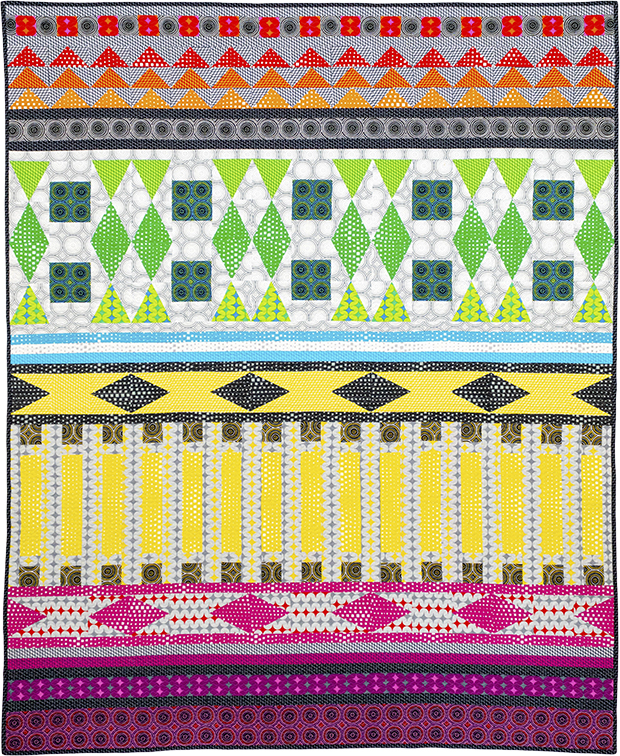
Earlier this week, I shared my Infrastructure quilt finish, along with links to all of the quilt along tutorials. Today I’m back with more inspiring versions of this quilt made by others. I love to see the same design made up in different fabric, don’t you??
My version of Infrastructure quilt made with Geo Pop fabric.
Heather Black’s Version Made from Solids
Heather Black originally designed this quilt for me to show off my Geo Pop fabric line. But then she made her own version using Benartex Superior Solids. The color placement is basically the same, but the solids really allow her amazing machine quilting to shine!
Whenever I do a quilt along, I always emphasize that I want everyone to work at their own pace. But it was really fun to follow two of the participants on Instagram as they kept up each and every week. Check out their beautiful versions of Infrastructure below:
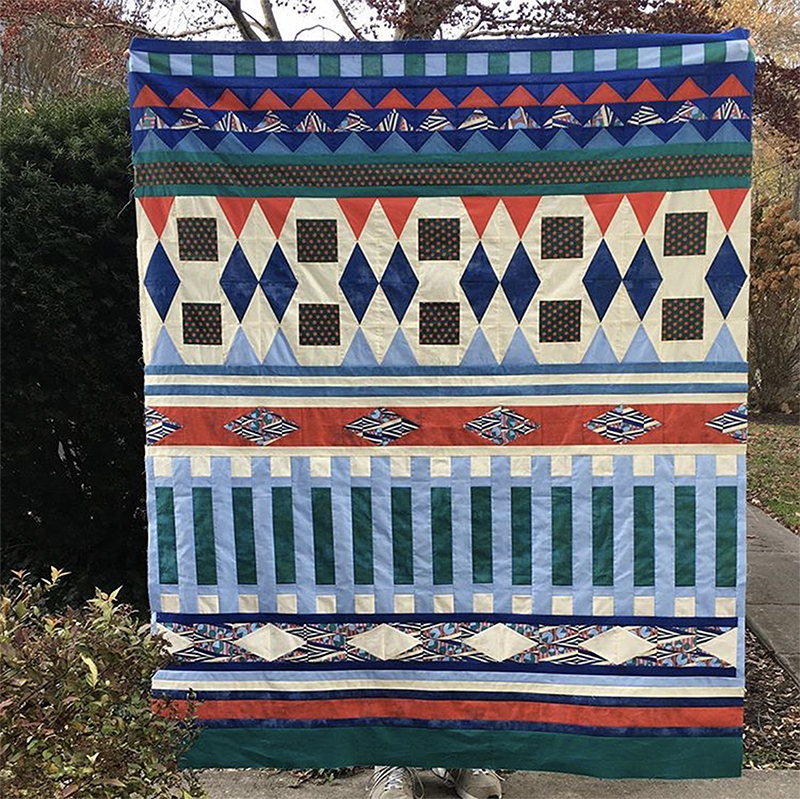
This lovely quilt top was made and shared by Margaret Fleisher on Instagram. I love her color choices and clever use of fabric. Now I’m excited to see how she quilts it!
If these have inspired you to make more quilts in the new year, be sure to check out my quilt along web page. It’s a roundup of all of the quilt alongs I’ve done so far. You may just find the perfect quilt you’ve been looking for!
I had the most amazing time making my Infrastructure quilt and sharing each step of the process with you. I’m excited to share more pics of the finished quilt along with links to all of the previous quilt along tutorials and videos. I hope it inspires you to make your own version!
I want to continue to be a cheerleader for “Start to Finish” quilting. Although I know that everyone has their favorite part of the quilt making process, I’m happy to guide you through the entire journey.
Happy Thanksgiving everyone! This officially kicks off the holiday shopping season, so I figured I’d join the crowd of business owners and get it on the Black Friday frenzy! From now through the end of the month, you can save 20% off all of my fabric lines by the yard, when you use code TURKEY during checkout at shop.ChristaQuilts.com.
It was such a thrill when Benartex contacted me three years ago and invited me to become one of their fabric designers for their Contempo division which features modern and contemporary prints. They told me they loved my work and would love for me to infuse my funky geometric style into fun colorful fabric. Modern Marks was the result and it’s been a wild ride ever since!!
I still have a bit left of each of the 26 Modern Marks fabrics, and most are now out of print. As you can see below, all of my groups mix and match and are a riot of color and texture!
I continued to fill out the rainbow in my fabric stash with this line, and decided I needed not one, but two background grays to go with them. Because Benartex reprints hot selling fabrics, the grays have been printed over, and over, and over again. They are literally, the “perfect” neutrals!!
Fun fact: most people mistake the word Fandangle with “Fandango“, but hey have two completely different meanings. Fandango is the dance, but Fandangle means decorative ornamentation – which is why I included fun fabric names like Beaded Curtain, Triangle Trinkets, and Baubles and Bits. Sometimes naming the fabrics is as much fun as designing them!!
With this group, you can separate them into warm and cool, but as you can see above, each print looks great with every other piece in the line. I have yardage of all 20 bolts of Fandangle available, and with this special deal, you can stock up on your faves!!
Can we say purple?? With each line I create, I want it to stand on its own as a complete color story. But, I love adding new things that will mix and match with what came prior. In Abstract Garden, I made sure to include purple, plus four great pastels that would serve as light, or “low volume” backgrounds.
Abstract Garden consists of 20 prints, many of which are loosely based on some of my favorite machine quilting motifs. The name is a tongue in cheek nod to the fact that I can’t really garden, OR draw floral motifs. Be sure to check out the signature print of the line, “Raised Beds.” It’s little plots of my most favorite geometric shapes!!
With four fabric collections under my belt, I decided I really needed a line of modern basics. This is my largest line yet at 25 pieces, but with only 4 different prints. I’m thrilled that I was able to include more neutrals – plenty of black, white, and gray in this group to go along with the bright saturated colors.
With Geo Pop, you can have fun fussy cutting the geometric stripe, and can create some really cool effects with the eye catching Mosaic Dots print.
Shop, Save, and Share!!
For your viewing pleasure, here’s my stash of all four collections that I’m offering for sale by the yard. I keep these in my overflow fabric room, I mean guest room!!
When you create with my fabrics, be sure to send me pics or tag me on social media using @christaquilts or #modernmarksfabric #fandanglefabric #abstractgardenfabric and #geopopfabric. I absolutely love to see what you create!!
Don’t forget to use code TURKEY at checkout to save 20%! Shipping is a flat $5 to the US, and I’m happy to refund excess International shipping charges, too!!
I love it when I see my fabrics popping up at quilt shops all over the country (and the world).
Each season I get an updated list from Benartex of who carries my current fabric and I’m happy to share it with you. Keep in mind this doesn’t include international shops, or those who purchase from a distributor. No does it include those who have the fabric on order but haven’t yet received it. But at least it gives you a start at finding out where to buy. If you know of any shops NOT on this list, please let me know and I’ll be glad to add them!
Geo Pop is my 4th fabric line, with 25 geometric skus in bright rainbow colors.
Geo Pop Shops!
Click the links below to go to their site or contact them for more info:
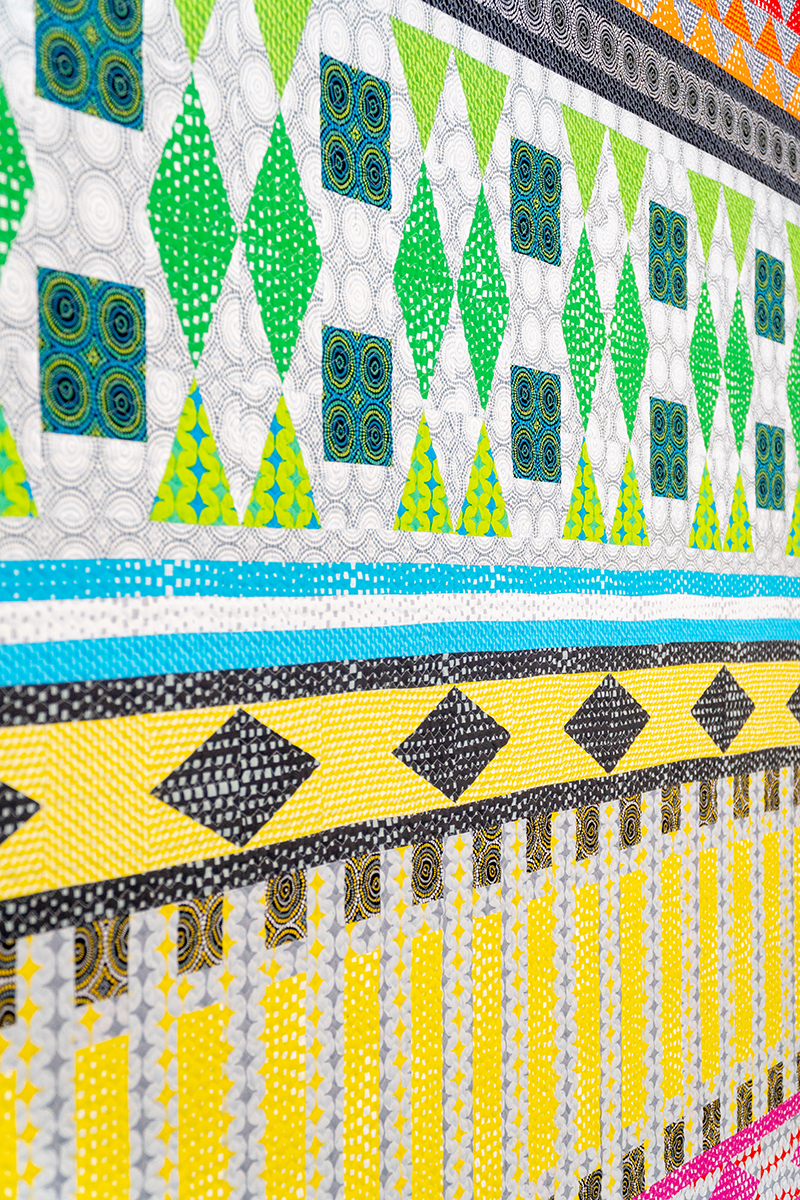
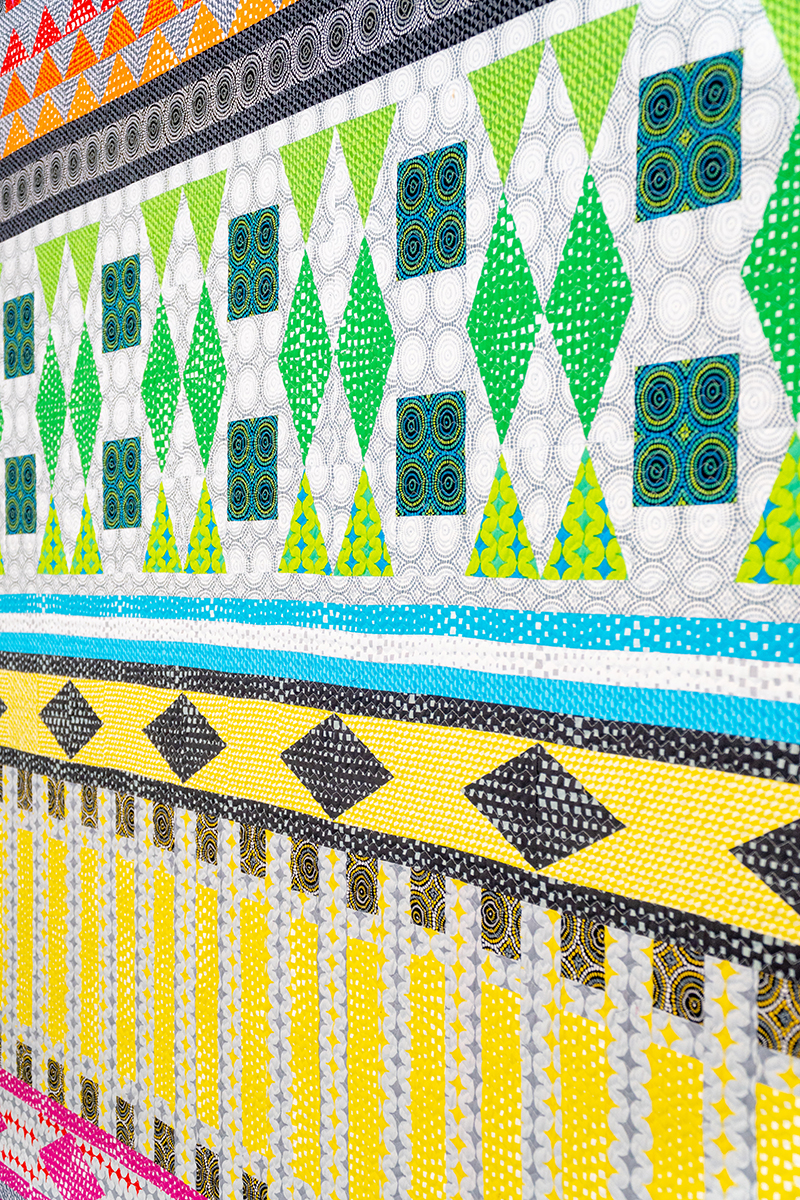
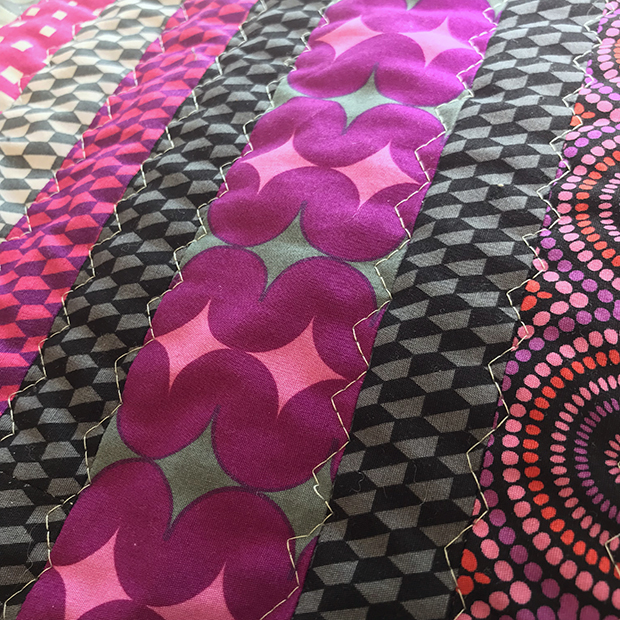
And now we get to my favorite part of making a quilt – machine quilting!!! There are so many different ways to quilt this quilt. Heather Black did an amazing job custom quilting hers, and I took the opposite approach with one of the simplest designs you can do – decorative machine stitching.
Infrastructure Machine Quilting Detail Using a Decorative Stitch
So the first thing to do is choose the thread you’d like to quilt with. I piece AND quilt all of my quilts using Aurifil, 50 weight, 100% cotton thread from my 3 thread collections. It’s thin, yet strong and blends into my quilts so all you see is the yummy texture. I use leftover bobbins for piecing my next quilt and I never have to worry about which bobbin matches which spool since they are all the same weight!
I like to use the same color thread in top and bobbin so that I don’t get “pokies” on my quilt – those little dots of thread that appear when your tension is the tiniest bit off and you are using highly contrasting thread.
I used Aurifil #5007 light gray/blue from my Neutrals thread box. It’s one of my favorite go-to neutrals because it blends with nearly every color. When I’m doing an allover edge-to-edge quilting design, I don’t want to have to stop and switch thread colors while I’m quilting.
Because the spools hold so much thread on them, it took me less than one spool to quilt the entire quilt, including the front and back.
Make a Quilting Plan
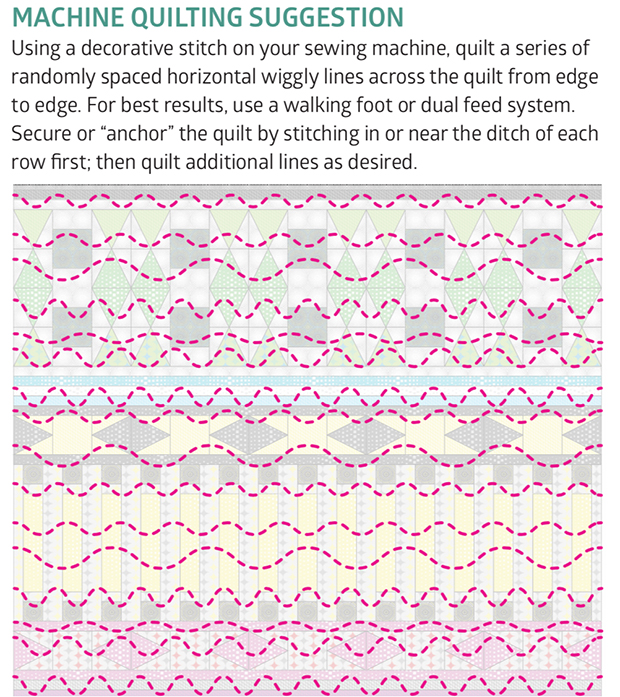
I love figuring out HOW I’m going to quilt ahead of time, so I don’t have to think too much. I will usually print out a copy of the quilt top from the pattern (you can photocopy the pattern cover for personal use, OR you can take a picture of your finished quilt top). Then I draw all over it until I come up with something I like. I include quilting suggestions in ALL of my quilt patterns to help you out with each quilt you make.
Above is the illustration that’s included in my Infrastructure Quilt Pattern. Here’s the basic idea: choose a decorative stitch on your sewing machine and quilt a series of lines across the quilt from one side to the other.
Make them as light or dense as you like and use my “divide and conquer” method: quilt one set of lines “near” the ditch instead of IN the ditch for each row. Then go back and quilt additional passes across the quilt, shrinking up the open spaces until the entire area is filled.
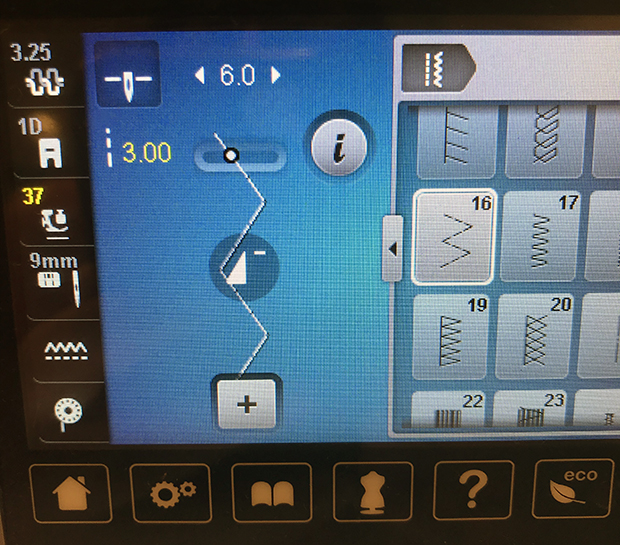
You can use ANY decorative stitch on you sewing machine. Play around with length and width settings until you find something you like, and stitch on a practice sample before you quilt on the real thing. Here’s a picture of the settings I chose on my machine, a BERINA 770 QE:
I’m using decorative stitch #16 which is known as a running stitch or a broken zig-zag. It creates several stitches each time it zigs and zags, so you can make it bigger than the default settings and it still looks great! I adjusted my width to 6.0 and my length to 3.0 because I like the way it looks. Don’t forget to use a zig-zag needle plate so you don’t break a needle when it moves back and forth!!
The Quilting
Here are some beauty shots of the decorative stitch quilting in process. I made sure to NOT try to line up the quilting lines perfectly because I love a more organic look. The more quilting I did, the more beautiful texture it added to the quilt and the more the thread blended in. After all, the best way to hide imperfect stitches is to surround them with MORE imperfect stitches!!
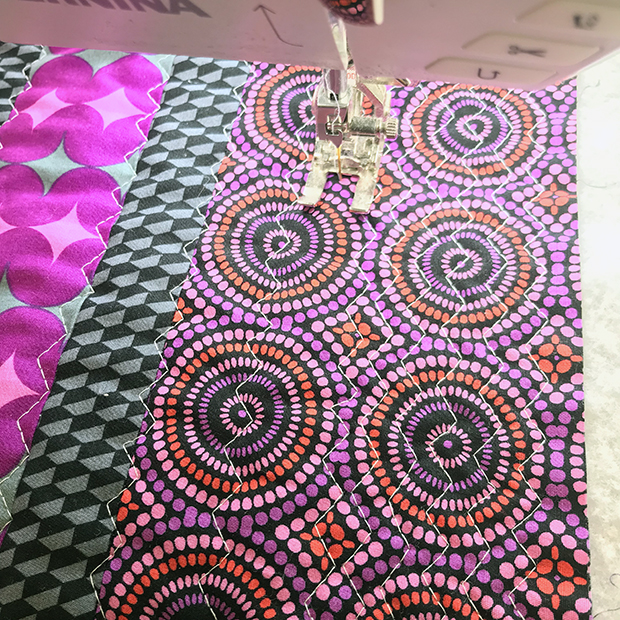
Here’s what it looks like when I’m stitching “near” the ditch in each row. You can see all the imperfections up close, but fortunately they get hidden when more quilting is added.
I’m filling in the spaces between the first pass with randomly spaced lines. I’m using the 20D foot on my BERNINA with the integrated dual feed. It works just like a walking foot and I don’t have to mark anything. I’m using the edge of the foot as a guide for some of the lines.
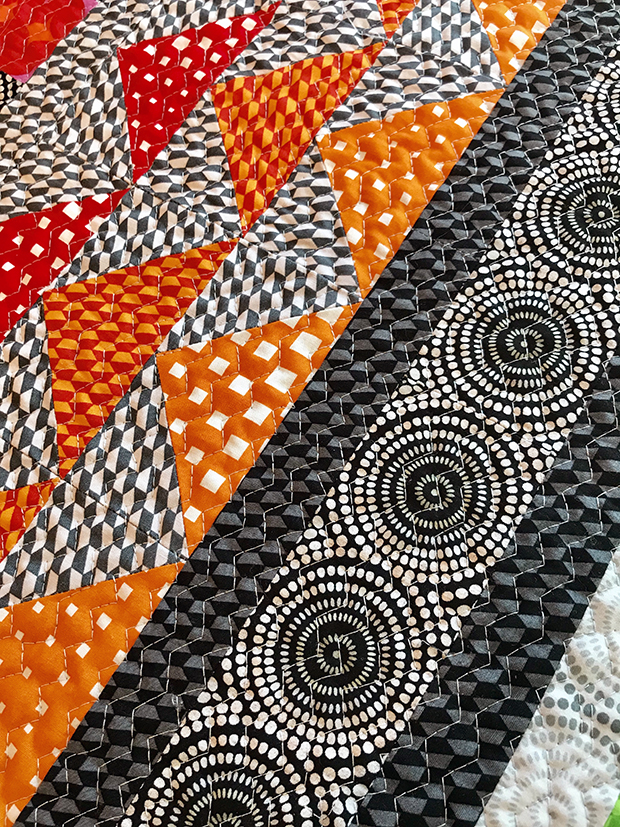
What this section looks like when it’s completely filled in.
None of the lines match up and some are a bit irregular – I love this look!!
Another section complete. Look how well the stitching blends in to the quilt!
This is one of my favorite designs because it adds great texture to ANY quilt!
See it In Action
Here’s my latest YouTube video, showing me quilting this decorative stitch on my quilt. It did take a few hours to accomplish, but I just worked on it a few minutes at a time over several days. It’s my joy and my zen when I get to do mindless quilting like this, and once you let go of perfection, it’s really quite fun!
Next week we’ll finish up with machine binding, including another video tutorial – so stay tuned!!
This Week’s Giveaway & Heather’s Version
Heather did some amazing custom quilting on her computerized long arm machine. Pop over to her blog at Quiltachussetts for more about how she chose her designs.
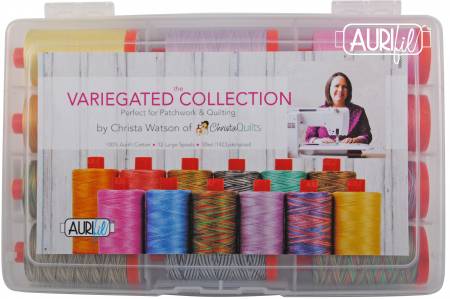
While you are there be sure to enter the giveaway on Heather’s blog. One lucky winner will receive one box of my Variegated thread collection, courtesy of Aurifl!! How cool is that???
How is your Infrastructure quilt coming along? Just remember, you can work at your own pace and if you are new, you can start this quilt any time! This week is quilt top assembly plus a complete basting video on YouTube. Keep reading for more….
Tips for Quilt Top Assembly
Once all 9 rows of Infrastructure have been sewn, it’s time to sew them together. They may look a little wavy, but if you sew each section in opposite directions, that will help eliminate some of the waviness.
If your rows are not all the same size, you can add coping strips, trim off some of the excess, or use lots of pins to ease in any fullness. Always sew with a “baggy bottom” which means sew with the longer strip on bottom and the feed dogs will help compensate. If needed, you can always go back and increase or decrease the seam allowance of some of the rows to get them all the same size.
Once the quilt top is sewn together, you want to take a “victory lap!” Sew about 1/8″ from the perimeter on both sides of the quilt to secure the edge seams from splitting open. This isn’t necessary for the top and bottom of the quilt since those are long strips of fabric without seams. When your top is finished, give it a final pressing and you are ready to baste!
Basting the Quilt – Quick Overview
I baste using my design wall and 505 basting spray. I make sure my batting and batting are bigger than my quilt top and I trim away some of excess after it’s been basted. I spray the top and backing outside separately, then assemble all the layers on my design wall, taking care to smooth each layer as I go.
Once everything looks nice and flat, I’ll roughly trim the edges so that only and inch or two remain around all 4 sides. I cut off as much extra as I can to prevent it from tucking under the back and quilting the quilt to itself!!
The final basting step is to iron the quilt on both sides to set the glue and smooth everything out one final time.
Full length Basting Tutorial on YouTube
Here’s the complete step-by-step basting process. The total video is just under 7 minutes because I’ve sped it up in several parts so that you don’t have to watch it in real time. In reality it still didn’t take very long – only about 45 minutes from start to finish to baste my quilt.
GIVEAWAY & HEATHER’S SOLIDS VERSION
Pop over to Heather Black’s blog at Quiltachusetts to see her week 10 post, made from Benartex Superior Solids. While you are there, be sure to enter the giveaway. One lucky winner will receive some Hobbs batting – which is the same batting I used to make my quilt. My favorites are the cotton/wool blend or the 80/20 cotton poly. It’s easy to work with and makes the quilt soft and cuddly!!
Both Heather and I would love to see how you are progressing, even if you make this quilt long after the quilt along is over! Here are all the ways you can share with us:
Leave a comment here on the blog, and add a link to anyplace you want to post pics
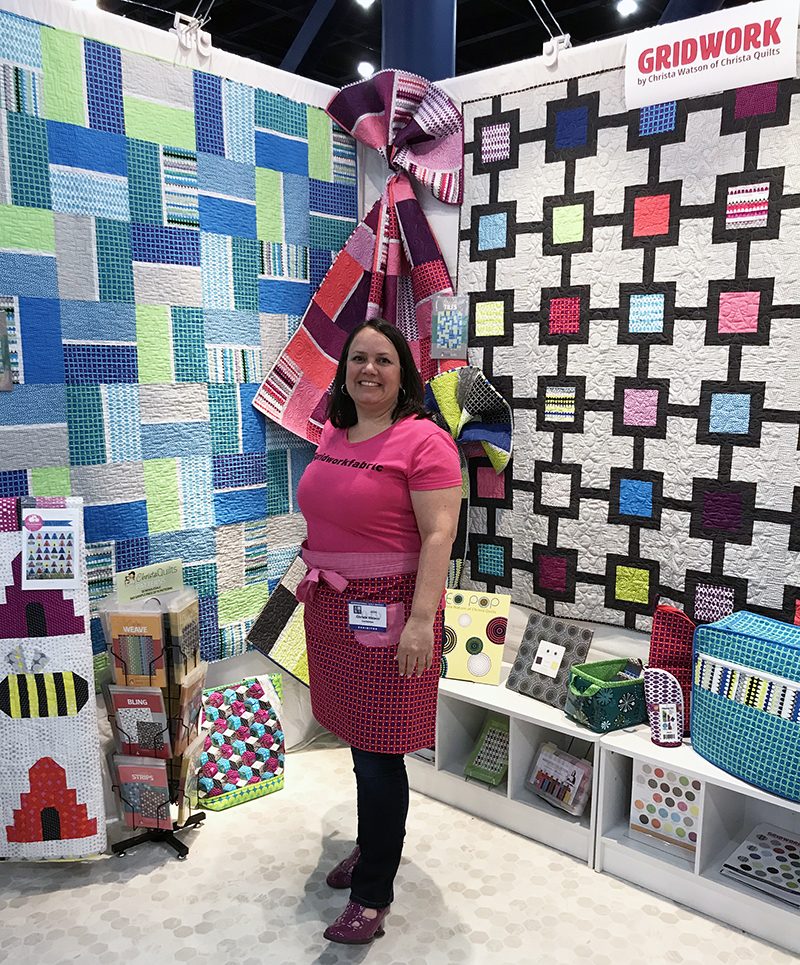
I had an amazing time at fall quilt market last month. This is the semi-annual trade show where I get to debut my new fabric and patterns. I was able to share my newest fabric line, Gridwork which is shipping to shops in January of next year.
Here’s a closeup of the Gridwork fabrics displayed in my booth.
The Shoes!!! And Matching Outfits!!!
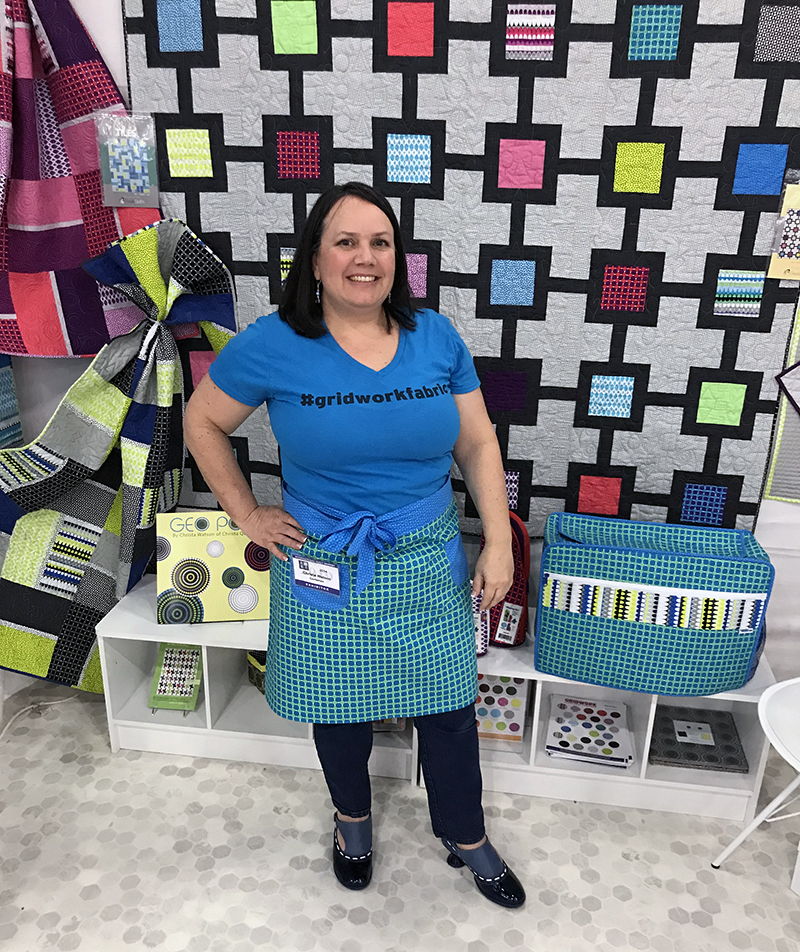
Each time I have a booth, I love creating something fun to wear from my fabrics. This year, I made 4 aprons and paired them up with fun pairs of Fluevog shoes. Each market I purchase a new pair that matches my fabric which is always a great excuse for shopping, right?
Day 1: I designed the Citron colorway of Gridwork to match my fave pair of shoes!!
Day 2: It’s so fun to match my outfit to my quilts!!
Day 3: I bought the blue pair this season and they are sooo comfy!!
Day 4: here’s a closer look at the purple patent leather shoes I got to wear twice.
I paired up the aprons and shoes with a matching Tshirts that I had custom printed with #gridworkfabric on the front and #benartex on the back. I figured I was the best walking advertisement for my fabrics, right??
The People!
It’s always fun to meet up with new friends at quilt market and make new connections with quilt shops who carry my fabric, and designers who want to work with my fabric. But the highlight of working with Benartex has been getting to know the other fabric designers. All of our looks are so different, yet they complement each other very well!
We roped our fearless leader, Benartex president David Lochner into posing with us and he was such a good sport! A you can tell, we like to have a good time!!
Over the 3 years since I’ve been with Benartex, I’m especially grateful to learn from superstars like Eleanor Burns and Paula Nadlestern. These ladies have been my heroes since I began quilting over 20 years ago and I pinch myself that I get to call them my colleagues and friends!!
Paula Nadelstern and I shared some fun moments on the show floor when I gave her some Instagram posting tips. She repaid the favor by recommending me for some upcoming teaching events, so stay tuned for more!
Another highlight of the show was the Benartex company dinner in which I got to sit next to Eleanor Burns. She made my night when she complimented me on my energy level. This is high praise from the energetic queen of quilting!!
The Projects!!
It was fun to spot my fabrics in other booths. I love it when designers want to showcase my fabrics in their new patterns because that exposes my fabrics to their customers who may not have seen it yet. And in turn, I get to share some talented designers with you all!!
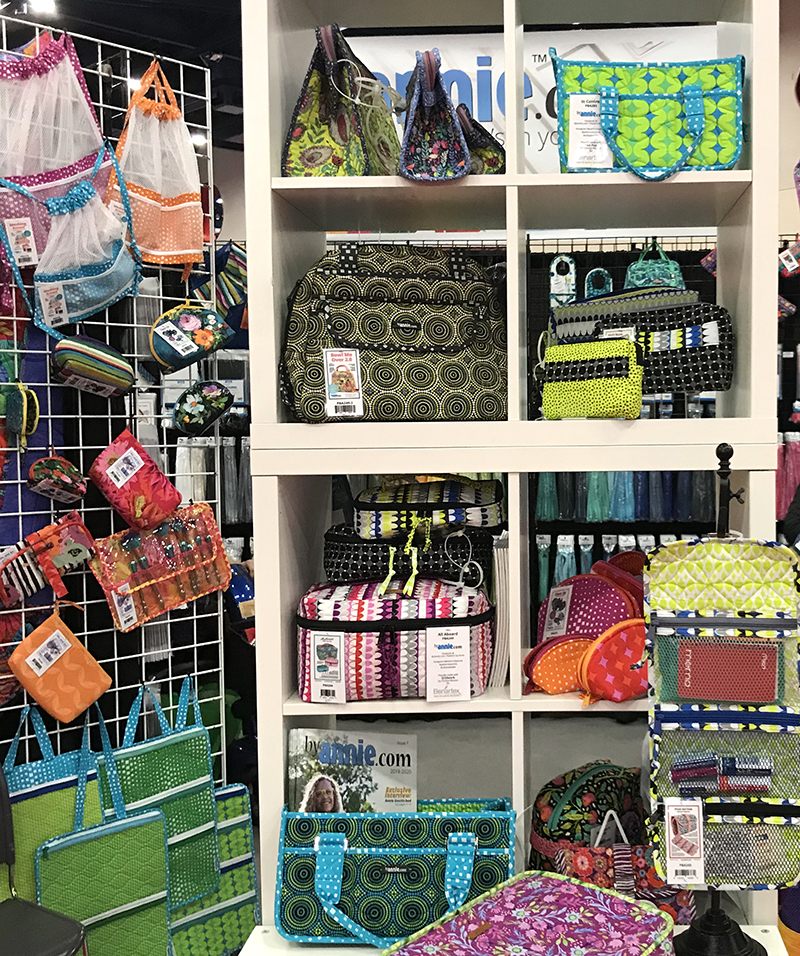
By Annie had a wonderful display of bags, containers and other projects made from both Gridwork and Geo Pop. It was fun to see how great they looked next to colorful fabrics from Tula Pink!
Brewer is one of the distributors that also carries my fabric and patterns for shops to purchase all in one spot. I was thrilled that they wanted to hang two of my quilts in their booth to promote my current patterns: Infrastructure and Color Weave. This is a great example showing how well my fabrics from different collections mix and match with each other.
My friends Lynn and Pam from The Stitch TV Show created a fun new pattern called Dapper, featuring colorful bowtie blocks made from Gridwork + solids. They are always a hoot to listen to online and in person!!
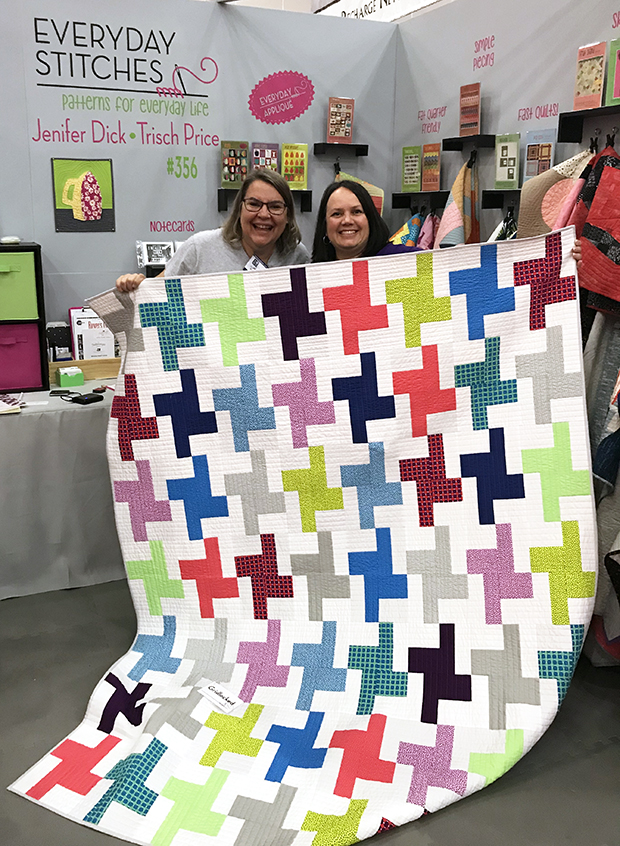
Jenifer Dick from Everyday Stitches also debuted a new fun pattern in her booth at quilt market using Gridwork fat quarters + background fabric. I love seeing how others use my prints!
I had a fabulous, though exhausting time and I’m thrilled with how many more shops are getting interested in my fabric. If you want to share the fabric love, be sure to ask your local quilt shop to order Gridwork (and any of my other fabrics) from their Benartex sales rep. Now it’s time to make more quilts!!


 Click here to get the Amethyst colorway in fat quarters, half yards, or full yard bundles.