Fabric Friday – Junior Jelly Rolls and Layer Cakes

It’s theΒ  first Fabric Friday of the year! Whoo hoo! That means it’s time to introduce you to some fun new precuts. Moda has recently introduced junior precuts – smaller bundles of precut strips and squares.

The Junior Layer Cakes include 20 squares, precut into a convenient 10″ x 10″ size. Right now they include the most popular bella solid colors, with all the squares being cut from the same fabric. These are so versatile for backgrounds, or to combine with other layer cake squares.

jrlayercakesClick here to view all Junior Layer Cakes.

The Junior Jelly Rolls include 20 precut 2 1/2″ x 42″ strips that are all the same color, also bella solids. I think if these are successful, Moda will probably expand to include the print strips.

jrjelly1jrjelly2


Click here to view all Junior Jelly Rolls.

Want to keep up with the latest and greatest new precuts?

Click here to sign up for my weekly newsletter.


Tutorial – How to Make a Hanging Sleeve for Your Quilt

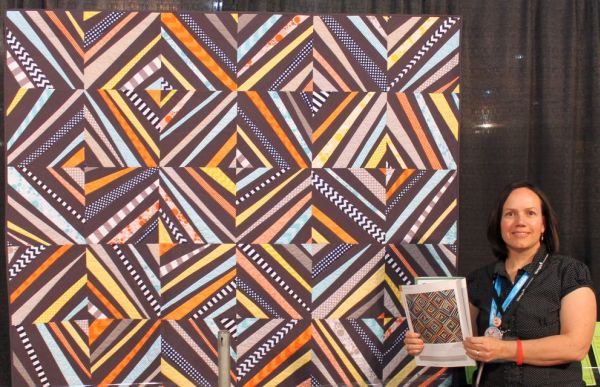
With quilt show season upon us, I thought I would share my favorite method for making a 4″ wide hanging sleeve. This is the quilt show standard, so that a pole can easily slide through the back. I made this sleeve for my Modern Logs quilt which will be hanging in the modern quilt category at Road to California later this month.

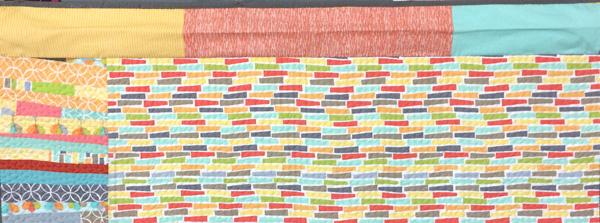
Hanging-Sleeve-FinishedMy Modern Logs backing was scrappy, so I made the hanging sleeve to match!

Materials Needed:

  • 8 1/2″ strip of fabric by the width of your quilt
  • Pins for hemming
  • Cotton thread to match your fabric
  • Hand sewing needle
  • Washable fabric glue (optional)

Step 1:

Measure the width of your quilt and cut a strip of fabric 8 1/2″ wide by 1 inch less than the width. Piece together additional strips if needed, for quilts wider than 42″. For example, my quilt measures 48″ wide so I will cut scrappy fabric strips, seam them together, and trim the strip to be 47″ long.

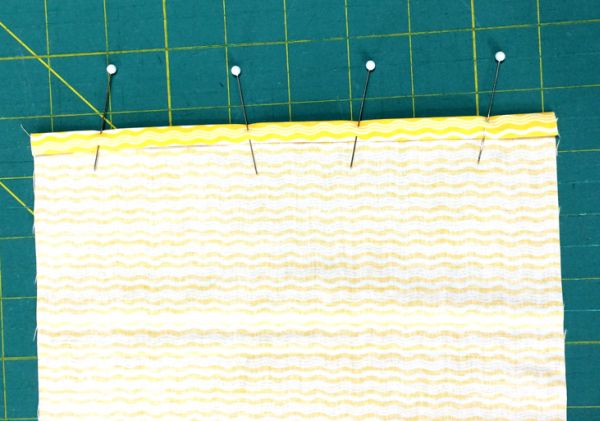
pinned-hemPin the hem in place – use a seam gauge if necessary to keep it even.

Step 2:

Hem both short sides by folding them over 1/4″ twice. You will be folding them over to the back side of the strip. Use a seam gauge if necessary to get consistent width folds. Pin to hold the folds and secure with stitching on both ends.

sewn-hemUse matching cotton thread so your seams will blend.

Step 3:

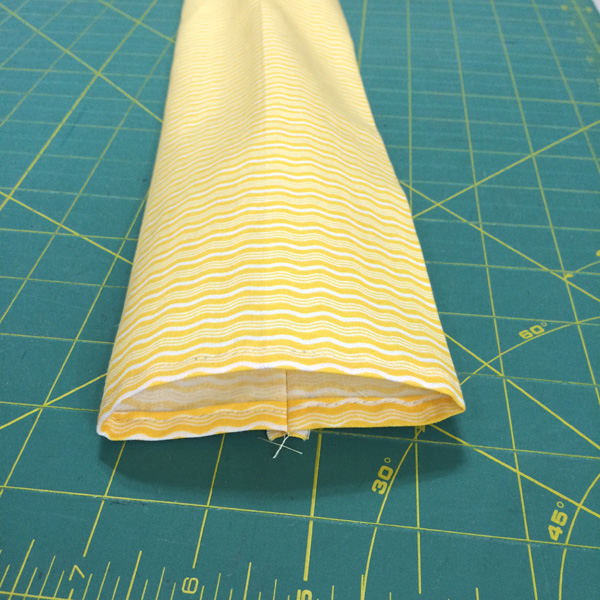
Fold the strip in half along the long side, wrong sides together. Press the fold on the bottom for a nice sharp crease.

folded-stripThe bottom of this picture is the folded, creased side. The top is the raw edge.

Step 4:

Open up the strip and bring each half of the strip together in the middle at the crease. Press the top and bottom edges to make a crease on both sides. These will be your guidelines for later.

creased-stripThe original crease is in the middle; you are adding 2 more creases.

Step 5:

Open up the strip and align the raw edges wrong sides together. Pin if needed and sew the raw edges along the length with 1/4″ seam. Backstitch at the beginning and end of the strip to secure.

pin-and-sew-the-tubePin and sew the raw edges together with 1/4″ seam allowance.

Step 6:

Wiggle the sleeve so that the seam is now in the middle of the sleeve and press the seam open. You will notice that the sleeve does not lie flat. This is correct – the extra room allows the quilt to hang nicely on the pole. Try to avoid pressing the sleeve flat (but if you do, it’s not the end of the world and it will still work).

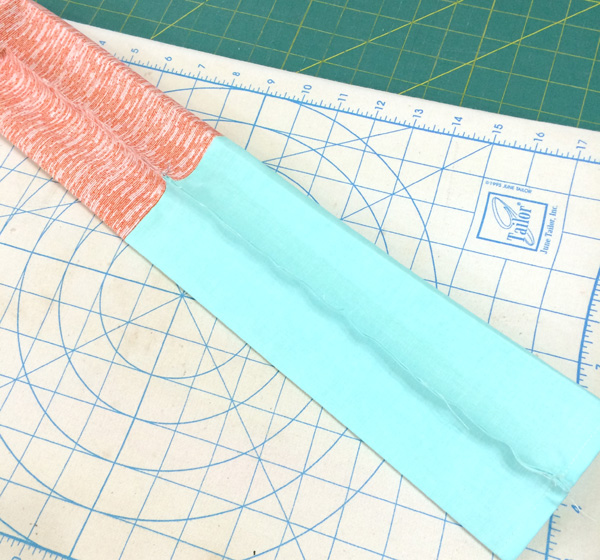
sewn-bubbleThe sleeve will not lie flat on both sides – that is correct!

Step 7 (optional):

If desired, gently add glue along the length of the hanging sleeve, on the seam side. Be sure you use a light hand, keeping at least 1/8″ away from the edges so the hand stitching won’t get caught up in the glue. You can skip this part and use pins only, if you prefer.

glue-bastingGlue-basting the sleeve on Abacus. Keep that glue away from the edges!

Step 8:

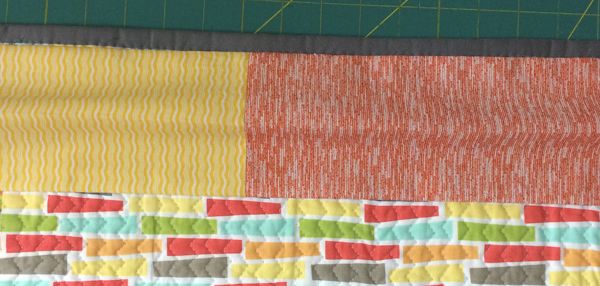
Lay out your quilt on a flat surface and gently place your hanging sleeve into position, seam side down, right along the edge of the binding. Center the sleeve so that you have about 1/2″ left on either side of the quilt. The sleeve will bubble up a bit along the center, giving you that extra hanging space.

bubble-sleeveThe sleeve should bubble up, giving you extra wiggle room for the hanging pole.

When you are happy with the sleeve position, press with a dry iron to secure the glue. It’s easiest to press on either long edge, one at a time, to avoid pressing out the bubble. Add a couple of pins around the edges for extra security while sewing.

basted-sleeveI like to line my sleeve right up next to the binding.

Step 9:

Using several lengths of cotton thread, hand sew the sleeve into place using a whip stitch or a ladder stitch. Secure all four ends and pop the knot into the batting of the quilt each time you finish up a length of thread.

Variation:

You can avoid sewing the top of the sleeve by hand if you add the sleeve to the quilt after the binding is sewn to the front of the quilt, but before it is flipped over to the back for finishing. In this case, align the top edge of the sleeve with the edge of your quilt. Stitch in place by machine, then finish the bottom and sides of the sleeve by hand. The binding will cover about 1/4″ of the sleeve but that should still be okay.

Machine-Sleeve A quilt sleeve partially sewn by machine, covered by binding on the top edge.


Making Quilting Your Business – Marketing Your Brand

Today I wanted to wrap up a series I began earlier – How to Make Quilting Your Business. I’ve explored topics I’m familiar with such as running an online shop, to other things I’ve never tried like designing fabric. I’ve learned a lot in the process and I hope I’ve been able to share a few insights with you.

20141231_businessofquilting

The final topic “Marketing Your Brand” is something I have had to learn about on the fly. Although I somewhat agree with the thought, “If you build it, they will come,” I also agree that “location, location, location!” is important and that you have to tell “them” all about it once you’ve built it!

I am not one to shy away from sharing what I’m doing in the hopes that I can get other people to join me. Although it’s my “job” to convince others to buy what I’m selling, I don’t see it as a scary task since I love what I do so much. Many people agree that selling is selling, yet I know I could never sell what I don’t believe in. Conversely, I don’t mind telling anyone and everyone what I have to offer, if I think it will suit them. The worst they can do is say “no, thank you” and the best thing they can do is say “yes!”

20141231_boq_stash

Here are a few things I’ve done to market my brand:

Networking – In college I was required to attend (boring) networking dinners for my major at the time – accounting. The idea was to hook up with other like-minded individuals to further our prospects in getting a job by getting to know them better over dinner. I should have known then that if I thought it was a waste of my time, I was in the wrong industry!

Now when I attend quilt shows, trade shows and other sewing events, it doesn’t even seem like work. Many of my most recent opportunities have come because of meeting someone at an event or knowing a “friend of a friend.” Often times I will briefly meet someone at one event, exchange a few words with them at the next event, and finally have a good conversation the third time around. It takes time and effort to build these relationships, but don’t be afraid to get out there and meet some great people!
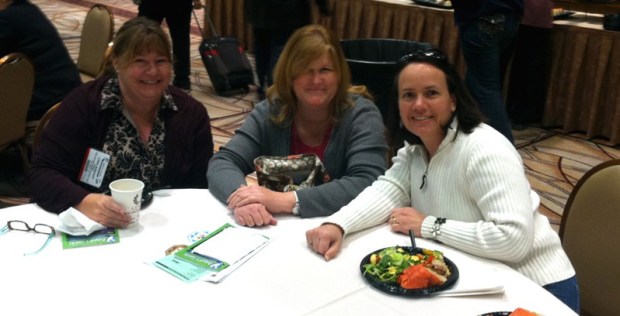
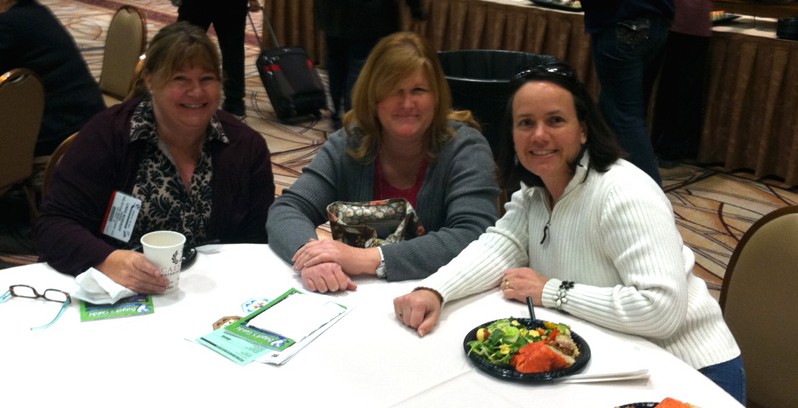
Networking with fellow quilt shop owner friends at a recent trade-show.

Cross-promoting – I am a huge fan of sharing what other people are up to in this industry. More often than not, many of them will return the favor. However, I try not to be obnoxious about it, nor do I request a quid-pro-quo. By genuinely seeking and sharing common experiences that I’m truly interested in, I’m providing valuable content to my blog readers and Instagram followers as well as building a relationship with the person I’m promoting. (Plus, it gives me an excuse to research fun topics I want to know more about!)

Invest in the Industry – I don’t just mean money. Sure, it will take resources to create and promote your business presence, both online and off. If you are selling a product, advertising is key. But even more importantly it takes time and “sweat equity” to gain traction for your business, no matter which industry you are in. Be patient, carve out a specific strategy, and take the time to map out your plan for success.

20141020_market_pin

The greatest way to stifle creativity is to be constantly worried about finances, so don’t quit your day job until you have set aside a few months’ living expenses and have established a rainy day fund.

Create Valuable Content – One of the best ways I have promoted my business is to get my work into books and magazines. I know it doesn’t pay a ton, but consider this: when I relied solely on the income from my precut store, I would pay lots of $$$ to advertise in quilting magazines, usually in the form of an ad taking up less than 1/4 page of space. Now that I’ve put on my designer hat, magazines pay me for content that splashes my name over 2-3 pages or more. Now that’s the best deal if I’ve ever seen one. πŸ™‚

Christa's Quilt AlongI’ve also created a series of Quilt Alongs that are completely free, and they have really helped get my name out there to a wider audience. Although the quilt alongs were a ton of work, they were fun to do and provided me with tons of modern machine quilting practice. They also helped me flesh out how to write step-by-step directions which I’ve been able to turn into patterns and classes.

Take Advantage of Free Publicity – Now let me be clear here – I do not mean work for free. What I mean is if someone wants to feature you in exchange for something easy, like a free pattern you’ve already designed, or by sending in a picture of a quilt you’ve already made, I’d say yes!

So many places like to feature a roundup of specific topics or themes and your work may just fit the bill. I think the worst business mistake a blogger or quilter can make is to create a free publicity quilt just because someone asks, unless you are indeed getting compensated either in money or product, and the quilt can serve additional purposes.
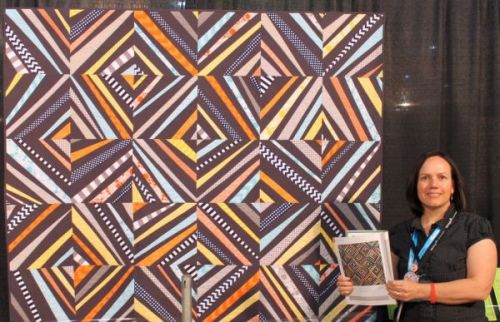
Quilt Scene MagazineSpiraling Out of Control has been in a couple of quilt magazines – free publicity!!

For example, I like my quilts to do double duty. One of my latest free publicity stunts was for a show quilt of mine to be featured full-page in a magazine. I’d already made the quilt, so all I had to do was send it to the show venue a couple of weeks early.

(Note – completing quilts ahead of schedule is helpful, too!) So although I didn’t receive payment, I did get a free copy of the magazine with my name in it in exchange for sending in a project I’d already made. It did cost me postage to ship it there, but the organizers paid the return postage so I was happy with the deal.

Keep Your Branding Simple – This can be a tough one, especially in the era of social media overload. How many different names do you have? The more names you are known by, the harder it is to keep track of who you are!
christaquilts_blog

Many times it makes sense to have a brand name that is different from your first name. Just be sure to use the same brand name across all your sites: your blog, facebook, twitter, instagram, pinterest, etc. I know that’s tricky if your business name is already taken, but for those of you just starting out, keep this in mind when deciding on a name.

And don’t be afraid to change it if needed. Quilts and Treasures (bleh!) and Desert Rose Quilts (better) were earlier incarnations of my business before I finally settled on Christa Quilts. It’s who I am and what I do, so it’s easy for people to remember. I also made sure to buy up several domain names with different spellings, just in case!

Make It Easy for Others to Say Yes – You may have a fabulous idea that others are interested in and you know they will love it. However, you may fall short because they can’t conceptualize it. So make it easy for them to understand, and simple to implement. The more legwork you do, the easier it is for someone else to agree.

For example, I knew I wanted to work with Robert Kaufman as a giveaway sponsor for my last quilt along, Abacus. Instead of vaguely asking them to be a “sponsor,” I presented them with a straightforward idea: I would make the quilt in Kona solids and give away the same bundle of fabrics that I used in my quilt.
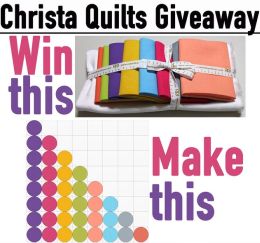
20141006_kona_giveawayA graphic that Kaufman made for me using my design sketch and their fabric bundle.

It was an easy idea for them to agree to and they even went one step further; they offered two bundles: one in my colorway and another showcasing their new 2014 solids. I quickly sketched out the quilt using the new colorway and then asked them to share it on their social media platform (see cross-promotion tip above).Β  They said yes, and I got a lot more followers on both my blog and instagram because of it! (See networking tip above – I only asked them to sponsor after I had already built a relationship with their brand.)

I’m sure I could go on, but this post is already pretty long, so if there’s anything else you are wondering about, please feel free to ask and I’ll do my best to answer. I love talking shop!

Click here for the start of this series.


My Phrase of the Year for 2015 – Be More Present.

My 2014 word of the year was Quilt, and boy did I take that to heart with my 2014 finishes. I think I made more quilts last year than I have in a long time and it felt wonderful!

For 2015 I came up with a phrase that will be my mantra for the year – Be More Present.

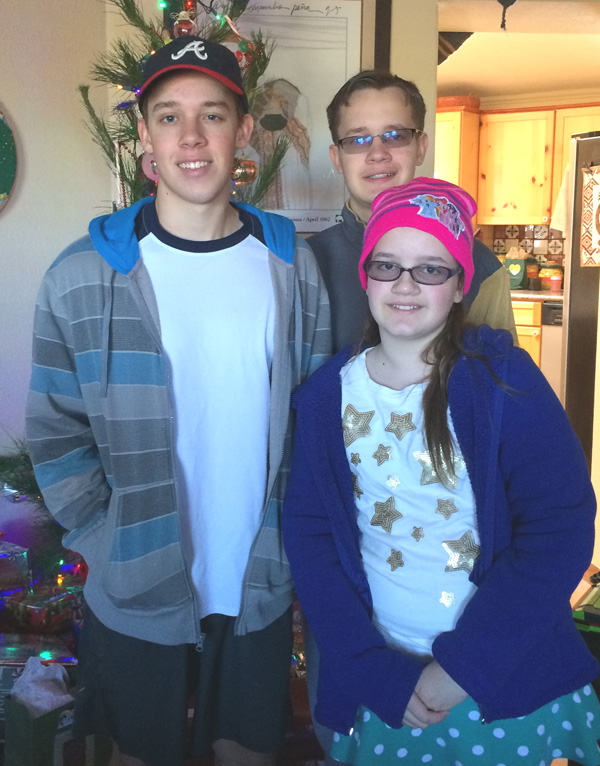
20141225_kids_xmasThese 3 are my pride and joy. I want to be more present for them!

As I continue to juggle the work/life balance, I want to be more involved and invested in everything I do. If I’m hanging out with the kids, I want to really be there (not thinking about the gazillion quilts I want to design and make).

If I’m teaching a workshop, I want to be fully ready ahead of time so I can focus on my students’ needs and be prepared to adapt the class if needed. When I’m trail running with Jason, I will enjoy the ambiance, rather than thinking about how hard it is to run up hills!

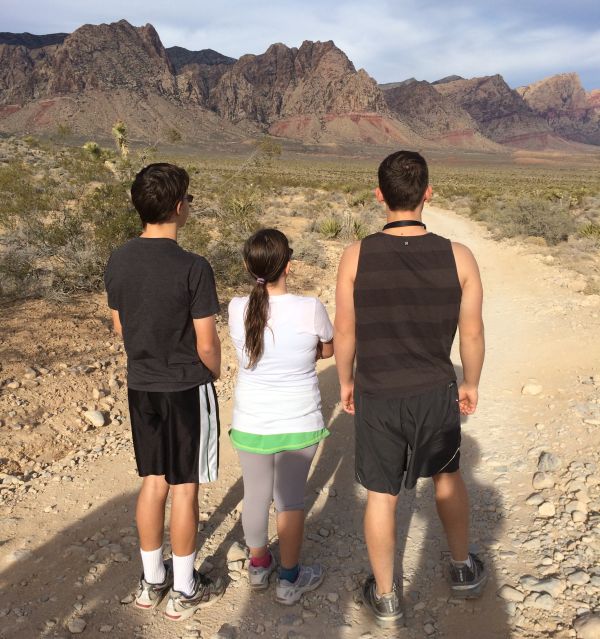
2014_kidstrailOur kids joined us on a recent trail run. We love the desert where we live!

We also came up with a family phrase – “be more adventurous,” and I think the two will go hand in hand. We’ve got a lot of fun family trips planned (Disneyland, lots of skiing, Hawaii & California beaches), plus Jason and I have signed up for a few trail races (there’s nothing like deadlines to keep me motivated)!

20141227_jason_jenna_skiMy daughter and hubby on a recent ski trip – we want to be more adventurous!

I’ll also be doing a lot more quilting-related travel this year. I think that if I can be more present at home, I’ll be able to be more adventurous when I’m out and about. That’s the plan, anyway!!

How about you? Have you coined a word or phrase for the year?

My Quilt Finishes 2012 – 2014

I recently organized my finished quilts page, showcasing the quilts I’ve made from 2012-2014. The year 2012 was a turning point for me because that’s when I discovered modern quilting and decided I wanted to be a “quilt professional.” Although my quilts aren’t all strictly modern, it’s fun to see them all on one page. I finished 7 quilts each in 2012 and 2013 and then really ramped things up with 19 finishes in 2014!!

I just tell myself that I’m making up for lost time during that period in my life where “Christa didn’t quilt!” πŸ™‚ You can click on each of the pictures for more detailed information about that quilt. Most of them include pattern information, tutorials, or inspirational in-process pics. Enjoy the show!

2014 Finishes

cwatson_Optical_Illusion_1800

Optical Illusion

Abacus-Finished-for-Blog

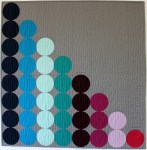
Abacus

Mini Churn Dash

Mini Churn Dash

Modern Logs

Modern Logs

Herringbone

Herringbone

Modern Quilt

Spiraling out of Control

Modern X

Modern X

12 quilts for my book in 2015!

12 quilts for my book in 2015!


2013 Finishes

Modern Trees

Modern Trees

Colorful Chevrons

Colorful Chevrons

String of Pearls

String of Pearls


Roses for Katelyn

Roses for Katelyn

Hugs 'n Kisses

Hugs ‘n Kisses

Sea of Squares

Sea of Squares

Love by Christa

Love Table Runner


2012 Finishes (The Year I Discovered Modern Quilting)

Charming Chevrons

Charming Chevrons

Girl Baby Bricks

Baby Bricks in Pink

Blue Baby Bricks

Baby Bricks in Blue

Finished Quilt

Busy Hands

Jolly Jelly Roll Quilt

Jolly Jelly Roll Quilt

Hearts and Feathers Wholecloth

Hearts and Feathers Wholecloth

Log Cabin Wreath, Pieced and Quilted by Christa Wason 18" x 18"

Log Cabin Mini Wreath

Christa’s Soapbox – Half the Key to Success is Showing Up

As I reflect on the past year, I appreciate all of the wonderful comments and support I’ve received while putting myself out there and sharing more of my work. I’ve enjoyed giving insights into my thought process as I continue to grow my business. I recently had one of those Eureka momentsΒ  when I realized – half the battle is won by simply showing up!

20141205_lightbulbYes quilting is a fun job; and yes it requires all of my free time. I revel in the successes, I sorrow in the disappointments, and I tweak my ideas constantly. A friend of mine (a former salesperson) recently said something profound to me: “9 out of 10 people may reject what you have to offer, so each time someone says no, you are that much closer to someone saying yes!” Isn’t that a great way to look at things?

I’ve realized that in my own experience, I get a lot of “successful hits” by simply trying out. Whenever I hear about a “call for entry” for a quilt show, magazine submission, teaching opportunity etc., I go for it, hoping to be selected for whatever it is I’m applying for. Most importantly – I don’t get upset or give up if it doesn’t work out. I know there will always be more opportunities, and I look forward to the next one.

I will be honest and tell you that only a few of the opportunities that have come my way have been from them seeking me. Mostly it’s the other way around, and I’m constantly keeping my eyes and ears open for any ideas that seem like a good fit for my business.

20141205_handsI write these soapboxes mainly as a way for me to articulate my thoughts, but secondarily to encourage those of you who have similar thoughts. I like to be a positive voice out there reminding you that with a little bit of tenacity, and a whole lot of determination, you can do anything you set your mind to!

Christmas 2015 – Viking Style

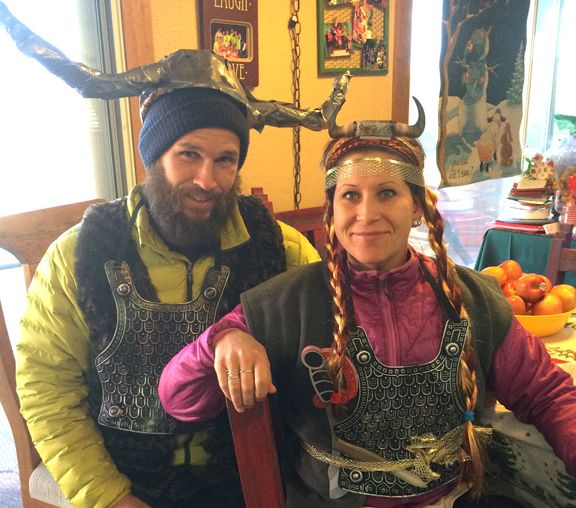
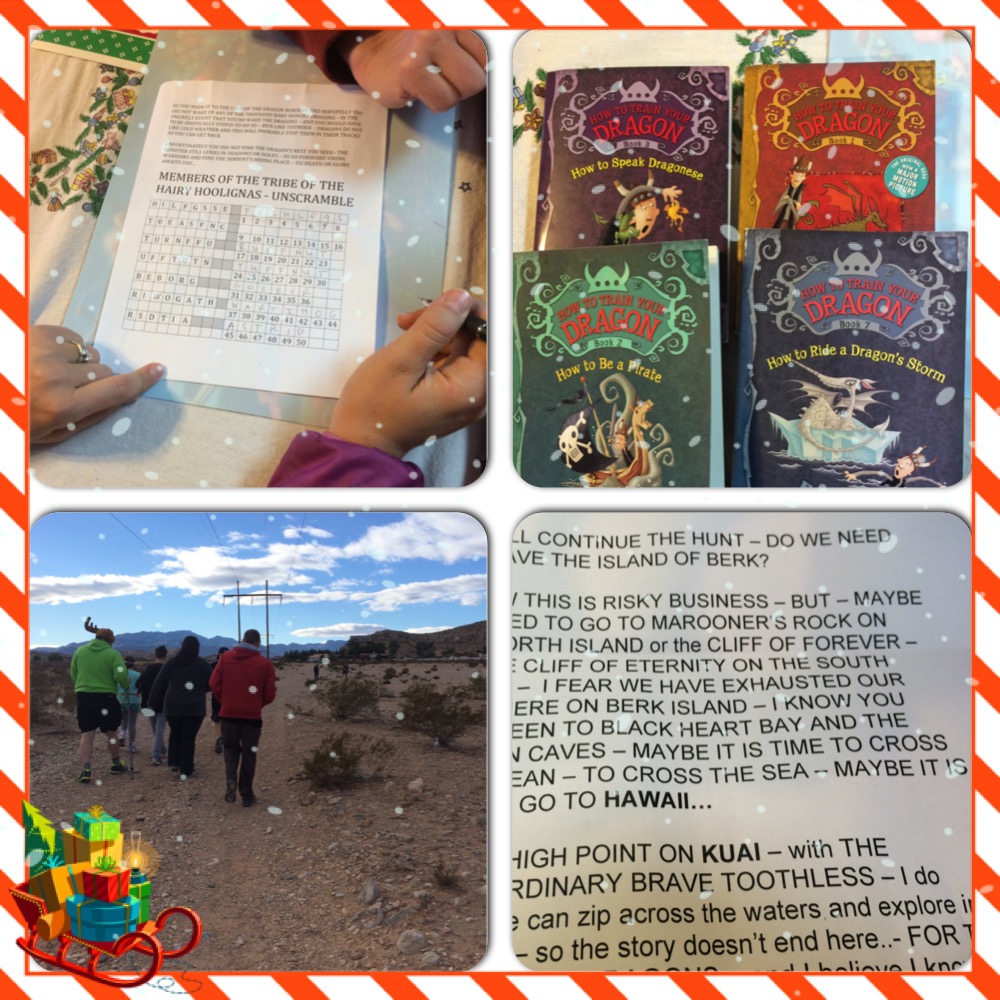
I got so many responses about my extended family’s Christmas tradition that I wanted to share this year’s fun as soon as possible. The scavenger hunt theme for 2015 was How to Train Your Dragon, so we all dressed up like vikings and went on our quest!

2014-Christmas-Scavenger-Hu

We started out with a large box to open, full of costumes and supplies. My mother-in-law is a madwoman with a sewing machine so she made bearskin vests for us (out of fake fur of course) and gathered plenty of props and accessories for us to look our best!

2014-Swenson-VikingsCloseup of my sister-in-law and her husband – what a perfect pair of Vikings!

We navigated some rough terrain, used our collective wisdom to solve riddles, and looked for clues on where to go next. At the conclusion of our quest, we were handsomely rewarded – with a family trip to Hawaii! We usually go on a trip with the in-laws each year, and the creative delivery is always a fun surprise!

2014-12-25 15.17.15

We are looking forward to a fun and festive 2015. πŸ™‚


Christmas Traditions

We have a fun tradition on my husband’s side of the family. My mother-in-law creates a themed scavenger hunt for us each year where we dress up and solve clues to find our grand finale of a present. She really goes all out, and I can’t wait until Christmas this year to see what she has cooked up. In the meantime, please enjoy pictures of some of our past Christmas antics:

2013 ChristmasSuperhero Christmas 2012

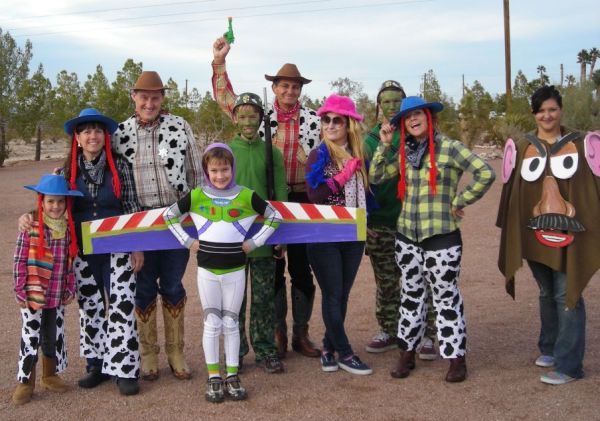
Β 2010 Christmas DressupToy Story Christmas 2010

2008-Rockstar-ChristmasRockstar Christmas 2008

What are some of your family’s favorite traditions?

Thank You and Some Christmas Cheer

Thank you all so, so much for your kind thoughts, sweet comments and prayers for our family. Reading through all your uplifting comments was so special and I really appreciate all the virtual hugs and love. We fly out on Monday and the funeral for my Nana will be on Tuesday in Waynesville, NC (a small town near Asheville). We’ll get back in time on Christmas Eve to celebrate the season with our children.

You may need to plug in headphones to hear the audio.

I will share some holiday cheer with you today. It’s video of my daughter’s first piano recital, playing Angels we Have Heard on High. She started lessons this year and she was so nervous to perform in front of others. I think she nailed it and she was so proud of herself for overcoming her nervousness.

2015 Piano kidsThe piano teacher gave chocolate pianos to the performers. My other son got one, too!

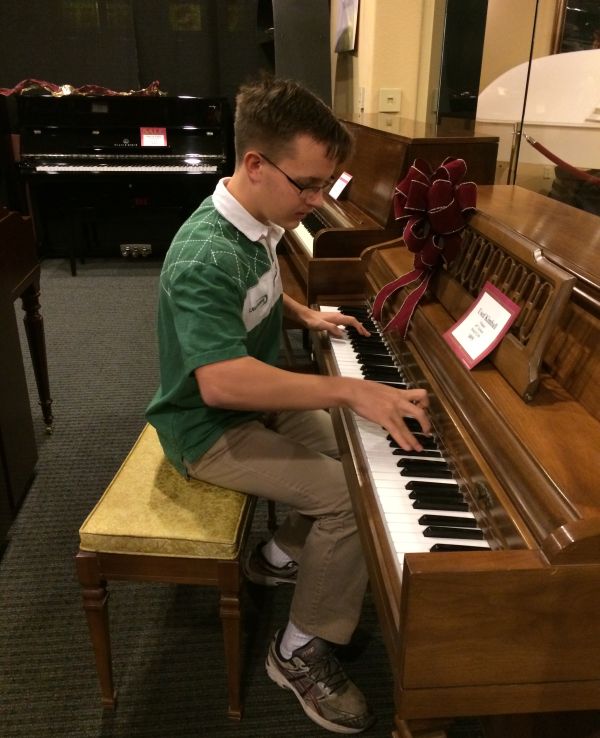
My older son also performed, but it was a longer song so I wasn’t able to get a good video of all of it. The two of them take lessons from the same piano teacher, while my middle son takes both piano and drum lessons from a different instructor. He performed for us in the showroom after the recital. We love having musical children. πŸ™‚

2014 Ryan PianoThe family that plays (music) together, stays together.

Merry Christmas and Happy Holidays to all!

Remembering My Nana

My sweet Nana passed away a couple of days ago so I’m getting ready to go to North Carolina for her funeral. I am at peace with this and was unsure whether I wanted to mention it on the blog in such a public way; but then I realized it’s very therapeutic for me to let everyone know what a fabulous and classy lady she was. She is my mom’s mom and she lived a very full and active 91 years, dedicating herself to the care of others. She was one of my most favorite people in all the world.

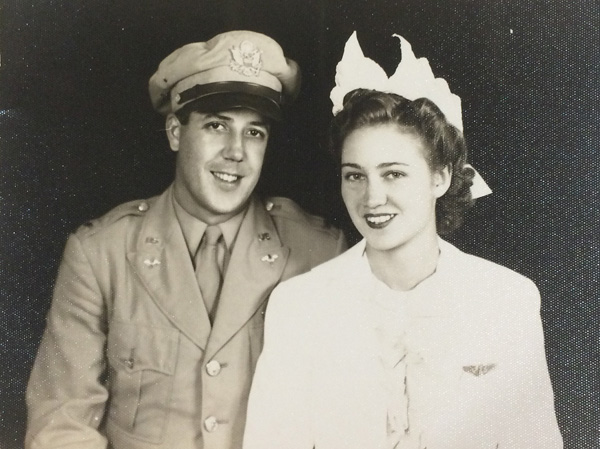
Nana-&-Grandaddy-1945Bud and Helen, 1945

Nana was a nurse back in the days of WWII and she met and fell in love with her high-school sweetheart. They were married for over 50 years until he passed away almost 18 years ago, a few months after getting to see his first great-grandchild – my oldest son. Nana was one of the most kind and loving people I ever knew, and I never heard a cross word come out of her mouth.

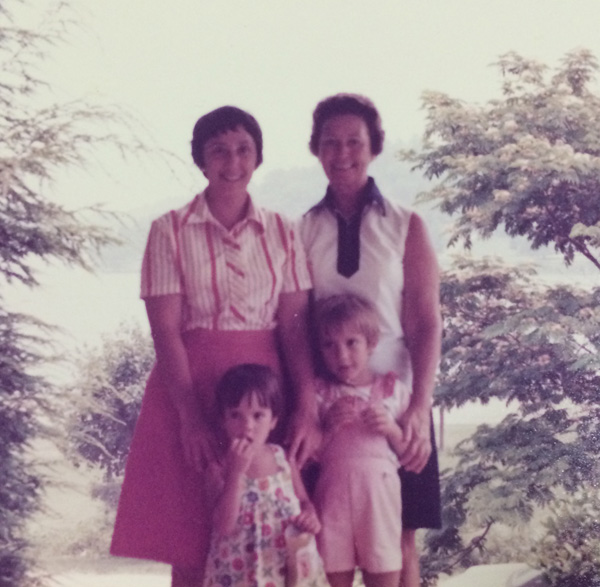
Nana,-Mom,-Laura,-ChristaNana, Mom, my older sister, and me – circa 1976.

Nana was a southern belle who grew up to be the most fabulous southern cook. Growing up, I spent two weeks with her and my Grandaddy (Bud, they called him) every summer in the mountains of North Carolina. It was such a special place to be, and I knew whenever I visited, they were excited to have me and my siblings over for a visit. We also saw our grandparents each Christmas, and Nana went out of her way to make sure we all felt loved and spoiled (in a good way). Although we lived on opposite ends of the country, we were always super close.

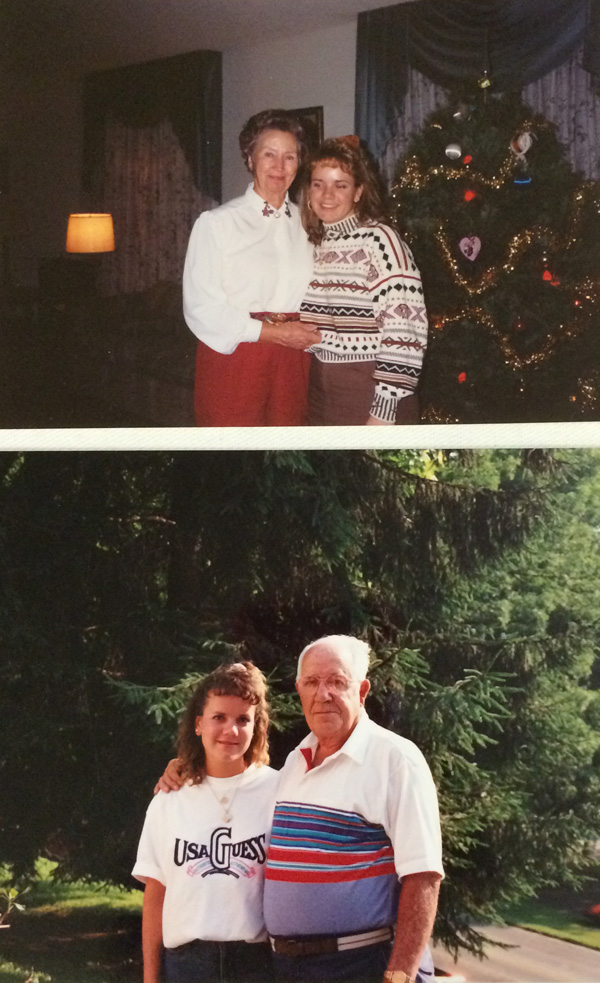
Nana-&-Grandaddy,-christmasThey always made me feel loved – especially during the teenage years! 1991-92.

Nana was the one who always taught me to be kind to others, to follow the KISS principle (Keep it Short and Sweet) and to keep-on-keepin’-on even when things got tough. Although we practice different religions, she always reminded me to pray and stay close to Heavenly Father. After all, she would tell me, “we all pray to the same God: some just do it on their knees, some bow their heads, some clasp their hands, and some fold their arms, but he hears it, all the same.”

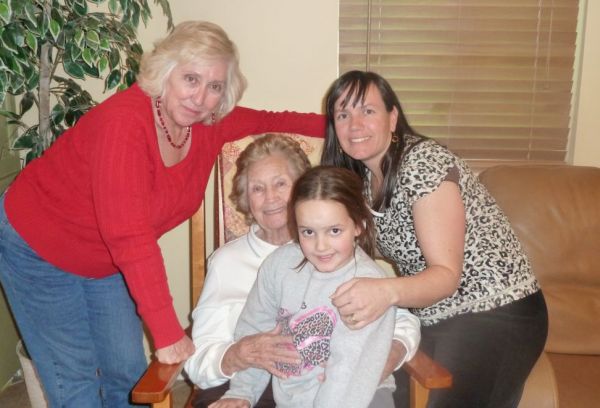
2010 Christmas 4 generationsFour generations of women: Nana, my mom, me and my daughter. Christmas 2010.

I sure will miss her this Christmas, but I have such sweet memories to cherish. Although not a sewer herself, she did some needlepoint over the years, always encouraged me in my artistic efforts, and bought one of my first quilts when I used to sell them years ago. The whole family went on a cruise together over the summer, and Nana kept up with all of our shenanigans without any complaint.

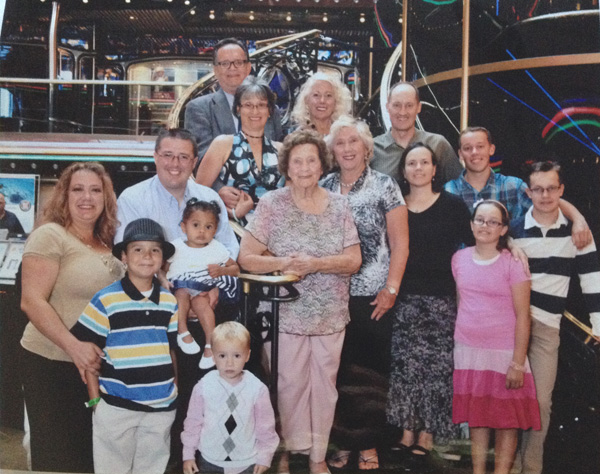
2014-Family-CruiseFamily picture from our cruise this summer – such sweet memories!

Nana left a legacy of two daughters, three grandchildren, and seven great-grandchildren. We all miss her, but we will Keep On Keepin’ On! πŸ™‚